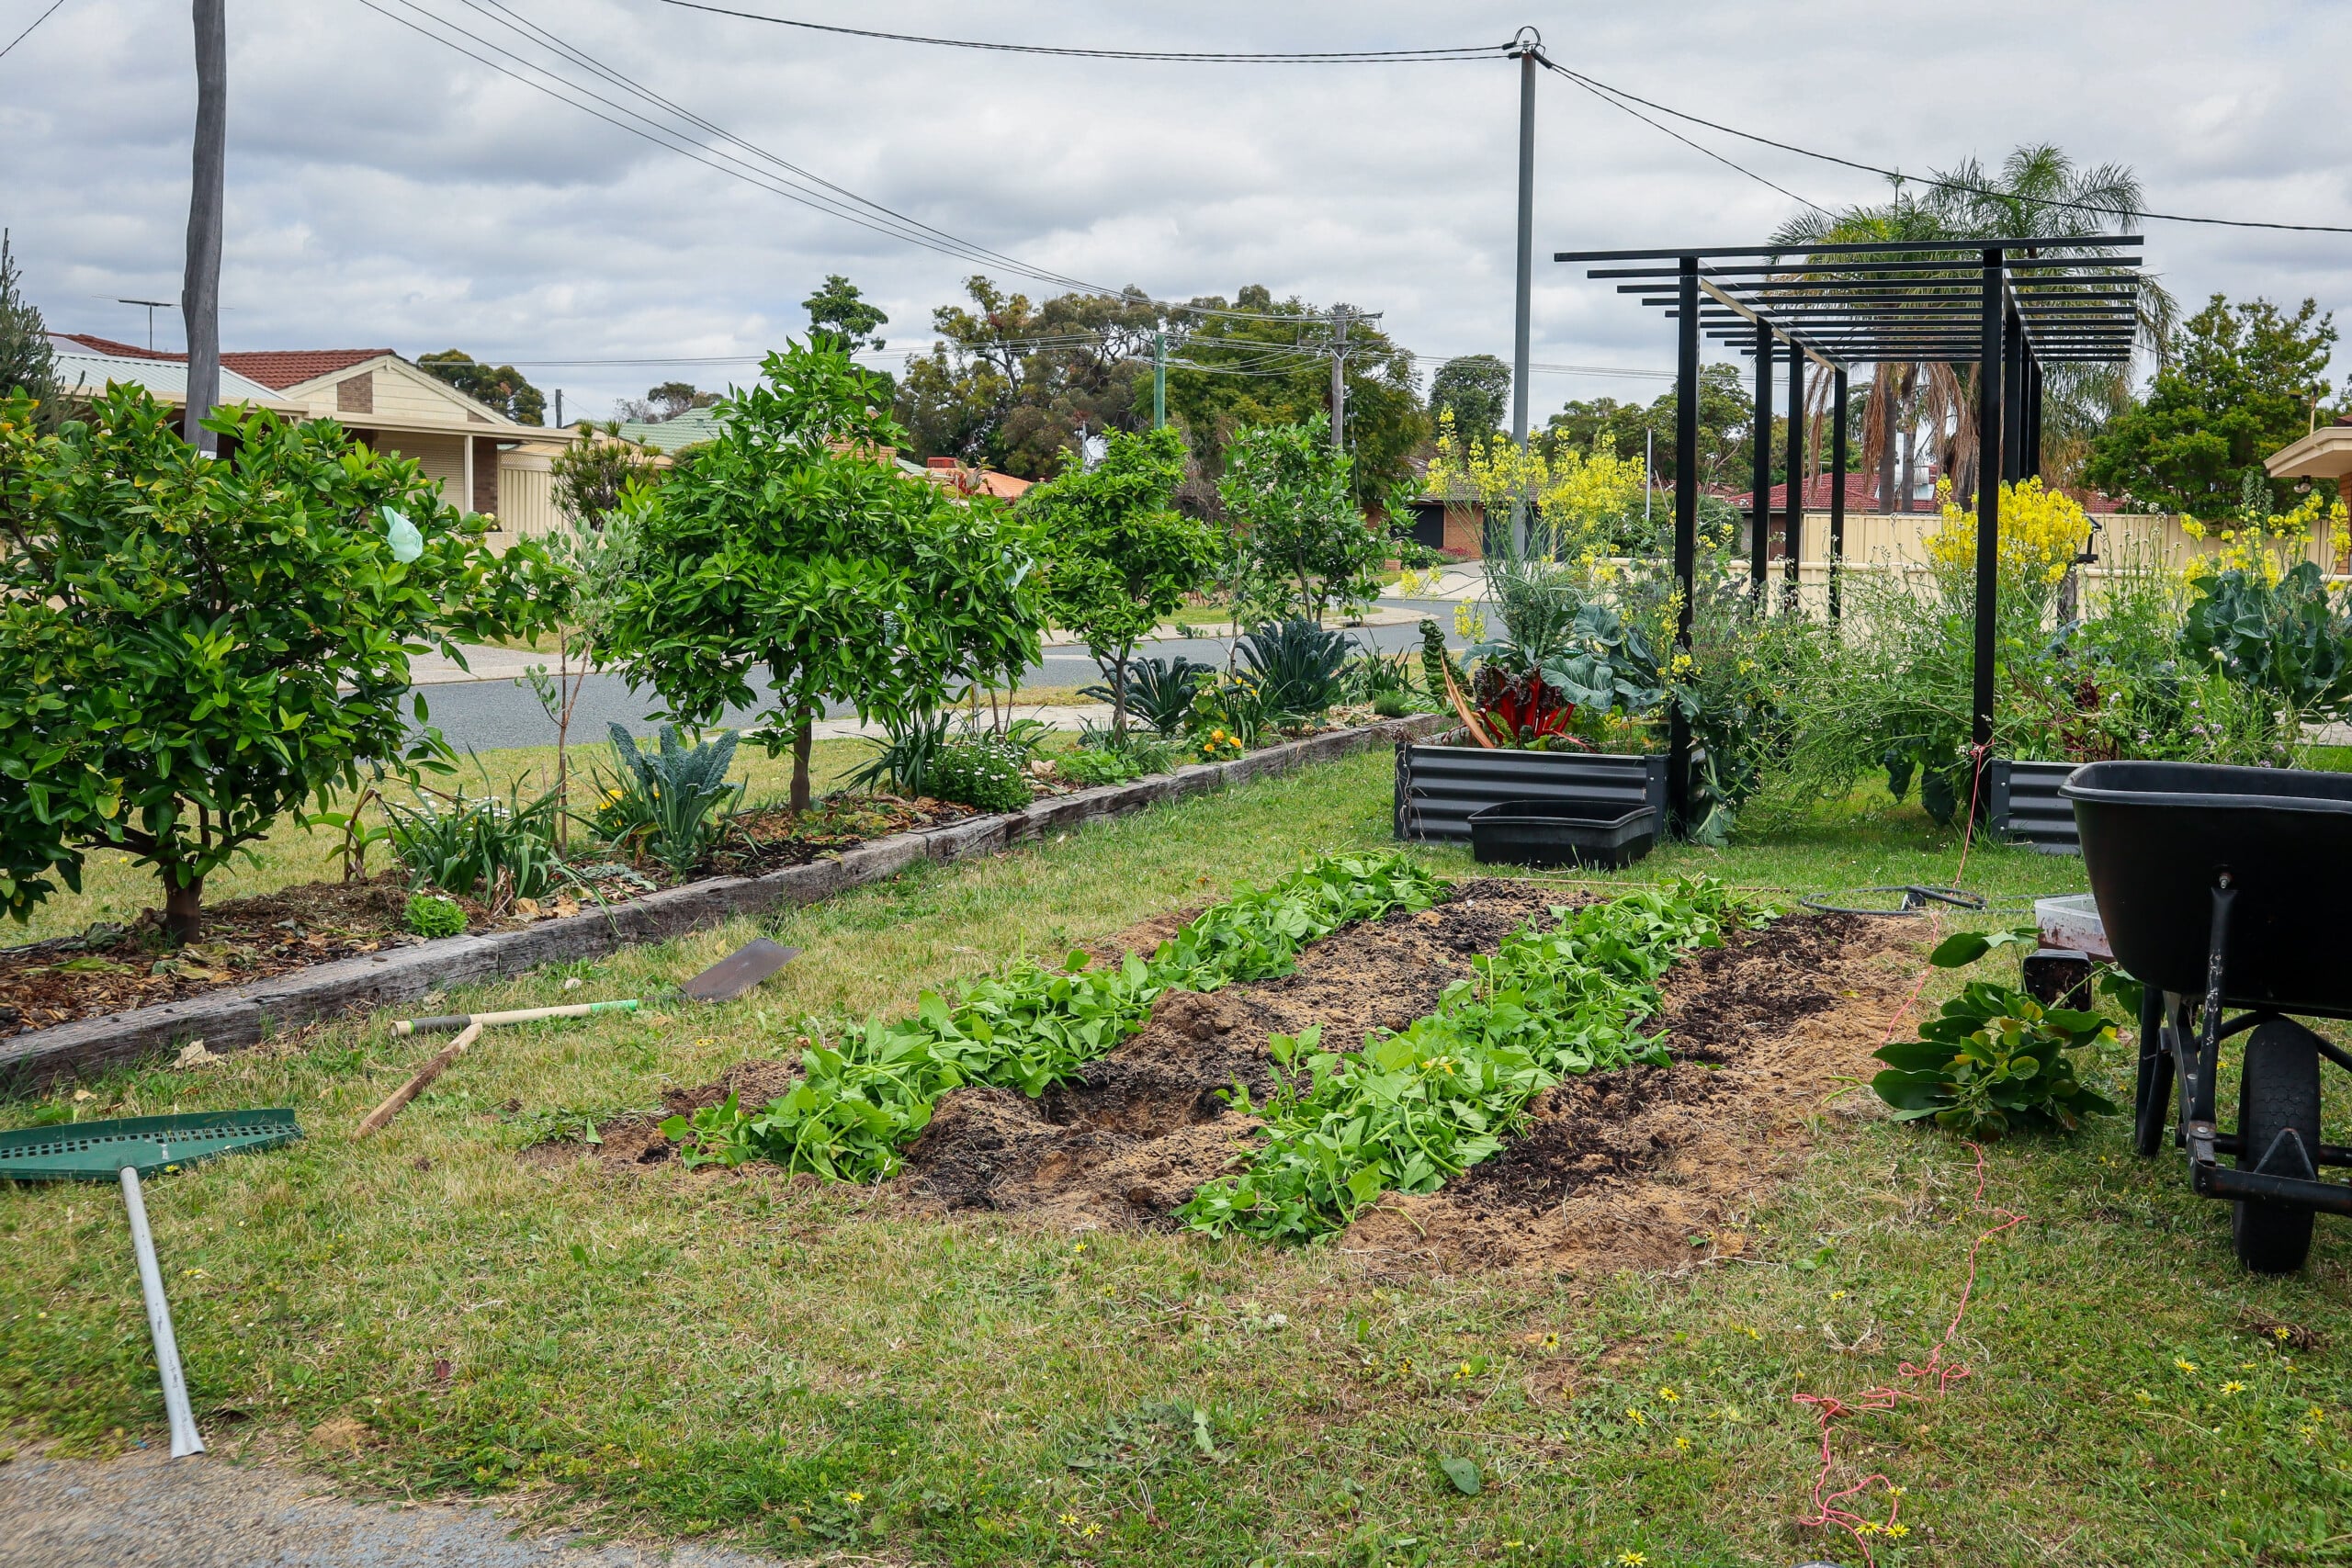
How to Build Healthy Soil for a Sustainable Garden

How to Build Healthy Soil for a Sustainable Garden

Healthy soil grows healthy plants

Soil is the KEY to a healthy, successful, and thriving garden. If you want to grow healthy, nutrient-dense food, you need healthy nutrient nutrient-producing soil. Healthy soil is ALIVE with a web of beneficial interconnected relationships that support life. If you want a thriving, resilient garden, start with the soil. Healthy soil is the foundation of a productive and sustainable garden. Soil is a living, breathing ecosystem filled with microbes, fungi, organic matter, and nutrients that work together to feed your plants and protect them from disease and drought.

In this post, you’ll learn how to build and maintain nutrient-rich, living soil that supports long-term garden health. Whether you’re starting from scratch or improving existing beds, these regenerative techniques will help you reduce inputs, boost biodiversity, and grow stronger, more nutrient-dense food—all while supporting the planet.

Watch the live masterclass for more info

Why is Soil Health Important?

Healthy soil is going to feed and nourish your plants so they can grow strong and healthy. If the soil is not providing those nutrients, plants may become weak. Weak plants are more likely to be attacked by bugs and if they do get attacked by bugs, they are more likely to die. Whereas a healthy plant will be able to push on through and keep producing. 

  • Healthy Plants – Healthy plants grow quicker and easier.
  • Bug Resistance – Healthy plants are less susceptible to bug infestations. Bugs tend to attack weaker plants and then the whole team piles on and you get diseases. So, having healthy strong plants will reduce the amount of loss and also, if your healthy plants do get some bugs, they will be strong enough to continue to produce.
  • Increased Harvests – Healthy soil is going to help you get better harvests. Your plants will be happy and healthy, and therefore, will produce a bigger and better harvest. Which of course, we want!
  • Less Disease – as per the bug-resistant – healthy strong plants will be less likely to get diseases. Diseases usually come at the end when the plant is already under stress. So, soil health can reduce the risk of that.
  • Promotes Soil Life – Getting the foundations right and building healthy soil, will be a snowball effect. Healthy soil will attract so many beneficial insects and microorganisms that will improve your soil further. Worms are fantastic for aerating the soil by tunneling. They also provide nutrients by eating plant matter to produce a by-product that can be easily absorbed by the plants. Healthy soil will have a hive of activity and produce nutrients to do all the work for you!
  • Better Nutrition – If we grow food in poor soil with no nutrients, how can we expect the food that plants produce to be extremely high in nutritional value? It’s just not going to happen. The better the soil health is, the more nutrients will be transferred into the food we eat. 
  • Less Watering –  Healthy soil will require less water. Fibre and plant matter in the soil will retain moisture. If the soil is dead and dry, water will run off it, or, just filter right through and your plants will need constant watering. So, healthy soil is also waterwise.
  • Abundance without Force – We want to create sustainable gardens that consistently produce food without having to force it. Poor soil will mean plants will grow slowly, get bugs and diseases and require more care and maintenance. We will constantly be having to feed them, water them, and fight off the bugs. It’s a tiring concept that is not sustainable long-term. This is what commercial soil looks like. It has been stripped and never replenished, so to get the crops they need to sell, they have to constantly feed with artificial food and spray bugs with pesticides. This will further kill of the living soil micro-organisms, so the next year, they will need to repeat and maybe even increase. Its a downward spiral. We on the other hand, will be caring for our soils and the plants will just grow themselves. Meaning, we can put in less and less work overtime, and receive more and more food. I know which way I would rather grow! 
garden tools
coffee ground fertilizer

Where to Start to improve your Soil?

Ok, so we know why it is so important to build healthy soil, but where do we start?

 Observe

Whether you have just moved into a new property or you are new to gardening, observing is key! Take a look around your gardens. Is there rubbish in the soil, are there buildings nearby, what would they be used for? Animals? Plants? What is growing in the area? This can be a good start to figuring out your soil health.

The other thing you will want to do is, have a little dig in the gardens. Dig down at least 30cm and observe what kind of soil you have. The top layer may be covered in mulch or grass, and then, the next inch or so will be the topsoil. This is the most fertile soil. Further down you will see more of your true soil. Is it sandy or is it clay-heavy? Observe, touch, and explore. Note this down as this will help you figure out what to do next. 

Soil Testing

Professional tests for toxicity – If you find rubbish or anything that seems like it could have a toxic effect on your soil, it would be best to get it professionally tested. This is very important if you want to grow food directly in the soil.

Jar test for soil structure – There are also two easy tests you can do at home to find out the structure and pH of your soil. You can test your soil structure by placing a small soil sample (1/2 cup) in a jar of water. Give it a shake, and allow it to sit for a day. Layers will start to appear and you will be able to see the sand, clay, and silt levels. 

If you have clay-heavy soil water will get clogged and not free drain. However, if you have really sandy soils, the water will disappear through the gaps and not stay long enough to be absorbed by the plants. You can amend your soil by adding other materials to help balance out and rehabilitate your soil structure. But first, you need to understand what you are working with. 

pH test – The pH test will help you work out where your base soil is. pH is important because it affects the root activity and the absorption of nutrients from the soil. Most plants like to grow around pH neutral 6-7 so it is best to try and get the majority of your gardens to a neutral level. Some plants do prefer it a little more alkaline or acidic. Blueberries for example, like more acidic soil. It is a good idea to test your soil if you have never grown in it before or you have just purchased new soil. A pH test kit can be found at your local garden centres or Bunnings. To test your soil, just dig down 10-15cm for veggie gardens and if you’re testing soil for deeper root plants like fruit trees, take a sample from 25-30cm down. Then you place the indicator dye and Barium powder from the kit and match the indications to the colour chart provided.

Link here for the pH test kit I use.

Baseline Foundations

Now that you have an understanding of what you’re working with, we want to create our baseline foundations. This is where we prep our gardens.

  1. Remove rubbish and rubble.
  2. Add compost – if you don’t do anything else, this is the most important takeaway. Compost is the best thing to add to your soil no matter where it is are at. Good compost supplies organic matter for soil building, fertilizer to feed plants, and most importantly, it’s packed with living soil mirco-organisms that kickstart biological activity. It adds fresh, healthy microbes that will start to digest the nutrients present in the soil and feed your plants. Compost is the key ingredient for building and maintaining healthy soil. If you’ve just moved to a new garden and want productivity, then compost will rapidly make your soils fertile.
  3. Cover – you want to protect all that good soil and hard work you have just done. We will dive in a little deeper next about why covering and mulching is so important and the different ways to do that

How to Build Soil for a Sustainable Garden?

Now that we have our foundations sorted, it is so important that we continue to build soil on a regular basis. Below are some tips to add to your gardening routines, to help build layers of good soil. Helping your gardens to thrive for many years to come. 

  • Compost – start composting at home and turning your food scraps, household recycling and greenwaste into healthy soil to feed your gardens. It is important that we continue to keep adding nutrients to our soil as the plants use it to grow. I like to add compost at the change of each season and top up my garden beds. If you want to learn more about composting click here to watch.
  • Chop & Drop – this is one of my favourite methods because it’s so easy. I don’t use this method on all of my gardens as it is more suited to fruit trees or areas where you don’t have a lot of little plants. I do this in my food forest style back fence garden. Everything that grows in that area gets returned directly to the soil. So when i prune trees or pull weeds, or cut plants, I just chop them up and leave them in the garden as mulch. This covers the soil and will break down and release nutrients to feed the plants. Eventually, over time, the layers of good, healthy soil will get thicker and thicker. Which is what we want! This method can also be used for paddocks or areas you don’t use often. Growing specific plants in an area where you want to use this method can be a great idea. Plants that hold nutrients in their leaves such as comfrey are great to add to the garden for this exact purpose. Then just give them a haircut and allow them to re-enter the soil.
  • Mulch It is so important that we cover the soil. Protecting the soil from drying out or from excess rain washing away nutrients. Because, if soil gets too hot or dry, the plants will start to die, and so will the good bugs and micro-organisms in the soil. Then, once that happens, the soil is no longer supporting life, and it becomes dirt that will not grow anything. Cover your soil with a thick layer of mulch and this will start to break down and feed the soil. Basically, turning your whole garden into a living compost system! Always try to mimic nature. In nature, leaves fall to create a cover for the soil and then breakdown to produce rich, healthy soil for the young seeds to grow.
  • Cover crops – Cover crops can be grown to protect the soil during a down season and then cut to mulch and feed the soil. Cover crops are planted specifically to build and hold soil and to smother weeds. They range from long-growing perennials to short-term green manures but the aim is the same: a solid cover of plants. Their leaves will protect the soil from hammering rains and eventually cover the surface with nutritious, topsoil. Weeds can actually be more beneficial for your garden than bare soil. Weeds protect the soil and support soil health just as any other cover crop would.
  • Plant for diversity – Different plants have different root structures and depths. They also use and excrete different nutrients. It is important to grow a wide variety of plants together to access different layers and levels within the soil. There is so much going on under the soil with the relationships between the roots and the microorganisms. The more diversity we have in plants, the more life we are encouraging beneath the surface. Diversity also helps reduce severe deficiencies, as all the plants aren’t competing for the exact same nutrients. 
  • Minimal disruptions – it is important to try to keep the digging of the soil to a minimum. Unless you need to amend drainage or plant something, try not to disrupt the soil. Add layers on top of layers and allow the soil microbiology to thrive. 
  • Go organic – this one is quite self-explanatory but, we want to reduce any harmful sprays and unnecessary fertilizers. These can kill off our delicate microbes, which we are of course trying to grow and promote. 
  • Natural fertilizers – It is beneficial to use natural fertilizers weak and often. Things like banana skin fertilizers are great for adding potassium to the soil for your fruiting plants. Weed tea and other teas made from breaking down plants in water, can also be a great way to recycle nutrients back into the soil.

Can I use any type of animal manure?

Herbivore animal manure is a great source of nutrients for growing food. This includes animals such as sheep, horses, cows, goats, rabbits, and chickens. It is best to choose composted animal manure rather than fresh off the paddock. This is because fresh grass seeds will still be viable and your garden may become overgrown with all sorts of weeds and grasses. This will end up causing you more trouble than it was worth.

Composting can help break down the seeds and leave you with weed-free nutrient-rich soil. The other reason it is better to choose composted manure rather than raw is that it can be very harsh on plant root systems. If you do not have the option for old or composted manure, then it is best to bury it on a bottom layer of the garden so the new young roots won’t dive straight into it. By being deeper under the soil the weed seeds will not get the light they need to grow so this can also help with the seed issues. 

Composting

Composting is not only great for the fertility of your soil and the secret to AMAZING vegetables, but it also stops waste from going to landfills. There are a whole bunch of ways to do this, depending on your living situation. You can make your own compost bin out of recycled wood, find a second-hand tumbler online, or purchase one. You can also simply dig a hole in the garden and bury it (be careful of attracting pests). There are also some new ways for people with no land to connect with others who do and give them their compost scraps. Community gardens, local Facebook groups, or now in Australia, there is even an app! Sharewaste

Care for your soil and your plants will grow with more ease, abundance, and it will feel less forced. Working with nature and not against it.

Links included in this description might be affiliate links. If you purchase a product or service with the links that I provide, I may receive a small commission. There is no additional charge to you! Thank you for supporting my blog so that I can continue to provide you with free content.

Happy gardening!
Holly 🌿

Rosemary, Feta and Roast Veggie Hand Pies

Rosemary, Feta and Roast Veggie Hand Pies

Rosemary and roast vegetables are a classic combo for a very good reason… They taste amazing! These Rosemary, Feta and Roast Veggie hand pies are so full of flavour and will keep you wanting more. This recipe, like most of my recipes, is completely versatile to what you have growing in your garden. Recipes that can be easily adapted to suit your seasonal harvests will make your life so much easier. Read the notes section for optional ingredients to swap.

This recipe can also be used for leftovers. Pre-make a batch of pastry and keep it in the freezer ready to turn your leftover Sunday roasts into delicious hand pies.

rosemary hand pies
rosemary hand pies
rosemary hand pies

Rosemary, Feta and Roast Veggie Hand Pies

Yield: 16 hand pies
Prep Time: 35 minutes
Cook Time: 1 hour 15 minutes
Total Time: 1 hour 50 minutes

These Rosemary, Feta and Roast Veggie hand pies are so delicious. It may be useful to make two batches of pastry and keep one set in the freezer for future leftover roast veggies. This recipe could also be adapted to make one large family pie.

Ingredients

Pastry

  • 150g cold Butter
  • 2 cups Flour
  • 1/4 tsp Salt
  • 1/2 tsp Apple Cider Vinegar
  • 5 TBS Iced Water
  • 1 TBS Sugar
  • 2 egg yolks
  • 1/2 cup of fresh chopped Rosemary

Filling

  • 500g Butternut Pumpkin
  • 200g Sweet Potato or Potato
  • 4 Radish (optional)
  • 1 Red Onion
  • 3 Cloves Garlic
  • 1 fresh Rosemary stalk
  • Oil for Roasting
  • 200g block of Feta 
  • 5-6 Rainbow Chard Stalks and Leaves

Sauce for Filling

  • 3/4 cup Raw Cashews
  • 3/4 cup Water

Instructions

Pastry

1. Cut the butter into 2cm cubes and place in the freezer for 5-10 minutes while preparing the other ingredients.

2. Add ice and water to a bowl.

3. Add the 5 TBSP of ice-cold water and egg yolks into a bowl and mix until combined. Set aside.

4. In a separate mixing bowl add butter and flour and rub together roughly. Try to do this quickly as to not heat the butter up too much with your hands.

5. Mix in the chopped rosemary, salt, apple cider vinegar, sugar then add the water and egg mixture to the flour mix a little at a time. Mixing to form a dough.

6. Roll to form a ball, cover (I use compostable film) and pop in the fridge to cool while you start on the filling.

Filling

1. Pre-heat your oven to 180degrees celsius.

2. Rinse and chop your Butternut Pumpkin and Sweet Potato into chunks (roughly 6cm. I like to leave the skin on both) and cut your Radish in half or leave whole if they are small.

3. Add to a large roasting dish and drizzle your veggies with oil. Strip and chop 1 stalk of fresh rosemary. Mix in with veggies.

4. Place your veggies in the oven for 25 mins.

5. While your veggies cook, dice the red onion and place in a frying pan with a drizzle of oil. Cook on a medium heat for 10min then add in chopped garlic for a further 2minutes.

6. Cut the rainbow chard stalks in to slices and roughly slice up the leaves. Add to the onion mix, stir and cook for 1-2 minutes. Remove from the heat.

7. After 25minutes remove the roast veggies, mix and turn them over then add the block of feta to the centre. Put back in the oven for a further 20-30 minutes until cooked through.

8. While the veggies continue to cook, blend the raw almonds and water to make a cream. Refrigerate.

9. Remove the roast veggies once cooked and with a fork, roughly smash up the chunks of veggies and mix through the feta. Dont over mix as you want small pieces of veggies and feta in each bite. Add the onion and rainbow chard and mix through. Cover and allow the mix to cool.

Assembly

1. Remove your pastry from the fridge and roll on a floured surface. To make the small round hand pies, cut out 10cm diameter rounds at roughly 5mm thick. Use a cookie cutter or an upturned glass to get the outline and cut around with a knife (ensure you have an even amount for tops and bottoms). If you would like the larger half moon size - use a side plate to cut large rounds. Place the rounds on a plate or tray, cover and return to the fridge to cool down again for 10minutes.

2. Preheat oven to 200degrees celsius.

3. Drizzle the cashew cream over the roast veggie mix. Divide your pastry rounds in half so there are tops and bottoms. Then add one heaped tablespoon of veggie mix to each bottom. Place the other pastry round on top and carefully push down the edges to secure. Use a folk to further press and secure the edges. Make a small hole or slit in the top to allow air to escape during cooking. If making the half moon pies - add mixture to one side the fold the pastry over down the middle and secure the edges.

4. To create a nice brown finish, brush the pastry with egg wash (one egg mixed) or milk.

5. Return to the fridge for 10minutes to cool again.

6. Bake for 12-15 minutes until golden. The larger half moon pies may take 15-20minutes.

7. Remove and serve warm with a fresh garden side salad or the green sauce from the Cauliflower recipe is also delicious combo.

Notes

1. The butter needs to be as cold as possible.

2. It is best to make the pastry ahead of time so it has a few hours to cool in the fridge.

3. Mix and match your favourite root vegetables such as carrots or beetroot.

4. To replace the fresh rosemary with dried rosemary use 1 TBS in the pastry and 1 tsp on the roast veggies.

5. Optional - replace the cashew cream with gravy.

6. Swap Rainbow chard for spinach or other greens.

7. Swap Feta for Cottage Cheese, Mozzarella or leave out if preferred.

Rosemary and Herb Salt

Rosemary and Herb Salt

Rosemary and herb salt is a quick and easy way to preserve your homegrown herbs to use throughout the year. Herb finishing salts add so much flavour to meals in a quick and convenient way. Try Rosemary and herb salt on your roast vegetables for a delicious boost of flavour. Get the recipe below 👇

Why Make Rosemary Herb Salt?

Making your own herb salt is a great way to reduce waste and extend your harvest. If your rosemary, thyme, or sage plants are growing abundantly, herb salt is a simple preservation method that retains flavour for months. It also allows you to create custom seasoning blends tailored to your taste.

Plus, it makes a beautiful, homemade gift for Mother’s Day, Christmas, or to share with friends and family—perfect for birthdays or festive seasons.

Benefits of Rosemary in the Garden?

Rosemary is such a versatile herb and works well with both sweet and savoury dishes. It has a fragrant, pine-like aroma. Rosemary offers so many beneficial relationships within your garden. Rosemary is a hardy, drought-tolerant, ever-green perennial herb. A fantastic staple to have to grow in any edible garden. Rosemary also has many healing properties, so it is a handy plant to have near the house or in a kitchen garden.

Rosemary is more than just a tasty kitchen herb—it’s a powerhouse plant in the garden too. It’s hardy, drought-tolerant, and thrives in full sun, making it ideal for warm and dry climates. Rosemary:

  • Attracts pollinators like bees when in flower
  • Repels some common pests due to its strong aroma
  • Helps create structure and evergreen interest in your edible garden
  • Can be grown in pots or in the ground
  • Drought-tolerant and easy to grow

Its resilience and low-maintenance nature make it a go-to for beginner gardeners and seasoned growers alike.

When is the Best Time to Harvest Herbs?

The best time of day to harvest your herbs is first thing in the morning. This is when the plants are hydrated and full of life. As the day goes on, they will lose moisture and not be as fresh and vibrant. Early in the morning, the bees are not yet active. As the sun comes up and the dew drys, the bees will be about in a hive of activity. So, if you do pick later in the day, just be cautious, not stress them out and avoid getting stung.

rosemary salt

Rosemary and Herb Salt

Yield: 1 cup
Prep Time: 5 minutes
Additional Time: 2 hours
Total Time: 2 hours 5 minutes

Ingredients

  • 1 cup of Salt
  • 1 -2 cups chopped herbs (Rosemary, Parsley, Fennel Frond)

Instructions

  1. Rinse herbs, remove stalks and roughly chop.
  2. Add to a mixer and blitz until breadcrumb consistency (or leave chunky if you would like too)
  3. Add in salt and blitz quickly to combine.
  4. Spread on to parchment and dry in the oven or dehydrator at 45 degrees celsius until dry. Stir through after one hour to loosen up the mix and allow it to dry faster. The length of time will depend on the water content of the herbs (approx 2 hours). The mixture will go a lighter green colour.
  5. Once dry add to a clean airtight jar.

Notes

  • The colour may fade over time
  • Try herbs such as Thyme, Mint, Sage, Chilli, Oregano

How to Use Herb Salt in Cooking

Use your rosemary herb salt:

  • As a seasoning rub for roasted meats or veggies
  • Mixed into olive oil for dipping bread
  • Sprinkled over focaccia before baking
  • Stirred into soups or stews for an added depth of flavour
  • On scrambled eggs, grilled halloumi, or oven-baked potatoes

Just remember—herb salt is more concentrated than regular salt, so you often need less of it when seasoning.

Want More Garden Tips and Recipes?

There has never been a better time to learn how to grow healthy, organic food at home. Take back control of your food systems and start the journey to live a more sustainable lifestyle. Say goodbye to nasty chemicals and wax-coated fruit and feed your body with real, nourishing, homegrown food. Subscribe to our FREE weekly newsletter below.

More Rosemary Inspiration Below

Rosemary

Plant of The Month Info Card Rosemary (Rosmarinus officinalis) is a fragrant…

Rosemary

Rosemary

October PLANT OF THE MONTH

Plant of The Month Info Card

Rosemary (Rosmarinus officinalis) is a fragrant perennial herb. Rosemary is a hardy, drought tolerant shrub and can also be used as an ornamental due to its evergreen foliage and purple or white edible flowers. Rosemary is a great herb to plant on your journey to sustainability, as it has a large list of beneficial uses for the garden, home, kitchen, plus many medicinal qualities. When Rosemary flowers it will attract an abundance of beneficial pollinators to increase your gardens production.

SOW

Spring or all year around in warm climates

SOIL

Free draining soil, compost & PH neutral – slightly alkaline.

LOCATION

Full sun 6-8 hours per day. Cold climates -move it to a warmer spot in winter.

CARE

Water at base – dont over water. Keep well mulched. Prune early Spring to encourage new growth.

FERTILISE

Spring and Autumn with seaweed solution or an organic slow release fertilizer.

PESTS

Aphids, white fly, scale, mealybugs. Mildew in humid climates.

HARVEST

Anytime of the year.

REPRODUCE

Cuttings are the easiest and quickest way to reproduce.

rosemary

Why Grow Rosemary?

Rosemary offers so many beneficial relationships within your garden. Rosemary is a hardy, drought tolerant, ever green perennial herb. A fantastic staple to have growing in any edible garden. Rosemary also has many healing properties, so it is a handy plant to have near the house or in a kitchen garden.

Here are some of the many reasons to grow Rosemary:

  • Low maintenance
  • Drought tolerant
  • Pest resistant
  • Attracts Pollinators
  • Creates diversity in the garden
  • Evergreen herbs
  • Edible flowers and leaves
  • Adds flavour to your meals
  • Great for skin care and healing
  • Anti-inflammatory properties
  • Boosts mental clarity and focus
  • Improves digestion
  • Aids in hair growth
  • Calming and therapeutic qualities

Popular Rosemary Varieties

Arp Rosemary’– Large sturdy shrub. Purple -blue flowers. Grows 1.5m high and 1m wide. Cold hardy. Popular for skewers.

‘Gorza’ – Tall upright shrub. Leaves are twice as big as other varieties. Large light purple flowers. Popular with Chefs. Can handle humid locations.

Salem’ – Medium sized upright shrub originating from Auckland, New Zealand. Deep Blue Flowers. Grows 1.5m tall and 1m wide. Popular for hedging.

‘Pink Remembrance  – Small-Medium sized shrub. Light pink flowers. Grows 1m tall to 80cm wide. Can handle cold climates, wind, salt and dry soils. Popular for pots or cottage gardens.

‘Huntingdon Carpet’ – Low lying or cascading Rosemary. Bright blue flowers. Grow 30-60cm tall. Popular for rock walls or pots.

‘Tuscan Blue’ – Tall upright plant. Light blue-purple flowers. Grows 1.5m tall x 1.5m wide. Popular topiary or hedge. Can handle coastal environments.

Blue Lagoon’ – Compact trailing/ cascading plant. Deep blue- purple flowers speckled with white. Grows 1m tall to 1m wide. Popular for rock walls. Can handle coastal environments.

Golden Rain’ – The most densely compact variety. Leaves turn a golden colour during winter then back to green in summer. Light blue flowers. Grows 60-90cm high and wide.

White Flowering’ – Short dark green, needle shaped leaves. Curved branching form. White flowers give the appearance of snow fall.

How to Grow Rosemary

Rosemary likes a full sun location, with approximately 6-8 hours of sunlight. Rosemary is a hardy, drought tolerant plant that grows well in poor soils. Rosemary doesn’t like having wet feet, so free-draining soil is important. In humid areas, select a variety such as the ‘Gorza’. Before planting, add in a layer of compost and mulch around the base after planting.

When to Plant Rosemary

Plant Rosemary in Spring after the last frost has past.

Care/ Maintenance

Rosemary can get root rot if it gets too much water, so ensure the soil has had time to dry out between watering. Feed with liquid seaweed or plant fertiliser every few months for improved results. Pruning Rosemary regularly will help keep it compact and fresh. Older branches tend to go woody and sparse over time. Prune after it has finished flowering and remove no more than 1/3 of the plant at a time. You can then use your trimmings to make new plants!

Pests / Disease

Rosemary is a hardy plant but it can suffer from a few pests and diseases from time to time. In humid areas Rosemary can get powdery mildew and root rot. To prevent this, water only at the base and not the leaves. Let the soil dry out before watering and ensure the soil is free-draining. Prune to allow good airflow. Aphids, white fly, scale and mealy bugs may also effect your Rosemary. It is best to catch these pests early and you may be able to blast them off with the hose or try a natural spray such as chilli and garlic. A mix of natural dish detergent and water can also help remove them.

How/ When to Harvest

Harvest and use your Rosemary all year round. Use sharp secateurs to allow new growth to form easily.

Reproducing

Rosemary is very easy to reproduce from cuttings. Choose a semi-hard wood section (not the soft new growth and not the thick hard stems – somewhere in the middle. You can cut that portion down). Cut lengths of 10-15cm and strip the bottom half of the leaves off. Then either place in a jar of water to sprout roots or place directly in a pot of soil. Ensure the pot is kept well watered while they sprout roots.

Cooking and Using Rosemary

Rosemary is such a versatile herb and works well with both sweet and savoury dishes. Rosemary has a pungent, pine like aroma.

Rosemary Pairs well with: Blackberries, Potato, Sweet Potato, Apricot, Grapefruit, Lemon, Watermelon, Pumpkin, Rhubarb, Onion, Olive, Orange, Cauliflower, Mushrooms, Garlic, Gin

Rosemary has many other uses such as:

  • Skewers for the BBQ
  • Use as a brush to apply marinades
  • Garnish and flavour teas, cocktails and drinks
  • Christmas wreaths
  • Herb finishing salts
  • Infused oils and vinegars
  • Infused butter
  • Bug Repellent
  • Bath salts or hand scrubs
  • Table setting decor
  • Add a sprig to gift wrapping
  • Garnishing cheese platters
  • Hydrosol

Preserving the Harvest

Rosemary can be preserved by drying see preserving herbs. The great thing about drying Rosemary, is that it reduces in size dramatically. So a massive basket of Rosemary can be condensed into a single jar. It can also be blitz with salt to make delicious Rosemary finishing salt. This is an easy way to add extra flavour to your dishes. Rosemary can also be added to oils and vinegars to infuse.

Rosemary Posts

Rosemary

Plant of The Month Info Card Rosemary (Rosmarinus officinalis) is a fragrant…

Previous Feature Plants

Beginners Guide to Edible Flowers

Beginners Guide to Edible Flowers

Edible flowers offer so many beneficial relationships within a home garden. When creating a sustainable permaculture garden, everything should have multiple functions and uses. The more the better! Edible flowers not only look beautiful, but they also aid in pollination, provide food and habitat to beneficial insects for pest management, add diversity to the soil and provide food, and in some cases, offer medicinal qualities for us.

Without adequate pollination, crops may be smaller, less abundant or may not produce at all. So, it is important that we attract pollinators to our gardens to increase yields along with the quality of produce.

Note: not all flowers are edible. Make sure you identify them correctly. Do not eat flowers from florists or areas unknown, as they may have been sprayed with pesticides. The safest option is to grow your own.

Why Grow Edible Flowers?

  • Attract beneficial insects to your garden for natural pest management
  • Attract pollinators to increase harvests
  • Create diversity in the garden
  • Add colour and aesthetics to your garden
  • Have subtle, delicate flavours
  • Add nutrients to your meals
  • Living ground cover to protect the soil
  • Have medicinal qualities
  • Create beautiful aesthetic dishes

How to Harvest Edible Flowers?

Pick your edible flowers in the morning but after the sun has come up. First thing in the morning the flowers will still be closed, so wait until they fully open up. They will be at their best in the morning, full of life and well-hydrated. If you are serving them fresh, pick your edible flowers as close to serving time as possible. Otherwise, place stems in a jar of water or keep in a moistened towel somewhere cool.

Read How to Preserve Edible Flowers – click here

A-Z Top Edible Flowers

Flowers for the bees

Borage

Borago Officinalis

Sow Spring to Autumn

  • Edible flowers
  • Great living ground cover to protect the soil and drop leaves for added nutrients
  • Very popular with the bees!
  • Great for salads and cocktail garnishes

best edible flowers

Calendula

Calendula officinalis

Sow Spring to Autumn

  • Edible petals and leaves (leaves are a bit bitter)
  • Medicinal properties
  • Attracts pollinators
  • Often used as natural dye
  • Vibrant coloured edible petals that look striking as garnishes.

Cornflower

Centaurea Cyanus

Sow Spring & summer

  • Edible petals – no flavour
  • Great living ground cover to protect the soil and drop leaves for added nutrients
  • Attracts pollinators
  • Dry the petals and use as cocktail garnishes or floral salt, tea anything really they are amazing!

chive

Chive Flowers

Allium schoenoprasum

Sow Spring to Autumn

  • Edible flowers (mild chive flavour) and leaves
  • Press the petals or let them dry naturally to use throughout the year
  • Great for pollination
  • Culinary herb – try infusing in vinegar for salad dressings
  • Deter pests for natural pest management

feijoa flower

Feijoa Flowers

Acca sellowiana

Flowers in Spring

  • Edible petals – subtle strawberry flavour
  • Fruit trees that produce sweet green fruit
  • Edible hedge option
  • Attracts small birds and bees for pollination
  • Only select a few to eat as this may reduce fruit crops

fennel

Fennel Flowers

Foeniculum vulgare

Sow Spring & summer

  • Edible flowers, leaves and bulb
  • Attract both bees and butterflies to the garden
  • Anise or liquorice flavour pairs well with pasta and savoury dishes
  • Flowers look like popping Fireworks

hollyhock

Hollyhock

Alcea rosea

Sow Late Summer & Autumn

  • Edible petals
  • Press the petals or let them dry naturally to use throughout the year
  • Attracts Bees, Butterflies and Birds
  • Tall Striking flowers
  • Great for stuffing

hibiscus

Hibiscus

Hibiscus rosa-sinensis

Bloom Spring to Autumn

  • Edible Flowers – citrus notes
  • Press or air dry to preserve
  • Attracts Bees, Butterflies and Birds
  • Medicinal properties
  • Used for teas, jams and garnishes

lavender

English Lavender

Lavandula angustifolia

Blooms Spring & Summer

  • Edible flowers – can be very pungent
  • Attracts Bees and Butterflies
  • Fragrant flowers – pairs well with citrus
  • Dried flowers can be used for teas, baking, fragrance, skincare
  • Medicinal properties

marigold

Marigold

Tagetes patula

Sow Spring to Autumn

  • Edible petals only – peppery can be bitter
  • Strong aroma deters pests
  • Attracts Pollinators to the garden
  • Brighten up the garden

Nasturtium

Tropaeolum Majus

Sow Spring to Autumn

  • Edible flowers , leaves, stem and seeds
  • Peppery flavour
  • Great pollinators
  • Medicinal properties
  • Chicken & animal feed
  • Nasturtiums make great living mulch

best edible flowers

Pansy

Viola Wittrockiana

Sow Spring to Autumn

  • Edible Flowers
  • Press or air dry to preserve
  • Attracts Pollinators to the garden
  • Add fresh to salads or garnishes
  • Crystallise for baking and cakes

pumpkin

Pumpkin

Cucurbita Maxima

Blooms Spring & Summer

  • Edible flowers – choose male (no small pumpkin at the base) or you will not get pumpkins!
  • Attracts Bees
  • Can be eaten raw, stir-fried, stuffed or battered
  • Added nutritional value

rose

Rose

Rosa

Boom Spring to Autumn

  • Edible petals and buds – flavour varies
  • Some have strong scents
  • Attracts Pollinators to the garden
  • Great cut flowers
  • Drinks, baking, jams, sugars

rosemary

Rosemary

Salvia rosmarinus

Blooms mainly Spring to Autumn

  • Edible Flowers – subtle rosemary flavour
  • Medicinal properties
  • Attracts Pollinators to the garden
  • Add fresh to salads, pickles, baking or garnishes

snapdragon

Snapdragon

Antirrhinum Majus

Sow Spring to Autumn

  • Edible flowers
  • Bright vibrant colours
  • Attracts Pollinators to the garden
  • Can be eaten raw in salads or garnish
  • Added nutritional value

Flowers for the bees

Sunflowers

Helianthus Annuus

Sow Spring & summer

  • Edible petals and seeds
  • Press the petals or let them dry naturally to use throughout the year.
  • The bees LOVE sunflowers and so do the birds
  • Sunflowers remove toxins from the soil
  • Tall and don’t take up much space.

zinnia

Zinnia

Zinnia Elegans

Sow Spring & summer

  • Edible petals – slightly bitter
  • Lush green leaves that are great for beneficial insects to live
  • Beautiful stand out cut flowers. The more you cut Zinnia, the more flowers they produce
  • Attract both bees and butterflies to the garden
  • Vibrant coloured edible petals that look striking as garnishes

How to use Edible Flowers?

  • Herbal Teas
  • Cocktail Garnish
  • Infused oils
  • Infused Vinegar
  • Cake decorating
  • Every day meal garnishing
  • Salads
  • Botanical Salts
  • Arts and crafts
  • Bath bombs or decoration
  • Hand scrubs
  • Infused spirits
  • Healing body balms and lotions

More on Edible Flowers

Masterclass 1: Introduction to Permaculture Zones

Masterclass 1: Introduction to Permaculture Zones

Masterclass 1: Introduction to Climate, Pathways and Zones

This masterclass we are talking about how to understand your local climate to maximise your growing potential, and discover your Zones, to create ease and flow in your gardening and sustainability routines.

Objectives:

This masterclass will be divided into 3 core sections, each with an actionable task and worksheet that you will be able to complete for your own property.

  1. Get to know your local climate and how that affects your garden and layout. 
  2. Identify your pathways. These are the areas of your property you frequent on a daily basis.
  3. Map out your Zones will help you determine where to place elements within your property. 

CLICK FOR THE WORKSHEETS

Climate and Location

Understanding your local climate is very important for selecting garden locations, plants, care and maintenance. What works for one person, may not work for you depending on your climate and location. Within each climate there are micro-climates and that is specific to your exact location. You may live at the bottom of a mountain, near a stream or closer to the ocean, and these will all have specific and direct effects on your microclimate. It may also be that your neighbour has a large tree, or there are high rise buildings creating shade or directing wind. It is important to get to know your region’s climate and then take note of your location and microclimate. This will help you determine what to plant and where to plant it.

To do this we need to do a sector analysis. This will help us determine where our external energies (sun, wind, water, frost and fire) may come from. This can include neighbouring buildings, trees or structures. 

Sun

The sun is a major factor when considering where to place your garden. Each plant has a certain amount of sunlight hours it needs to perform and be fruitful. So, understanding which areas of your property get the most sun and shade is so important! 

When I first moved to my house, I was so excited to plant fruit trees that I planted a lime tree in the shadiest spot on my property. At the time, it was summer, and it received a lot of sun. But, throughout the rest of the year the neighbours tree shaded it, and I spent the rest of the time trying to keep it alive. After observing my property and analysing my sectors, I transplanted it to a full sun location. Since then, it has thrived and is covered in limes. So, getting this right, will make a massive difference and may save you a lot of time and money in sad trees! 

Something that is interesting, and not widely known to beginner gardening, is that the sun tracks lower in the sky over winter (here in our temperate climate). Your “perfect sunny spot” may be short lived. With the sun tracking directly above your property over summer, you will have a lot less shade as the shadows will be short. During winter the sun is significantly lower in the sky, so many other objects will cast long shadows such as trees, fences and buildings. Once you have identified this, it can then be managed and used in your favour.

I cannot stress how important it is to be constantly observing your garden and taking notes. The seasonal Gardening Review Sheets make this easy to document.

Solar panels are another way to capture and store the sun’s energy.

Wind

Wind is another factor that can be difficult to analyse without a long term observation. Winds tend to come in patterns and seasons and some research online of local wind patterns can help you get started with this. Once you have identified this, you may be able to plant trees or shrubs to help break the wind or protect your garden. 

Water

When it rains do you notice certain areas that pool water? or do you have creeks or dams on your property? When it rains it can be a great idea to stop and take a look at where the water is flowing or moving to. Noting this down will help you capture and store that energy and decide where to place elements in your design. Eg: if an area is prone to getting boggy, can you divert the water and spread it out to water more plants, or plant water loving trees there and avoid planting trees that hate having wet feet. Water naturally flows by gravity so you can use this to your advantage. Water flowing on your property will also pick up nutrients and top soil and deposit them in lower lying areas. This can help you locate fertile soil for edible gardens.

Frost

If you live in an area that has frosts, next time it happens, take a look around. Are there areas that seem more frosty than others? Dips and hollows can really change the temperature of the air, so you may find some areas of your property are more prone to frost than others. 

Fire

Planning for a fire is something that many of us, especially here in Australia, should do when designing our gardens and properties. Identifying where weak points may be or the direction in which fire may travel can help you design to minimise loss. Your local council pages may have more information about creating fire plans. 

Other External Forces:

You may have neighbouring noise pollution from a factory, farm or noise from a highway. Bad smells, dust or something visually unappealing.  Identifying these will help you come up with design solutions. You may be able to plant dense hedges or place elements such as barns and forests to reduce these before they end up at your property.

Knowledge is Power

Having these energies mapped out, will provide you with the information to make decisions and maximise your results. Having them all down on paper can really help you see the bigger picture. Many problems can be turned into solutions, once they are recognised. You can capture and store these wild energies and turn them into free power using solar or wind turbines.

Resources

Helpful websites for climate info are 

https://www.sunearthtools.com

https://suncalc.net/

https://www.suncalc.org/

Pathways and Zones 

Next we are going to go over pathways and zones. These two work together, so, to figure out our zones, we must first find our pathways. To start with it will be handy to get an aerial view of your property. This way you can see where north is and how your house and structures sit on your land. You can obtain one from google earth, local council or similar. This will help with your worksheets and drawing out your zones. 

I do just want to touch on the term ‘Permaculture’ incase you are not familiar with the term. Permaculture comes from “ permanent agriculture”. Permaculture has a set of ethics and beliefs around creating an integrated system to work with nature. Everything is interconnected to create energy efficiency, ease and flow. It is what guides most of my gardening and lifestyle, so many of my lessons will have connections or links to permaculture practices. 

Pathways

To workout your pathways, print out the pathways worksheet and choose 3 days to map your daily routine. Choose 3 days that are a fair representation of how you spend most of your time (eg: if you work 5 days a week, choose those days).

  • Outline the boundary of your property.
  • Outline your buildings and key elements (house, rooms, garage, car park, mailbox, compost bin, gardens, barn, chicken coop etc).
  • Each day draw lines or pathways through your map of where you have visited. Do this for at least 3 days.

This will allow you to see patterns and areas that you visit regularly, verses areas you do not.

What are Zones in Permaculture?

Zones are a way to divide your property into sections of areas that are used frequently, versus those that receive less attention. Determining these zones will allow you to place your gardens, animals and elements in areas that will allow the most ease and flow. Creating ease and flow is so important because, it will make tasks more sustainable long term. The permaculture zones generally start from the house at zone zero and work upwards. 

Learning your zones is important for the placement of elements. A kitchen garden is something that is used frequently for daily meals, so should be located closer to the home than for example, an orchard. An orchard can be harvested from when fruit is ripe, and in batches, so it can be placed in a zone further away from the house. Chickens will need to be fed and cared for daily, so they are another element that should be placed in a zone close by. The placement of systems that work together should also be considered. For example, if you throw a lot of your old vegetables or weeds in the compost or to the chickens, then these systems should be near each other or on the way to each other, for ease and flow. 

The secret to getting started with identifying your zones, is found in your daily routine.

We are creatures of habit, so it can be useful to map your current routines and track which areas of your property you frequent often. I have created a worksheet to help you map your pathways. Once you have these mapped out you can start creating your zones. These may change over time as your garden and lifestyle changes and develops.

Once you have you pathways mapped out, you can start to number or circle zones.

We will all have different zones and pathways because, we all have different routines and priorities. Below are some examples but also take into consideration how often you use or frequent these areas or elements. You may visit your chickens 3 times a day to say hello or you may only use your compost for pruning and weeding rather than everyday scraps. This will also change depending on the size of your property. It’s about finding out what YOUR zones are.

It is useful to go through this every few years, especially, if your lifestyle has changed or you have moved properties.

Zone 0

  • Typically your house or dwelling as you spend the most time here.
  • Bokashi
  • Indoor garden

Zone 1

  • Kitchen Gardens
  • Patio or Balcony gardens
  • Outdoor setting areas
  • Greenhouse 
  • Seedling Raising areas
  • Compost
  • Worm farms
  • Pot plants or container gardens
  • Utility sheds

Zone 2 

  • Main vegetable patch
  • Small animals such as chickens, ducks
  • High maintenance fruit trees or regular produces (lemons)
  • Larger composting systems
  • Dense planting
  • Vertical gardens

Zone 3 

  • Other animals such as goats, bees, sheeps etc
  • Milking animals
  • Hardier fruit trees or food forests
  • Animal food systems
  • Windbreaks
  • Firebreaks
  • Ponds

Zone 4 

  • Storage of extra supplies or firewood
  • Low maintenance herd animals such as cattle 
  • Agroforestry
  • Set and forget planting
  • Old established non producing trees

Zone 5 

  • Wilderness / bushland
  • Neighbouring properties

Place and mapping your zones out doesn’t need to be linear. They can be the same distance from the house as each other – it is more about how often you frequent them. For example: zone 3 may be closer to your house than zone 2 but it is out the side door of your house that you don’t often use.

The main goal of creating these zones and sectors is so that you can place your elements such as kitchen garden, shed, chickens, orchards in areas where they can benefit the most from the natural energy forces and create as many interconnected relationships as possible.

So you may place your vegetable patch where it is protected from winds, gets good winter sun and is next to or on the way to your chickens and compost bins. That way your extra garden greens can easily be fed to the chickens or placed in the compost. And then that compost can be easily spread on the gardens to grow more food. 

Creating pathways where things can naturally happen along the way makes it so much easier and more achievable. 

Remember to think of this as a journey. You may be just starting out with a kitchen garden and vegetable patch but in the future you may have chickens, a pond, a food forest and so on, so it’s important that you place things in areas that you naturally frequent and that are easily accessible. Otherwise, the further down the journey you get, it may get overwhelming and hard. If this happens, then your orchard may not get pruned, garden beds may be forgotten about and die and the wheels might start falling off. 

This is such a valuable exercise to do and update regularly. Create systems that work together and have that ease and flow. That way it will actually be sustainable long term with a lot less effort. 

If you have any questions please let me know via email, I will be more than happy to help.

Holly