Citrus are a fantastic addition to a home garden because they are hardy, quite forgiving, and easy to use in the kitchen. Here in Perth Citrus grow very well due o our warm sunny climate and sandy soils. Citrus are sun lovers and require at least 6 hours of sunlight per day. They are not a fan of frosts and extremely cold weather. If you do get harsh winters you could try growing citrus in a pot so that you can move it to a warmer location for the winter months. In this guide we will go through all of the steps to growing and taking care of your citrus trees so that you can get delicious and abundant crops of fruit each year.
Types of Citrus
Not all citrus are made equally and each type will have slightly different needs. It is important to look into this when choosing which citrus and also which variety is right for you and your garden.
These guidelines are general in nature and more suited to your classic citrus such as Lemon, Lime, Orange and Grapefruit. Citrus such as native finger limes are a little more delicate and have different feeding and sunlight requirements.
Top Quick Tips
Choose a sunny location
Prepare soil with compost
Loosen roots to ensure it is not root bound when planted
Feed regularly with compost, liquid fertilisers, and mulch
Check for gall wasps in Autumn and winter
Check no shoots are growing from below the graft line!
Mulch and keep weed-free around the base of the citrus
Remove mulch from directly touching the trunk
WATCH the masterclass
Choosing a location
Citrus are sun lovers and require 6+ hours of sunlight per day. Citrus grown in the shade can still fruit but will be less productive and more susceptible to fungus and disease.
However, here in Perth, dappled summer shade in the afternoon could work well to help protect the trees from our harsh summer sun.
Protection from the wind is also desired so that flowers don’t get blown off before they have had time to set as fruit.
Consider the size of the tree for the location you have chosen. Most varieties of citrus are available as dwarfing which means they will grow to a maximum height of 2m. This can be a good idea for small urban blocks.
Soil
Citrus like free-draining soil and don’t like having waterlogged or boggy roots. This can quickly lead to root rot. They also prefer soil that is neutral in pH.
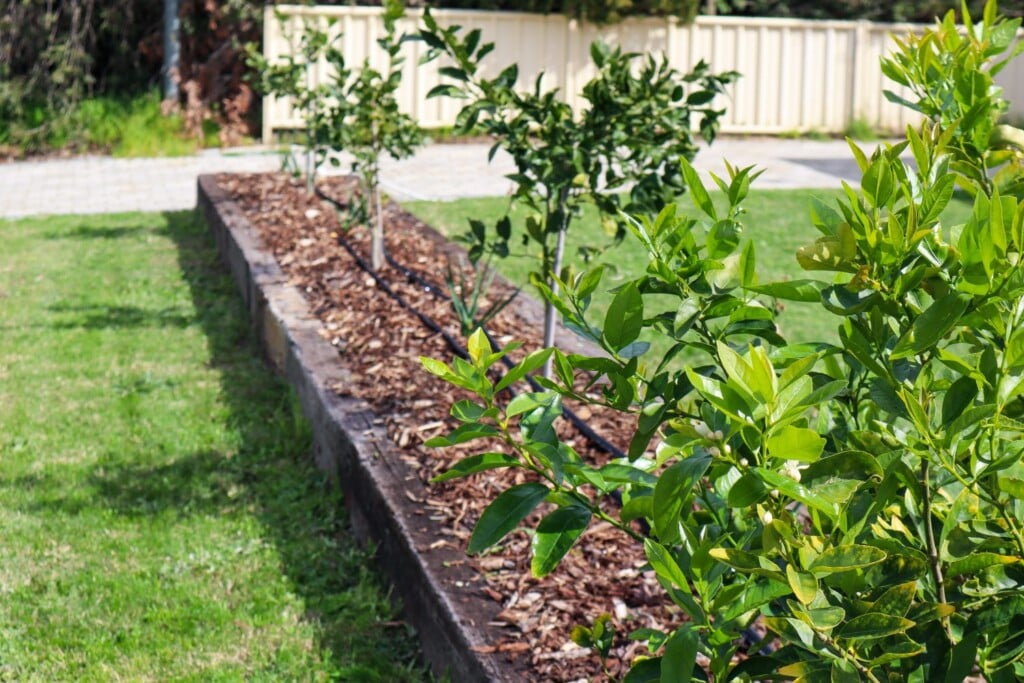
To prepare your soil dig a hole that is twice the size of the pot your tree has come in. You may want to add compost and composted manures (chicken, horse) to amend your soil. Make sure you mix in the soil amendments with your natural soil so that it isn’t a dramatic transition.
For sandy soils: add in some compost and mix it through the sandy soil so that it is free draining but now has a little extra nutrition.
For Clay soils: Add in compost and sandy soil to help create a more free-draining patch. It would also be beneficial to mound the soil up so any excess water drains away from the dree to help reduce clay-bogged soil.
Note: do not put any fertilizer in the hole as this will burn the roots.
When to plant Citrus Trees?
The ideal time to plant out your new citrus tree is in Spring after any chances of frosts and passed. This will give the tree time to get situated before summer. Avoid planting citrus (or any trees) during the peaks of summer. It is already stressful enough for the plant without adding in extreme temperatures. If you buy or receive a citrus tree during summer, keep it in a pot and ensure it doesn’t dry out, or plant it in a larger pot and keep it somewhere protected from summer sun until Autumn when it is safer to plant out.
How to plant out your potted plant?
Firstly make sure you water your plant well – place a tray underneath for it to absorb the water.
Have your hole prepared (twice as big as the pot).
Carefully squeeze the sides of the pots and start to pull the tree out by holding the stem at the base.
Gently loosen the soil around the sides to allow the roots to spread out once it is planted. If your plant is root bound and all the roots are tightly wrapped in the shape of the original pot, you will need to tear away some of the roots to break it free from it’s confined shape. Use the hose to blast away some of the soil and this can also help free up the roots. If you do not break up the roots around the side the plant will remain tightly bound and will not be able to expand and grow.
We the soil with a hose and place the plant in the hole and push the soil back around it. Compact the soil down by gently using your foot.
It can be a good idea to stake your tree for extra support so that it grows straight and doesn’t snap in any strong winds.
Give the tree good water.
Mulch around the base. Wet cardboard can help keep weeds away and then add mulch on top. Mulch out as far as the leaves spread on the tree. Pull back the mulch from about an inch away from the trunk so that it doesn’t rot.
Give your tree consistent water but always check first to see if the soil is moist so as to not overwater it.
It is generally advised to remove fruit for the first 3 years so that the tree can establish strong roots and branches. You will often find the tree will naturally drop fruit itself in the first few years.
Feeding
Mulch around citrus, especially below the canopy line. Citrus have shallow feeder roots so they can dry out, overheat or get too cold if their roots are exposed.
Citrus are quite heavy feeders but young trees in the first year won’t need much if any fertiliser. Use compost, compost teas, worm teas, chicken manure or bedding, and slow-release citrus fertilisers. You can feed citrus every 6 weeks from August to February.
Citrus are very good at telling you what nutrients they are missing by the colour of their leaves. Yellow tips, veiny patterns, brown patches, or yellow leaves that drop off. Sometimes it may just be that the pH of the soil is not right or the soil temperatures are too low for the plant to absorb nutrients. This is why our trees often look a little sad after winter.
May deficiencies can look similar to a balanced NPK fertiliser or regular feeds of compost teas and natural liquid fertilisers can help reduce the chances of deficiencies.
Some of the common issues are:
Lack of Nitrogen – Leaves turning yellow and dropping off. Often caused by excess rain or not enough nutrients being added. Sheep pellets, composted animal manure, garden compost and lawn clippings can help.
Lack of Magnesium: Leaves start to look yellow in patches, tie-dye effect but the base or centre of the leaf remains the greenest. This appears mainly in older leaves. To add magnesium to your plant apply a feed of Epson salts. These can be purchased from the plant store and will have the directions and amounts listed. Usually, 1-2 tsp dissolved in hot water then added to 1L of water per tree. This can also be sprayed on the leaves for a quicker effect but do not do this before a hot sunny day.
Lack of Potassium: Potassium or potash is what helps our flowers and fruits form. Banana peels, wood ash (white part used sparingly) or potassium sulphate.
Heavy rain and temperatures can also affect how nutrients are absorbed so don’t stress too much, often these correct themselves as rain eases or temperatures rise again. balanced regular feeding of compost and increasing diversity helps.
Watering
Citrus like regular and consistent watering. 1-2 times a week in warmer months. It is important that citrus get plenty of water when starting to form fruit. Drip irrigation, weeper hose or other slow-release watering can help to allow water to soak in. Mulching will help retain moisture and temperature around the plants.
Pests and diseases
Citrus are quite hardy and as long as we keep up the nutrition and they have enough sunlight they can usually shake off most pests.
A few to look out for are:
Gall Wasps: These lay eggs in the branches of your tree and swell to look like little lumps. Often we don’t notice them until late summer and autumn. It is important that we remove these during winter before the eggs hatch. You can tell if they have hatched because they leave little exit holes in the lump. The lumps should be removed and ideally burnt. If not secure them in a bag and tie them tight so if they hatch they cannot escape. leave it in the sun for 4 weeks if possible to kill off the larvae. DO NOT put in the compost. If wasps are allowed to hatch they will start to infect your neighbours trees and then you will have more and more issues each year as the surrounding trees get left unchecked. Be aware that removing a lot of branches will affect the following year’s production.
Avoid excess fertilizer in spring or late winter can cause big flushes of new growth. This is what they love to lay eggs in.
Citrus leaf miner: This moth lays eggs and the larvae leave silvery wiggle marks on the leaves similar to a snail trail. Remove affected leaves, especially on young growth. dispose of in a similar way to the above.
Aphids: Aphids will attack new growth, especially in the warmer months. When possible spray them off with a hose to reduce the population. Eco neem oil or dishwashing liquid and water can be applied to the new growth if the infestation is bad or reoccurring.
Sooty Mould: This is a black mould that looks a bit like the plant has been burnt. Sooty mould doesn’t really affect the plant but it is a clear indicator that something else is going on. Usually, this means your tree is being attacked by aphids or spider mites. Once you clear up this issue the sooty mould will dry up and fall off.
Encourage beneficial insects by increasing diversity and flowers to the garden.
Pruning
The great thing about citrus is they don’t require any special pruning. You can prune your trees to shape or keep them at a manageable height. The best time is late winter to early spring once the tree has finished fruiting. Use sharp, clean cutting tools and don’t cut more than 20%. You do not want to do an overall “hedge” prune as this will affect the next season’s harvest. Select specific branches that need to be cut back for height or shape.
Grafted fruit trees are when a delicious variety is attached to the roots of a vigorous growing variety. Most citrus will be grafted.
Keep an eye on the graft line and always remove shoots or suckers that appear below the graft. The graft line is usually easy to see as it will have a different texture and often a different width. This is most important in the first few years of planting the tree. You do not what the graft to grow or it can overtake your tree and kill off the actually selected variety.
How to tell if the rootstock is taken over?
Citrus rootstock often has very sharp spikes. The leaves will be a different shape too. They are usually bush lemons and will produce no fruit or small dry tasteless lemons. Always check below the graft line to ensure all rootstock shoots are removed.
Harvesting
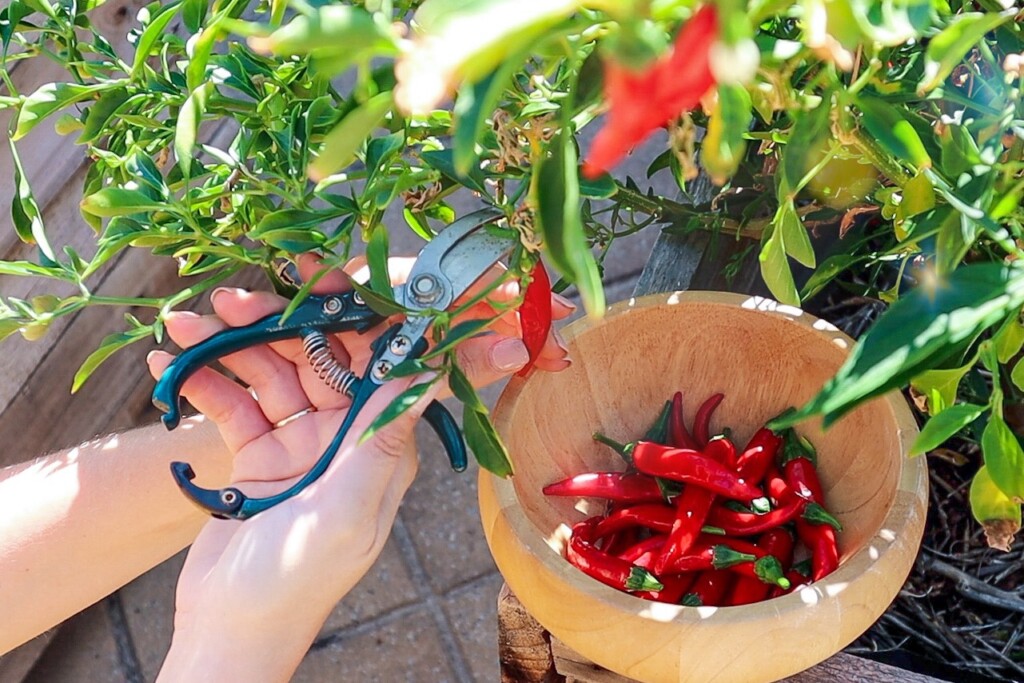
Use sharp secateurs to harvest your fruit rather than ripping off the tree and causing damage to branches. The best way to tell f citrus is ripe is to try one and see. Fruit often take 9-12 months to ripen. Fruit can be left on the tree so that you can eat them fresh as needed. Until they start to fall or you are getting excess rain. Large downpours of rain can cause citrus to burst open and split.
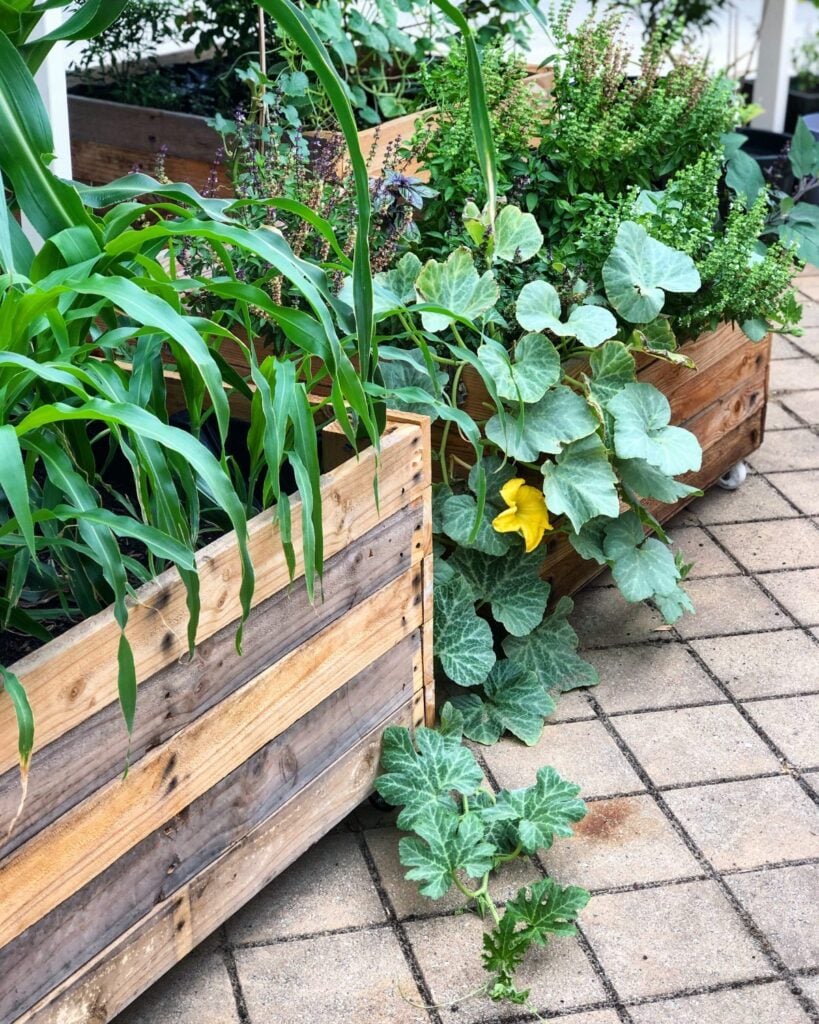
An edible food forest is a type of food-producing system that mimics nature and creates a low-maintenance edible garden. Food forest systems can be designed and adapted to suit small urban blocks, sloping sections, and large open spaces. The idea of creating a food forest is that you can let it go a little wild and allow nature to create balance. Food forests not only provide an abundance of food, but they also promote biodiversity, sequester carbon, attract wildlife, nurture the soil, and create a beautiful and tranquil place to be.
Watch the workshop
What is a Food Forest?
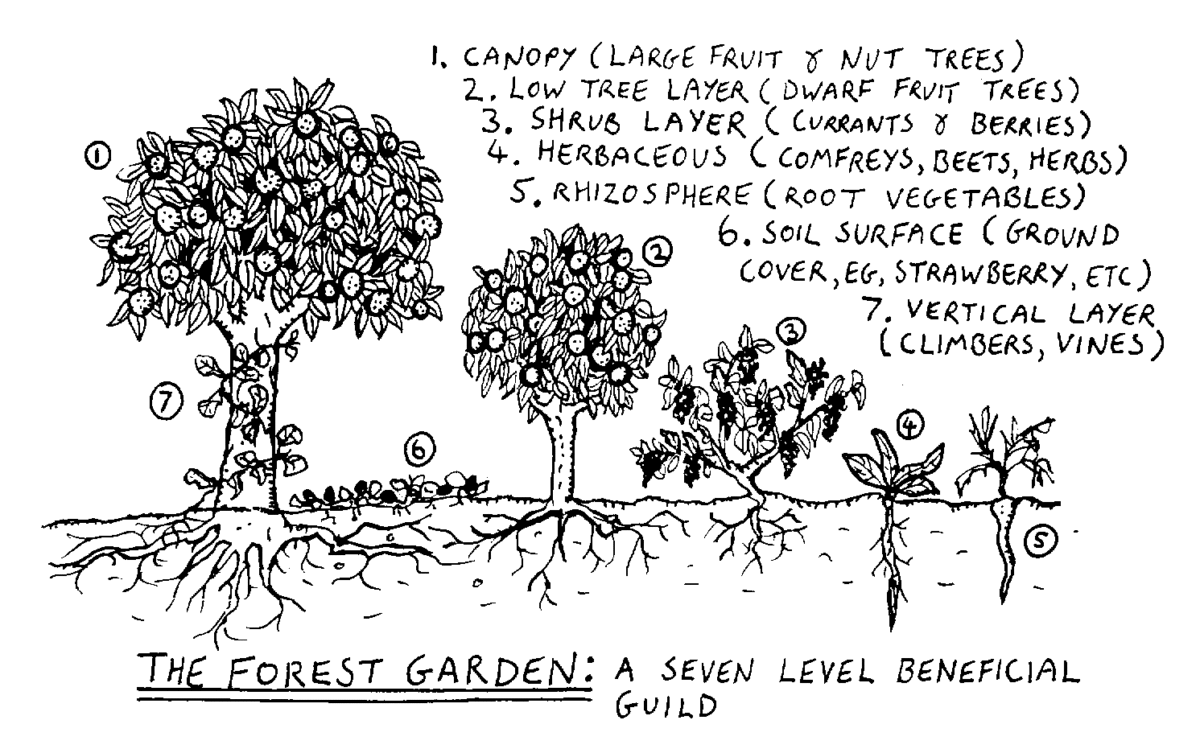
A food forest is a layered system of gardening that is designed to promote biodiversity and create an ecosystem that feeds off each other through mutually beneficial relationships. A food forest aims to mimic patterns and systems that occur in nature. Although, the food forest gardens we create are definitely not what occurs naturally eg: planting tomatoes with guavas, feijoa, and lettuce. It is more so about creating layers both above the surface with different heights and shapes, as well as below the surface with varying root structures. This way all the plants can get the space they need to thrive, provide nutrients, shade, and shelter to others, and work all together as one big family to grow abundant food supplies.
image credit: Graham Burnett
Why Create a Food Forest Garden?
If you are looking to create a low-maintenance garden that produces food all year round, is lush, tranquil, and attracts birds, bees, and other local wildlife, then a food forest may be the garden for you! Food forests are a great way to grow a huge variety of plants in a single area. The ground covers will smother weeds so there is one less job for you to do! The plants are mainly perennials so this means we don’t need to dig up the soil and replace plants each season. The less we dig up our soil the better as this promotes healthy microorganisms and soil life.
There are certain characteristics of a food forest that allow it to renew and support itself with little external input
Planting Density
It’s important to cover and protect the soil from the harsh sunlight
Planting densely creates a habitat for wildlife
More leaf matter to fall and nourish the soil
More roots to hold the soil together and reduce erosion
More flowers for the bees = more pollination and more food production
Dense planting will reduce the number of unwanted weeds
Having flowers and fruit trees planted close together can increase pollination as the bees and pollinators will be nearby
Growing a wide variety of plants
Planting a wide variety of plants will mean you have fruit, vegetables and flowers ready at all different times of the year
Diversity in plants not only provides you with a wide range of nutrients but also your garden and wildlife
Different root structures will provide the soil microbes with different secretions and reduce the severe depletion of nutrients in the soil. If you have all one crop planted in a single area they use up the same nutrients and the soil can become depleted. Having a wide variety can help keep it balanced.
Plants have different flowers which will attract different pollinators to your garden. Each pollinator will achieve different results for each plant. It’s important not only to have flowers available all year round but also a variety of different kinds.
Self Fertilising
With a variety of layers and heights in your food forest, the plants will drop their leaves and fruit which will act as a mulch and built-in fertiliser.
Some plants may get overgrown or die off (survival of the fittest!) which will also return nutrients to the soil.
From time to time you may need to trim your trees to reduce their height or width. This trimming can be put through a mulcher or cut up and returned back to the garden to feed the plants.
Self Seeding
By letting some plants go to flower and seed you will have new plants popping up each year. This can be an extremely easy way to grow more food for free.
At times fruit trees may grow beneath the canopy from the seeds of rotting fruit. It can be a good idea to move these as they won’t have adequate space to grow. Either, relocate them or pot them up to swap or trade.
How to Start a Food Forest Garden
Step 1: Choose a location and prep the soil
First up, we must decide on an area to start converting into a food forest system. This could be an old veggie patch, the front lawn, along the back fence line, or a large open field. The preparation needed will depend on the condition of the area selected. But in general, you will want to:
Clear any debris or unwanted structures
Remove or smother the grass. This can be done by laying down an old carpet for a few months to kill off all the grass. If the grass is still alive and present it can be hard to maintain. Another way is to use sheets of cardboard, as these will eventually breakdown once the grass has died.
If your location has never been used to grow before, the soil quality may be extremely poor or sandy. It could be a good idea to add a layer of compost or organic manure.
Cover your area in a thick layer of mulch. This will protect the soil and help keep any grasses or unwanted weeds away.
Give the area a good water and feed with a liquid seaweed solution.
Step 2: Selecting a plant list
We want to select plants that:
A: we want to eat and
B: provide benefits to other aspects of our garden (animal feed, mulch, birds, shade, etc).
Below are the 7 layers of the food forest. Write down a wish list of plants for each layer and then you can start mapping out which plants will go where depending on their size, what “layer” they are, and how much light they will need to grow.
7 Layers of a Food Forest
1 Canopy Layer – Large trees that require full sun – fruit and nut trees (Avocado, Chestnut, Mango)
2 Understorey Trees – Dwarf fruit or small trees ( Citrus, Papaya)
3 Perennial Shrubs – Small bushy plants (Berries, Ginger, Arrowroot)
Some plants may fall into multiple categories – Sweet potato is a root crop but also a fantastic ground cover. Ginger is also a root crop but can make a great Perennial shrub layer.
Step 3: Designing
Mapping out a design can be as detailed or as rough as you like. It is important to come up with some kind of plan so that you can decide where to plant your larger trees so that they get enough sunlight. You don’t want to be digging up and moving things around. This should be your master plan not what you are starting with. So go big, add in all things you want so that you can plan for the future and ensure you can room.
How to map out your food forest design
1 Draw the outline of your location or property to scale
2 Add in any permanent structure (sheds, veggie patch, established trees, fences)
3 Map where the sun and shade come from. Mark areas as full sun, part sun, or full shade.
4 Add in your large Canopy trees and allow space for them to grow.
5 Add in your pathways or future large structures (pond, shed, chicken coop)
5 Add in your sub-canopy trees
6 Add in your scrubs, herbaceous layer, root crops, ground cover, and vertical layers.
7 Add seating, a table, or a place for you to view and enjoy your food forest.
Step 4: Planting
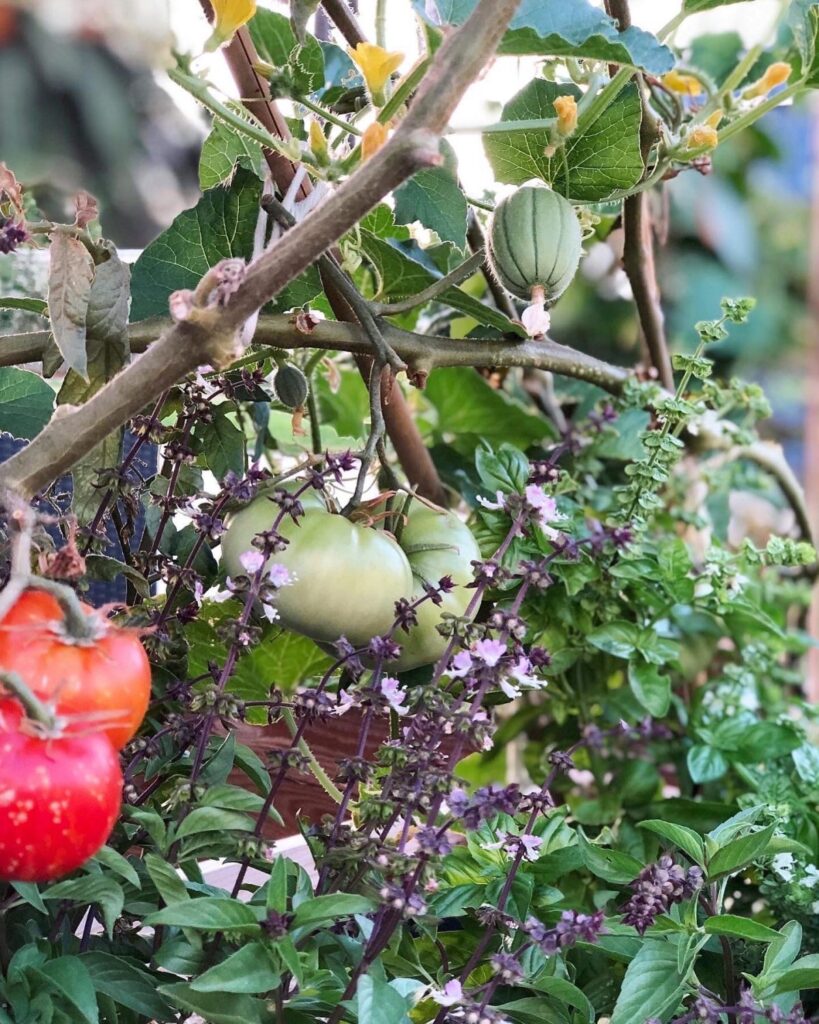
To start with you will want to select your large canopy trees and ensure there is enough space for them to grow. The height and width will be noted on the labels. Then you can start adding in your sub-canopy/dwarf trees. Large trees may take years to fully establish so your food forest may not look very ‘foresty’, to begin with. This is a great time to interplant with more annual crops (lettuce, tomatoes, broccoli, etc).
When I first started my back fence line in a food forest system, there were large gaps between the trees. This meant there was a lot more light and space available but I knew that eventually my canopy and sub-canopy trees would grow to fill the space. I used this time to grow seasonal veggies and edible flowers. As well as accumulating and establishing new shrub layers and ground covers.
How to Source Plants for your Food Forest?
Creating a food forest can involve a lot of new plants and the costs will quickly add up. This is where learning how to make cuttings can be extremely valuable. Not only can you reproduce your plants to grow in other areas of the garden but you can also swap, trade, and sell your plants to acquire new ones. Keep an eye out on local pages as you can pick up established trees for cheap or even free! I have managed to get established fruit trees that are already fruiting for less than $20. This can really speed up your food forest production.
Maintaining your Food Forest
The idea of creating your food forest is that it will require less care and attention. This can mean it will look a little wild from time to time (in a good way)
Pruning or trimming back excess trees can be a great way to propagate more or mulch to feed the garden. This can be done once the tree has finished fruiting.
Some trees will need to be staked and secured while they are young so that they don’t snap off.
Propagating plants to establish in other areas – it can take a while for some plants to establish so once they have you can start to reproduce them in other areas.
Harvesting fruit – this is important so that you can reduce the number of unwanted critters (such as rats). Rotting fruit on the ground can also promote fruit fly infestations which you do not want! So ensure all fruit is picked and preserved or composted.
Feeding – It can be beneficial especially in a young food forest to add in extra fertilisers. Try using natural products such as seaweed solution or creating your own from leftover plants and weeds.
Netting or bagging fruit – Depending on your location you may need to net or place net bags on your fruit. Fruit fly, bats, and birds can decimate crops in just a few hours.
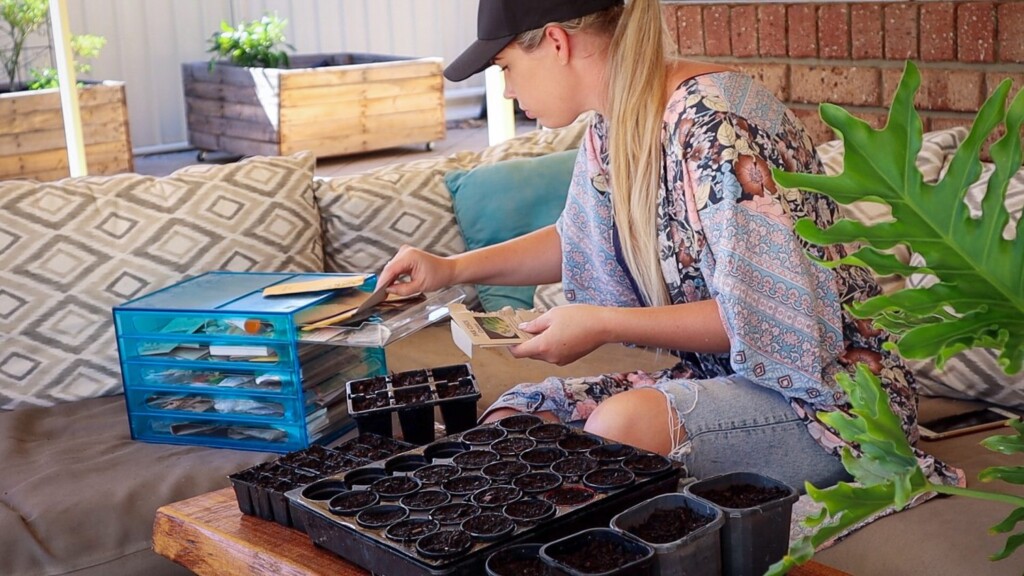
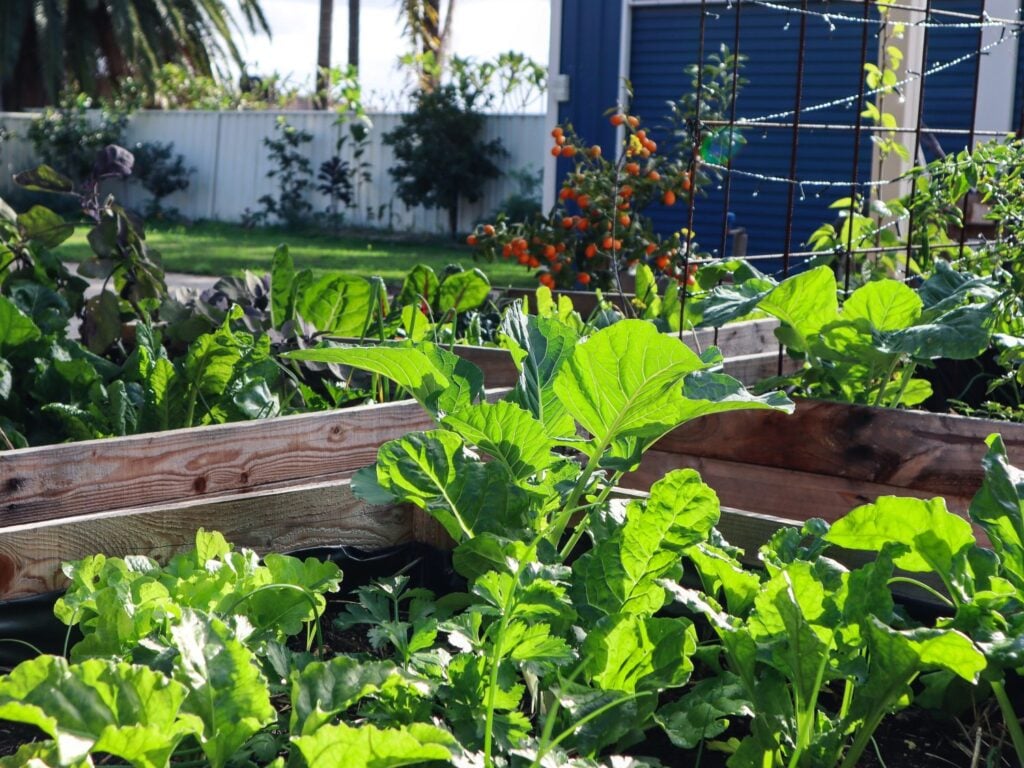
Autumn is a busy month in the garden and it is time to prepare your garden beds for new plants by adding compost and fresh mulch. Autumn is also the season to sowyour cool-season seeds. Create succession planting by sowing seeds in batches 2-3 weeks apart. Autumn is also when our summer fruit and vegetables will be finishing up. This is a great time to harvest as much as you can and preserve any extra food.
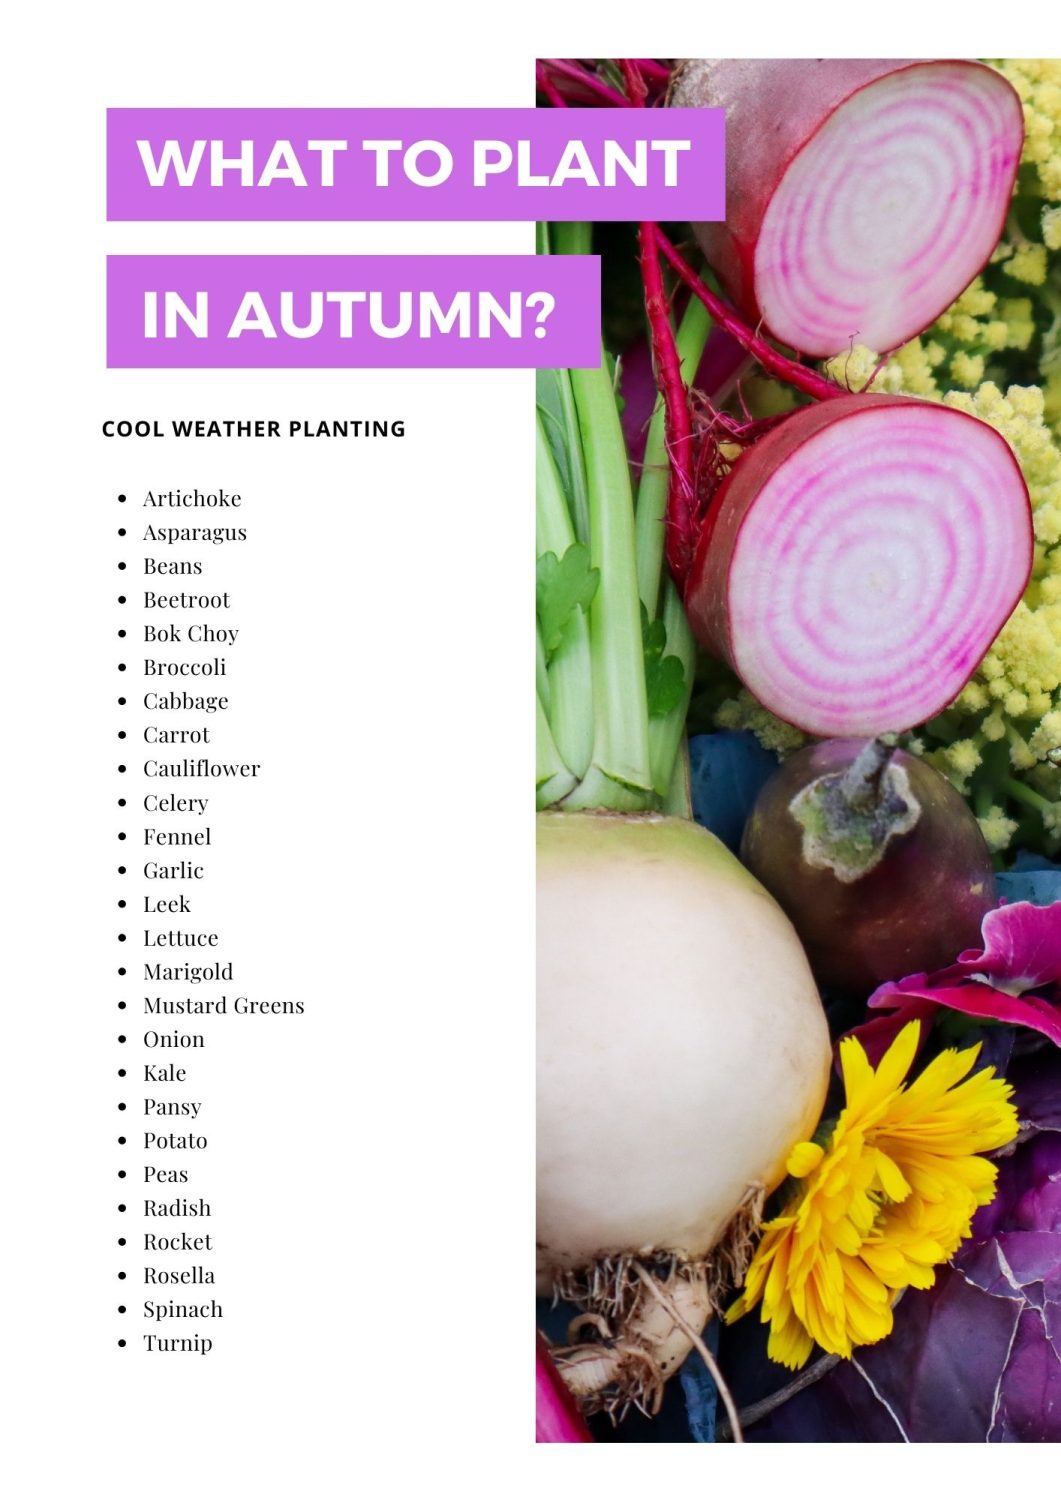
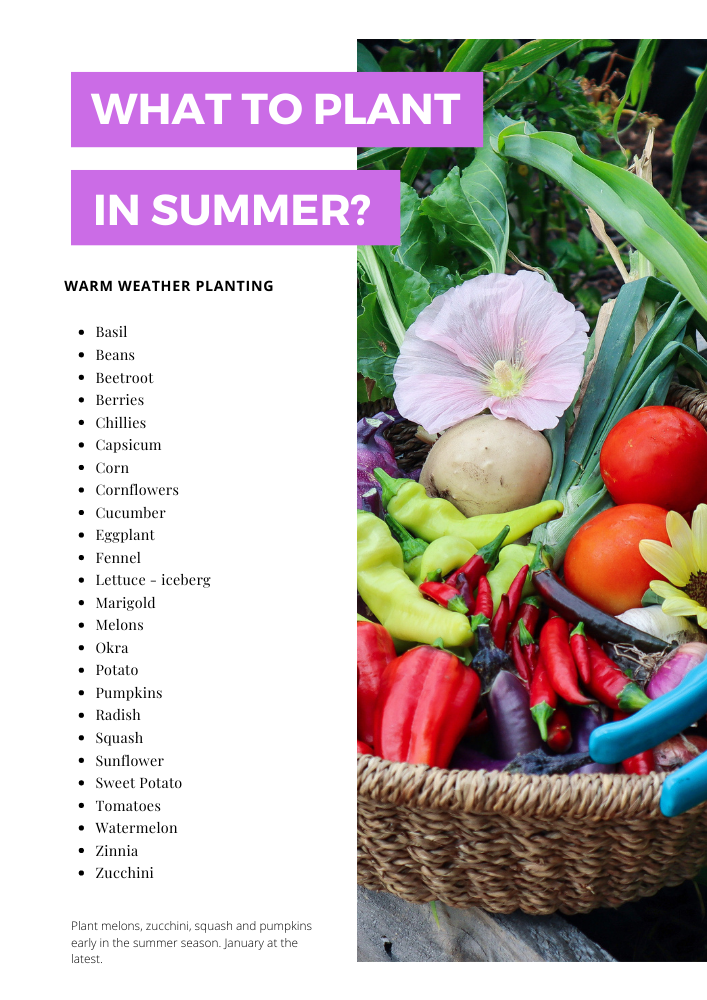
What to Plant
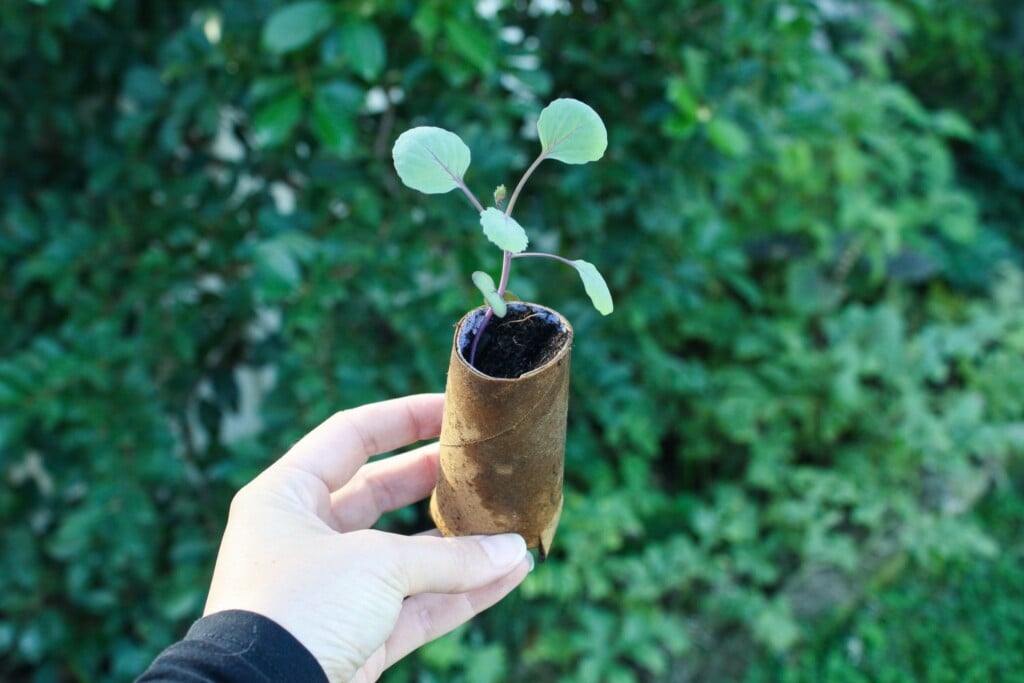
Autumn is a great time to start planning and planting out your winter seeds. If you are planting seedlings that are already small plants, it may be too hot still for many cool-season plants. Check out these 10 edible plants to sow at the beginning of autumn. These 10 edibles are great to sow for that in-between stage. Your cool-season crops such as broccoli, cabbage, and cauliflower are great to start from seed in late March because, by the time they are small seedlings and ready to plant out into the garden, the temperatures will be cool enough.
The end of Summer and the start of Autumn is often when your fruit and vegetable production is at its highest. This can be a busy time in the kitchen preparing jams, chutney, dried fruits, and preserves. If you find it hard to keep up with the production of fruit and vegetables (an amazing problem to have!) gifting or freezing excess can be a great idea.
The cooler days of autumn can be a welcomed relief after a hot summer. The nights are still warm and light so it is a great time to dine outside and enjoy your garden. Set up a meal outside and celebrate your summer harvests with family or friends. Below are some inspiring ideas to embrace Autumn.
Hang fairy lights and dine outside
Create Sculptures or garden structures using pruned trees
Pack a picnic and enjoy the balmy nights
Host a preserving night and have your friends help process your ecxess harvests in return for homemade goodies
Swap and trade cuttings with friends
Planning for Winter
The key to easy and successful gardens is to plan ahead. This can help you maximise your food production and help maintain momentum. Autumn can be a busy season in the garden to prepare beds and seeds for winter production. Plants tend to grow slower in winter with decreases in sunlight and temperature. Getting your plants in the ground in Autumn and the start of winter will allow you to focus on harvesting food and dreaming up new garden ideas.
Summer is a busy time in the garden and also in life! It can often feel overwhelming with harvesting, watering, and generally trying to keep your garden alive during hot periods, all whilst trying to enjoy time with loved ones. Summer harvests can come on hard and fast and we want to make the most of that time to use and preserve extra harvest to use throughout the year. It can be a great time to stock up the pantry with homemade preserves. Tomatoes, Cucumbers, Zucchini, Watermelon, Chillies and Capsicum are just a few of the fruit and vegetables that are in abundance during the warmer months. If you go away a lot, or want to spend more time relaxing, then it can be a great idea to prep your harvests and freeze so that you can use the slower autumn months to create your jams, chutneys and other preserves using your summer harvests.
Summer can bring really harsh weather for your gardens and it pays to be prepared to keep your gardens happy and healthy. Creating sustainable systems and working with nature rather than against it, can help you maintain lush gardens without too much time and effort.
Summer Gardening
Summer can be a little chaotic in the garden. Warm weather can bring quick growth spurts and an abundance of ripe fruit and vegetables. It can also bring harsh weather conditions with summer storms and high temperatures. Summer is also a time when we tend to go away more often, or spend more time out and about with friends and family. It is important to establish systems to keep your gardens hydrated and thriving, so you don’t loose all your hard work with just a few hot days.
Below are a few tips to help keep your gardens thriving through summer without having to put in any extra time or effort.
Ensure gardens are mulched and soil is not exposed to direct sun
Set up automatic sprinklers or irrigations systems
Set your automatic sprinklers to very early morning so the plants have time to absorb the water before the sun rises and drys it out
Utilise shade or set up temporary shade
Move pots under shade when you’re going away to reduce heat exposure
Water-wise Gardening Tips
🌱 SLOW AND STEADY | The best way to get your plants to effectively absorb the water is to slowly distribute it and allow the plant time to absorb it. If you simply pour it on and walk away a lot of water will spread and run away across the surface and not be drawn down to the roots.
🌱 WATER UNDER MULCH | If you have a thick layer of mulch and only a limited amount of water, it is a good idea to pull back some of the mulch around the plant and pour the water directly onto the soil. Mulch can sometimes absorb ALL the water and not leave any for the plants. Mulch is great for protecting the soil and stopping evapouration so once the water is on the soil, push the mulch back around to keep the moisture locked in.
🌱 TIME IT RIGHT | Timing is everything. Choose cooler times to water your plants such as the early morning or late evening. This allows the plants to absorb as much of the water as possible before the sun and heat evapourate it. I tend to water any plants that are prone to mildew such as pumpkins, melons, cucumbers etc early in the morning rather than at night. That way they have time to absorb the moisture but they will also have all day to dry out if any moisture has reached their leaves. The rest of my gardens I tend to water in the evenings.
🌱 IMPROVE SOIL | Poor soil structure will be so hard to keep well watered as it will just let the water runoff or filter away. Sandy soils can become aquaphobic and be basically waterproof. Clay rich soils will become hard and compact restricting water flow to the roots. The best way to improve soil structure is to add fibre to your soils. Adding fibre means adding more plant matter by either compost of composted manure. Compost rich soil will retain more moisture and feed your plants. Healthy well-feed plants won’t require as much watering as their roots will be more developed and widespread to capture water more effectively.
🌱 SELECTIVE PLANTING | If you often have water restrictions or know there is likely to be a real water shortage in your area then make sure you are selective in what you choose to grow. Some plants will require more water than others so do your research and select plants that will work best for your conditions. Plants such as watermelons, tomatoes, cucumbers and lettuce will require a lot more water than plants such as chilli, natives, citrus, corn, sweet potato or mini eggplant.
Summer is all about harvesting and maintaining your crops. It’s an abundant time in the garden with rapid growth. Keep on top of staking and tying tomatoes.
Often the more you pick, the more your plants will produce, so keep picking your harvests to ensure you maximise crops and don’t let food go to waste.
Tie and stake tomatoes regularly
Net or bag stone fruit
Pick any fruit from the ground as to not attract bugs and fruit flies
Keep pathways clear
Pick weeds before they go to seed
Apply mulch to keep moisture in
Apply fruit fly nets or bags after the fruit has been pollinated
Clean your tools regularly to stop any diseases from spreading
Remove any plants that look unhealthy or diseased to stop the spread
Dead-head any flowers bushes such as chrysanthemums or lavender to encourage more flowers
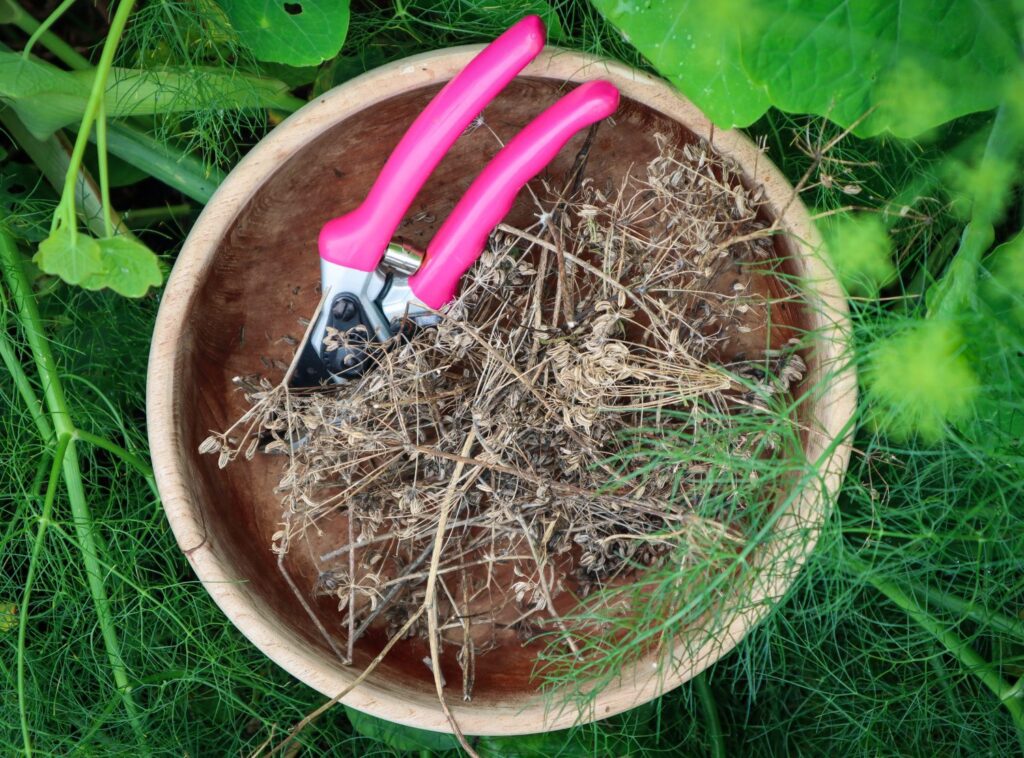
Pick and save any seeds from your successful plants
Picking your veggies is actually a very important part of growing if you want to have an abundance. Your veggie plants are producing flowers and fruit to then produce seeds and be able to reproduce.
If you are constantly picking the harvests, your plants will work harder to make sure they are producing more to get its seeds out there for another year. If you leave your veggies on the plant too long, they will think their job is done and slow down production.
Summer fruit and veggies are some of our all-time favourites, so it’s important to harvest as much as we can and preserve them for later in the year.
Ways to preserve summer produce:
Tomato sauce, passata, chutney.
Freeze whole or chopped tomatoes for future sauce or add straight to cooking.
Freeze Chopped Zucchini for smoothies, soups and future preserves
Make garden pesto using any leftover greens and freeze in large ice-cubes.
Make preserves, jam, sauce, chutney and relish to gift and trade
DIY Pots and gift seedlings
Plant a pineapple from scraps
Start a cocktail garden – Plant herbs and flowers so you can enjoy beautiful refreshing summer drinks.
Press flowers – Preserve the colourful blooms of spring to create cards and art during the slower seasons.
Try your hand at some photography! The bees and flowers will be putting on a brilliant show.
Have a picnic in your backyard
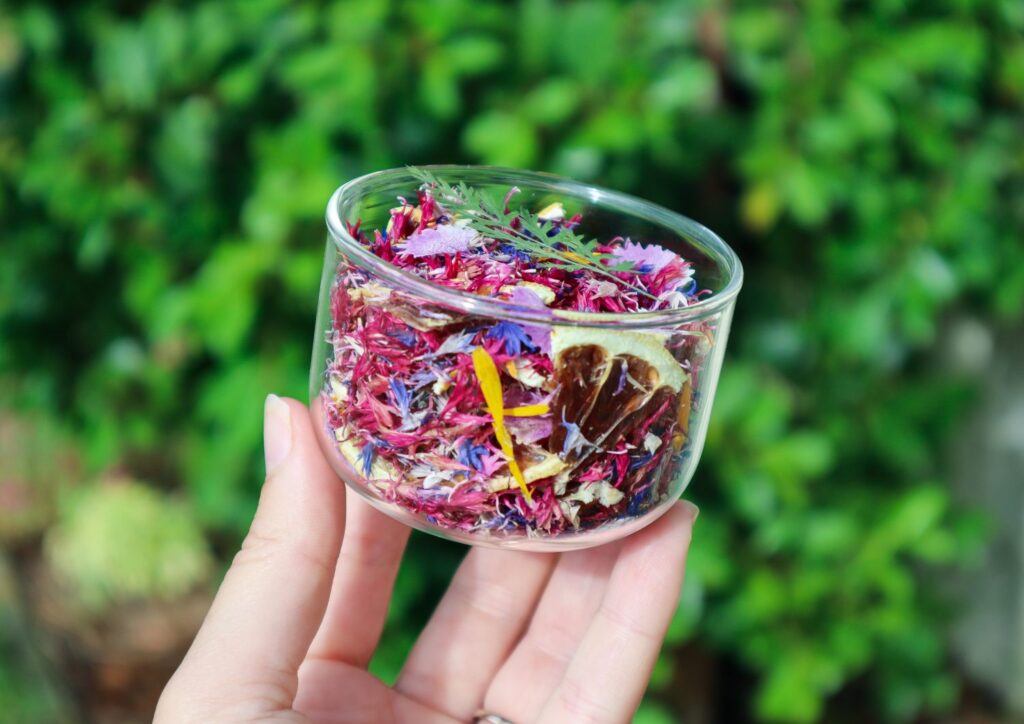
Host a summer dinner party or high tea to celebrate and welcome the change of season. Use edible flowers to create show-stopping, colourful drinks and dishes.
Planning for Autumn
The key to easy and successful gardens is to plan ahead. This can help you maximise your food production and help maintain momentum. Summer can be a harsh season in the garden and Autumn will come as a welcomed relief. Production will be slowing down and you can start planting out your winter seeds.
Planting seeds will give you a head start and a smooth transition of food across the seasons.
Harvest and preserve as much as you can
Save seeds from successful plants or identify ones you want to leave to go to seed
Plan out where you want to have your winter gardens and which crops you want to grow where
It’s a good idea to grow crops in different beds than you did the previous year to allow the soil time to recover from the specific minerals each crop depletes
Pull out any crops that have finished and compost them
Deadhead annual flowers to encourage repeat flowering
Remove any dying or diseased looking plants. This stops any diseases from spreading to other plants and they may attract unwanted pests. Plus if they aren’t very productive anymore they are taking up valuable real estate for more plants
Keep your compost hydrated. In summer composts can dry out too, so give them a sprinkle of water every now and then. Make sure you turn it to aerate
At the end of summer, you can start planting your early autumn and winter seeds
Masterclass 1: Introduction to Climate, Pathways and Zones
This masterclass we are talking about how to understand your local climate to maximise your growing potential, and discover your Zones, to create ease and flow in your gardening and sustainability routines.
Objectives:
This masterclass will be divided into 3 core sections, each with an actionable task and worksheet that you will be able to complete for your own property.
Get to know your local climate and how that affects your garden and layout.
Identify your pathways. These are the areas of your property you frequent on a daily basis.
Map out yourZones will help you determine where to place elements within your property.
Understanding your local climate is very important for selecting garden locations, plants, care and maintenance. What works for one person, may not work for you depending on your climate and location. Within each climate there are micro-climates and that is specific to your exact location. You may live at the bottom of a mountain, near a stream or closer to the ocean, and these will all have specific and direct effects on your microclimate. It may also be that your neighbour has a large tree, or there are high rise buildings creating shade or directing wind. It is important to get to know your region’s climate and then take note of your location and microclimate. This will help you determine what to plant and where to plant it.
To do this we need to do a sector analysis. This will help us determine where our external energies (sun, wind, water, frost and fire) may come from. This can include neighbouring buildings, trees or structures.
Sun
The sun is a major factor when considering where to place your garden. Each plant has a certain amount of sunlight hours it needs to perform and be fruitful. So, understanding which areas of your property get the most sun and shade is so important!
When I first moved to my house, I was so excited to plant fruit trees that I planted a lime tree in the shadiest spot on my property. At the time, it was summer, and it received a lot of sun. But, throughout the rest of the year the neighbours tree shaded it, and I spent the rest of the time trying to keep it alive. After observing my property and analysing my sectors, I transplanted it to a full sun location. Since then, it has thrived and is covered in limes. So, getting this right, will make a massive difference and may save you a lot of time and money in sad trees!
Something that is interesting, and not widely known to beginner gardening, is that the sun tracks lower in the sky over winter (here in our temperate climate). Your “perfect sunny spot” may be short lived. With the sun tracking directly above your property over summer, you will have a lot less shade as the shadows will be short. During winter the sun is significantly lower in the sky, so many other objects will cast long shadows such as trees, fences and buildings. Once you have identified this, it can then be managed and used in your favour.
I cannot stress how important it is to be constantly observing your garden and taking notes. The seasonal Gardening Review Sheets make this easy to document.
Solar panels are another way to capture and store the sun’s energy.
Wind
Wind is another factor that can be difficult to analyse without a long term observation. Winds tend to come in patterns and seasons and some research online of local wind patterns can help you get started with this. Once you have identified this, you may be able to plant trees or shrubs to help break the wind or protect your garden.
Water
When it rains do you notice certain areas that pool water? or do you have creeks or dams on your property? When it rains it can be a great idea to stop and take a look at where the water is flowing or moving to. Noting this down will help you capture and store that energy and decide where to place elements in your design. Eg: if an area is prone to getting boggy, can you divert the water and spread it out to water more plants, or plant water loving trees there and avoid planting trees that hate having wet feet. Water naturally flows by gravity so you can use this to your advantage. Water flowing on your property will also pick up nutrients and top soil and deposit them in lower lying areas. This can help you locate fertile soil for edible gardens.
Frost
If you live in an area that has frosts, next time it happens, take a look around. Are there areas that seem more frosty than others? Dips and hollows can really change the temperature of the air, so you may find some areas of your property are more prone to frost than others.
Fire
Planning for a fire is something that many of us, especially here in Australia, should do when designing our gardens and properties. Identifying where weak points may be or the direction in which fire may travel can help you design to minimise loss. Your local council pages may have more information about creating fire plans.
Other External Forces:
You may have neighbouring noise pollution from a factory, farm or noise from a highway. Bad smells, dust or something visually unappealing. Identifying these will help you come up with design solutions. You may be able to plant dense hedges or place elements such as barns and forests to reduce these before they end up at your property.
Knowledge is Power
Having these energies mapped out, will provide you with the information to make decisions and maximise your results. Having them all down on paper can really help you see the bigger picture. Many problems can be turned into solutions, once they are recognised. You can capture and store these wild energies and turn them into free power using solar or wind turbines.
Next we are going to go over pathways and zones. These two work together, so, to figure out our zones, we must first find our pathways. To start with it will be handy to get an aerial view of your property. This way you can see where north is and how your house and structures sit on your land. You can obtain one from google earth, local council or similar. This will help with your worksheets and drawing out your zones.
I do just want to touch on the term ‘Permaculture’ incase you are not familiar with the term. Permaculture comes from “ permanent agriculture”. Permaculture has a set of ethics and beliefs around creating an integrated system to work with nature. Everything is interconnected to create energy efficiency, ease and flow. It is what guides most of my gardening and lifestyle, so many of my lessons will have connections or links to permaculture practices.
Pathways
To workout your pathways, print out the pathways worksheet and choose 3 days to map your daily routine. Choose 3 days that are a fair representation of how you spend most of your time (eg: if you work 5 days a week, choose those days).
Outline the boundary of your property.
Outline your buildings and key elements (house, rooms, garage, car park, mailbox, compost bin, gardens, barn, chicken coop etc).
Each day draw lines or pathways through your map of where you have visited. Do this for at least 3 days.
This will allow you to see patterns and areas that you visit regularly, verses areas you do not.
What are Zones in Permaculture?
Zones are a way to divide your property into sections of areas that are used frequently, versus those that receive less attention. Determining these zones will allow you to place your gardens, animals and elements in areas that will allow the most ease and flow. Creating ease and flow is so important because, it will make tasks more sustainable long term. The permaculture zones generally start from the house at zone zero and work upwards.
Learning your zones is important for the placement of elements. A kitchen garden is something that is used frequently for daily meals, so should be located closer to the home than for example, an orchard. An orchard can be harvested from when fruit is ripe, and in batches, so it can be placed in a zone further away from the house. Chickens will need to be fed and cared for daily, so they are another element that should be placed in a zone close by. The placement of systems that work together should also be considered. For example, if you throw a lot of your old vegetables or weeds in the compost or to the chickens, then these systems should be near each other or on the way to each other, for ease and flow.
The secret to getting started with identifying your zones, is found in your daily routine.
We are creatures of habit, so it can be useful to map your current routines and track which areas of your property you frequent often. I have created a worksheet to help you map your pathways. Once you have these mapped out you can start creating your zones. These may change over time as your garden and lifestyle changes and develops.
Once you have you pathways mapped out, you can start to number or circle zones.
We will all have different zones and pathways because, we all have different routines and priorities. Below are some examples but also take into consideration how often you use or frequent these areas or elements. You may visit your chickens 3 times a day to say hello or you may only use your compost for pruning and weeding rather than everyday scraps. This will also change depending on the size of your property. It’s about finding out what YOUR zones are.
It is useful to go through this every few years, especially, if your lifestyle has changed or you have moved properties.
Zone 0
Typically your house or dwelling as you spend the most time here.
Bokashi
Indoor garden
Zone 1
Kitchen Gardens
Patio or Balcony gardens
Outdoor setting areas
Greenhouse
Seedling Raising areas
Compost
Worm farms
Pot plants or container gardens
Utility sheds
Zone 2
Main vegetable patch
Small animals such as chickens, ducks
High maintenance fruit trees or regular produces (lemons)
Larger composting systems
Dense planting
Vertical gardens
Zone 3
Other animals such as goats, bees, sheeps etc
Milking animals
Hardier fruit trees or food forests
Animal food systems
Windbreaks
Firebreaks
Ponds
Zone 4
Storage of extra supplies or firewood
Low maintenance herd animals such as cattle
Agroforestry
Set and forget planting
Old established non producing trees
Zone 5
Wilderness / bushland
Neighbouring properties
Place and mapping your zones out doesn’t need to be linear. They can be the same distance from the house as each other – it is more about how often you frequent them. For example: zone 3 may be closer to your house than zone 2 but it is out the side door of your house that you don’t often use.
The main goal of creating these zones and sectors is so that you can place your elements such as kitchen garden, shed, chickens, orchards in areas where they can benefit the most from the natural energy forces and create as many interconnected relationships as possible.
So you may place your vegetable patch where it is protected from winds, gets good winter sun and is next to or on the way to your chickens and compost bins. That way your extra garden greens can easily be fed to the chickens or placed in the compost. And then that compost can be easily spread on the gardens to grow more food.
Creating pathways where things can naturally happen along the way makes it so much easier and more achievable.
Remember to think of this as a journey. You may be just starting out with a kitchen garden and vegetable patch but in the future you may have chickens, a pond, a food forest and so on, so it’s important that you place things in areas that you naturally frequent and that are easily accessible. Otherwise, the further down the journey you get, it may get overwhelming and hard. If this happens, then your orchard may not get pruned, garden beds may be forgotten about and die and the wheels might start falling off.
This is such a valuable exercise to do and update regularly. Create systems that work together and have that ease and flow. That way it will actually be sustainable long term with a lot less effort.
If you have any questions please let me know via email, I will be more than happy to help.