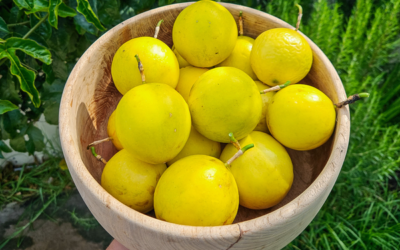
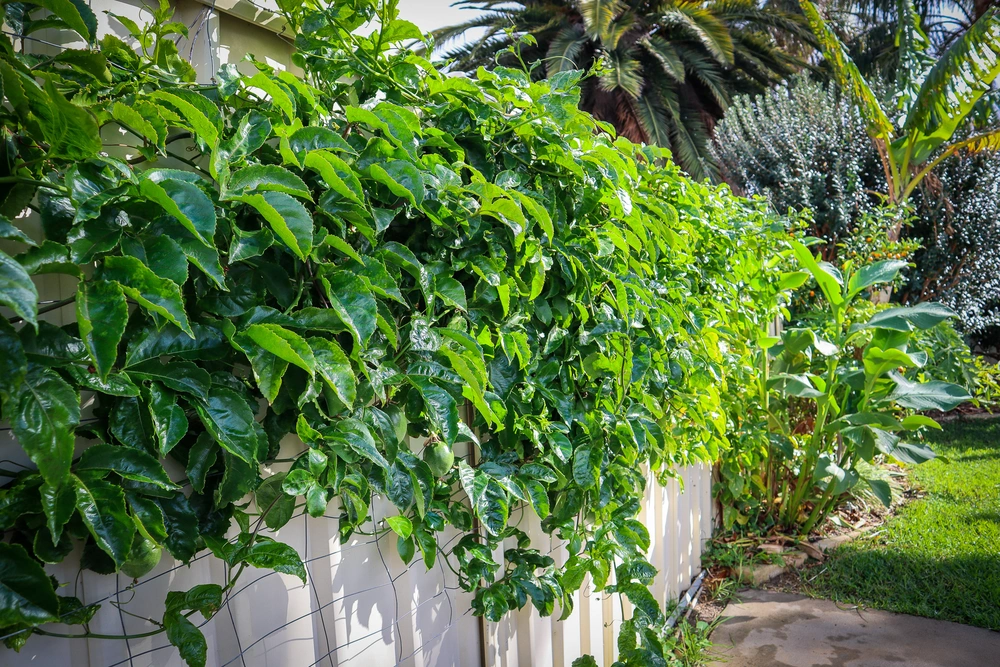
Wildlife and beneficial insects are key to creating a sustainable self-sufficient garden. They help form part of a balanced ecosystem and creating a small wildlife pond in the garden is an incredible way to attract them. Wildlife ponds can be a transformative addition to any garden or outdoor space, offering many amazing benefits including beauty, tranquility, and increased pollination. Whether you have a sprawling backyard or a compact urban garden, a small DIY wildlife pond has the potential to create a thriving ecosystem, attract beneficial insects, and help your gardens grow an abundance of food.
Today I’m going to share the process of creating my own DIY wildlife pond including choosing a location, pond plants, and why I have chosen native Australian fish for the pond.
One of the key advantages of having a wildlife pond is the ability to attract beneficial insects. Many of these insects, such as ladybugs, lacewings, and hoverflies, are natural predators of garden pests. By providing them with a water source and a suitable habitat, you can encourage their presence and create a natural pest control system within your garden. No need for harmful chemical pesticides making your garden healthy, thriving, and sustainable.
Click to WATCH the transformation or continue reading below
Planning Your Wildlife Pond
1. Choose a location for your wildlife pond
The first step in creating your small wildlife pond is to find suitable location options. Look for an area that is relatively level and away from large trees or shrubs whose roots may interfere with excavation or cause water quality issues. Consider the overall layout of your garden and how the pond will fit into the existing landscape. Keep in mind that a wildlife pond can range in size from a small, shallow pond to a larger, more expansive water feature, so choose a location that suits the space you have available.
Important things to consider when choosing the location for your wildlife pond:
Sunlight – most pond plants will need 6-7 hours of sunlight per day. This is more important in spring and summer than in winter as many pond plants will slow or die down over winter anyway.
Shade – Shade is also important, especially during the hottest part of the day. Shade will help keep the pond cool, especially in summer and reduce the algae. Adding plants will help shade out the pond.
Water source – Having a water source or hose available nearby is important especially in summer if the pond water gets low or too hot.
Safety and access – Pets or young children – depending on the size of your pond you will want to consider access if you have young children or pets (my water-loving dog would jump in immediately!). It would be worth checking out your local council’s requirements for ponds.
Close proximity to gardens – If you are wanting to attract wildlife to your gardens to help with pollination and pest management then it would be a good idea to have it close to your veggie patch or gardens. Existing gardens will also create wildlife corridors for safe access to and from the pond.
My pond location:
Front garden away from my water-loving dog
In an existing garden bed for a wildlife corridor
Outside my office window to enjoy the aesthetics and tranquility
The size and design of your wildlife pond could be determined by the space available or the structure you choose to use. Whether that is a prefabricated pond, pot or barrel pond, or full DIY pond with a pond liner.
I sourced a preformed poly pond that was roughly 1m x1m and 30cm deep. There is a huge range of preformed ponds available to fit a range of spaces. Baths, tubs, and tanks also make great DIY pond structures.
3. Filling and Balancing the Pond
Having a water source nearby is important to be able to top up or cool the pool down during the warmer months. Rainwater would be ideal to fill your pond but if like me, you only have access to mains or system water you will need to do a few extra steps to balance and remove the chlorine.
To condition the water you can either leave it to sit and gas off for 2-3 weeks or you can speed up the process by running an aeration pond pump in the water. The other way to condition the water is to purchase some water conditioning treatment. This is what I did and I also waited two weeks before adding in fish just to be sure and to allow natural bacteria to build up. I also added “splosht” which are small dissolving sachets of good bacteria to help keep the pond clean. The ones I used are made here in Western Australia so it is native bacteria. Speak to your local pond shop to see what will work best for your pond.
4. Introducing Plants to the Pond
Selecting plants for your pond is an exciting time! Firstly, it is important to determine what types of wildlife you would most like to attract to your pond. This will help you select plants to suit and reduce some of the overwhelm.
Frogs like lily pad like leaves and grasses or reeds to hide in.
Small birds like nectar-producing flowers and dense shrubs to hide in.
Ladybugs and beneficial insects like pollen-rich flowers such as herb flowers
Lizards like low-lying dense ground covers to easily hide in
Native wildlife often are attracted to native plants and flowers
Another thing to consider is whether you would like them to all be edible or a mix of both. I chose to plant edibles, natives, and herbs. A wide range of leaf types and plant heights/structures will help encourage a wider array of wildlife to your pond.
There are 4 main types of plants you may like to select for your pond:
Full Aquatic Plants: These grow completely submerged underwater such as Water lilies, and Vallis grass. They are great for deeper parts of the pond and can help oxygenate the water.
Filtration plants: These help keep the water clean and act as natural filtration. These are plants such as: Lebanese Cress, Water Mints, Gotu Kola, Pennywort, Watercress, Kang Kong. Most of these plants like to be partially submerged. I have mine propped up on bricks with 1 inch out of the water.
Marginal Plants: These are plants that can be planted around the edge of the pond or in shallow water. These are plants like: Fairy Lights, Blue Grass, Reeds, Bull Rush, Taro, Water Chestnuts, Mint, Queensland Arrowroot, Iris, Lebanese Cress, Watercress, Thalia, Papyrus, Society Garlic, Sweet Violet, and Moneywort.
Floating cover plants: These plants multiply quickly and cover the surface of the water. This can help regulate the pond temperature and shade out the pond. This can reduce algae and also offer food to many fish. Plants such as: Duckweed, Azolla, Frogbit and Hornwort.
Check out the video for a full tour of the plants I selected for this project.
5. Adding Natural Elements
Natural elements such as logs, rocks, and sticks offer surfaces for wildlife to rest on, cross over or hide under. It is important to make easy access in and out of the water. This will allow frogs, lizards, and bees the ability to get in and out. Shallow areas, ledges, ramps, and varying heights around the edge of the pond will help with this. It will also help your pond blend in and look more natural and integrated within the garden.
6. Adding Fish to the Pond
Adding fish to your pond can help with filtration and keep mosquito larvae in check. Understanding what type of wildlife you would ideally like to attract to your wildlife pond can help determine the type of fish for your pond. I am hoping to get frogs in my pond and many introduced fish such as goldfish or Koi may eat frogs’ eggs. This can be ok in a large pond with more space for frogs to hide and lay eggs. As I have a small pond and would like to encourage frogs, I have decided to go with West Australian Perch and White Cloud minnows that eat mosquito larvae but not the frogs eggs. They are also low maintenance and can handle ponds without pumps.
After purchasing the fish from the pond store, I let the bags sit in the pond water for 5 minutes to let the water in the bag adjust to the pond temperature. I then gently opened the bag and let the fish out. The Minnows dart about on the surface often but the Perch love to hide and I never see them! So that is something to consider.
7. Maintaining Your Wildlife Pond
It is important to regularly check on the pond, especially during the first year as things grow and temperatures change. Observing will allow you to see what types of wildlife are using the pond and what changes or additions you could make. Adding a small pump or water fountain will also help keep the pond cool and reduce algae. I do plan to add a solar pump and fountain eventually.
Scoop out dead leaves or excess algae
Top up water in summer if needed
Regular top-ups of “Splosht” good bacteria or similar
I decided to add solar lights to the pond as it is outside my office window and is nice to view during the evenings when I’m working late. I selected floating solar lights and also spotlights to point at feature plants. The fun thing about these lights is that I can change the colours and turn them on and off via a remote. The floating lights also offer more protection for the fish whilst the plants are established.
Just like the rest of your gardens your pond will change and develop over the seasons and the years. It will require some tweaking and editing as you go to find a good balance. There are so many amazing reasons to create a wildlife pond for your gardens.
By creating a wildlife pond, you are not only providing a habitat for a variety of natural life but also fostering diversity in your surroundings. These ponds act as sanctuaries for a wide array of wildlife, including frogs, lizards, birds, dragonflies, and beneficial insects such as bees and butterflies. These creatures play essential roles in pollination, pest control, and maintaining a balanced ecosystem.
Links included in this description might be affiliate links. If you purchase a product or service with the links that I provide I may receive a small commission. There is no additional charge to you! Thank you for supporting my blog so that I can continue to provide you with free content.
Our gardens will inevitably get shadier as mature trees start to grow. We will also get more shade in our gardens throughout the year during different seasons. In this episode of the Homegrown Podcast, we will discuss how to grow food if you have areas of shade in the garden. What to plant, how to maximise production and minimise disease.
Growing edible plants in the shade is definitely possible! One of the most important factors to consider when planning your edible plants or permaculture garden is to OBSERVE your environment and analyse yourβ¦
Edible Climbing Vines help maximise growing space and double the amount of food in each garden bed or container. One thing that I think is so underrated is the ability to grow foodβ¦
In this video are 10 of the best edible flowers I grow because they are not only my secret ingredient to make all food look magical but, are also great for attracting pollinatorsβ¦
Bottle Gourds are an abundant climbing plant that produce a range of different sized and shaped fruits depending on the variety. Not only do they produce a huge amount of food but they can also be dried to use as bowls, cups, bottles, and other vessels or containers.
So far this season each vine has produced over 30kg of food with the potential for much more! Once you get to know how to use the bottle gourd it may just become one of the most used vegetables in your garden.
Help train the vine up structures. Prune older leaves to improve airflow. Hand pollinate when possible.
FERTILISE
Feed with compost teas and keep well mulched.
PESTS
Rats, aphids, snails.
HARVEST
Harvest when large and still green for eating or leave to dry out for bottles.
REPRODUCE
Grows easily from seed.
Why Grow Bottle Gourd?
Here are some of the many reasons to grow Bottle Gourds
Easy to grow
One plant provides an abundance!
Climbing vine – vertical gardening
Cover or create shade for the garden
Versatile crop
Make bowls or vessels
Base crop to make many dishes
Grows well in containers
Popular Bottle Gourd Varieties
Gourds come in many different shapes.
New Guinea Bean – Lagenaria siceraria – Italian heiloom. Popular in India where it grows easily. Large pale green tube-like gourds that can grow over 1m if left. Harvest at 40cm for eating. creamy white flesh simular to Zucchini.
Birdhouse Gourd – Lagenaria siceraria – Round bowl-shaped gourds with a narrow neck that can be used green as a zucchini substitute or left to dry and make into bowls and hanging bird feeders.
Round Bottle Gourd –Lagenaria siceraria – Large round bottle gourds that are perfect for making bowls. Can be eaten when young and green.
Mini bottle Gourd –Lagenaria siceraria – Popular for crafts. Round on the bottom then a skinny center with another bowl at the top similar to an hourglass shape.
Cucuzza Squash – Lagenaria siceraria– Slim elongated pale yellow-green gourd. Can be used as a Zucchini substitute.
Speckled Swan or Gooseneck Gourd –Lagenaria siceraria – Dark green with light speckles. Bowl-shaped base with a curved neck to look like a swan. Very decorative gourds.
When to Plant
Gourds love warm weather! Plant your seedlings out into the garden after your last frost when the weather is starting to warm up. Seeds can be started indoors until it is warm enough to go into the garden.
How to Grow
Choose a sunny spot with 6-8 hours of sunlight or dappled part shade.
Plant seeds direct or in seed trays first.
Ensure you have a decent-sized trellis or arbor for them to grow up. Bottle gourds are vigorous growing similar to a pumpkin. It is best to have them up off the ground. Pergola-type structures or tunnels work best so that the bottle gourds can hang down.
Keep new plants well watered, especially during summer
Prune older leaves off that are starting to go brown or damaged to allow more airflow. Bottle gourds like pumpkins can get powdery mildew in wet or humid weather.
Hand pollinate to ensure successful harvests. I have found even with bees about hand-pollinating is often necessary. Remove the petals from the male flower (which has no baby fruit on it) and dust the female flowers with pollen (they have baby fruit at the base of the flower)
Care/ Maintenance
Plants will grow quickly in late summer and may need help to be trained or directed in the right direction to remain on the trellis. Hand-pollinate for added success. Remove powdery mildew leaves.
Pests / Disease
Rats may eat the fruit. Slugs and snails can be an issue when the plants are still small.
How/ When to Harvest
Bottle gourds can be harvested at many stages. While the skin is still soft and can be easily scratched they are best for eating.
To get a continuous crop harvest regularly so the plant has more energy to keep producing. Near the end of summer when the plant slows down you can leave the gourds on the vine to dry and go brown for crafts and vessels.
Reproducing
Bottle Gourds grow easily from seed.
Allow the gourd to mature on the plant (until it stops getting bigger and starts to get harder skin or go brown and dry). Cut the gourd open and scoop out the seeds. Separate from the flesh and allow to dry completely on a plate. Pop in a container or brown paper bag, label and date then store in a cool dark location until next spring.
Cooking and Using
Bottle Gourd can be used fresh, dried, or frozen. Bottle gourd is used in a similar way to Zucchini. Peel the outer skin off using a vegetable peeler. If the gourd has started to go hard on the outside you may need to use a knife to slice the outer skin. Remove the center pith and seeds.
Bottle gourd has very little flavour and makes a great vegetable to use as a filler or to carry flavours via dressings and marinades. Bottle gourd is a great way to thicken up smoothies.
Bottle Gourd can be frozen to use in soups, curries, or smoothies. Dehydrate strips using a vegetable peeler or zoodle maker can be dried and used as an alternative to pasta.
I am so excited to announce the launch of my brand new live show and podcast – Homegrown with Sustainable Holly. Homegrown the live show is a live podcast for those who want to grow food at home and live a more sustainable lifestyle.
Welcome to the edible gardening Podcast x Livestream where you can listen, ask questions, or watch live and be a part of an interactive gardening show. Together we will sow seeds, discuss what’s happening in the garden, make plans, and track goals to grow more food at home naturally and sustainably.
Homegrown is hosted by Holly an Edible Gardener, YouTuber, and Photographer creating a more sustainable life in the suburbs of Perth, Australia. Join us Wednesdays at 5pm AWST – live on YouTube and grow your own nourishing homegrown food!
Be sure to subscribe to get updates on when new episodes go live! And if you found some inspiration from the show I would love it if you could give me a rating and review. This helps me grow the show and be able to get lots more exciting guests.
Why is it a live show?
Live streaming allows us to have real, raw and unedited conversations about growing food at home and also behind the scenes of growing a business from the garden it’s going to be an evolving show but we are starting right here in my kitchen. I’m so excited to have you along for the journey and to see where we can go next with this live cast. I already have some incredible inspirational guests that are crazy enough to put their hands up to join us here in future episodes.
And just a forewarning whether you are watching is live on YouTube or listening to the podcast after the fact i just want to put it out there that this is a live show so there may at times real life background noise like my dog Tama barking at someone driving down “his” street or people turning up, neighbors on power tool. I mean who knows what is going to happen but its all part of the adventure right?
How can I get involved?
Join for the livestream over on YouTube on Wednesays and get involved! Join in the live chat, ask questions and make suggestions for future episodes. To keep the flow of the show for those that are listening to it after recording, i will answer questions at the end. So pop any questions you have in the livechat and write a Q at the start so i can see them clearly from the comments and stick around to the end and i will feature some of your questions!
Want to be a Guest on the show? Send me a quick message with a little info about your garden and we will take it from there!
Edible Climbing Vines help maximise growing space and double the amount of food in each garden bed or container. One thing that I think is so underrated is the ability to grow food up π
Today I am going to share a list of edible climbers to grow in your garden and utilise vertical space and create shade and protection. These 10 edible climbing vines are perennials which means they will produce more and more food each year without us having to replant them!
There are so many incredible reasons you should be growing food vertically.
Not only to maximize space but also to increase airflow to reduce rot or disease, strategic shade, or like me to reduce some of the heat in my garden by covering my ugly fences!
Click to watch for bonus Planting Tips π
Annuals vs Perennials πΏ
Annuals will allow you to still change up your garden beds each season and have the flexibility of space. Whereas perennials (which grow for longer than 2 years) will allow you to get a crop established and provide long-term protection and produce more and more food each year.
10 Perennial Edible Climbing Vines
1. Passionfruit
Passionfruit is one of my favourite fruits to eat and the main reason I am growing this edible climber in my garden. They are also evergreen so it has leaves all year round to create shade and protection. Passionfruit have thick, lush leaves so they work perfectly to cover fences or create screens to block out unsightly structures or areas.
Watch the video above to see how to plant passionfruit from a store-bought fruit!
BONUS TIP: Purchase a passionfruit plant that is NOT grafted. Grafted passionfruit needs to be carefully maintained or the rootstock can quickly take over and become invasive with no fruit.
2. Choko /Chayote
Choko is a quick-growing vining edible plant that can make great summer shade to protect your summer garden. They will often die back over winter but will pop up and regrow each spring. Any fruits left on the ground will also easily regrow.
Choko are similar to a large zucchini or marrow and can be used as a substitute for potatoes or even apples to bulk up pie recipes.
3. Sweet Potato
Growing Sweet Potatoes / KΕ«mara (Ipomoea batatas) in your home garden is a great step toward self-sufficiency. They are my favourite permaculture plant and are an easy crop to grow for beginner gardeners. It is important to grow plants that support and encourage other plants and beneficial insects in your garden. Creating a cohesive ecosystem that promotes the growth and success of your garden’s health and supports abundant harvests.
Sweet potatoes send out runners and can easily be trained up a vertical trellis. Plus, many people do not know that the leaves of the sweet potato plant are also edible.
4. Grapes
The great thing about growing grapes as edible climbers is that they are deciduous. This means they lose their leaves in winter so you can plant grapes strategically to provide shade in summer and let light through in winter!
5. Malabar Spinach
Malabar spinach is a fantastic edible climber for warm or tropical climates. It thrives in summer during warm weather when most other spinach and leafy greens die off. This can help fill the gaps in your seasonal harvests. Malabar spinach can be grown in pots or containers. It has succulent-like leaves so can handle hot weather but it can be frost sensitive.
6. Butterfly Pea
If you love colour then this edible climber will be perfect for you! With bright blue-purple flowers the butterfly pea is a striking addition to an edible garden. The flowers can be used as a natural food colouring or infused in teas or cocktails. Plus, if you add acidity such as lemon juice the colour will transform to hot pink! Such a fun plant to grow.
7. Kiwifruit
Kiwifruit can be grown over structures to create great canopy shade. They are prolific produces and the fruit can be eaten fresh, frozen for smoothies, made into jams and even dehydrated for naturally sweet treats. You will need to have both a male and a female plant for pollination.
8. Kiwiberry
Kiwi berries have a similar taste to the kiwifruit but are much smaller around the same size as a grape. Kiwi berry vines grow really well in containers or urban gardens.
9. Nasturtium
Nasturtium is often known for its wild rambling nature but it can be trained vertically as an edible climber. The whole plant is edible including the leaves, flowers and seed pods. Nasturtium has a strong peppery taste and can be used in salads, flavoured salts, pickles and many other recipes. Here in Perth, my Nasturtium dies down in summer but will pop up and regrow by itself in Autumn/winter.
10. Scarlett Runner Bean
Scarlet runner beans are also known as the 7-year bean because they pop up and regrow each year (for about 6-7 years). Beans are a great addition to an edible garden and can easily be cooked or frozen to preserve.
Annual Climbing Vines πΏ
Annual climbers are also great because they don’t need dedicated space so you can grow, harvest and remove then grow something different each season! Having a mix of annuals and perennials will help you grow more food all year round.
Annual climbers can be plants such as Cucumber, Squash, Tomatoes, Pumpkin, and Melons.
Do you have big dreams and sustainable homestead goals to grow food and create your dream self-sufficient lifestyle but it feels so far off? You may be renting or in an apartment. Today, I’m going to share 10 actionable steps to help you achieve your sustainable homestead goals no matter how far away they feel. This is the path I have been on and I think this may help or inspire you too.
Are you ready? because your dream life starts now!
Click to watch the video π
I was listening to a podcast the other day and they were talking about you are where you are for a reason and that is because you still have more to learn. If I got /my big break and had 100s or 1000s of people flocking to join my garden-to-plate membership would I cope? the answer is probably not! My systems have been built on a small scale and I still have lots more work to do before reaching that level (goals!). Hopefully one day I will be able to help 100s and 1000s of people grow food so I’m continuously working on improving my systems.
The same with getting your dream homestead, if you suddenly found yourself dropped in the middle of an off-grid property would you know exactly what to do? Would you know how to improve your soil, plant trees, care for animals, or afford a house, infrastructure, and the bills that come along with it? or would it be an overwhelming chaotic mess?
There are so many small steps you can start taking today and these are the 10 stages I have been working through to bring my dreams to life. so hopefully they help and inspire you too!
10 ACTIONABLE STEPS to start your Sustainable Homestead Goals now
1. What are your goals?
Write them down. Where do you want to live? What lifestyle do you want to achieve? How do you want your days to look?
The great thing about having clear goals is that decisions along the way become easier (great for people like me that struggle with decision-making!) Does this align with my goals or not? Start at the end and work backward. Will this change along the way? Probably but at least it will give you a direction to start working towards and not be stuck doing nothing.
2. Make a vision board
I like to do this every year and I use Canva and put together a collage type of document. I then have mine as my screen savers on my phone and computer for constant reminders but you could just print out some images and put them on the fridge or the wall. I am a real visual person so this works for me.
3. Pay off debts
Ditch after pay and all that. Don’t buy things you don’t need with money you don’t have. That has always been part of my mentality so I have never financed furniture or anything like that…Hence why my house looks a little bare π I prioritize money in other ways.
One of the hardest things I did was prioritize paying off my student loan. It took me a few years and I set up automatic payments to come out after each pay. If I was still buying coffees and let’s be honest probably plants…then I would increase my repayments a bit because I obviously still had disposable income. ..and repeat. As a student, I knew how to live off the minimum. Lifestyle creep is inevitable but if your dreams are big and solid you can do it!
Hard now and easy later!
Something I found so useful was the debtfree charts. You can choose a relevant one and divide the amount into sections. Each time you pay one down you can highlight it. For a visual person like me, this worked a treat. I just wanted to pay one more line . These also work great for savings too.
4. Start savings
Once you have your debts out of the way start saving. You know what you are capable of paying after paying off your debts so switch to a savings mode. Don’t get into the continuous reward stage. Remind yourself of the goals you are working towards.
5. Start growing food
This can be started from day one. You don’t need all the gear or all the nice raised garden beds, that will come. Start with what you have. Keep an eye on marketplace there are so many free pots and random things that you will be able to turn into gardens. Both my compost bins were free and I even got a free fruit tree recently.
If you dream of creating these thriving edible gardens that produce a whole lot of food then the only way there is through it. There’s no quick fix. you have so much to learn and you will learn faster by doing.
So get seeds in the soil and start growing.
6. Learn learn learn
We are so lucky to have incredible resources at our fingertips. Watch YouTube, listen to podcasts, invest in the skills you want to have, and visit community gardens. Learn to love the process because continuous learning is so important!
7. Take action
Take what you have learned and put it into practice. Grow cuttings, and plant fruit trees in pots, if you plan to have a homestead in the same state then you can be growing your future plants and trees in containers to eventually take with you. Or even sell at a higher price to add to your savings.
8. Surround yourself with Like-minded People and Communities.
This is a great way to stay motivated and learn so much. Not just about how to grow food or raise chickens but just about their outlook on life and values. People are so generous with their time and resources. Offer to help someone in their garden, this is a great way to learn and you may even receive cuttings or seeds from special plants.
9. Start working on Financing the Dream.
We all need to make money its just part of the world we live in. Does your current job and career align with the sustainable homestead goals or lifestyle you are working towards? It may do, you may already love your job but it also more than likely does not. Start a side business or grow your hobby with the direct intention of it becoming your career. Keep coming back to that lifestyle you set out in stage 1. If you want to have time to go on adventures or spend days in the garden then make sure what your working towards actually allows for that.
Do you dream of starting a flower farm? What can you do now? Start social media and grow a following. It’s free and it’s a real actionable step toward that goal. If you need some ideas check out this video on 100 ways to make an income from your property. I guarantee if one of those things excites you, there is an actionable step you can take today to make progress.
10. Re-evaluate and check in with yourself.
This is really the stage I am at now. I have been working on the last 9 steps for the last 10 years and it’s important to make sure my sustainable homestead goals and visions are still aligned. Don’t be afraid to pivot. Maybe after growing food or doing cut flowers your are unsure if that really fits anymore. For me, annuals just aren’t really it ( I LOVE PERENNIALS) and I’m actually unsure about all the 100s of animals I initially wanted. Animals are a lot of work and commitment I kind of want the freedom to come and go more often.
My dream is still real and I would love to have land to rewild and have my dream homestead but lots of things have changed. I also want to be able to travel and explore more. So I’m creating new visions that I can’t wait to share with you along the way.
Sometimes it will be really tough. But find joy in the journey, IN THE INBETWEEN, the learning!. and absolutely celebrate the small wins! because they are aligned to stage 1 so they will all add up to be something incredible.
DISCLAIMER: Links included in this description might be affiliate links. If you purchase a product or service with the links that I provide I may receive a small commission. There is no additional charge to you! Thank you for supporting my website so I can continue to provide you with free content each week!
Do you want to learn how to GROW, COOK & PRESERVE your own food naturally and sustainably?
Join in monthly Workshops and Challenges, Plant of the Month features, and Garden to Plate Recipes, with a fun and supportive community to live a more sustainable lifestyle.