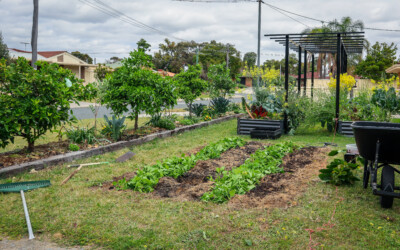
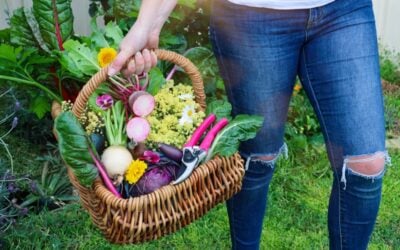
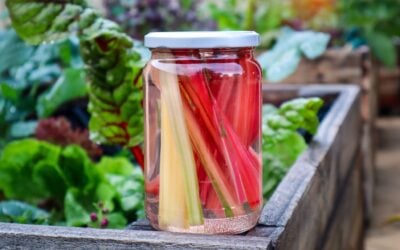
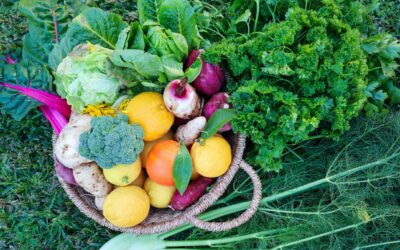
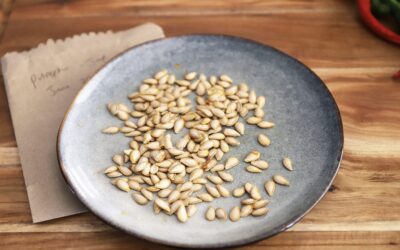
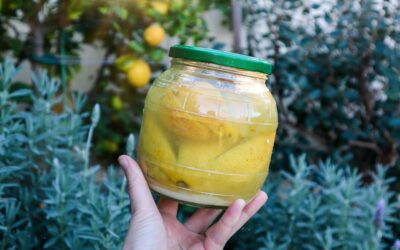
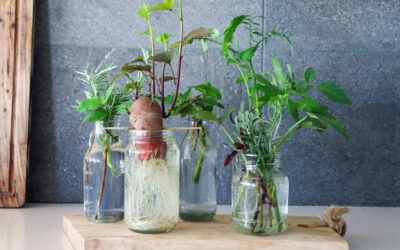
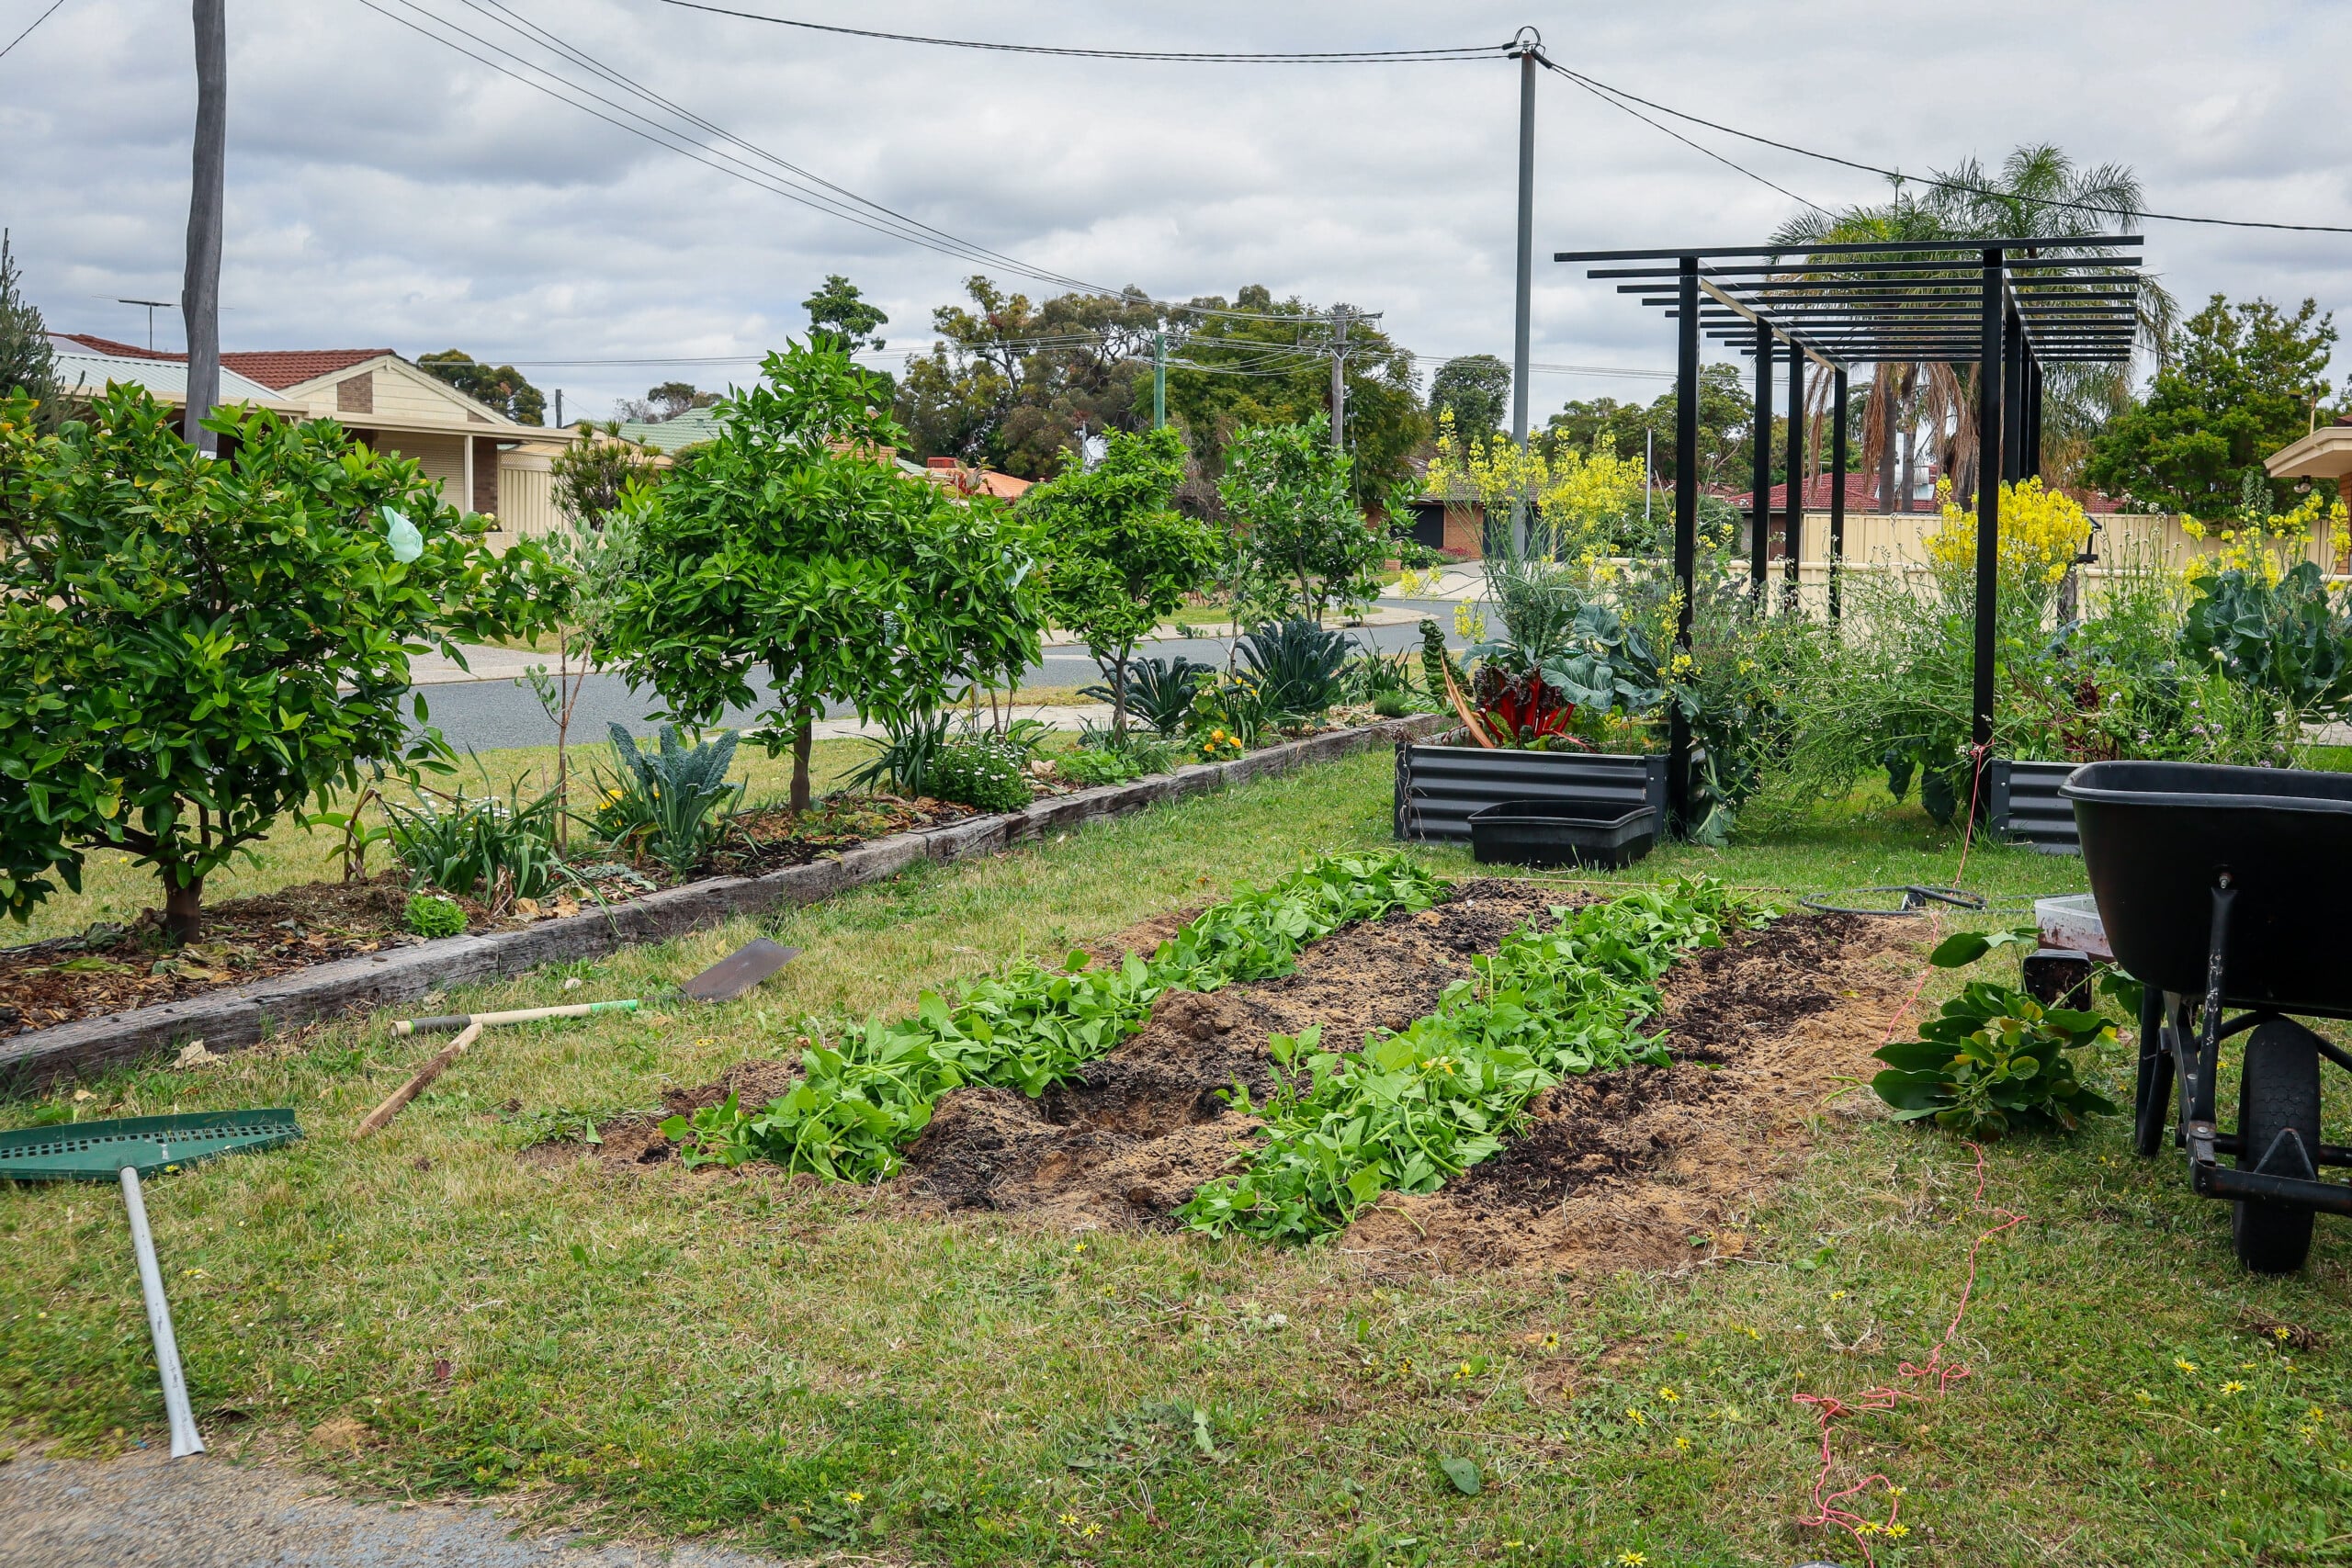
10 Perennial Edible Climbing Vines for productive gardens

10 Perennial Edible Climbing Vines for productive gardens

Edible Climbing Vines help maximise growing space and double the amount of food in each garden bed or container. One thing that I think is so underrated is the ability to grow food up πŸ‘†

Today I am going to share a list of edible climbers to grow in your garden and utilise vertical space and create shade and protection. These 10 edible climbing vines are perennials which means they will produce more and more food each year without us having to replant them!

There are so many incredible reasons you should be growing food vertically.

Not only to maximize space but also to increase airflow to reduce rot or disease, strategic shade, or like me to reduce some of the heat in my garden by covering my ugly fences!

Click to watch for bonus Planting Tips πŸ‘‡

Annuals vs Perennials 🌿

Annuals will allow you to still change up your garden beds each season and have the flexibility of space. Whereas perennials (which grow for longer than 2 years) will allow you to get a crop established and provide long-term protection and produce more and more food each year.

10 Perennial Edible Climbing Vines

1. Passionfruit

Passionfruit is one of my favourite fruits to eat and the main reason I am growing this edible climber in my garden. They are also evergreen so it has leaves all year round to create shade and protection. Passionfruit have thick, lush leaves so they work perfectly to cover fences or create screens to block out unsightly structures or areas.

Watch the video above to see how to plant passionfruit from a store-bought fruit!

BONUS TIP: Purchase a passionfruit plant that is NOT grafted. Grafted passionfruit needs to be carefully maintained or the rootstock can quickly take over and become invasive with no fruit.

2. Choko /Chayote

Choko is a quick-growing vining edible plant that can make great summer shade to protect your summer garden. They will often die back over winter but will pop up and regrow each spring. Any fruits left on the ground will also easily regrow.

Choko are similar to a large zucchini or marrow and can be used as a substitute for potatoes or even apples to bulk up pie recipes.

3. Sweet Potato

Growing Sweet Potatoes / KΕ«mara (Ipomoea batatas) in your home garden is a great step toward self-sufficiency. They are my favourite permaculture plant and are an easy crop to grow for beginner gardeners. It is important to grow plants that support and encourage other plants and beneficial insects in your garden. Creating a cohesive ecosystem that promotes the growth and success of your garden’s health and supports abundant harvests.

Sweet potatoes send out runners and can easily be trained up a vertical trellis. Plus, many people do not know that the leaves of the sweet potato plant are also edible.

4. Grapes

The great thing about growing grapes as edible climbers is that they are deciduous. This means they lose their leaves in winter so you can plant grapes strategically to provide shade in summer and let light through in winter!

5. Malabar Spinach

Malabar spinach is a fantastic edible climber for warm or tropical climates. It thrives in summer during warm weather when most other spinach and leafy greens die off. This can help fill the gaps in your seasonal harvests. Malabar spinach can be grown in pots or containers. It has succulent-like leaves so can handle hot weather but it can be frost sensitive.

6. Butterfly Pea

If you love colour then this edible climber will be perfect for you! With bright blue-purple flowers the butterfly pea is a striking addition to an edible garden. The flowers can be used as a natural food colouring or infused in teas or cocktails. Plus, if you add acidity such as lemon juice the colour will transform to hot pink! Such a fun plant to grow.

7. Kiwifruit

Kiwifruit can be grown over structures to create great canopy shade. They are prolific produces and the fruit can be eaten fresh, frozen for smoothies, made into jams and even dehydrated for naturally sweet treats. You will need to have both a male and a female plant for pollination.

8. Kiwiberry

Kiwi berries have a similar taste to the kiwifruit but are much smaller around the same size as a grape. Kiwi berry vines grow really well in containers or urban gardens.

9. Nasturtium

Nasturtium is often known for its wild rambling nature but it can be trained vertically as an edible climber. The whole plant is edible including the leaves, flowers and seed pods. Nasturtium has a strong peppery taste and can be used in salads, flavoured salts, pickles and many other recipes. Here in Perth, my Nasturtium dies down in summer but will pop up and regrow by itself in Autumn/winter.

10. Scarlett Runner Bean

Scarlet runner beans are also known as the 7-year bean because they pop up and regrow each year (for about 6-7 years). Beans are a great addition to an edible garden and can easily be cooked or frozen to preserve.

Annual Climbing Vines 🌿

Annual climbers are also great because they don’t need dedicated space so you can grow, harvest and remove then grow something different each season! Having a mix of annuals and perennials will help you grow more food all year round.

Annual climbers can be plants such as Cucumber, Squash, Tomatoes, Pumpkin, and Melons.

Want to learn more about my favourite Perennials? Download the Free Ebook Here

Zucchini Wrapped Haloumi on Rosemary Skewers

Zucchini Wrapped Haloumi on Rosemary Skewers

These Zucchini wrapped haloumi skewers are so delicious and easy to make! Marinated in my favourite green sauce plus the Rosemary flavour also infuses during cooking. I made this during one of my YouTube live streams and had to share the recipe! Serve on a fresh salad or with a charcuterie board. These would also be great for summer BBQs.

Rosemary (Rosmarinus officinalis) is a fragrant perennial herb. Rosemary is a hardy, drought-tolerant shrub and can also be used as an ornamental due to its evergreen foliage and purple or white edible flowers. Rosemary is a great herb to plant on your journey to sustainability, as it has a large list of beneficial uses for the garden, home, kitchen, plus many medicinal qualities. When Rosemary flowers it will attract an abundance of beneficial pollinators to increase your garden’s production.

Zucchini wrapped Haloumi on Rosemary Skewers

Zucchini wrapped Haloumi on Rosemary Skewers

Yield: 9
Prep Time: 25 minutes
Cook Time: 8 minutes
Total Time: 8 minutes

Easy and delicious these Rosemary Skewers make a quick lunch or entertaining dish.

Ingredients

  • 1 medium Zuchinni
  • 1 packet Haloumi
  • Olive oil
  • 9 Rosemary sprigs
  • Green Dressing (available below for logged in members or see notes)

Instructions

  1. Soak the Haloumi in a bowl of water for 5-10 mins while prepping the rest of the dish (optional but reduces the salt and makes the halloumi softer).
  2. Cut the Zucchini into thin ribbons using a wide vegetable peeler.
  3. Prepare the green sauce or marinade (available below for logged-in members or see notes)
  4. Pour half the marinade over the zucchini Ribbons.
  5. Remove the haloumi from the water, cut it into squares roughly 1-2cm, and place in the bowl with the remainder of the marinade.
  6. Place the ribbons and halloumi in the fridge to marinate further for 10-20min.
  7. Heat a pan with olive oil on medium heat.
  8. Lay a zucchini strip out flat and place a haloumi cube at the beginning then roll to wrap the square.
  9. Strip 3/4 of the leaves from the rosemary skewers (see notes if you are using the leaves for the marinade you will need to do this at the beginning).
  10. Place 3 wrapped cubes on a skewer and place in the pan. Cook until golden on each side - roughly 3 minutes each side.
  11. Serve on a fresh salad with lemon or lime wedges and extra green sauce or a creamy yogurt dressing.

Notes

  • Non-member's alternative to the green dressing - Strip 3/4 of the leaves from the Rosemary sprigs. Roughly chop and add 1/4 cup of Olive Oil and use that as the marinade.
  • Swap Haloumi for Feta or Vegan Cheese
  • P.S - I make the members green dressing in the YouTube live.

Green Sauce Chimichurri

This vibrant green dressing is packed full of flavour and is a delicious way to add a fresh zing to your meals.

Content is protected for Garden to Plate members only. Sign up for full access https://sustainableholly.com/join-the-club/

Watch the Live Video πŸ‘‡

Want more Recipes?

Join the Garden to Plate club to learn more about growing thriving gardens and wholesome Garden to Plate meals.

  • Monthly workshops
  • Edible plant grow guides
  • Seasonal Grow Guides
  • Garden-to-plate recipes
  • Community to get help when you need it!
10 ACTIONABLE STEPS to help you achieve your sustainable homestead GOALS

10 ACTIONABLE STEPS to help you achieve your sustainable homestead GOALS

Do you have big dreams and sustainable homestead goals to grow food and create your dream self-sufficient lifestyle but it feels so far off? You may be renting or in an apartment. Today, I’m going to share 10 actionable steps to help you achieve your sustainable homestead goals no matter how far away they feel. This is the path I have been on and I think this may help or inspire you too.

Are you ready? because your dream life starts now!

Click to watch the video πŸ‘‡

I was listening to a podcast the other day and they were talking about you are where you are for a reason and that is because you still have more to learn. If I got /my big break and had 100s or 1000s of people flocking to join my garden-to-plate membership would I cope? the answer is probably not! My systems have been built on a small scale and I still have lots more work to do before reaching that level (goals!). Hopefully one day I will be able to help 100s and 1000s of people grow food so I’m continuously working on improving my systems.

The same with getting your dream homestead, if you suddenly found yourself dropped in the middle of an off-grid property would you know exactly what to do? Would you know how to improve your soil, plant trees, care for animals, or afford a house, infrastructure, and the bills that come along with it? or would it be an overwhelming chaotic mess?

There are so many small steps you can start taking today and these are the 10 stages I have been working through to bring my dreams to life. so hopefully they help and inspire you too!

10 ACTIONABLE STEPS to start your Sustainable Homestead Goals now

1. What are your goals?

Write them down. Where do you want to live? What lifestyle do you want to achieve? How do you want your days to look?

The great thing about having clear goals is that decisions along the way become easier (great for people like me that struggle with decision-making!) Does this align with my goals or not? Start at the end and work backward. Will this change along the way? Probably but at least it will give you a direction to start working towards and not be stuck doing nothing.

2. Make a vision board

I like to do this every year and I use Canva and put together a collage type of document. I then have mine as my screen savers on my phone and computer for constant reminders but you could just print out some images and put them on the fridge or the wall. I am a real visual person so this works for me.

3. Pay off debts

Ditch after pay and all that. Don’t buy things you don’t need with money you don’t have. That has always been part of my mentality so I have never financed furniture or anything like that…Hence why my house looks a little bare πŸ˜… I prioritize money in other ways.

One of the hardest things I did was prioritize paying off my student loan. It took me a few years and I set up automatic payments to come out after each pay. If I was still buying coffees and let’s be honest probably plants…then I would increase my repayments a bit because I obviously still had disposable income. ..and repeat. As a student, I knew how to live off the minimum. Lifestyle creep is inevitable but if your dreams are big and solid you can do it!

Hard now and easy later!

Something I found so useful was the debtfree charts. You can choose a relevant one and divide the amount into sections. Each time you pay one down you can highlight it. For a visual person like me, this worked a treat. I just wanted to pay one more line . These also work great for savings too.

4. Start savings

Once you have your debts out of the way start saving. You know what you are capable of paying after paying off your debts so switch to a savings mode. Don’t get into the continuous reward stage. Remind yourself of the goals you are working towards.

5. Start growing food

This can be started from day one. You don’t need all the gear or all the nice raised garden beds, that will come. Start with what you have. Keep an eye on marketplace there are so many free pots and random things that you will be able to turn into gardens. Both my compost bins were free and I even got a free fruit tree recently.

If you dream of creating these thriving edible gardens that produce a whole lot of food then the only way there is through it. There’s no quick fix. you have so much to learn and you will learn faster by doing.

So get seeds in the soil and start growing.

6. Learn learn learn

We are so lucky to have incredible resources at our fingertips. Watch YouTube, listen to podcasts, invest in the skills you want to have, and visit community gardens. Learn to love the process because continuous learning is so important!

7. Take action

Take what you have learned and put it into practice. Grow cuttings, and plant fruit trees in pots, if you plan to have a homestead in the same state then you can be growing your future plants and trees in containers to eventually take with you. Or even sell at a higher price to add to your savings.

8. Surround yourself with Like-minded People and Communities.

This is a great way to stay motivated and learn so much. Not just about how to grow food or raise chickens but just about their outlook on life and values. People are so generous with their time and resources. Offer to help someone in their garden, this is a great way to learn and you may even receive cuttings or seeds from special plants.

9. Start working on Financing the Dream.

We all need to make money its just part of the world we live in. Does your current job and career align with the sustainable homestead goals or lifestyle you are working towards? It may do, you may already love your job but it also more than likely does not. Start a side business or grow your hobby with the direct intention of it becoming your career. Keep coming back to that lifestyle you set out in stage 1. If you want to have time to go on adventures or spend days in the garden then make sure what your working towards actually allows for that.

Do you dream of starting a flower farm? What can you do now? Start social media and grow a following. It’s free and it’s a real actionable step toward that goal. If you need some ideas check out this video on 100 ways to make an income from your property. I guarantee if one of those things excites you, there is an actionable step you can take today to make progress.

10. Re-evaluate and check in with yourself.

This is really the stage I am at now. I have been working on the last 9 steps for the last 10 years and it’s important to make sure my sustainable homestead goals and visions are still aligned. Don’t be afraid to pivot. Maybe after growing food or doing cut flowers your are unsure if that really fits anymore. For me, annuals just aren’t really it ( I LOVE PERENNIALS) and I’m actually unsure about all the 100s of animals I initially wanted. Animals are a lot of work and commitment I kind of want the freedom to come and go more often.

My dream is still real and I would love to have land to rewild and have my dream homestead but lots of things have changed. I also want to be able to travel and explore more. So I’m creating new visions that I can’t wait to share with you along the way.

Sometimes it will be really tough. But find joy in the journey, IN THE INBETWEEN, the learning!. and absolutely celebrate the small wins! because they are aligned to stage 1 so they will all add up to be something incredible.

DISCLAIMER: Links included in this description might be affiliate links. If you purchase a product or service with the links that I provide I may receive a small commission. There is no additional charge to you! Thank you for supporting my website so I can continue to provide you with free content each week!

CREATING EXTRA INCOME FOR YOUR HOMESTEAD

Online surveys: https://bit.ly/3Bg0XNr

Ebook templates: https://bit.ly/2UfOXsr

Email lists: https://bit.ly/3VNXRbT

Photography editing: https://bit.ly/3cPfXW8

Create an online community: https://bit.ly/3W6s8mv

Do you want to learn how to GROW, COOK & PRESERVE your own food naturally and sustainably?

Join in monthly Workshops and Challenges, Plant of the Month features, and Garden to Plate Recipes, with a fun and supportive community to live a more sustainable lifestyle.

22 heat-tolerant edible plants to grow in HOT full-sun locations

22 heat-tolerant edible plants to grow in HOT full-sun locations

Do you have areas that get very hot full sun and nothing seems to survive? These 22 heat-tolerant edible plants to grow in HOT full-sun locations will help you grow productive edible gardens. I’ve been growing food here in Perth, Australia for the last 10 years, and let me tell you, it was a big change and learning curve coming from the lush green of new Zealand.

Today, I’m sharing some plant ideas to plant in those super hot locations but keep reading to the end because it’s not just about what you plant but also when and how! Bonus tips on that, so you can turn your hot barren wasteland into productive edible gardens.

Click to WATCH 22 heat-tolerant edible plants

22 Heat-tolerant Edible Plants

1. Rosemary

Attracts bees 🐝 Has healing properties and is great for skin and hair care. Flavour enhancing culinary herb🌿 When I first moved here I wondered why so many houses had Rosemary hedges out the front – and it’s because it thrives on neglect and our poor sandy soils. Rosemary is a great heat-tolerant addition to your edible garden. Try making your own Rosemary Salt.

2. Strawberry Guava

Strawberry/cherry and lemon cherry guavas are really hardy, low-maintenance fruit trees, that produce bucketloads of fruit!

3. Mulberry

Another powerhouse perennial that survives on neglect – they grow super fast so you can use these as a nanny plant or a pioneer plant. If you have a barren hot area you could plant a Mulberry to get quick shade established and later on remove it or heavily prune if it gets too big. Mulberry also loses leaves in winter to let light in.

4. Lavender

Lavender is drought tolerant – a great pollinator plant with many medicinal (calming and sleep) and culinary uses. In my garden (which will be different with climates and varieties) Lavender flowers at the same time as my Feijoas so I have it planted in between them to attract pollinators and increase my Feijoa harvests.

5. Feijoa / Pineapple Guava

If you have been following me on Instagram or subscribed to my YouTube you will have guessed this plant would make the list πŸ˜‚ Low maintenance, super hardy, and produced plenty of food! Feijoas do taste better when they get 50 chill hours a year so they aren’t optimally grown here in Perth but they do grow well and are drought-tolerant. They are evergreen and super bushy so can be grown as an edible hedge. They are known to have fire retardant qualities which is very handy for hot dry climates. If you are looking to purchase a Feijoa, choose a named variety (such as Duffy, White Goose, Mammoth plus more) as these will perform better and produce fruit faster than generic seedling plants.

6. Passionfruit

Passionfruit is an edible vine that can be used to cover a fence, structure or grown over an arbor to create shade. This can help cool your garden down and provide delicious fruit. Passionfruit flowers can also be used to make calming teas to aid in sleep and anxiety. NOTE: Avoid planting a grafted variety the grafts takeover and become invasive, hard to get rid of, and don’t produce good fruits.

7. Citrus

Citrus like full sun and once established can thrive in hot environments. Avoid planting new trees before or during the hot summer so that they have time to get their roots established before the added stress of summer.

8. Lemon Verbena

A fragrant lemony scent that is similar to lemongrass. Lemon Verbena is great in teas, baking, and all the things!

9. Pomegranate

A hardy fruiting tree that thrives in hot environments.

10. Loquat

Loquats are hardy fruit trees that thrive in hot conditions. Loquats can be a pest plant because they grow so easily and birds spread the seeds so check with your local area.

11. Lilly Pilly

Part of the Syzygium genus is a great dense evergreen hedging plant with bright pink fruits. The fruits are edible and can be made into jams, sauces, and even sparking wine!

heat-tolerant edible plants

12. NZ Spinach / Warrigal Greens

NZ Spinach unlike most spinach can be grown over summer. Although not technically spinach it can be used just as you would use spinach. NZ Spinach grows as a tick edible ground cover to protect the soil and provide nutritious greens.

13. Malabar Spinach

Malabar spinach grows as a climbing vine and can be used to grow up structures and provide shade in summer. With succulent-type leaves, the Malabar Spinach does well in hot conditions but does not like frosts.

14. Quince

Quince is a hardy fruiting tree that thrives in hot conditions. Quince is great for making preserves such as jams, jelly, and chutney.

15. Zinnia

Zinnia is an edible flower that thrives in hot dry conditions. Zinnia has vibrant flowers in a huge range of colours. The great thing about Zinnia is that it produces nectar so it attracts a diverse range of pollinators to the garden such as bees, hoverflies, butterflies, and small birds. Zinnia is susceptible to powdery mildew so great for dry summers.

16. Sunflower

I love growing Sunflowers because they attract a huge amount of pollinators to the garden and you can pretty much eat the whole plant! I use the petals fresh in a salad or press to use on baking as garnishes. The seeds can be used on top of salads, to make oil, or to make spreads and the leaves are also edible. Sunflower stems can even be made into flour! Sunflowers also help remove toxins from the soil so they are a fantastic addition to a hot full-sun garden.

17. Figs

Figs are hardy edible plants that can easily be grown from cuttings. Figs are great for hot locations and the fruit can be used for jams, relish, baking, and just enjoyed fresh!

18. Olive

Olives grow well in hot conditions and also in pots and containers. They are beautiful-looking plants with their slim silvery leaves. Olives can be used to make oils and delicious preserves. Olive leaves also have many medicinal qualities.

19. Grapes

Grapes are great for growing over structures to provide shade to your garden and help other plants grow. Grapes are deciduous so they lose their leaves in winter to let light in and have full leaf coverage in summer to protect from the harsh midday sun. Grape plants have so many uses from fresh delicious table grapes to jams, preserves, and wine! grape leaves also have many uses in the kitchen.

20. Hollyhock

Hollyhocks are an edible flowers that can grow up to 10 feet tall! They attract 100 of pollinators to the garden and their height acts as a flag inviting them in. The leaves are also edible and can be cooked to make wraps. Hollyhocks are an annual so they will need to be planted again each year but are so worth it! They can be susceptible to powdery mildew.

21. Thyme

Thyme is a hardy herb that thrives in hot conditions. Thyme is very versatile in the kitchen and pairs well with tomato dishes, on pizza, and roast veggies. Thyme also produces masses of tiny white flowers that attracts an array of beneficial insects and pollinators. Thyme creeps over the ground so it makes a great edible ground cover plant.

22. Macadamia Nut

Macadamia nut trees can take a long time to start producing (5-7 years) but are really hardy and nuts are great additions to a homestead to make flour and milk from.

Get exclusive access to monthly Gardening Workshops and Challenges, Grow guides, Garden to Plate Recipes, and a fun and supportive community to ask questions and get gardening advice when you need it!!

5 Tips for Successfully growing heat-tolerant edible plants

Many of these heat-tolerant plants listed are perennials and the reason perennials are so good for hot environments is that they have established roots and have time to get used to their environment. Annuals such as lettuce and tomatoes are planted new and have shallow roots so are more vulnerable to overheating.

Below are some tips to help you get your plants established and thriving through hot periods.

  1. Focus on good soil with organic matter
  2. Mulch, much, mulch
  3. Have water available nearby
  4. Avoid planting in late spring or during summer
  5. Provide temporary protection such as shade cloth or umbrellas during hot periods.
  6. Grow nanny plants or pioneer plants (quick-growing trees that provide dappled shade in summer eg: grapes, mulberry)
  7. Plant new trees in pots until after the summer heat has passed
  8. Plant densely – allowing other plants to protect and shade each other and the soil.

Need SHADE loving plants? Check out this video πŸ‘‡

Garden to Gift – Sustainable DIY gifting ideas

Garden to Gift – Sustainable DIY gifting ideas

Gift-giving doesn’t need to be expensive, stressful, or hard! These sustainable DIY gift ideas will have you inspired to create more gifts from your garden – all year round! Whether you are visiting a friend or trying to find a Birthday, Mother/fathers day, or Christmas gift there’s something for all occasions in this gift guide.

Click to watch my gift guide ideas below

My thoughts around gift giving

I don’t always buy or give gifts for special occasions…It can seem strange at first to skip out on gift-giving. We may feel guilty, awkward, or just like a bad friend or partner! But if nothing is popping up as the perfect gift idea then I don’t waste money on consuming more “stuff” that they may not even like.

BUT….what I do is.. make more homemade gifts myself! It’s much more personalised and can spark inspiration in others. If you gift produce or create gifts from your garden you may even inspire the receiver to reconnect with their own garden. I also give small gifts from my garden each time I visit friends and family. In short, my gift-giving is sporadic and you may receive an amazing gift from me, regular handmade gifts, or nothing at all. But if I find the perfect idea later in the year I just gift it then. Who doesn’t love a surprise gift?

Garden to Gift Ideas

These gift ideas can be used all year round to create personalised gifts from your garden. The great thing is, they are free/low cost, low waste, and easy to put together for last-minute (oops I forgot ) gift ideas.

—- GET CREATIVE —-

1. Framed Art

Pressed flowers make beautiful garden art ideas. Mixed with small illustrations or paintings. TIP: Choose small frames as nearly everything looks cute in a small frame… You could also get second-hand frames and paint them for an extra thrifty option.

2. DIY Colouring in Book

Draw basic outline illustrations and create a custom colouring books for kids. They don’t need to be professional artworks just choose objects that they love and use their name to make them feel special. Choose themes such as Farm, Beach, Woodland, Food Forest, and Veggie patch!

3. Photography

Framed photos or prints make great gifts! They are low-cost and can be easily personalised. Close-ups from the garden, scenic landscapes, and photos of friends and family. I love getting printed photographs because it is something I rarely do anymore. In this digital age, we rarely take the time to sort through our hundreds of photos so sometimes it’s nice to do.

4. Custom Clothing and Plant Dye

DIY Jackets are a fun way to get creative and make custom gifts. Denim jackets can always be found at secondhand shops and upcycled. I love making jackets for significant events like weddings and first birthdays. They make great keepsakes too. Paint flowers from your garden or sew fabric patches. Get extra creative and make your own natural plant dyes from the garden.

—- GET PRESERVING —-

5. Homemade Jam, Chutney & Sauces

Homemade preserves make such great gifts! Especially if they are made from delicious fruit and vegetables grown in your home garden. Create fun, custom labels easily using Canva templates. You can also create DIY tags and notes using leaves and small bundles of herbs and flowers.

Sweet chilli sauce

6. Dried Herbs

Herbs produce in abundance and drying them is a great way to preserve them to use throughout the year. Make your own mixed herb blends and gift them to others to use in their kitchen. Homemade dried herbs are so much better than the greyish uninspiring supermarket editions.

7. Dehydrated Fruit

Dehydrated fruit is one of my go-to garden to gift ideas! I make large batches and always have enough on hand to either pop in a recycled jar or cut up and mix with dried flowers for a tea blend or a cocktail garnish blend. Dried citrus can be used in teas, cocktails, cakes, and baking. Also, incredible in mulled wine! Try chocolate-dipped for something extra special!

8. Flavoured Sugar and Salts

Herbal sugars and salts are such a fun and easy way to incorporate produce from your garden in a unique way. Simply blitz herbs and mix through salt and allow to fully dry. Dried edible flowers, herbs and citrus can be added to sugar to create flavoured sugars. Try Mint sugar in a hot chocolate!

Rosemary Salt

Nasturtium Salt

Fairy Salt

Calendula Sugar

9. Cocktail Garnish or Tea Blends

Tea blends make incredible gifts from the garden. See the list and mix and match to make your favourite blends. Dry herbs and flowers fully first either air dry or in a low-temperature oven or dehydrator (30-40 degrees Celcius). Dried fruit, herbs, and flowers also make great cocktail garnishes. Add to a nice jar and create a DIY Label.

—- GET BAKING —-

10. Bake Bread

Homemade bread is so delicious and makes a great gift idea. Baking great bread is not a skill everyone possesses so if you do, share the love and make a sourdough loaf or even a Garden Foccacia using herbs and fresh ingredients from your garden. Wrap it in brown paper with a note and place a small bundle of herbs or flowers. Done!

11. Sweet Treats

Who doesn’t love sweet treats? Homemade cookies, cakes and slices always make great gifts. Get creative and use edible flowers, herbs and fruit from your garden to create something special!

12. Savoury snacks

Savoury snacks are an entertainer’s dream. Try some botanical crackers for a great way to use herbs from your garden. Other delicious snacks could be scrolls, scones, slices, quiche or flavoured nuts.

—- GET GROWING —-

13. Cuttings and Seedlings

Take extra cuttings and pot them up to have extra gifts on hand at all times! Cuttings such as Sweet potato, mint, rosemary, fig and mulberry are easy to get striking. Check out my Cuttings Ebook for more ideas. If you have extra plants pop up in the garden, (hello volunteers!) simply pot them up to give as gifts.

14. Plant Extra Seeds

It’s always a good idea to plant extra seeds in case something happens to your others. I do this in stages so I plant extra seeds 3-4 weeks after my first lot. That means if my seeds have made it to the garden as seedlings but get eaten or damaged I have replacements already on the way. However, if I don’t need the backs up then I have plenty to gift to friends and family.

15. Edible Bouquets

I love picking wild vegetable and herb flowers that have gone to seed, herbs and edible flowers to create beautiful edible bunches to gift. There are so many great reasons to do this!

  • They smell amazing
  • Look beautiful and a little wild
  • Don’t cost anything!
  • Can be used to flavour meals and tea
  • Can be regrown in their own garden.

The great thing about keeping herbs such as Mint, Rosemary, Basil and Lavender in jars of water is that they will send off roots! Let your gift receiver know what they can replant.

16. Fresh Produce

Extra produce makes incredible gifts! This can be vegetables, herbs, flowers or fruit you have grown in your garden. Pop in a basket or box and deliver to your friends and family. The great thing about gifting produce from your garden is they get to try different things that may not be at the supermarket. You may also inspire them to reconnect with where their food comes from and start growing their own. You really don’t know how much you can inspire and make a change by simply gifting some homegrown produce.

17. Gifting Seeds

Once your gardens get established you will have plenty of seeds to start harvesting. Pop some in a brown envelope with a note of what they are, when you harvested them and who they were from. Seeds are great gifts because they bring with them so much inspiration and potential!

If you found these gift ideas helpful please share this post with others and help to inspire more people to create their own Homemade Garden to Gifts.

Setting up a Backyard Worm Farm

Setting up a Backyard Worm Farm

Worms are an amazing addition to a self-sufficient homestead as they turn scraps into nutrient-rich organic fertilizer to help you grow more food. Creating a sustainable lifestyle is all about taking small steps and changes to close the loop and nurture thriving ecosystems. You don’t have to do it all at once and I highly recommend starting small, mastering a manageable garden, and then start adding layers one by one. If you overwhelm yourself and don’t have habits and systems in place it won’t be sustainable long term and you can end up with unproductive chaos.

Click to watch a warm farm tour

Tips for setting up a backyard worm farm

1. Source a Worm Farm or Home for your Worms

There are many options for backyard worm systems from kit-set to DIY. You will also more than likely be able to pick up a second-hand worm farm so keep an eye out on your local listings and marketplace. Be mindful of your local climate and do a little research. In Perth, Australia, we have extremely hot summers that reach over 40 degrees. Cool shady locations are a must for worms. If you do live in a hot climate there are some great DIY options using old fridges and freezers to offer more protection. This is something I will be creating very soon!

backyard worm farm

2. Choose a Location

Choose a location for your worms that is out of direct sunlight and is well protected. On the flip side if you get snow or cold temperatures you would need to make sure you can bring your worm farm somewhere warmer.

The other important consideration to make is to keep it close and convenient. Worms like to be fed a little and often so you don’t want them down the back of your property where they may get forgotten about. Permaculture zone 1-2 would be great or have them located on a path that you frequent regularly. For example: on the way to the chicken coop or the washing line. Having things in convenient locations is the absolute key to being consistent and having systems in place that easily become habits means you don’t even have to think about it just becomes part of everyday life.

3. Source Composting Worms

There are many times of worms in your garden and they all play different roles so it’s important to get the right worms for your worm farm to make sure they are happy and thriving. Tiger worms are a popular type of worm for this system and can be purchased at many plant nurseries or hardware stores that sell worm farms. You may also be able to get set up with worms from friends that have their own form farms established.

4. What to Feed your worms

Feed your worms little and often! Be consistent.

What to feed: Coffee grinds, tea leaves, vegetable scraps, egg shells, banana peels, shredded paper or cardboard, dried leaves, greens, vacuum dust, and hair. The more variety the better as this will help keep a balanced pH. Add a little sprinkle of soil when you feed as the grit can help the worms break down the scraps. Keep the food scraps in smaller pieces if possible.

What to avoid feeding your Worms?

Avoid citrus, garlic, or the onion family as this will create an acidic environment that will harm the worms. No meat – as this can create bad bacteria and attract rats and other unwanted pests.

backyard worm farm

5. Water your Worms

Worms like a moist environment of around 70% moisture, so it’s important to give your worms a regular drink. Keep a damp sheet of cardboard, hessian sack, or newspaper on top of the food scraps to retain moisture and regulate temperatures. This also acts as a slow-releasing food source.

6. How to care for Worms when you go on Holiday

If you are going away for a few weeks your worms should be fine if you get them prepared. Flush water from the top tray, add plenty of food and some slow-release food such as pea straw, hay, and place some layers of wet newspaper or cardboard on top. This will help keep the worms nice and moist. If you are worried or going away for longer ask someone to stop by and feed your worms.

How to harvest the Worm Tea and Worm Castings?

The by-products of worms are both castings and worm tea. Castings are the worm poo which is your food scraps converted into soil. Add scoops of worm castings to your garden beds to feed and enrich the soil. Warm castings are quite concentrated so it’s best to mix this through with other soil first.

Once the worm bin starts to fill up with worm castings and the worms start trying to get out it may be time to change the bins over. Depending on the size of your worm farm and the population of worms this can be done 2-4 times a year. The active worm bin should be in the top layer so it is time to move this down and place an empty bin on top. Lift out as much of the uneaten food as possible and add it to the empty tub. Put in some fresh food and bedding and pour water over the top to moisten it all down. The worms will start to come up to the top layer to access the food and leave the bin of castings behind.

This may take a while for the worms to move up depending on how much uneaten food is left behind and how dense the population of worms is.

If you don’t have multiple layers in your worm farm another way to harvest the castings is to tip it all out onto some cardboard. The worms don’t like sunlight so they will move to the bottom of the pile and you can harvest off the top layer before putting the worms back in.

Worm tea can be watered down 10:1, especially on young seedlings but we also use a much more concentrated version of 50:50 on fruit trees. Just be careful when using it around young plants as they will be more sensitive, that’s when I would water it down more. Like with everything in the garden, when you are unsure or just starting out do sections and test it out first.

Use the worm tea within a month or two as you want to ensure the living organisms stay alive as that is the key to healthy soil!

If you have extra worm concentrate, bottle it up for gifts or this could be a great little side hustle for kids to sell.