If you’ve ever grown fennel, you’ll know it’s a plant that just keeps on giving! But what do you do with all the Fennel Fronds/ Leaves? When you buy Fennel, the fronds are...
What to Do With Fennel Fronds – 15+ Easy Ideas & Recipes
read more


If you’ve ever grown fennel, you’ll know it’s a plant that just keeps on giving! But what do you do with all the Fennel Fronds/ Leaves? When you buy Fennel, the fronds are...
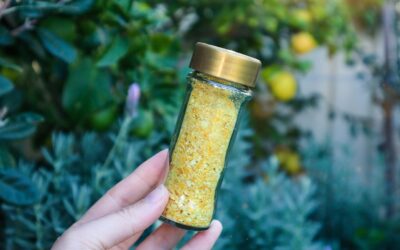
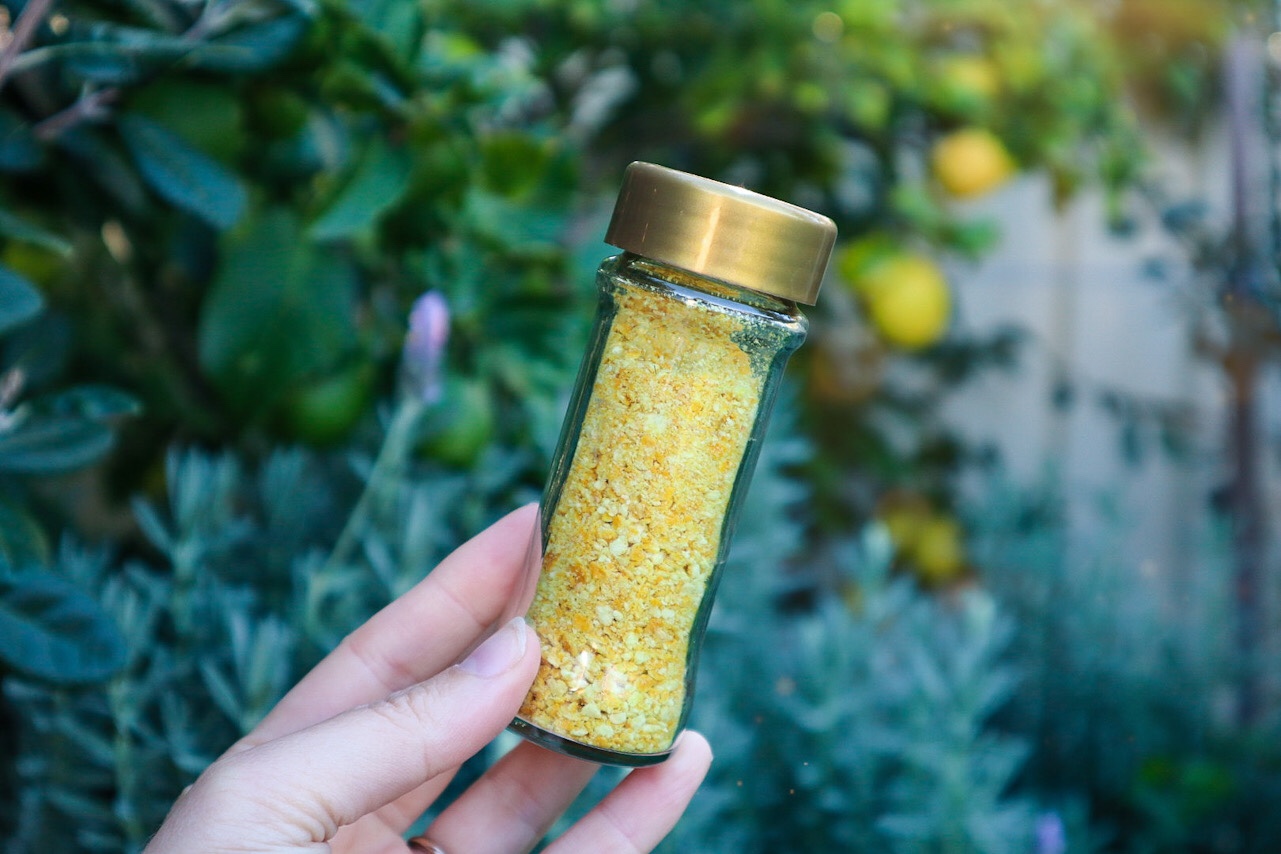
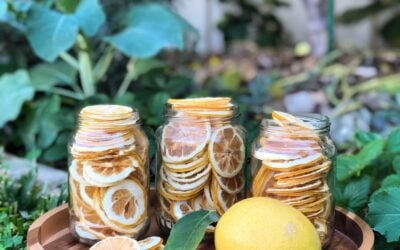
If you’ve ever juiced a bunch of lemons and felt a twinge of guilt tossing out those beautiful yellow peels, this one’s for you. These lemon zest sprinkles are a vibrant,...
Kumquat and custard scrolls are delicious! If you have a Kumquat tree overflowing with fruit, then whip up a batch of Kumquat jam and make these scrolls. There’s nothing quite...

Rich, creamy, and dairy-free decadence straight from the garden. If you’ve ever wondered what to do with an abundance of ripe avocados, this Avocado Chocolate Tart is the answer....
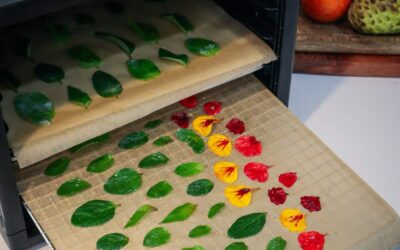
Add a little bit of flair to your desserts, baked treats, or cocktails with these sparkly, sweet candied mint leaves. They’re beautiful, easy to make, and add a delicate crunch...
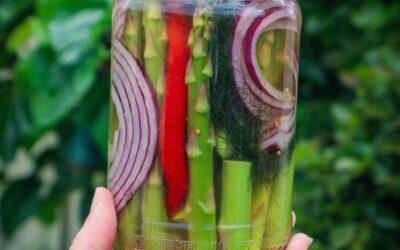
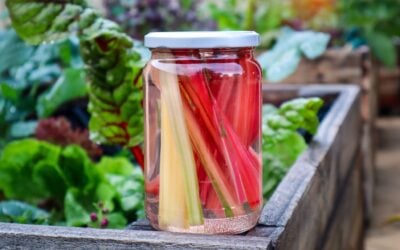
Quick-pickled asparagus is one of my favourite ways to preserve the fresh, crisp flavour of a spring harvest. If you're lucky enough to have an abundance of asparagus, either...
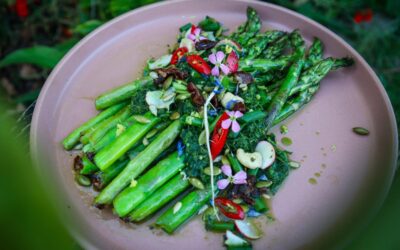
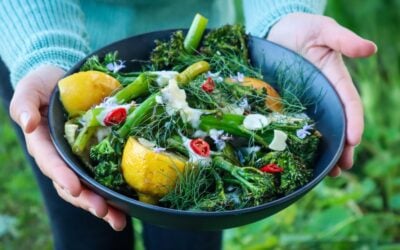
Fresh seared Asparagus topped with a delicious flavour-packed Radish top chimichurri and topped with crispy seeds. This Asparagus dish is quick and easy and makes a great Spring...
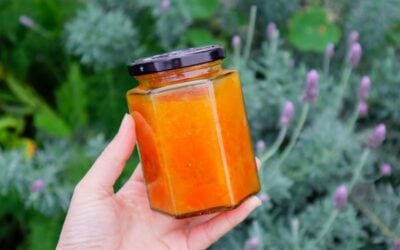
If you grow kumquats (or cumquats), you probably know how prolifically they fruit! These tiny, tangy citrus gems often produce more than you can eat fresh, making them perfect...

Sautéed Rainbow Chard is a quick and easy way to prepare a nutritious side of greens. This recipe is fresh, vibrant, and so so delicious! Infused with garlic and lemon zest, and...

This a delicious zero-waste recipe to use up your excess Feijoa skins and get the most out of your harvest. Feijoas ripen quickly, within a few weeks, and it can be hard to keep...
Feijoas or pineapple guavas come in thick in fast over the Autumn month. Their sweet, perfumey flavour is delicious and eaten fresh but once the trees are established you will...

Quick and easy creamy garlic sauce that is perfect for burgers, salads, wraps, fritters, or grilled veggies. You do need to be prepared a little ahead of time to soak the nuts....

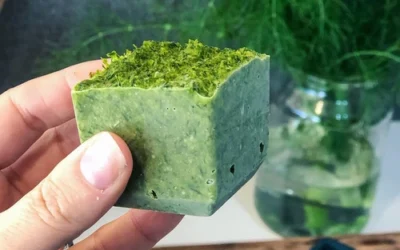
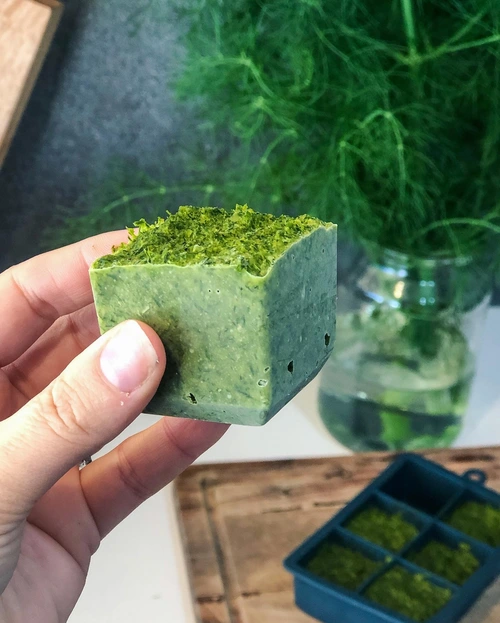
Looking for a healthy, homemade wrap alternative? These DIY spinach sushi wraps are a delicious and nutritious way to use up garden greens and create quick, wholesome meals....

If you are growing Strawberry Guava you will almost certainly experience huge bowls of fruit after a few years. They ripen quickly and new fruits are ready each day during summer...
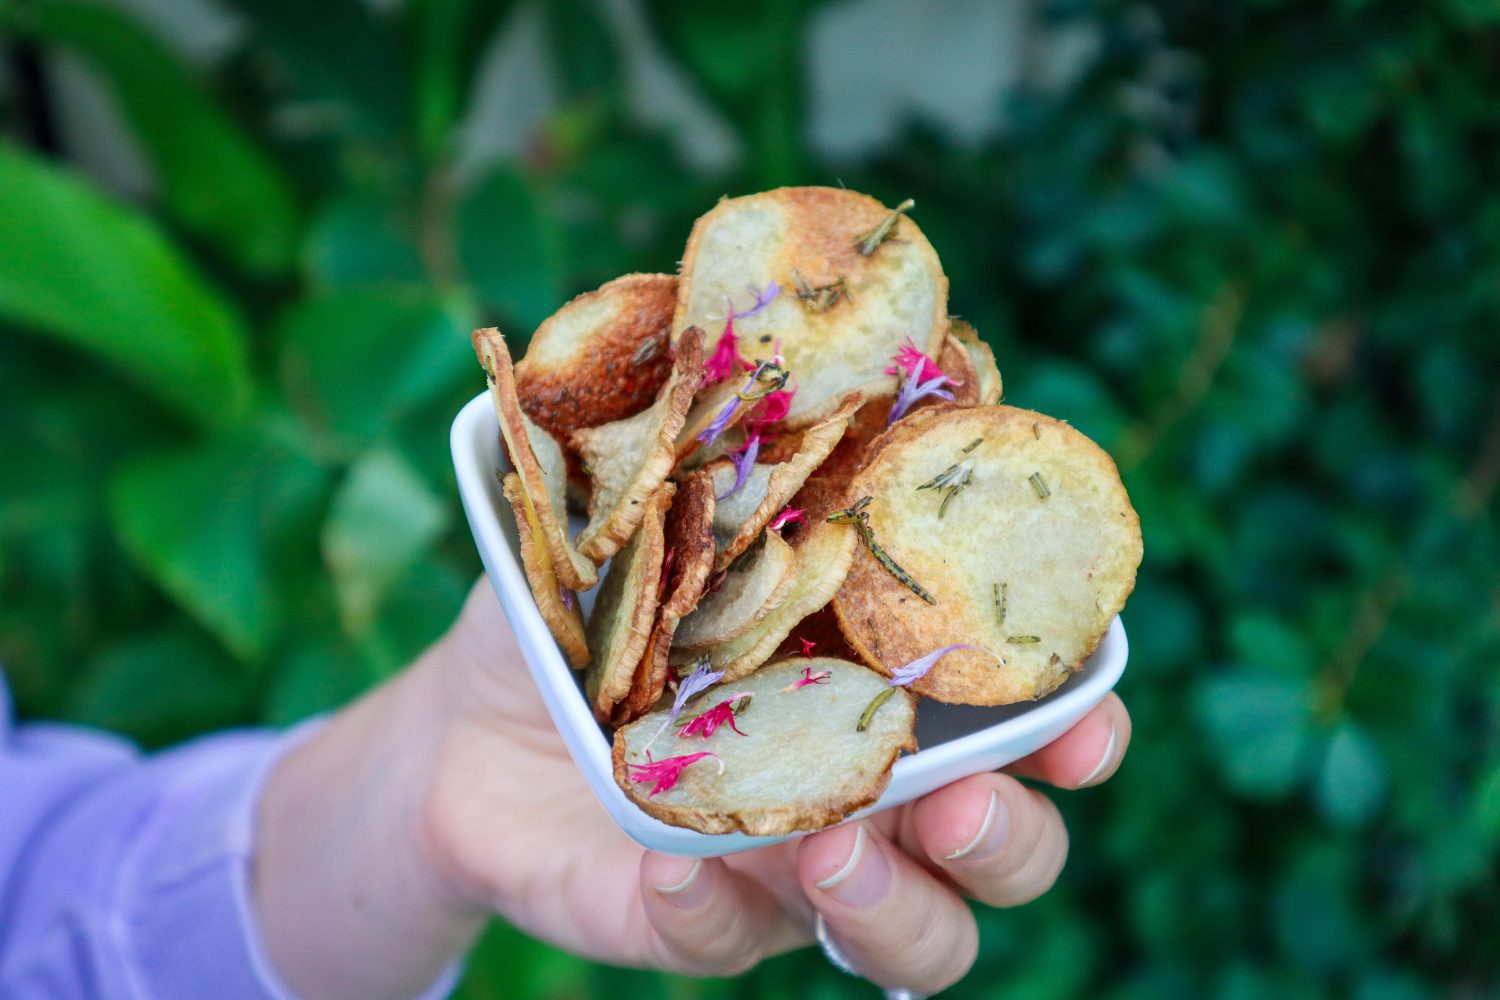
Extra crunchy chips using the Queensland Arrowroot or Canna Edulis. This is a beautiful tropical plant that can be used as a perennial substitute for potatoes. It creates a...

This coconut and lemon verbena loaf is so easy to make. Whip up a loaf or two for a Sunday Afternoon tea and sit back and enjoy your garden. Crunchy and chewy on the outside and...
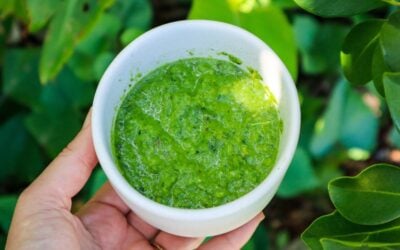
Making your own homemade green curry paste is so easy! You will never want to buy it again after you get the perfect blend. It will need adjusting to your heat tolerance, but...
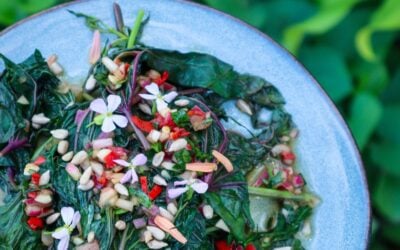
If you're looking for a delicious, nutrient-packed way to use sweet potato leaves, this sweet and spicy greens recipe is the perfect choice. They are not only edible but also...

These Zucchini wrapped haloumi skewers are so delicious and easy to make! Marinated in my favourite green sauce plus the Rosemary flavour also infuses during cooking. I made this...

Lemon balm has calming and soothing properties that can reduce stress and anxiety. This refreshing summer drink may help you chill out and unwind. Nothing beats an iced cold...

Have odd fruit and veggies to use up? This leftover breakfast loaf is a great way to reduce waste and make a delicious and healthy breakfast (or anytime) alternative. This recipe...
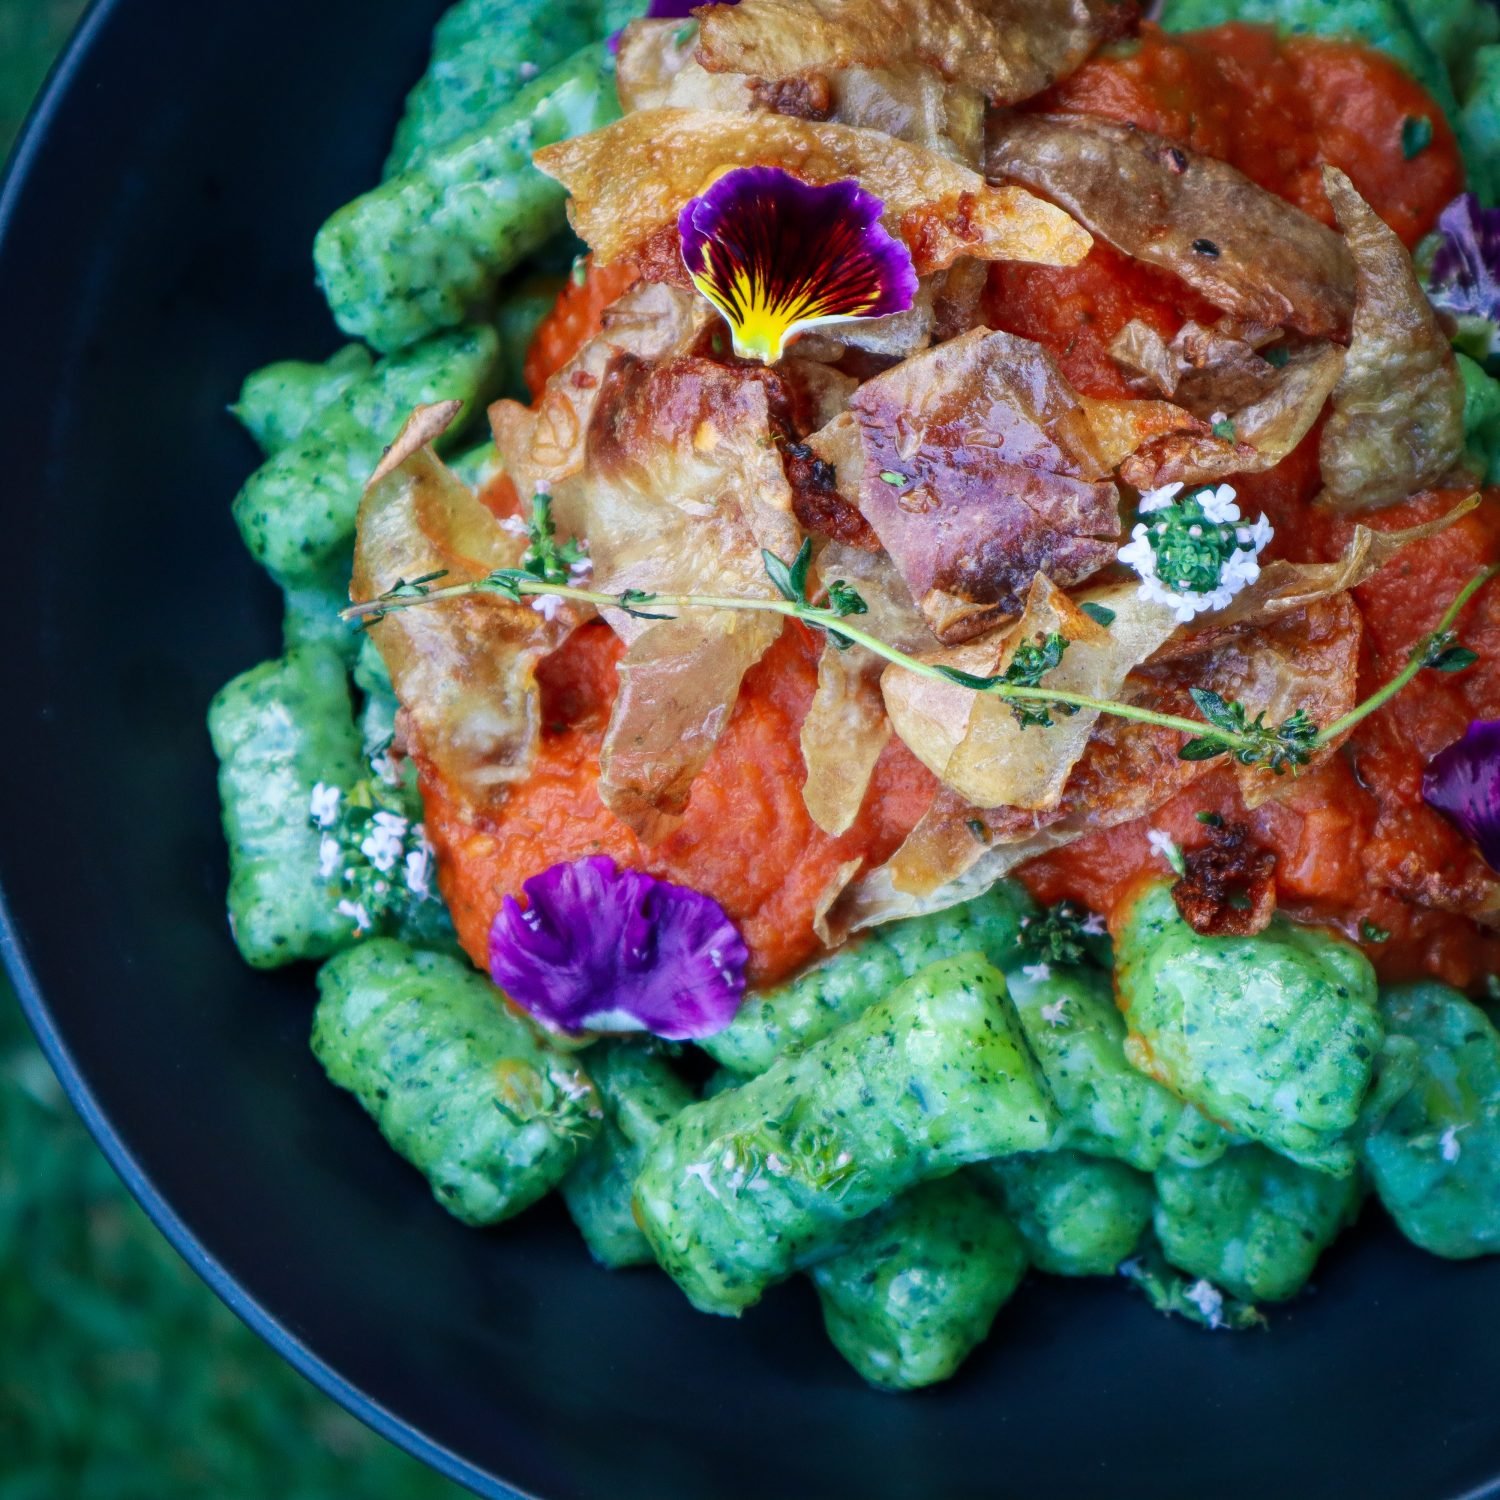
Soft pillowy spinach gnocchi with crispy potato skins. Serve with herbed butter or the simple roasted tomato sauce recipe. Delicious! Unlike most spinach varieties, the NZ...

There is nothing quite like homemade tomato sauce... especially when it’s made from fresh tomatoes straight from the garden. This recipe is one of those easy,...

Ginger and Pear is a match made in heaven. This spiced ginger and pear tea cake is the perfect way to refuel after knocking out some tasks in the garden. Enjoy whilst sitting out...

Creamy hummus loaded with crispy kale chips and edible flowers, this is a great way to use up your excess Kale harvest. Perfect for entertaining, served with toasted bread,...
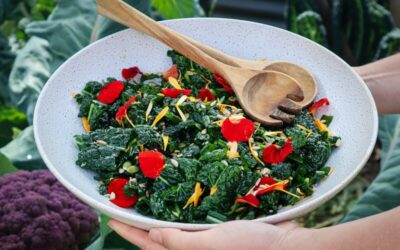
Simple and so delicious this really is the best Kale salad! Garden-to-plate in a couple of minutes. Kale can be a struggle for many people to like but the curly edges and small...
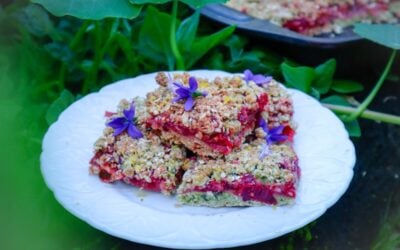
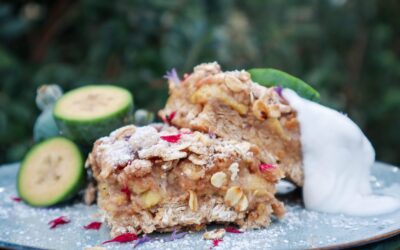
Deliciously sweet, and tart Rhubarb Crumble Slice with hidden garden greens. This gooey-centered slice is easy to make and will make a yummy dessert or sweet treat for lunches....

Packed with fresh greens from the garden these garden green pikelets are so fun to make. With subtle, fragrant herb flavours and vibrant green colour these pikelets are a delight...
Loquat trees are incredibly productive, often producing more fruit than you can eat fresh! If you're lucky enough to have a tree loaded with fruit, this homemade loquat sweet...

Beautiful and delicious floral shortbread with subtle flavours of orange and thyme. This basic shortbread recipe can easily be adjusted to add seasonal edible flowers and herbs...

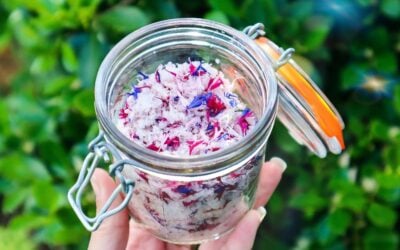
Calendula-infused salts or sugars make perfect gifts from the garden. It is a great way to preserve calendula to use throughout the year. Infused sugars can be great for...

Cabbage steaks are one of the easiest ways to turn the humble cabbage into a delicious meal or hearty side dish. Simply slice and roast to transform cabbage into tender,...
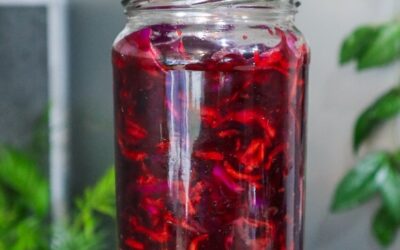
Post updated 26th June 2026 Beet sauerkraut is a simple way to preserve extra veggies while creating a delicious probiotic-rich side dish. I made this kraut with red cabbage,...

Okonomiyaki is a delicious cabbage dish similar to a fritter or hash brown (although referred to as a pancake). They make a great base to build any toppings you like! Add a fresh...
Homemade Mint and Rosemary Sauce is so easy to make, and the flavour is unbeatable when compared to store-bought! With just a few ingredients and fresh herbs straight from the...
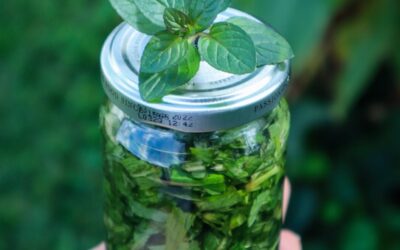
Mint Extract is a great way to preserve your abundant mint harvests. This recipe works well with chocolate mint or any type of mint you have growing in the garden. With two...

Green salads are a staple in any homegrown, garden-to-plate lifestyle — but that doesn’t mean they have to be boring. This simple green salad is fresh, vibrant, and packed with...

This Creamy Roast Pumpkin Pasta is the ultimate comfort food. The crispy pumpkin leaves make a delicious crunchy addition. The perfect Autumn and Winter meal. Make extra sauce...
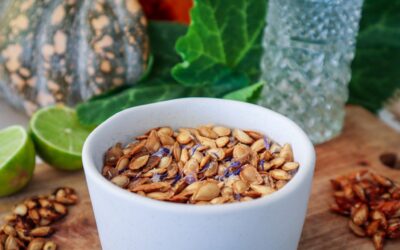
Roasted Salt and Vinegar Pumpkin Seeds make a delicious snack that once you start you won't be able to stop! Below are three delicious flavours: Salt and Vinegar, Cinnamon and...

This Radish and Apple Relish is a delicious addition to any garden platter. Served with crackers and a slice of cheese this relish is sure to impress! Radish are easy to grow and...

Delicious Roast Radish and Carrot Salad with Radish Top Chimichurri dressing for a low waste recipe to get the most your of your harvest. Roast Radish is just something else!...
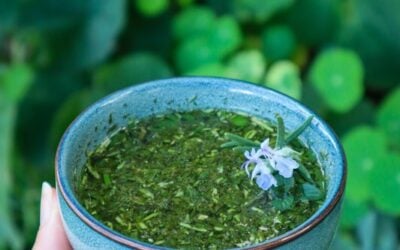
Chimichurri sauce is one of the easiest ways to transform homegrown herbs into a flavour-packed dressing. I love this chimichurri recipe because you can adapt it to use...

What do Banana, Zucchini, and Avocado have in common? They make a dream cake that is out of this world! This Banana Cake is so decadent and delicious! No one will even know there...

This simple homemade pickled red onion recipe is so easy and delicious! I can easily demolish a jar of pickled red onions in a week. They just get better and better as they...
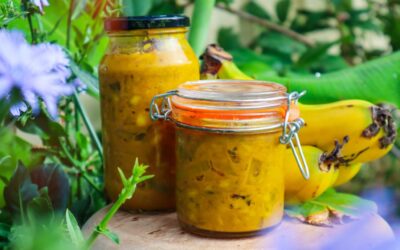
Banana peels are often discarded but they have so many uses both in the garden AND the kitchen! This Banana Peel Chutney is just one way to use up your leftover Banana Peels....
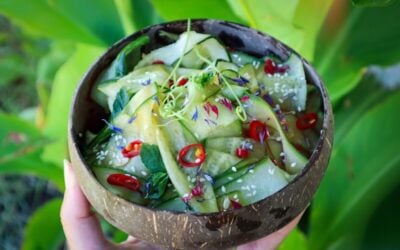
Cucumber salad is a quick and easy way to use up your summer harvests. This salad is a light and refreshing side dish that would go great with any summer BBQ or rice dish....
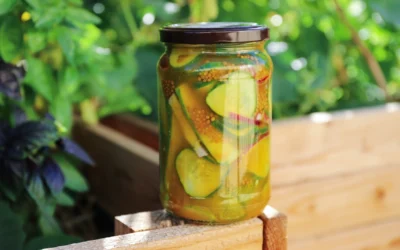
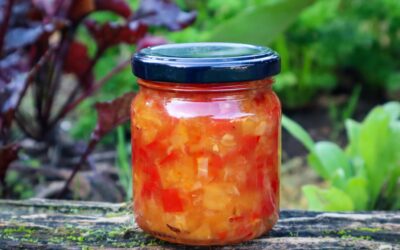
Make the most of your abundant Cucumber harvest with these delicious,Quick Sweet & Sour Turmeric Refrigerator Pickles. Turmeric has anti-inflammatory properties, and the...

Zucchini are ready and abundant during the warmer months of summer which co-insides with a season of celebrations and events. This Lemon and Poppy Seed Zucchini cake is perfect...

Zucchini are one of my favourite vegetables to grow because of their ease to grow and abundant harvests. They are such generous plants! The best thing about growing an abundance...
Crackers are such an easy snack to grab and these Super Seed Crackers are also very easy to make. Having easy staple recipes on hand can help you make the most out of your...

These Chocolate Dipped Watermelon Pops are the ultimate summer treat. Made with just two simple ingredients, they combine sweet, juicy watermelon with a crisp chocolate coating...
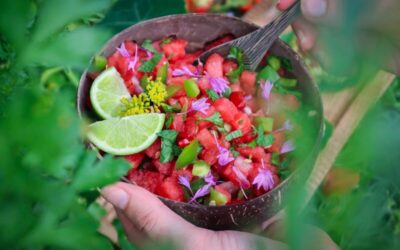
Watermelon salsa is a refreshing and delicious addition to any summer BBQ. Serve with grilled Fish, Chicken, Fritters, Tofu, or Haloumi. This salsa is so quick and easy to make...
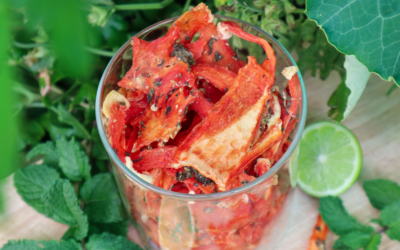
If you’ve ever ended up with a massive watermelon that’s way too big to finish, or it is simply too overripe to enjoy fresh..This Mojito Watermelon Jerky Recipe is a winner! Some...

Rainbow slaw not only looks amazing but it's also packed full of nutrients. Just like planting diversity creates a healthy garden, eating diversely also has many health benefits....

Pick your fresh greens and herbs straight from the garden and turn them into these delicious green flatbreads. This recipe is quick and easy to make and can be used for a wide...

Rosemary and roast vegetables are a classic combo for a very good reason... They taste amazing! These Rosemary, Feta and Roast Veggie hand pies are so full of flavour and will...
Rosemary and herb salt is a quick and easy way to preserve your homegrown herbs to use throughout the year. Herb finishing salts add so much flavour to meals in a quick and...
Pickled Rainbow Chard Stalks are a great way to preserve and utilise the whole vegetable. If you have made a recipe or cooked a meal using only the leafy greens, then this quick...

Cauliflower is fantastic at absorbing flavour which makes it a perfect substitute for rice. This Cauliflower fried rice is simple, easy to make, packed full of nutrients and...
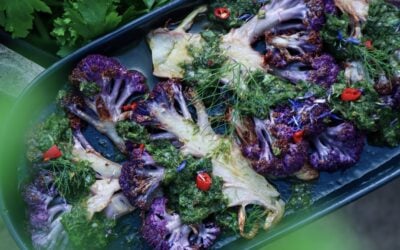
Cauliflower steaks are one of the easiest ways to turn a simple vegetable into a proper meal. Just slice, season, and whack them in the oven until they’re golden and caramelised...

Pumpkin soup is like a warm, comforting hug during winter. This recipe uses the whole Butternut Pumpkin including the skin and seeds to add a toasty, crispy topping. The best...
Broccolini or Broccoli is in abundance during the winter months and it is important to have some quick and easy meals or sides dishes to mix things up and let the vegetable...

This Stirfry Broccoli dish is super quick and easy to make and packed full of flavour! A great side dish to serve with any rice or noodle meal, or just to spice up your weekly...
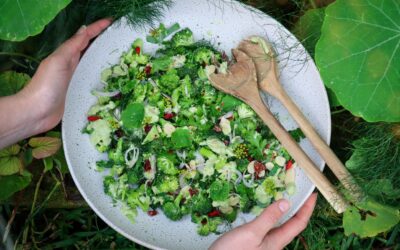
Raw Broccoli Salad is so quick and easy to make and tastes absolutely delicious. Fresh, crunchy, zingy and creamy with pops of sweet and sour. It is so vibrant and full of...

Winter greens are in abundance and it is the perfect time of year to enjoy warm, nourishing soups. This garden green soup is full of greens that are only lightly cooked, so they...

Satay Rainbow Rolls are healthy, delicious and so easy to make! Once you master the rolls you can mix and match ingredients with what is fresh and growing in your garden. Plus,...
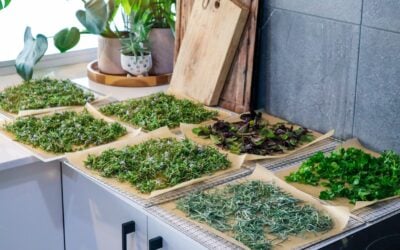
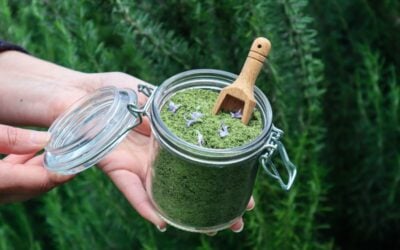
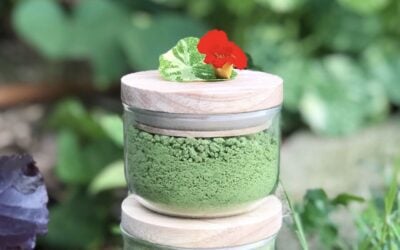
Preserving herbs from your garden is a great way to make the most of their abundance and store them for the winter months when many herbs will not be growing. Herbs are a great...

This curried sweet potato soup is my FAVOURITE! Preparing batches of soup is a great way to have extra meals on hand in the freezer. Preparing meals ahead of time means you will...

This Sweet Potato and White Chocolate Slice is so so delicious. The sweet potato makes it fudgy and the white chocolate gives it a caramel flavour with crisp and chewy edges....

Beetroot is one of my favourite veggies to cook with. It is so versatile and can be used for both sweet and savoury dishes. Beetroot has also a vibrant natural pigment that I...

Beetroot falafel is a quick and easy way to make a delicious meal with only a few ingredients. I have included ways to use the whole vegetable from root to shoot. These beetroot...
I grow a lot of edible flowers in my urban permaculture garden. That way, I not only have plenty of flowers for the bees, but also lots of beautiful edibles to brighten up any...
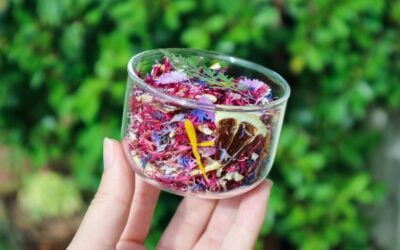
I jump at any chance to use edible flowers in my dishes and this edible flower fairy salt is one of my favourites! Edible flowers are a great, easy way to add wow factor to any...
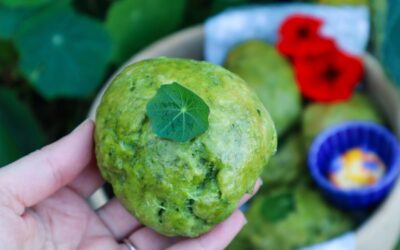
Nasturtium Bread Rolls are bright, vibrant and all-natural colouring. Create WOW factor food with this garden-inspired bread recipe. Nasturtiums are the plant that keeps on...
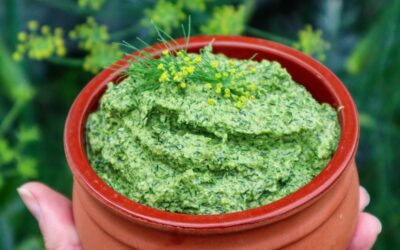
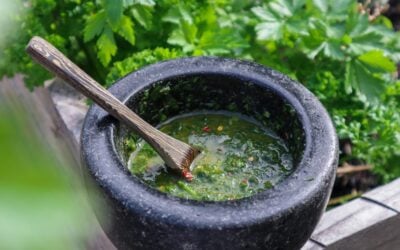
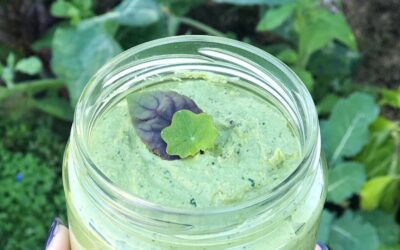
I made this delicious Fennel Front Pesto to use up the all the beautiful fresh fennel fronds I had. Super quick and easy to make! Are you growing fennel and not sure what to make...
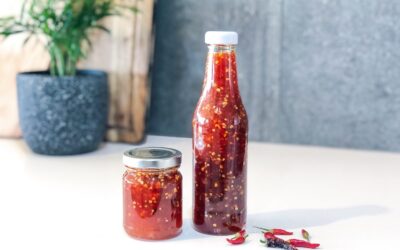
This easy Homemade Sweet Chilli Sauce is a fantastic way to use up a bunch of homegrown chillies. Growing Chillies is a great place to start for Beginner Gardeners or those with...

Garden toast is something I created one day when I was scraping together something for lunch and all I had was a crust and some cottage cheese in the fridge. I didn't have any...
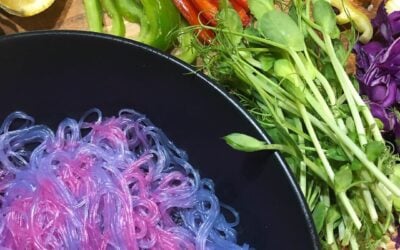
Colour-changing unicorn noodles are a simple but magical kitchen experiment that kids (and I) absolutely love. Using all-natural colouring, these noodles transform from deep...

Focaccia bread is so easy to make and I use a basic bread recipe that I also use for pizza bases. With heaps of basil still in my garden, I thought I would make some delicious...

I have been wanting to make this vegetarian "pulled pork" for a while now and of course, I had to put my own Holly's Kitchen experiment twist on it and make the dough pink! I was...

Zucchini season is in full swing and I am trying to make as many different recipes as I can to learn how to get the most out of harvests. These White Chocolate and Raspberry...

Yay, its summertime and Zucchini Fritters served with homemade chutney and a fresh garden salad is the perfect summer meal. My Zucchini harvests are in full swing and I will be...
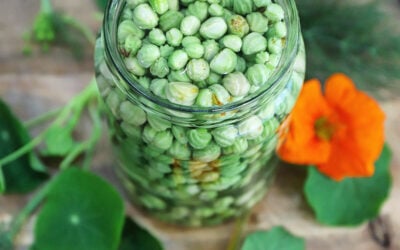
If your nasturtiums are starting to slightly take over the garden...this quick-pickled nasturtium caper recipe is a great way to put some of those seed pods to good use! These...

I am loving growing my own fresh Beetroots but I had no idea how to use the leaves other than adding a little into a stirfry or composting. I am passionate about creating ways to...

What to do with lemons?! Lemon and citrus season is in full swing and if you are lucky enough, you may be struggling to use up all your produce before it goes to waste. A great...
I had homemade Garden Pesto on my (Giant) list of things to try and when I finally did... omg I will never buy pesto again! Quick, easy and so delicious!! Also, you can really...

These nasturtium leaf mini quiches are a quick, easy way to use up an abundance of nasturtium leaves straight from the garden. They’re simple, flexible, and packed with seasonal...
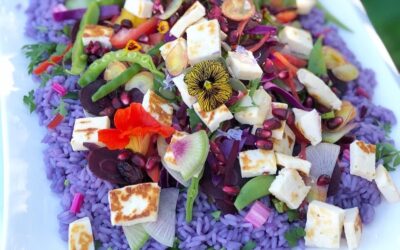
Unicorn Rice Salad is the perfect dish for entertaining! It's such a fun dish and so easy to prepare! I'm not one for strict recipes so this one is super flexible and you can...

Nasturtium wraps with green papaya salad, Haloumi, garden greens, and edible flowers. I can’t even describe how incredible this tastes! The sweetness from the salad, salty...
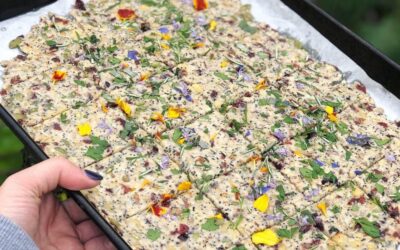
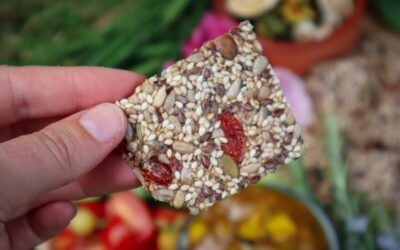
Post updates 27th June 2026 Homemade Botanical Crackers These Flower, Herb and Seed Botanical Crackers are the perfect addition for any cheese platter! The nuts and seeds could...
Delicious and beautiful Nasturtium Leaf Salt is a great way to add some fun and flavour to your meals. The wildly abundant Nasturtium is back for the Autumn/ Winter season, and I...
It's Lemon Season and nature times it perfectly with the start of the flu season. My lemon tree is about 5 years old and has really started producing decent crops this year. Part...

Making Homemade Almond Milk is super easy and tastes so good! Being able to make milk from only a couple pantry staples will be great for those times when you can't get to the...
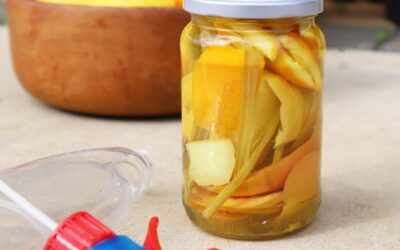
I made DIY Citrus Cleaner and it's AMAZING, so I had to share! It's really easy! You just collect some citrus peel or slices. You can do this over a week and just add to the jar...

I love growing Chillies! They are so easy to grow and consistently produce in abundance. So learning how to preserve them has been important to me. These homemade Chilli Flakes...