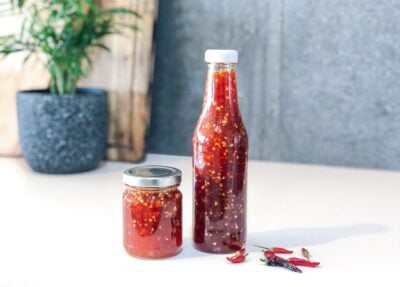
This easy Homemade Sweet Chilli Sauce is a fantastic way to use up a bunch of homegrown chillies. Growing Chillies is a great place to start for Beginner Gardeners or those with limited space, as they are easy to grow and can produce an abundance of chilli on one plant. Chilli plants like warm weather, but they can be grown throughout winter in a greenhouse or warm spot. I will cut back my chilli plants soon, place them in a warm area and let them go semi-dormant for the winter, which is called “overwintering”. That way come spring and summer, the plants are well established and will provide me with a decent crop.
This recipe can be adjusted to be as mild or hot as you like. You can use different chilli varieties, but obviously, the hotter the variety, the more your sweet chilli sauce will pack a punch! If you are concerned, I would remove and save the seeds from 3/4 of the chilli, and once it has cooked down a bit, taste and add more of the seeds to get the desired heat. I just went all-in with the seeds and used a hot Thai Chilli variety, so mine turned out quite hot, but I like that.
Easy Homemade Sweet Chilli Sauce
Yield: 500g
Prep Time: 10 minutes
Cook Time: 1 hour
Additional Time: 5 minutes
Total Time: 1 hour15 minutes
This easy Homemade Sweet Chilli Sauce is a fantastic way to use up a bunch of homegrown chillies. Growing Chillies is a great place to start for Beginner Gardeners or those with limited space as they are easy to grow and can produce an abundance of chilli on one plant.
This recipe can be adjusted to be as mild or hot as you like. You can use different chilli varieties but obviously, the hotter the variety the more your sweet chilli sauce will pack a punch! If you are concerned I would remove and save the seeds from 3/4 of the chilli and once it has cooked down a bit, taste and add more of the seeds to get the desired heat. I just went all-in with the seeds and used a hot Thai Chilli variety so mine turned out quite hot but I like that.
Ingredients
250 - 350g Chilli
8 Cloves Garlic
5 cm piece of Ginger
2 cups Sugar
2 cups White Vinegar
3 teaspoons Salt
Instructions
Wash chilli and cut off the green stems.
Roughly chop the Chilli, Garlic and Ginger and add to a mixing bowl or food processer.
Blitz the mixture into a rough paste using either a food processor or stick mixer. If using a stick mixer make sure you cover the bowl with a cloth to stop bits of chilli flying everywhere!
Add the blitzed chilli mixture to a pot and add Sugar, Vinegar and Salt.
Bring to the boil and then let it simmer on a low - medium heat until the mixture thickens (45min - 1hr).
The mixture will continue to thicken as it cools. Add a dash of water or extra vinegar if need be.
Heat oven to 130 degrees celsius and add your clean jars or bottles to sterilize for 15mins. Put the lids in a bowl of boiling water for 5 minutes.
Carefully pour the warm sauce mixture into your jars while they are still warm and secure the lids on.
Store in the fridge and use within 3-4 weeks*
* For long term storage place in smaller containers or jars and freeze or use canning methods for long term preservation.
Notes
If you want a mild sweet chilli sauce, remove 3/4 of the chilli seeds and set aside. Once the mixture has started to reduce, taste and add extra seeds as desired.
Serve with Sweet Potato Fries, as a Stirfry sauce, burger sauce or even add to noodles and vegetables for a deliciously tasty meal packed full of flavour.
If you have chilli plants that ripen at different times or a smaller amount to harvest, try freezing them whole until you have enough saved up to make the recipe. Other ways to preserve your chillies are to dry them out and keep them whole or try blitzing the dried chillies to make a chilli powder or flakes.
I hope you enjoy this easy homemade sweet chilli sauce!
Watch My Chilli Harvest and How to Make Sweet Chilli Sauce
DISCLAIMER: Links included in this description might be affiliate links. If you purchase a product or service with the links that I provide I may receive a small commission. There is no additional charge to you! Thank you for supporting my page so I can continue to provide you with free content!
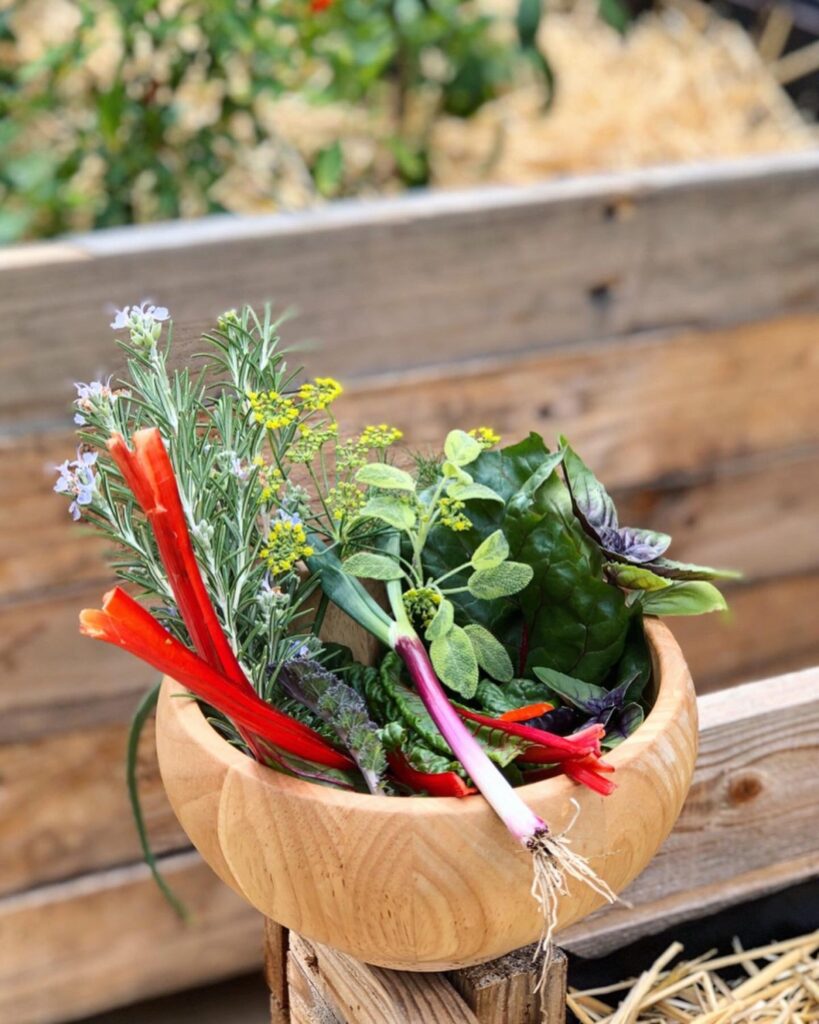
Garden toast is something I created one day when I was scraping together something for lunch and all I had was a crust and some cottage cheese in the fridge. I didn’t have any avocado, eggs or anything special to have with it. So I went out into the garden and found some inspiration! I picked two small tomatoes, herbs and edible flowers. It looked like a mini garden on toast and now I can’t stop making these beautiful, tasty creations!
Here are the creations I have made so far..
Original Garden Toast
My first addition with the last piece of bread I had left! I had fun making this and it definitely tasted delicious! Ingredients: Rye Multigrain toast, Cottage Cheese, Fresh tomato, Parsley, Rosemary, Rosemary flowers, Zinnia Petals and Basil leaves.
Fairy Garden Toast
It’s amazing what a little bit of Beetroot juice can do! Natural colouring and plenty of beneficial nutrients with an array of micro herbs and greens. You may even be able to convince your kids to eat more greens with this Fairy Garden toast. Get them involved in the process by having a bowl each to go outside and collect herbs. Ingredients: White Multigrain Toast, Cottage Cheese mixed with beetroot juice or fresh grated Beetroot, Baby Nasturtium leaves, Parsley leaves, Basil leaves, Sweet Violet flowers, Rosemary Flowers, Baby Pink chard leaves, Pink Zinnia Flower petals and Dill Flowers.
Jungle Garden Toast
Packed full of herbs and flavour! Ingredients: Country Grain Toast, Basil Pesto, Orange Nasturtium petals, Tiger Eye Viola Petals, Strawberry Flowers, Parsley leaves, Rosemary Flowers, Pea tendrils, Burgundy Marigold Petals and Purple basil leaves.
Summer Garden Toast
Summer on toast! Homegrown tomatoes are so sweet and delicious and tomato on toast is one of my favourite ways to eat them! Ingredients: Rye Multigrain toast, Red, yellow, orange cherry tomatoes, Purslane, Red basil leaves, Strawberry Flower, Sweet Violet Flower, Dill flowers, Rosemary Flowers, chopped Purple Kale, baby Nasturtium leaves and Fresh Chilli.
Botanical Garden Toast
Pest on toast is so delicious! I made extra pesto and if you follow me on Instagram you would have seen that I ate this for breakfast for an entire week! It was also so good with a poached egg on top. Ingredients: Sourdough toast, Basil pesto, Cottage Cheese, Chopped walnuts, Fresh Chilli, Basil Leaves, Fennel Flowers, Pink and White Dianthus, Baby Pumpkin Tendrils, Parsley Leaves and Strawberry Flowers.
Unicorn Garden Toast
My latest creation and maybe my favourite yet! Purple sweet potato spread is a vibe! Ingredients: Sourdough Toast, Mashed Purple Sweet Potato and Cottage Cheese, Overnight Pickled Red Cabbage and Red Onion (1/2 cup water, 1/2 cup apple cider vinegar, a teaspoon of sugar heated to dissolve. Pour cooled liquid over Cabbage and Onion), Purple Kale, Grilled Baby Eggplant, Purple Pansy, Multicoloured Dianthus, Rosemary Flowers and Red Basil.
Get Inspired by your Garden
There is always something in my garden to make a toast topping and I love how easy and creative it is! Each piece is so unique and full of fresh garden nutrients! Having these ideas tried and tested means I know I can always whip up something even when my fridge is looking very lean.
Get creative and inspired by your own garden. There is something so satisfying about being able to walk outside and make a meal from your own fresh, homegrown veggies. This is a great meal idea for beginner gardeners who don’t have many established edibles. Just look out for baby leaves and edible flowers (make sure you research and clearly identify they are edible). Baby leaves and flowers can add subtle flavours and turn any dish into a work of art!
Be sure to tag me on Instagram or Facebook so I can see your creations!
Holly 🌱
MY GARDENING ESSENTIALS // Fertiliser spray gun: https://bit.ly/366nL1t Retractable Hose: https://bit.ly/2TSC0Bo More gardening tools: https://bit.ly/32IQmbD
DISCLAIMER: Links included in this description might be affiliate links. If you purchase a product or service with the links that I provide I may receive a small commission. There is no additional charge to you! Thank you for supporting my page so I can continue to provide you with free content!
Unicorn noodles are so easy to make and completely magical to watch the colours change from purple to pink. My kind of Chemistry Lesson! They are made using all-natural colouring and would be perfect for kids in the kitchen. With the current restrictions in place, there may be many parents looking for more creative and healthy ways to entertain their kids. Make sure to share this recipe with your friends. I have posted these a few times over on my Instagram but thought I would put the recipe up here for easy reference.
Roughly chop the red cabbage. Use the outer leaves with a deeper colour.
Add water and cabbage to a pot and bring to the boil. Let it simmer for 5-10 mins bruising the cabbage with a wooden spoon.
Remove the cabbage and discard (compost).
Add the noodles to the purple water and turn over until they spread out in the pot and are fully submerged in liquid.
Turn the heat off and cover the pot for 10-15 minutes until the noodles have absorbed all the liquid.
Stir the noodles and strain off the excess liquid if there is any.
Place your noodles in a bowl and before serving roughly squeeze the lemon over the purple noodles and the acidity will change the colour to pink.
Notes
The more cabbage leaves you use the deeper the colour will be. The key is to get the noodles to absorb all the liquid so don’t add too much water at the start.Try using the noodles to make rice paper rolls or serve as a side dish to a Thai Curry.
SURE TO IMPRESS
These Unicorn Noodles are a great way to get kids interested in cooking! Let their imagination run wild and give them their own slice of lemon to colour change the noodles. Not only for kids these Unicorn Noodles are also a great way to add theatre to the dinner table if you are hosting family or friends. I love creating meals that stand out from the rest and get people talking. We eat with our eyes and colourful food always sparks so much more joy at the table.
You can also use the absorption method to cook white long-grain rice in the purple liquid as well. Check out my other recipes for Unicorn Rice below.
I would love to see your Unicorn noodle creations so be sure to tag me on Facebook or Instagram and let me know how you go!
Unicorn noodles are so easy to make and completely magical to watch the colours change from purple to pink. My kind of Chemistry Lesson! They are made using all-natural colouring…
Unicorn Rice Salad is the perfect dish for entertaining! It’s such a fun dish and so easy to prepare! I’m not one for strict recipes so this one is super…
For more colourful Recipe ideas and Garden tips be sure to subscribe.
MY GARDENING ESSENTIALS // Fertiliser spray gun: https://bit.ly/366nL1t Retractable Hose: https://bit.ly/2TSC0Bo More gardening tools: https://bit.ly/32IQmbD
DISCLAIMER: Links included in this description might be affiliate links. If you purchase a product or service with the links that I provide I may receive a small commission. There is no additional charge to you! Thank you for supporting my page so I can continue to provide you with free content!
Focaccia bread is so easy to make and I use a basic bread recipe that I also use for pizza bases. With heaps of basil still in my garden, I thought I would make some delicious herb focaccia. You can use any herbs and greens you have in your garden for this Focaccia Bread recipe and get creative with the topping design!
Bread Ingredients – makes 2 focaccia
1 tsp Sugar
2 1/4 tsp Active Dried Yeast
4 cups Flour
1 1/2 cups lukewarm water
1 tsp salt
1 TBS olive Oil
Topping ingredients
2 cups of herbs ( I used 70% basil, chives, sage, dill, nasturtium leaves)
4 Chillis
4 Cloves Garlic
1/2 tsp rock salt
2-3 TBS Olive Oil
1 small Red Onion
1 small Red Bunching Onion or spring onion
Baby Rainbow Chard
Dill flowers
Rosemary
Method
To make the bread combine water, sugar and yeast in a jug or bowl. Whisk to mix and set aside for 10mins.
In a large bowl mix flour, salt and Olive oil and then add yeast mix. Stir and form a dough. Add extra flour or water if needed.
Cover and leave somewhere warm for 1-2 hours to rise.
Whilst waiting for the dough start making your herb mix. Finely chop garlic, herbs and chilli (remove seeds if you don’t like too much heat and place in a pestle and mortar. Add rock salt and 1 TBSP Olive oil. Grind to a paste. If you don’t have a pestle and mortar just chop finely and crush in a bowl using the end of a rolling pin or similar.
Add the remaining 2 TBS of oil and stir to combine.
Finely slice rings of red onion. I use the thin fitting on my mandoline. Place in a bowl and add your baby greens, then drizzle with oil.
Cut your spring onion or bunching onion down the middle lengthways.
Once the dough has doubled in size, place on a floured bench and split in half. Roll each half out to form your focaccia. Place on a greased oven tray.
Using the end of a chopstick or teaspoon handle, make small indents into the dough so that the flavour can get right in. Brush on your oily herb mix and then place on your extra toppings as desired. Red onion, spring onion, rosemary, extra herbs or chilli, baby greens.
Add an extra drizzle of olive oil and cover with a tea towel. Let them rise again somewhere warm for about 10mins.
Heat oven to 170degrees celsius and cook for 25mins or until slightly golden.
Top with fresh herbs and serve. Delicious by themselves but amazing with chutney. I had extra herb oil left so I added more herbs/ chilli and made a green curry to eat with my bread and it was so good together!!
Other topping suggestions: Feta, olives, cheese, sundried tomatoes, caramelised onion… the options are endless for Focaccia Bread toppings!
Get creative and make your Focaccia bread your own piece of art. Be sure to tag me so I can see your amazing creations!
Holly 🌱
MY GARDENING ESSENTIALS // Fertiliser spray gun: https://bit.ly/366nL1t Retractable Hose: https://bit.ly/2TSC0Bo More gardening tools: https://bit.ly/32IQmbD
DISCLAIMER: Links included in this description might be affiliate links. If you purchase a product or service with the links that I provide I may receive a small commission. There is no additional charge to you! Thank you for supporting my page so I can continue to provide you with free content!
I have been wanting to make this vegetarian “pulled pork” for a while now and of course, I had to put my own Holly’s Kitchen experiment twist on it and make the dough pink! I was sent some of Vinofoods delicious Merlot BBQ sauce to try for the #vinofoodchallenge and it was AMAZING! This sauce is hand-made at the Lake House Denmark in Western Australia. They have a beautiful range of small-batch, handcrafted Sauces and Condiments.
This recipe is easy and such a fun meal to make if you are entertaining or even cooking with kids. The “vegetarian pulled pork” is so quick and easy to make with ONLY 3 ingredients and could be used on many other dishes such as burgers, wraps or tacos!
Pizza Dough Ingredients (makes 4)
1 1/2 cups Beetroot Juice (approx 4 Beetroots) – or replace with water for plain dough
4 cups Plain Flour
2 tsp Dry Active Yeast
1 tsp Sugar
1 tsp Salt
1 TBS Olive Oil
Vegetarian Pulled Pork Ingredients
1 Onion ( i used half red and half white)
1/2 Bottle Vinofood Merlot Barbecue Sauce 280g – HERE
1 can Organic Young Jackfruit (CeresOrganics)
Pizza Toppings
Tomato paste
Fresh herbs (pizza thyme, oregano)
Cheese
Tomato
Mushroom
Method
Juice the Beetroot. I used 4 medium-sized Beetroot and it worked out nearly the perfect amount. If you don’t quite have enough you could add water, it may just mute the colour a little. Set the juice aside. I also put the pulp in an airtight container and use throughout the week in smoothies, curry or anything really! #zerowaste
Place the beetroot juice in a saucepan and heat slightly so that it lukewarm. Measure into a mixing bowl to ensure you have 1 1/2 cups (add water if you are short).
Add the yeast and sugar to the beetroot juice and stir well. Cover and set aside for 10mins. This will start to froth so make sure your bowl or jug has plenty of room spare.
In a mixing bowl sift flour, add olive oil, salt and slowly mix in the beetroot juice to form a dough.
On a floured bench form the dough into a ball and sprinkle with more flour as needed until it is combined and no longer sticky. Place dough in a clean floured bowl, cover and place in a warm spot to rise for 1-2 hours.
While you wait for the dough you can prepare your vegetarian pulled pork. I used this amount to make 2 pizzas but it could stretch to 4 just depends how much topping you like. I rolled out my two extra bases and froze them for future use.
Cut the onions and brown in a pan with a little olive oil.
Rinse and drain the can of jackfruit and add to the pan once the onions have browned. Stir and cook through for a few minutes then simply add the Merlot BBQ sauce. I also added about 1/2 cup water. Stir and start to break up the jackfruit by mashing down with a spoon or spatular. It should start to break apart similar to pulled pork.
Simmer on medium heat for 5 minutes until the chunks of jackfruit are separated. Turn off, cover and set aside.
Once the dough has risen. Place on a floured bench and cut into 4 even size pieces. Roll out each base using flour as needed to stop it sticking.
Preheat oven to 200degrees Celcius.
Place your pizzas on an oven tray (lightly dust with flour) and add your toppings. Start with a few teaspoons of Tomato paste, herbs then add BBQ jackfruit, tomato, mushroom and top with cheese.
Place in the oven and cook until dough is crispy – approx 10-15mins
To serve I added some edible flowers…I would also suggest an extra drizzle of BBQ sauce because it is so good!
MY GARDENING ESSENTIALS // Fertiliser spray gun: https://bit.ly/366nL1t Retractable Hose: https://bit.ly/2TSC0Bo More gardening tools: https://bit.ly/32IQmbD
DISCLAIMER: Links included in this description might be affiliate links. If you purchase a product or service with the links that I provide I may receive a small commission. There is no additional charge to you! Thank you for supporting my page so I can continue to provide you with free content!
DISCLAIMER: Links included on this page might be affiliate links. If you purchase a product or service with the links that I provide I may receive a small commission. There is no additional charge to you! Thank you for supporting my channel so I can continue to provide you with free content each week.
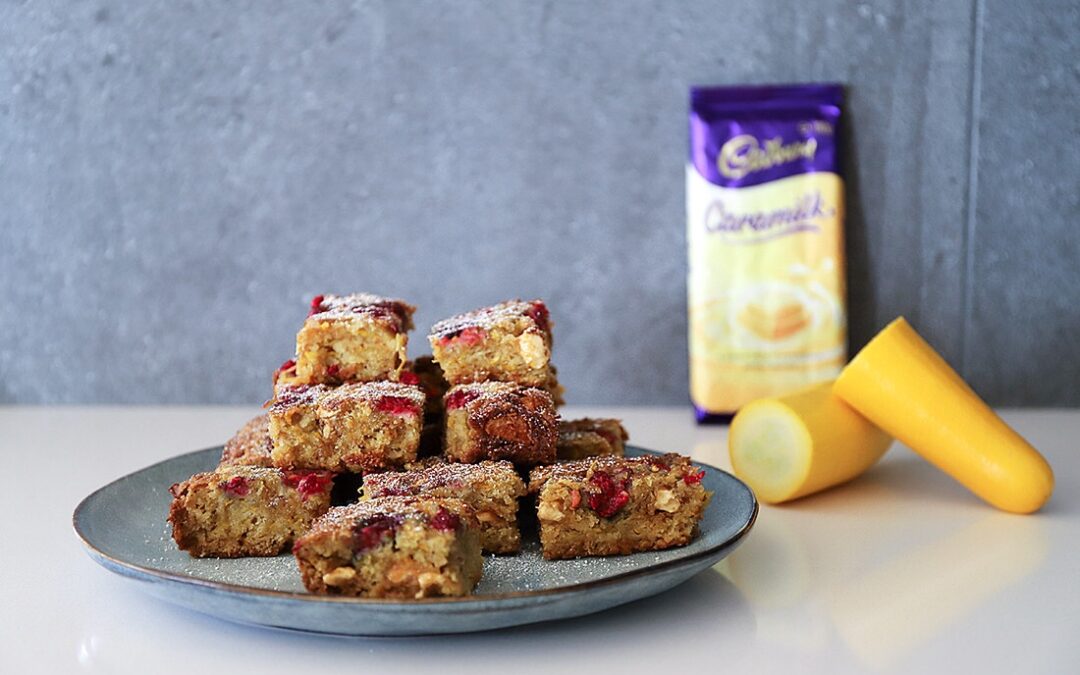
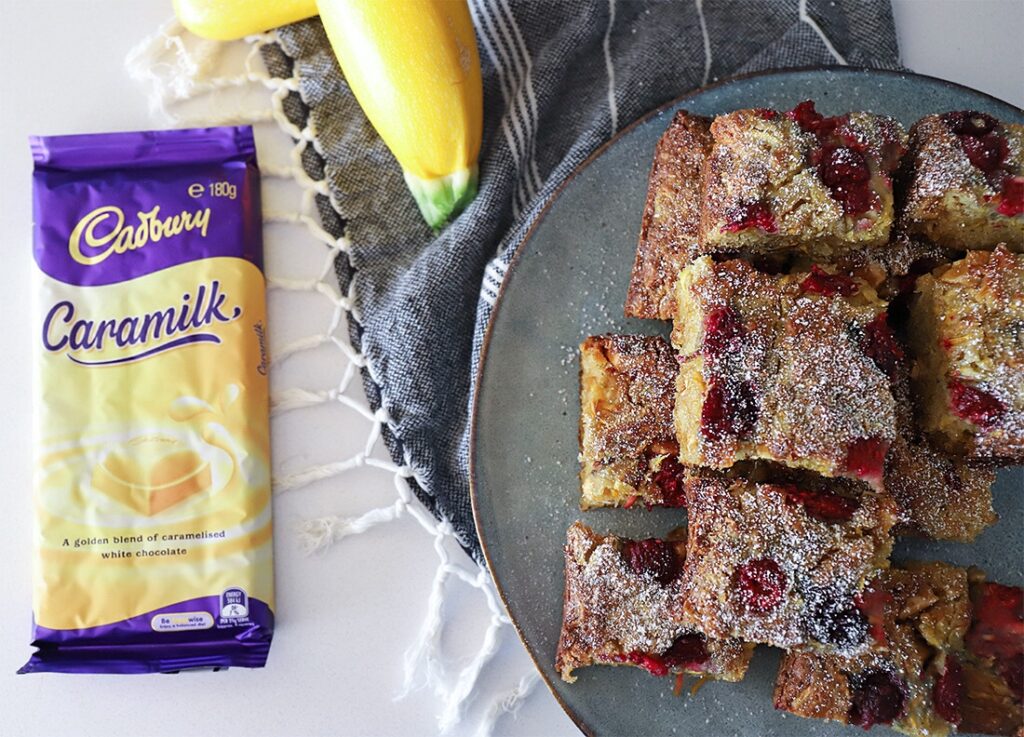
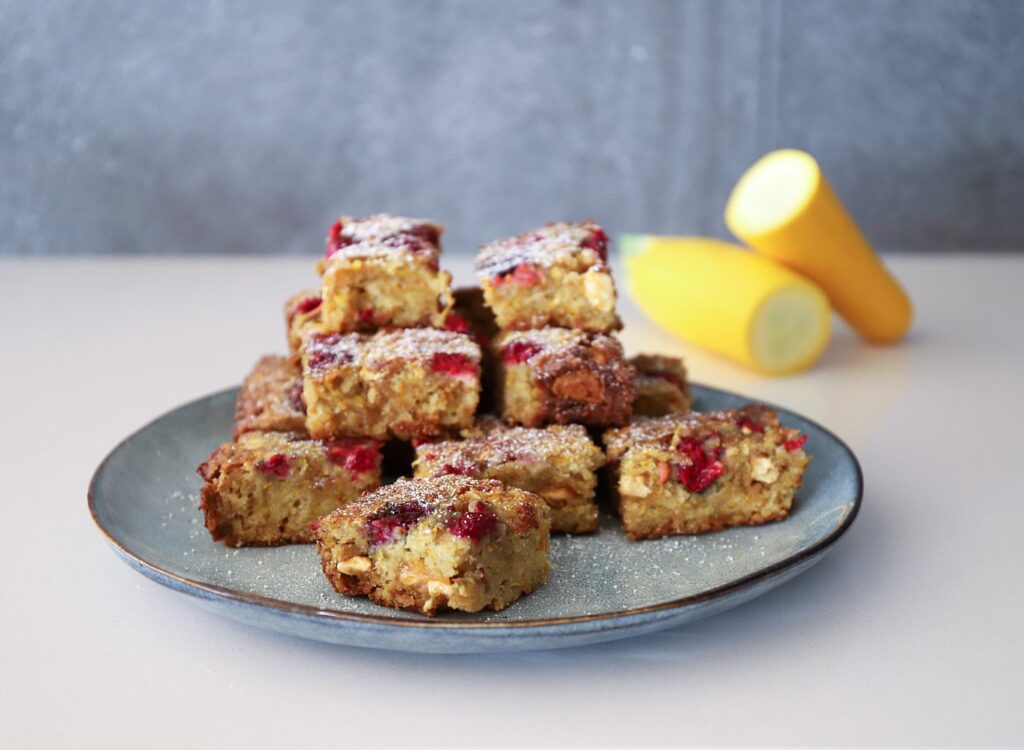
Zucchini season is in full swing and I am trying to make as many different recipes as I can to learn how to get the most out of harvests. These White Chocolate and Raspberry Zucchini Brownies are my new favourite sweet treats!! You can’t even taste the Zucchini.
My sister-in-law sent me a bunch of Caramilk blocks and I have been saving them in the freezer. I decided to use some to test out a batch of white chocolate brownies using my Golden Zucchini. WOW. They turned out way better than I could ever have imagined! Even have a slight banana bread vibe to them. I did try to film the recipe but my memory card ran out halfway through which was a total fail! I will get there!
Anyway, these are super easy and definitely a sweet treat! The raspberry is perfect to help balance out the sweetness.
White Chocolate and Raspberry Zucchini Brownies
Ingredients:
2 cups grated Zucchini – mine worked out about 2 medium-sized Zucchini
1/2 cup vegetable oil
1/2 cup brown sugar
1/2 cup raw sugar
2 teaspoons vanilla extract
1 1/2 teaspoons baking soda
2 cups organic plain flour
3/4 cup raspberries
1 block/180g White Chocolate (replace with which ever chocolate you like)
1 teaspoon salt
Method
Preheat oven to bake at 180degrees Celcius. Grease baking pan (roughly 28cm x20cm).
In a bowl mix sugar, flour and oil until combined.
Grate Zucchini and add to the bowl along with baking soda and vanilla extract.
Sprinkle salt over and stir until it becomes a moist batter. The mix will start off quite dry but keep mixing and the Zucchini will release its moisture to form a batter.
Once it has started to become a sticky batter. Chop up your chocolate into small chunks and mix through the batter.
Add half the raspberries and stir through gently.
Pour the mix into the greased pan and press in the remaining Raspberries.
Bake for 20-30 minutes or until a skewer comes out clean.
Cool on a wire rack. Cut into squares and enjoy!
Try quizzing your friends to see if they can pick the core ingredient.
Enjoy!
Holly 🌱
MY GARDENING ESSENTIALS // Fertiliser spray gun: https://bit.ly/366nL1t Retractable Hose: https://bit.ly/2TSC0Bo More gardening tools: https://bit.ly/32IQmbD
DISCLAIMER: Links included in this description might be affiliate links. If you purchase a product or service with the links that I provide I may receive a small commission. There is no additional charge to you! Thank you for supporting my page so I can continue to provide you with free content!