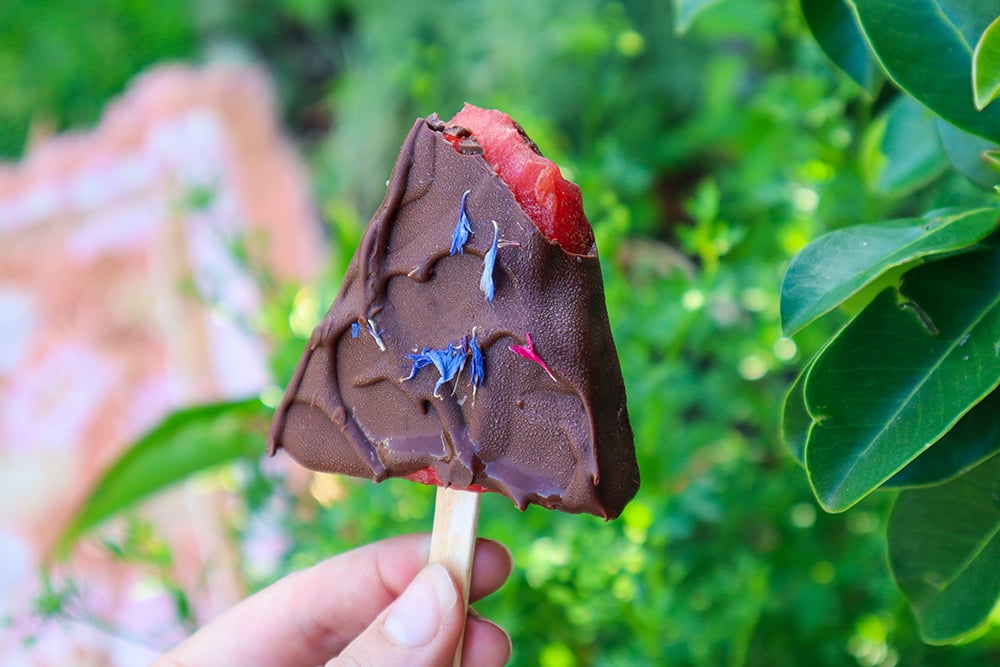
Watermelon Choc-Tops
Celebrate summer with these delicious watermelon choc-tops. Indulge in a sweet treat without all the added refined sugars. These watermelon choc-tops can be made frozen for an iceblock or chilled in the fridge for a refreshing summer treat. If you don’t like biting into a frozen iceblock, the refrigerated versions may be the best for you. These were such a hit and will now be a summer staple in our house!
With just two simple ingredients you can quickly and easily make these Watermelon Choc-tops that are sure to impress! Sprinkle with edible flowers before the chocolate sets to add a little extra magic.


Watermelon Choc-tops
Watermelon Choc-tops are the ultimate summer treats! Quick and easy to make using simple ingredients.
Ingredients
- Watermelon
- Chocolate buttons (or whatever chocolate you prefer)
- Edible Flowers
- Iceblock sticks
Instructions
- Slice your watermelon up into Iceblock sized pieces around 1cm thick and place in a container in the fridge to cool while you melt your chocolate.
- To melt the chocolate I place my chocolate buttons in a small saucepan and set it over another saucepan with water and allow the steam to heat it.
- Once your chocolate has melted remove it from the heat.
- Create a rack to hold your watermelon iceblocks by placing two sticks (or chopsticks or knives) across the top of a cup.
- Push the iceblock stick into the watermelon pieces so that they are secured.
- Spoon over your melted chocolate and sprinkle on edible flowers. I used dried cornflower. Carefully place your chocolate-coated watermelon upright on your makeshift rack by holding the bottom edge of the watermelon.
- Place in the freezer to set. The watermelon will be frozen and ready to eat within 2hours. Or place in the fridge until the chocolate has set for the fresh version.
Notes
Both fresh and frozen are good! However, I do prefer the frozen ones.
The difference between the fresh or frozen versions is :
- Fresh - Sweeter, very juicy, a little hard to eat.
- Frozen- Mild watermelon flavour, not too sweet, need to be good with biting into frozen food.