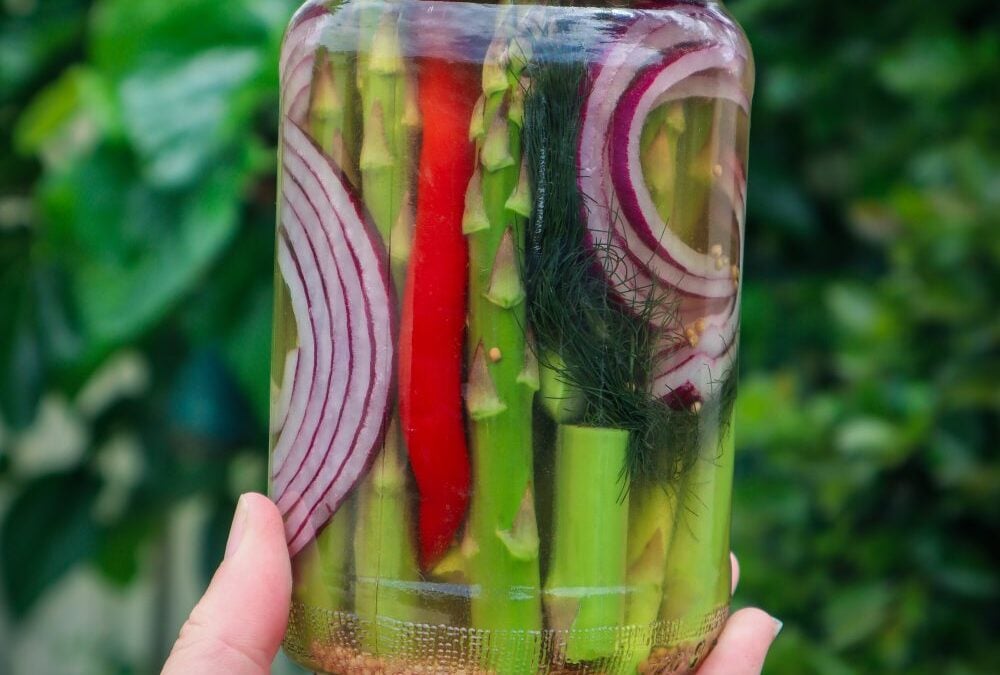
Quick-pickled asparagus is one of my favourite ways to preserve the fresh, crisp flavour of a spring harvest. If you’re lucky enough to have an abundance of asparagus—either from your own garden or a market haul—this easy refrigerator pickle is a simple, satisfying way to make the most of it. These pickles are crunchy, tangy, and packed with flavour, making them perfect for snacking, adding to grazing boards, or tossing into salads and wraps.
Refrigerator Pickles are Great for Beginners
Refrigerator pickles are one of the easiest ways to experiment with preserving at home—no canning or complicated steps needed. This recipe uses a basic hot brine made with apple cider vinegar, water, a little sugar or honey, and salt. Mustard seeds add a subtle zing, while red onion (or shallot), dill, and optional chilli give the spears depth and a burst of visual appeal.
Preparing the asparagus is simple: just snap the ends at their natural breaking point and trim them to fit your jar. You can even add the leftover ends into the jar—they soak up the flavour just as well and help minimise waste.
Once packed into a sterilised jar and covered with the hot brine, the pickled asparagus just needs time to chill in the fridge. After 24 hours, the flavours will develop beautifully, and they’ll be ready to enjoy. These will keep for up to a month in the fridge, though they rarely last that long in my house!
Easy Refrigerator Pickled Asparagus Spears
Prep Time: 10 minutes
Additional Time: 1 day
Total Time: 1 day10 minutes
Quick and easy way to extend your Asparagus harvest. Add other in-season veggies or herbs to the mix. Enjoy as a snack or added to wraps and sandwiches.
Ingredients
1 cup water
1 cup ACV
1 bunch asparagus
2 TBSP sugar (or honey)
1/2 TSP salt
2 tsp mustard seeds
2 sprigs dill or fennel frond
2 red chilli (optional for spice)
1/4 red onion sliced or 1 shallot
Instructions
Clean and sterilize a Jar (approx 700gram).
Rinse Asparagus and hold the bottom to snap the spear at the freshest part. Cut fresh spears to fit in the height of your jar.
Stack spears the jar. The excess cuts can also be added. Push dill, onion and chilli in the jar and add mustard seeds.
In a saucepan add water, vinegar, sugar (or honey), and salt. Bring to a simmer or until sugar is dissolved.
Add the hot liquid to the jar. The liquid should completely cover the spears. Secure the lid and flip it upside down to help seal. Leave on the bench until cool (room temperature). Place in the refrigerator for at least 24/hours before eating. Eat within 1 month.
Final Tip
Try swapping out the dill for fennel fronds or tarragon for a twist, or add garlic cloves for extra bite. It’s a quick, easy way to enjoy asparagus long after the season is over.
Links included in this post might be affiliate links. If you purchase a product or service with the links that I provide I may receive a small commission. There is no additional charge to you! Thank you for supporting my blog so that I can continue to provide you with free content.
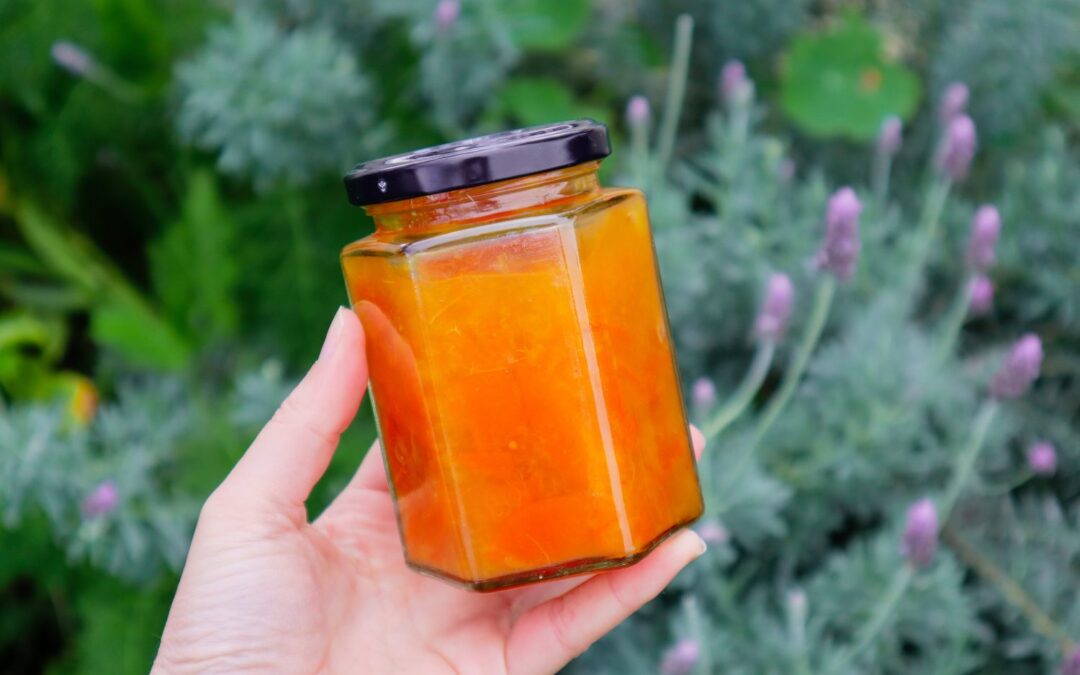
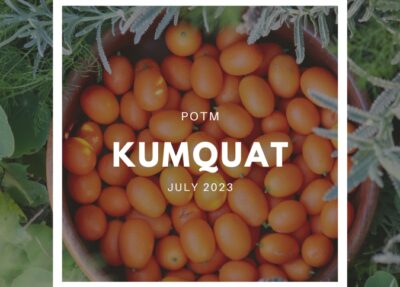
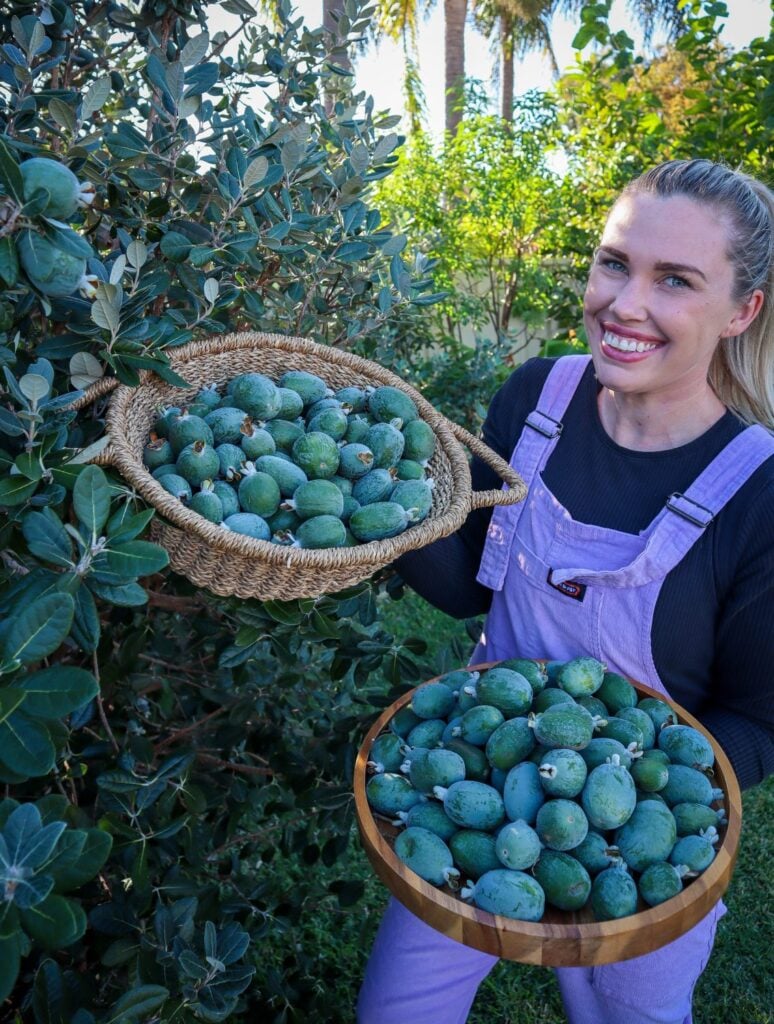
If you grow kumquats, you probably know how prolifically they fruit! These tiny, tangy citrus gems often produce more than you can eat fresh, making them perfect for preserving. Making kumquat jam is one of the best (and most delicious) ways to enjoy your homegrown harvest throughout the year. This easy kumquat jam recipe is a simple, low-waste method that uses natural pectin from the seeds and minimal ingredients—just fruit, water, sugar, and lemon.
Whether you’re new to preserving or a seasoned jam maker, this recipe is a great way to use up a bunch of kumquats and create something delicious to enjoy or gift to friends and family.
Why You Should Make Kumquat Jam
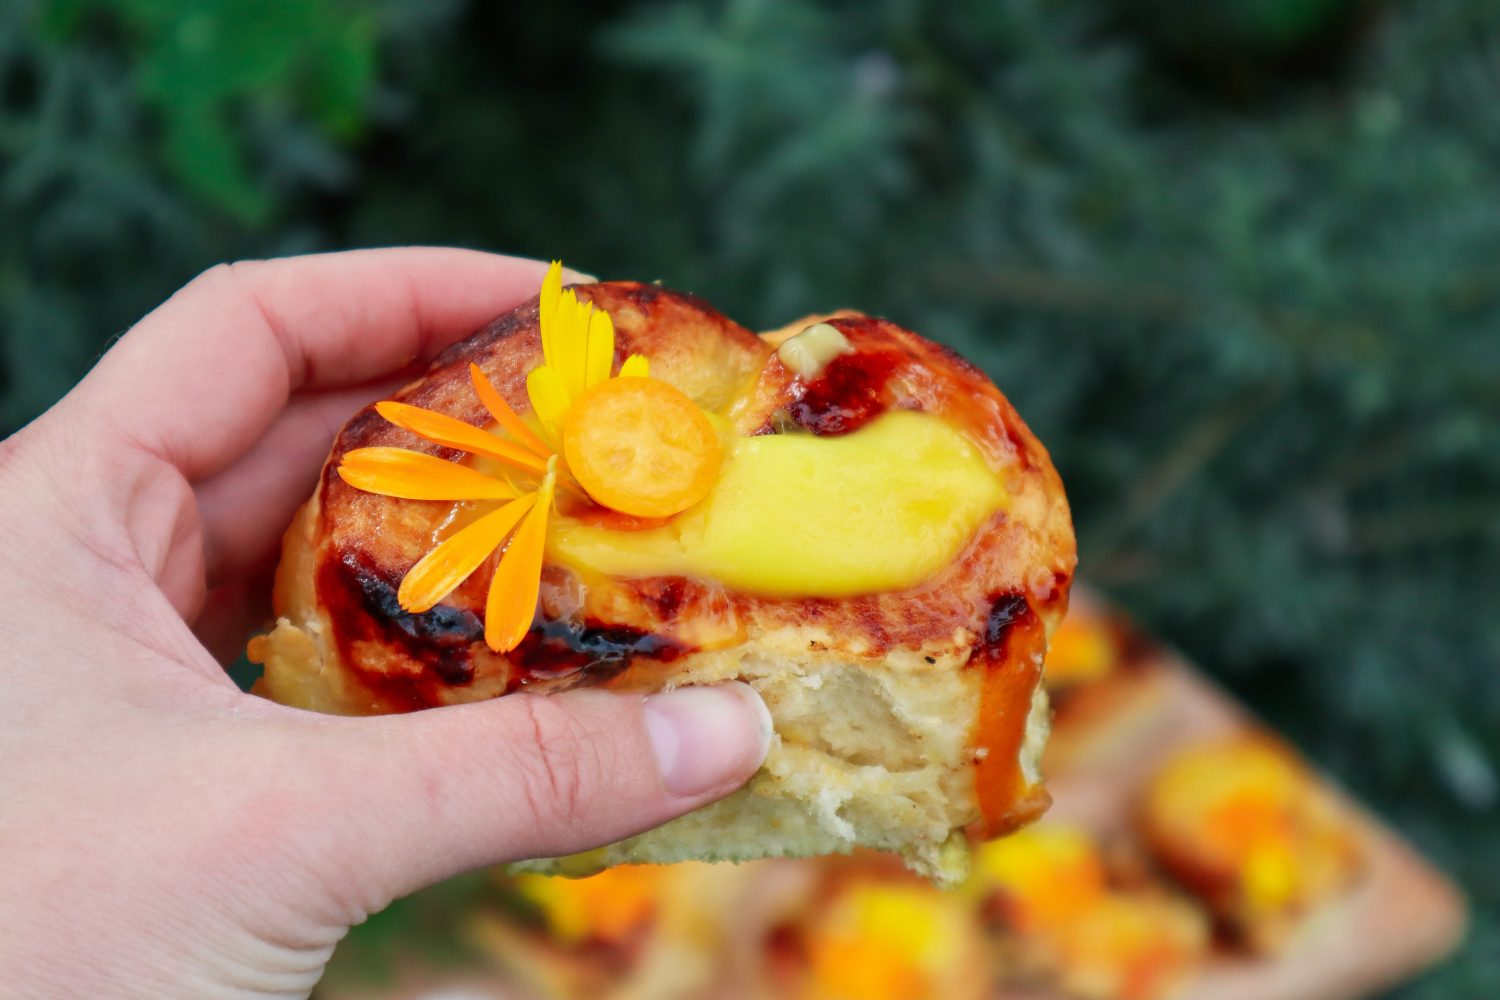
Kumquats are a unique grape-sized citrus fruit with edible skins and a sweet-tart flavor that works beautifully in jams and marmalades. Unlike many other citrus fruits, kumquats can be eaten whole, which means their zest, juice, and skin all contribute to flavour-packed, easy-to-make preserves. This homemade kumquat jam is vibrant, tangy, and great for using in other recipes like my delicious Kumquat Jam and custard scrolls! (a must try)
Another bonus? You don’t need to buy pectin. Kumquat seeds contain natural pectin, which helps the jam set, so this is a great way to make a more natural jam using what you already have.
Simple Ingredients for Homemade Kumquat Jam
4 cups chopped kumquats (seeds reserved)
5 cups water
1½ cups sugar
½ lemon (juice)
Kumquat Jam
Yield: 3 jars
Prep Time: 4 hours30 minutes
Cook Time: 10 minutes
Additional Time: 15 minutes
Total Time: 4 hours55 minutes
Kumquat jam is a great way to use and preserve your harvests. Add this jam to pikelets or baking for a delicious citrus flavour.
Ingredients
4 cups chopped Kumquats
5 cups of water
1 1/2 cups sugar
1/2 lemon
Instructions
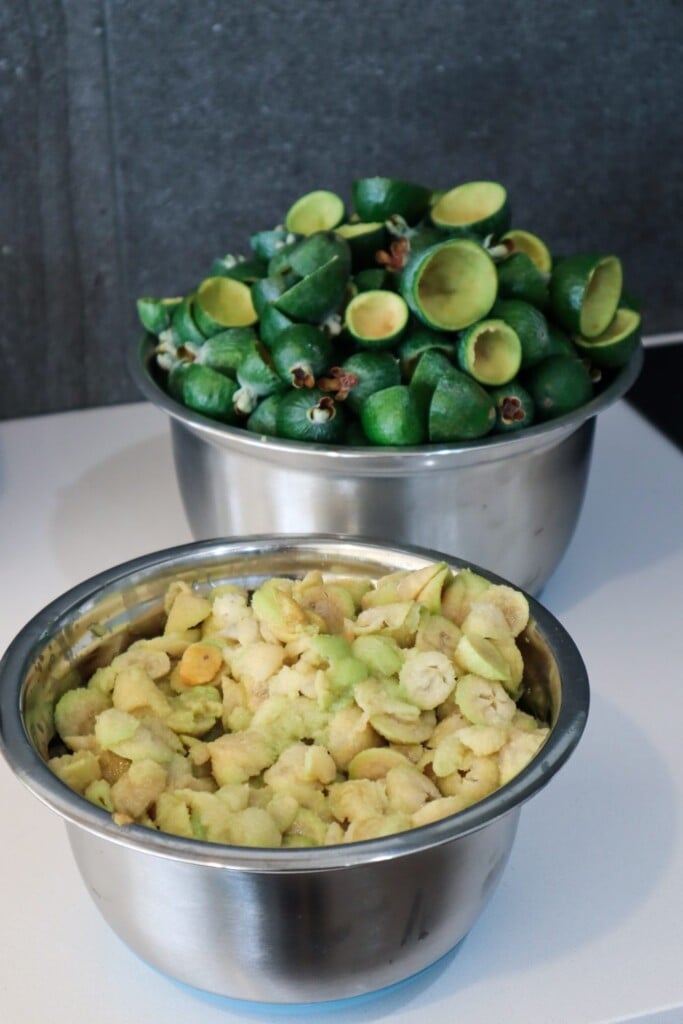
Wash and chop your Kumquats and keep the seeds as you will need them to use as natural pectin.
Place the Kumquats and water in a pot.
Get all your seeds and make a little bag from cheesecloth or in a strainer. You want the seeds to be submerged in the water but not dispersed throughout as you will be discarding them later. Let the seeds and kumquats sit in the water for 4hrs to release the natural pectin. Remove the seeds and discard.
Place a saucer or plate in the freezer to test your jam out at the end.
Bring the pot to a simmer for 30mins. Add in the sugar and stir. Bring the pot to boil for 5min.
Test your jam by putting droplets onto your frozen plate. They should thicken as you run the end of a spoon through the droplet to check. If it doesn't look like it is set add some fresh lemon juice, reheat, and stir. Test again. I repeated this a couple of times and it started to look set.
Spoon hot mixture into hot jars (heat mine in the oven to sterilise 120 degrees for 15 mins and the lids in a bowl of boiling water).
Turn the jars upside down to cool and help the lids seal.
Refrigerate and enjoy.
How to Make Kumquat Jam (Step-by-Step)
1. Prep Your Kumquats
Wash your kumquats thoroughly. Chop them up and be sure to collect the seeds as you go. You’ll need the seeds later to extract the natural pectin that helps the jam thicken.
2. Create a Pectin Bag
Place the chopped kumquats and water into a large pot. Take your reserved seeds and place them into a small cheesecloth bag or a metal strainer. This step is important—you want the seeds to soak in the water but not disperse throughout the jam, as you’ll be removing them later.
Let the pot sit for around 4 hours at room temperature. This resting time allows the seeds to release their pectin into the water naturally.
3. Remove Seeds & Begin Cooking
After 4 hours, remove and discard the seeds. Place a small saucer or plate in your freezer (this will help you test if the jam is set later).
Bring your pot of kumquats and water to a simmer and cook for 30 minutes. Then stir in the sugar and bring the mixture to a rolling boil for 5 minutes.
4. Test for Set
Remove your plate from the freezer and spoon a few drops of the jam onto the cold surface. Wait a few seconds, then run the edge of a spoon through it. If the jam wrinkles or holds its shape, it’s ready. If not, add the juice of ½ a lemon, stir, and boil for another minute or two. Repeat the test until the jam is set.
5. Jar Your Jam
Sterilise your jars ahead of time by placing them in a 120°C (250°F) oven for 15 minutes. Soak the lids in boiling water. Once your jam is ready, spoon the hot mixture into the hot jars and seal them while hot. I like to turn my jars upside down as they cool to help them seal.
How to Store Your Kumquat Jam
Once cooled, store your jam in the fridge. Properly sterilised and sealed jars can last several months in the fridge or a cool pantry. Opened jars should be used within a few weeks.
Delicious Ways to Use Kumquat Jam
Spread on toast or scones
Swirled into yogurt or porridge
As a glaze on roast vegetables or meats
Paired with cheese on a grazing board
Layered in cakes or desserts
Making your own jams/ preserves is a rewarding way to reduce waste, use seasonal fruit, and add something homemade and flavourful to your pantry. If you’re growing kumquats, give this small-batch kumquat jam recipe a try. You’ll love the sweet, tangy flavor and the satisfaction of creating a garden-to-table treat with your garden’s harvest.
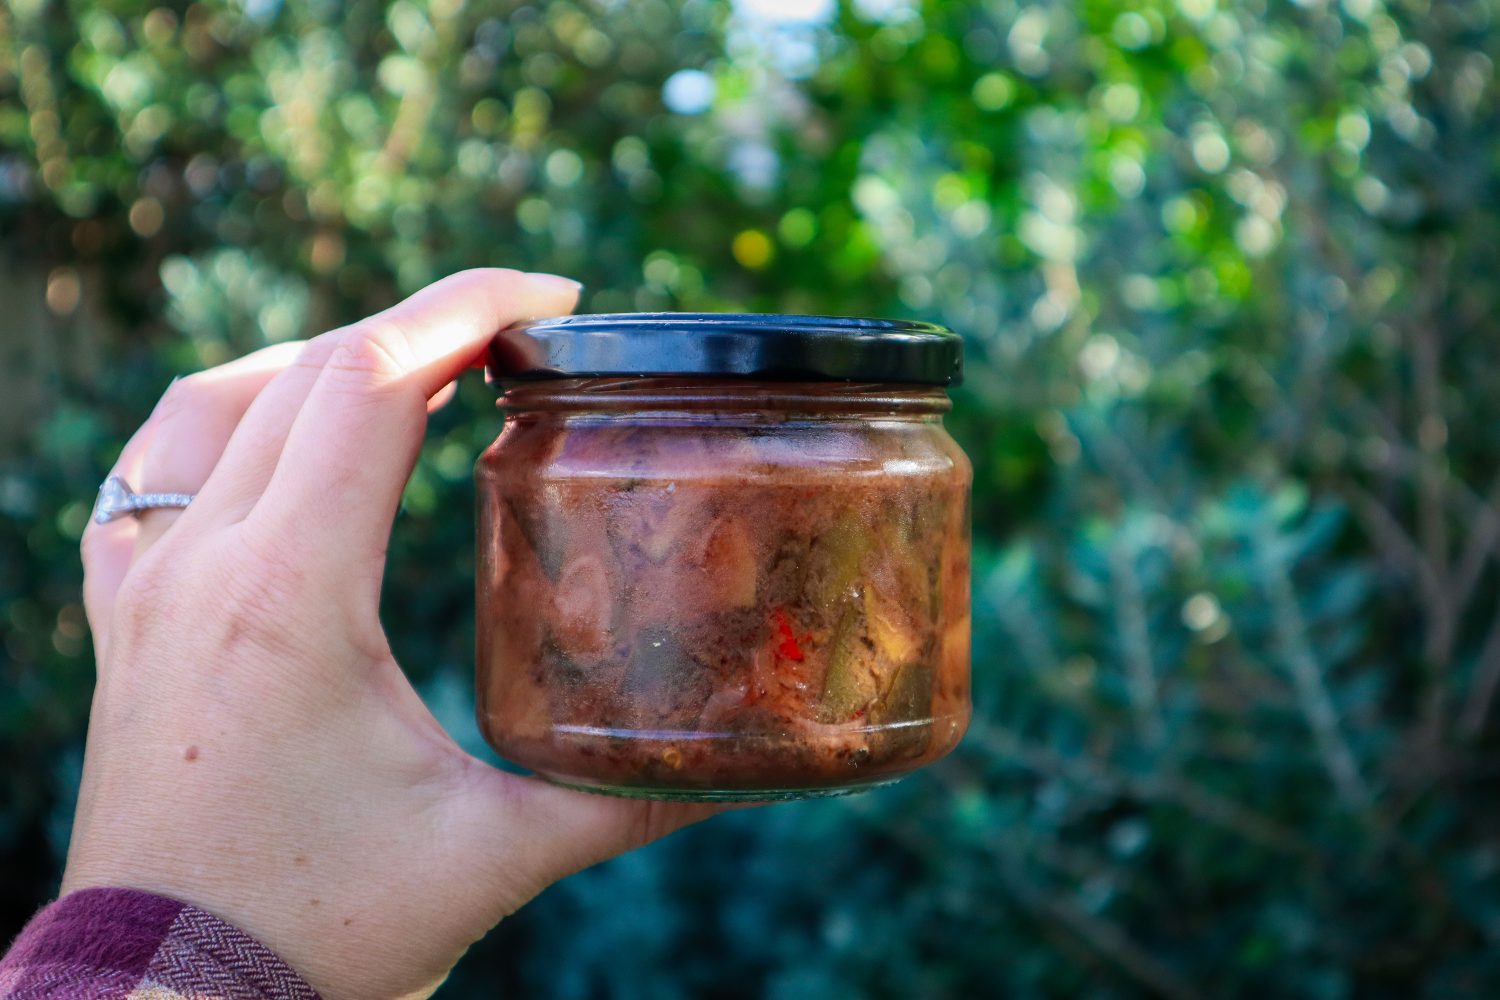
This a delicious zero-waste recipe to use up your excess Feijoa skins and get the most out of your harvest. Feijoas ripen quickly, within a few weeks, and it can be hard to keep up! This Feijoa skin chutney is a delicious way to enjoy your harvests and makes a great gift! Enjoy on a cheese platter or add flavour to a sandwich.
The Best Way to Use Feijoa Skins
Feijoa season is short but abundant, leaving many gardeners and Feijoa/ Pineapple Guava lovers wondering what to do with the excess fruit. Instead of letting the skins go to waste, why not turn them into a delicious Feijoa Skin Chutney? This simple recipe transforms feijoa peels into a flavorful condiment that pairs beautifully with cheese, meats, and sandwiches.
Using Feijoa skins reduces food waste and ensures you get the most out of your harvest. This chutney is packed with bold flavors, balancing the natural tartness of feijoa skins with warm spices and sweetness. Plus, it makes a wonderful homemade gift for friends and family!
Why Use Feijoa Skins?
Most people scoop out the feijoa flesh and discard the skins, but the skins are packed with flavor and nutrients. I love eating them whole, which gives a balance of sweet and sour flavour! But… with huge harvests, it’s time to get creative!
The skins have a slightly bitter and aromatic taste, which blends beautifully with the spices and vinegar in this chutney.
By using the skins, you can: – Reduce food waste and maximize your harvest – Enjoy a unique flavor that’s different from regular feijoa chutney – Create a versatile condiment for both sweet and savory dishes
What You’ll Need to Make Feijoa Skin Chutney
This recipe uses simple pantry staples to bring out the best flavors in feijoa skins. Here’s what you’ll need:
Feijoa skins – Washed and chopped
Onions – For a rich, savory base
Apple cider & red wine vinegar – Adds tang and preserves the chutney
Raw sugar – Balances the tartness
Cumin Seeds – Warm spices for depth of flavor
Chili (optional) – For a little kick
Feijoa Skin Chutney
Prep Time: 15 minutes
Cook Time: 2 hours
Total Time: 2 hours15 minutes
Sweet chutney is perfect for cheese platters or to add flavour to sandwiches. Great zero-waste recipe to use up left over Feijoa skins.
Ingredients
3 cups feijoa skins chopped
1/2 cup red wine vinegar
1/2 cup apple cider vinegar
2 onions
2 green or red cayenne chilli (mild-medium spice)
1 cup raw sugar
1 1/2 tsp salt
1 tsp cumin seeds
Instructions
Remove the hard flower ends of the feijoas skins and slice the skins into strips (roughly 1cm wide).
Remove chilli seeds (or leave them in if you like it spicey!). Slice into pieces.
Peel (discard skins) and dice onion.
Place all ingredients in a pot or saucepan and lightly simmer for 1-2 hours until thickened and brown.
Sterilise jars by washing and adding them to the oven upside down at 120 degrees celsius for 15mins. Place lids in a bowl and add boiled water.
Spoon hot chutney into hot jars, clean rims and secure lids.
Notes
Once opened use within 1 week and keep refrigerated.
You can add Feijoa flesh as well as skins but this would increase the sweetness so use less sugar.
Ways to Enjoy Feijoa Skin Chutney
This chutney is incredibly versatile! Try these serving ideas:
On a cheese platter – A perfect match for sharp cheddar or creamy brie
In sandwiches or wraps – Adds a sweet and spicy kick
With grilled meats – Delicious as a glaze or dipping sauce
As a homemade gift – A thoughtful and unique present
Storage Tips & Shelf Life
Store chutney in sterilized jars for up to 6 months in a cool, dark place.
Once opened, keep in the fridge and use within 2–3 weeks.
The flavors will develop over time, so let it sit for a few weeks before enjoying for the best taste!
A Delicious Way to Reduce Food Waste
Making Feijoa Skin Chutney is one of the best ways to make the most of your feijoa harvest. It’s a simple, delicious, and sustainable recipe that transforms leftovers into a gourmet treat. Give it a try this feijoa season, and enjoy a homemade condiment that’s bursting with flavor!
What do you make with your excess feijoas? Let me know in the comments! 🌿
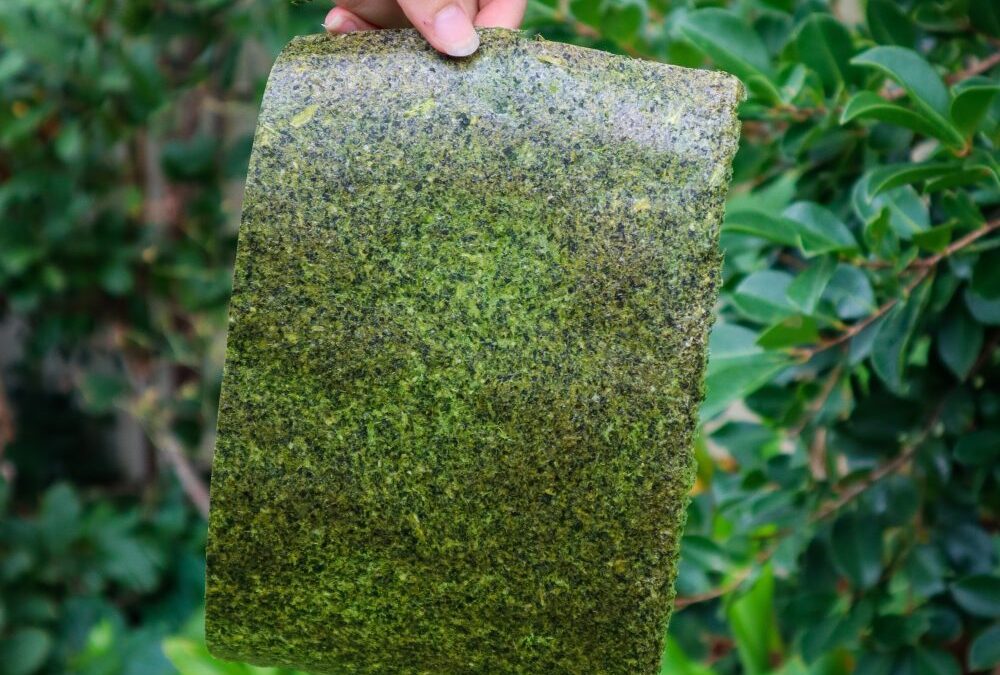
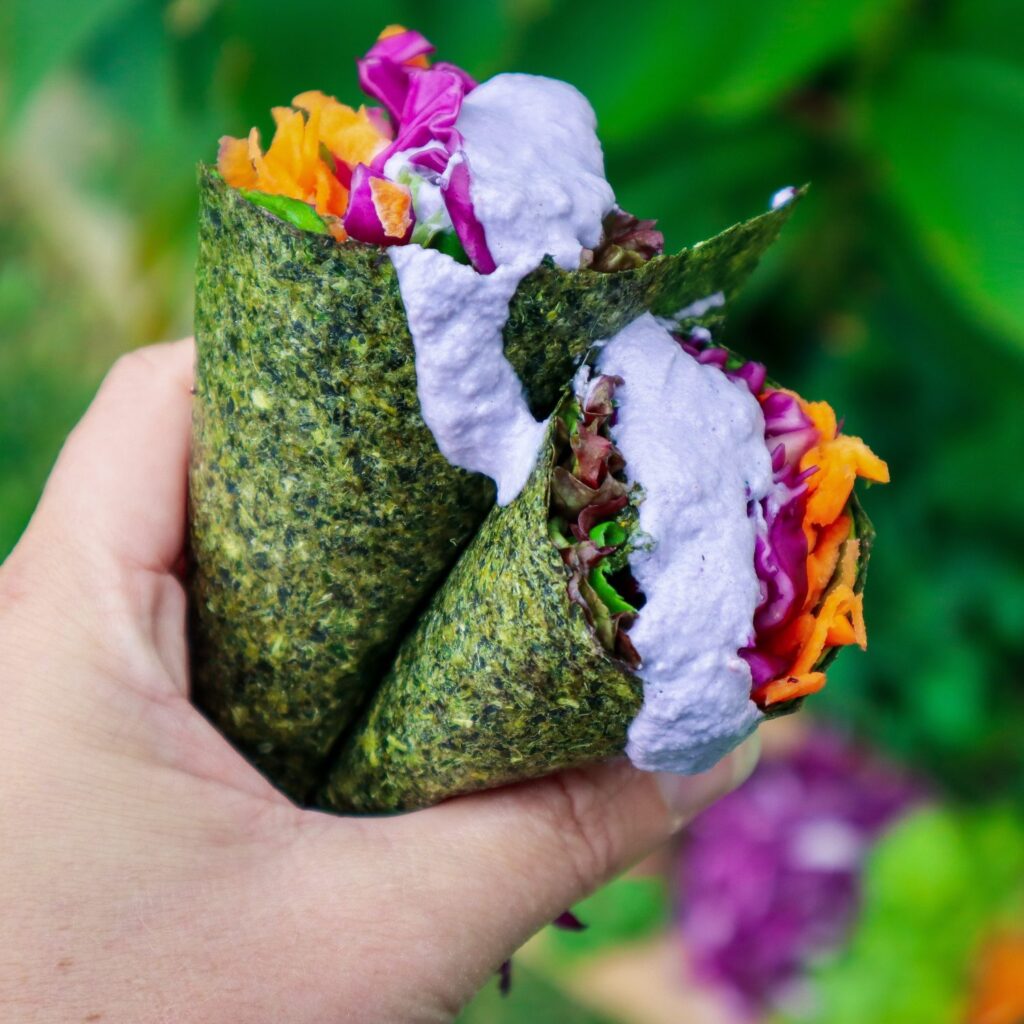
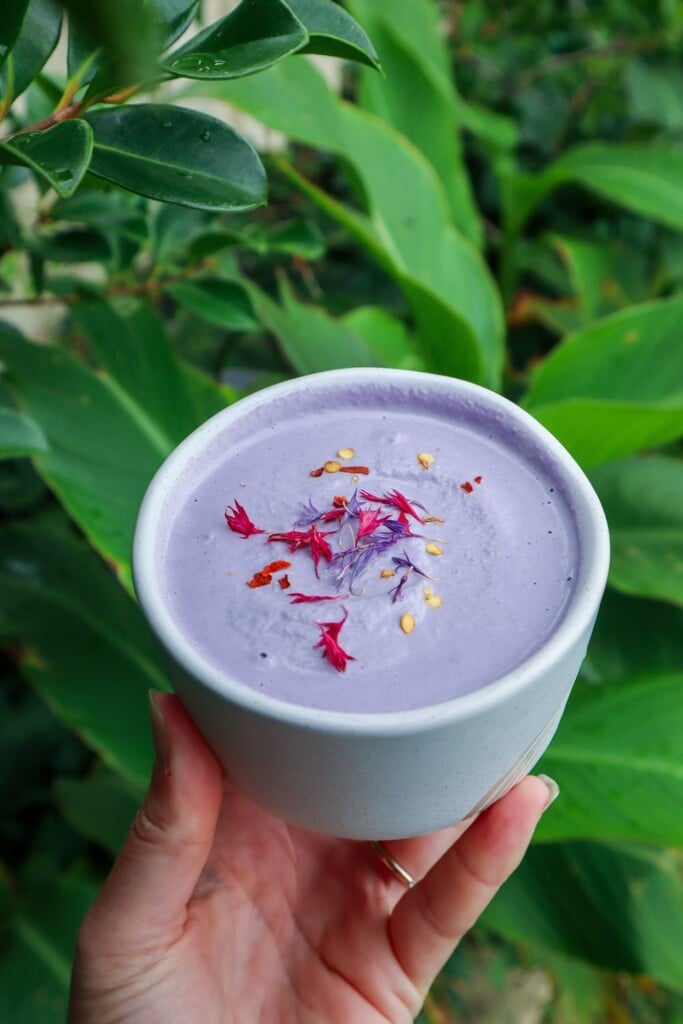
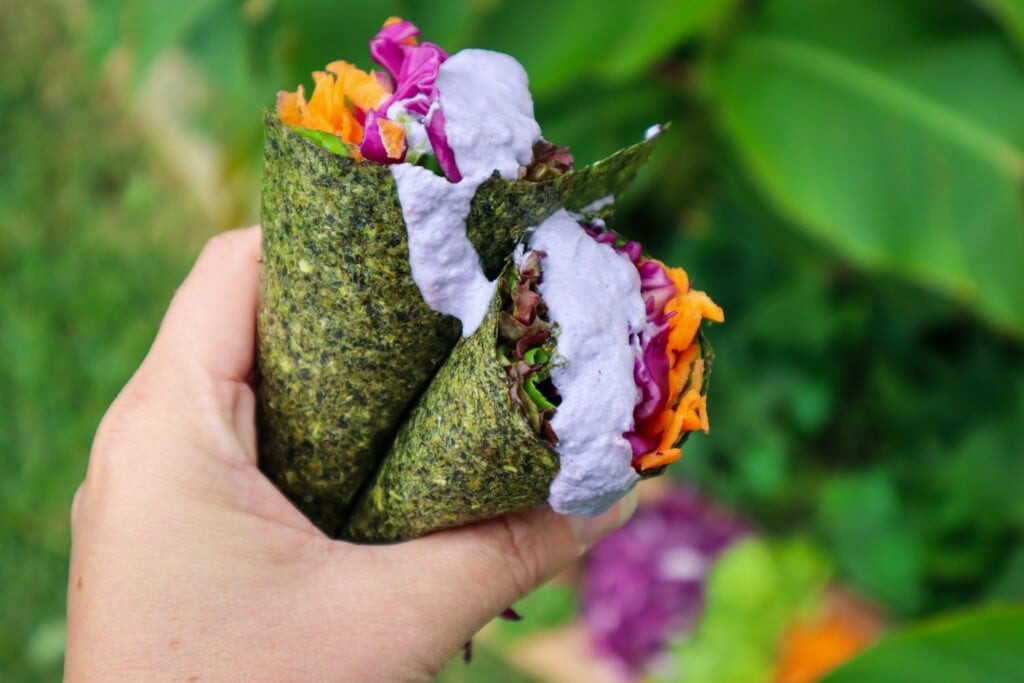
Looking for a healthy, homemade wrap alternative? These DIY spinach sushi wraps are a delicious and nutritious way to use up garden greens and create quick, wholesome meals. Whether you follow a gluten-free, low-carb, or plant-based lifestyle, these wraps are a game-changer. Made from fresh spinach, herbs, and garden vegetables, they’re packed with nutrients and completely free from preservatives and additives.
These wraps have the texture of nori but are 100% vegetable-based. Use them for sushi, wraps, or as a healthy tortilla alternative. This is the perfect recipe for zero-waste gardeners who want to make the most of their seasonal harvests. I am so impressed with how amazing these are!
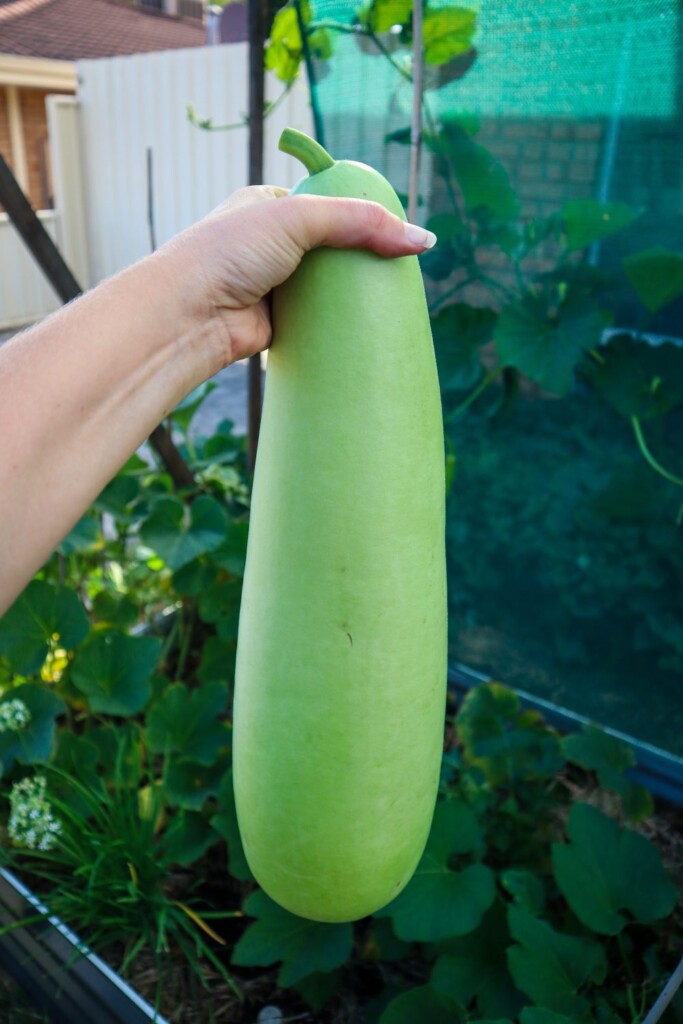
These dehydrated spinach sushi wraps taste and feel just like the real deal but I know exactly what is in them. Use excess garden greens along with bottle gourd or zucchini to make a batch of sushi wraps for a quick and easy lunch. Like most of my recipes, you can mix and match different greens and herbs depending on what’s in season or in abundance in your garden.
Garden Vegetable Variations
Don’t have spinach? No problem. Try other leafy greens such as:
NZ spinach (Tetragonia)
Swiss chard
Rocket/arugula
Sweet potato leaves
Amaranth greens
You can even mix in edible weeds like chickweed or purslane for extra nutrition.
Recipe Notes
Psyllium Husk helps bind the mixture and gives flexibility.
Herbs are optional but add great flavor.
Dehydration Time varies depending on water content and thickness.
Spinach "sushi" wraps
Yield: 8
Prep Time: 10 minutes
Cook Time: 6 hours
Total Time: 6 hours10 minutes
Easy way to preserve excess produce and have wraps on hand for a quick garden-to-plate lunch when you need it.
Ingredients
4 cups spinach or greens*
1/2 cup fresh herbs*
1 TBSP psyllium husk
1 - 2 TBSP water
2 cups chopped bottle of gourd or zucchini
Instructions
Rinse the greens and quickly blanch for 30 seconds in hot water then transfer to iced water to cool.
Strain and add to a mixer or blender. (use the blanching water on the garden once it has cooled down)
Peel Bottle gourd using a vegetable peeler, remove the center seeds and pith then chop into 2-3cm cubes. If using zucchini there is no need to peel.
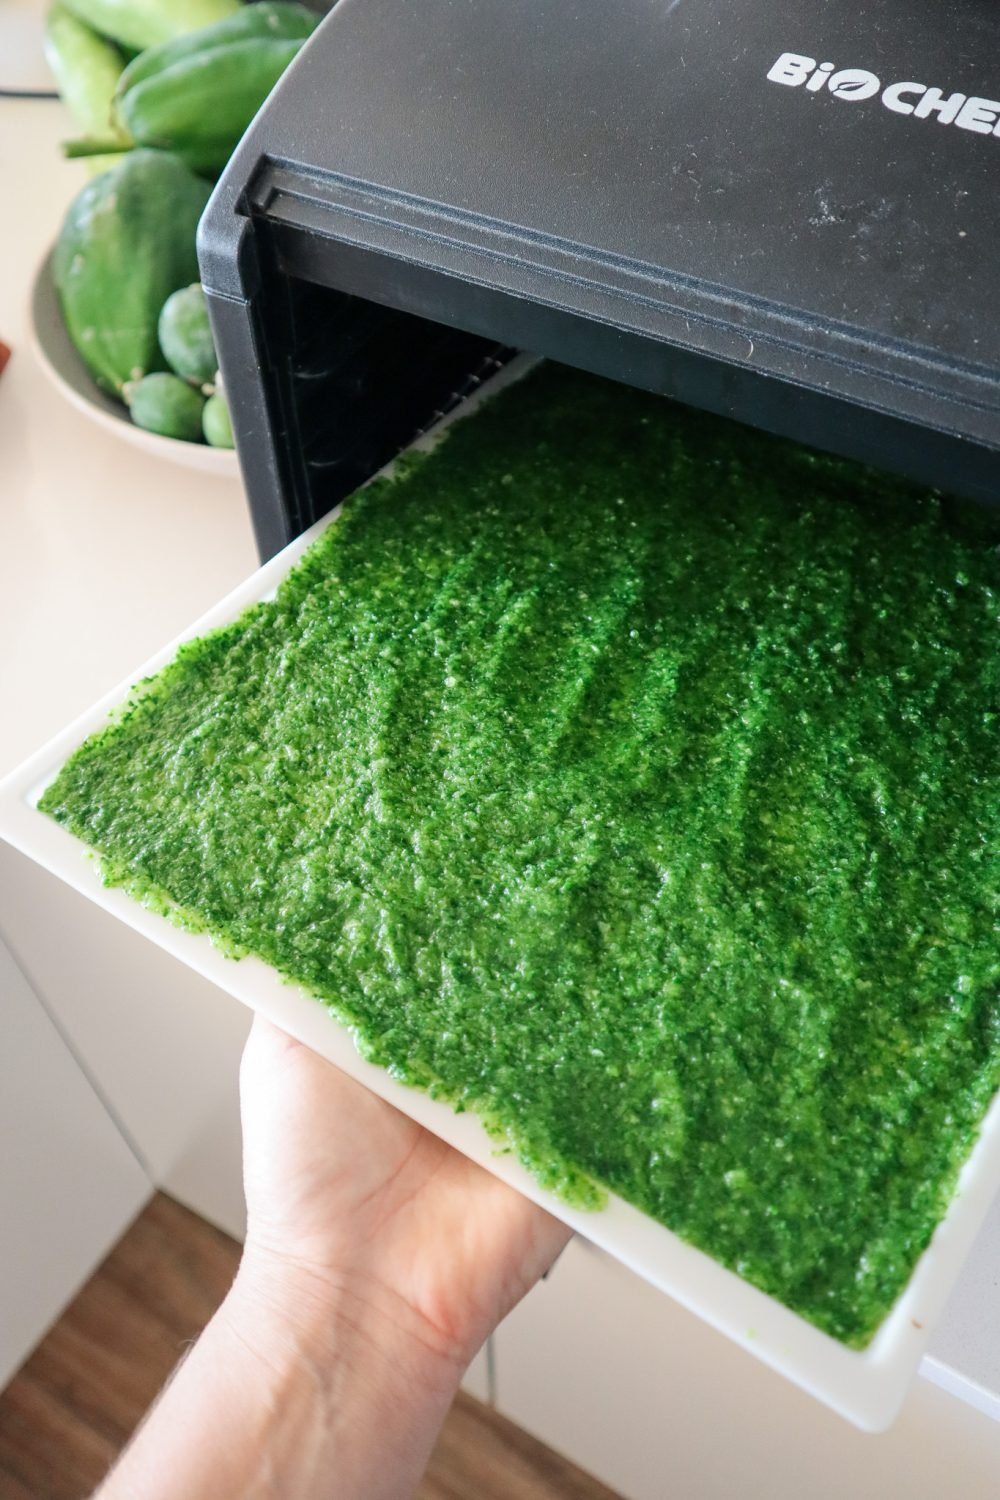
Add all the ingredients to a blender or mixer and blitz until combined. You may need to move things about with a spoon to get it mixed or add a dash more water. You want a thick paste-like consistency not too watery.
Spread the mixture onto 3-4 silicon dehydrator trays. You may need to do this in batches or use baking paper and a tray if you do not have enough of the silicon trays. The mixture should be thick enough to not see through to the tray or paper but also as thin and even as you can (before seeing through to the tray)
Dehydrate at 50 degrees celsius until dry. Check after 2-3 hours as the time will vary depending on the water content of the greens you used.
Remove and carefully run a knife around the edges to loosen it. Carefully peel off the sheet it is best to do this one bit at a time holding the sheet as close to the tray as possible as to not tear it.
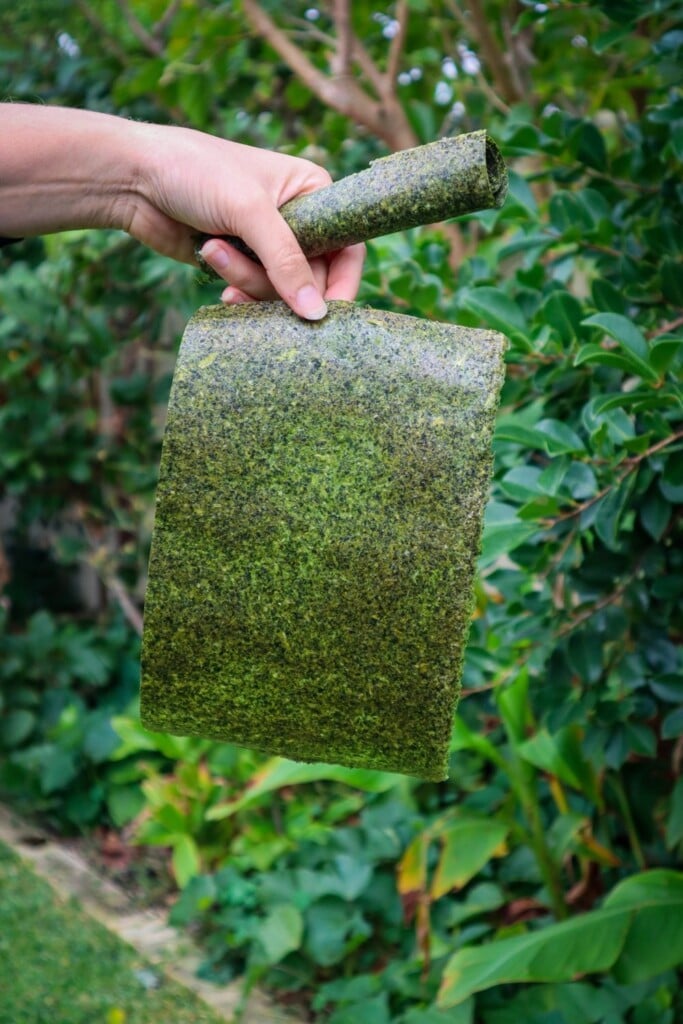
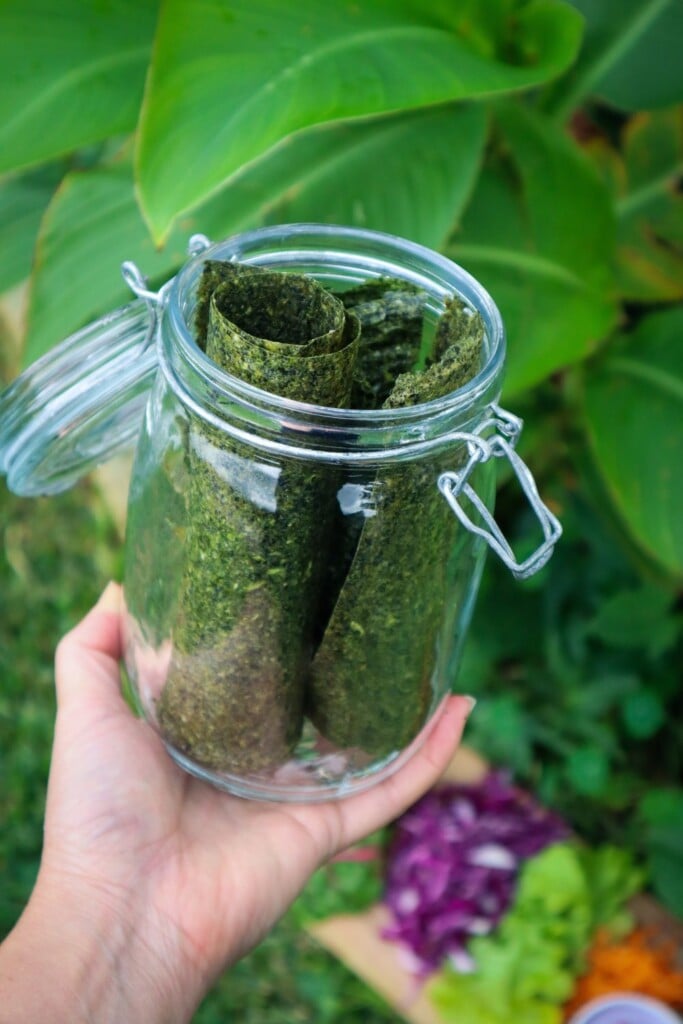
Once removed from the tray cut the sheets into the desired size (I cut in half for wraps but I keep them whole for sushi rolls) then roll them up and place them in an airtight storage jar. Or use them straight away. would
Use the wraps with your favorite salad ingredients and grilled chicken, haloumi or similar.
Notes
Greens - I used NZ spinach including the young stems but you could use any spinach or greens such as chard, rocket, sweet potato leaves etc just remove any thick stems.
Herbs - add herbs or leave them out (replace with more greens) completely up to you. Try adding 1/2 cup of herb such as parsley, chives or coriander for added flavour.
If you do not have a dehydrator you can use an oven on low to 50 degrees but be aware it may take up 6 hours so ensure you are home and not leaving the oven unattended.
These homemade spinach sushi wraps are a sustainable way to reduce kitchen waste and boost your nutrition. Whether you’re preserving an abundant garden harvest or just trying to eat healthier, they’re a delicious, eco-friendly addition to your kitchen staples.
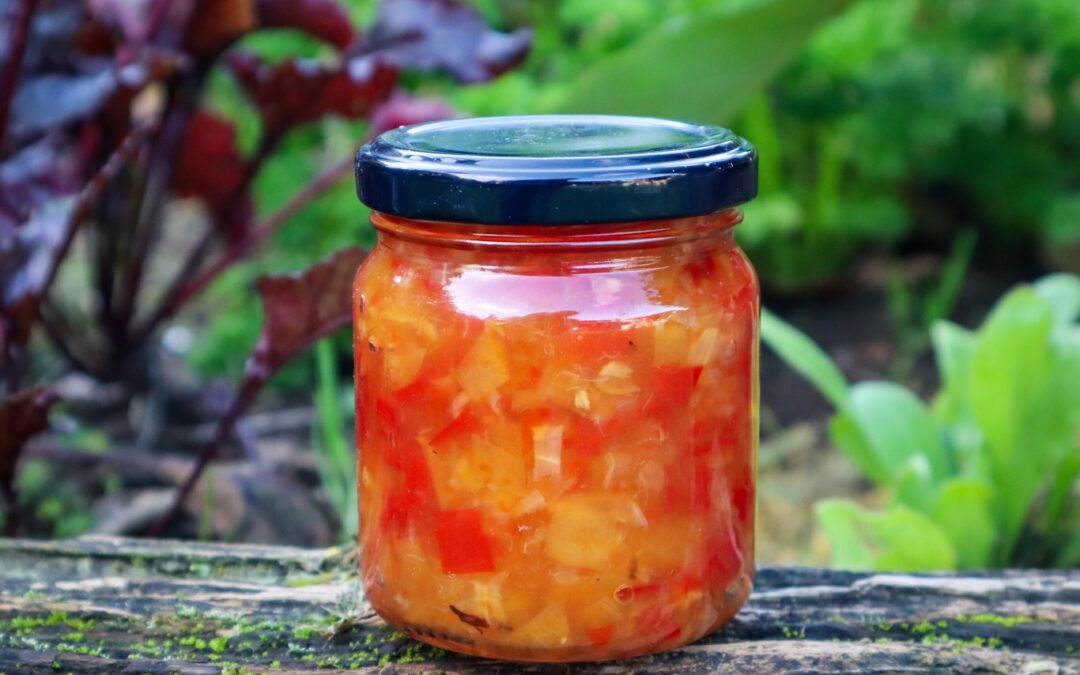
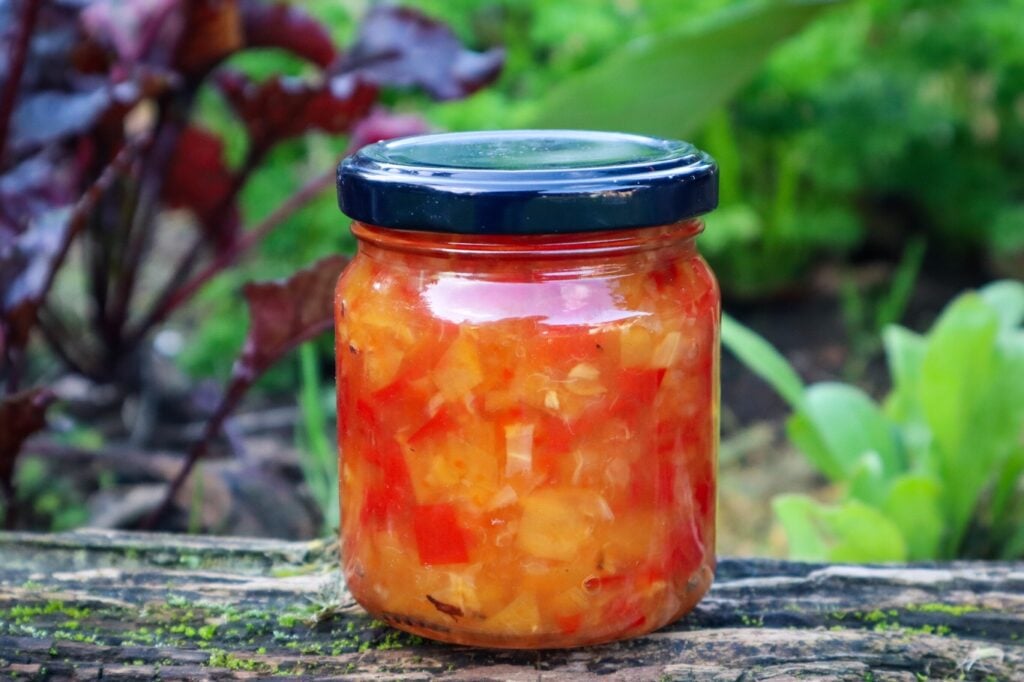
Loquat trees grow fruit in huge abundance and this Loquat and Chilli jam is a delicious preserve to go on a platter. Choose your level of heat by adding or removing seeds and using mild or spicey chilli varieties.
Loquat and Chilli Jam
Yield: 1 small Jar
Prep Time: 10 minutes
Cook Time: 30 minutes
Total Time: 40 minutes
Sweet and spicey Chilli jam that is great for serving on platters.
Ingredients
1 cup chopped Red Chillies (approx 6 large whole chilli)
1 cup chopped Loquats
1/2 cup of Vinegar
1/2 cup of Sugar
1/4 tsp Salt
1cm cube of fresh Ginger
Instructions
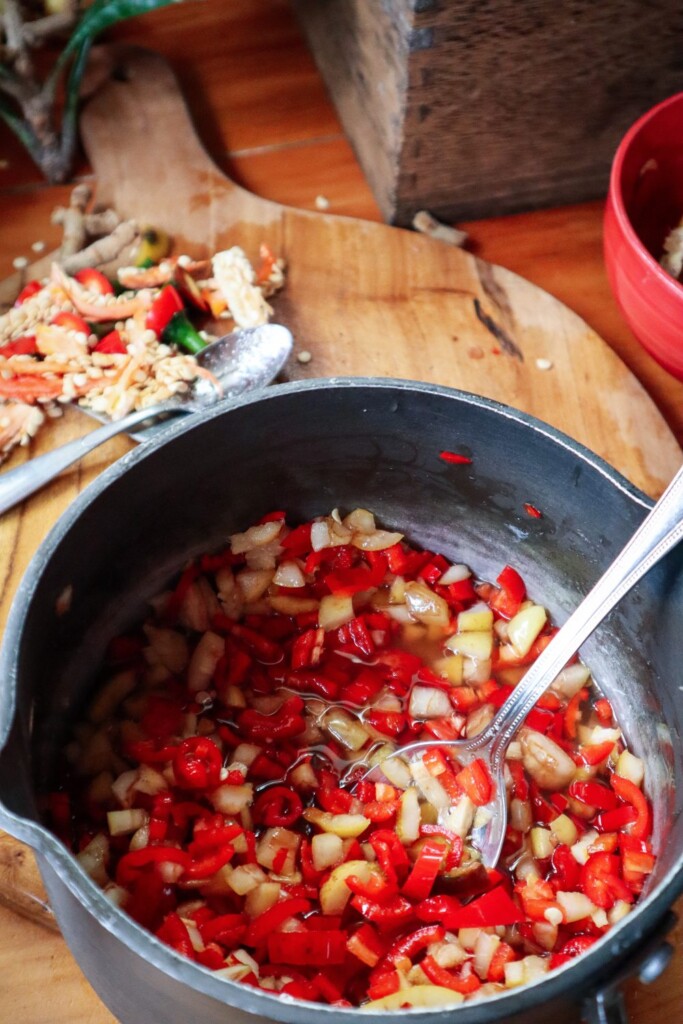
Wash the Loquats and remove the seeds including the seed membrane. Cut the hard end pieces off and dice them into small pieces.
Place the Loquats in a saucepan with the sugar and mix to combine allow to sit while you prepare the Chillies.
Chop the Chilli and remove the seeds. Keep them to the side as you can add them extra if you want to increase the heat later. Dice into small pieces or use a food processor.
Peel the ginger and finely dice.
Add the chillies, vinegar, salt and ginger to the saucepan and turn on a low heat. Cover and allow to lightly simmer for 20-30minutes. Keep an eye on it so that the mixture doesn't burn or get too thick. Add a 1/4 cup of water if it does start to clump together or stick to the bottom. Once the chilli and loquats have softened taste and add extra chilli seeds if you like.
Spoon the hot mixture into a sterilized small preserving jar. Invert for 5 minutes to help the seal. Allow to cool. Store in the refrigerator and use within 2 months.
Notes
If it is too sweet add a splash more vinegar or a pinch of salt.
This Chilli Jam is quite spicey so I did not add any seeds. If you want it to be more mild add more loquats and less Chilli.