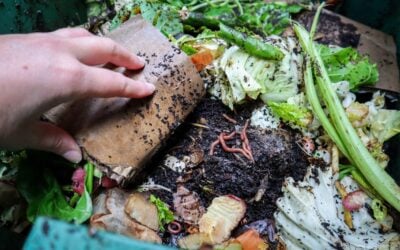
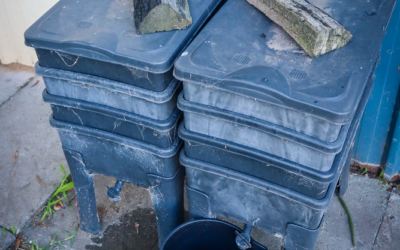
Worms are an amazing addition to a self-sufficient homestead as they turn scraps into nutrient-rich organic fertilizer to help you grow more food. Creating a sustainable lifestyle is all about taking small steps and changes to close the loop and nurture thriving ecosystems. You don’t have to do it all at once and I highly recommend starting small, mastering a manageable garden, and then start adding layers one by one. If you overwhelm yourself and don’t have habits and systems in place it won’t be sustainable long term and you can end up with unproductive chaos.
Click to watcha warm farm tour
Tips for setting up a backyard worm farm
1. Source a Worm Farm or Home for your Worms
There are many options for backyard worm systems from kit-set to DIY. You will also more than likely be able to pick up a second-hand worm farm so keep an eye out on your local listings and marketplace. Be mindful of your local climate and do a little research. In Perth, Australia, we have extremely hot summers that reach over 40 degrees. Cool shady locations are a must for worms. If you do live in a hot climate there are some great DIY options using old fridges and freezers to offer more protection. This is something I will be creating very soon!
2. Choose a Location
Choose a location for your worms that is out of direct sunlight and is well protected. On the flip side if you get snow or cold temperatures you would need to make sure you can bring your worm farm somewhere warmer.
The other important consideration to make is to keep it close and convenient. Worms like to be fed a little and often so you don’t want them down the back of your property where they may get forgotten about. Permaculture zone 1-2 would be great or have them located on a path that you frequent regularly. For example: on the way to the chicken coop or the washing line. Having things in convenient locations is the absolute key to being consistent and having systems in place that easily become habits means you don’t even have to think about it just becomes part of everyday life.
3. Source Composting Worms
There are many times of worms in your garden and they all play different roles so it’s important to get the right worms for your worm farm to make sure they are happy and thriving. Tiger worms are a popular type of worm for this system and can be purchased at many plant nurseries or hardware stores that sell worm farms. You may also be able to get set up with worms from friends that have their own form farms established.
4. What to Feed your worms
Feed your worms little and often! Be consistent.
What to feed: Coffee grinds, tea leaves, vegetable scraps, egg shells, banana peels, shredded paper or cardboard, dried leaves, greens, vacuum dust, and hair. The more variety the better as this will help keep a balanced pH. Add a little sprinkle of soil when you feed as the grit can help the worms break down the scraps. Keep the food scraps in smaller pieces if possible.
What to avoid feeding your Worms?
Avoid citrus, garlic, or the onion family as this will create an acidic environment that will harm the worms. No meat – as this can create bad bacteria and attract rats and other unwanted pests.
5. Water your Worms
Worms like a moist environment of around 70% moisture, so it’s important to give your worms a regular drink. Keep a damp sheet of cardboard, hessian sack, or newspaper on top of the food scraps to retain moisture and regulate temperatures. This also acts as a slow-releasing food source.
6. How to care for Worms when you go on Holiday
If you are going away for a few weeks your worms should be fine if you get them prepared. Flush water from the top tray, add plenty of food and some slow-release food such as pea straw, hay, and place some layers of wet newspaper or cardboard on top. This will help keep the worms nice and moist. If you are worried or going away for longer ask someone to stop by and feed your worms.
How to harvest the Worm Tea and Worm Castings?
The by-products of worms are both castings and worm tea. Castings are the worm poo which is your food scraps converted into soil. Add scoops of worm castings to your garden beds to feed and enrich the soil. Warm castings are quite concentrated so it’s best to mix this through with other soil first.
Once the worm bin starts to fill up with worm castings and the worms start trying to get out it may be time to change the bins over. Depending on the size of your worm farm and the population of worms this can be done 2-4 times a year. The active worm bin should be in the top layer so it is time to move this down and place an empty bin on top. Lift out as much of the uneaten food as possible and add it to the empty tub. Put in some fresh food and bedding and pour water over the top to moisten it all down. The worms will start to come up to the top layer to access the food and leave the bin of castings behind.
This may take a while for the worms to move up depending on how much uneaten food is left behind and how dense the population of worms is.
If you don’t have multiple layers in your worm farm another way to harvest the castings is to tip it all out onto some cardboard. The worms don’t like sunlight so they will move to the bottom of the pile and you can harvest off the top layer before putting the worms back in.
Worm tea can be watered down 10:1, especially on young seedlings but we also use a much more concentrated version of 50:50 on fruit trees. Just be careful when using it around young plants as they will be more sensitive, that’s when I would water it down more. Like with everything in the garden, when you are unsure or just starting out do sections and test it out first.
Use the worm tea within a month or two as you want to ensure the living organisms stay alive as that is the key to healthy soil!
If you have extra worm concentrate, bottle it up for gifts or this could be a great little side hustle for kids to sell.
Soil is the KEY to a healthy, successful, and thriving garden. If you want to grow healthy, nutrient-dense food, you need healthy nutrient nutrient-producing soil. Healthy soil is ALIVE with a web of beneficial interconnected relationships that support life. If you want a thriving, resilient garden, start with the soil. Healthy soil is the foundation of a productive and sustainable garden. Soil is a living, breathing ecosystem filled with microbes, fungi, organic matter, and nutrients that work together to feed your plants and protect them from disease and drought.
In this post, youโll learn how to build and maintain nutrient-rich, living soil that supports long-term garden health. Whether you’re starting from scratch or improving existing beds, these regenerative techniques will help you reduce inputs, boost biodiversity, and grow stronger, more nutrient-dense foodโall while supporting the planet.
Watch the live masterclass for more info
Why is Soil Health Important?
Healthy soil is going to feed and nourish your plants so they can grow strong and healthy. If the soil is not providing those nutrients, plants may become weak. Weak plants are more likely to be attacked by bugs and if they do get attacked by bugs, they are more likely to die. Whereas a healthy plant will be able to push on through and keep producing.ย
Healthy Plants – Healthy plants grow quicker and easier.
Bug Resistance – Healthy plants are less susceptible to bug infestations. Bugs tend to attack weaker plants and then the whole team piles on and you get diseases. So, having healthy strong plants will reduce the amount of loss and also, if your healthy plants do get some bugs, they will be strong enough to continue to produce.
Increased Harvests – Healthy soil is going to help you get better harvests. Your plants will be happy and healthy, and therefore, will produce a bigger and better harvest. Which of course, we want!
Less Disease – as per the bug-resistant – healthy strong plants will be less likely to get diseases. Diseases usually come at the end when the plant is already under stress. So, soil health can reduce the risk of that.
Promotes Soil Life – Getting the foundations right and building healthy soil, will be a snowball effect. Healthy soil will attract so many beneficial insects and microorganisms that will improve your soil further. Worms are fantastic for aerating the soil by tunneling. They also provide nutrients by eating plant matter to produce a by-product that can be easily absorbed by the plants. Healthy soil will have a hive of activity and produce nutrients to do all the work for you!
Better Nutrition – If we grow food in poor soil with no nutrients, how can we expect the food that plants produce to be extremely high in nutritional value? It’s just not going to happen. The better the soil health is, the more nutrients will be transferred into the food we eat.ย
Less Watering –ย Healthy soil will require less water. Fibre and plant matter in the soil will retain moisture. If the soil is dead and dry, water will run off it, or, just filter right through and your plants will need constant watering. So, healthy soil is also waterwise.
Abundance without Force – We want to create sustainable gardens that consistently produce food without having to force it. Poor soil will mean plants will grow slowly, get bugs and diseases and require more care and maintenance. We will constantly be having to feed them, water them, and fight off the bugs. It’s a tiring concept that is not sustainable long-term. This is what commercial soil looks like. It has been stripped and never replenished, so to get the crops they need to sell, they have to constantly feed with artificial food and spray bugs with pesticides. This will further kill of the living soil micro-organisms, so the next year, they will need to repeat and maybe even increase. Its a downward spiral.ย We on the other hand, will be caring for our soils and the plants will just grow themselves. Meaning, we can put in less and less work overtime, and receive more and more food. I know which way I would rather grow!ย
Where to Start to improve your Soil?
Ok, so we know why it is so important to build healthy soil, but where do we start?
Observe
Whether you have just moved into a new property or you are new to gardening, observing is key! Take a look around your gardens. Is there rubbish in the soil, are there buildings nearby, what would they be used for? Animals? Plants? What is growing in the area? This can be a good start to figuring out your soil health.
The other thing you will want to do is, have a little dig in the gardens. Dig down at least 30cm and observe what kind of soil you have. The top layer may be covered in mulch or grass, and then, the next inch or so will be the topsoil. This is the most fertile soil. Further down you will see more of your true soil. Is it sandy or is it clay-heavy? Observe, touch, and explore. Note this down as this will help you figure out what to do next.ย
Soil Testing
Professional tests for toxicity – If you find rubbish or anything that seems like it could have a toxic effect on your soil, it would be best to get it professionally tested. This is very important if you want to grow food directly in the soil.
Jar test for soil structure – There are also two easy tests you can do at home to find out the structure and pH of your soil. You can test your soil structure by placing a small soil sample (1/2 cup) in a jar of water. Give it a shake, and allow it to sit for a day. Layers will start to appear and you will be able to see the sand, clay, and silt levels.
If you have clay-heavy soil water will get clogged and not free drain. However, if you have really sandy soils, the water will disappear through the gaps and not stay long enough to be absorbed by the plants. You can amend your soil by adding other materials to help balance out and rehabilitate your soil structure. But first, you need to understand what you are working with.
pH test – The pH test will help you work out where your base soil is. pH is important because it affects the root activity and the absorption of nutrients from the soil. Most plants like to grow around pH neutral 6-7 so it is best to try and get the majority of your gardens to a neutral level. Some plants do prefer it a little more alkaline or acidic. Blueberries for example, like more acidic soil. It is a good idea to test your soil if you have never grown in it before or you have just purchased new soil. A pH test kit can be found at your local garden centres or Bunnings. To test your soil, just dig down 10-15cm for veggie gardens and if you’re testing soil for deeper root plants like fruit trees, take a sample from 25-30cm down. Then you place the indicator dye and Barium powder from the kit and match the indications to the colour chart provided.
Now that you have an understanding of what you’re working with, we want to create our baseline foundations. This is where we prep our gardens.
Remove rubbish and rubble.
Add compost – if you don’t do anything else, this is the most important takeaway. Compost is the best thing to add to your soil no matter where it is are at. Good compost supplies organic matter for soil building, fertilizer to feed plants, and most importantly, itโs packed with living soil mirco-organisms that kickstart biological activity. It adds fresh, healthy microbes that will start to digest the nutrients present in the soil and feed your plants. Compost is the key ingredient for building and maintaining healthy soil. If youโve just moved to a new garden and want productivity, then compost will rapidly make your soils fertile.
Cover – you want to protect all that good soil and hard work you have just done. We will dive in a little deeper next about why covering and mulching is so important and the different ways to do that
How to Build Soil for a Sustainable Garden?
Now that we have our foundations sorted, it is so important that we continue to build soil on a regular basis. Below are some tips to add to your gardening routines, to help build layers of good soil. Helping your gardens to thrive for many years to come.
Compost – start composting at home and turning your food scraps, household recycling and greenwaste into healthy soil to feed your gardens. It is important that we continue to keep adding nutrients to our soil as the plants use it to grow. I like to add compost at the change of each season and top up my garden beds. If you want to learn more about composting click here to watch.
Chop & Drop – this is one of my favourite methods because it’s so easy. I don’t use this method on all of my gardens as it is more suited to fruit trees or areas where you don’t have a lot of little plants. I do this in my food forest style back fence garden. Everything that grows in that area gets returned directly to the soil. So when i prune trees or pull weeds, or cut plants, I just chop them up and leave them in the garden as mulch. This covers the soil and will break down and release nutrients to feed the plants. Eventually, over time, the layers of good, healthy soil will get thicker and thicker. Which is what we want! This method can also be used for paddocks or areas you don’t use often. Growing specific plants in an area where you want to use this method can be a great idea. Plants that hold nutrients in their leaves such as comfrey are great to add to the garden for this exact purpose. Then just give them a haircut and allow them to re-enter the soil.
Mulch– ย It is so important that we cover the soil. Protecting the soil from drying out or from excess rain washing away nutrients. Because, if soil gets too hot or dry, the plants will start to die, and so will the good bugs and micro-organisms in the soil. Then, once that happens, the soil is no longer supporting life, and it becomes dirt that will not grow anything. Cover your soil with a thick layer of mulch and this will start to break down and feed the soil. Basically, turning your whole garden into a living compost system! Always try to mimic nature. In nature, leaves fall to create a cover for the soil and then breakdown to produce rich, healthy soil for the young seeds to grow.
Cover crops – Cover crops can be grown to protect the soil during a down season and then cut to mulch and feed the soil. Cover crops are planted specifically to build and hold soil and to smother weeds. They range from long-growing perennials to short-term green manures but the aim is the same: a solid cover of plants. Their leaves will protect the soil from hammering rains and eventually cover the surface with nutritious, topsoil. Weeds can actually be more beneficial for your garden than bare soil.ย Weeds protect the soil and support soil health just as any other cover crop would.
Plant for diversity – Different plants have different root structures and depths. They also use and excrete different nutrients. It is important to grow a wide variety of plants together to access different layers and levels within the soil. There is so much going on under the soil with the relationships between the roots and the microorganisms. The more diversity we have in plants, the more life we are encouraging beneath the surface. Diversity also helps reduce severe deficiencies, as all the plants aren’t competing for the exact same nutrients.ย
Minimal disruptions – it is important to try to keep the digging of the soil to a minimum. Unless you need to amend drainage or plant something, try not to disrupt the soil. Add layers on top of layers and allow the soil microbiology to thrive.ย
Go organic – this one is quite self-explanatory but, we want to reduce any harmful sprays and unnecessary fertilizers. These can kill off our delicate microbes, which we are of course trying to grow and promote.ย
Natural fertilizers– It is beneficial to use natural fertilizers weak and often. Things like banana skin fertilizers are great for adding potassium to the soil for your fruiting plants. Weed tea and other teas made from breaking down plants in water, can also be a great way to recycle nutrients back into the soil.
Can I use any type of animal manure?
Herbivore animal manure is a great source of nutrients for growing food. This includes animals such as sheep, horses, cows, goats, rabbits, and chickens. It is best to choose composted animal manure rather than fresh off the paddock. This is because fresh grass seeds will still be viable and your garden may become overgrown with all sorts of weeds and grasses. This will end up causing you more trouble than it was worth.
Composting can help break down the seeds and leave you with weed-free nutrient-rich soil. The other reason it is better to choose composted manure rather than raw is that it can be very harsh on plant root systems. If you do not have the option for old or composted manure, then it is best to bury it on a bottom layer of the garden so the new young roots won’t dive straight into it. By being deeper under the soil the weed seeds will not get the light they need to grow so this can also help with the seed issues.ย
Composting
Composting is not only great for the fertility of your soil and the secret to AMAZING vegetables, but it also stops waste from going to landfills. There are a whole bunch of ways to do this, depending on your living situation. You can make your own compost bin out of recycled wood, find a second-hand tumbler online, or purchase one. You can also simply dig a hole in the garden and bury it (be careful of attracting pests). There are also some new ways for people with no land to connect with others who do and give them their compost scraps. Community gardens, local Facebook groups, or now in Australia, there is even an app! Sharewaste
Care for your soil and your plants will grow with more ease, abundance, and it will feel less forced. Working with nature and not against it.
Links included in this description might be affiliate links. If you purchase a product or service with the links that I provide, I may receive a small commission. There is no additional charge to you! Thank you for supporting my blog so that I can continue to provide you with free content.