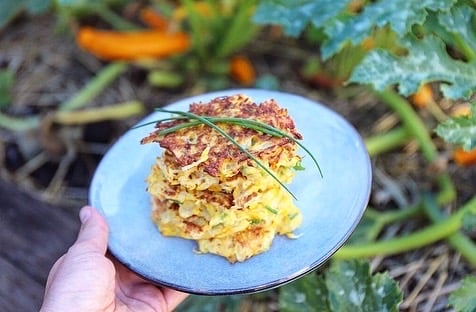
Yay, its summertime and Zucchini Fritters served with homemade chutney and a fresh garden salad is the perfect summer meal. My Zucchini harvests are in full swing and I will be making the most of the abundance by trialling out as many new Zucchini recipes as I can. When I first started growing Zucchini the only way I knew how to cook with them was to throw them in a stirfry, but I have since learnt there are so many easy and delicious ways to use them. I look forward to sharing them all with you! These were quick and easy to make and taste so good! That is pretty much the main criteria for anything I cook!
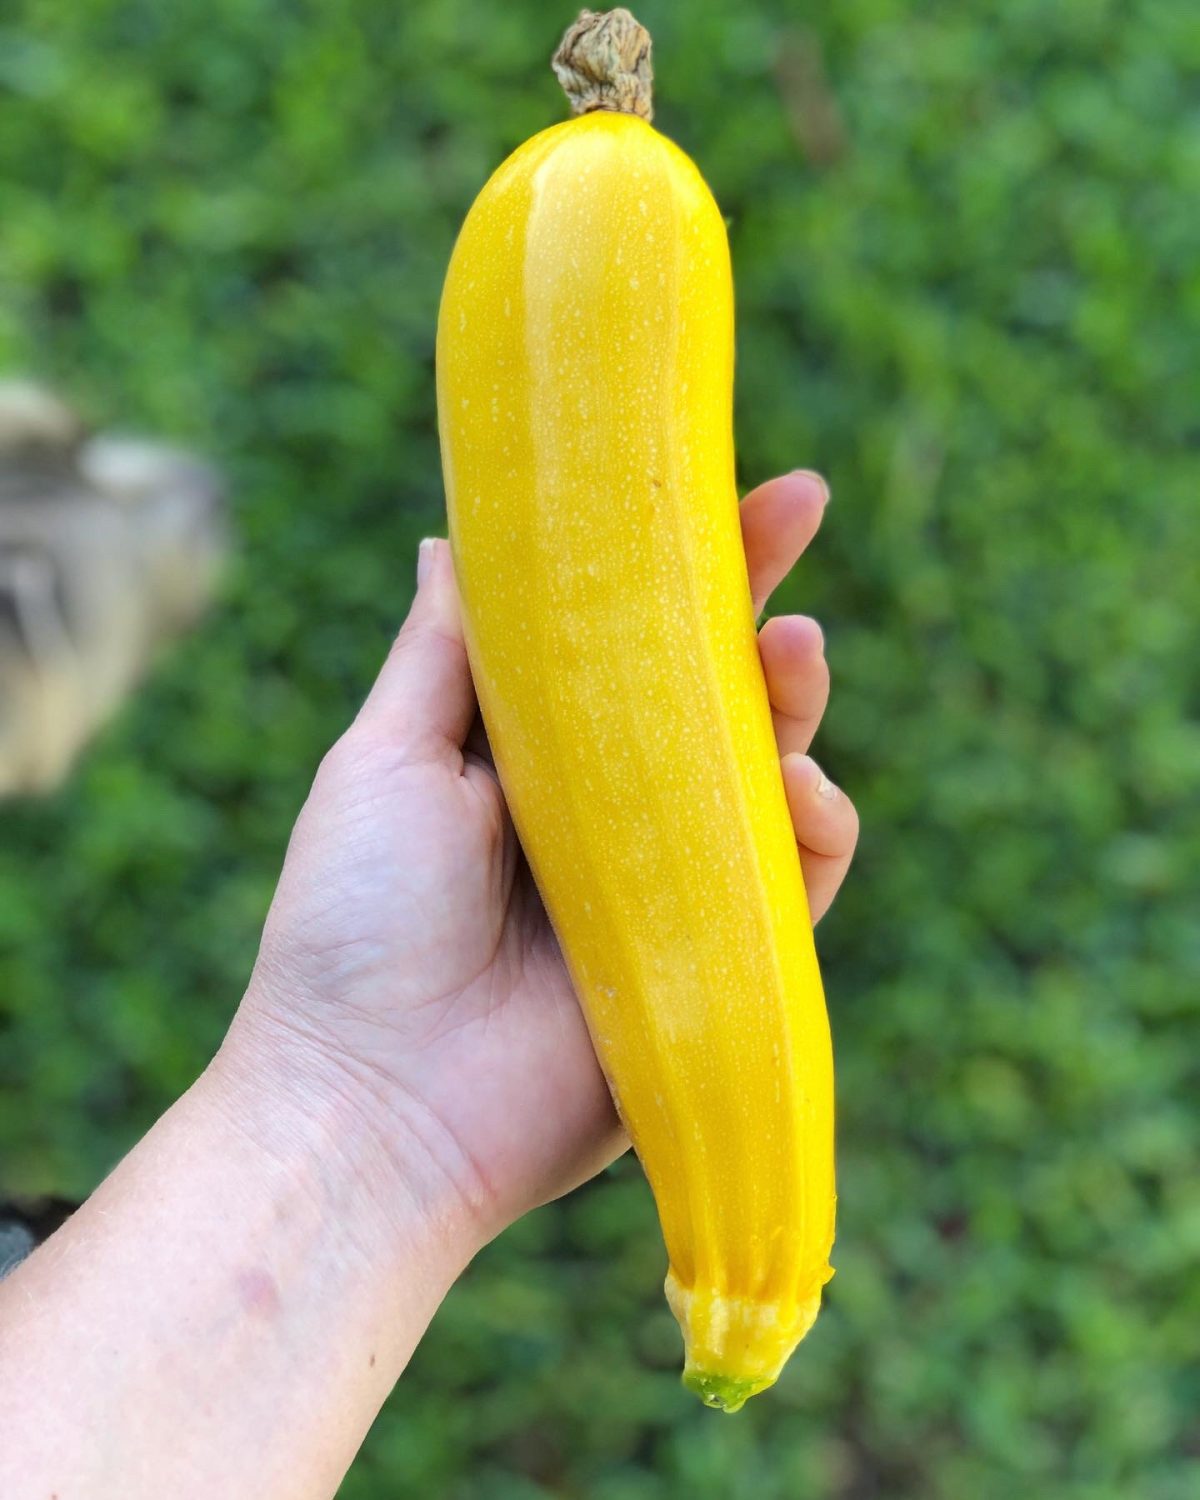
For these fritters, I used Golden Zucchini as that is what I had just picked but you can use any variety. I have found the Golden Zucchini much like the regular black variety but you do have to harvest them earlier as the seeds inside start to develop quickly.
Ingredients
3 small-medium zucchini
1/2 cup flour
1 Egg (sometimes I leave this out)
1/4 finely sliced red onion (could use shallots or spring onion)
1/2 cup chopped parsley and chives
Salt and Pepper
1 small fresh chilli finely sliced
Note: you could add 1/2 cup of cheese to really up the flavour such as parmesan, cheddar or fetta.
How to Make them:
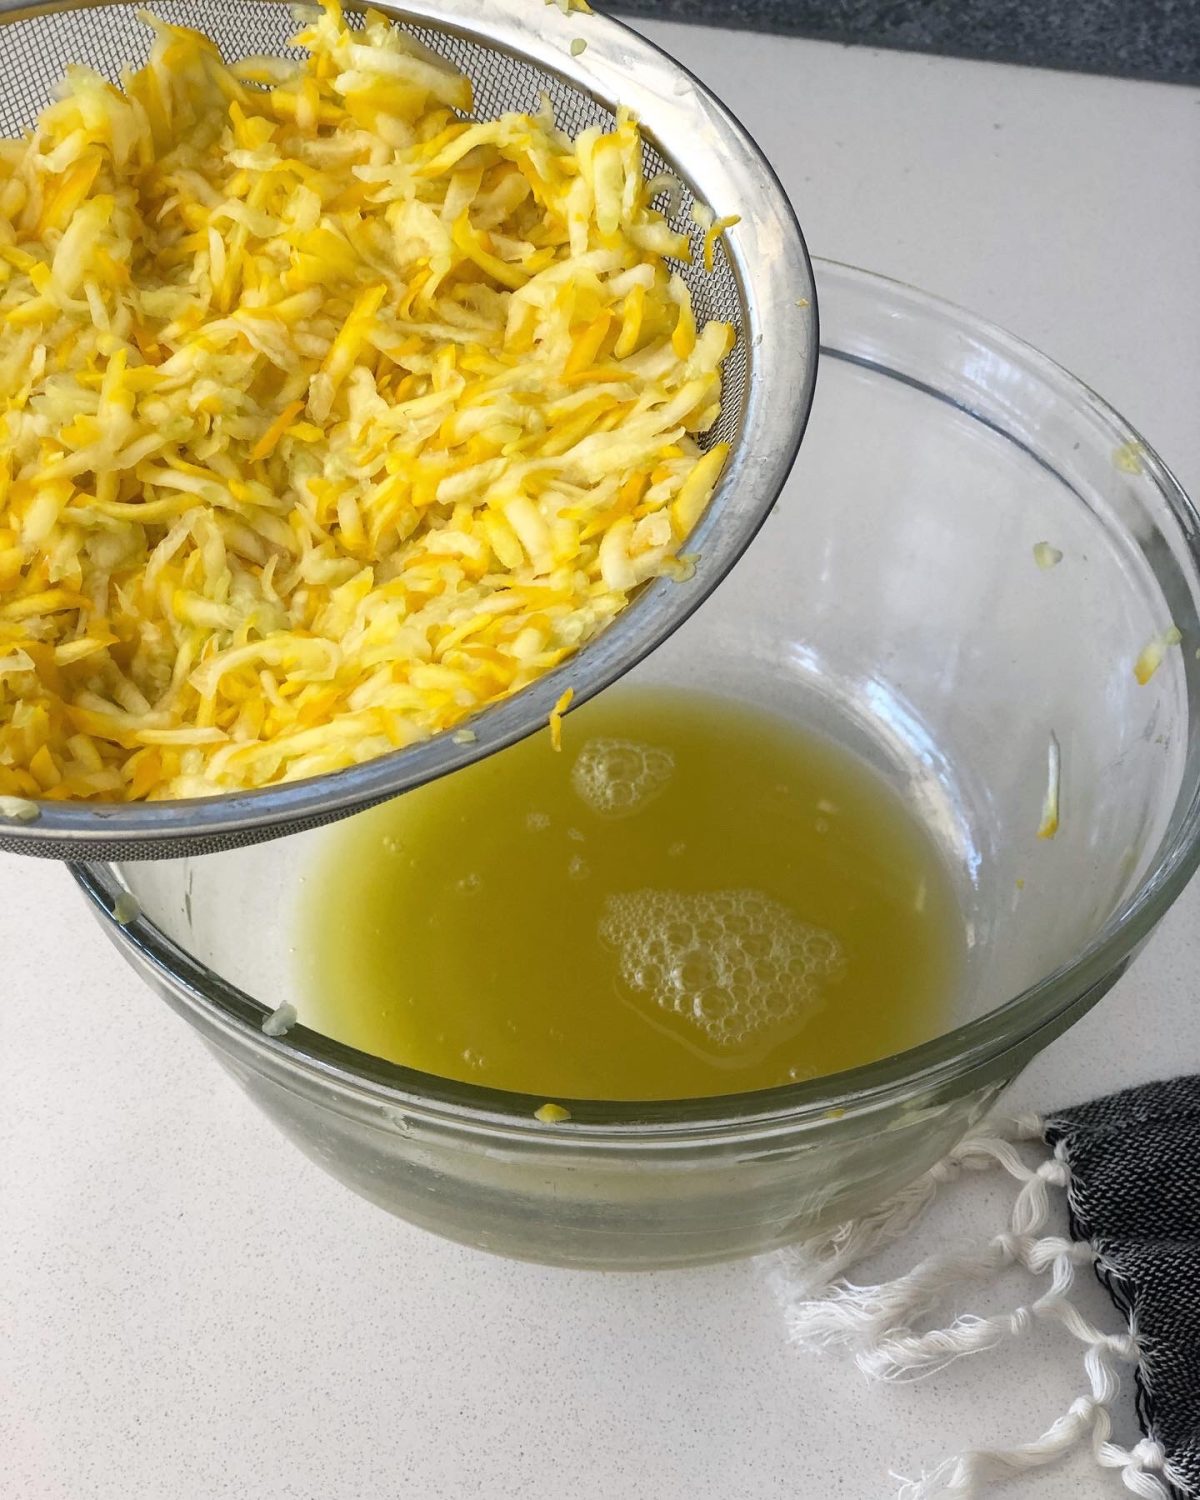
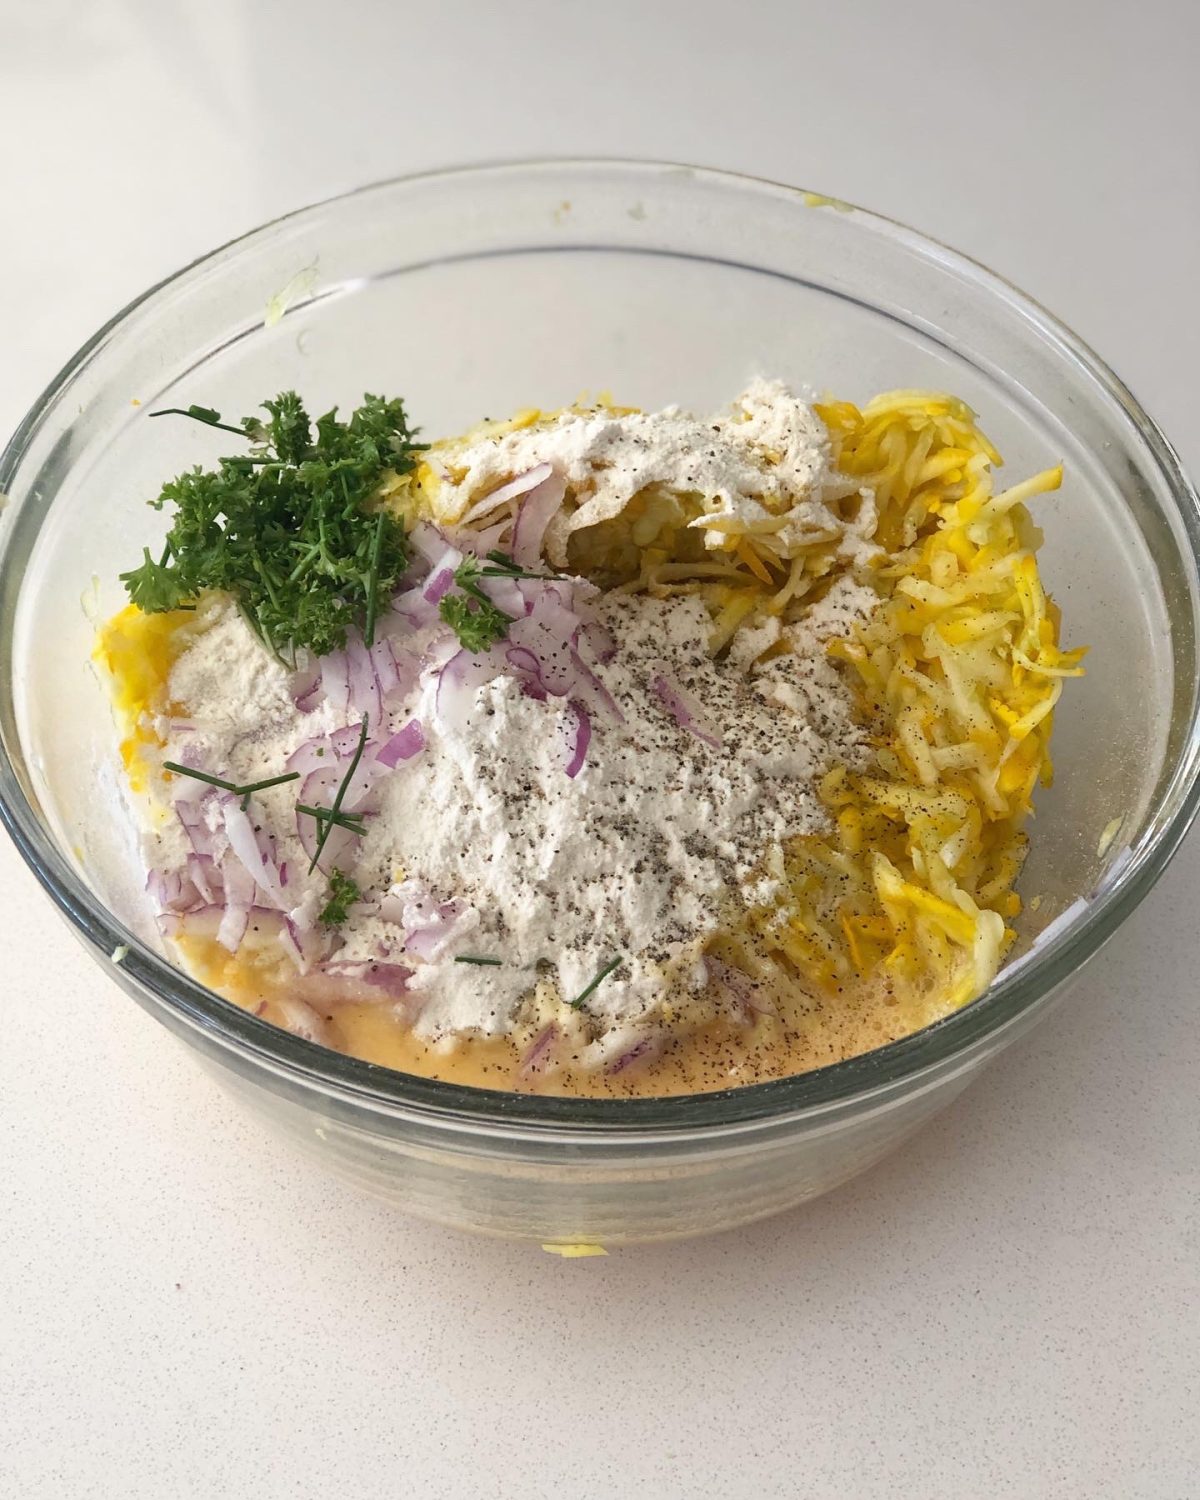
Rinse your zucchini and grate them into a bowl. Grind with a good amount of rock salt (roughly 5-6 grinds) to allow the moisture to extract. Stir through, cover and set aside for 10minutes.
Finely chop your herbs, onion and chilli.
After 10 minutes or so place your grated zucchini in a sieve and squeeze out all the extra moisture.
Then in a clean bowl mix all your ingredients together and season well with salt and pepper.
Heat a pan on medium-high heat with oil and spoon your mixture in and flatten it down a bit. Cook 3-4 minutes on each side or until crispy brown.
Makes 10-12 Zucchini Fritters
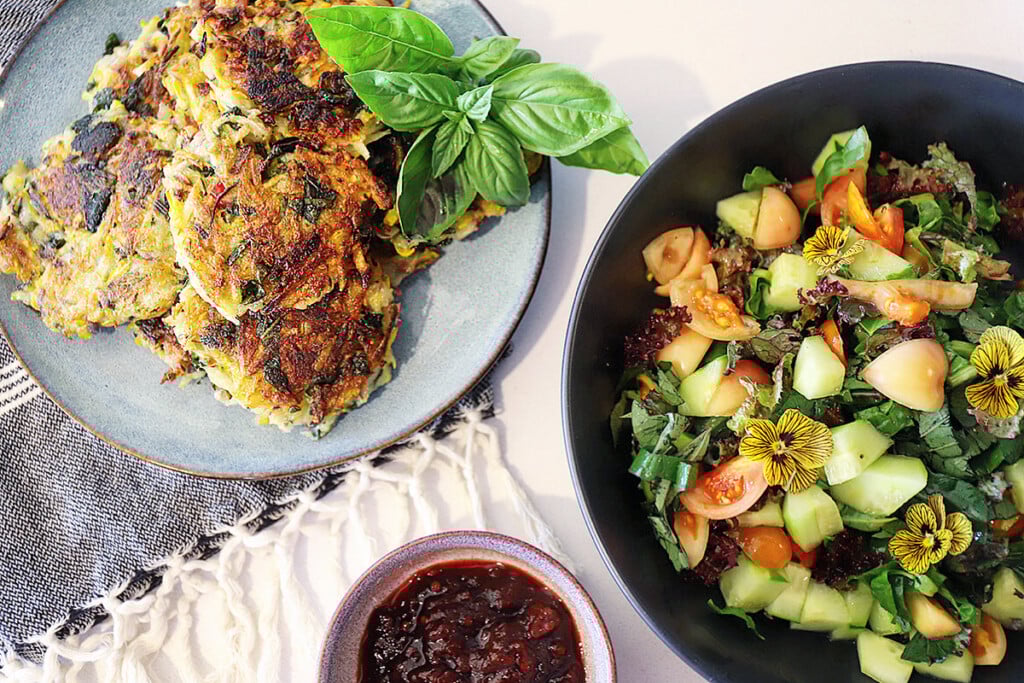
Serving suggestions:
You could serve your Zucchini Fritters with a dollop of Greek yoghurt or sour cream, your favourite chutney and a fresh green garden salad.
What are your favourite ways to use Zucchini?
Holly 🌱
MY GARDENING ESSENTIALS // Fertiliser spray gun: https://bit.ly/366nL1t Retractable Hose: https://bit.ly/2TSC0Bo More gardening tools: https://bit.ly/32IQmbD
DISCLAIMER: Links included in this description might be affiliate links. If you purchase a product or service with the links that I provide I may receive a small commission. There is no additional charge to you! Thank you for supporting my page so I can continue to provide you with free content!
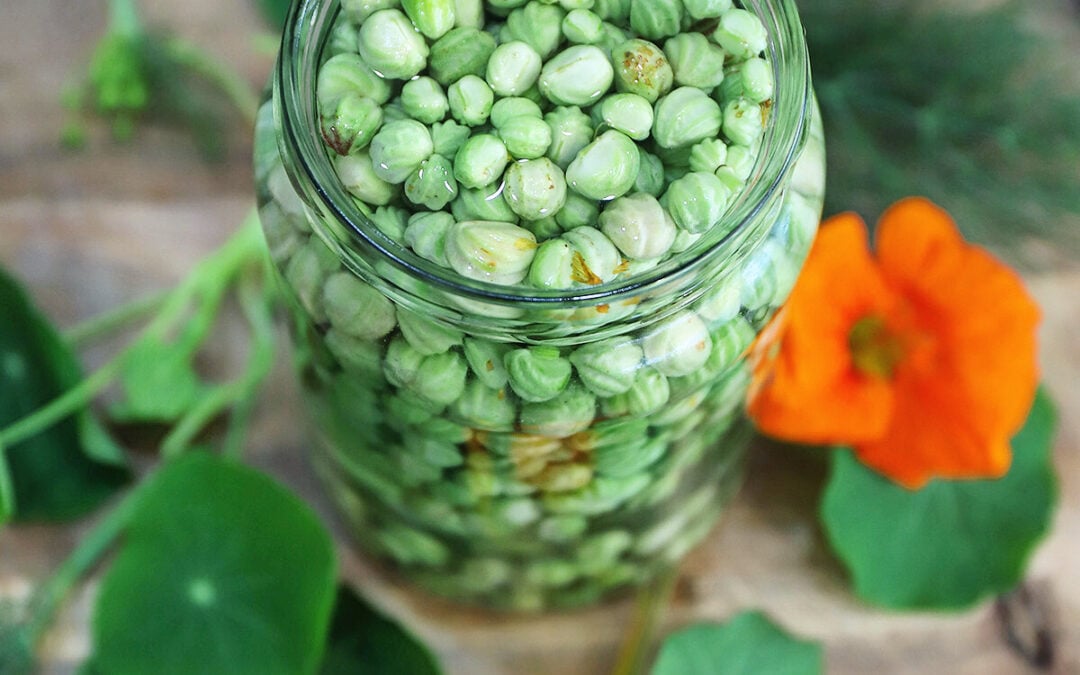
If you have been following me for a bit you will know I have been on a Nasturtium recipe craze! One of the things I am trying to do is learn as many recipes as I can for things that I grow in my garden. It turns out Nasturtiums have a lot more uses than just a pretty edible flower!! My plants were getting a bit wild and overtaking the garden so I picked all the flowers and collected a whole bunch of seed pods to make Nasturtium Capers. This is a two-part process where I soaked the seed pods for 5 days before pickling.
INGREDIENTS
Jar of Nasturtium Seed pods
White Vinegar
Sugar
Mustard seeds
Dill leaves
METHOD
Part 1: Soaking – Wash the seed pods well with water and place in a jar filled with water. Leave to soak in the fridge for 2 days. Then rinse again and refill the jar with water and add a teaspoon of salt to make a brine. Leave to soak for another day or so. This process should help remove some of the bitterness from the seeds. After a few days in the brine rinse and leave in plain water while you prepare the vinegar.
Part 2: Pickling liquid – In a saucepan on a low heat add a jar (whatever one you are going to be pickling in) of white vinegar and then about 1/4 of the jar of water. Add 1 teaspoon of salt and I like my pickles sweet so I added 1 Tablespoon of sugar. Stir until the sugar and salt have dissolved. Taste and add more sugar or salt depending on your liking. Set aside to cool.
Wash your jar well with hot water to sterilise and add your seed pods and pick out any that don’t look the best or any leaves etc. I added a teaspoon of mustard seeds, small dill leaf and a sprinkle of chilli flakes. You could mix this up with whatever flavours you like.
Once the pickling liquid has cooled down add it to your jar and place in the fridge. I noticed from my research that they go brown once pickled so tried one batch with Nasturtium flowers added to it (on top pushed down into the liquid) and this turned out great with an orange pickling liquid. I removed the flowers at the end when I opened them to eat. I waited two weeks to try mine because I got busy but I’m sure after a few days to a week you could try them.
As these Nasturtium Capers are just a refrigerated pickle I would eat them within 3 months.
How to eat Nasturtium Capers?
These are a delicious accompaniment to most meals! Try served on an omelette, pizza, salad or with a fish dish.
Lettuce wraps with Avocado, Haloumi, Basil and Nasturtium Capers.
MY GARDENING ESSENTIALS // Fertiliser spray gun: https://bit.ly/366nL1t Retractable Hose: https://bit.ly/2TSC0Bo More gardening tools: https://bit.ly/32IQmbD
DISCLAIMER: Links included in this description might be affiliate links. If you purchase a product or service with the links that I provide I may receive a small commission. There is no additional charge to you! Thank you for supporting my page so I can continue to provide you with free content!
I am loving growing my own fresh Beetroots but I had no idea how to use the leaves other than adding a little into a stirfry or composting. I am passionate about creating ways to get the most out of everything that I grow! After all, a lot of time, patience and effort went into growing it! These Dolmades completely blew my mind – absolutely delicious! I made this with my purple unicorn rice but you can use plain rice. These can also be made using Rainbow Chard leaves.
Also if you only have liquid vegetable stock just replace with the water in step 1.
Ingredients
1 large freshly picked Beetroot
3/4 cup Long-grain Rice
2-3 Red Cabbage leaves
4 teaspoons Vegetable Stock Powder
1/4 Red Onion
1 small Lemon
1/2 cup Parsley
1/2 packet Haloumi
1/4 dried Cranberries
Ricotta (or greek yoghurt), lemon juice and chopped parsley to serve.
Method
Add 1 1/2 cups of water and the cabbage leaves to a saucepan with a lid and bring to the boil. Simmer for about 5-10 minutes and gently stir and bruise the cabbage with a spoon a few times to release the colour.
While your purple water is boiling, finely chop your red onion and fry in a small saucepan. Set aside to cool.
Strain the cabbage water into a bowl and discard the leaves (compost). Measure the purple water back into your saucepan and make sure you have 1 cup. Add a little more if it has evaporated.
Quickly rinse your rice under water to remove some of the starch and then add to your purple water along with 2 teaspoons of vegetable stock powder and lighter simmer for 10minutes. remove from the heat and set aside to cool. The rice should be nearly cooked and most of the liquid should be absorbed.
Rinse your beetroot leaves and cut off the stems ( i will work on a recipe for these next but for now future stirfry).
Get a dish (casserole size) and fill with cold water and ice.
In a large saucepan add water and bring to the boil. Place your beet leaves into the boiling water and submerge for about 1 minute. The colour will change to a vibrant green.
Carefully remove the leaves and place directly into the ice bath so that they stop cooking and retain their vibrant colour.
Once they have cooled down after a minute or so remove the leaves and lay them flat on to a tea towel to dry off a bit. You may need to use a couple of tea towels depending on how many leaves you to have and how big they are.
Into a bowl add the zest of one lemon, chopped parsley, cooked red onion, haloumi chopped into small pieces, cranberries and purple rice. Mix to combine and then squeeze over 1/4 wedge of lemon juice.
Lay your beet leaves shiny side down and add a small amount of mixture to the base near the stem. Fold the sides in and then roll-up.
Once all your mixture is used, place your rolled Dolmades with the end piece on the bottom into a large saucepan.
Drizzle with oil and mix the last two teaspoons of vegetable stock with one cup of water and add to the saucepan. Cover and simmer for 10-15mins.
Serve with greek yoghurt, tzatziki or I used Ricotta mixed with lemon juice and chopped parsley.
If you have any ideas for using Beetroot Leaves leave me a comment below! Tag me on Instagram if you make these delicious Dolmades, I would love to see your versions.
Holly 🌱
MY GARDENING ESSENTIALS // Fertiliser spray gun: https://bit.ly/366nL1t Retractable Hose: https://bit.ly/2TSC0Bo More gardening tools: https://bit.ly/32IQmbD
DISCLAIMER: Links included in this description might be affiliate links. If you purchase a product or service with the links that I provide I may receive a small commission. There is no additional charge to you! Thank you for supporting my page so I can continue to provide you with free content!
What to do with lemons?! Lemon and citrus season is in full swing and if you are lucky enough, you may be struggling to use up all your produce before it goes to waste. A great problem to have! Below are a few of my favourite ways to use up lemons. I love how the lemon season coincides with the flu season and lemons are a fantastic natural remedy, packed full of vitamin C for colds and flu! Nature really is amazing. If you have a ton of lemons, below are some great ways to preserve your lemons so you can use them throughout the year.
Fresh off the Tree
One of the best ways to extend your harvest is to leave them on the tree for as long as you can. As soon as you pick them they will start to ripen and deteriorate much quicker than if they remain on the tree. I love fresh lemons especially walking out to my garden and picking a lemon and cutting it up for a fresh cup of hot lemon water or in summer, iced lemon water! This is also the best way to get the most vitamin C as once you cook or dehydrate lemons, the Vitamin C levels reduce significantly. But there is only so much fresh lemon I can eat…
Gifting or Swapping
Gifting or trading your excess lemons is a great way to make friends with your neighbours! Your friends, family and work colleagues may also love some fresh lemons if they don’t have a tree at home. This can open up some great conversations and people may even start bringing and gifting their own excess produce.
Dehydrated Lemons
It’s winter and I love a hot water lemon drink in the morning to warm up! The only thing is that often I put the remaining half a lemon in the fridge and it will end up at the back of the fridge until it gets thrown out 🙁 So if I want lemon for my tea I pick a small one and put it somewhere front and centre so I can see it! This is why I love using dehydrated lemons because you can use a couple of slices as needed. Dehydrated lemons can also be used in baking, cake decorating, or finely chopped to add some lemony flavour to your cooking. They rehydrate once they get wet so they work quite similarly to fresh lemon but have a more caramelised flavour.
Lemon Zest Sprinkles
Zest the skins and dehydrate. Place in a jar and use in cooking and baking to as some lemony flavour!
Lemon Juice
You can then juice the lemons and freeze into ice cubes. Once the cubes are frozen, place into a container or freezer bag and label. These can be used in cold drinks, cocktails, cooking, baking and added to boiling water for a delicious hot lemon tea at just the right temperature! (can you tell I like lemon tea).
Citrus Cleaner
Ok, so you have now used the zest and the juice of the lemons, what do you do with the remaining flesh?! Place all the lemon scraps in a jar and fill with White Vinegar. Place in a dark spot in your pantry and leave for two weeks. You can then strain the liquid off and add the same amount of distilled water and you have a natural all-purpose cleaner. This is a great way to get the most out of your lemons with as little waste as possible.
You can also simply throw a few slices into your jug/kettle and add a few dashes of white vinegar and water. Simply boil the jug and then let it sit for 30mins. Rinse and clean. This will help remove the limescale and calcium build-ups on your jug.
Baking
Lemon slice, lemon meringue pie, lemon cheesecake. I’m not one for baking recipes but I have been doing some trial and error lately!
Roasted Lemons
In winter I like to make a roast vegetable salad because it’s a little bit more of a winter warmer but not too heavy. I chop up my root vegetables (carrots, sweet potato, beetroot, potato etc) along with some wedges of lemon and oven roast with oil and herbs. This is a great way to use up those half lemons in the fridge or some lemons that are getting too ripe. Once the vegetables are roasted I serve in a bowl of chopped up greens and top with feta cheese, pumpkin seeds, and aioli dressing. The roasted lemon wedges can then be squeezed on top and they add beautiful mellow caramelised lemon flavour.
Lemon Butter
Lemon butter or curd is heaven in a jar! This is a super luxurious and delicious way to use lemons and can also make great gifts! Enjoy on toast, pancakes, meringues or add to the centre of lemon muffins for a delicious surprise.
Other ideas
There are still so many different ways to use lemons that I haven’t tried yet. Here are a few below:
Marmalade
Lemonade!!
Preserved Lemons
Lemon cake
Limoncello
Let me know what you use lemons for in the comments below!
MY GARDENING ESSENTIALS // Fertiliser spray gun: https://bit.ly/366nL1t Retractable Hose: https://bit.ly/2TSC0Bo More gardening tools: https://bit.ly/32IQmbD
DISCLAIMER: Links included in this description might be affiliate links. If you purchase a product or service with the links that I provide I may receive a small commission. There is no additional charge to you! Thank you for supporting my page so I can continue to provide you with free content!
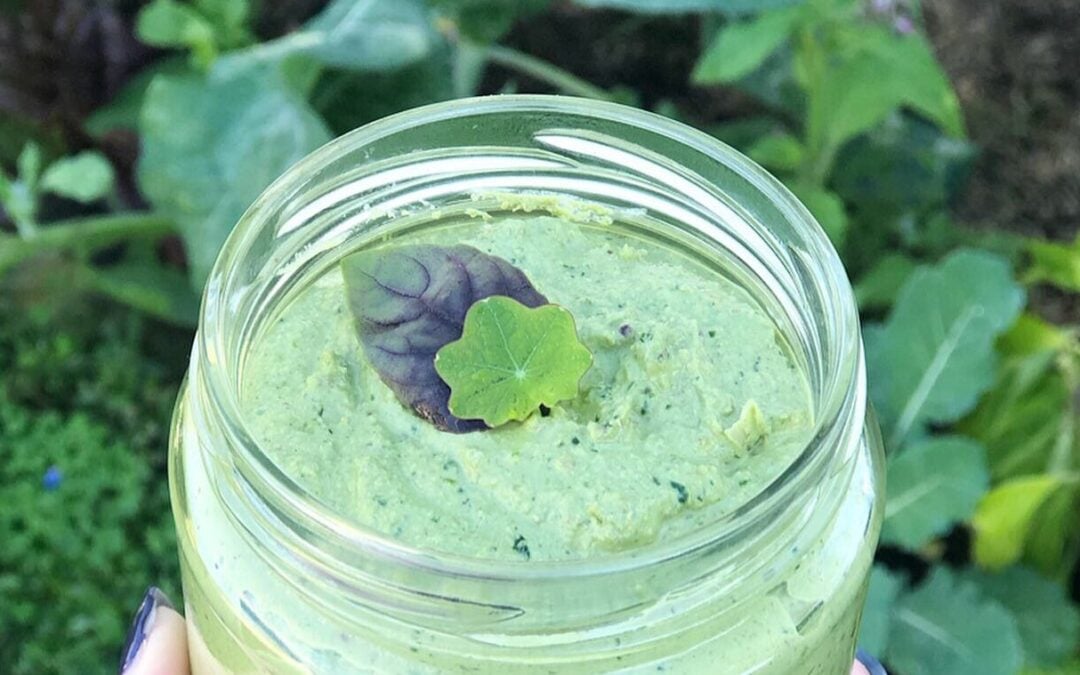
I had homemade Garden Pesto on my (Giant) list of things to try and when I finally did… omg I will never buy pesto again! Quick, easy and so delicious!! Also, you can really just add whatever garden greens and herbs you have growing in your garden. I even use the ones with holes from bugs. Just wash and check there are no bugs before using.
Garden Pesto Recipe
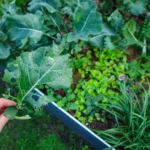
2 cups of greens and herbs. I used Nasturtiums (flowers and leaves), young sweet potato leaves, basil, cauliflower leaves, kale, bokchoy, tatsoi, rainbow chard, and parsley.
1 Small garlic clove
1 cup walnuts
1/4 cup Olive Oil
Splash of water
1TBS Lemon juice
Pinch of salt to season
Wash and quickly blanch the greens in boiling water for 30secs then add into iced water. This will help them keep their vibrant green colour.
Strain off and then blend all ingredients except the nuts until combined.
Then add in the nuts and blitz until mixed or chunky if you prefer. I just have NutriBullet and it’s OK, I just need to stop and mix quite a few times. A mixer would be better. Then place it in a recycled glass jar. I kept mine in the fridge and used it that week. You could freeze smaller portions in IceCube trays for later.
Mix your Garden Pesto with some pasta for a deliciously easy, low-waste meal!
Holly 🌱
MY GARDENING ESSENTIALS // Fertiliser spray gun: https://bit.ly/366nL1t Retractable Hose: https://bit.ly/2TSC0Bo More gardening tools: https://bit.ly/32IQmbD
DISCLAIMER: Links included in this description might be affiliate links. If you purchase a product or service with the links that I provide I may receive a small commission. There is no additional charge to you! Thank you for supporting my page so I can continue to provide you with free content!
Nasturtium is in absolute abundance in my garden right now and I want to learn how to make the most of this fruitful time. I think learning how to use a plant is just as important as learning how to grow it. This month I have been exploring lots of different ways to use Nasturtium. Nasturtium mini quiches are so quick, easy, and taste delicious. Get the most out of your garden by growing things that have a multitude of uses to really help you maximise your space.
Nasturtium Mini Quiche
12 Medium – Large Nasturtium Leaves
Quiche Mix
5 eggs
1/4 cup milk or cream (i used coconut cream)
1/2 cup water
Salt and Pepper to season
Whisk Quiche mix in a bowl and set aside.
Fillings
Red onion
Feta
Spring onion
Marinated olives
Red capsicum
Parsley
Broccoli
Rainbow Chard
Grated Cheese
Finely chop your filling vegetables. I overshot how many veggies I needed. My muffin trays are on the smaller side and you don’t need much to fill them. So just chop a little bit and you can always chop more if needed. You could add any vegetables you have available these are just what I had.
Assembly
Preheat Oven to 170-180 degrees celsius.
Grease a muffin tray well with oil.
Place your Nasturtium leaves top side down.
Add your filling (except grated cheese), just a couple of pieces of each as it will soon fill up.
Using a measuring cup or jug pour your Quiche mix in and try not to fill over the top of the leaves.
Sprinkle with grated cheese.
Bake for 30mins or until the filling has been set.
Remove and allow to cool for 10mins.
Carefully remove from trays using a spoon. You may need to run a knife around the top of the cheese has stuck to the sides.
Please note my recipes are more of a guide.. ( I am not a technically accurate baker, I just wing it).
If you have plenty of Nasturtiums check out my other recipes.
You can share your version on Instagram using #sustainablehollyskitchen or tag me @sustainable_holly so I can see your beautiful creations!!
Holly 🌱
MY GARDENING ESSENTIALS // Fertiliser spray gun: https://bit.ly/366nL1t Retractable Hose: https://bit.ly/2TSC0Bo More gardening tools: https://bit.ly/32IQmbD
DISCLAIMER: Links included in this description might be affiliate links. If you purchase a product or service with the links that I provide I may receive a small commission. There is no additional charge to you! Thank you for supporting my page so I can continue to provide you with free content!