Quick-pickled asparagus is one of my favourite ways to preserve the fresh, crisp flavour of a spring harvest. If you’re lucky enough to have an abundance of asparagus—either from your own garden or a market haul—this easy refrigerator pickle is a simple, satisfying way to make the most of it. These pickles are crunchy, tangy, and packed with flavour, making them perfect for snacking, adding to grazing boards, or tossing into salads and wraps.
Refrigerator Pickles are Great for Beginners
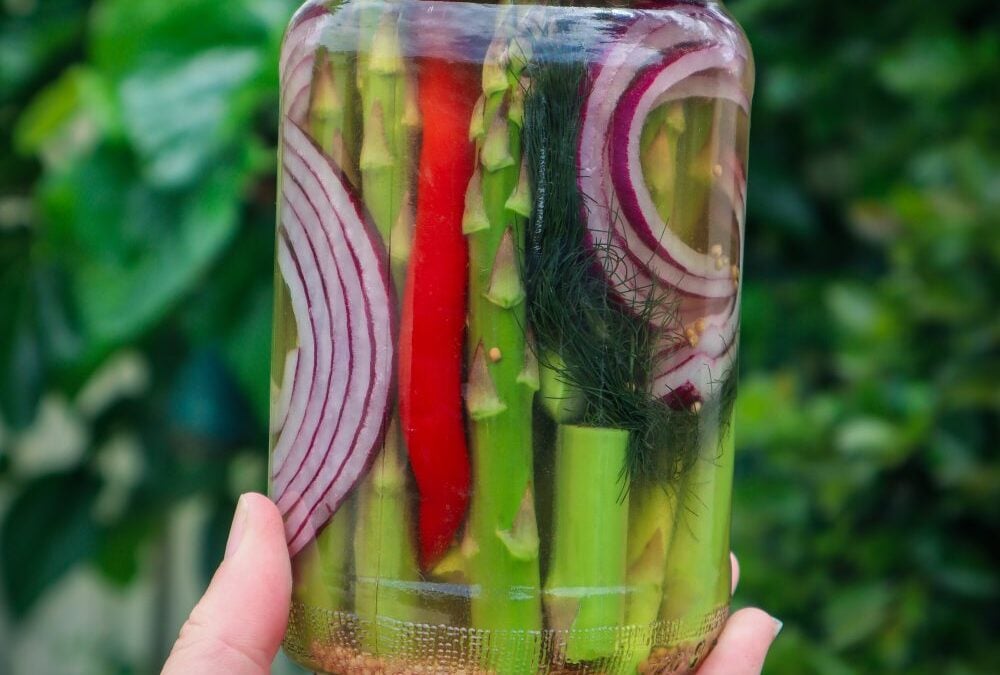
Refrigerator pickles are one of the easiest ways to experiment with preserving at home—no canning or complicated steps needed. This recipe uses a basic hot brine made with apple cider vinegar, water, a little sugar or honey, and salt. Mustard seeds add a subtle zing, while red onion (or shallot), dill, and optional chilli give the spears depth and a burst of visual appeal.
Preparing the asparagus is simple: just snap the ends at their natural breaking point and trim them to fit your jar. You can even add the leftover ends into the jar—they soak up the flavour just as well and help minimise waste.
Once packed into a sterilised jar and covered with the hot brine, the pickled asparagus just needs time to chill in the fridge. After 24 hours, the flavours will develop beautifully, and they’ll be ready to enjoy. These will keep for up to a month in the fridge, though they rarely last that long in my house!
Easy Refrigerator Pickled Asparagus Spears
Prep Time: 10 minutes
Additional Time: 1 day
Total Time: 1 day10 minutes
Quick and easy way to extend your Asparagus harvest. Add other in-season veggies or herbs to the mix. Enjoy as a snack or added to wraps and sandwiches.
Ingredients
1 cup water
1 cup ACV
1 bunch asparagus
2 TBSP sugar (or honey)
1/2 TSP salt
2 tsp mustard seeds
2 sprigs dill or fennel frond
2 red chilli (optional for spice)
1/4 red onion sliced or 1 shallot
Instructions
Clean and sterilize a Jar (approx 700gram).
Rinse Asparagus and hold the bottom to snap the spear at the freshest part. Cut fresh spears to fit in the height of your jar.
Stack spears the jar. The excess cuts can also be added. Push dill, onion and chilli in the jar and add mustard seeds.
In a saucepan add water, vinegar, sugar (or honey), and salt. Bring to a simmer or until sugar is dissolved.
Add the hot liquid to the jar. The liquid should completely cover the spears. Secure the lid and flip it upside down to help seal. Leave on the bench until cool (room temperature). Place in the refrigerator for at least 24/hours before eating. Eat within 1 month.
Final Tip
Try swapping out the dill for fennel fronds or tarragon for a twist, or add garlic cloves for extra bite. It’s a quick, easy way to enjoy asparagus long after the season is over.
Links included in this post might be affiliate links. If you purchase a product or service with the links that I provide I may receive a small commission. There is no additional charge to you! Thank you for supporting my blog so that I can continue to provide you with free content.
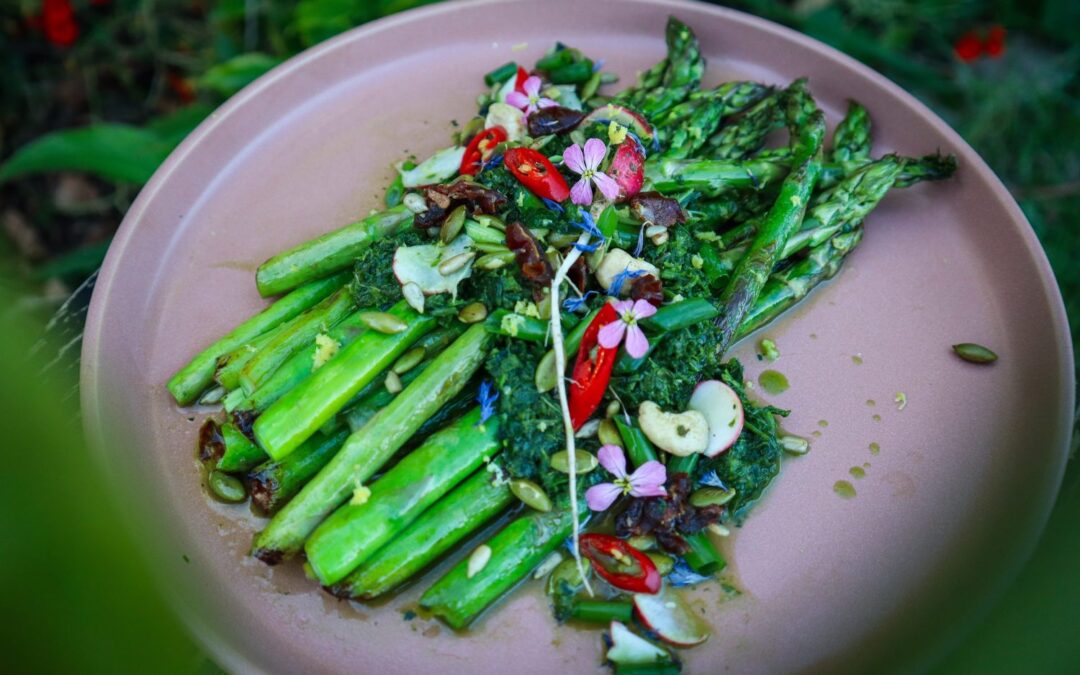
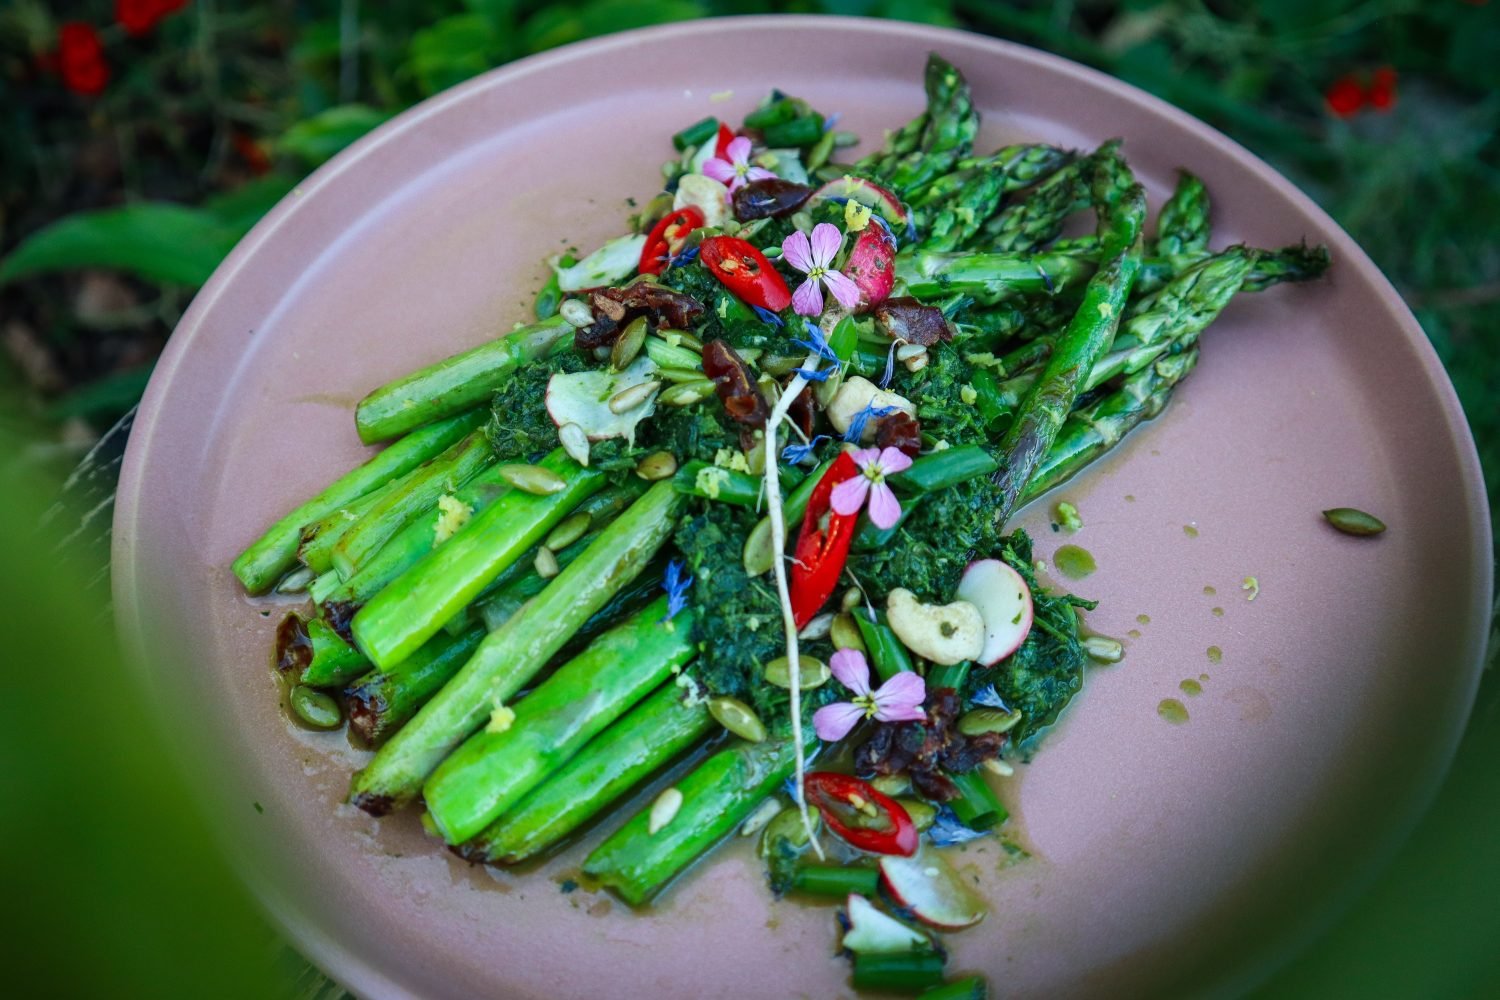
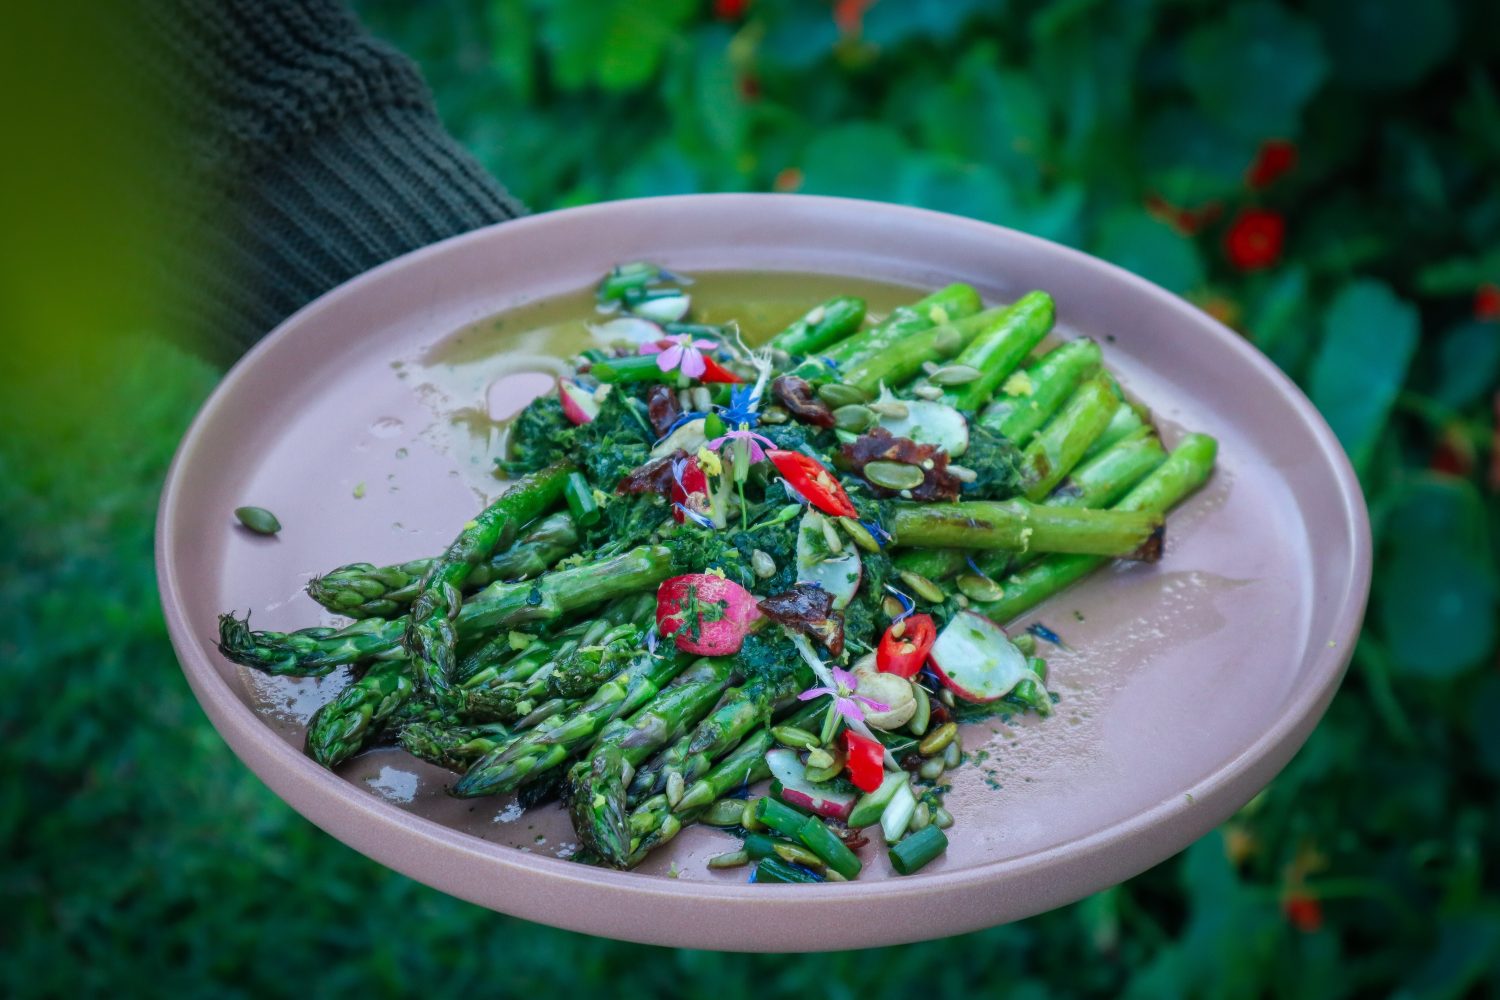
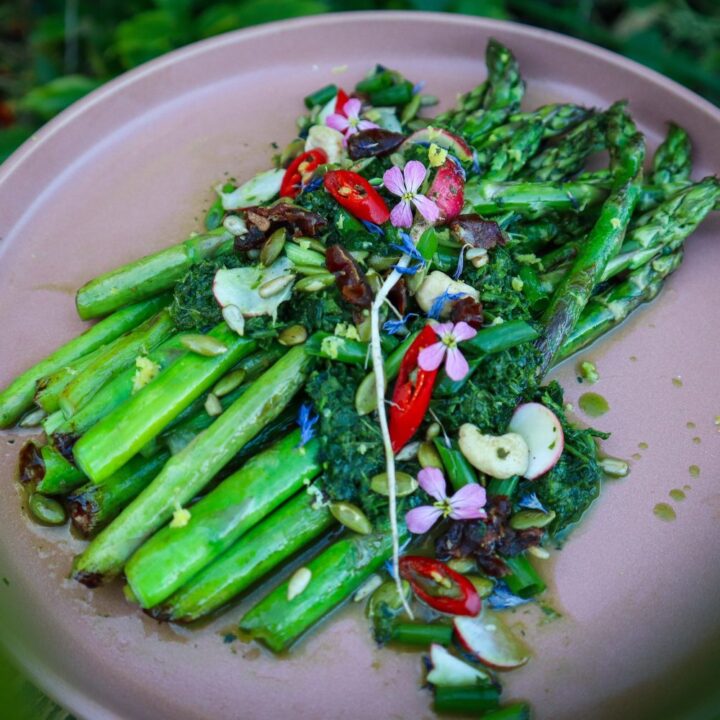
Fresh seared Asparagus topped with a delicious flavour-packed Radish top chimichurri and topped with crispy seeds. This Asparagus dish is quick and easy and makes a great Spring side dish to accompany your meals. Add fresh in-season herbs and greens to adapt to suit. This Chimichurri green sauce is one of my favourites and is packed with flavour! Asparagus is ready in Spring and is the perfect balance between a light yet hearty side dish. Top with radish flowers for a pop of spring colour!
Why You’ll Love This Recipe
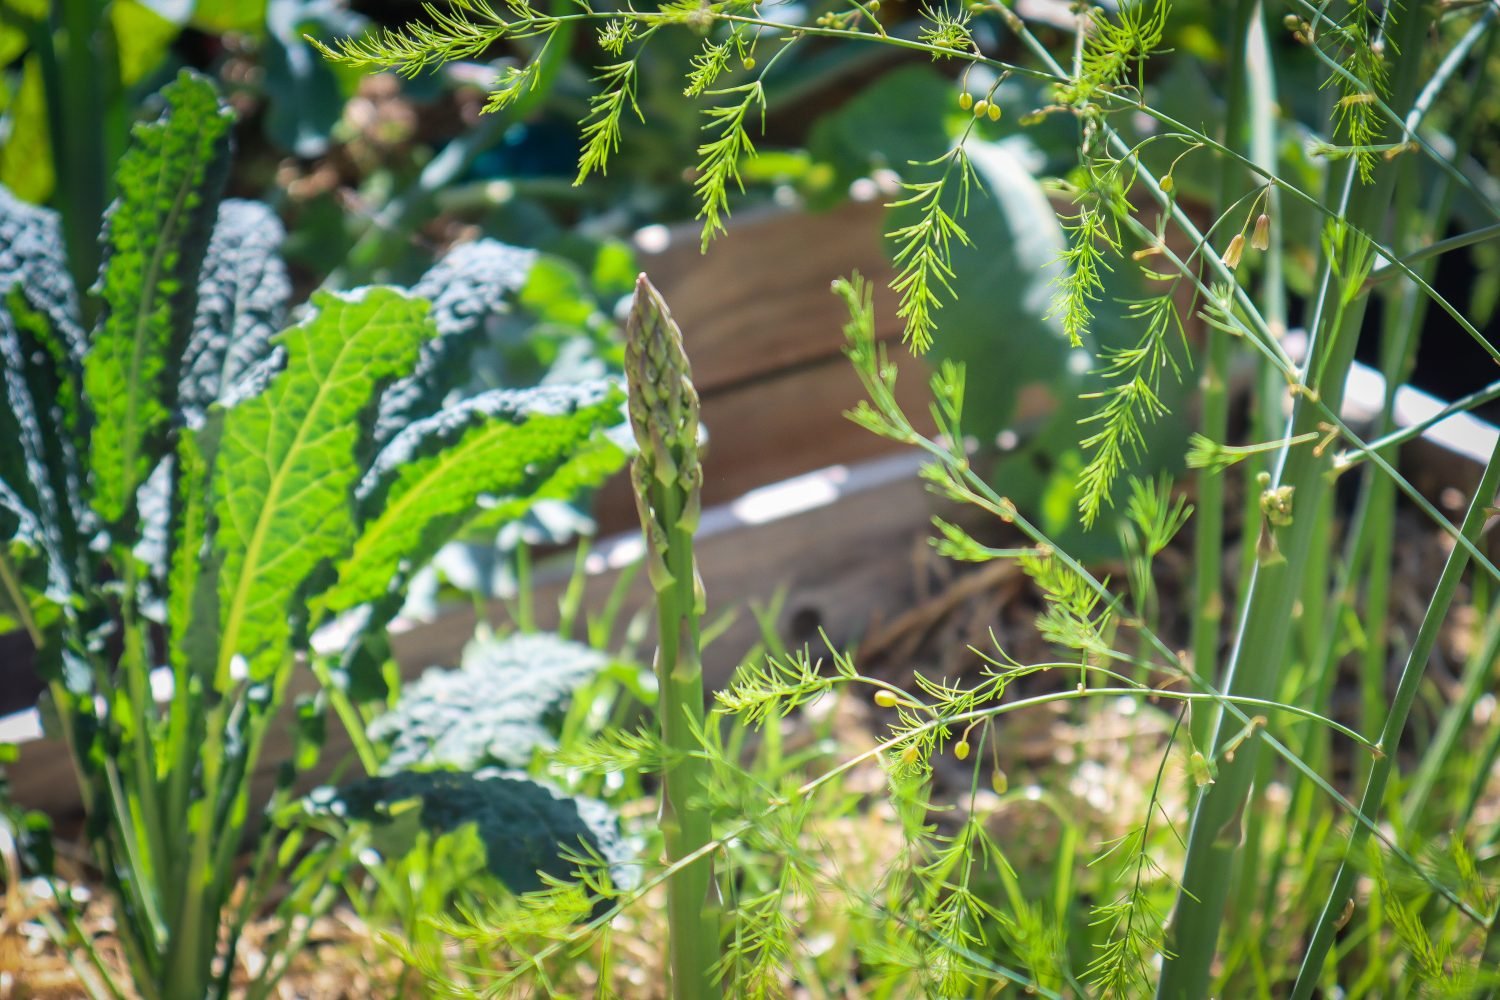
Spring is all about fresh greens and easy meals, and this recipe ticks all the boxes. Asparagus is one of the first vegetables to pop up after winter and is always a sign that the garden is waking up. Cooking it simply—seared, grilled, or pan-fried—lets its natural flavour shine.
Pairing it with a chimichurri made from radish tops makes this dish both flavourful and low-waste. Radish greens are often overlooked, but they’re peppery, nutrient-rich, and perfect for green sauces like this.
Low-Waste, High-Flavour
This chimichurri can be adapted with whatever fresh herbs or leafy greens you have on hand—think parsley, coriander, lemon balm, or even carrot tops. A handful of toasted seeds (like sunflower or pepitas) adds texture, while soft, chewy dates bring a lovely balance of sweetness.
For a final flourish, top with delicate radish flowers or other edible blooms from your garden to highlight the beauty of spring produce.
Asparagus with Radish Top Chimichurri, toasted Seeds and Dates
Prep Time: 10 minutes
Cook Time: 5 minutes
Total Time: 10 minutes
Light, fresh, and packed full of flavour, this grilled Asparagus is the ultimate Spring side dish. Topped with crispy seeds, chilli, and dates for a sweet and spicy punch.
Ingredients
1 large bunch of Asparagus
1 red chilli
2 TSP seeds (sunflower and/or pumpkin)
1 tsp lemon zest
1 tsp Olive Oil
2 Pitted Dates
Radish top Chimichurri
1 cup greens (Medium - young leaves Radish leaves and Parsley)*
1 1/2 TBSP lemon juice
1 TBSP Red Wine Vinegar
1/4 cup Olive Oil
1 tsp Sugar
2-3 Garlic Cloves
Sea salt flakes to season
Fresh Red Chilli or 1/4 tsp chilli flakes
Instructions
Rinse Asparagus, hold the bottom, and bend to snap. The spears will snap at the freshest part. Add oil to a grill or fry pan and cook Asparagus until lightly charred, bright green, and still a little crunchy.
Add Greens (Radish tops and Parsley), Lemon juice, Vinegar, Sugar, and Garlic to a mixer or mortar and pestle. I prefer a mortar and pestle as I like it chunky and not to blended. Blitz or crush to combine and make a green sauce.
Then gradually add oil to combine. Add Chilli flakes and a pinch of Sea Salt Flakes. Taste and balance with more salt or sugar if needed.
Remove Asparagus from the pan when cooked and add in the seeds and sliced dates (optional for those that like a bit of sweetness). Lightly toast until slightly golden.
Add Asparagus to a plate and drizzle over the green sauce. Garnish with toasted seeds, sliced red chilli, lemon zest, and edible flowers (I used Radish and cornflowers)
Notes
Swap Parsley or Radish tops for Fennel fronds, Carrot tops, Corriander, or a mix.
A Celebration of Spring on a Plate
This dish is proof that you don’t need fancy ingredients to create something beautiful and delicious. It’s quick to throw together, makes use of food scraps that might otherwise be tossed, and looks stunning on the plate. Perfect for a shared meal, a garden lunch, or a seasonal celebration.
Links included in this post might be affiliate links. If you purchase a product or service with the links that I provide I may receive a small commission. There is no additional charge to you! Thank you for supporting my blog so that I can continue to provide you with free content.
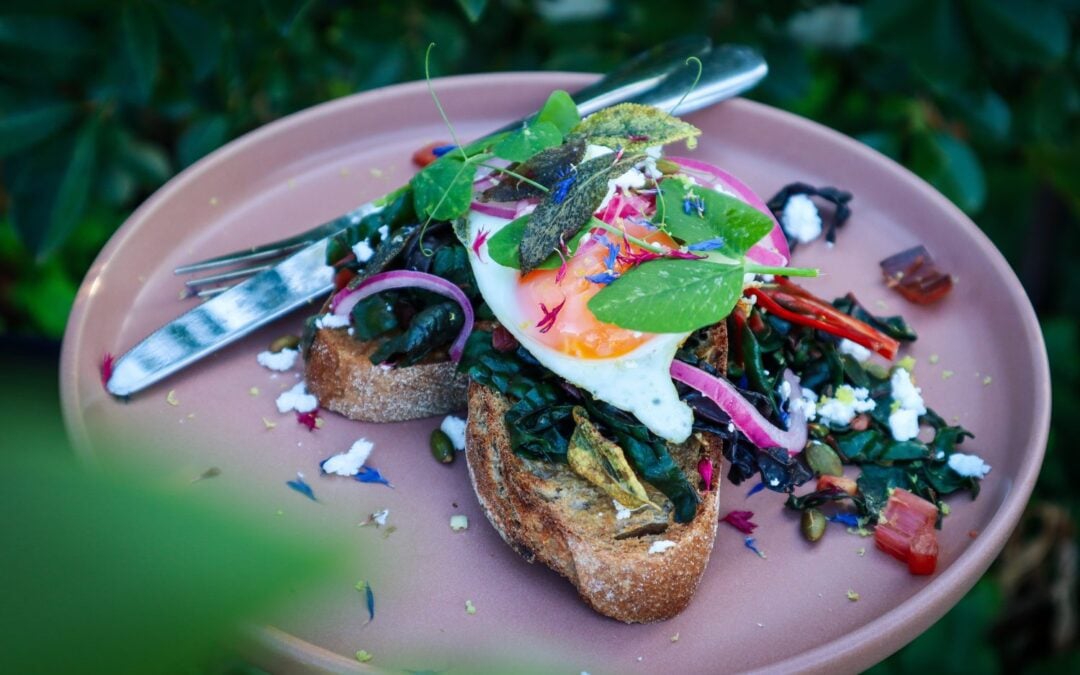
Sautéed Rainbow Chard is a quick and easy way to prepare a nutritious side of greens. This recipe is fresh, vibrant and so so delicious! Infused with garlic, lemon zest and topped with Crispy Sage and pickled onions this is the Ultimate garden-to-plate breakfast (lunch or dinner!). The pickled onions are best to make at least the day before so they have time to infuse and pickle.
Sautéed Rainbow Chard on Toast with Feta and Crispy Sage
Yield: serves 2
Prep Time: 20 minutes
Cook Time: 10 minutes
Total Time: 30 minutes
Fresh, nutritious and full of flavour, this garden-to-plate breakfast is easy and delicious! Make the most of the Rainbow Chard season.
Peel and finely slice garlic. Add to a pan on medium heat with butter. Cook for 2 mins.
Roughly slice Rainbow chard stalks (1cm chunks) and add them to the pan. Cook for a further 2 minutes.
Chop leaves and keep to the side.
In another pan fry the eggs to your liking.
Add chard leaves to the garlic and stalks and cook for 1-2 mins until wilted. Stir through Lemon zest and season with salt.
Turn the oven grill on to 180 degrees. Drizzle Sage with olive oil or butter and place on an oven tray along with Pepitas. Toast under the grill until slightly golden watching carefully as this will take less than 1 minute. Alternatively, this can be done in the pan along side eggs.
Toast sourdough and butter.
Place two pieces of toast on each plate and evenly distribute rainbow chard mix, crumble on feta, top with eggs, sprinkle on toasted pepitas, and top with Red Pickled Onions.
Add edible flowers for colour - I used Cornflowers and pea shoots.
Notes
The pickled onions are best to make at least the day before so they have time to infuse and pickle.
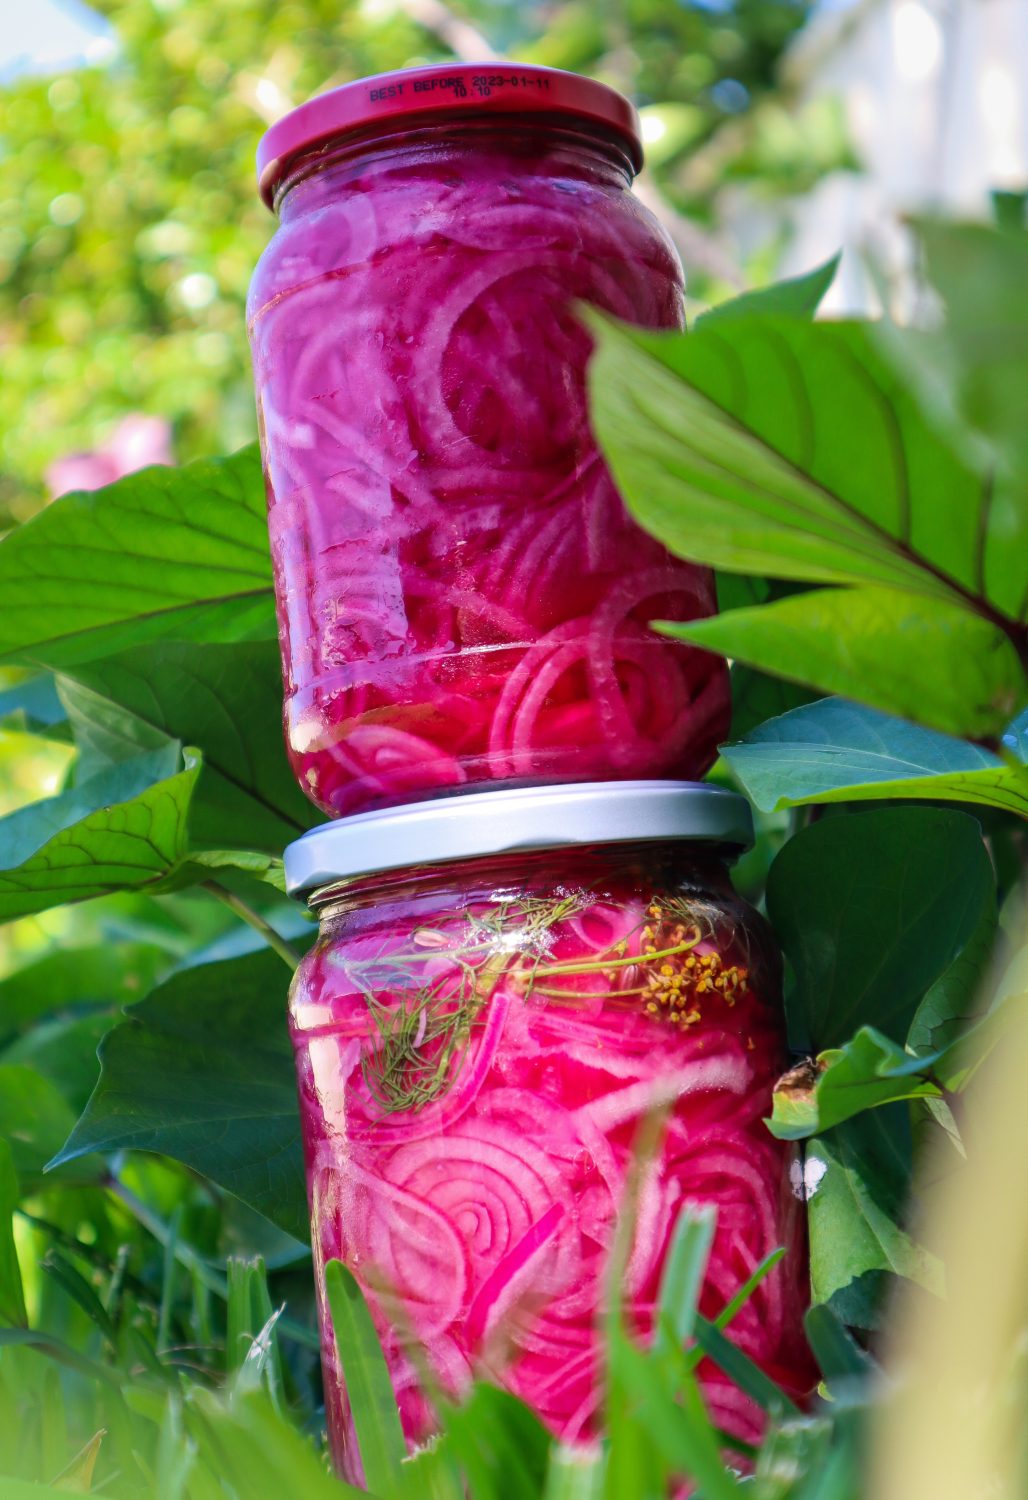
Simple Pickled Red Onions
Prep Time: 10 minutes
Cook Time: 2 minutes
Total Time: 12 minutes
Quick and easy pickled red onions add flavour to any meal. Add your seasonal garden herbs such as Fennel, Dill or Chilli to boost the flavours.
Ingredients
3 Red Onions
1/4 cup Apple Cider Vinegar
1/4 cup White Vinegar
1 1/2 TBSP Raw Sugar*
1 1/2 tsp Salt
1 cup Water
1/2 tsp Chilli flakes (optional)
Instructions
Finely slice the red onions - using a mandoline is the easiest option.
Cram as many red Onions into a clean sterilised jar.
In a saucepan add the vinegar, sugar, and salt and stir until the sugar has dissolved and the mix starts to simmer.
Add any extra flavours to the jar such as chilli, fennel flowers, fennel fronds, fennel seeds, mustard seeds, or peppercorns ( 1tsp per jar).
Pour over the liquid and secure the lid.
Allow cooling for one hour and place in the fridge.
Notes
To sterlise the jars place in a hot dishwasher run or wash and heat in the oven for 10-15 minutes at 110 degrees Celsius.
You can swap and use just one type of vinegar if you prefer.
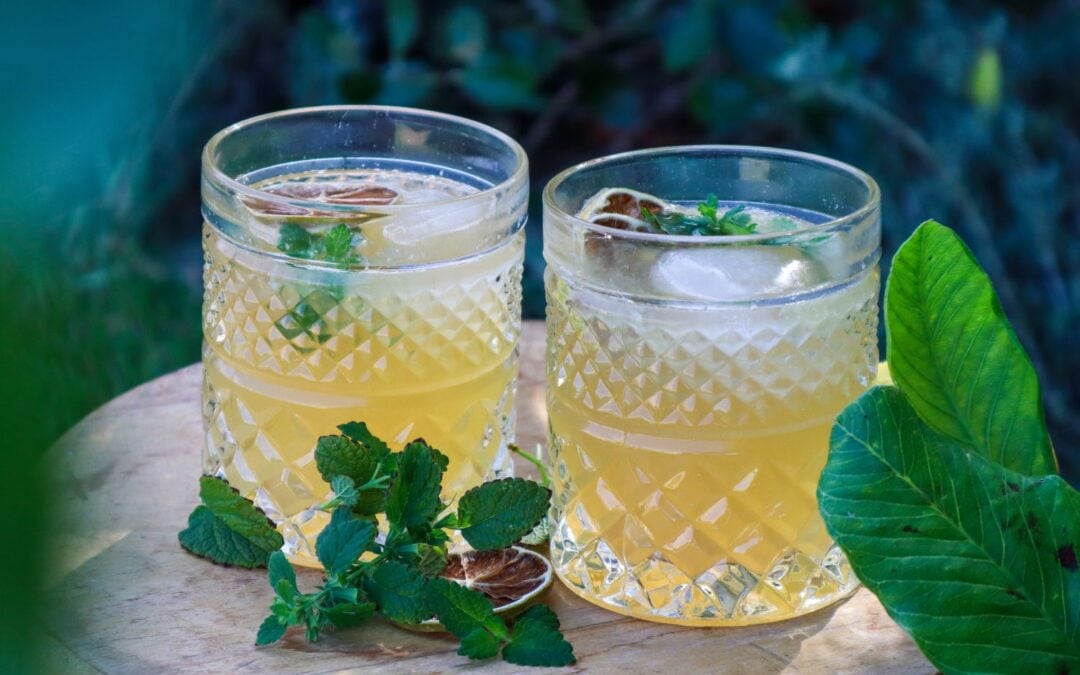
Lemon balm has calming and soothing properties that can reduce stress and anxiety. This refreshing summer drink may help you chill out and unwind. Nothing beats an iced cold lemonade after a busy day working in the garden but this homemade version with fresh ingredients is a winner!
Lemon Balm Lemonade
Yield: 4-6 glasses
Prep Time: 35 minutes
Total Time: 35 minutes
Refreshing and soothing this botanical lemonade is the perfect summer drink to enjoy in the garden.
Ingredients
1 cup Lemon Balm Leaves
1 fresh lime
1 fresh lemon
3 TBSP Raw local Honey
2 cups sparkling water
1 cup water
Instructions
Roughly chop up the lemon balm leaves.
Bring 1 cup of water to a simmer in a pot. Remove from heat and add lemon balm. Place a lid on and let it infuse for at least 30 minutes.
Using a blunt object such as the end of a rolling pin, crush the leaves and flowers into the water to extract more.
Using a sieve, strain the liquid into a jug, and squeeze out any extra liquid from the leaves..
Add in honey and stir until the honey has dissolved. Use less or more honey depending on how sweet you like it.
Squeeze the juice of the lime and lemon and add to the jug. Stir to combine.
Add in sparking water and serve in glasses over ice.
To serve add extra lemon balm leaves and dehydrated lemon or lime.
Notes
Add in other herbs to create your own unique blends. Try Calendula, Mint, Lemon verbena, and Lavender.
Simple and so delicious this really is the best Kale salad! Garden-to-plate in a couple of minutes. Kale can be a struggle for many people to like but the curly edges and small dimples are amazing for holding on to flavours. This dressing is so easy and full of flavour it can be used on any of your garden salads.
The Best Kale Salad
Prep Time: 5 minutes
Total Time: 5 minutes
Simple and so delicious! This Kale salad is a staple garden-to-plate recipe.
Ingredients
4 cups chopped Kale (I used the Tuscan Variety)
2 TSBP Nuts or Seeds (Pumpkin and Sunflower)
3 Fresh Calendula Flowers
3 Fresh Nasturtium Flowers
1/4 tsp Salt
1 pinch dried chilli flakes
Salad Dressing
2 TBSP Lemon Juice
1 tsp Olive Oil
1 1/2 tsp Maple Syrup (or Honey)
Instructions
Wash and chop the Kale into 1cm strips. Add to a mixing bowl.
Toast the nuts or seeds in a dry frying pan - medium heat - for 2-3 minutes until slightly golden.
Mix together the dressing and massage into the kale with your hands until fully coated.
Sprinkle the salt, chilli, and calendula petals over the Kale and mix.
Add the salad to a serving dish and sprinkle over the seeds and Nasturtium Petals.
Enjoy!
Notes
Serve with a protein of your choice or pan-fried Haloumi or enjoy it on its own!
Ssubstitute edible flowers for what is available in your garden.
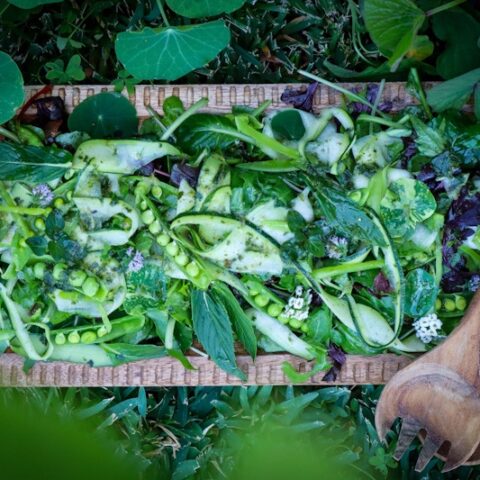
Green salads are a staple in any homegrown, garden-to-plate lifestyle — but that doesn’t mean they have to be boring. This simple green salad is fresh, vibrant, and packed with flavour, using ingredients that grow during the spring months. It’s the kind of salad you throw together in five minutes, but it tastes like something you’ve put real effort into. The secret is in the sauce! What I love most is how adaptable it is. Rocket brings a peppery bite, zucchini adds sweetness and crunch, peas bring that soft pop of freshness, and the mint ties everything together with a cooling lift. It’s the perfect side dish for spring and summer meals, or an easy way to use up handfuls of garden produce when everything is growing at once.
Try this delicious mint sauce recipe to dress potatoes or roast veggies!
Green Living
This is also a great recipe for anyone trying to reduce food waste — baby zucchinis, slightly overgrown rocket, or peas that aren’t “pretty” enough for a pod-and-eat moment all shine beautifully in this salad. Serve it alongside grilled veggies, roast chicken, a simple pasta, or enjoy it as a refreshing lunch on its own. And if you want to take it to the next level, try dressing it with my fresh mint sauce — it’s unbelievably good drizzled over potatoes, tossed through greens, or spooned onto roasted vegetables.
Growing your own food is all about keeping things simple, seasonal, and flavourful — and this salad does exactly that. Fresh, light, nourishing… and straight from the garden.
Rocket, Zucchini, Pea and Mint Green Salad
Prep Time: 10 minutes
Total Time: 10 minutes
Simple and packed full of flavour this green salad is sure to impress!
Ingredients
3 cups of Rocket and mixed greens*
1/2 Zucchini
6-8 Sugar Snap Peas
5-6 Mint Leaves for serving
1/2 cup Mint Dressing (see recipe below)
Instructions
Add Rocket and Greens to a mixing bowl and drizzle with 1/2 the mint sauce. Mix lightly to coat.
Add greens to the Serving dish.
Using a wide peeler, peel long strips of zucchini lengthwise. Add to mixing bowl and coat with a little extra dressing. Add on top of the salad mix.
Cut the Peas in half-length ways and place them throughout the salad.
Place mint leaves throughout the salad and top with edible flowers. (I used Mint flowers and white Alyssum). Drizzle over the remaining mint sauce to serve.
Notes
* Use seasonal salad greens such as Mizuno, Lettuce, Nasturtium, and Baby Spinach
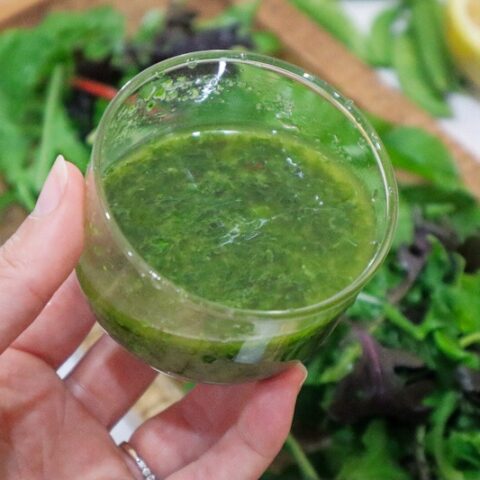
Mint Sauce/ Dressing
Yield: 1/2 cup
Prep Time: 10 minutes
Total Time: 10 minutes
Ingredients
1/2 cup Mint leaves (Spearmint or common mint)
1 tsp Lemon Juice
1 tsp ACV
1 Tbsp Red Wine Vinegar
1 Tbsp Olive Oil
2 Tbsp Water
Salt to season
1/2 tsp Honey
Instructions
Roughly chop up the Mint leaves and add to a Mortar and Pestle
Add in the remaining ingredients and grind to a combined dressing.
Taste and add more lemon, honey, or salt to balance if needed.