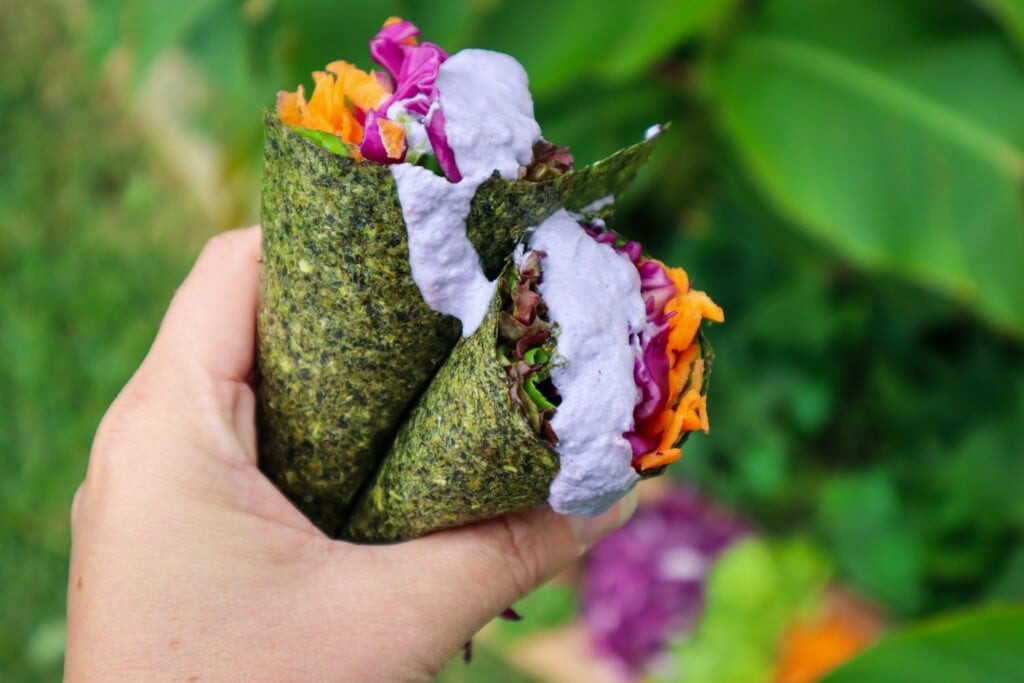
Looking for a healthy, homemade wrap alternative? These DIY spinach sushi wraps are a delicious and nutritious way to use up garden greens and create quick, wholesome meals. Whether you follow a gluten-free, low-carb, or plant-based lifestyle, these wraps are a game-changer. Made from fresh spinach, herbs, and garden vegetables, they’re packed with nutrients and completely free from preservatives and additives.
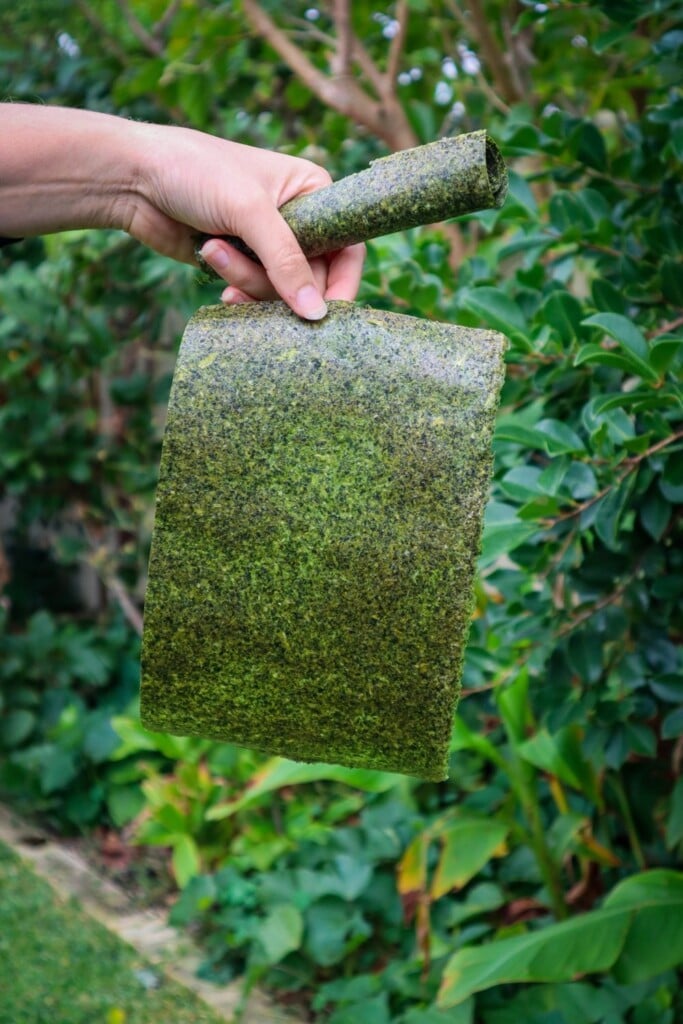
These wraps have the texture of nori but are 100% vegetable-based. Use them for sushi, wraps, or as a healthy tortilla alternative. This is the perfect recipe for zero-waste gardeners who want to make the most of their seasonal harvests. I am so impressed with how amazing these are!
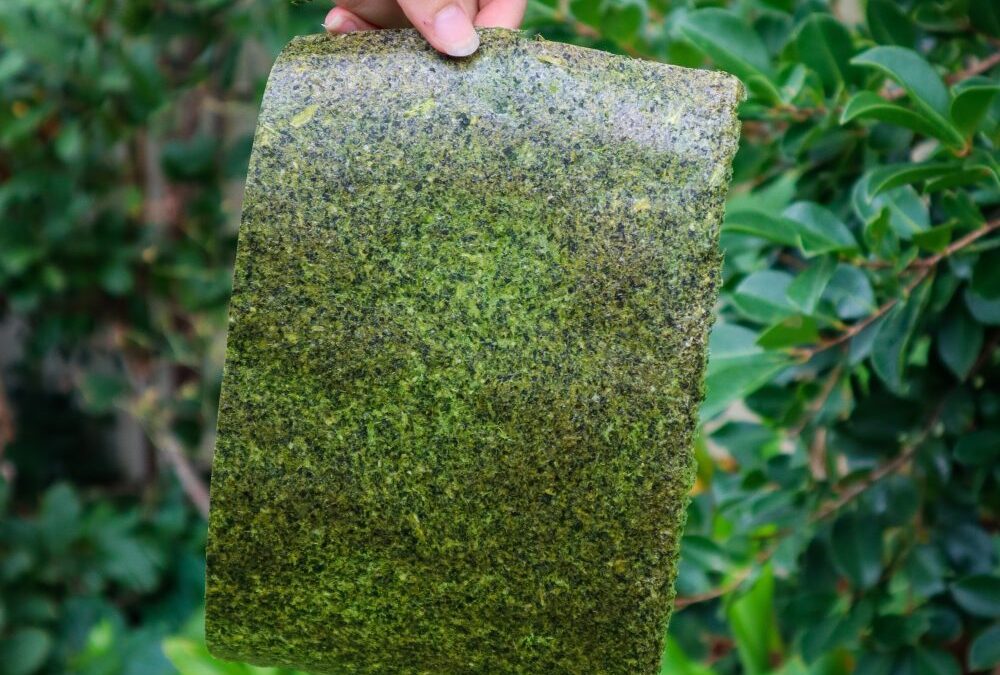
These dehydrated spinach sushi wraps taste and feel just like the real deal but I know exactly what is in them. Use excess garden greens along with bottle gourd or zucchini to make a batch of sushi wraps for a quick and easy lunch. Like most of my recipes, you can mix and match different greens and herbs depending on what’s in season or in abundance in your garden.
Garden Vegetable Variations
Don’t have spinach? No problem. Try other leafy greens such as:
NZ spinach (Tetragonia)
Swiss chard
Rocket/arugula
Sweet potato leaves
Amaranth greens
You can even mix in edible weeds like chickweed or purslane for extra nutrition.
Recipe Notes
Psyllium Husk helps bind the mixture and gives flexibility.
Herbs are optional but add great flavor.
Dehydration Time varies depending on water content and thickness.
Spinach "sushi" wraps
Yield: 8
Prep Time: 10 minutes
Cook Time: 6 hours
Total Time: 6 hours10 minutes
Easy way to preserve excess produce and have wraps on hand for a quick garden-to-plate lunch when you need it.
Ingredients
4 cups spinach or greens*
1/2 cup fresh herbs*
1 TBSP psyllium husk
1 - 2 TBSP water
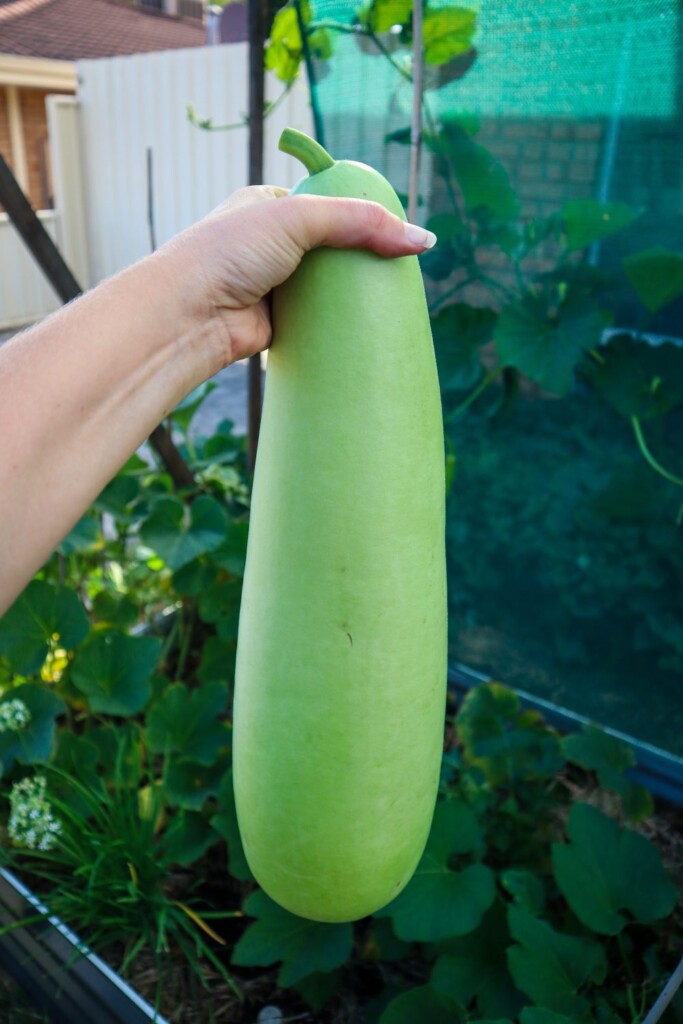
2 cups chopped bottle of gourd or zucchini
Instructions
Rinse the greens and quickly blanch for 30 seconds in hot water then transfer to iced water to cool.
Strain and add to a mixer or blender. (use the blanching water on the garden once it has cooled down)
Peel Bottle gourd using a vegetable peeler, remove the center seeds and pith then chop into 2-3cm cubes. If using zucchini there is no need to peel.
Add all the ingredients to a blender or mixer and blitz until combined. You may need to move things about with a spoon to get it mixed or add a dash more water. You want a thick paste-like consistency not too watery.
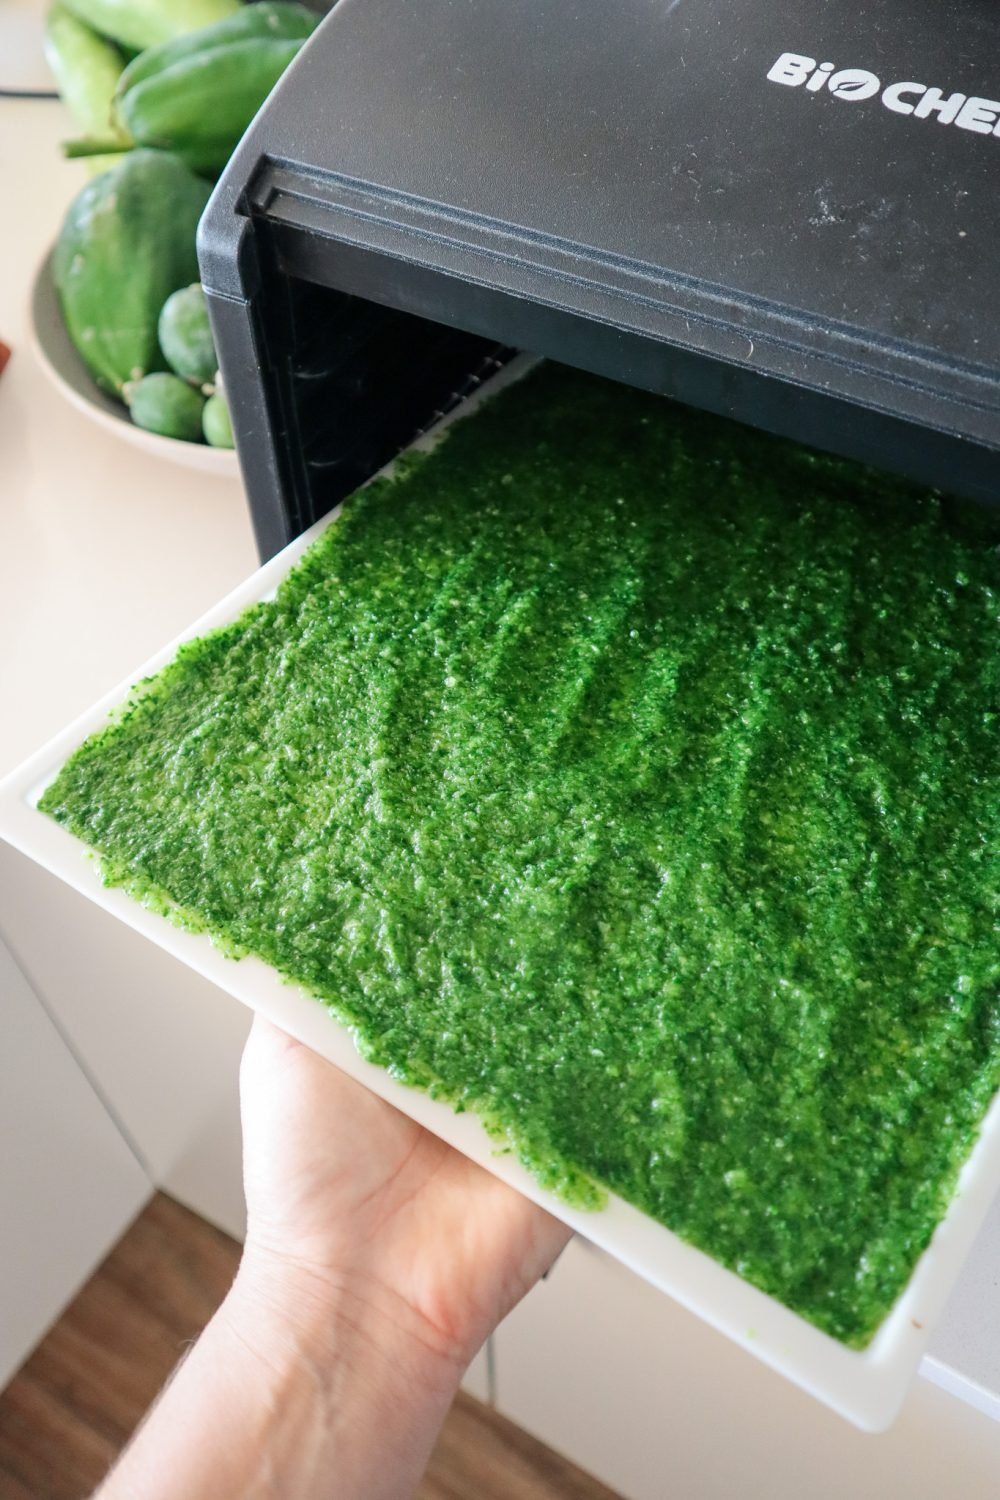
Spread the mixture onto 3-4 silicon dehydrator trays. You may need to do this in batches or use baking paper and a tray if you do not have enough of the silicon trays. The mixture should be thick enough to not see through to the tray or paper but also as thin and even as you can (before seeing through to the tray)
Dehydrate at 50 degrees celsius until dry. Check after 2-3 hours as the time will vary depending on the water content of the greens you used.
Remove and carefully run a knife around the edges to loosen it. Carefully peel off the sheet it is best to do this one bit at a time holding the sheet as close to the tray as possible as to not tear it.
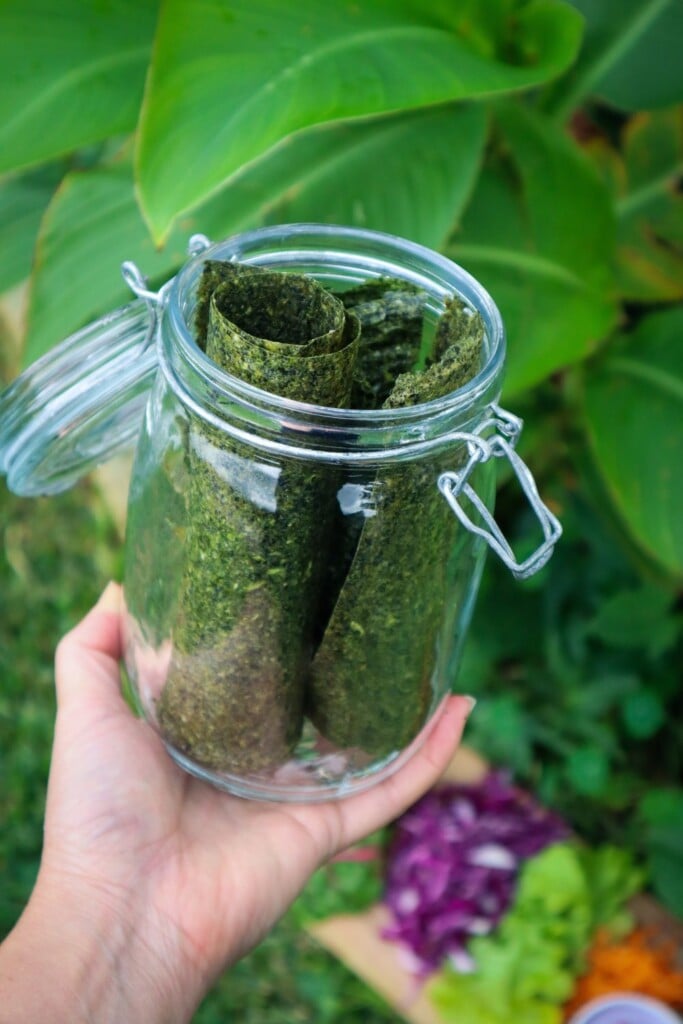
Once removed from the tray cut the sheets into the desired size (I cut in half for wraps but I keep them whole for sushi rolls) then roll them up and place them in an airtight storage jar. Or use them straight away. would
Use the wraps with your favorite salad ingredients and grilled chicken, haloumi or similar.
Notes
Greens - I used NZ spinach including the young stems but you could use any spinach or greens such as chard, rocket, sweet potato leaves etc just remove any thick stems.
Herbs - add herbs or leave them out (replace with more greens) completely up to you. Try adding 1/2 cup of herb such as parsley, chives or coriander for added flavour.
If you do not have a dehydrator you can use an oven on low to 50 degrees but be aware it may take up 6 hours so ensure you are home and not leaving the oven unattended.
These homemade spinach sushi wraps are a sustainable way to reduce kitchen waste and boost your nutrition. Whether you’re preserving an abundant garden harvest or just trying to eat healthier, they’re a delicious, eco-friendly addition to your kitchen staples.
If you’re looking for a delicious, nutrient-packed way to use sweet potato leaves, this sweet and spicy greens recipe is the perfect choice. They are not only edible but also highly nutritious, making them a fantastic addition to your homegrown meals.
During the warmer months, when sweet potato vines are growing abundantly, their tender leaves make an excellent spinach substitute. Pairing them with chillies, which also thrive in the heat, creates a flavorful and seasonal dish straight from your garden.
In this recipe, we’ll sauté fresh sweet potato leaves with a blend of sweet and spicy ingredients, making it a perfect side dish or a hearty topping for rice, noodles, or even grilled meats.
Why Eat Sweet Potato Leaves?
Many people don’t realize that sweet potato leaves are 100% edible and packed with vitamins A, C, and K, as well as iron, calcium, and fiber. Unlike regular potato leaves (which are toxic), sweet potato leaves are safe to eat and have a mild, slightly sweet taste with a soft, spinach-like texture when cooked.
Some benefits include:
✅ Nutrient-dense – High in antioxidants, vitamins, and minerals ✅ Easy to grow – Thrives in hot weather, requiring minimal care ✅ Great for permaculture gardens – Offers dual-purpose harvests (leaves and tubers) ✅ Versatile – Can be stir-fried, steamed, added to soups, or blended into smoothies
Instructions
1. Prepare the leaves
Pick and wash the leaves thoroughly (see notes for tips).
Pat dry and remove any tough stems.
2. Chop the aromatics
Finely slice the onion, garlic, and chilli.
If you prefer a milder spice level, remove the chilli seeds before slicing.
3. Mix the sauce
In a small bowl, combine the soy sauce, honey, and other sauce ingredients.
Stir well to ensure all flavors are blended.
4.Stir-fry the greens
Heat a large wok or frying pan over medium-high heat.
Add the greens and ¾ of the sauce mixture.
Stir-fry until the greens have wilted but remain vibrant.
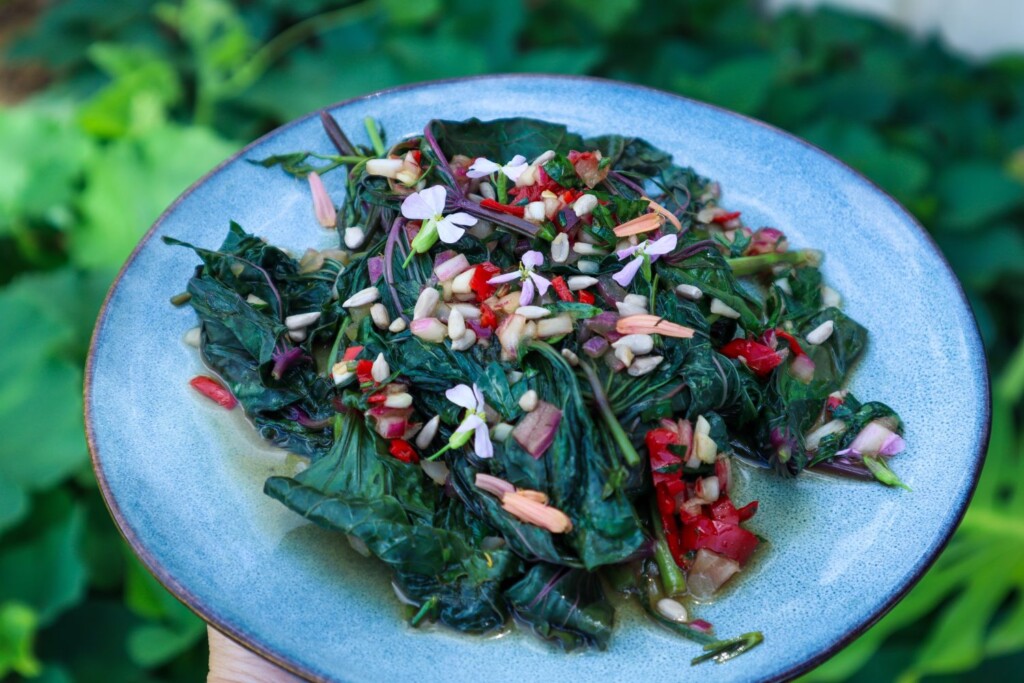
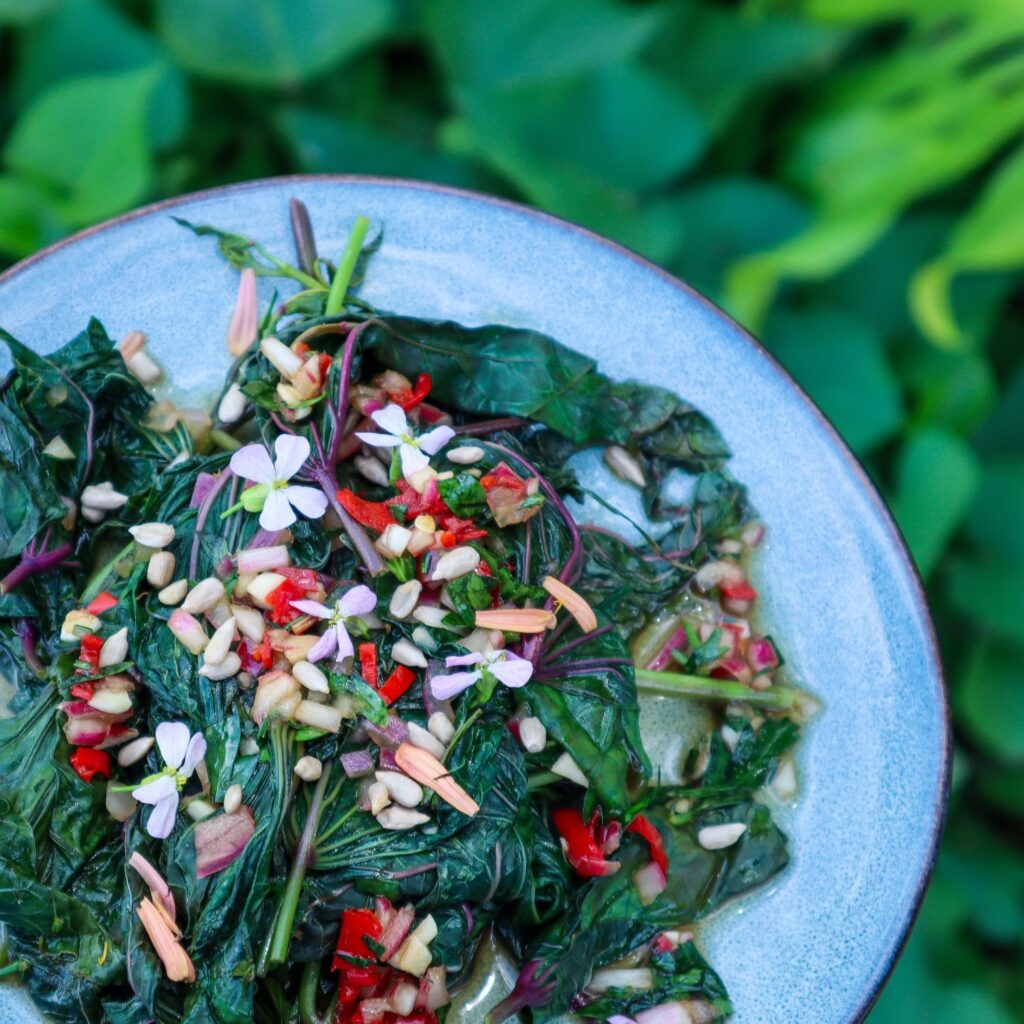
5.Serve and garnish
Transfer to a serving dish and drizzle with the remaining sauce.
Sprinkle with sunflower seeds and garnish with edible flowers if desired.
Serve immediately and enjoy!
Sweet and Spicy Sweet Potato Leaves
Yield: 2-4
Prep Time: 10 minutes
Cook Time: 2 minutes
Total Time: 2 minutes
Chilli and sweet potato greens are both thriving in the warmer months. This sweet and spicy side dish is a great way to combine the two.
Ingredients
Greens
4-6 cups Sweet Potato Greens
1 TSBP Sunflower Seeds
Sweet and Spicy Sauce
2 garlic cloves
1-2 red cayenne chillies (or your favourite)
1/4 cup chopped parsley
1 tsp Olive oil
1 TSP Red wine vinegar
1 TSP Maple syrup (or honey)
1 TSP Tamari (or soy sauce)
1 /4 cup finely chopped red onion
Instructions
Pick and wash your sweet potato greens well (see notes)
Finely slice Onion, Garlic and Chilli. Remove the chilli seeds if you don't want it too spicy (I prefer no seeds).
Add the rest of the sauce ingredients together and mix well.
Heat a large wok or frying pan on medium-high heat.
Add sweet potato greens and 3/4 of the sauce mix and stir-fry until the greens have wilted.
Place on a side dish and top with the remaining sauce along with Sunflower seeds and flowers to serve. Serve immediately.
Notes
Sweet Potato Greens excrete a white milky substance when picked. This can cause allergies to sensitive skin. Rinse well.
Sweet potato leaves will wilt to less than 1/4 the original size just like spinach does.
Choose young sweet potato leaves and shoots - the newest 4-5 leaves.
Add and swap for other greens such as spinach or chard.
Make it as mild or as spicy as you like by adding in or removing the seeds.
Recipe Variations & Substitutions
🌿 No sweet potato leaves? Substitute with spinach, kale, chard, or amaranth leaves. 🌿 Prefer it milder? Reduce the chillies or swap for sweet bell peppers. 🌿 Add protein by tossing in tofu, shrimp, or shredded chicken. 🌿 Make it heartier by serving over rice or mixing with noodles.
Tips & Substitutions
Handling the Leaves – When picked, sweet potato greens release a white, milky sap, which may cause irritation for sensitive skin. If you have skin allergies, wear gloves when handling or wash your hands immediately after.
Wilt Factor – Like spinach, sweet potato leaves shrink significantly when cooked, reducing to less than 1/4 of their original size. Keep this in mind and adjust your portion size accordingly.
Best Leaves to Use – For the most tender and flavorful greens, choose the youngest 4-5 leaves at the tip of each vine. Mature leaves can be tougher and slightly bitter.
Swap & Customize – Feel free to mix in or replace the leaves with spinach, chard, or other leafy greens from your garden.
Control the Spice – Make this dish as mild or fieryas you like by adjusting the amount of chillies or removing the seedsfor a milder flavor.
Sweet Potato Leaves
They are an underrated garden gem, offering incredible health benefits and a delicious, versatile flavor. If you grow sweet potatoes, don’t let the lush green vines go to waste—try this sweet and spicy stir-fry for a quick, nutritious meal! I also add them to any soups, curries, and stirfries for extra greens.
Have you ever cooked with them? Let me know in the comments 👇
Simple and so delicious this really is the best Kale salad! Garden-to-plate in a couple of minutes. Kale can be a struggle for many people to like but the curly edges and small dimples are amazing for holding on to flavours. This dressing is so easy and full of flavour it can be used on any of your garden salads.
The Best Kale Salad
Prep Time: 5 minutes
Total Time: 5 minutes
Simple and so delicious! This Kale salad is a staple garden-to-plate recipe.
Ingredients
4 cups chopped Kale (I used the Tuscan Variety)
2 TSBP Nuts or Seeds (Pumpkin and Sunflower)
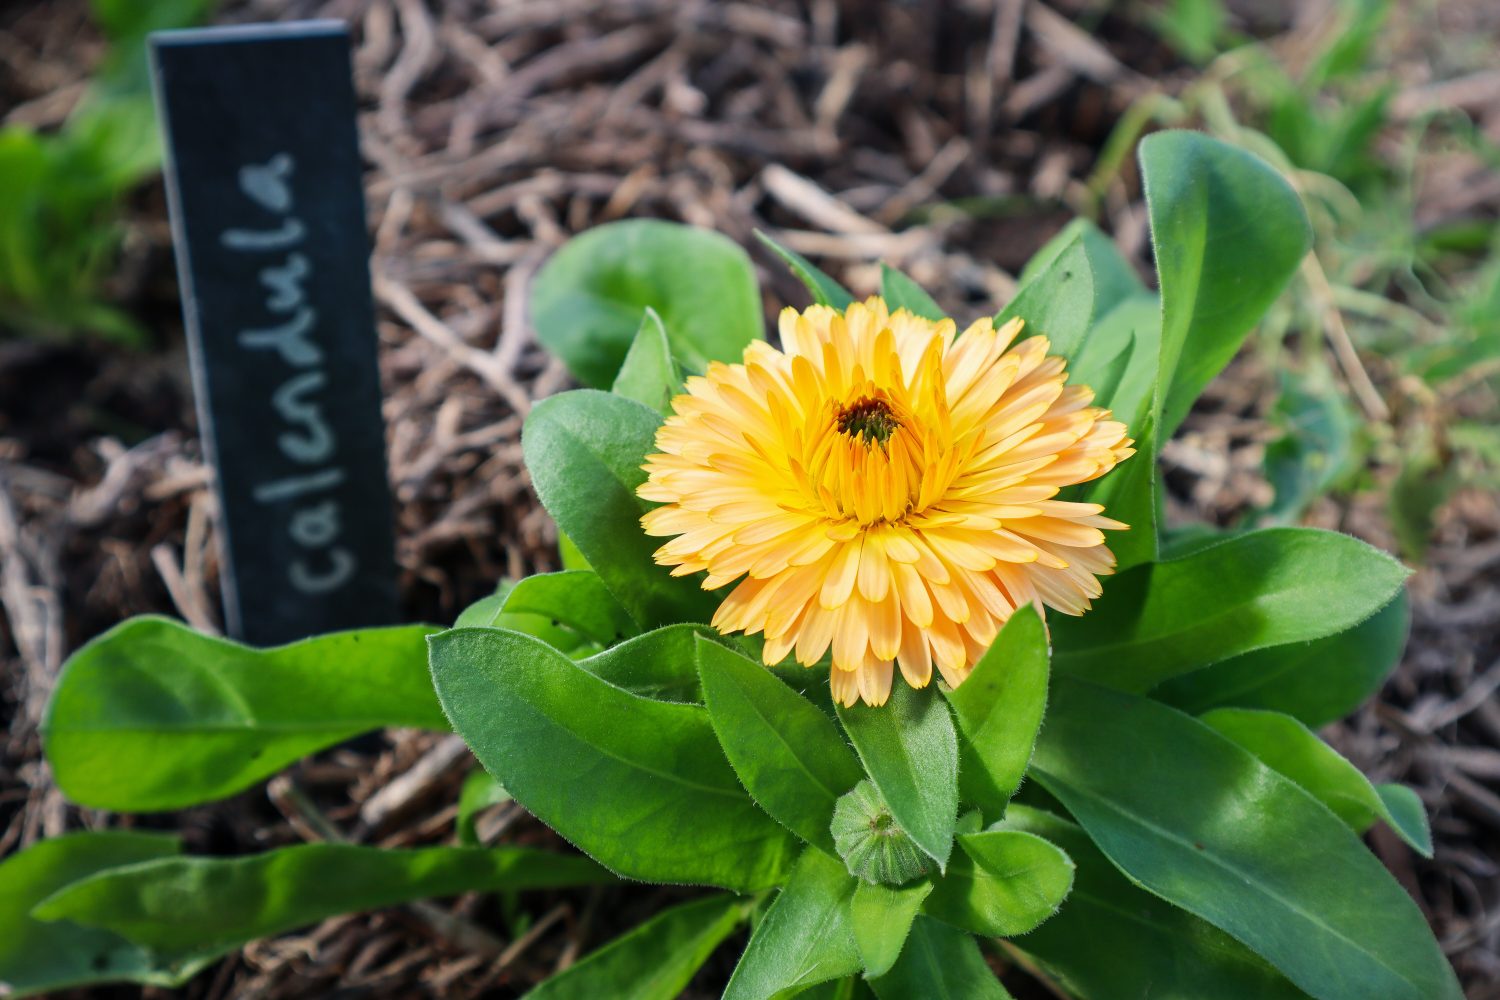
3 Fresh Calendula Flowers
3 Fresh Nasturtium Flowers
1/4 tsp Salt
1 pinch dried chilli flakes
Salad Dressing
2 TBSP Lemon Juice
1 tsp Olive Oil
1 1/2 tsp Maple Syrup (or Honey)
Instructions
Wash and chop the Kale into 1cm strips. Add to a mixing bowl.
Toast the nuts or seeds in a dry frying pan - medium heat - for 2-3 minutes until slightly golden.
Mix together the dressing and massage into the kale with your hands until fully coated.
Sprinkle the salt, chilli, and calendula petals over the Kale and mix.
Add the salad to a serving dish and sprinkle over the seeds and Nasturtium Petals.
Enjoy!
Notes
Serve with a protein of your choice or pan-fried Haloumi or enjoy it on its own!
Ssubstitute edible flowers for what is available in your garden.
Kale (Brassica oleracea) is a member of the Cabbage family and produces an abundance of leafy greens. The great thing about Kale is that it grows vigorously and is much more pest-resistant than cabbages. Kale is packed with nutrients and antioxidants and can be used raw or cooked similar to lettuce or spinach.
Benefits from regular compost and natural fertilizers.
PESTS
Slaters, slugs, aphids, snails, and green caterpillars/ cabbage moth.
HARVEST
Harvest the outer leaves as the plant grows or cut the mature plant off and allow new growth to form.
REPRODUCE
Kale is Bi-annual so seeds usually form in the summer or second season.
Why Grow Kale?
Kale is a fantastic crop for beginner gardeners or those wanting a low-maintenance edible garden. Kale is hardy and grows well in many different conditions.
Here are some of the many reasons to grow Kale:
Easy to grow
Versatile produce
Low maintenance
Bulk up salads
Nutritious smoothies
Less susceptible to pests
Visual Aesthetics
Supports Immune health
Rich in Vitamin C,K,E
Can be eaten raw or cooked
Popular Kale Varieties
‘Tuscan / Tuscano’ – Heirloom variety. Produces long dark green, palm-like leaves. Popular for flavour and texture.
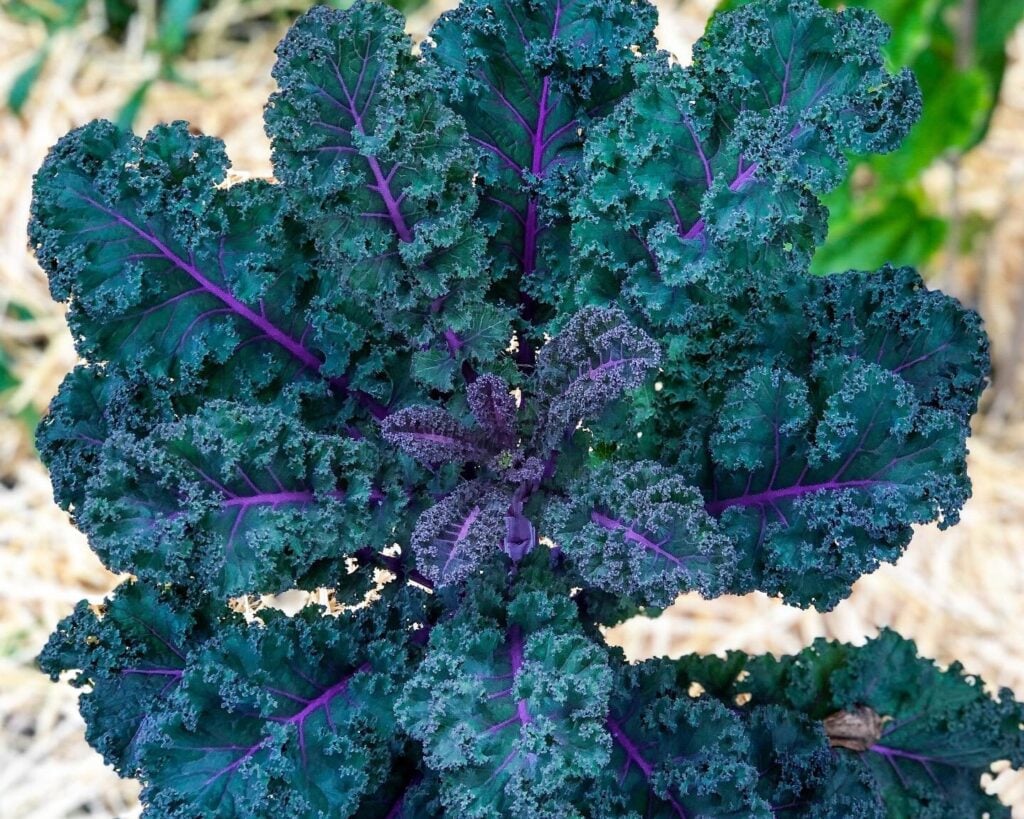
‘Red Russian’ – Silvery green curly leaves with striking purple veins. Young leaves are good raw and older leaves are better cooked. Great for microgreens.
‘Siberian‘ – Green curly leaves. Mild sweet flavour. Hardy and prolific.
‘Scarlet‘ – Bright purple frilly leaves. Colour deepens with cool weather. Nutritious and ornamental.
When to Plant Kale
Kale is best planted from the end of Summer to Spring. Flavour improves with cool weather. In summer plants can get covered in aphids and caterpillars and the flavour is less palatable.
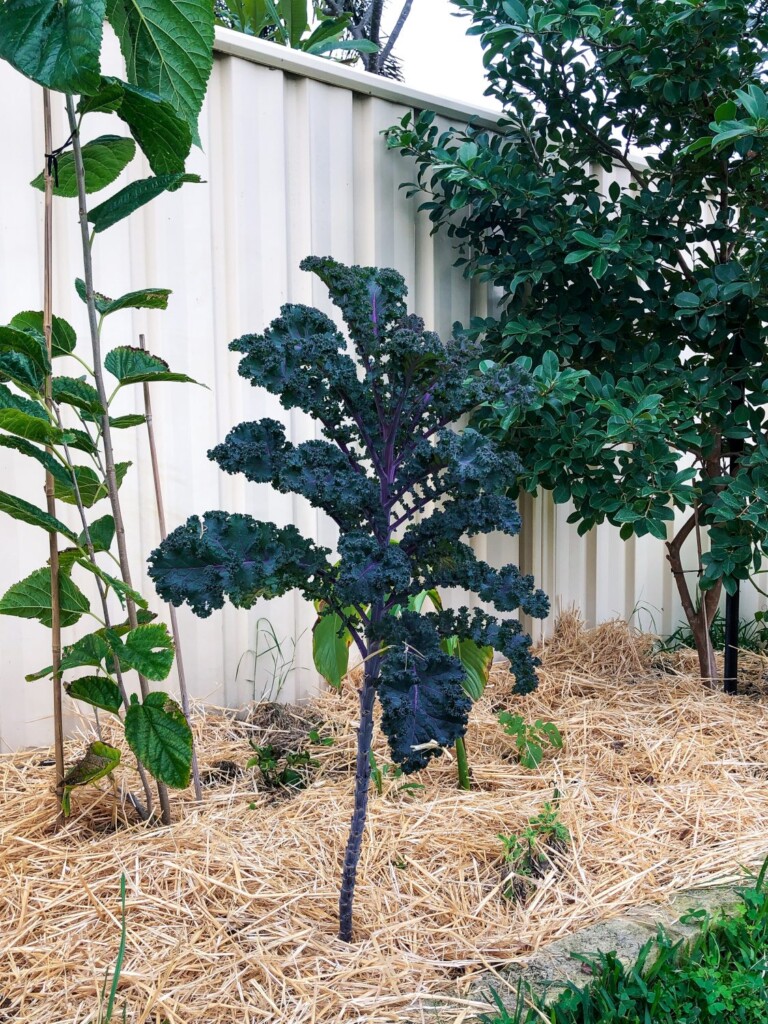
How to Grow Kale
Plant seeds into seed trays first (young kale is popular with pests) and transplant them in a sunny location once they have 4-5 leaves.
Dig in compost and composted manure to feed the soil.
Kale has shallow roots so add mulch to keep retain moisture and regulate temperature.
Care/ Maintenance
Keep Kale well-watered and keep an eye out for pests.
Pests / Disease
Slugs and snails may eat young seedlings. Older plants can suffer from aphids and green caterpillars, especially in warmer months. Use natural pest management.
How/ When to Harvest
The best time to harvest your Kale is during the coldest months. This is when the flavour is at its best! Harvest a few of the bottom leaves off each plant to allow continuous growth. Towards the end of winter/ early spring, you can cut the Kale plants off just leaving the stalk in the ground. This will reshoot multiple side shoots for a new harvest into Spring.
Reproducing
Kale is biennial so it will go to flower and produce seeds in its second season/ year or if the weather gets too warm. If your Kale does go to flower, wait until the flowers turn into seed pods and once they start to dry and turn brown they can be harvested. Keep the seed pods somewhere warm and dry until they have completely dried out. Pop open the seed pods to reveal the small Kale seeds. Keep your seeds in a dry, dark cool location.
Cooking and Using Kale
Kale can be eaten raw or cooked.
Kale pairs well with: Garlic, onion, chilli, apple, lemon, potato, beetroot, sweet potato, cauliflower, cabbage, tomato, mustard, honey, radish
Kale ideas:
Salads
Smoothies
Quiche
Pie
Curry
Pastries
Stirfry
Pesto
Preserving the Harvest
Kale can be easily preserved to use throughout the year.
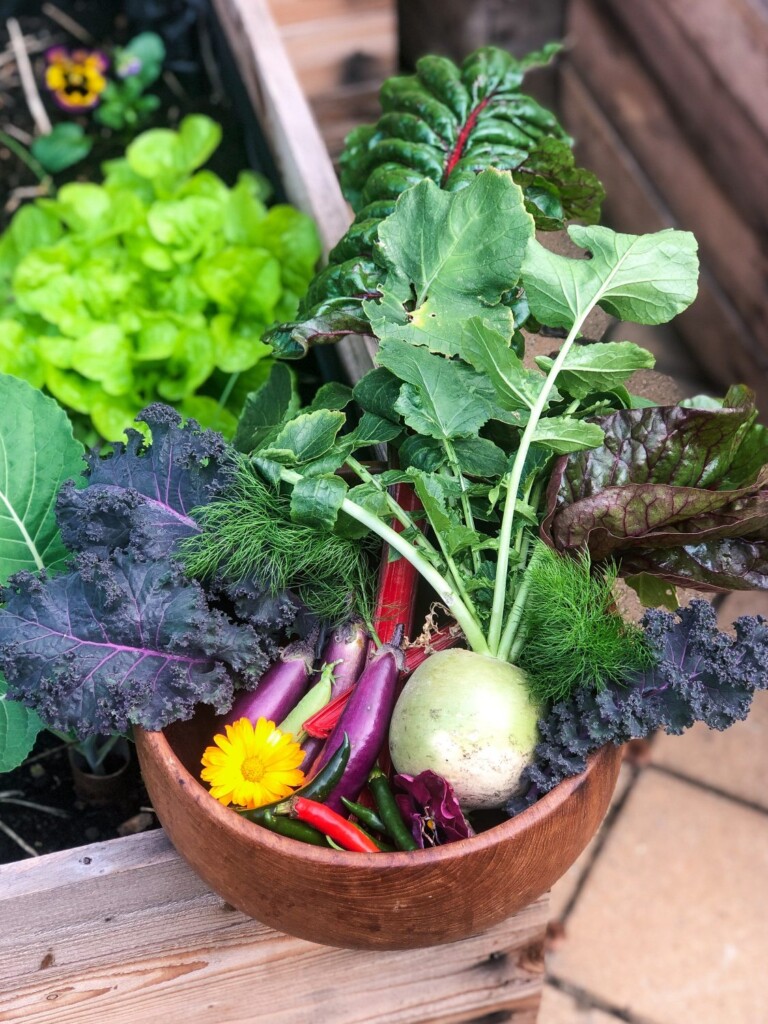
It’s no secret in Australia and New Zealand that the price of lettuce has lost the plot.. $7.50 – $12 for a whole lettuce or $7 a bag 150gram mixed leaves. Now, obviously, this varies from place to place but these 18 substitutes for lettuce will allow you to have salad and sandwich greens all year round! You may already have some of these growing in your garden.
Many of these 18 lettuce substitutes have more nutrients and multiple uses so you can get more out of the food you grow. Lettuce is often used in sandwiches and salads so for today’s lettuce alternatives I will share which ones are best for these two main uses.
Calendula is an edible flower and the leaves are also edible. Calendula leaves do have quite a strong flavour but you can add a few of these to your salads or sandwiches. Calendula flowers also have many healing qualities as well as attract pollinators to the garden. An amazing multi-use plant to add to your edible garden.
Nasturtiums thrive well in most soil types and you will often see them spilling out onto the street from gardens or popping up in the wild. They have quite a weed-like growth because they are so easy to grow and self-seed. The whole plant is edible including the leaves, flowers, and seed pods. Nasturtium leaves are great for salads and are also the perfect size and shape to add to sandwiches. With a natural peppery flavour, Nasturtiums are a great substitute for lettuce.
3. Baby Beetroot Leaves
Baby Beetroot leaves can be harvested a few off each plant to use in salads and sandwiches. Beetroot leaves can have beautiful red veins or be entirely red depending on the variety. A beautiful and nutritious substitute for lettuce.
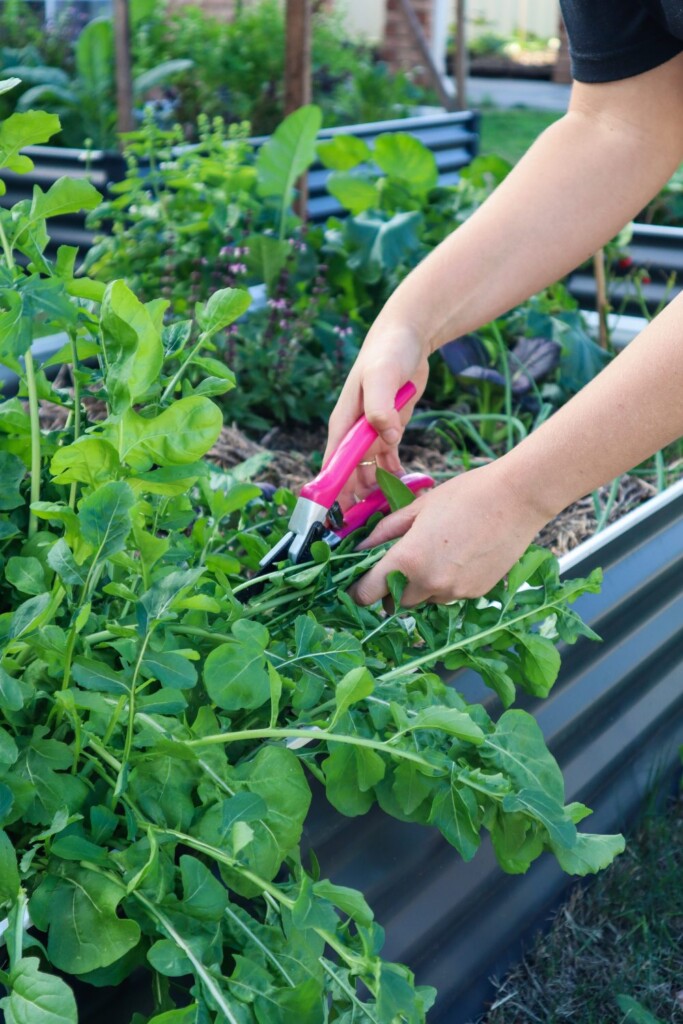
4. Rocket / Arugula
Rocket or Arugula is a popular substitute for Lettuce. Rocket has a distinct peppery taste and is delicious in salads, sandwiches and served on top of pizzas. Rocket grows quickly so if you plant both Rocket and Lettuce seeds you will have Rocket ready to eat while you wait for the lettuce to get established.
5. Kale
Kale is a popular substitute for lettuce and can be grown all year round in many climates. Kale comes in many varieties some are better than others for salads and sandwiches. My favourite is the Tuscan Kale as it has a softer texture. Choose the smaller leaves and chop Kale up finely to add to salads and sandwiches.
6. Purslane
Purslane is an edible weed that has succulent-like leaves. Purslane thrives in dry climates and is often popping up in my gardens in Perth. Purslane is a great addition to salads and sandwiches as an alternative to lettuce.
7. Sweet Violet
Sweet violets are known for their delicate purple or white flowers and beautiful fragrant scent. The sweet violet leaves are also edible and can be added to salads and sandwiches. They do have a bitter flavour so it can be a good idea to mix a few with other greens.
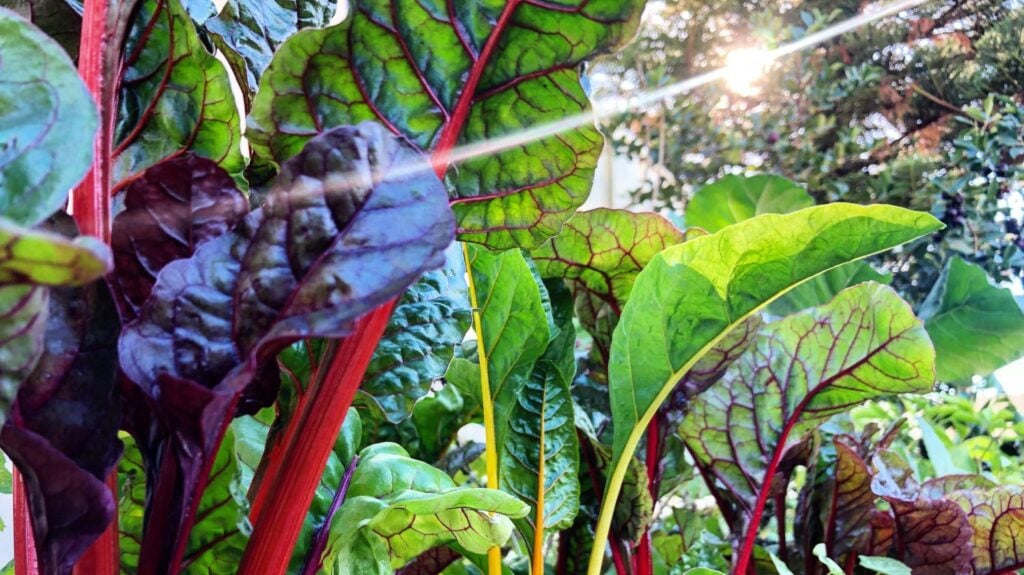
8. Rainbow Chard
Rainbow chard is a fantastic versatile green to grow during the colder months of the year. Baby rainbow chard leaves can be picked and used in salads and sandwiches. Larger leaves contain more oxalic acid so it is recommended to blanch them first.
9. Celery
Celery is a fresh, crunchy and hydrating vegetable just like lettuce. Celery leaves and stalks can be used in both salads and sandwiches.
10. Cabbage
Cabbage is a great all-around vegetable that has many culinary uses. Finely sliced cabbage is a deliciously fresh and crunchy substitute for lettuce. A little bit of Cabbage goes a long way so it is a very economical vegetable.
11. Asian Greens/ Bok Choy, Tatsoi, Choy Sum
Asian greens such as Bok Choy are great additions to your edible garden because they grow fast, can be harvested multiple times from each plant and are versatile in the kitchen. Use the softy leafy ends in salads and sandwiches and the thicker stems in soups or stir-fries.
12. Dandelion Greens
Dandelions are another edible weed. Choose young dandelion greens to add to salads and sandwiches as a substitute for lettuce. Always make sure you identify weeds correctly and only forage from places you know have not been sprayed with chemicals.
13. Sweet Potato Leaves
Sweet Potato Leaves are abundant green in the garden. Use the young leaves in a salad or blanch or stirfry the larger leaves.
14. Spinach
Spinach is another popular substitute for lettuce and is a versatile plant to have in the garden. Baby spinach leaves are best for raw salads or sandwiches due to the oxalic acid contained in the plant.
15. Chickweed
Chickweed (Stellaria media) is an edible weed that grows in abundance during winter. Chickweed has small delicate leaves and flowers and loves to grow in moist shady spots during winter. Chickweed has a mild fresh flavour similar to sprouts and makes a delicious lettuce substitute. Chickweed is also a popular feed for chickens.
16. Carrot & Radish Tops
Carrot tops and Radish tops can be finely sliced to add to salads. The younger leaves will be more tender than the older larger ones. Finely slice and drizzle with salad dressing. They can also be wilted down in the pan to soften first. The tops also go great in a Garden Pesto to dress your salads.
17. Watercress
Watercress grows in abundance during the winter months and is a great substitute for lettuce. Watercress does have a strong peppery flavour so it can be good to mix a little with other more mild greens and a dressing. Watercress is also good for soups and stir-fries. Watercress can be foraged but always ensure you have a safe source with no chemicals contaminating it.
18. Parsley
Parsley is a common herb that is often under-utilized. Parsley can be delicious chopped up fine in a salad or added to a sandwich! Flat leaf parsley is my favourite variety for this.
Sustainable Living Alternatives
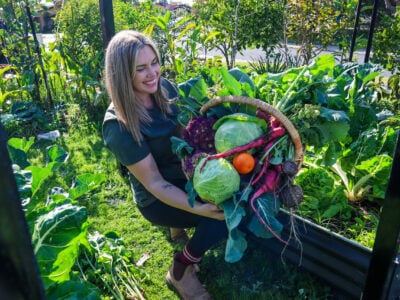
The great thing about growing food is you have access to so many parts of the plant that are often discarded. Learning what parts of the plant are edible and how to use them can help you double your food supply overnight!
There are many more options than this so let me know in the comments if you use any of these or if you use other plants as lettuce substitutes in your garden. That will help others that find this post and are looking for more ways to expand their food source.
Of course, grab yourself some lettuce seeds too, and get your own little salad bar growing. I like to grow mixed loose leaf varieties and then I pick one or two leaves of each plant. Combined with other greens from your garden you can make your salad greens go a whole lot further.
NOTE: It’s important to note that some greens from the garden do contain higher levels of oxalic acid than others. This can block the absorption of some nutrients. Oxalic acid is reduced by cooking which is why many leafy greens such as spinach and chard are cooked first. This is mainly only a problem if you eat a lot of that plant. So by chopping up a little from each and choosing the younger leaves you can reduce the amount of oxalic acid consumed.