Let’s dive into this incredible companion plant and explore how to grow Calendula and what to make with it! Calendula (Calendula officinalis) is a hardy edible flower that has many beneficial uses both in the garden and in the home. Calendula is easy to grow and if left to go to seed, will pop up each year in your garden with bright pops of colour.
Calendula has anti-inflammatory, anti-viral, and antibacterial properties great for making healing teas, balms and lotions.
Autumn – Spring.Mild summers can grow all year round.
SOIL
Grows well in most soil types.
LOCATION
Full sun – part shade position
CARE
Consistent watering.
FERTILISE
Doesn’t require feeding.
PESTS
Slaters, slugs, aphids, snails, green caterpillars.
HARVEST
Harvest young leaves fresh and flowers once fully open.
REPRODUCE
Seeds can be saved once the petals have fallen and the flower has dried off.
Why Grow Calendula?
Calendula is an edible that provides flowers for the bees they look beautiful and ornamental in the garden.
Here are some of the many reasons to grow Calendula:
Easy to grow
Flowers for the bees
Natural pest management
Low maintenance
Edible flowers
Can be used raw or cooked
Edible leaves
Healing and medicinal qualities
Protects soil
Anti-inflammatory, anti-viral, anti-fungal
Natural food colouring or dye
High in vitamin A&C
Cut flowers
Chicken coop health
Popular Calendula Varieties
‘Pink Surprise’ – Large double-layer petals with a peachy colour.
‘Double Red’ – Large double-layered petals with a deep orange colour.
‘Golden Emperor‘ – Large single-petal flowers. Daisy-like flower with bright yellow colour.
‘Balls improved orange‘ – Large double orange flowers.
‘Pacific Apricot’ – Large double-petal light yellow-peach flowers.
When to Plant Calendula
Calendula can be sown at the end of summer or autumn. It can grow all year round in some locations that have mild summers.
How to Grow Calendula
Choose a sunny location.
Plant seeds directly in the soil or in seed trays.
Plant seeds or seedlings 1 hand width apart
Protect young seedlings from slugs and snails but adding a ring of crushed eggshells
Add mulch to retain moisture
Care/ Maintenance
Calendula is a hardy, easy-to-grow plant. Harvest flowers regularly once petals are open to encourage more blooms.
Pests / Disease
Slugs and snails may eat young seedlings. Use natural pest management. Caterpillars can eat the leaves and flowers. Calendula can become a “trap” for pests and this will keep them away from your other plants.
How/ When to HarvestCalendula
The best time to harvest flowers and most vegetables is early in the morning, while the plants are hydrated. Wait until the flowers have opened usually once the sun is out. For medicinal uses, dry the flower with the green central structure attached, as that is where a lot of the healing properties are.
Reproducing
Wait until the flowers start to die off, their petals will fall and the seeds will start to form at the centre of the flower. Once they start to go brown and dry you can pick the flower and allow it to dry inside. Calendula self-seeds easily. If you would like to have flowers pop up in your garden next year, allow the seeds to dry on the plant and fall onto the soil. Once you know what calendula leaves look like you will be able to identify volunteer plants next year and dig up seedlings to spread around your garden.
Cooking and Using Calendula
Calendula flowers and leaves can be eaten raw or used in baking and home products.
NOTE: Calendula is not suitable for those who are pregnant or trying to conceive, as it may affect menstruation. Or those who are sensitive to the Asteraceae/Compositae family.
Preserving the Harvest
Calendula can be easily preserved to use throughout the year.
Calendula petals can be sprinkled in chicken bedding to help reduce ticks and bacteria. They can also be incorporated into their food which can make the egg yolks a deeper yellow colour.
Pumpkin (Cucurbita maxima.) is a great base crop to grow that provides your homestead with an abundance of food. Pumpkins can be stored to use throughout the year and provide a variety of uses both sweet and savoury.
Pumpkin is easy to grow if you get these key things right: Rich compost, Sun, Water, and plenty of space to roam.
Pumpkins come in three main species, known as
Cucurbita maxima – Thick skin large pumpkins (eg. Jap, Queensland Blue)
Cucurbita moschata – Winter Squash (Butternut)
Cucurbita pepo – Summer Squash
Depending on where you live in the world different species will be known as Pumpkin or winter squash. In this plant of the month, we will just be focusing on the Cucurbita maxima.
Feed with compost and with liquid seaweed fertiliser.
PESTS
Slaters, slugs may get young plants.Rats can get to the pumpkins.
HARVEST
From 70-120 days.
REPRODUCE
Save seeds from the best-tasting pumpkins.
Why Grow Pumpkins?
Pumpkins are easy to grow and can provide a large amount of food. They are a great base crop to build complete dishes with both sweet and savoury.
Here are some of the many reasons to grow Pumpkins:
Easy to grow
Low maintenance
The whole plant is edible: Fruit, flowers, seeds, young shoots, and leaves
A large source of food
Have their own “packaging” with a hard exterior
Rich in vitamin A
High in antioxidants
Aid in upset stomachs
Nutrient-dense food source
Easy to store
Save seeds easily for sustainable gardening
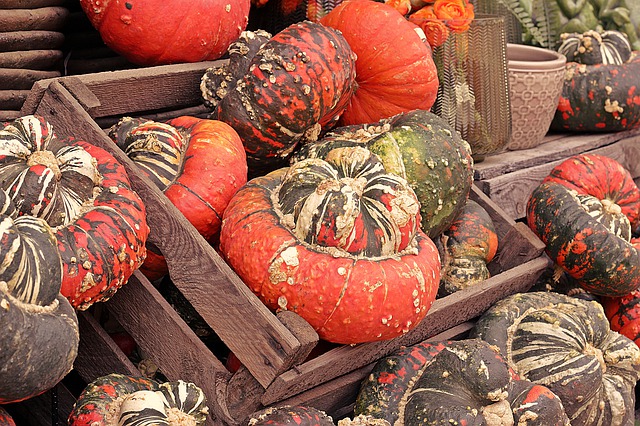
Popular Heirloom Pumpkin Varieties
‘Jarrahdale’ – Australian heirloom. Ribbed blue/grey skin and orange flesh. Sweet and smooth flesh. Weight approx 5kg. Great storage.
‘Queensland Blue’ – Popular Australian heirloom. Large grey/blue skin. Easy to grow. Great storage.
‘Turks Turban‘ – Heirloom from the 1800s. Fun to grow for its interesting shape. Orange, green and white colours. Good storage.
‘Bohemian‘ – Australian heirloom once thought to have been lost. Great for roasting. Stores well.
‘Golden Nugget’ – Small compact bushing plant – great for small spaces. Good for stuffing. Small round orange pumpkins. 1kg per pumpkin.
‘Blue Hubbard‘ –Large heirloom from the 1700s. Long vines. Great stored up to 12 months. 10kg per pumpkin.
‘Dills Atlantic‘ – Giant Pumpkin grows up to 220kg! Best used for pies and soups or winning competitions.
‘Lakota’ – Orange and Green skin with bright orange flesh. Bell-shaped. Nutty flavour. Decorative and great for storage. 2.5kg per pumpkin.
When to Plant Pumpkins
For an early season, you can start your seed off in a tray indoors or in a greenhouse. This is best at the end of winter or the start of spring. If you are sowing the seeds directly in the soil, it is best to wait until spring after frost. In warm, frost-free zones, you may be able to grow pumpkins all year round.
How to Grow Pumpkins
Choose a sunny location with plenty of space. Most pumpkins can ramble several metres but 1sqm per plant is enough.
Pile on the compost. Pumpkins are heavy feeders so mound up a pile of compost to plant your seed or seedlings on top of.
Apply mulch around the seedlings to retain moisture.
Poke a stick or stake near the mound. As the vines grow and take off you will have a locater to know where to water. Avoid watering the leaves as this can cause powdery mildew. Water around the stake.
Pumpkins can also be grown vertically if you are short on space. Provide robust trellis support and direct the vines in the direction you want. Once the pumpkins start to form, it is a good idea to place a sport underneath to that the stem can support the pumpkin as it grows. A stretchy “hammock” style support works well.
Care/ Maintenance
Try to avoid watering the leaves.
The fruit requires pollination to set and grow to maturity. If you notice the small pumpkins shrivel and die off it may be due to a lack of pollination. You can hand-pollinate by wiping pollen from the male flower onto the female flower. See more details on how here.
Feed with liquid seaweed for added nutrition if you have poor soil.
Pinch the ends of the vine off if it gets too long and wild.
Pests / Disease
Slugs and snails may eat young seedlings. Use natural pest management. Aphids can also be an issue on young shoots. Dip them in soapy water. Rats and mice may also nibble on your pumpkins. If you have issues with this you can build a crate or mesh around the pumpkin until it is ready to harvest.
How/ When to Harvest
Your pumpkins will be ready when the vine starts to die off. The closest curly tendril to the stem will be brown and going dry. The pumpkins should be slightly hollow when you know on them and have hard skins. Use sharp secateurs and cut the stem as close to the vine as you can. This will help with storage (see below).
Reproducing
The best way to reproduce pumpkins is to save the seeds. Save the seeds from your best-tasting or largest pumpkins. See the seeds saving guide here. wash and dry your seeds and store them somewhere dry and cool to replant next season.
Cooking and Using Pumpkins
Pumpkin is a great base for many sweet or savoury dishes. It can even be used as a base for many sauces and preserves.
The young leaves and shoots are also edible. These can be added to soups, curries and stir-fried. The flowers are great stuffed or used in salads. The seeds can be coated in spices and roasted for snacks or added on top of soups.
Depending on the variety, some pumpkins can be cured and stored for up to 12 months. Most will be around 6 months. The thicker the skin, the longer they last. Check the variety for a guide.
To prepare your pumpkins to store:
Cut the stem as close to the vine so that you do not damage the pumpkin.
Wash any dirt off using a hose.
Wipe the pumpkins down with a mix of Vinegar and water (1:1) This helps remove any further dirt and bacteria. Check for holes or damage to the skin. These will not store well so they should be eaten first.
Place your pumpkins somewhere dry with diffused sunlight to cure for two weeks. On the deck or porch is often a good place. This helps to harden and dry the skin.
Store your pumpkins in a cool and dark space between 10-16 degrees Celsius. Place them on a piece of cardboard or ply to protect them from bacteria or moisture on the floor.
Check your pumpkins regularly for any signs of mould or softening. Discard them so that they don’t affect the others.
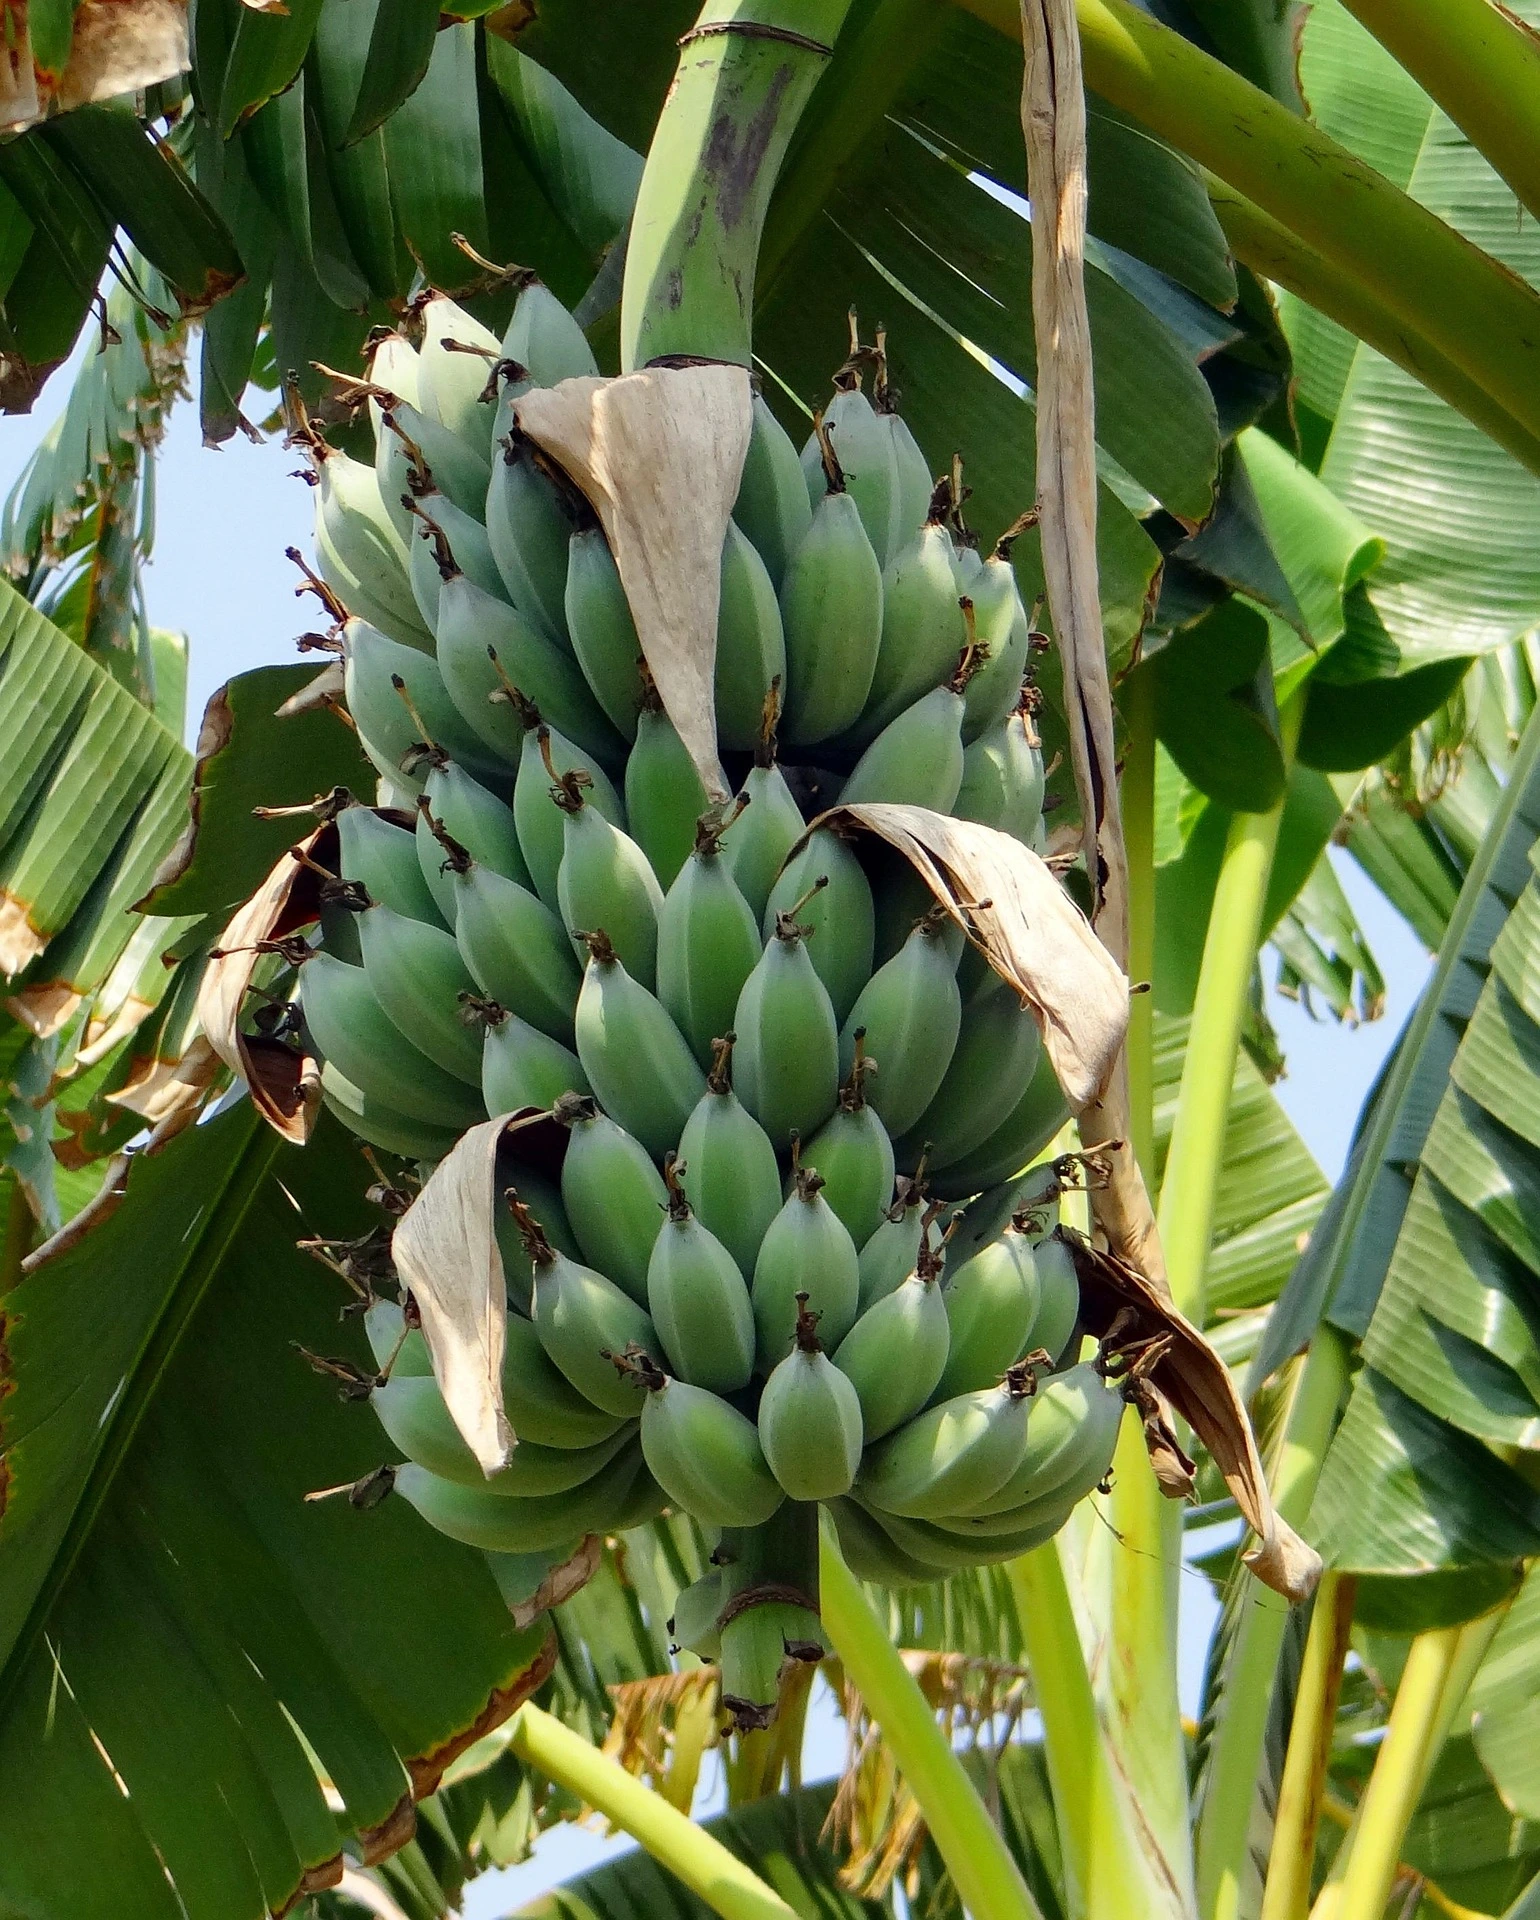
Learn tips and tricks on how to grow bananas and get abundant harvests. Bananas (Musa) are fantastic permaculture plants because they have so many uses both in the garden and the kitchen. Bananas are in fact, a perennial herb, not a tree. The bananas grow from a stalk that emerges from the centre of the banana palm.
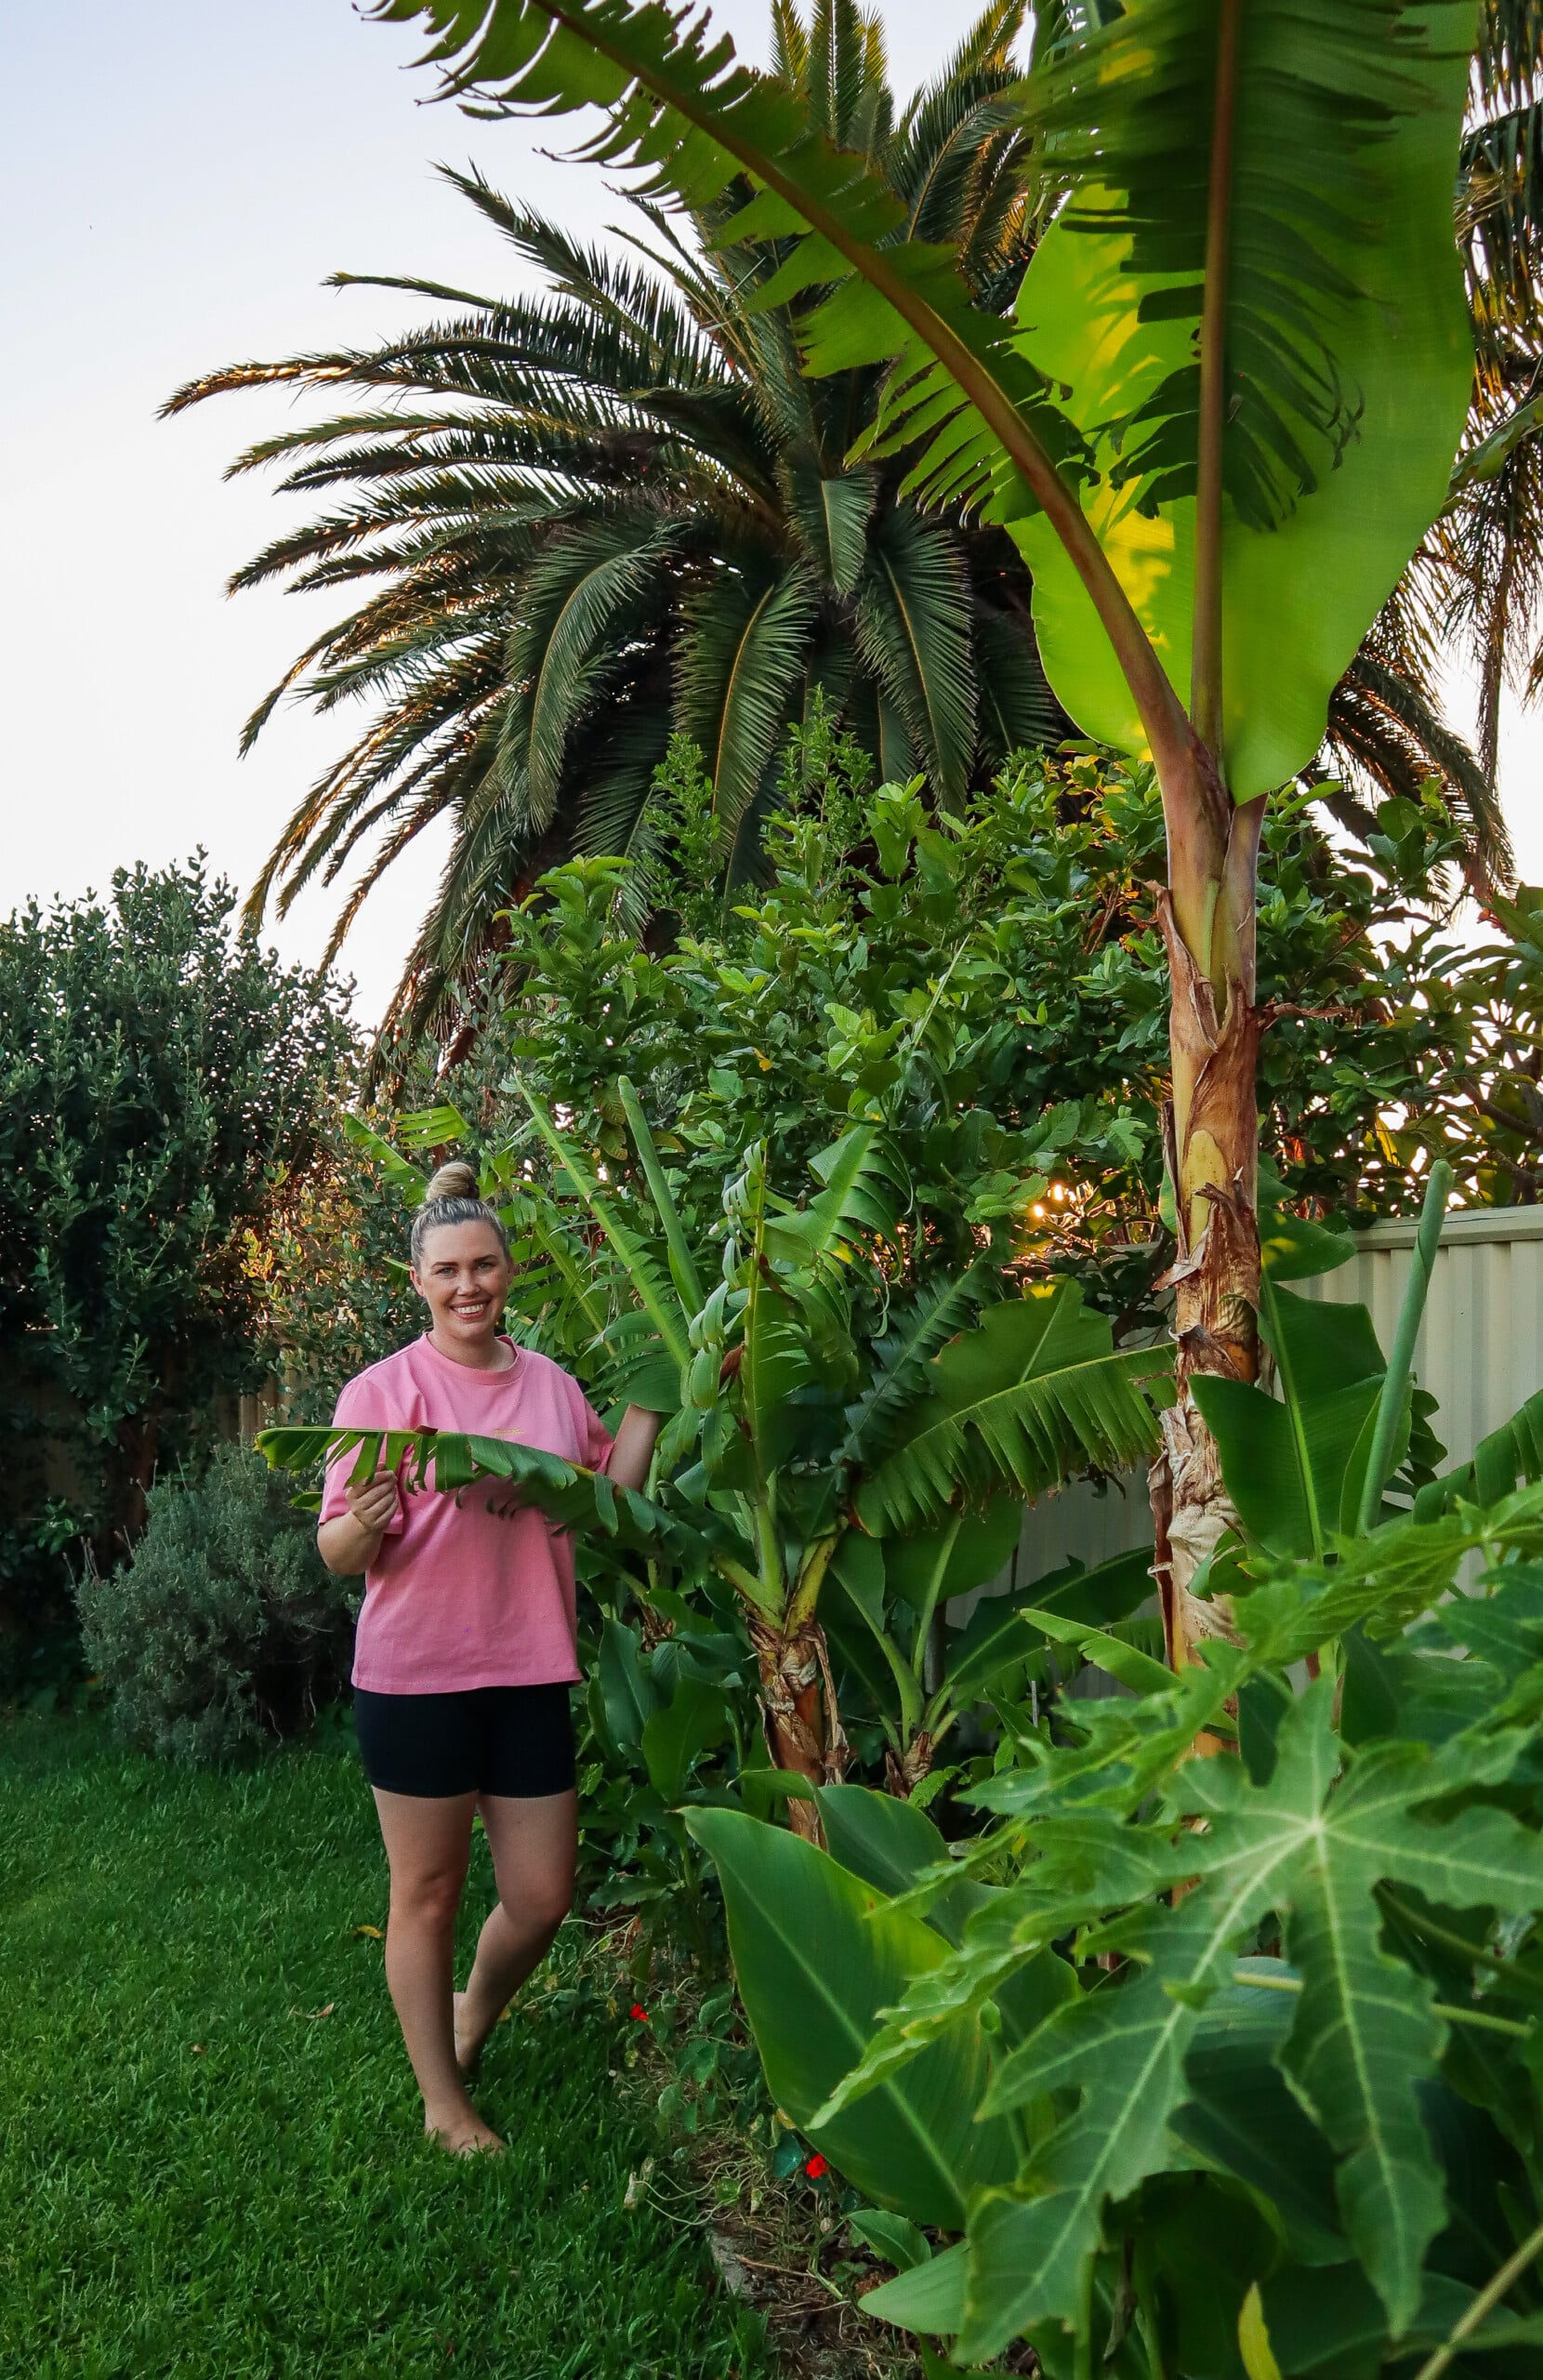
Bananas come in both full-size and dwarf varieties, allowing you to grow them in both large and small space gardens. Plus, you just can’t beat the flavour of homegrown bananas!
Rich fertile compost and well-drained soil. Mound soil up.
LOCATION
Full sun. Protection from harsh winds.
CARE
Water and feed regularly.
FERTILISE
Feed with compost and with liquid seaweed fertiliser.
PESTS
Rodents may attack the fruit.Root rot in wet soils.
HARVEST
9 months +
REPRODUCE
Small “pups” form at the base of the main trunk.
Why Grow Bananas?
Bananas are quick-growing and have many beneficial relationships within the garden. Once you know what conditions bananas thrive in, they are easy to grow.
Here are some of the many reasons to grow Bananas:
‘Ladyfinger‘– Popular backyard banana. Small, sweeter fruit. Don’t turn brown once cut. Plant size 2-5m tall.
‘Gold Finger‘ – Cross between ladyfinger and Cavendish. High wind resistance. Quickest to fruit. Plant size 2-5m tall.
‘Cavendish – Williams’ – Medium-sized bananas. Popular variety. Thin peel and creamy texture. Plant size 2-5m tall.
‘Blue Java‘ – Cold-tolerant variety. Known as the ice cream bananas due to their creamy texture. Plant size 2-5m tall.
‘Red Dacca‘ – Dwarf sized plant. Deep maroon-red peel when ripe. Plant size 2.5m tall.
‘Dwarf Cavendish’ – Smaller version of the Cavendish. Ideal for pots or urban gardens. Plant size 1m tall.
‘Dwarf Ducasse‘ – Dwarf sized plant. Known as the sugar banana due to sweetness. Plant size 1-2m tall.
‘DPM 25‘ – Variety of Cavendish developed to resist Panama disease. Plant size 2-5m tall.
How to Grow Bananas?
Bananas like warm, sunny, sheltered areas. Choose a full sun location with at least 6 hours of sunlight a day. Bananas can be damaged by extreme heat, so in some places like Perth, semi-shade may also work well. Bananas are grown from small plants or “pups” so check out which varieties you want to grow and visit your local nurseries. Due to the spread of diseases, there are restrictions in Australia around swapping and trading bananas. Bananas are heavy feeders, so make sure you add lots of compost and composted animal manure into your soil. Make a mound around the base so that the water drains off and the banana has plenty of food.
In permaculture design, bananas are often grown in a banana circle. This way you can add piles of compost, mulch and plant matter to break down and feed all the plants around the circle.
Papaya and root crops such as turmeric and ginger are often planted alongside the bananas to utilise the space. They are also heavy feeders, so make sure there is plenty of compost and plant matter around them. Bananas grow quickly and can be great for preventing soil erosion on sloped blocks.
When to Plant Bananas?
Plant Bananas during the warmer months of spring and summer.
Care/ Maintenance for Bananas
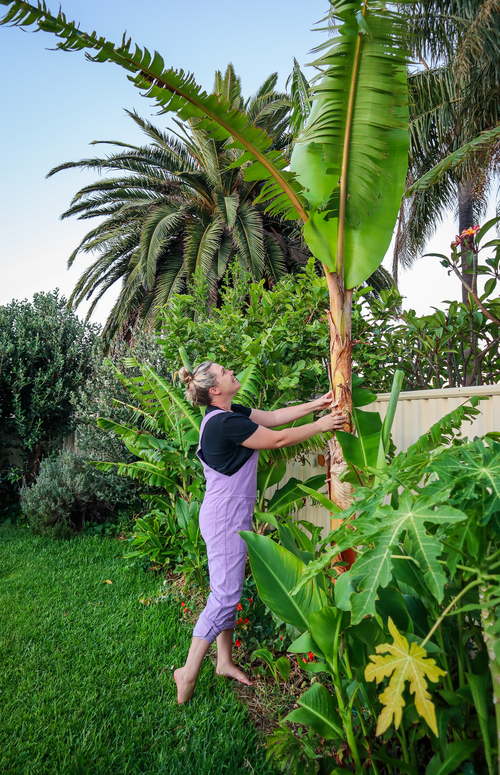
Banana plants are made up of a high percentage of water so they do need adequate moisture to grow. They just don’t like having soggy roots. Well-draining, fertile soil with plenty of mulch or cover crops will help retain moisture. Bananas want all THE FOOD so regularly feeding of compost, natural fertilisers and mulch can help your bananas thrive. The leaves will get damaged by winds and turn brown. You can cut these off and lay them at the base of the plants to return nutrients back into the soil.
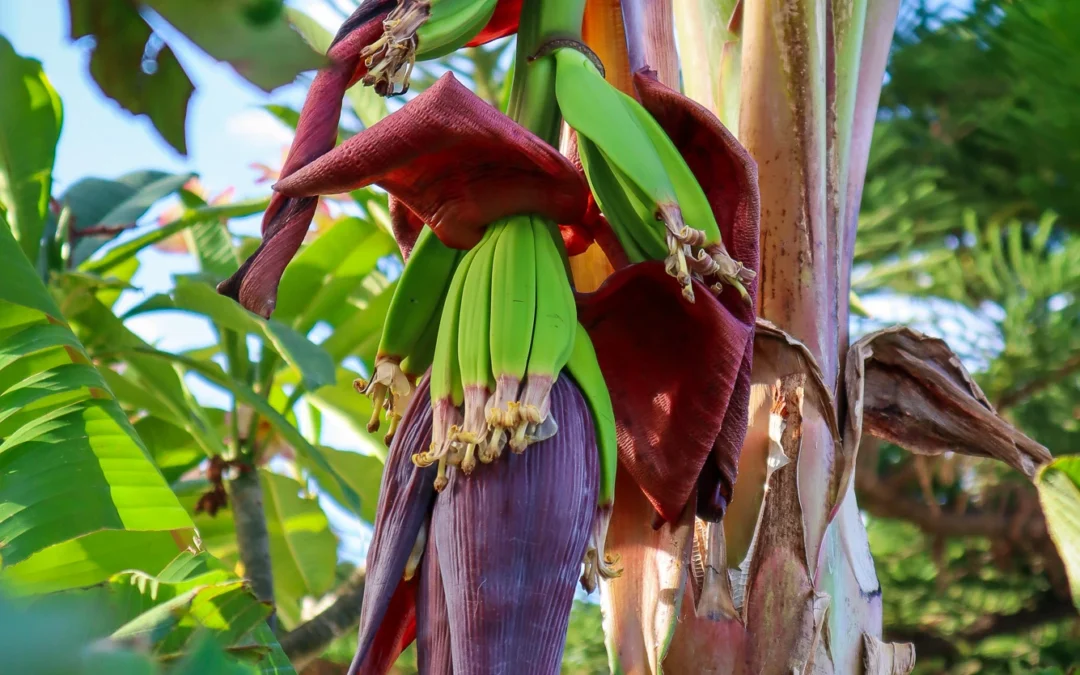
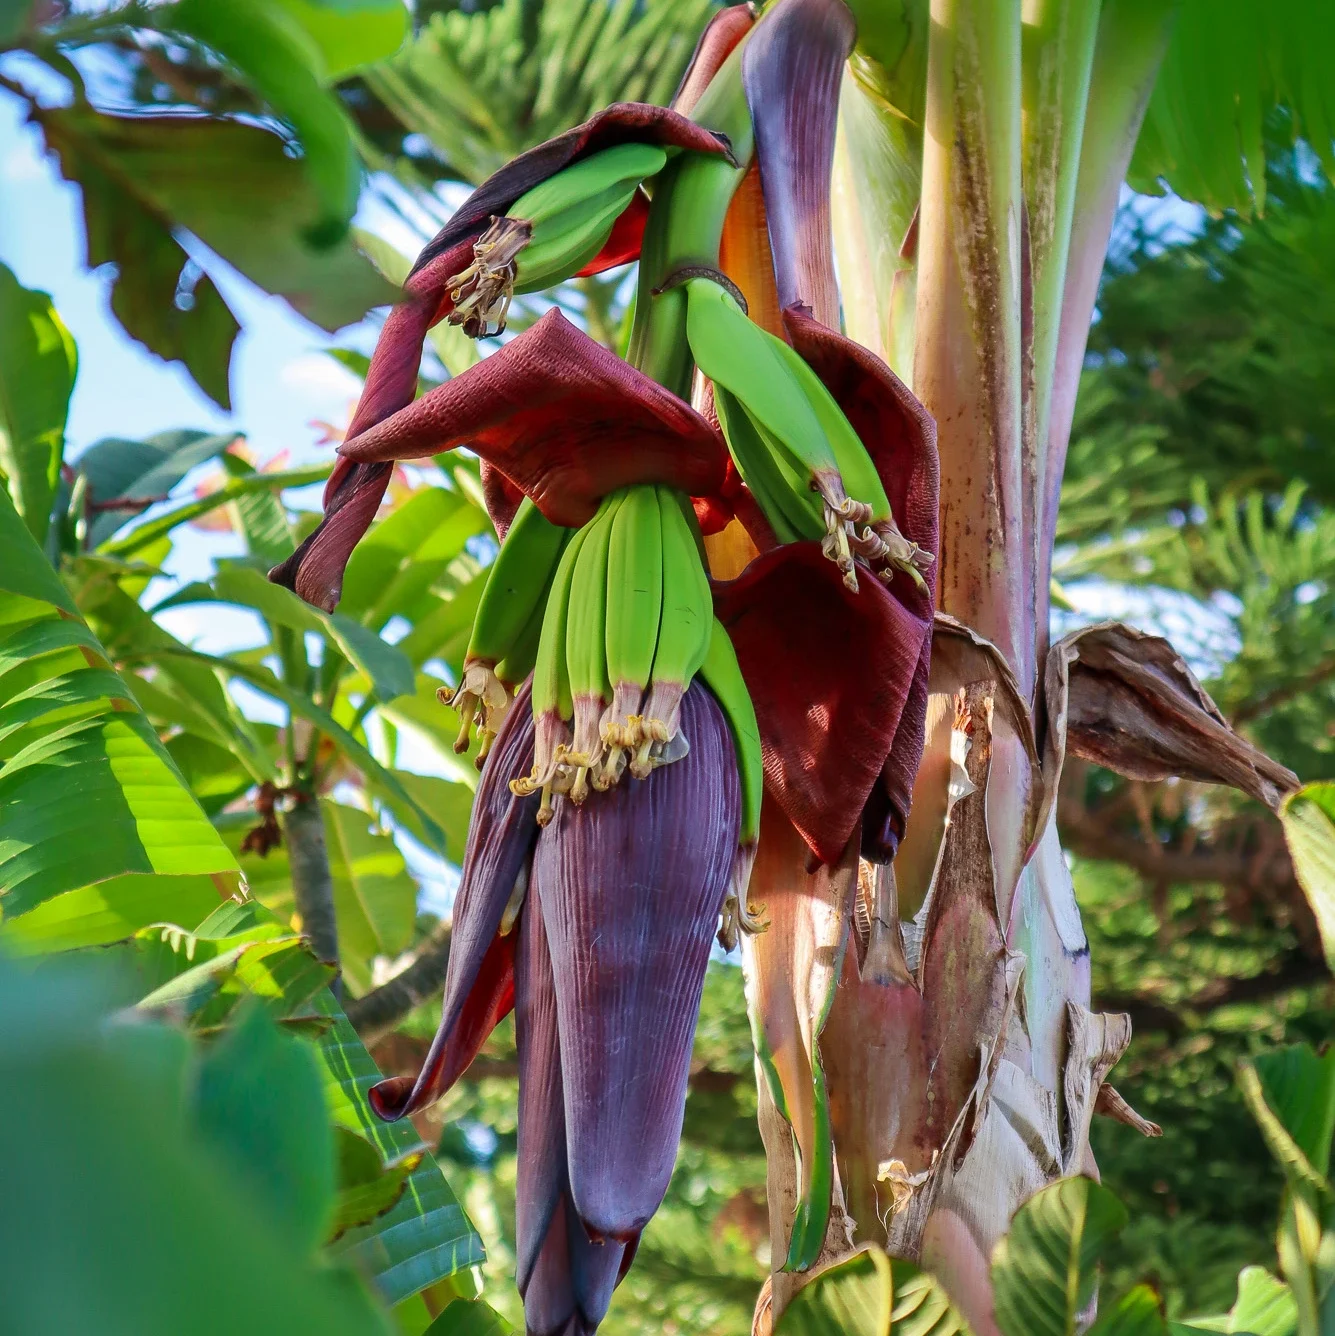
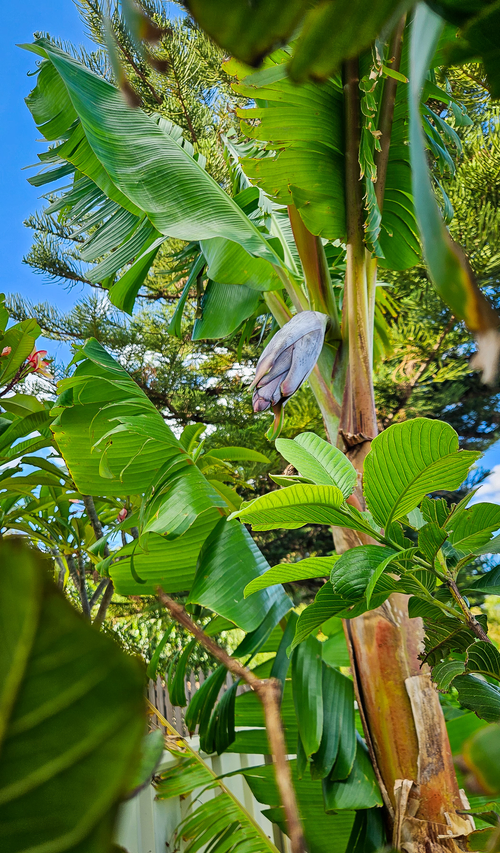
Pollination/ Fruiting
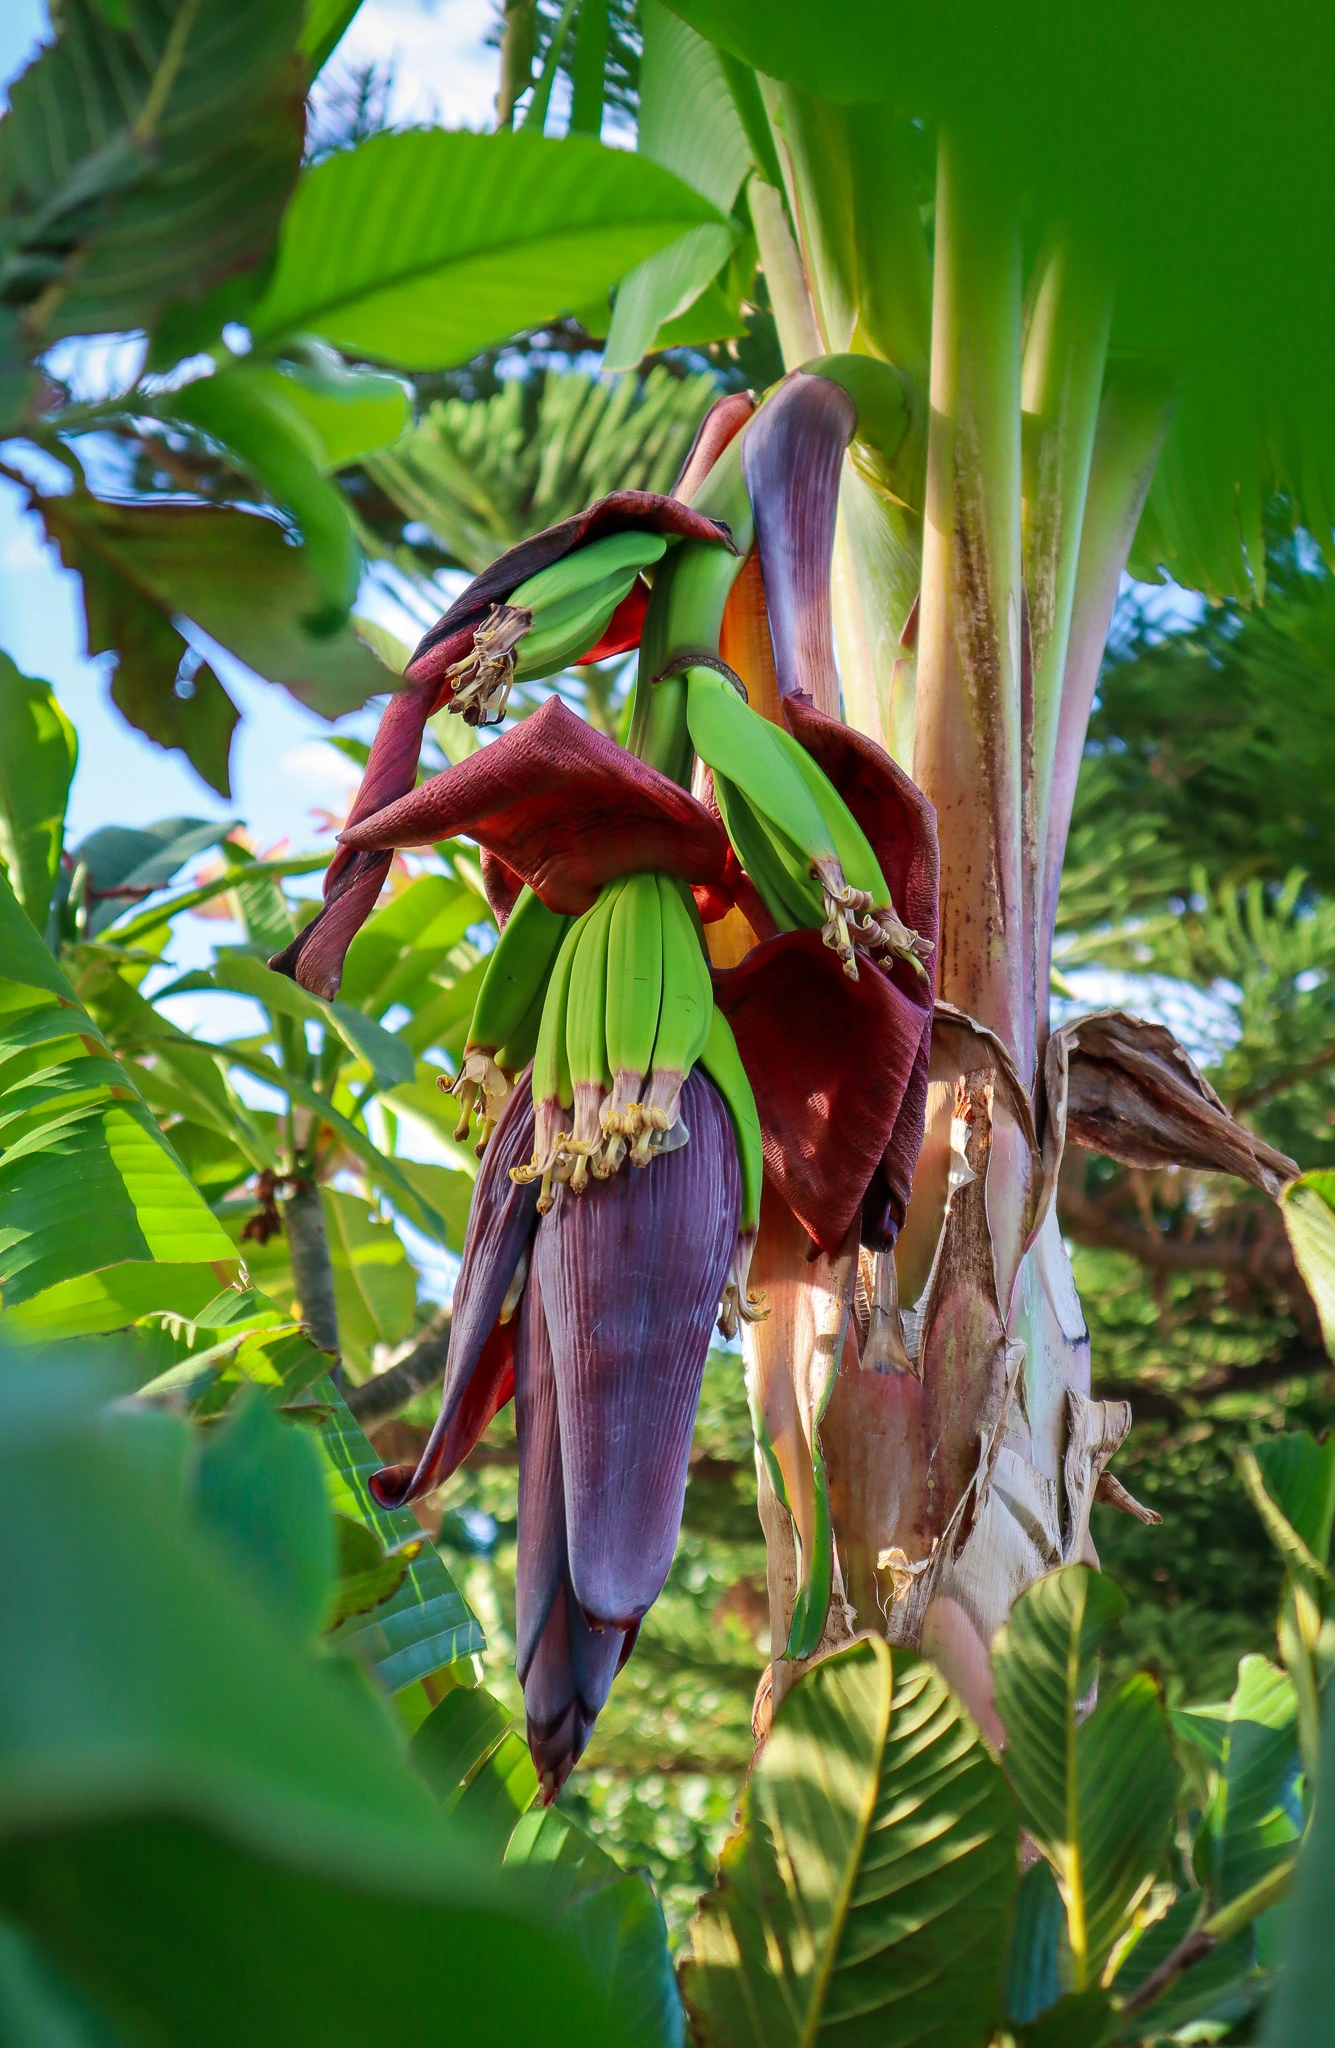
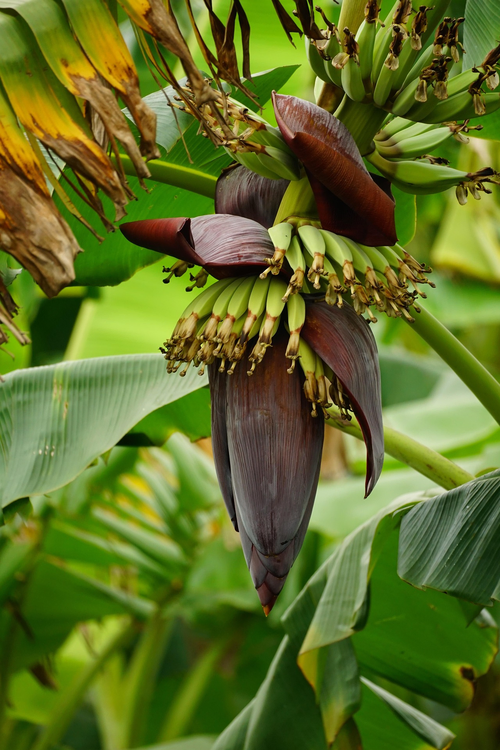
Bananas first send up a short leaf about half the size of normal, closely followed by the “flaf leaf”, this is a sure sign a flower is on the way! The flag leaf is short and grows straight upwards. Bananas send up a flower through the centre of the plant on a spike called the inflorescence. The flowers will have both male and female so you do not need multiple plants for pollination to occur. Once the bananas form, you may need to add support to the bunch to stop the weight from pulling the whole tree down. This will depend on the size and strength of the plan,t and also if you have strong winds or storms.
The small bananas will start to form facing downwards. Once they turn upwards over a few days, it may be beneficial to cover the bunch with a bag. This protects the bananas from birds, bats and other insects.
How to tell when bananas are ready to harvest?
The bananas will ripen off the plant if you harvest them at the right time. You want to wait until the bananas start to be more round and less angular. Or wait until the first banana goes yellow, then they will be ready to harvest. You can harvest each “hand” of bananas as they start to ripen, or you can remove the whole bunch and hang it somewhere dark, dry, warm and protected to ripen off the tree. Under a patio or veranda is always a good option.
Bananas only fruit once from each single plant. Once your bananas are ready, you can chop the entire plant down. Cut this up and add to your banana patch as mulch to break down and add nutrients back into the soil.
Pests / Disease
Bananas can be prone to diseases, and due to our high commercial crops here in Australia, there are regulations to help stop the spread of diseases. This includes only purchasing plants from trusted nurseries and not swapping and trading plants around the community.
Bananas are popular among many pests such as birds, bats, rats and fruit flies. Covering the bunch with a banana bag or a recycled plastic bag can help reduce the risk of losing your delicious crop.
How/ When to Harvest Bananas
Bananas will be ready to harvest when they:
Are light green to yellow
Have no harsh angles but are rounded and smooth
The flower remnant at the ends of each banana comes off easily
Cut the stalk with at least 20cm at the top to hold and hang
Cut the whole tree down as it will die anyway, and use for mulch
Remove the ripe bananas and hang the main bunch up somewhere cool and dark to continue ripening.
The purple blossom end is also edible. Remove the hard outer leaves to reveal the soft pale centre.
Note:
Remove the bag for hanging and ripening purposes, or they will ripen too quickly.
Ensure they are hung somewhere that pests cannot get to them.
Bananas can be picked when they are still green to use as a savoury “potato” substitute.
Reproducing Bananas
Bananas have been cultivated to have no seeds for optimum eating. The best way to reproduce bananas is to dig up the small suckers or “pups” that start growing from the base of the main stem. Look for suckers that are at least 30cm tall and have narrow, sword-like leaves. The broadleaf suckers will still grow, but have smaller root systems as they rely on the main plant for water. Use a sharp blade or spade to detach and dig up the side sucker.
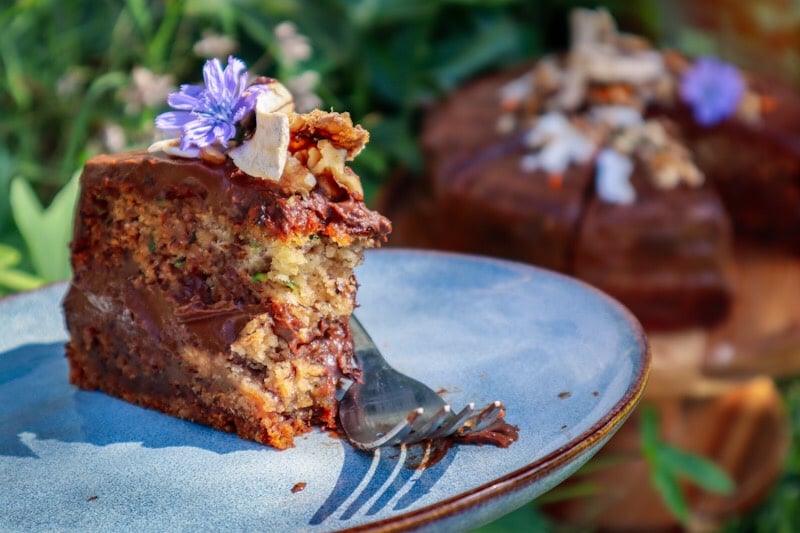
Cooking and Using Bananas
Bananas are super versatile and can be used for both sweet and savoury dishes. The banana leaves can also be used as a substitute for baking paper to steam and infuse flavours into meals. This technique is often used for steaming fish or rice. Banana leaves also make great natural platters, plates and serving dishes. Simply compost them after!
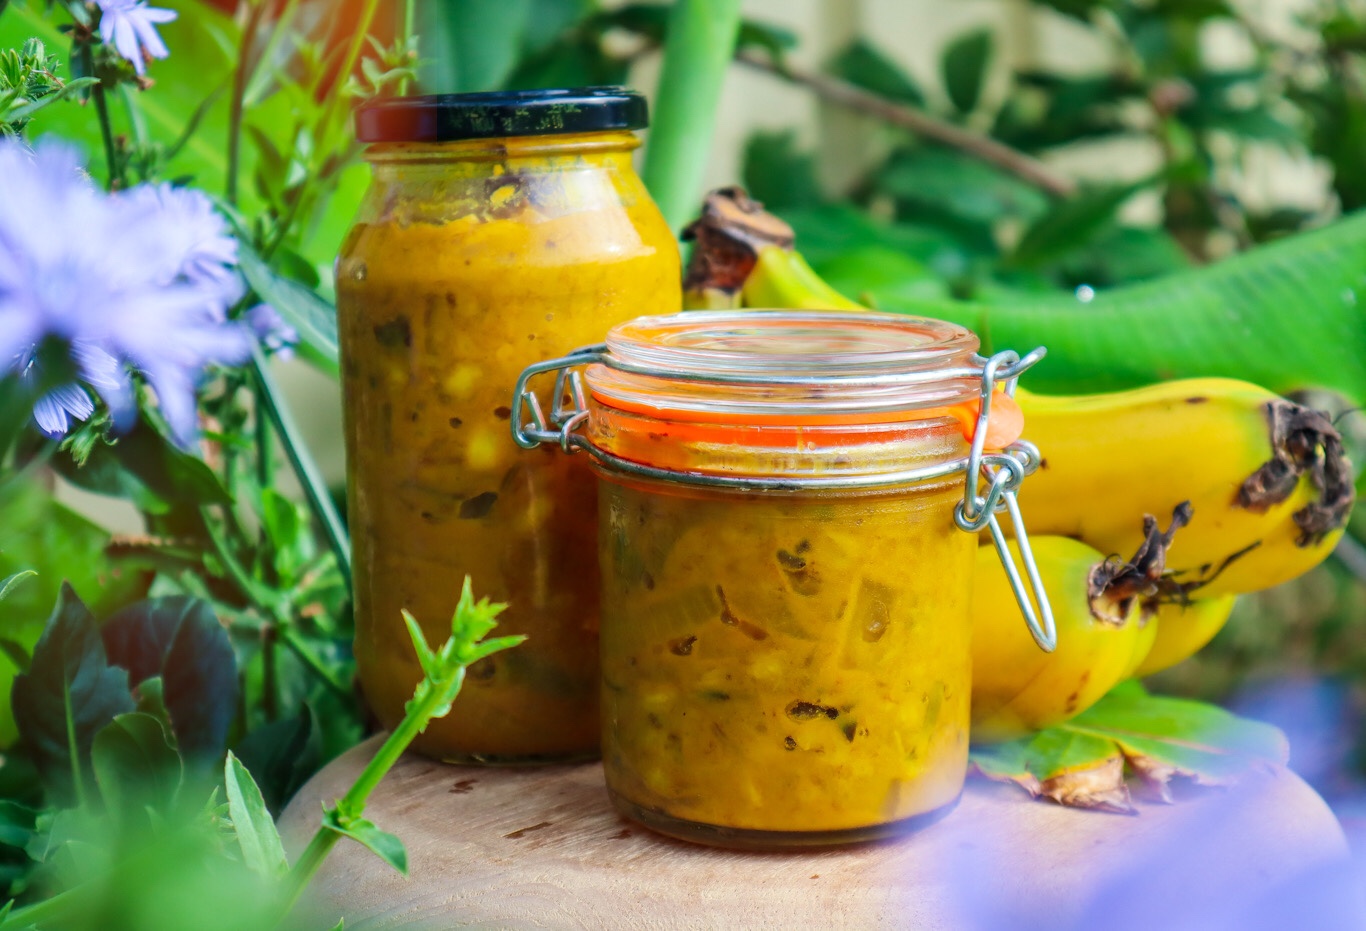
Bananas produce in huge abundance and can ripen quicker than you can eat them. Freezing and dehydrating bananas is a quick and easy way to get the most out of your harvest. Below are a few ways to utilise your ripe bananas:
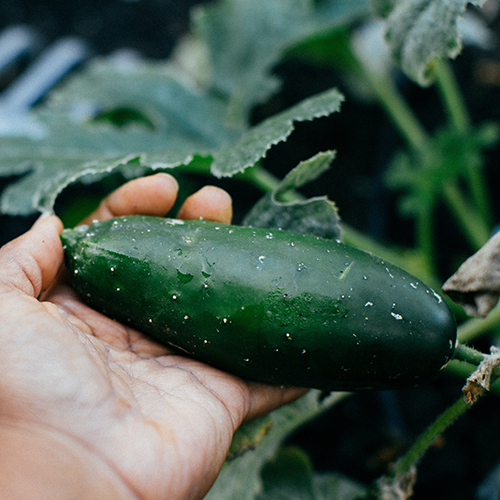
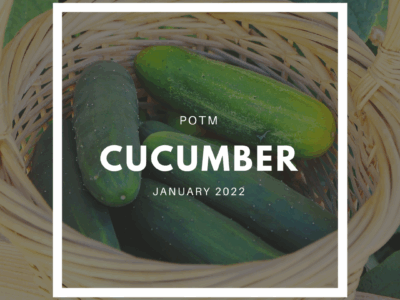
Cucumber (Cucumis sativus) is a delicious and refreshing summer crop that are easy to grow and produce an abundance of food on a single plant. Cucumber can also be grown in pots or grow bags, so they make a fantastic high-yield option for urban gardens.
Cucumber is light, fresh, and great for pickling or eating fresh in salads. The great thing about growing Cucumbers is that you will have more than enough to preserve, gift, swap, or trade.
Full – part sun. Protection from harsh midday sun can help.
CARE
Water at the base to prevent mildew on the leaves.
FERTILISE
Feed every 2-3 weeks with liquid seaweed fertiliser.
PESTS
Mildew in humid climates.Rodents may attack the fruit.
HARVEST
Spring and Summer. Usually around 7-weeks after planting.
REPRODUCE
Save seeds from your best Cucumber at maturity.
Why Grow Cucumber?
Cucumber is quick-growing and can be pickled and preserved to use throughout the year. Cucumber is a great base crop to grow, allowing you to create more meals straight from your garden.
Here are some of the many reasons to grow Cucumber:
Easy to grow
Prolific production on each plant
High in Vitamin C & K
Rich in Antioxidants
Can promote healthy digestion
Hydrating food source
Make quick pickles and salsas
Cool, calm and reduce skin inflammation
Generous crops for gifting, swapping, or trading
The whole plant is edible including shoots, stems and leaves
Popular Cucumber Varieties
‘Marketmore‘– Popular green variety. Prolific, quick-growing, disease resistant. 15-20cm sized fruit.
‘Space Master‘ – Compact vine for small spaces. Great for slicing. 20cm green fruit. 30 fruit per plant.
‘Lebanese Mini‘ – Small mini fruit with edible skin. Great for snacks, salads, and pickles. 40 fruit per plant.
‘Crystal Apple‘ – Australian heirloom. White apple-sized fruit with citrus flavours.
‘National Pickling‘ – Small Heirloom variety. Great for pickling, snacks, and salads.
How to Grow Cucumber
Cucumber grows in a vine structure and can be easily trained to grow vertically up a trellis or a teepee structure. It can be a good idea to get the vines up off the ground to improve airflow and reduce disease. Choose a full sun location with at least 6 hours of sunlight a day. Cucumbers can also be grown in pots and containers. Some varieties are more of a bush than a vine but this will say on the packet.
Cucumbers are warm-loving plants and can be damaged by frosts. It may be best to plant your seeds in small pots or seed trays until your last frost has passed. Plant your seeds as per the packet instruction as each variety and climate will have different growing suggestions. Once your seedlings have 4-5 leaves and your likelihood of frosts has passed, plant your seedlings in free-draining soil with plenty of compost.
When to Plant Cucumber
Plant Cucumber during the warmer months of spring and summer. For early crops, you can plant seeds inside in seed trays and plant outside once your last frost has finished.
Care/ Maintenance
Cucumbers like plenty of water so keep the soil moist and hydrated.
Mulch around your plants to protect the soil and retain moisture. Water the Cucumber at the base to avoid getting the leaves wet, as Cucumber can be prone to powdery mildew. Watering in the morning can also help to prevent this, as the leaves will have time to dry out and not sit wet for too long. If you do see white powdery mildew, remove the affected leaves and make up an organic spray with a mix of 9 parts water to 1 part milk. Spray this over the Cucumber leaves.
It can be beneficial to remove the older leaves at the base of the plant to increase airflow and prevent moisture from sitting around too long. Use sharp and clean secateurs to reduce the spread of any diseases. It can also be helpful to feed your plants withliquid seaweed or garden fertilizerevery 2-3 weeks for added nutrition.
Pollination/ Fruiting
Our bees do a fantastic job at pollinating, so planting flowers nearby will help to encourage plenty of pollinators to your garden. Pick your cucumber harvest often to encourage more to grow.
Pests / Disease
Protect young seedlings from slugs, snails and slaters. They can get some fungal diseases in humid weather. It is important not to wet the leaves to prevent powdery mildew from forming. If you do start to see some powdery mildew, remove the leaves (if it is only a few) or create a spray of 1 part milk to 9 parts water and spray over the affected area. Once the fruits start to mature be aware of rodents or other animals finding your harvests.
How/ When to Harvest
Harvest your Cucumber when they are small and often. They will start to go yellow once they are getting too mature and maybe bitter and the seeds inside will be hard.
Cucumber grows very quickly once the plant is established, so you may need to check every day or every other day for new produce.
The young leaves and tendrils are also edible and can be used in salads and stirfrys.
Reproducing
Cucumber seeds are the easiest way to reproduce. Let 1-2 of your best-looking Cucumbers grow to maturity (until the skin is yellow). This will be when the seeds are mature and ready to harvest. Wash the flesh off the seeds and allow them to dry before storing it in a cool, dry, dark space. Early in the season, you can also take cuttings from the plant and place them in a jar of water. They will spout roots from the nodules where the leaves were and you can replant.
Cooking and Using Cucumbers
Cucumbers are great for adding to summer salads, refreshing water and of course all the pickles!
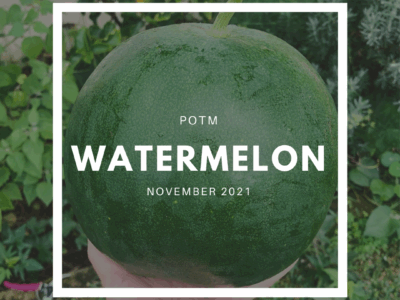
Watermelon (Citrullus lanatus) is easy to grow in home gardens and provides large amounts of delicious fruit. Sweet and bursting with juice, watermelons provide us with a delicious and hydrating summer treat. Watermelons grow on a vine and can trail along the ground or can also be grown vertically with extra support for their heavy fruit. This makes them a great addition to any home garden.
Rich compost and composted manure soil. Create soil mounds.
LOCATION
Full sun 6-8+ hours per day.
CARE
Young plants need regular watering.Water at the base to prevent mildew on the leaves.
FERTILISE
Feed every 2-3 weeks with liquid seaweed fertiliser.
PESTS
Mildew in humid climates.Rodents may attack mature fruit.
HARVEST
Late Summer. Usually around 3 months after planting.
REPRODUCE
Save seeds from your best watermelons.
Why Grow Watermelon?
Watermelon is bursting full of sweet, delicious, and hydrating food. Nature’s way of providing us with refreshing and nutritious energy for the long, hot summer days. Although they do need plenty of water to grow abundant crops, watermelon can do well in hot, dry climates.
Here are some of the many reasons to grow Watermelon:
Low maintenance
Drought tolerant
Pest resistant
Creates diversity in the garden
Abundant, sweet, juicy fruit
Can be grown along the ground or vertically
Can be used for sweet or savoury dishes
Make your own garden treats
Hydration
Vitamin C & A
Antioxidants
Animal Feed
Popular Watermelon Varieties
‘Sugar Baby’– Abundant red flesh Heirloom variety. Compact fruit with matte green hard outer skin to prevent splitting. 10-week harvest. 4 Fruit per plant. 3kg per fruit.
‘Moon & Stars’ – Heirloom pinky-red flesh variety with yellow “stars” over the fruit and leaves and one large “moon” speck. Thich skin to prevent splitting. 14- week harvest. 3-4 fruit per plant. 25kg per fruit.
‘Crimson Sweet (War Paint)’ – Very popular with deep red flesh and white paint-like stripes on the skin. 12-week harvest. 10kg per fruit.
‘Candy Red (Charleston Grey) – Heirloom. Large oval fruits with deep red flesh. Light green skin. 15+ week harvest. 15kg fruit.
‘Bush Jubilee’ – Old variety with red flesh and green striped skin. High sugar content. Compact bushy vine, great for small space gardening. 14-week harvest. 5kg fruit.
‘Blacktail Mountain’ – Large round fruit with red flesh. Dark green skin. Extra Sweet. Great for colder climates. 15-week harvest. 4 fruit per plant. 5kg per fruit.
‘Sweet Siberian’ – Heirloom with a green outer skin and sweet orange flesh. Great for colder climates. 10-weeks harvest. 5 fruit per plant. 4kg per fruit.
‘Golden Midget’ – Skin turns yellow when ripe. Sweet red flesh. Prefers warmer climates. 14-week harvest. 7 fruit per plant. 2.5kg per fruit.
How to Grow Watermelon
Watermelon likes a full sun location, with approximately 6-8 hours of sunlight. Plant seeds when daily temperatures start to average 20-25 degrees Celsius per day (less for colder varieties). Watermelon does not like their roots being disturbed. So if possible planting them directly in the ground can be beneficial. Create 30cm high mounds of soil using rich compost and composted manure. Plant your seeds 1 inch deep on the top or plant your seedlings if you have germinated inside.
When to Plant Watermelon
Plant your watermelon seeds from Spring to early Summer. Watermelon can take a while to produce so it is a good idea to get them in the ground early. As soon as temperatures average 20-25 degrees Celcius.
Care/ Maintenance
Young watermelon plants will need regular watering. Especially in the height of summer. The leaves will curl up and notify you that they are too dry. Avoid watering the leaves as this can allow powdery mildew to form. It can be a great idea to put a stick or marker where you plant the seeds. Once the plant is established, it can be hard to see where the main stem and roots are to water correctly. Placing a marker will help you water the correct part of the plant for maximum efficiency. Cover your soil with mulch – pea straw or lucerne can be a great option as it will start to break down and feed your plants.
Feed your plants regularly (every 2 weeks or so) with a liquid seaweed fertiliser for an extra boost of nutrients.
Heavy rain or excess watering when the fruit is nearing maturity, may cause the melon to crack open. Keep an eye on your ripening melons.
Watermelon can also be grown vertically! Especially the smaller fruiting varieties. Plant them near a trellis or frame and move the vines as they grow to latch onto the frame. They have strong tendrils that will hold them in place. Once the fruit starts to form you may need to support the weight so that they do not snap and fall. A mini hammock under the melon using a stretchy, breathable fabric such as a stocking can be useful.
Pollination/ Fruiting
Watermelons require pollination from a male to a female flower to form fruit. If you have plenty of bees in your garden, they should be able to do this for you. If you notice small watermelons forming and then dying off, this may mean you have a pollination problem. This can be aided by using a small paintbrush to dust the pollen of the male flower (single flower with no baby melon forming) to a female flower (flower with a baby melon at the base). This can help boost your success rate and grow more watermelon. Be sure to plant lots more flowers in between your plants to attract the bees if you ever have pollination problems.
Pests / Disease
Watermelon is relatively pest-resistant. They can get some fungal diseases in humid weather. It is important not to wet the leaves to prevent powdery mildew from forming. If you do start to see some powdery mildew, remove the leaves (if it is only a few) or create a spray of 1 part milk to 9 parts water and spray over the affected area. Once the fruits start to mature be aware of rodents or other animals finding your fruit.
How/ When to Harvest
Harvesting watermelon can be tricky! And devastating when you get it wrong (be prepared it may happen from time to time..). Under-ripe watermelon will be bland and lack flavour, whereas, over-ripe watermelon will be floury and granular.
Some ways to determine if your watermelon is ready:
Look for the curly tendrils closest to the watermelon stem. They should turn brown and dry when the watermelon is ready.
A light knock on the watermelon, it should sound slightly hollow when ready.
Carefully roll the melon over and the part that was touching the ground should be turning yellow.
Reproducing
Watermelon seeds are the easiest way to reproduce watermelon. Choose seeds from your best mature melons. Wash off the flesh and allow it to dry before storing it in a cool, dry, dark space. Watermelon can also be grown from cuttings. Do this early in the season otherwise, the vine will not have enough time to produce before the weather gets cold. Cut a 10cm piece of a side shoots off. You want to let the main leader vine grow so do not cut this. Cut just below a leaf as this is where the roots will form. Place in a jar of water until you see some roots form. Then plant it back out into the garden. This is more for a bit of fun as you will get the best crops from direct-sown seeds.
Cooking and Using Watermelon
Watermelon is so delicious eaten fresh but there are many other ways to prepare watermelon to use in both sweet or savoury dishes.
Watermelon Pairs well with: Mint, Lime, Basil, Citrus, Red Onion, Feta Cheese, Coconut, Yoghurt, Almonds, Jalapeno, Haloumi, Ginger
Watermelon ideas:
Fruit salad
Juice
Iceblocks
Salads
“Chips” or “Wedges” with dipping sauce
Fruit kebabs
Watermelon jerky
Grilled watermelon
Cocktails
Serving Bowls using the skin/shell
Cocktails and Mocktails
Carvings
Sorbet
Watermelon Cake
Flavoured Water
Salsa
Fruit leather
Syrup
Preserving the Harvest
Watermelon is best eaten cold and fresh but sometimes we can’t keep up with their generous yields. Dehydrated watermelon is a great way to use up a lot of extra watermelons. Watermelon jerky is extremely sweet and could make a good substitute for natural lollies. Other ways you could preserve your watermelon are Freezing cubes, juicing and freezing cubes or making syrup or chutney.