A Guide to Growing Citrus

A Guide to Growing Citrus

Citrus are a fantastic addition to a home garden because they are hardy, quite forgiving, and easy to use in the kitchen. Here in Perth Citrus grow very well due o our warm sunny climate and sandy soils. Citrus are sun lovers and require at least 6 hours of sunlight per day. They are not a fan of frosts and extremely cold weather. If you do get harsh winters you could try growing citrus in a pot so that you can move it to a warmer location for the winter months. In this guide we will go through all of the steps to growing and taking care of your citrus trees so that you can get delicious and abundant crops of fruit each year.
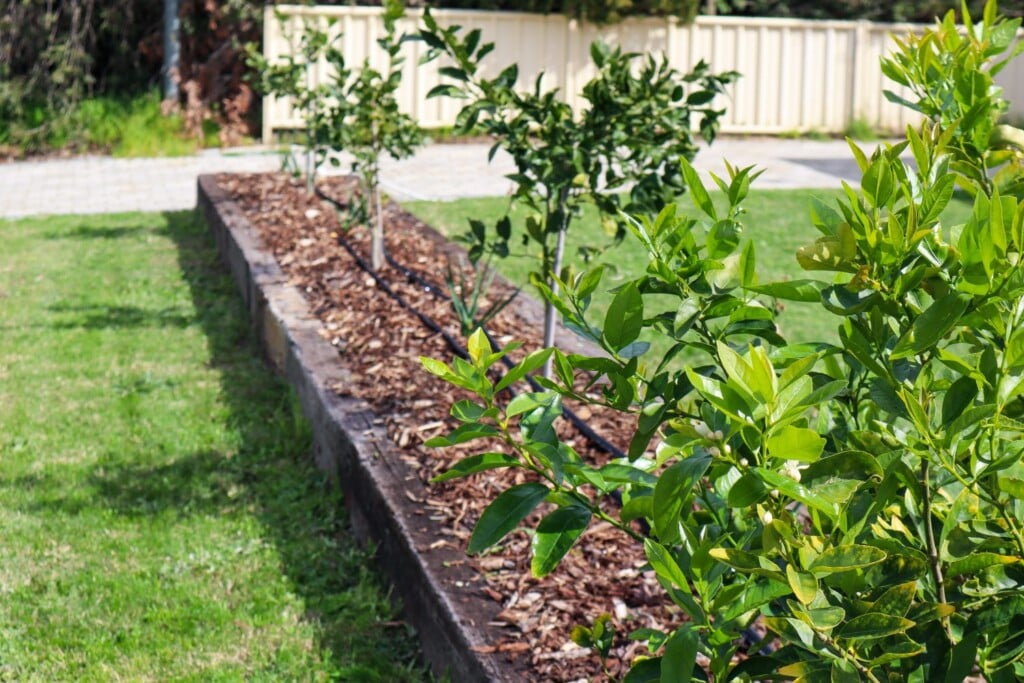
Types of Citrus

Not all citrus are made equally and each type will have slightly different needs. It is important to look into this when choosing which citrus and also which variety is right for you and your garden.

These guidelines are general in nature and more suited to your classic citrus such as Lemon, Lime, Orange and Grapefruit. Citrus such as native finger limes are a little more delicate and have different feeding and sunlight requirements.

Top Quick Tips

  • Choose a sunny location
  • Prepare soil with compost
  • Loosen roots to ensure it is not root bound when planted
  • Feed regularly with compost, liquid fertilisers, and mulch
  • Check for gall wasps in Autumn and winter
  • Check no shoots are growing from below the graft line!
  • Mulch and keep weed-free around the base of the citrus
  • Remove mulch from directly touching the trunk

WATCH the masterclass

YouTube video

Choosing a location

Citrus are sun lovers and require 6+ hours of sunlight per day. Citrus grown in the shade can still fruit but will be less productive and more susceptible to fungus and disease.

However, here in Perth, dappled summer shade in the afternoon could work well to help protect the trees from our harsh summer sun.

Protection from the wind is also desired so that flowers don’t get blown off before they have had time to set as fruit.

Consider the size of the tree for the location you have chosen. Most varieties of citrus are available as dwarfing which means they will grow to a maximum height of 2m. This can be a good idea for small urban blocks.

Soil

Citrus like free-draining soil and don’t like having waterlogged or boggy roots. This can quickly lead to root rot. They also prefer soil that is neutral in pH.

To prepare your soil dig a hole that is twice the size of the pot your tree has come in. You may want to add compost and composted manures (chicken, horse) to amend your soil. Make sure you mix in the soil amendments with your natural soil so that it isn’t a dramatic transition.

For sandy soils: add in some compost and mix it through the sandy soil so that it is free draining but now has a little extra nutrition.

For Clay soils: Add in compost and sandy soil to help create a more free-draining patch. It would also be beneficial to mound the soil up so any excess water drains away from the dree to help reduce clay-bogged soil.

Note: do not put any fertilizer in the hole as this will burn the roots.

When to plant Citrus Trees?

The ideal time to plant out your new citrus tree is in Spring after any chances of frosts and passed. This will give the tree time to get situated before summer. Avoid planting citrus (or any trees) during the peaks of summer. It is already stressful enough for the plant without adding in extreme temperatures. If you buy or receive a citrus tree during summer, keep it in a pot and ensure it doesn’t dry out, or plant it in a larger pot and keep it somewhere protected from summer sun until Autumn when it is safer to plant out.

How to plant out your potted plant?

  1. Firstly make sure you water your plant well – place a tray underneath for it to absorb the water.
  2. Have your hole prepared (twice as big as the pot).
  3. Carefully squeeze the sides of the pots and start to pull the tree out by holding the stem at the base.
  4. Gently loosen the soil around the sides to allow the roots to spread out once it is planted. If your plant is root bound and all the roots are tightly wrapped in the shape of the original pot, you will need to tear away some of the roots to break it free from it’s confined shape. Use the hose to blast away some of the soil and this can also help free up the roots. If you do not break up the roots around the side the plant will remain tightly bound and will not be able to expand and grow.
  5. We the soil with a hose and place the plant in the hole and push the soil back around it. Compact the soil down by gently using your foot.
  6. It can be a good idea to stake your tree for extra support so that it grows straight and doesn’t snap in any strong winds.
  7. Give the tree good water.
  8. Mulch around the base. Wet cardboard can help keep weeds away and then add mulch on top. Mulch out as far as the leaves spread on the tree. Pull back the mulch from about an inch away from the trunk so that it doesn’t rot.
  9. Give your tree consistent water but always check first to see if the soil is moist so as to not overwater it.
  10. It is generally advised to remove fruit for the first 3 years so that the tree can establish strong roots and branches. You will often find the tree will naturally drop fruit itself in the first few years.

Feeding

Mulch around citrus, especially below the canopy line. Citrus have shallow feeder roots so they can dry out, overheat or get too cold if their roots are exposed.

Citrus are quite heavy feeders but young trees in the first year won’t need much if any fertiliser. Use compost, compost teas, worm teas, chicken manure or bedding, and slow-release citrus fertilisers. You can feed citrus every 6 weeks from August to February.

Citrus are very good at telling you what nutrients they are missing by the colour of their leaves. Yellow tips, veiny patterns, brown patches, or yellow leaves that drop off. Sometimes it may just be that the pH of the soil is not right or the soil temperatures are too low for the plant to absorb nutrients. This is why our trees often look a little sad after winter.

May deficiencies can look similar to a balanced NPK fertiliser or regular feeds of compost teas and natural liquid fertilisers can help reduce the chances of deficiencies.

Some of the common issues are:

Lack of Nitrogen – Leaves turning yellow and dropping off. Often caused by excess rain or not enough nutrients being added. Sheep pellets, composted animal manure, garden compost and lawn clippings can help.

Lack of Magnesium: Leaves start to look yellow in patches, tie-dye effect but the base or centre of the leaf remains the greenest. This appears mainly in older leaves. To add magnesium to your plant apply a feed of Epson salts. These can be purchased from the plant store and will have the directions and amounts listed. Usually, 1-2 tsp dissolved in hot water then added to 1L of water per tree. This can also be sprayed on the leaves for a quicker effect but do not do this before a hot sunny day.

Lack of Potassium: Potassium or potash is what helps our flowers and fruits form. Banana peels, wood ash (white part used sparingly) or potassium sulphate.

Heavy rain and temperatures can also affect how nutrients are absorbed so don’t stress too much, often these correct themselves as rain eases or temperatures rise again. balanced regular feeding of compost and increasing diversity helps.

Watering

Citrus like regular and consistent watering. 1-2 times a week in warmer months. It is important that citrus get plenty of water when starting to form fruit. Drip irrigation, weeper hose or other slow-release watering can help to allow water to soak in. Mulching will help retain moisture and temperature around the plants.

Pests and diseases

Citrus are quite hardy and as long as we keep up the nutrition and they have enough sunlight they can usually shake off most pests.

A few to look out for are:

Gall Wasps: These lay eggs in the branches of your tree and swell to look like little lumps. Often we don’t notice them until late summer and autumn. It is important that we remove these during winter before the eggs hatch. You can tell if they have hatched because they leave little exit holes in the lump. The lumps should be removed and ideally burnt. If not secure them in a bag and tie them tight so if they hatch they cannot escape. leave it in the sun for 4 weeks if possible to kill off the larvae. DO NOT put in the compost. If wasps are allowed to hatch they will start to infect your neighbours trees and then you will have more and more issues each year as the surrounding trees get left unchecked. Be aware that removing a lot of branches will affect the following year’s production.

Avoid excess fertilizer in spring or late winter can cause big flushes of new growth. This is what they love to lay eggs in.

Citrus leaf miner: This moth lays eggs and the larvae leave silvery wiggle marks on the leaves similar to a snail trail. Remove affected leaves, especially on young growth. dispose of in a similar way to the above.

Aphids: Aphids will attack new growth, especially in the warmer months. When possible spray them off with a hose to reduce the population. Eco neem oil or dishwashing liquid and water can be applied to the new growth if the infestation is bad or reoccurring.

Sooty Mould: This is a black mould that looks a bit like the plant has been burnt. Sooty mould doesn’t really affect the plant but it is a clear indicator that something else is going on. Usually, this means your tree is being attacked by aphids or spider mites. Once you clear up this issue the sooty mould will dry up and fall off.

Encourage beneficial insects by increasing diversity and flowers to the garden.

Pruning

The great thing about citrus is they don’t require any special pruning. You can prune your trees to shape or keep them at a manageable height. The best time is late winter to early spring once the tree has finished fruiting. Use sharp, clean cutting tools and don’t cut more than 20%. You do not want to do an overall “hedge” prune as this will affect the next season’s harvest. Select specific branches that need to be cut back for height or shape.

Grafted fruit trees are when a delicious variety is attached to the roots of a vigorous growing variety. Most citrus will be grafted.

Keep an eye on the graft line and always remove shoots or suckers that appear below the graft. The graft line is usually easy to see as it will have a different texture and often a different width. This is most important in the first few years of planting the tree. You do not what the graft to grow or it can overtake your tree and kill off the actually selected variety.

How to tell if the rootstock is taken over?

Citrus rootstock often has very sharp spikes. The leaves will be a different shape too. They are usually bush lemons and will produce no fruit or small dry tasteless lemons. Always check below the graft line to ensure all rootstock shoots are removed.

Harvesting

Use sharp secateurs to harvest your fruit rather than ripping off the tree and causing damage to branches. The best way to tell f citrus is ripe is to try one and see. Fruit often take 9-12 months to ripen. Fruit can be left on the tree so that you can eat them fresh as needed. Until they start to fall or you are getting excess rain. Large downpours of rain can cause citrus to burst open and split.

Beginners Guide to Edible Perennial Plants

Beginners Guide to Edible Perennial Plants

Edible Perennial Plants are an investment in your future food production. Perennials grow back each year and provide long-term sustainable harvests. When creating a self-sufficient garden, edible perennials can form a really good base to build from.  Annual vegetables can be a lot of work and it can be devastating if you lose a crop after all that time and effort. Having a mix of edible perennials in your garden will give you the comfort of knowing you will still have food available that will re-grow year after year.

Most of the vegetables we see in the supermarkets are annual vegetables that are grown for a single season and then harvested. This means that perennials are a little unusual for home gardeners to grow and cook.

What is a Perennial Vegetable?

  • Annuals – Grow for a single season and then harvested completely or die off
  • Biennials – Grow for a season and then flower or seed for the second season. Most are grown as annuals or left to collect seeds.
  • Perennials – Grow for more than two years and many can continue to grow for decades. They often die back in winter and re-grow in spring on their own accord.

edible perennial plants

Why Grow Edible Perennial Plants?

  • Re-grow each year without planting
  • Stable consistent food supply
  • Create diversity in the garden
  • Economical plant purchases
  • Low maintenance
  • Form deeper root systems to require less watering
  • Stabilise soil and reduce erosion
  • Require less feeding as they are slow-growing
  • Habitat for wildlife long term
  • Support no-dig gardens

Pros and cons of Edible Perennial Plants vs Annuals?

Many edible perennial plants are quite slow-growing. This helps them form strong established root systems to feed and support their growth for many years to come. This can mean that you may not get food from your perennial plants within the first year or two. However, all good things take time and time is going to pass anyway. Think of it as an investment that will have compounding growth and provide you with a sustainable future food supply. Saving your future self, time, and money!

Perennials stay in the same spot and regrow year after year so you need to make sure you select a suitable spot from the start. Look into how much sunlight/shade and type of soil they prefer before planting. This also means your garden beds will be allocated to that plant long-term. The great thing about annuals is that you can mix and match different plants constantly.

A-Z Top Edible Perennial Plants

Artichoke

Artichoke

Cynara cardunculus var. scolymus

Full Sun – summer harvest

  • Edible flowers
  • Beautiful aesthetic plant
  • Very popular with the bees!
  • Most produce in their second year
  • Harvest buds before they flower
  • Reproduce from side suckers

asparagus

Asparagus

Asparagus officinalis 

Full sun – spring & summer harvest

  • Produces for up to 30 years
  • Beds can look bare for part of the year
  • Grow underground and pop up in spring
  • Mulch well
  • Feed with animal manure
  • Seeds form from berries

Brazilian spinach

Brazilian Spinach

Alternanthera sisssoo 

Sub-tropical or tropical climate – All year round

  • Low growing lush green plant
  • Hardy easy to grow plant
  • Use as you would spinach
  • Propagate from cuttings
  • Likes humid weather

blueberry

Blueberry

Vaccinium sect. Cyanococcus

Full sun – part shade

  • Grow to about 2m tall
  • Can fruit for up to 30 years
  • Likes acidic soil
  • Fruit starts really producing after two years
  • High in antioxidants
  • Produce up to 7kg of fruit each year
chicory

Chicory

Cichorium intybus

Full sun – part shade

  • Eat fresh or cooked to reduce bitterness
  • Great animal feed
  • Beautiful edible flowers
  • Attracts bees for pollination
  • Can be grown as an annual or perennial
  • Short lived 7 year perennial
fennel

Fennel

Foeniculum vulgare

Full sun – part shade

  • Green variety can be invasive
  • Edible leaves, flowers, seeds and bulbs
  • Easy care free plant
  • Leaves, seeds and flowers are great for flavouring pickles and ferments
  • Medicinal qualites

horseradish

Horseradish

Armoracia rusticana

Full sun – part shade

  • Root crop that spreads (can be invasive)
  • Edible leaves and roots
  • “wasabi” like flavour used as a condiment
  • Great for flavouring pickles and ferments
  • Medicinal qualities
  • Likes cooler climates

Jerusalem artichoke

Jerusalem Artichoke (sunchoke)

Helianthus tuberosus

Full sun

  • Edible roots
  • Low maintenance
  • Attracts Bees and Butterflies
  • Abundant production of crops
  • Drought tolerant
  • Good for mulch and biomass
  • Can be invasive – keep conatained

pepino

Pepino

Solanum muricatum

Full sun – part shade

  • Low-lying fruiting shrub
  • Melon flavour
  • Abundant production
  • Frost sensitive
  • Easy to grow, low maintenance
  • Easily grown from cuttings

pineapple plant

Pineapple

Ananas comosus

Full sun – warm climates

  • Low maintenance
  • Re-grow from the top and side suckers
  • Low lying and can be grown in pots
  • Slow growing can take 2 years to fruit
  • Regrow to have many on the go and have regular fruit

Queensland Arrowroot

Canna edulis

Sun – Part shade

  • Edible leaves and roots
  • Substitute for potatoes
  • Reproduce easily from side tubers
  • Easy to grow
  • Leaves can also be used as mulch

raspberry

Raspberry

Rubus idaeus

Full sun

  • Plants grow for 8-10 years
  • Grow easily from cuttings or if the canes touch the ground so can be invasive
  • Prefer cooler climates
  • Vigorous growing
  • Canes die after fruiting so needs pruning

rhubarb

Rhubarb

Rheum rhabarbarum

Sun – part shade

  • Edible stalks
  • Leaves are toxic
  • Likes plenty of compost and manure
  • Takes 1-2 years to start producing well
  • Can be reproduced by splitting at the crown
  • Plants can grow for 10-50 years

society garlic

Society Garlic

Tulbaghia violacea

Full sun – part shade

  • Dense, low lying clumping plant
  • Garlic flavour all year round
  • Attracts Pollinators to the garden
  • Edible flowers and leaves
  • Drought tolerant

sorrel

Sorrel – french

Rumex acetosa

Full sun – part shade

  • Substitute for cooked spinach
  • Great animal feed
  • Abundant production
  • Low maintenance
  • Cut flowers off to reduce bolting

strawberry

Strawberry

Fragaria ananassa

Full sun – part shade

  • Edible flowers, fruit and leaves
  • Bright vibrant colours
  • Attracts Pollinators to the garden
  • Can be eaten raw in salads or as garnish
  • Added nutritional value

Sweet potato

Sweet Potato

Ipomoea batatas

Full sun – part shade

  • Edible perennial leaves and root
  • Leaves are a substitute for spinach
  • Living mulch
  • May die off in winter (cool climates)
  • Easily propagated from vine or tiny piece of root left behind in the soil.

taro

Taro

Smallanthus sonchifolius

Part sun-shade

  • Large root crops
  • Great under-story plant
  • Tubers cook similarly to potato
  • Young leaves can be cooked
  • Water regularly
  • Harvest in Autumn as the leaves die

turmeric

Turmeric

Curcuma longa

Part shade

  • Multiplying root crop
  • Plant in warmer months of spring
  • Can harvest some at a time rather than all at once
  • Attractive plant as low-middle layer
  • Medicinal qualities

walking onion

Walking Onions (Egyptian)

Allium cepa var. proliferum

Full sun – part shade

  • Edible leaves, flowers and bulb
  • Hardy low maintenance
  • Stems fold over and regrow new plants
  • Drought and frost tolerant
  • Grows bulbs at the base and also mini ones on the end of the stem

yacon

Yacon

Colocasia esculenta

Part sun – shade

  • Large sweet root crops
  • Great under-story plant
  • Tubers cooks similarly to potato
  • Young leaves can be cooked
  • Water regularly
  • Harvest in Autumn as the leaves die

Want to learn more about my favourite Perennials? Download the Free Ebook Here

edible perennials

How to Grow Bananas – The Ultimate Garden-to-Plate Guide

How to Grow Bananas – The Ultimate Garden-to-Plate Guide

banana

How to Grow Bananas

Learn tips and tricks on how to grow bananas and get abundant harvests. Bananas (Musa) are fantastic permaculture plants because they have so many uses both in the garden and the kitchen. Bananas are in fact, a perennial herb, not a tree. The bananas grow from a stalk that emerges from the centre of the banana palm.

Bananas come in both full-size and dwarf varieties, allowing you to grow them in both large and small space gardens. Plus, you just can’t beat the flavour of homegrown bananas!

Quick Tips on How to Grow Bananas

PLANT

Spring and Summer.

SOIL

Rich fertile compost and well-drained soil. Mound soil up.

LOCATION

Full sun. Protection from harsh winds.

CARE

Water and feed regularly.

FERTILISE

Feed with compost and with liquid seaweed fertiliser.

PESTS

Rodents may attack the fruit. Root rot in wet soils.

HARVEST

9 months +

REPRODUCE

Small “pups” form at the base of the main trunk.

Why Grow Bananas?

Bananas are quick-growing and have many beneficial relationships within the garden. Once you know what conditions bananas thrive in, they are easy to grow.

Here are some of the many reasons to grow Bananas:

  • Easy to grow
  • Provide shade
  • Reduce soil erosion
  • Leaves used for platters and plates
  • Fibres for weaving
  • Bananas are high in potassium
  • Vitamins A,B and C
  • Great for baking
  • Green matter for composting and mulching gardens
  • Feed and bedding for animals
  • Banana skin fertiliser

Ladyfinger– Popular backyard banana. Small, sweeter fruit. Don’t turn brown once cut. Plant size 2-5m tall.

Gold Finger‘ – Cross between ladyfinger and Cavendish. High wind resistance. Quickest to fruit. Plant size 2-5m tall.

Cavendish – Williams’ – Medium-sized bananas. Popular variety. Thin peel and creamy texture. Plant size 2-5m tall.

Blue Java – Cold-tolerant variety. Known as the ice cream bananas due to their creamy texture. Plant size 2-5m tall.

‘Red Dacca – Dwarf sized plant. Deep maroon-red peel when ripe. Plant size 2.5m tall.

‘Dwarf Cavendish’  – Smaller version of the Cavendish. Ideal for pots or urban gardens. Plant size 1m tall.

‘Dwarf Ducasse – Dwarf sized plant. Known as the sugar banana due to sweetness. Plant size 1-2m tall.

‘DPM 25 – Variety of Cavendish developed to resist Panama disease. Plant size 2-5m tall.

How to Grow Bananas?

Bananas like warm, sunny, sheltered areas. Choose a full sun location with at least 6 hours of sunlight a day. Bananas can be damaged by extreme heat, so in some places like Perth, semi-shade may also work well. Bananas are grown from small plants or “pups” so check out which varieties you want to grow and visit your local nurseries. Due to the spread of diseases, there are restrictions in Australia around swapping and trading bananas. Bananas are heavy feeders, so make sure you add lots of compost and composted animal manure into your soil. Make a mound around the base so that the water drains off and the banana has plenty of food.

In permaculture design, bananas are often grown in a banana circle. This way you can add piles of compost, mulch and plant matter to break down and feed all the plants around the circle.

Papaya and root crops such as turmeric and ginger are often planted alongside the bananas to utilise the space. They are also heavy feeders, so make sure there is plenty of compost and plant matter around them. Bananas grow quickly and can be great for preventing soil erosion on sloped blocks.

When to Plant Bananas?

Plant Bananas during the warmer months of spring and summer.

Care/ Maintenance for Bananas

Banana plants are made up of a high percentage of water so they do need adequate moisture to grow. They just don’t like having soggy roots. Well-draining, fertile soil with plenty of mulch or cover crops will help retain moisture. Bananas want all THE FOOD so regularly feeding of compost, natural fertilisers and mulch can help your bananas thrive. The leaves will get damaged by winds and turn brown. You can cut these off and lay them at the base of the plants to return nutrients back into the soil.

Pollination/ Fruiting

Bananas first send up a short leaf about half the size of normal, closely followed by the “flaf leaf”, this is a sure sign a flower is on the way! The flag leaf is short and grows straight upwards. Bananas send up a flower through the centre of the plant on a spike called the inflorescence. The flowers will have both male and female so you do not need multiple plants for pollination to occur. Once the bananas form, you may need to add support to the bunch to stop the weight from pulling the whole tree down. This will depend on the size and strength of the plan,t and also if you have strong winds or storms.

The small bananas will start to form facing downwards. Once they turn upwards over a few days, it may be beneficial to cover the bunch with a bag. This protects the bananas from birds, bats and other insects.

How to tell when bananas are ready to harvest?

The bananas will ripen off the plant if you harvest them at the right time. You want to wait until the bananas start to be more round and less angular. Or wait until the first banana goes yellow, then they will be ready to harvest. You can harvest each “hand” of bananas as they start to ripen, or you can remove the whole bunch and hang it somewhere dark, dry, warm and protected to ripen off the tree. Under a patio or veranda is always a good option.

Bananas only fruit once from each single plant. Once your bananas are ready, you can chop the entire plant down. Cut this up and add to your banana patch as mulch to break down and add nutrients back into the soil.

Pests / Disease

Bananas can be prone to diseases, and due to our high commercial crops here in Australia, there are regulations to help stop the spread of diseases. This includes only purchasing plants from trusted nurseries and not swapping and trading plants around the community.

Bananas are popular among many pests such as birds, bats, rats and fruit flies. Covering the bunch with a banana bag or a recycled plastic bag can help reduce the risk of losing your delicious crop.

How/ When to Harvest Bananas

Bananas will be ready to harvest when they:

  • Are light green to yellow
  • Have no harsh angles but are rounded and smooth
  • The flower remnant at the ends of each banana comes off easily
  • Cut the stalk with at least 20cm at the top to hold and hang
  • Cut the whole tree down as it will die anyway, and use for mulch
  • Remove the ripe bananas and hang the main bunch up somewhere cool and dark to continue ripening.
  • The purple blossom end is also edible. Remove the hard outer leaves to reveal the soft pale centre.

Note:

  • Remove the bag for hanging and ripening purposes, or they will ripen too quickly.
  • Ensure they are hung somewhere that pests cannot get to them.
  • Bananas can be picked when they are still green to use as a savoury “potato” substitute.

Reproducing Bananas

Bananas have been cultivated to have no seeds for optimum eating. The best way to reproduce bananas is to dig up the small suckers or “pups” that start growing from the base of the main stem. Look for suckers that are at least 30cm tall and have narrow, sword-like leaves. The broadleaf suckers will still grow, but have smaller root systems as they rely on the main plant for water. Use a sharp blade or spade to detach and dig up the side sucker.

banana

Cooking and Using Bananas

Bananas are super versatile and can be used for both sweet and savoury dishes. The banana leaves can also be used as a substitute for baking paper to steam and infuse flavours into meals. This technique is often used for steaming fish or rice. Banana leaves also make great natural platters, plates and serving dishes. Simply compost them after!

Banana pairs well with: Citrus, Strawberry, Coconut, Papaya, Coffee, Caramel, Peanuts, Lemon, Blueberry, Chocolate, Cinnamon, Bacon, Honey, Mango, Pineapple, Guava, Vanilla, Walnut

Banana ideas:

  • Frozen for smoothies
  • Fresh in fruit salads
  • Banana bread
  • Muffins and cakes
  • Banana tart
  • Banana pancakes
  • Hot sauce base
  • Custard

Preserving the Harvest

Bananas produce in huge abundance and can ripen quicker than you can eat them. Freezing and dehydrating bananas is a quick and easy way to get the most out of your harvest. Below are a few ways to utilise your ripe bananas:

  • Chutney and Relish
  • Frozen pieces – great for smoothies, milkshakes and baking.
  • Dehydrated chips
  • Jam, butter and chutney
  • Dried and powdered for flavouring
  • Baked goods are then frozen
  • Banana Peel Fertilizer

More Banana Posts

Other Grow Guides

Grow Food From Cuttings

Grow Food From Cuttings

Grow food from cuttings and boost your garden’s sustainability. Do you want to grow more food without all the cost of buying seeds and plants to make it happen? This guide will show you some easy and quick ways to grow a tonne of food. Multiplying plants from ones you already have or making cuttings from friends gardens can help you set up and grow a sustainable garden without all the costs involved.

grow food from cuttings

$18

30-page Digital Ebook featuring 10 detailed plants to grow from cuttings. Plus tips & tricks to propagate and grow a sustainable garden.

Homegrown food not only tastes so much better but it also provides you with much more nutrients than many store-bought fruits and veggies. You also can control what goes on your food and skip all the pesticides, chemical fertilisers and other nasty sprays that get used on commercially grown food. Many of the plants in this guide may already be in your garden, neighbours or friends and family’s. Learning to identify these plants and how to propagate and regrow them from cuttings will take your gardening and sustainability to the next level.

By the end of this guide, you will have a list of edible plants you can go out and reproduce to grow wholesome food for you and your family.

Happy Gardening

Holly