15 Best Vegetables to Plant in Autumn For Perth Gardens + Growing Tips

15 Best Vegetables to Plant in Autumn For Perth Gardens + Growing Tips

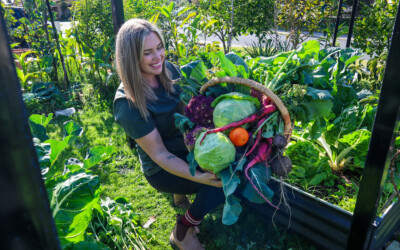
If you’re looking for the best vegetables to plant in autumn in Perth (zone 10b), these 15 vegetables and herbs will set your garden up for a productive season. After months of trying to keep the garden alive through relentless heat, autumn gardening in Perth feels like a breath of fresh air.

This is the season where growing food in Perth actually starts to feel enjoyable again (my favourite season!)….and it’s when my garden puts on some of its best growth all year.

If you’ve been waiting for the right time to start a veggie garden or refresh tired summer beds, it doesn’t get any easier than Autumn (if you can get the pests in check…don’t worry, I will share my top tips for this at the end of the post!).

In this post, I wanted to share 15 vegetables that genuinely thrive during autumn in Perth, along with bonus tips on how to sow and get the most out of your harvests!

Why Autumn Is One of the Best Gardening Seasons in Perth

One of the biggest mistakes I see beginner gardeners make in Perth is trying to start everything in the middle of summer. Our summers can be brutal. Between the dry heat, intense sun, warm nights, and sandy soil that dries out quickly, young seedlings can struggle fast. I do very little planting in summer.

Autumn, everything starts bursting out of the soil! I let a lot of plants go to seed, so my gardens often have seeds popping up everywhere! Including cracks in the pavement and lawn. The soil is still warm from summer, which helps seeds germinate quickly, but cooler air temperatures dramatically reduce stress on plants (and help retain moisture!). It’s this sweet spot where growth really takes off again.

I honestly find autumn gardening the MOST enjoyable. Instead of constantly trying to save plants from heatwaves, you can focus on building healthy soil, succession planting, and enjoying the garden again. Take the time to slow down, observe and enjoy your garden!

I recently shared a full autumn garden tour over on YouTube, showing what’s growing, what I’m planting right now, and how the food forest is transitioning into the cooler season 👇

15 Vegetables and Herbs to Grow in Autumn (Perth)

Lettuce

Lettuce absolutely shines in autumn. During summer, it bolts almost instantly in my garden (or just goes pure crisp!), but once the weather cools down, it becomes one of the easiest and most rewarding crops to grow. I love filling gaps throughout my raised garden beds with loose-leaf varieties because you can harvest them continuously over months.

SOWING TIP: Lettuce seeds are delicate, so don’t bury them too deep. I sprinkle them on the surface and only barely cover them with a light sprinkle of soil (or none at all).

ABUNDANCE TIP: I let a lettuce go to seed every year (around spring / early summer), and the seeds fall into the soil and regrow on their own once the weather cools in autumn! I literally did not plant lettuce this year, and yet I have 100s of plants throughout my garden (and the lawn and pavers). Or pop the seed head upside down in a paper bag and dry out for the next season.

Carrots

Carrots grow well during Perth’s cooler months. The milder temperatures help roots develop properly without the stress and inconsistent growth that often happens during hot weather. One thing that’s made a huge difference in my sandy soil is keeping carrot beds consistently moist during germination.

SOWING TIP: I like to lay the seeds directly on the surface and cover with a hessian sack or a plank of wood. Come back and check in a few days to see when they have sprouted. This keeps them moist, stops them blowing away, or birds eating the seeds. I like to sow seeds every couple of weeks for an extended harvest.

ABUNDANCE TIP: Let a carrot continue to grow until it flowers and goes to seed. Not only will the bees and beneficial insects love you, but you will get 100s of free carrot seeds. I find that carrot success is in overplanting, so having excess seeds is always a huge benefit.

Pineapple Sage

This is my favourite herb! I have not had success growing it as a perennial in my garden, so it is something I replant every autumn. Sweet, fragrant leaves and edible flowers, pineapple sage is amazing in teas, salads, and baking. Plus, the small birds love harvesting the nectar from the bright red flowers.

GROWING TIP: I suggest planting from a seedling. They like a warm sunny spot with adequate watering. I have struggled to grow this in the past, so I tried a few different spots in the garden until I found a place where it was happy!

ABUNDANCE TIP: Prune or pinch out the tips of the plant to encourage a bigger, bushier shrub. Once established, pineapple sage becomes an incredible living pollinator plant in the food forest. Helping your fruits and veggies get better pollination (and grow more fruit).

Spinach

Spinach thrives once temperatures cool down. I grow a mix of traditional spinach and perennial spinach throughout autumn because they produce so much reliable food. NZ spinach/ Warrigal greens makes a great living ground cover. Longevity Spinach is packed with so many nutrients and grows easily from cuttings. Traditional spinach in the raised garden beds offers a regular supply of cut-and-come-again greens.

SOWING TIP: Keep spinach consistently watered while young to encourage tender leafy growth. I like planting it along bed edges where it’s easy to harvest regularly.

ABUNDANCE TIP: Perpetual spinach can continue producing for months if regularly harvested. Instead of removing the whole plant, pick the outer leaves continuously for a much longer harvest. Perennial spinach, such as NZ Spinach, Brazilian Spinach, Longevity Spinach, Okinawa Spinach, Malabar Spinach or Chaya (tree spinach) are a great way to have a continuous supply of leafy greens.

Peas

Peas are one of those crops that instantly make the garden feel productive again. Autumn is the perfect time to sow them in Perth because they establish well before winter and love the cooler nights. I usually grow climbing peas along trellises on the back (southern) side of my raised beds, which helps maximise space (without shading out the other plants) while creating beautiful vertical greenery.

SOWING TIP: Peas germinate best in consistently moist soil, so don’t let young seedlings dry out during establishment. Trellising early also makes a huge difference once growth takes off.

ABUNDANCE TIP: Leave the roots in the ground after harvesting. As legumes, peas help add nitrogen back into the soil, which benefits the next crop planted nearby. Leave some peas to fully mature on the plant and save your own seeds. Seeds that have grown from plants in your garden will be well adapted to growing in your exact conditions.

Broccoli

Broccoli can struggle badly in heat, but autumn gives it the conditions it actually wants. This is the time I start planting out seedlings so they can mature through winter. A big lesson I’ve learnt with broccoli is not to skimp on soil fertility. Heavy-feeding crops like this need rich compost soil and consistent moisture to really thrive. I love to grow purple broccoli because it adds colour to a winter garden!

GROWING TIP: Mulch heavily around broccoli seedlings early. This helps regulate soil moisture and reduces stress while the plants establish. I tend to plant seedlings rather than seeds because they do take a while to grow, so you want to make sure they have enough time to produce before the spring heat arrives. So seeds in late summer to early autumn or plant seedlings in mid-late autumn.

ABUNDANCE TIP: The leaves are edible, too! Chop up and cook the leaves just like you would chard for a nutritious bonus harvest! Just take a few from each plant so that there are still plenty of leaves for the plant to grow. Often, if you cut the main head off, some side shoots will appear, so leave the plant in the garden for some smaller side shoots.

Kale

Kale is one of the easiest and most reliable vegetables in my autumn garden. Once established, it handles cool weather beautifully and produces continuously for months. It’s also one of those crops that makes the garden feel abundant because you’re constantly harvesting leaves without needing to replant immediately.

GROWING TIP: Not all Kale is the same…some are spikey and tough. Try out a few varieties and see which one you prefer. My favourite is the Black Tuscan Kale. It is smoother and easier to use meals.

ABUNDANCE TIP: Rather than harvesting the entire plant, pick the lower leaves continuously while allowing the top to keep growing taller. I also prune my kale in spring and let it grow through summer. This means come the following autumn, you already have an established plant ready to start producing!

Beetroot

Beetroot grows surprisingly easily during autumn and doesn’t need a huge amount of space. I often tuck beetroot throughout raised beds and around larger crops because it fits into small gaps really well. The cooler weather also helps produce sweeter roots. For sweeter, less earthy-tasting varieties, try the Golden Beetroot or Chioggia candy-striped Beetroot.

SOWING TIP: Sow directly where you want them to grow because beetroot dislikes being transplanted. Keeping soil consistently moist helps improve germination rates. Sow multiple seeds 2-3 weeks apart for a continuous harvest.

ABUNDANCE TIP: Don’t forget the leaves! Young beetroot greens are delicious and productive long before the roots are fully mature. They are part of the chard family, so you can use the leaves and stalks in soups and stir-fries just like you would silverbeet or chard. Just harvest a few from each plant so they still have enough energy to produce healthy roots.

Cabbage

Autumn is the perfect time to establish cabbages before winter. I’ve found they perform much better once the cabbage moth pressure starts easing compared to spring and summer. Here in Perth, our winters can be short. I love to grow the smaller mini cabbage varieties (Diggers Seeds).

SOWING TIP: Cabbages are heavy feeders, so I always plant them into beds with plenty of compost and organic matter already added. I like to plant cabbage from seedlings, as they can be slow-growing, and pests do love to eat them when they are young. Late summer and early autumn, sow seeds in seed trays. Late autumn or early winter, I would stick to seedlings to have enough time for them to form before the hot weather arrives in spring. Because cabbages a low-growing plant, plant them on the northern or western side or edge of your garden beds, so they don’t get shaded out by taller plants.

ABUNDANCE TIP: Smaller “mini” cabbages not only take up less room (allowing you to fit in more plants), but they are also the perfect size to make sure none goes to waste.

Parsley

Parsley is such an underrated herb in an edible garden. Once the weather cools, it explodes with growth and becomes one of the easiest productive herbs in the garden. It’s also fantastic for filling edges throughout a food forest system. I often cut back extra growth to use as chop and drop mulch. Fresh parsley can be topped on so many meals or added to salads for a boost in nutrients.

SOWING TIP: Parsley appreciates regular moisture while establishing. Once settled in, though, it becomes surprisingly resilient. I tend to direct sow into the garden.

ABUNDANCE TIP: Allow some parsley plants to flower. The flowers attract huge numbers of beneficial insects and pollinators into the garden. Then the seeds can scatter to regrow in their own next autumn. Free plants and zero effort gardening! If you want to extend your growing season and keep parsley well into spring and summer, sow some in a shady part of your garden. This can help stop it from going to seed and allow longer harvests.

Radish

Radish is perfect if you want quick results. Some varieties go from seed to harvest in just 4 weeks, making them ideal for filling empty garden spaces while slower crops establish. They’re also one of my favourite crops for beginner gardeners because they give such fast rewards. If you are not a fan of radish, try roasting them! So delicious.

SOWING TIP: Sow radish frequently and in small batches rather than all at once for a continuous harvest. I sprinkle seeds in the gaps after I have planted in my large crops like cabbage and cauliflower.

ABUNDANCE TIP: Allow a few radishes to flower and go to seed. The young green seed pods are edible, and the flowers are loved by pollinators. Once the seed pods go brown, dry and crack open to release the radish seeds. The leaves are also edible and can be used in meals like soup, pesto or chimichurri.

YouTube video

Spring Onion

Spring onions are one of the lowest-maintenance crops I grow. They fit almost anywhere, handle cooler weather well, help repel pests and are incredibly useful in the kitchen. I usually scatter them throughout beds rather than planting in neat rows. They grow quickly and are much easier to grow here in Perth with our short, mild winters.

SOWING TIP: Direct sow spring onions densely around the gaps between larger crops to maximise small spaces throughout the garden.

ABUNDANCE TIP: Instead of pulling the whole plant out, cut above the roots and allow them to regrow multiple times.

Rainbow Chard and Silverbeet

Rainbow chard is a staple must-grow in my autumn and winter gardens. I love the bright colours, and it provides continuous (generous) harvests through the cooler months. It’s one of those dependable crops that keep producing even when other plants struggle.

SOWING TIP: Give chard/silverbeet plenty of compost and regular water for lush leafy growth. Direct sow or seed trays, but I tend to direct sow mine.

ABUNDANCE TIP: Harvest outer leaves continuously instead of removing the whole plant. One or two healthy chard/silverbeet can feed you for months!

Asian Greens

Pak choi, bok choy, tatsoi, and other Asian greens thrive during autumn and winter when it cools down. They grow quickly and are perfect for succession planting. Early autumn in Perth can still be quite warm, plant asian greens mid-late autumn to reduce the chance of them bolting and going straight to flower.

SOWING TIP: Asian greens grow incredibly fast, so sow regularly every couple of weeks for constant harvests. Direct sow and seed trays, as they can be eaten by pests when they are little.

ABUNDANCE TIP: Cut with a sharp knife at the base instead of removing the whole plant, and they can regrow to get multiple harvests.

Cauliflower

Cauliflower can be a little slow and patience-testing at times, but autumn gives cauliflower the stable conditions it needs to properly develop. I love to grow the Purple Sicily variety for the bright colour it adds to the garden; it tastes good too!

SOWING TIP: Sow in seed trays and plant out seedlings in Autumn. Enjoy the soil has fresh compost as they are quite heavy feeders.

ABUNDANCE TIP: Don’t pull the whole plant out after harvesting the main head. Some varieties continue producing small side shoots, which give you extra harvests from the same plant. Plus, the leaves are edible too! Great for slicing into soups and stir-fries.

My Biggest Autumn Vegetable Gardening Tips for Perth

1. Plant Extra

Sow a few rounds of seeds or seedlings as backups in case the pests get to them first. Slugs and snails are busy during the cooler months, and it’s best to hang all your hopes on a select few seedlings.

2. Focus on Soil Building

Early Autumn is the perfect time to add compost, worm castings, and organic matter back into tired summer beds.

3. Plant Little and Often

I usually pop a few seeds in for successional sowing or as backup reserves every couple of weeks, which creates more consistent harvests.

4. Don’t Rush Winter Crops Too Early

Even though it’s cooling down, early autumn days can still be quite warm in Perth. Timing matters. I would plant asian greens mid-late autumn to reduce bolting.

How to Stop Pests from Eating Your Seedlings in Autumn?

Over the last 10+ years, growing my own food here in Perth, I have tried many different techniques to reduce pest pressure during the cooler months. These are the most effective solutions I have found.

1. Used Coffee Grounds

This is really my number one secret weapon for stopping the slugs, slaters and snails eating my young seedlings!! I pick up bags of used coffee grounds from a local cafe for free – saves them going to landfill and makes a huge difference to my garden! Grounds that have been through a large machine with water are close to pH neutral. We also have naturally alkaline soil and water here in Perth, so if there was any slight acidity left, this would help balance that out. Apply small sprinkles over your seedlings.

NOTE: This does need to be regularly applied after any watering or rain. I usually just find the bigger chunks from the last application and re-crumble them on top.

2. Remove Lower Leaves

As your seedlings start to grow and get large enough that their leaves touch the soil. Start to remove the older leaves. The leaves that touch the soil act as a ladder for pests.

3. Plant Extra

In a natural garden, pests are totally normal! I would be more concerned if nothing wanted to eat your veggies! Plant extra so that you always have some backups available and more chance of getting a productive harvest.

🎥 A Look Around My Autumn Food Forest

This season is honestly one of the busiest and most exciting transitions in the garden. The sweet potatoes are slowing down, new greens are filling the beds, and the entire space is shifting back into lush growth again after a crispy summer. There’s something really motivating about seeing fresh seedlings establish quickly after months of struggling through heatwaves 😅

If you’d like to see exactly what’s happening in the garden right now, I shared a full autumn garden tour here:

Autumn gardening in Perth truly is one of the best times to grow food. The combination of warm soil, cooler air, and reduced plant stress creates incredible growing conditions for so many vegetables. Whether you’re starting a new garden, refreshing old beds, or simply trying to grow more food at home, this is such a rewarding season to lean into.

Start with a few vegetables that thrive in cooler weather, focus on building healthy soil, and let the garden evolve season by season 🌿

Happy Gardening,

Holly 🌱

Loaded Kale Hummus with Crispy Kale Chips

Loaded Kale Hummus with Crispy Kale Chips

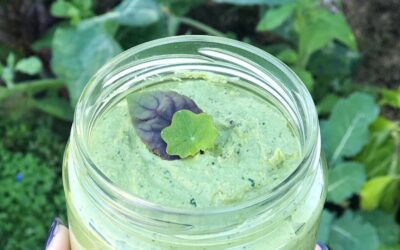
Creamy hummus loaded with crispy kale chips and edible flowers, this is a great way to use up your excess Kale harvest. Perfect for entertaining, served with toasted bread, pitas, or spooned onto a salad wrap. If you’ve got kale growing like crazy in your winter garden, this one’s for you! This Loaded Kale Hummus is a fresh, vibrant twist on classic hummus and one of my favourite ways to use up a big harvest of leafy greens. It’s packed with flavour, rich in nutrients, and makes the perfect colourful addition to snack platters, wraps, grain bowls or a simple piece of sourdough.

Ingredients from the Garden

  • Kale: Use any variety you have! I often mix curly and Tuscan kale for colour and texture.
  • Fennel fronds: Optional but adds a soft, aniseed freshness.
  • Edible flowers: Calendula, viola, nasturtium, or blue cornflower all work beautifully for a colourful finish.

Easy Swaps

  1. Swap chickpeas for white beans or lentils if you’re using what you’ve got on hand.
  2. Add a little cumin, za’atar, or preserved lemon for extra flavour.
  3. If you like heat, add fresh chilli on top!
loaded kale hummus

Loaded Kale Hummus

Ingredients

Hummus

  • 2 cups chopped Kale
  • 1½ cups cooked chickpeas, drained and rinsed (or 1 can)
  • ⅓ cup smooth tahini
  • 2 tablespoons olive oil
  • ½ teaspoon sea salt
  • 2 1/2 tablespoons fresh lemon juice, more to taste
  • 2-3 Roasted garlic cloves
  • 6 tablespoons water, or as needed to blend

Crispy Kale Topping

  • 2 cups chopped Kale
  • 1 TBSP Olive Oil
  • 1/4 tsp Salt
  • 1/2 tsp paprika or smokey seasoning
  • Edible flowers to serve*
  • Fennel fronds to serve
  • 1/4 tsp chilli flakes

Instructions

  1. Preheat oven to 180 degrees. Wash and dry off Kale.
  2. Add two cups of chopped Kale (approx 2cm square chunks) to a mixing bowl.
  3. Add 1 TBSP oil and massage into the Kale. Sprinkle on the 1/4 tsp salt and the paprika and stir to combine. Add to a baking tray along with the whole cloves of garlic (unpeeled lightly coat in oil).
  4. Bake until Kale is crispy (10minutes). Check if the garlic is soft and if not remove the kale and cook the garlic for a further few minutes.
  5. Set the crispy kale aside in a bowl.
  6. Add all the hummus ingredients into a mixer or blender including the roasted garlic (remove the peels first). Blitz to combine. Taste and add extra salt or lemon juice if needed.
  7. Pour the hummus into a bowl and load up the crispy Kale chips on top. Sprinkle over edible flowers and optional chilli flakes and serve with warm toasted bread.

Notes

  • Edible flowers I used are: Onion flowers, pansies, calendula, cornflower, chrysanthemum, and nasturtium.
  • Toasted nuts and seeds would also be delicious additions.
  • Drizzle a little extra olive oil to serve.

Storing Kale Hummus

This hummus keeps in the fridge for up to 5 days in an airtight container. The crispy kale topping is best enjoyed fresh, but you can make a fresh batch quickly if needed. You can also freeze the base hummus (without toppings) for up to 3 months, perfect for quick snacks or lunch prep.

Garden to Plate

If your kale is getting ahead of you this season, blanch and freeze chopped kale in small handfuls so you’re ready to make this hummus (or green smoothies, soups, etc.) anytime. You can also substitute other leafy greens like silverbeet, beet greens, or parsley if you’re harvesting those instead.

Happy gardening,

Holly 🌱

More Kale Recipes

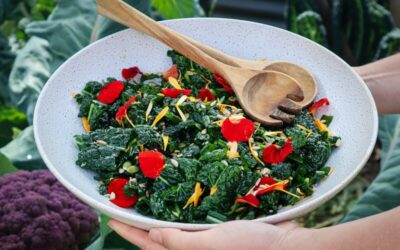
The Best Kale Salad

Simple and so delicious this really is the best Kale salad! Garden-to-plate…

Kale

Kale (Brassica oleracea ) is a member of the Cabbage family and produces…

Garden Toast

Garden toast is something I created one day when I was scraping…

Garden Pesto

I had homemade Garden Pesto on my (Giant) list of things to…

The Best Kale Salad

The Best Kale Salad

Simple and so delicious this really is the best Kale salad! Garden-to-plate in a couple of minutes. Kale can be a struggle for many people to like but the curly edges and small dimples are amazing for holding on to flavours. This dressing is so easy and full of flavour it can be used on any of your garden salads.

kale salad

The Best Kale Salad

Prep Time: 5 minutes
Total Time: 5 minutes

Simple and so delicious! This Kale salad is a staple garden-to-plate recipe.

Ingredients

  • 4 cups chopped Kale (I used the Tuscan Variety)
  • 2 TSBP Nuts or Seeds (Pumpkin and Sunflower)
  • 3 Fresh Calendula Flowers
  • 3 Fresh Nasturtium Flowers
  • 1/4 tsp Salt
  • 1 pinch dried chilli flakes

Salad Dressing

  • 2 TBSP Lemon Juice
  • 1 tsp Olive Oil
  • 1 1/2 tsp Maple Syrup (or Honey)

Instructions

  1. Wash and chop the Kale into 1cm strips. Add to a mixing bowl.
  2. Toast the nuts or seeds in a dry frying pan - medium heat - for 2-3 minutes until slightly golden.
  3. Mix together the dressing and massage into the kale with your hands until fully coated.
  4. Sprinkle the salt, chilli, and calendula petals over the Kale and mix.
  5. Add the salad to a serving dish and sprinkle over the seeds and Nasturtium Petals.
  6. Enjoy!

Notes

Serve with a protein of your choice or pan-fried Haloumi or enjoy it on its own!

Ssubstitute edible flowers for what is available in your garden.

Kale

Kale

kale

Kale (Brassica oleracea ) is a member of the Cabbage family and produces an abundance of leafy greens. The great thing about Kale is that it grows vigorously and is much more pest-resistant than cabbages. Kale is packed with nutrients and antioxidants and can be used raw or cooked similar to lettuce or spinach.

kale

What parts of Kale are edible?

PLANT

Autumn – Spring

SOIL

Fertile, well-drained soil. Plenty of compost.

LOCATION

Full sun – part shade position.

CARE

Regular watering.

FERTILISE

Benefits from regular compost and natural fertilizers.

PESTS

Slaters, slugs, aphids, snails, and green caterpillars/ cabbage moth.

HARVEST

Harvest the outer leaves as the plant grows or cut the mature plant off and allow new growth to form.

REPRODUCE

Kale is Bi-annual so seeds usually form in the summer or second season.

Kale salad

Why Grow Kale?

Kale is a fantastic crop for beginner gardeners or those wanting a low-maintenance edible garden. Kale is hardy and grows well in many different conditions.

Here are some of the many reasons to grow Kale:

  • Easy to grow
  • Versatile produce
  • Low maintenance
  • Bulk up salads
  • Nutritious smoothies
  • Less susceptible to pests
  • Visual Aesthetics
  • Supports Immune health
  • Rich in Vitamin C,K,E
  • Can be eaten raw or cooked

‘Tuscan / Tuscano’ – Heirloom variety. Produces long dark green, palm-like leaves. Popular for flavour and texture.

‘Red Russian’ – Silvery green curly leaves with striking purple veins. Young leaves are good raw and older leaves are better cooked. Great for microgreens.

Siberian – Green curly leaves. Mild sweet flavour. Hardy and prolific.

‘Scarlet – Bright purple frilly leaves. Colour deepens with cool weather. Nutritious and ornamental.

When to Plant Kale

Kale is best planted from the end of Summer to Spring. Flavour improves with cool weather. In summer plants can get covered in aphids and caterpillars and the flavour is less palatable.

How to Grow Kale

  • Plant seeds into seed trays first (young kale is popular with pests) and transplant them in a sunny location once they have 4-5 leaves.
  • Dig in compost and composted manure to feed the soil.
  • Kale has shallow roots so add mulch to keep retain moisture and regulate temperature.

Care/ Maintenance

Keep Kale well-watered and keep an eye out for pests.

Pests / Disease

Slugs and snails may eat young seedlings. Older plants can suffer from aphids and green caterpillars, especially in warmer months. Use natural pest management.

How/ When to Harvest

The best time to harvest your Kale is during the coldest months. This is when the flavour is at its best! Harvest a few of the bottom leaves off each plant to allow continuous growth. Towards the end of winter/ early spring, you can cut the Kale plants off just leaving the stalk in the ground. This will reshoot multiple side shoots for a new harvest into Spring.

Reproducing

Kale is biennial so it will go to flower and produce seeds in its second season/ year or if the weather gets too warm. If your Kale does go to flower, wait until the flowers turn into seed pods and once they start to dry and turn brown they can be harvested. Keep the seed pods somewhere warm and dry until they have completely dried out. Pop open the seed pods to reveal the small Kale seeds. Keep your seeds in a dry, dark cool location.

Cooking and Using Kale

Kale can be eaten raw or cooked.

Kale pairs well with: Garlic, onion, chilli, apple, lemon, potato, beetroot, sweet potato, cauliflower, cabbage, tomato, mustard, honey, radish

Kale ideas:

  • Salads
  • Smoothies
  • Quiche
  • Pie
  • Curry
  • Pastries
  • Stirfry
  • Pesto

Preserving the Harvest

Kale can be easily preserved to use throughout the year.

  • Frozen raw
  • Fermented
  • Dehydrated green powder
  • Blanched and frozen

Kale Posts

The Best Kale Salad

Simple and so delicious this really is the best Kale salad! Garden-to-plate…

Kale

Kale (Brassica oleracea ) is a member of the Cabbage family and produces…

Garden Toast

Garden toast is something I created one day when I was scraping…

Garden Pesto

I had homemade Garden Pesto on my (Giant) list of things to…

Previous Feature Plants

Garden Toast

Garden Toast

Garden toast is something I created one day when I was scraping together something for lunch and all I had was a crust and some cottage cheese in the fridge. I didn’t have any avocado, eggs or anything special to have with it. So I went out into the garden and found some inspiration! I picked two small tomatoes, herbs and edible flowers. It looked like a mini garden on toast and now I can’t stop making these beautiful, tasty creations!

Here are the creations I have made so far..

Original Garden Toast

My first addition with the last piece of bread I had left! I had fun making this and it definitely tasted delicious! Ingredients: Rye Multigrain toast, Cottage Cheese, Fresh tomato, Parsley, Rosemary, Rosemary flowers, Zinnia Petals and Basil leaves.

Fairy Garden Toast

It’s amazing what a little bit of Beetroot juice can do! Natural colouring and plenty of beneficial nutrients with an array of micro herbs and greens. You may even be able to convince your kids to eat more greens with this Fairy Garden toast. Get them involved in the process by having a bowl each to go outside and collect herbs. Ingredients: White Multigrain Toast, Cottage Cheese mixed with beetroot juice or fresh grated Beetroot, Baby Nasturtium leaves, Parsley leaves, Basil leaves, Sweet Violet flowers, Rosemary Flowers, Baby Pink chard leaves, Pink Zinnia Flower petals and Dill Flowers.

Jungle Garden Toast

Packed full of herbs and flavour! Ingredients: Country Grain Toast, Basil Pesto, Orange Nasturtium petals, Tiger Eye Viola Petals, Strawberry Flowers, Parsley leaves, Rosemary Flowers, Pea tendrils, Burgundy Marigold Petals and Purple basil leaves.

Summer Garden Toast

Summer on toast! Homegrown tomatoes are so sweet and delicious and tomato on toast is one of my favourite ways to eat them! Ingredients: Rye Multigrain toast, Red, yellow, orange cherry tomatoes, Purslane, Red basil leaves, Strawberry Flower, Sweet Violet Flower, Dill flowers, Rosemary Flowers, chopped Purple Kale, baby Nasturtium leaves and Fresh Chilli.

Botanical Garden Toast

Pest on toast is so delicious! I made extra pesto and if you follow me on Instagram you would have seen that I ate this for breakfast for an entire week! It was also so good with a poached egg on top. Ingredients: Sourdough toast, Basil pesto, Cottage Cheese, Chopped walnuts, Fresh Chilli, Basil Leaves, Fennel Flowers, Pink and White Dianthus, Baby Pumpkin Tendrils, Parsley Leaves and Strawberry Flowers.

Unicorn Garden Toast

My latest creation and maybe my favourite yet! Purple sweet potato spread is a vibe! Ingredients: Sourdough Toast, Mashed Purple Sweet Potato and Cottage Cheese, Overnight Pickled Red Cabbage and Red Onion (1/2 cup water, 1/2 cup apple cider vinegar, a teaspoon of sugar heated to dissolve. Pour cooled liquid over Cabbage and Onion), Purple Kale, Grilled Baby Eggplant, Purple Pansy, Multicoloured Dianthus, Rosemary Flowers and Red Basil.

Get Inspired by your Garden

There is always something in my garden to make a toast topping and I love how easy and creative it is! Each piece is so unique and full of fresh garden nutrients! Having these ideas tried and tested means I know I can always whip up something even when my fridge is looking very lean.

Get creative and inspired by your own garden. There is something so satisfying about being able to walk outside and make a meal from your own fresh, homegrown veggies. This is a great meal idea for beginner gardeners who don’t have many established edibles. Just look out for baby leaves and edible flowers (make sure you research and clearly identify they are edible). Baby leaves and flowers can add subtle flavours and turn any dish into a work of art!

Be sure to tag me on Instagram or Facebook so I can see your creations!

Holly 🌱

MY GARDENING ESSENTIALS //
Fertiliser spray gun: https://bit.ly/366nL1t
Retractable Hose: https://bit.ly/2TSC0Bo
More gardening tools: https://bit.ly/32IQmbD

DISCLAIMER: Links included in this description might be affiliate links. If you purchase a product or service with the links that I provide I may receive a small commission. There is no additional charge to you! Thank you for supporting my page so I can continue to provide you with free content!