What Fruit Trees & Edible Plants to Avoid Planting in the Ground!

What Fruit Trees & Edible Plants to Avoid Planting in the Ground!

From invasive root systems to aggressive self-seeding, I will share why urban gardeners should Avoid Planting these in the Ground. These 15 Fruit Trees & Edible Plants can take over your garden, damage nearby structures, or require constant maintenance. Planting fruit trees and edible plants in the ground might seem like the best way to grow them, but some plants can quickly become a headache in urban gardens!

If you have limited space or an urban garden, this will be important info to know BEFORE you plant these in the ground! In this post, I’ll explain why these plants are better suited for containers, raised beds, or controlled areas, helping you avoid common gardening mistakes.

Fig Trees

Figs are delicious and easy to grow, but their strong root systems can cause major problems. They have the potential to damage pavers, concrete, and even underground drains as they search for water. If planted in raised beds, they can take over the space, outcompeting other plants.

A better option? Grow figs in a pot. This allows them to focus on fruit production rather than excessive growth. You may find they fruit quicker and more prolifically in a pot when they focus more on fruit production than on establishing their size. If you have plenty of space, you can plant them in the ground—just keep them away from structures, driveways, and pipes.

Kumquat Trees

Kumquats are a fun citrus tree, but for many gardeners, they end up being more ornamental than practical. While they produce masses of fruit, the small, tart fruits are best suited for jams, chutneys, or cocktails—not for everyday snacking.

A small potted tree will be much easier to manage and will give you great harvests to experiment with. Rather than a full-sized tree overloaded with fruit that becomes a chore to harvest.

Blackberry

Blackberries are known for their invasive growth habits. They send suckers underground, making them hard to contain, and if their stems bend over and touch the ground, they root and spread even further.

To keep them under control, grow blackberries in containers or install a deep garden edge to prevent runners from escaping. Otherwise, they can quickly take over your garden or spread into neighboring gardens or properties.

Blueberry

Blueberries thrive in acidic soil, which can be challenging to maintain in the ground. Without consistent soil pH, they may struggle to produce fruit.

Growing blueberries in pots allows you to control soil acidity, ensuring healthier plants and bigger harvests. Plus, container-grown blueberries take up less space and can be moved easily.

Grafted Passionfruit

Grafted passionfruit vines are notorious for causing problems in the garden, especially for beginner gardeners. The rootstock can take over, killing off the main plant and leaving behind a non-fruiting, invasive vine. The suckers can spread over 50 meters, making them extremely difficult to remove once established.

For a hassle-free option, grow non-grafted passionfruit vines to avoid rootstock takeover.

Mint

Mint is one of the worst plants for spreading aggressively. It sends out underground runners that allow it to jump containment and take over nearby garden beds. Even in pots, it can escape through drainage holes and establish itself in the soil.

Since a single plant can produce more than enough for home use, keep mint contained in a pot or raised bed to prevent it from becoming invasive.

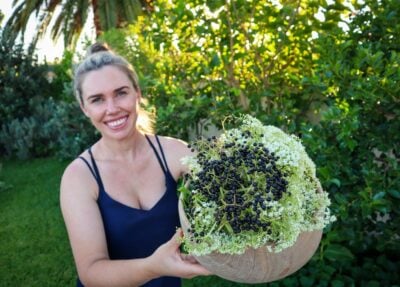
Elderberry

Elderberry bushes are great for their medicinal berries and flowers, but they send out suckers that make them difficult to control. Even if you try to remove them, they can keep coming back for years.

If you’re growing elderberries in a small space, consider pots or designated garden areas to manage their spread.

Goji Berry

Goji berries grow fast and aggressively, spreading through self-seeding and suckering. While they are packed with nutrients, they can quickly take over garden beds if not regularly pruned.

For better control, grow goji berries in a pot to keep them manageable.

Jerusalem Artichoke (Sunchoke)

Jerusalem artichokes send out underground tubers that spread rapidly and uncontrollably. Once established, they are nearly impossible to remove.

To prevent them from taking over, grow sunchokes in large containers or contained garden beds where they can be harvested easily.

Yarrow

Yarrow is a fantastic medicinal herb. It also attracts a lot of beneficial insects and pollinators to the garden. However, it has an aggressive spreading growth habit in the garden. It spreads through runners under the ground that can invade neighboring properties and garden beds. Yarrow can be hard to get rid of once a patch is established.

If you want to grow Yarrow in an urban garden, try containers or root barriers to keep it in check.

Malabar Spinach

This fast-growing vine can take over trellises and nearby plants. It also self-seeds aggressively, meaning it will pop up all over your garden. It is also more ornamental than edible so you don’t need to have it regrowing everywhere.

For better management, grow it in containers or a dedicated trellis space.

Lemon Balm

Lemon balm is one of my FAVOURITE herbs. It is part of the mint family and spreads rapidly through self-seeding. Once established, it can take over veggie patches.

Keep it pruned to stop flowering and contained by growing it in pots rather than directly in the ground.

Choko (Chayote Vine)

Chayote vines are a great perennial vine but do grow extremely fast, climbing over fences, trees, and garden beds. They also regrow from tuberous roots, making them hard to remove once established.

To prevent it from taking over, grow choko in containers or on a dedicated trellis.

Loquat

Loquats are delicious, but birds spread their seeds, causing them to self-sow aggressively. These trees also grow large, shading out other plants and taking up valuable space.

If you plant a loquat tree, be prepared for regular pruning and fruit netting.

Nasturtium

While nasturtiums are great companion plants, they self-seed aggressively and can quickly take over garden beds. In warm climates, they may become invasive.

To keep them in check, grow nasturtiums in pots or confined spaces.

Where & How to Plant Instead:

1. Large Pots & Containers 🪴

  • Great for invasive trees like figs, bamboo, or mulberries.
  • Controls root spread and makes maintenance easier.
  • Use at least a 50L (13-gallon) pot with good drainage.

2. Raised Garden Beds 🌱

  • Ideal for shallow-rooted plants that need better soil structure.
  • Prevents aggressive roots from spreading into pathways or damaging pipes.
  • Use deep beds (40cm/16” or more) for trees like bananas or certain berry bushes.

3. Root Barrier Systems 🚧

  • Works well for trees with aggressive or spreading roots (e.g., willows, mulberries).
  • Install a thick plastic or metal barrier at least 60cm (24”) deep around the root zone.

4. Espalier Against a Fence or Trellis 🌿

  • Perfect for space-saving and controlling growth (e.g., citrus, apples, pears).
  • Improves air circulation and prevents disease.
  • Train branches horizontally along wires or a fence.

5. Food Forest or Dedicated Zone 🌳

  • Some trees, like guavas or loquats, spread but work well in food forests.
  • Plant in designated areas where spreading isn’t an issue.
  • Use companion planting to balance growth and improve soil health.

6. Grow Bags or Air-Pruning Pots 🛍️

  • Good for trees like figs or pomegranates that do well in restricted root spaces.
  • Promotes healthy root structure and prevents circling roots.
  • Use 40L+ fabric pots for long-term growth.

Planting in the ground

While these plants can all be great additions to your garden, planting them directly in the ground can lead to maintenance headaches and invasive growth. By growing them in containers or designated areas, you can still enjoy their benefits without the stress of keeping them under control.

Have you had trouble with any of these plants? Leave a comment below and share your experience! Don’t forget to subscribe to my YouTube channel for more gardening tips. 🌱

Links included in this description might be affiliate links. If you purchase a product or service with the links that I provide I may receive a small commission. There is no additional charge to you! Thank you for supporting my blog so that I can continue to provide you with free content.

Happy gardening!
Holly 🌿
Click to watch and find out more!

Simple Homemade Green Curry Paste with Fresh Garden Herbs

Simple Homemade Green Curry Paste with Fresh Garden Herbs

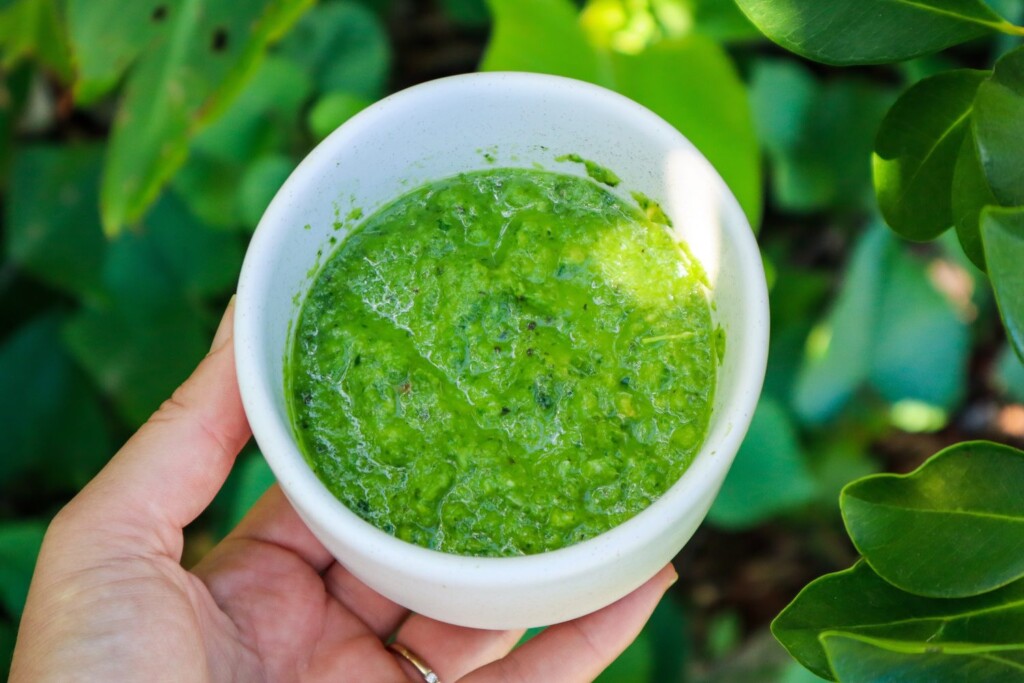
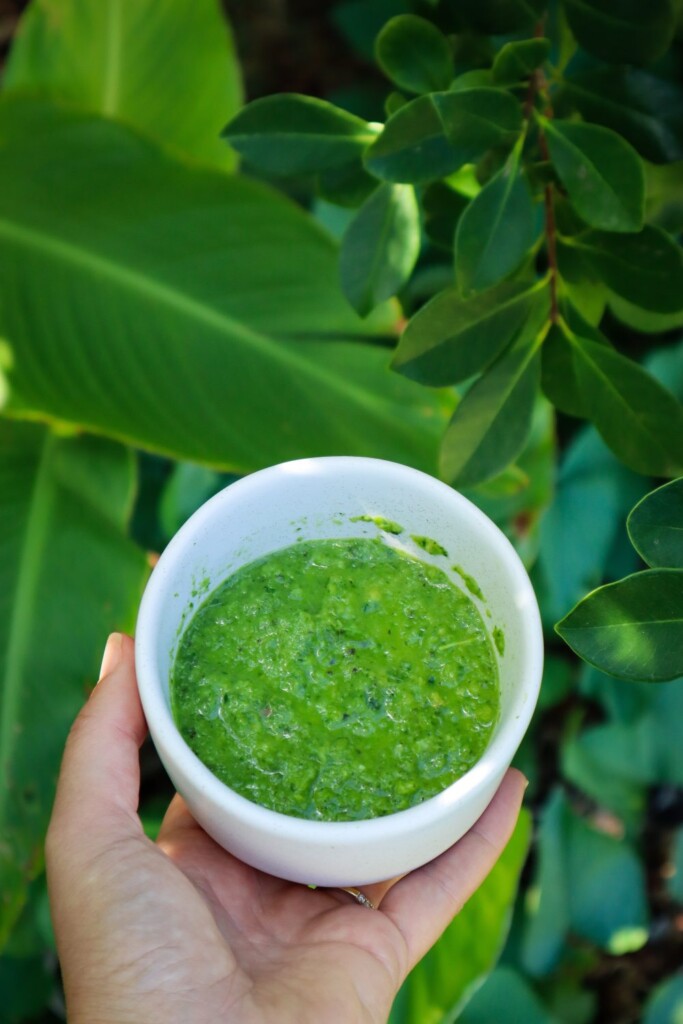
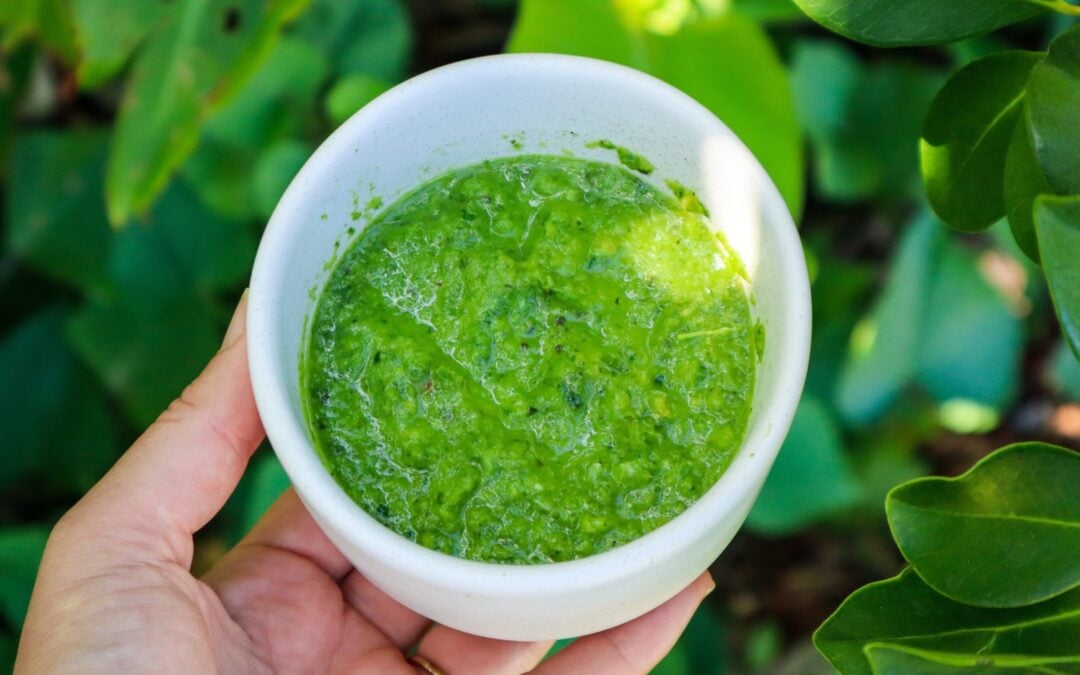
Making your own homemade green curry paste is so easy! You will never want to buy it again after you get the perfect blend. It will need adjusting to your heat tolerance, but mine is quite low, so you can always build on it from there. Using fresh herbs and ingredients from your garden takes this vibrant green curry paste to the next level! Extra curry paste can be frozen for a future quick and easy garden-to-plate meal.

See the bottom of the page for how to turn this green curry paste into a delicious meal.

Garden-to-Plate is flavour-packed!

If you grow your own herbs and chillies, this recipe is a fantastic way to use up extra harvests. Here’s a look at a few of the key ingredients and how they contribute to your garden and kitchen:

  • Green chillies: Long cayenne or similar varieties are perfect for this. They’re productive, easy to grow in pots, and can be frozen or dried for later use.
  • Lemon balm or lemongrass: Lemon balm is a wonderful lemony herb that grows like a weed. It’s a great lemongrass substitute and adds a bright citrus note.
  • Basil: Thai basil is traditional, but any sweet basil works. It’s easy to grow and makes this paste extra aromatic.
  • Spring onion: Grows well in containers or in-ground. The green tops add a mellow onion flavour.
  • Ginger and garlic: While not always garden-grown, both are staples in many food gardens and can be preserved or grown in pots in warm climates.

This paste also works beautifully as a marinade for grilled veggies or protein or as a punchy flavour boost in soups and noodle dishes.

Swaps & Substitutions

  • Lemon balm vs. lemongrass: Lemon balm is great if lemongrass isn’t available, but either works well.
  • Chillies: Use what you have! Bird’s eye chillies for more heat, jalapeños or milder green varieties if you prefer it gentle.
  • Herbs: Try coriander or mint for a different twist.
homemade green curry paste

Green Curry Paste

Yield: 1-2

Fresh and vibrant green curry paste to make a delicious garden-to-plate meal from scratch!

Ingredients

  • 6 Green Chillies (long cayenne) - see notes
  • 1 Spring onion
  • 3 Garlic cloves
  • 10 cm piece of fresh ginger
  • 1 lime
  • 1/2 cup lemon balm (or 1 stalk lemon grass)
  • 1/4 cup fresh basil
  • 1 tsp Raw sugar
  • 1/2 tsp Sea Salt

Instructions

  1. Cut the ends of the green chillies and remove the seeds (this is optional. Keep to the side if you want to add extra heat) and slice and add to a blender or mortar and pestle.
  2. Peel the ginger using the back of a spoon and slice it into small pieces.
  3. Zest the lime and add the zest and juice to the mix.
  4. Dice and chop all other ingredients and add everything to the mix.
  5. Blitz or pound until a paste-like consistency. You may need to add a splash of water if it is not mixing.
  6. Use immediately or freeze for future use.

Notes

  • Green Cayenne are on the mild side. If you are using hotter chillies use less or more to your heat preference. I also remove the seeds because I like it mild. Keep the seeds to the side and add extra during the cook if you want to increase the heat.
  • Other herbs and greens can be added such as parsley or corriander

Tips for Storing and Preserving Green Curry Paste

  • Fridge: Store in a sealed jar for 5–7 days.
  • Freezer: Freeze in tablespoon-sized portions in ice cube trays, then transfer to a container or zip-lock bag for up to 3 months.

Pro tip: Label your frozen curry cubes so you know what’s what when digging through the freezer later!

How to make a Green Curry with the Homemade Paste

To turn your green curry paste into a delicious garden-to-plate meal follow these steps.

  1. In a deep pan or Wok, brown onions in 1TSBP Olive Oil.
  2. Add your protein of choice and brown off.
  3. Add the green curry paste and stir to combine for 1 minute
  4. Add 400ml of Coconut cream.
  5. Stir and taste. Add extra sugar or salt if needed. Salt helps bring out more flavor. Sugar can ease some of the spice.
  6. Add chopped greens and veggies such as Zucchini, Capsicum, Carrot, Snow Peas, Beans, and Chard.
  7. Cook until protein is cooked through and veggies are softened but still have a bit of crunch.

Roasted Sweet Potato rounds are also delicious on top of a green curry!

Homemade green curry paste is a game-changer—flavourful, fresh, and full of your garden’s best. Whether you grow a few herbs on your balcony or have a thriving backyard veggie patch, this recipe is a wonderful way to make the most of your harvests.

Chill out – Lemon Balm Lemonade

Chill out – Lemon Balm Lemonade

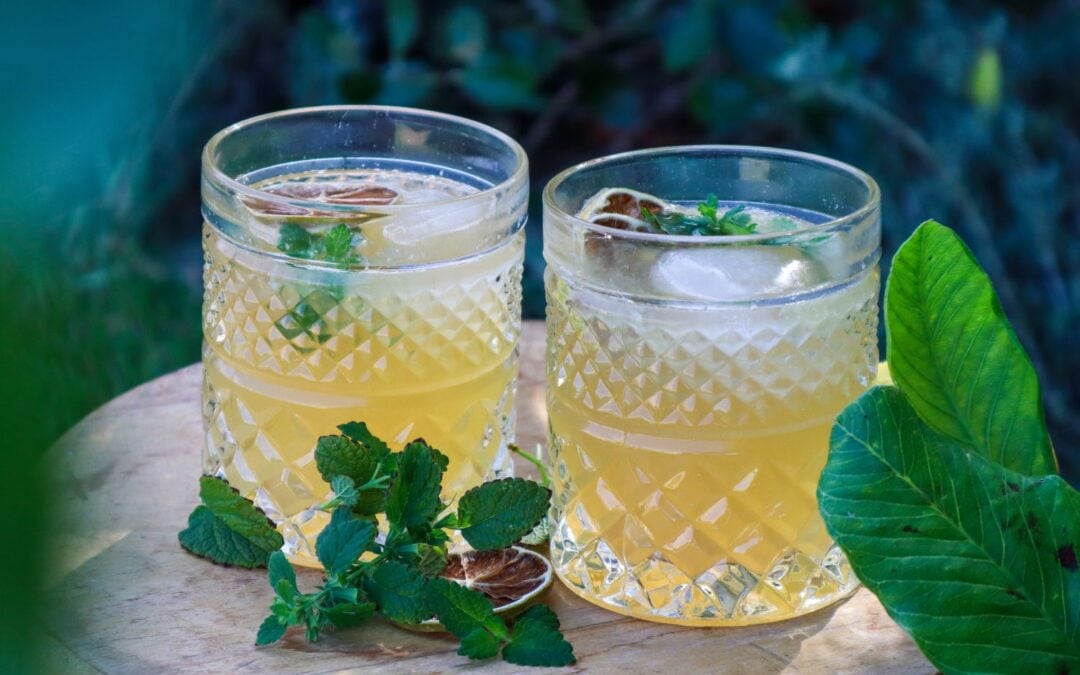
Lemon balm has calming and soothing properties that can reduce stress and anxiety. This refreshing summer drink may help you chill out and unwind. Nothing beats an iced cold lemonade after a busy day working in the garden but this homemade version with fresh ingredients is a winner!

lemon balm lemonade

Lemon Balm Lemonade

Yield: 4-6 glasses
Prep Time: 35 minutes
Total Time: 35 minutes

Refreshing and soothing this botanical lemonade is the perfect summer drink to enjoy in the garden.

Ingredients

  • 1 cup Lemon Balm Leaves
  • 1 fresh lime
  • 1 fresh lemon
  • 3 TBSP Raw local Honey
  • 2 cups sparkling water
  • 1 cup water

Instructions

  1. Roughly chop up the lemon balm leaves.
  2. Bring 1 cup of water to a simmer in a pot. Remove from heat and add lemon balm. Place a lid on and let it infuse for at least 30 minutes.
  3. Using a blunt object such as the end of a rolling pin, crush the leaves and flowers into the water to extract more.
  4. Using a sieve, strain the liquid into a jug, and squeeze out any extra liquid from the leaves..
  5. Add in honey and stir until the honey has dissolved. Use less or more honey depending on how sweet you like it.
  6. Squeeze the juice of the lime and lemon and add to the jug. Stir to combine.
  7. Add in sparking water and serve in glasses over ice.
  8. To serve add extra lemon balm leaves and dehydrated lemon or lime.

Notes

Add in other herbs to create your own unique blends. Try Calendula, Mint, Lemon verbena, and Lavender.

Use lemon or lime or both.

Lemon Balm

Lemon Balm

lemon balm

Plant of The Month

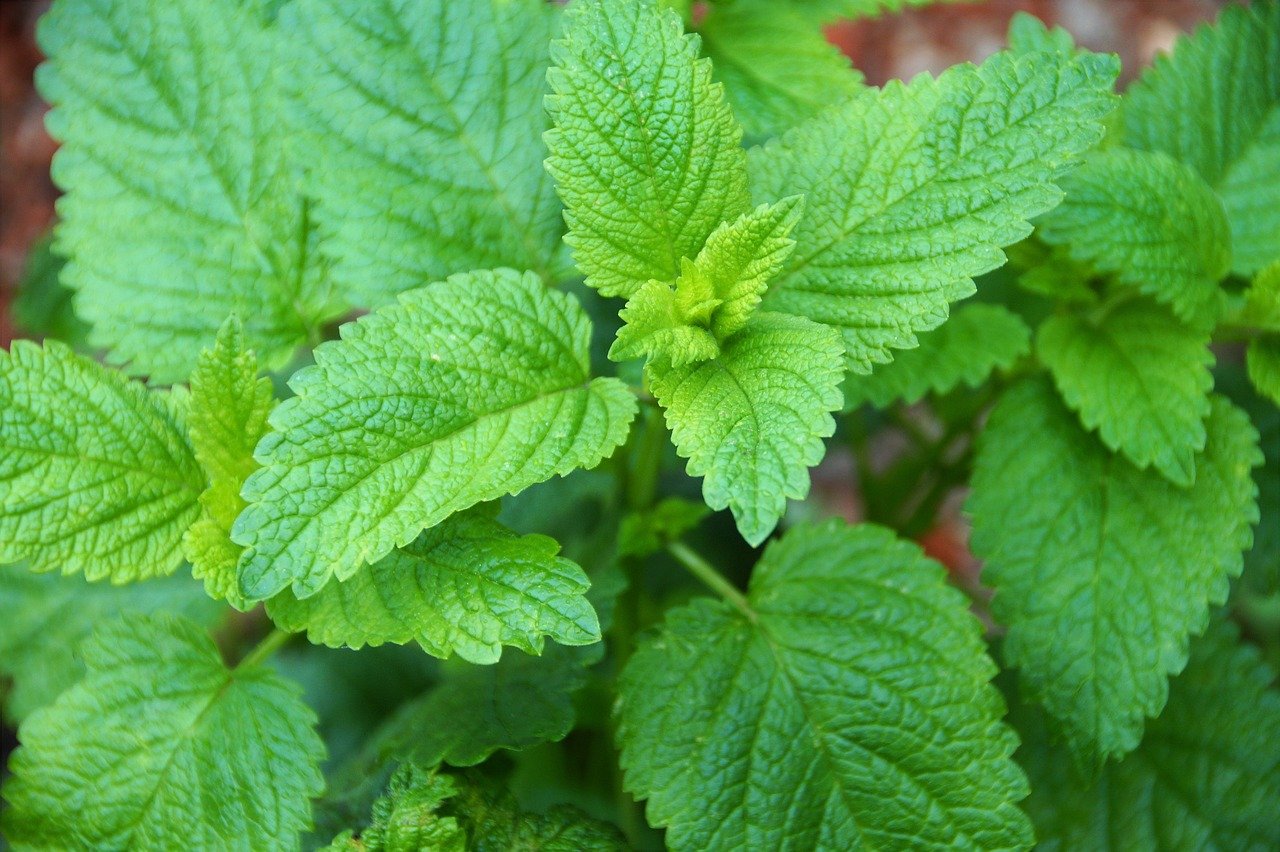
Lemon Balm (Melissa officinalis) is a perennial herb with fragrant lemon-scented leaves. Lemon balm is part of the Mint family and is known for having weed-like growth and self-seeds easily. With hundreds of small white flowers, the lemon balm is a powerful bee attractant. It has toothed edges and slightly hairy leaves with a lemony scent.

Lemon balm-like many herbs, has been traditionally used to aid in an array of health conditions. With calming and relaxing properties as well as anti-viral and anti-bacterial qualities, lemon balm is a great addition to a kitchen garden.

What parts of Lemon Balm are edible?

PLANT

Spring after the last frost. Can be grown all year round in many climates.

SOIL

Fertile, moist, well-drained soil. Will grow in most soil types.

LOCATION

Full sun – Dappled or shaded position.

CARE

Regular watering – is a thirsty plant.

FERTILISE

Easy to grow and doesn’t need much help.

PESTS

Snails, slaters, and aphids.

HARVEST

Harvest regularly to keep contained.

REPRODUCE

Grows easily from cuttings or save seeds after flowering.

lemon balm

Why Grow Lemon Balm?

There are many reasons to grow Lemon Balm and it is so easy to grow!

Here are some of the many reasons to grow Lemon Balm

  • Easy to grow
  • Fragrant lemon scent and flavour
  • Grows well in containers
  • Low maintenance
  • Pollinator plant
  • Relaxant
  • Antiviral
  • Aids in Cold sores
  • Great for teas
  • Salad dressings
  • Cut and come again harvest
  • Pest resistant
  • Reduce stress and anxiety

When to Plant Lemon Balm

Lemon balm grows well most of the year. New plants should be planted after the last frost. If planting in summer, keep well watered.

How to Grow Lemon Balm

  • Choose a sunny spot with dappled or part shade in the heat of summer.
  • Prepare the soil with rich compost
  • Direct sow seeds or plant in seed trays first.
  • 1 plant is plenty.
  • Can benefit from protection during the heat of summer.

Care/ Maintenance

Lemon balm, like Mint is a thirsty plant. Keep well watered and have a drip tray for pots. Cut back the plant after it has finished flowering to promote new growth.

Pests / Disease

Lemon Balm is pretty hardy and will thrive with minimal effort. Use natural pest management.

How/ When to Harvest

  • Once the plant is well-established, harvest sprigs as needed.
  • Use clean, sharp kitchen scissors to cut your harvest, or just pick with your hands to prevent the spreading of diseases.
  • Cut and come again crop that will regrow quickly. I often harvest and use in cold drinks or teas every other day.

Reproducing

Take cuttings and allow to root in a jar of water. Refresh the water every few days. Seeds can also be saved and will flower with white flowers on the stem. Once the seeds form and turn brown, collect them and dry them further. Keep in a dark, cool and dry environment.

Cooking and Using Lemon Balm

Lemon balm is best used fresh. Dried leaves lose their scent and flavour.

Lemon Balm pairs well with: Garlic, Citrus, Lettuce, Lavender, Cucumber, Radish, Fish, Fennel

Lemon Balm ideas:

  • Salads
  • Salad dressing
  • Stirfry
  • Soup
  • Teas
  • Iced drinks
  • Iceblocks

Preserving the Harvest

Lemon Balm is best used fresh but can be infused to make the flavour last.

  • Essential oil
  • Infused vinegar
  • Essences

Medicinal Uses:

  • Cold Sores – Make a strong infused tea or oil and apply it to the affected area 3-5 times a day
  • Insect Bites – Make a strong infused tea or oil and apply it to the affected area 3-5 times a day or rub crushed leaves on the spot
  • Stress and anxiety – Brew a calming tea using fresh leaves

Lemon Balm Posts

Previous Feature Plants