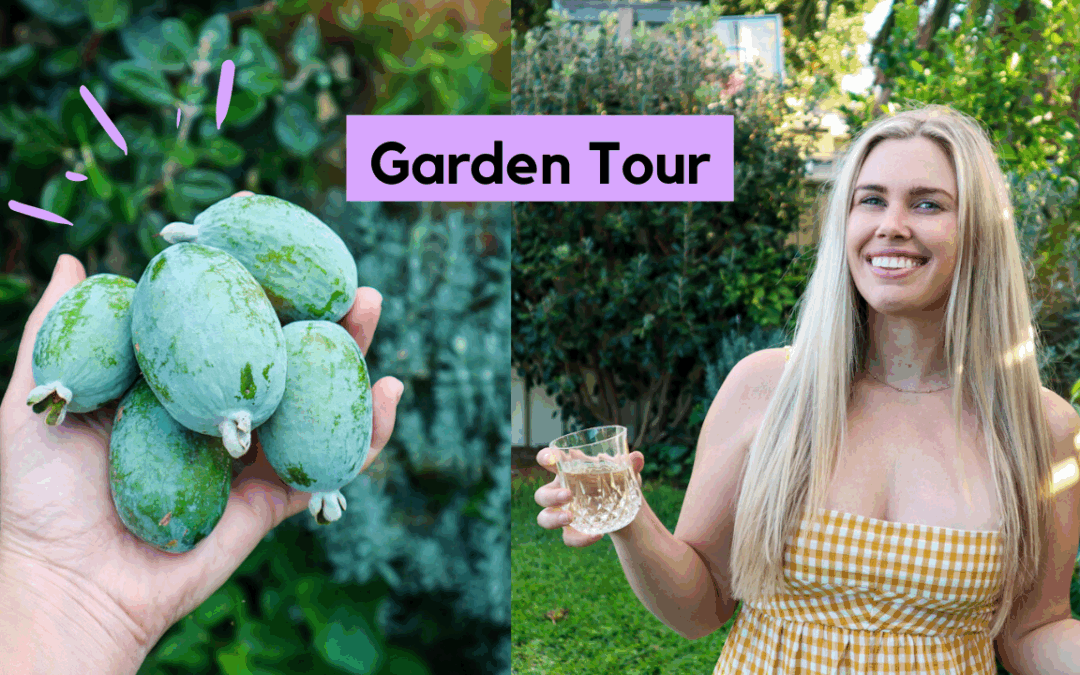
Autumn is often a slow time in my urban permaculture garden. Summer annuals are ending and the Winter seeds and seedlings are not yet up and running. There is a calmness to autumn which I love. I have filmed a new garden tour of my Urban Permaculture Gardens that you can watch below. For more garden tours and videos head over and subscribe to my YouTube Channel. That way you will get a notification each time I upload a new video (hopefully weekly!).
Here come the Feijoas!
Growing Feijoas here in Perth is a little piece of home that I cherish. They are the first fruit trees we planted here at our house and I have been lovingly caring for them for the past 5 years. Every year I get so excited and hope for fruit. They started producing in their 3rd year with just a couple of small fruit. The next year there was around 10 and this year there will be over 30. Hopefully now, each year there will be hundreds! Gardening definitely requires some patience, but it is so worth it in the end. I am celebrating this win!
What are Feijoas and Why Grow Them?
I definitely need to do a whole video on the Feijoa as they are one of my favourite fruit trees for any home garden. Feijoa or Pineapple Guava – Acca sellowiana is an evergreen fruit tree. They produce fragrant green fruit that are sweet and taste like a mix of pineapple /guava. Feijoa foliage is lush, thick, and grows quickly, which makes them a great option for a hedge or fence screening. Plus, an edible hedge is the best kind of hedge! They are also known to have fire retardant qualities so it can be a good idea to plant along with your fire-prone boundaries.
Most feijoa plants are self-pollinating, however, having multiple trees will increase your pollination rate and produce better yields. I highly recommend choosing named varieties rather than generic seedlings as they produce much quicker and better quality fruit. You can find these at your local fruit tree nursery.
Autumn Urban Permaculture Garden
My summer annuals have just about all finished with just some basil and capsicums holding on. All my winter seeds and seedling are in and are starting to take off with a little bit of recent rain. This can be a slow time in the garden but I do have some cross-overs with my fruit trees and perennials to keep my food production up. The Feijoa and Hawaiian Guava are starting to ripen and the Lemons are coming through thick and fast. I also have plenty of sweet potatoes which not only provide large tubers for eating but also bucket loads of edible leaves which can be a great substitute for spinach. The banana capsicums are still producing and I have lots of herbs such as basil, parsley, rosemary, and sage. So there are still plenty of meals to be made using my homegrown ingredients.
Edible Front Garden
My front garden has transformed from a pumpkin patch into a cabbage patch with lots of red cabbage and brassicas. I have also interplanted with rainbow chard and flowers. It is a great space for all my larger vegetables as they take up too much real estate in the pallet planters. The front fruit trees are flourishing and I have one blood orange fruit, 3 lemonades, and a million baby limes coming through.
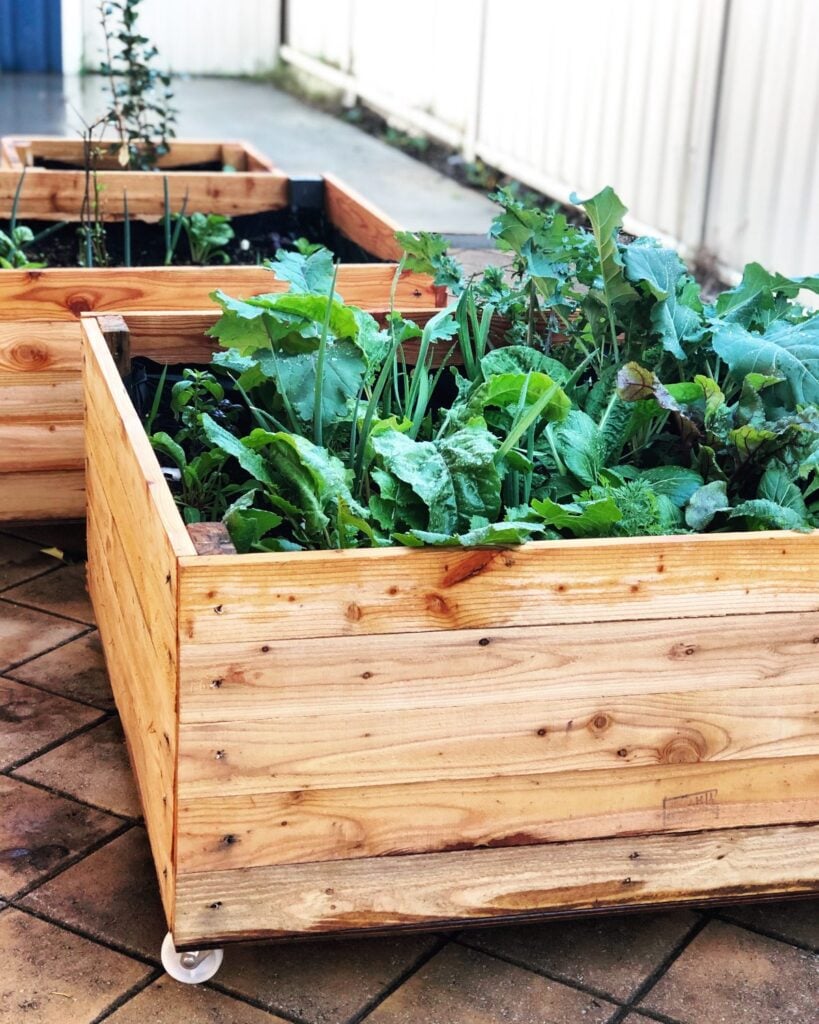
Pallet Planter Boxes
The pallet planters are where I grow most of my annuals and quick-picking greens and herbs. These are great because I can move them about to get the best sunlight during the winter months. In summer I am busy doing the opposite and giving them shade from the burning heat! My pallet planters are all mixed in with lots of brassicas, rainbow chard, edible flowers, lettuce, onion, and Asian greens. I also plant radish in between all my crops because they are ready to harvest from seed in just 28 days, so they will be ready before the main crops are overcrowded. This is a great way to maximize space in a small urban garden. Plus it’s a great way to get some quick food during a slower transition phase in the garden.
It is important to take down notes at the end of a season and that way you can make improvements for the next one. I have created these seasonal gardening review sheets which have helped me establish when things fruit and where the gaps are in my food production.
Let me know if you would like to see more regular garden tours maybe Monthly?
Happy Gardening
Holly 🌱
MY GARDENING ESSENTIALS // Fertiliser spray gun: https://bit.ly/366nL1t Retractable Hose: https://bit.ly/2TSC0Bo More gardening tools: https://bit.ly/32IQmbD
DISCLAIMER: Links included in this description might be affiliate links. If you purchase a product or service with the links that I provide I may receive a small commission. There is no additional charge to you! Thank you for supporting my page so I can continue to provide you with free content!
Hi everyone! Today I take you on a tour of my urban permaculture kitchen garden and show you what I have growing here in Perth, Australia. My kitchen garden is my permaculture zone 1 and really close to the kitchen so it is convenient to grab what I need for dinners. My Kitchen garden is growing in pallet planters and pots which means I can maximise the sun and shade to grow successfully all year round.
Watch myKitchen Garden Tour
Zone 1 Permaculture areas
My kitchen garden is located right outside my kitchen window so it’s very close and convenient which is key! Zone 1 permaculture areas are ones that are frequently used or pathways on the way to frequently used areas. If you can see your kitchen garden, you are more likely to utilise it and give it the love and care needed to make it thrive. This is where pots and containers can be a great option as you can create kitchen gardens in your outdoor living areas, balcony, windowsill or patio. I grow lots of herbs, chillies, edible flowers and greens in my kitchen garden that I can easily pick to add to salads and meals as needed.
Pallet Planter Boxesfor Urban Gardening
I am passionate about growing as much of my own food as I can and building my own urban permaculture homestead. These pallet planter boxes help me grow more food on my suburban block and provide so much fresh homegrown food. Urban gardening means trying to find creative ways to best utilise the space available to grow food. These DIY pallet planters can be made with recycled pallets that are often available for free. Use heat-treated pallets and not ones chemically treated. Make sure you do your own research.
Creating a cheap and efficient way to grow your own veggies and start a kitchen garden. Adding wheels means you can use them on concreted or paved areas and push them in and out of the sun/shade/rain as required. Perfect for growing in the heat of summer in Perth, Australia! You do not need to have the “perfect” place to grow food it is important to get to know your surroundings and just start by growing a few things. It’s all part of the journey and you will continue to learn and develop along with your garden. I hope you enjoy this video and get inspired to grow more of your own food.
Leave a comment below if you have any questions about my Urban Permaculture Kitchen Garden, Pallet Planter Boxes or anything I have growing in this video.
Holly 🌱
MY GARDENING ESSENTIALS // Fertiliser spray gun: https://bit.ly/366nL1t Retractable Hose: https://bit.ly/2TSC0Bo More gardening tools: https://bit.ly/32IQmbD
DISCLAIMER: Links included in this description might be affiliate links. If you purchase a product or service with the links that I provide I may receive a small commission. There is no additional charge to you! Thank you for supporting my page so I can continue to provide you with free content!
Hi everyone! Welcome to my FIRST ever Urban Permaculture Garden tour! See what I have growing in my edible garden this Autumn (May 2020). My garden is constantly changing so I’m excited to finally document the growth! It’s amazing to look back at old photos and see how much has changed since we moved in. I am currently growing food in containers, pallet planters, makeshift garden beds in the driveway and slowly turning my grass into edible gardens. It is all a work in progress and I am constantly expanding my gardens and my knowledge to create my urban homestead. When we first purchased our property it had one tiny lemon tree and a few ornamental grasses along the back fence.
I now have over 15 fruit trees and many other edibles all throughout the garden. I have noticed so many insects and birds starting to frequent my yard and that makes me so happy! Diversity in plants and animals makes for a happy ecosystem.
You do not need to have the “perfect” place to grow food it is important to get to know your surroundings and just start by growing a few things. It’s all part of the journey and you will continue to learn and develop along with your garden. I hope you enjoy this video and get inspired to grow more of your own food.
Comment below if you have any questions about my Urban Permaculture Garden or anything I have growing in this video.
MY GARDENING ESSENTIALS // Fertiliser spray gun: https://bit.ly/366nL1t Retractable Hose: https://bit.ly/2TSC0Bo More gardening tools: https://bit.ly/32IQmbD
DISCLAIMER: Links included in this description might be affiliate links. If you purchase a product or service with the links that I provide I may receive a small commission. There is no additional charge to you! Thank you for supporting my page so I can continue to provide you with free content!
Nasturtium is in absolute abundance in my garden right now and I want to learn how to make the most of this fruitful time. I think learning how to use a plant is just as important as learning how to grow it. This month I have been exploring lots of different ways to use Nasturtium. Nasturtium mini quiches are so quick, easy, and taste delicious. Get the most out of your garden by growing things that have a multitude of uses to really help you maximise your space.
Nasturtium Mini Quiche
12 Medium – Large Nasturtium Leaves
Quiche Mix
5 eggs
1/4 cup milk or cream (i used coconut cream)
1/2 cup water
Salt and Pepper to season
Whisk Quiche mix in a bowl and set aside.
Fillings
Red onion
Feta
Spring onion
Marinated olives
Red capsicum
Parsley
Broccoli
Rainbow Chard
Grated Cheese
Finely chop your filling vegetables. I overshot how many veggies I needed. My muffin trays are on the smaller side and you don’t need much to fill them. So just chop a little bit and you can always chop more if needed. You could add any vegetables you have available these are just what I had.
Assembly
Preheat Oven to 170-180 degrees celsius.
Grease a muffin tray well with oil.
Place your Nasturtium leaves top side down.
Add your filling (except grated cheese), just a couple of pieces of each as it will soon fill up.
Using a measuring cup or jug pour your Quiche mix in and try not to fill over the top of the leaves.
Sprinkle with grated cheese.
Bake for 30mins or until the filling has been set.
Remove and allow to cool for 10mins.
Carefully remove from trays using a spoon. You may need to run a knife around the top of the cheese has stuck to the sides.
Please note my recipes are more of a guide.. ( I am not a technically accurate baker, I just wing it).
If you have plenty of Nasturtiums check out my other recipes.
You can share your version on Instagram using #sustainablehollyskitchen or tag me @sustainable_holly so I can see your beautiful creations!!
Holly 🌱
MY GARDENING ESSENTIALS // Fertiliser spray gun: https://bit.ly/366nL1t Retractable Hose: https://bit.ly/2TSC0Bo More gardening tools: https://bit.ly/32IQmbD
DISCLAIMER: Links included in this description might be affiliate links. If you purchase a product or service with the links that I provide I may receive a small commission. There is no additional charge to you! Thank you for supporting my page so I can continue to provide you with free content!
Planting Flowers for the Bees is high on my current list of gardening goals. Bees are such an important element in the garden and it wasn’t until I really started trying to grow my own food that I realised just how important they are! Previously, although, I knew they were important for pollination, I had mixed feelings towards bees because my dad is deadly allergic. One Bee sting will quickly send him into anaphylactic shock and growing up this was such a scary reality. Today, I continue to learn more and more about bees and I am amazed at how incredible they really are.
Trying to grow food without pollinators can be hard and sometimes impossible without intervention. If you have ever tried growing pumpkin or watermelon you will understand what I mean! It is so important that we try and look out for our bee friends and provide them with healthy, organic, pesticide-free gardens. I am constantly planting flowers for the bees and also letting things go to seed, so there is always an abundance of flowers and bees in my garden.
Having water available for the bees is also another great idea, especially in Perth’s warm climate. If you have a bird bath you can place a flat rock in it so that the bees can stop by for a drink. Below are some of the plants that I grow and the Bees love!
Top 5 Flowers for the Bees
1. Rosemary – This is my number one plant for the bees. There is always a hive of activity on my rosemary plant and I love seeing so many bees in my garden. Of course, it is a staple in the kitchen as well!
2. Borage – Bees love borage flowers and they are so pretty and edible too! They are usually blue, pink or white but often you get this fantastic tie-dye effect!
3. Lavender – is such a great fragrant addition to the garden and you can make natural perfumes, beauty products and it is also edible! Lavender is so easy to grow from cuttings so you can just cut off a stalk and plant it in other areas of your garden or pot up and give as a gift to your family and friends.
4. Sunflowers – These have to be one of my favourite flowers! The bees love them and they are an absolute show stopper in the garden. Sunflowers are also known to be soil remediators and extract any toxins in the soil.
5. Zinnia – I am new to growing zinnia but I absolutely love them! They come in so many amazing colours (even green!) and the flowers are also edible! These are now a much-loved staple in my garden. I even grew them down the side of a fence with very poor soil and they thrived.
Bonus – The other thing I do let some of my veggies go to seed. Diversity in the garden is important and you will see different types of bees like different flowers. Radish flowers for example, always attract our native Blue Banded bees which are amazing to watch! Having a diversity of plants and insects in your garden will help create a thriving ecosystem.
Take the time to slow down and observe your garden and you will start to recognise which flowers are attracting beneficial insects. You may even find some you have never seen before! Most weekends I have my morning coffee in the garden and just spend some time observing without any distractions. We are often so busy trying to do something that we lose sight of all the little things going on.
This weekend I challenge you to give it a go! Make a coffee and spend just 10 minutes or so sitting in the garden or nature and observe. And if you can plant some more Flowers for the Bees.
Holly ✨
MY GARDENING ESSENTIALS //
Fertiliser spray gun: https://bit.ly/366nL1t
Retractable Hose: https://bit.ly/2TSC0Bo
More gardening tools: https://bit.ly/32IQmbD
DISCLAIMER: Links included in this description might be affiliate links. If you purchase a product or service with the links that I provide I may receive a small commission. There is no additional charge to you! Thank you for supporting my page so I can continue to provide you with free content!