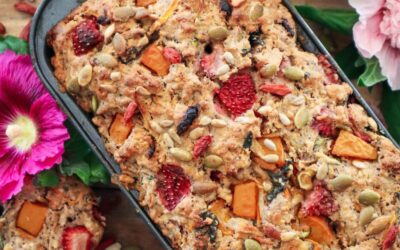
Have odd fruit and veggies to use up? This leftover breakfast loaf is a great way to reduce waste and make a delicious and healthy breakfast (or anytime) alternative. This recipe is flexible to allow a range of fruits, nuts, and seeds you have available.
Leftover Breakfast Loaf
Prep Time: 15 minutes
Cook Time: 45 minutes
Additional Time: 20 minutes
Total Time: 1 hour20 minutes
Have random odd fruit and veggies that need to be used up? This leftover breakfast loaf is a delicious way to make sure they don't go to waste.
Ingredients
Dry ingredients
2 cups flour
1 cup oats
1 tsp cinnamon
1 tsp mixed spice
1 TBSP Baking Powder
1/2 cup seeds (i used 50:50 pumpkin and sunflower)
1/2 cup walnuts (choose your favourite nuts)
1 TBSP Poppy Seeds
1/2 cup chopped mixed dried fruit (Goji berries, apricot, raisons)
Wet ingredients
1/2 cup coconut oil (liquid)
1/2 cup quality maple syrup
3/4 cup oat milk (or preferred milk)
Fruit & Veggies
1 cup grated zucchini
1 cup grated carrot
1 cup chopped greens/ spinach
1 cup grated pear (or apple)
1 cup diced Apricot & strawberry (swap for berries or cherries)
Instructions
Preheat oven to 180 degrees.
Mix dry ingredients in a bowl.
Grate and add chopped fruit and veggies to a bowl along with all the wet ingredients. Stir to combine.
Fold in the dry to the wet mix and combine with minimal mixing (don't over-mix).
Grease a loaf or bread tin and add in the mix. Bake for 45 minutes or until the skewer comes out clean.
If there is a little too much for the tin ( in my case) add to muffin trays (but these will only take 20 minutes).
Allow the tin to cool for 10 minutes then remove the loaf and cool for a further 10-15mins on a wire rack (do not slice straight out of the oven or it will fall apart and turn dry).
Notes
To freeze the extra loaf cut it into slices first and pop it in the compostable ziplock bags.
Mix and match fruit, veggies, nuts, and seeds to make your own delicious blends.
Frozen berries can be used add them in frozen don't thaw them out first.
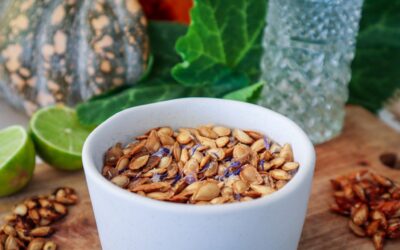
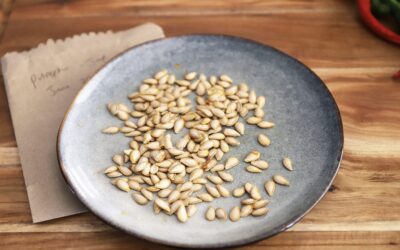
Roasted Salt and Vinegar Pumpkin Seeds make a delicious snack that once you start you won’t be able to stop! Below are three delicious flavours: Salt and Vinegar, Cinnamon and Honey and Lime and Cracked Pepper. Get more from your harvests by using the whole pumpkin. After harvesting your pumpkins save the seeds from the best ones – select for the best flavour, biggest size, or whatever traits you desire. With the remaining pumpkins and seeds, you can make these snacks to add crunch to salads, soups, or just enjoy them on their own.
Roasted Salt and Vinegar Pumpkin Seeds
Reduce your food waste and turn extra pumpkin seeds into delicious snacks.
Ingredients
white vinegar
pumpkin seeds
sea salt
Instructions
Preheat the oven to 200 degrees
Rinse your pumpkin seeds to remove any extra pumpkin flesh.
Coat the seeds in white vinegar and sprinkle with sea salt.
Roast until slightly golden. Approx 5 minutes.
Remove from the oven and allow to cool. They will get crunchier as they cool.
For extra flavour splash with a little vinegar as you serve them.
Enjoy!
Honey and Cinnamon Roasted Pumpkin Seeds
Cook Time: 5 minutes
Total Time: 5 minutes
Turn your leftover pumpkin seeds into a delicious sweet treat.
Ingredients
Pumpkin Seeds
Honey
Cinnamon
Sea salt
Instructions
Preheat the oven to 200 degrees celsius.
Wash the pumpkin seeds to remove any flesh.
Drizzle enough honey to coat the seeds and sprinkle with cinnamon and a pinch of sea salt.
Spread the seeds out on a roasting tray and separate them. Roast for 4-5 mins check regularly the honey will caramelize quickly. Remove the seeds from the tray while they are still hot.
Enjoy!
Notes
Add on top of ice cream, and cakes, or enjoy them as they are.
Lime and Cracked Pepper Pumpkin Seeds
Cook Time: 5 minutes
Total Time: 5 minutes
Delicious and full of flavour!
Ingredients
Pumpkin Seeds
1 lime
Cracked Pepper
Sea salt
Instructions
Preheat the oven to 200 degrees celsius.
Wash the pumpkin seeds to remove any flesh.
Grate lime zest over the pumpkin seeds and squeeze enough lime juice to coat the seeds. Season with a pinch of sea salt and grind over crack pepper.
Spread the seeds out on a roasting tray and separate them. Roast for 4-5 mins check regularly. Remove the seeds from the tray while they are still hot and allow them to cool on a plate.
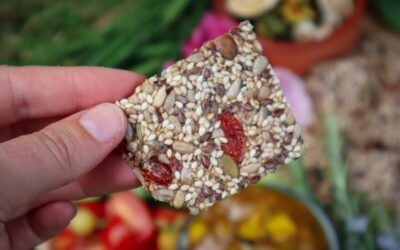
Crackers are such an easy snack to grab and these Super Seed Crackers are also very easy to make. Having easy staple recipes on hand can help you make the most out of your produce. These Crackers also look amazing bundles up and given to friends.
Simply add these crackers to a plate full of fresh fruit and veggies from your garden, along with some delicious relish or garden pesto and you have a winning platter.
Super Seed Crackers
Prep Time: 25 minutes
Cook Time: 1 hour
Total Time: 1 hour25 minutes
Easy and delicious super seed crackers. The ultimate summer platter addition. Serve with relish or pesto straight from the garden to the plate.
Ingredients
1 1/2 cups Sunflower Seeds
1/2 cup Pumpkin Seeds
1/2 cup Linseeds
1 TBSP Poppy Seeds
1/3 cup dried Goji Berries
2 tsp dried Rosemary (1 tsp if store bought)
2 TBSP Chia Seeds
1 Cup Sesame Seeds
2 TBS Psyllium Husks
2 1/4 Cups of Water
Instructions
Add all the ingredients to a bowl and mix to combine.
Allow to sit for 20mins to become a thick mixture.
preheat the oven to 150degrees celsius.
Pour half the mix onto baking paper and place another sheet on top. Roll out to form a thin layer then remove the second sheet of baking paper. Place on an oven tray and repeat with the second half of the mixture.
Bake for 1 hour or until slightly golden.
Remove and cool then slice into your desired cracker size shapes. Store in an air tight container.
Notes
Swap out the Goji berries with your favourite dried fruit. Mix it up!
Cornflour can be used as a substitute for Psyllium husks, you may need to add a little more. Also, mix it with a little water to form a paste before adding it to the mix.
Saving seeds can go a long way towards creating a sustainable lifestyle. Seeds have the power to grow an endless supply of food if they are continuously saved. Saving your own seeds will not only provide you with a sustainable food source but will also save you money in replenishing your seeds each year.
Saving your seeds is a great step towards self-sufficiency and when a world crisis happens, (hello 2020) the seed shelves are empty. People become more aware that they are relying on others to provide for them. Having your own seeds will mean you will have more resilience and can be more self-reliant.
Saving seeds from your best vegetables will help you develop your own SUPER plants! Selecting for pest resilience, size, strength, taste or timing, means you can grow more plants with those desired traits.
You will also get seeds and vegetables that are acclimatised to your exact growing conditions. They have adapted to their surroundings and will thrive! If you are already growing these vegetables you may as well save the seeds!
Can you save any seeds?
Heirloom or open-pollinated seeds are the best to save. These are varieties have been passed down for generations and have been bred “true to type”. This means they haven’t been cross-pollinated so they will produce the same or very similar vegetables each time they are planted.
Hybrid seeds have been cross-pollinated with two different varieties to get the 3rd outcome. The seeds saved from these can have extremely varied results, that can often be less desirable.
Over the years many heirloom seed varieties have been lost forever as more and more hybrid seeds are produced by large corporations that control the market. Saving your own heirloom seeds can help keep those varieties alive for future generations.
Saving seeds from the best-performing vegetables in your garden is such a valuable skill to have. It means you will have direct access to high-performing vegetables that you know and love.
Our family have tomato seeds that have been passed down from our grandpa and they produce the most incredible tomatoes for making sauce! Each year we grow the tomatoes and come together to make a big batch of tomato sauce. It is a fun, family tradition.
Annuals, Biennials, and Perennials
Not all plants go to seed in the first season. Annuals are often most of your common seasonal vegetables such as lettuce, tomatoes, watermelon, pumpkin, beans, peas and cucumbers. These produce seeds at the end of each crop or are in the ripe fruit. This means you can save the seeds from these each year. By choosing the best fruit and vegetables to save seeds from, each year your plants will get better depending on the desired traits you have selected for eg: biggest fruit, best flavour, most pest resistant.
Biennials will only go to seed in their second season and you will need to keep them growing throughout winter. This can mean you need to transplant them to a greenhouse if your winters are too cold. Biennials can be a little trickier to save seeds from. They also take up a lot of space whilst not producing much food while you wait for the seeds. These are many of the root vegetables and vegetables such as beetroot, carrot, onions, cabbage, kale, rainbow chard, and cauliflower.
Perennials are even trickier again as they are plants that regrow by themselves every year such as asparagus. It is often easier to transplant perennials by splitting the plant and transplanting than saving seeds.
Cross-Pollinating Varieties
When deciding to save seeds from your heirloom vegetables make sure that they are not getting cross-pollinated. Pollination can happen from insects or even wind for some varieties. So it is best to keep varieties of the same vegetable separate and in different corners of the garden. Another great way to protect and avoid cross-pollination is to stagger your planting. So if you want to plant two different types of tomatoes then plant them so that the first variety has finished flowering before the second one starts. This will just help ensure you get true-to-type seeds and know exactly what tomatoes you will have to plant the next year.
If you are growing multiple varieties at the same time, they may cross-pollinated but you can still save the seeds as this process will be good practice. If you plant those seeds out it will be a bit of an experiment to see what will regrow.
That doesn’t mean you can’t have some fun and try to cross-pollinate each season and see what happens.
Wait Until They’re Mature
Many fruit and vegetable seeds are only viable once they become over-ripe. This means you may miss out on getting to eat them. To save the seeds from vegetables you want to leave them on the plant until they are either dry or with fruit such as tomato and cucumbers they should be so over-ripe that they are starting to rot or go way past eating quality. This is how they naturally produce seeds in the wild.
Plants such as lettuce, celery, chard and radish will send off flowers once they get ripe and then these flowers will turn to seed pods. You will want to wait until the seed pods start to go brown and dry before harvesting for seeds.
Selecting Plants to Save Seeds From
This is an important step to make sure you save the best seeds! It can also be one of the hardest steps to commit to, as you will often have to forfeit eating that top-performing vegetable. If you see the perfect cucumber or tomato growing during the season, you will have to let it go overripe and bad before saving the seeds. This can often be disheartening, but just remember you will have even better crops in the years to follow!
Selecting “the best” vegetables to save seeds from is completely up to you. You may select for the biggest fruit, best tasting, plants that produce a lot, early fruiting, cold-hardy, disease-resistant, colour, or pest resistant.
How to Save Seeds?
There are two main ways to save seeds depending on the plants.
1 . Wait for the flowers to turn to seed or the seed pods to dry on the plant (beans, peas, flowers, radish, parsley, fennel). Once dry, pick and allow them to dry even further. Seed heads such as flowers can be hung upside down with the seeds heads secured in a paper bag. Once they are completely dry, you can shake off the seeds into the bag.
For seed pods such as beans, peas, and radish, once they are completely dry, you can remove the seeds from the pods and place them in a jar or brown paper bag. This can be quite time-consuming, especially with smaller seed pods.
2. Let fruit or vegetables go overripe on the plant to mature the seeds. They may change colour or start to break down ( tomatoes, cucumber, eggplant, chilli, capsicum, squash).
Once they are overripe, pick them and cut them open to reveal the seeds. Clean off the flesh and dry.
FermentFleshy Fruit Seeds
When saving seeds from fleshy fruits such as cucumbers, melons, or tomatoes, it can be hard to separate out the slimy layer surrounding the seed. This layer is to protect the seed when it is ingested by animals, birds, or from soil bacteria, and allows the seed to make it safely to the next season.
In nature, the fruit will rot on the plant producing mature seeds, then fall to the ground and the slimy film will protect the seed while the soil bacteria and microbes start breaking it down. Then, by the time the soil has warmed up again the following season, the seed will be ready to burst into life! This is why your volunteer tomatoes that grow from the compost are so hardy and fast-growing! They have been processed correctly.
We can mimic nature by squeezing the fresh fleshy seeds into a jar of filtered water to ferment (will be stinky) for a few days. Leave a lid loosely on the top of the jar and you will notice a white film starting to cover the surface. This is the lacto-fermenting process.
The viable seeds will be at the bottom of the jar and the bad seeds will float. Once the film covers the top of the surface you can separate off the bad seeds, rinse your seeds, dry them, and store them.
The easiest way to do this, is to dry them on a paper towel and when they are completely dry fold it up and place them in a brown paper bag or jar to store.
Is Fermenting Necessary?
No, you can simply rinse your seeds and dry them out. The fermenting phase helps eliminate the bad seeds, remove the protective layer and kill off some of the seed-borne diseases.
Dry the Seeds Completely
You want to make sure your seeds are completely dry before storing them. Lay them flat on a tray, moving them around every day or so until they are dry. Thicker seeds such as pumpkin may take a week or so to fully dry. Remove as much of the extra plant matter as possible (seed pods, petals, protective layers).
Storing the Seeds
Store your seeds somewhere cool, dark, and dry. I like to keep my seeds in brown paper bags, envelopes or recycled vitamin/pill canisters. Make sure you label them well with the name and/or desired trait (early tomatoes, best-tasting pumpkins, etc) and put the date.
Store your seeds in the coolest room or area of your house. Seeds can also be kept in the fridge in airtight containers.
How Long will Saved Seeds Last?
It is best to plant your seeds and resave each year or two, but if they have been stored correctly, some seeds may last over 10 years. Saving seeds and gifting them to friends and family, will mean you will be able to keep heirloom varieties available for generations to come.
If in doubt don’t throw them out! Old seeds can still be sown, you may just get less successful germination.
Saving seeds and figuring out how to save seeds from each plant can be tricky. Let me know if you have any questions about saving your seeds. This guide may also come in handy to determine whether plants are annual or biennial and how they are pollinated.