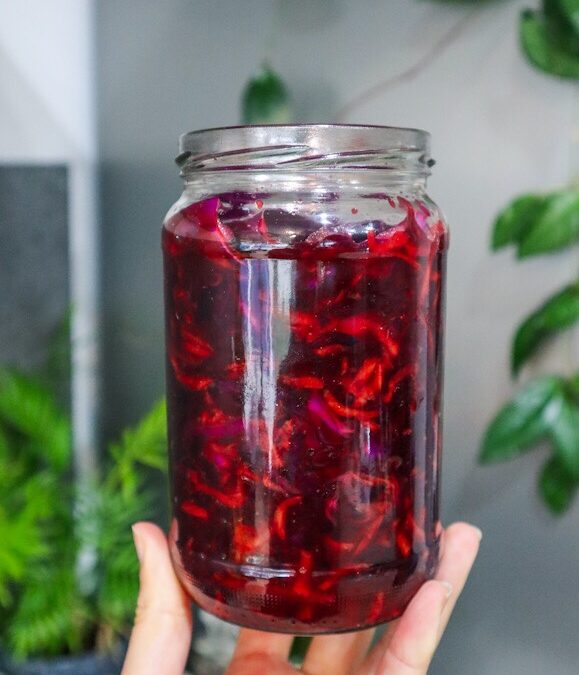
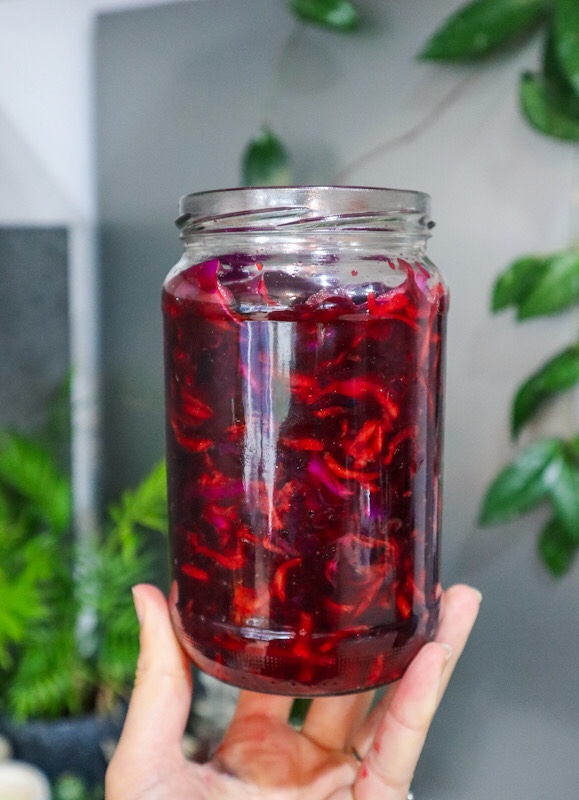
Sauerkraut is a great way to preserve extra cabbage and make a delicious probiotic accompaniment. Red Cabbage, Carrot, and Beet make this a vibrant colourful Sauerkraut but you could use regular cabbage.
Cabbage, Beet and Carrot Sauerkraut
Prep Time: 10 minutes
Total Time: 10 minutes
Vibrant kraut full of gut-loving probiotics. This is a quick and easy way to see up extra Cabbage harvests.
Ingredients
3 cups shredded cabbage (1/4 of a whole cabbage)
1 medium Beetroot
2 Medium Carrots
1 1/2 tsp Salt
Instructions
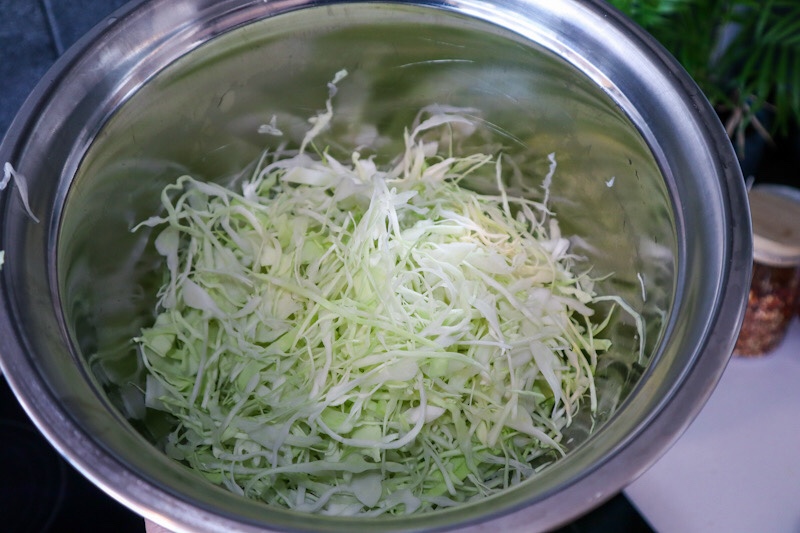
Finely slice or grate cabbage using a mandoline or grater. Reserve a whole piece to cover the contents at the end. Add to a large mixing bowl and sprinkle over the salt. at the
Squeeze the salted cabbage to extract the moisture. Do this for 5-7 minutes.
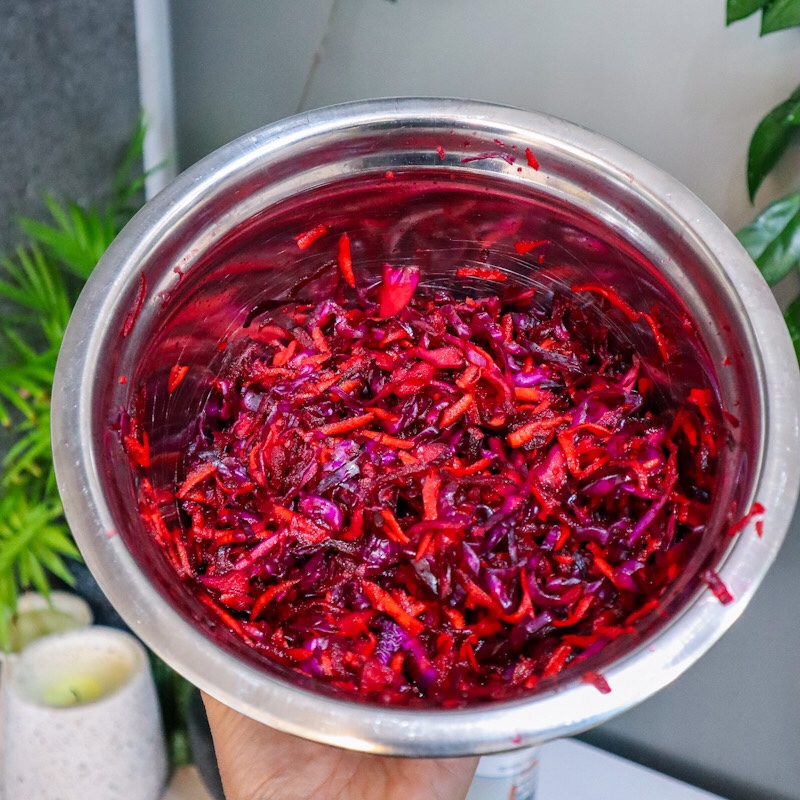
Grate carrot and Beetroot and add to the cabbage bowl. Peeled or unpeeled is optional - see notes.
MIx to combine. Cover and let it sit for 5 minutes.
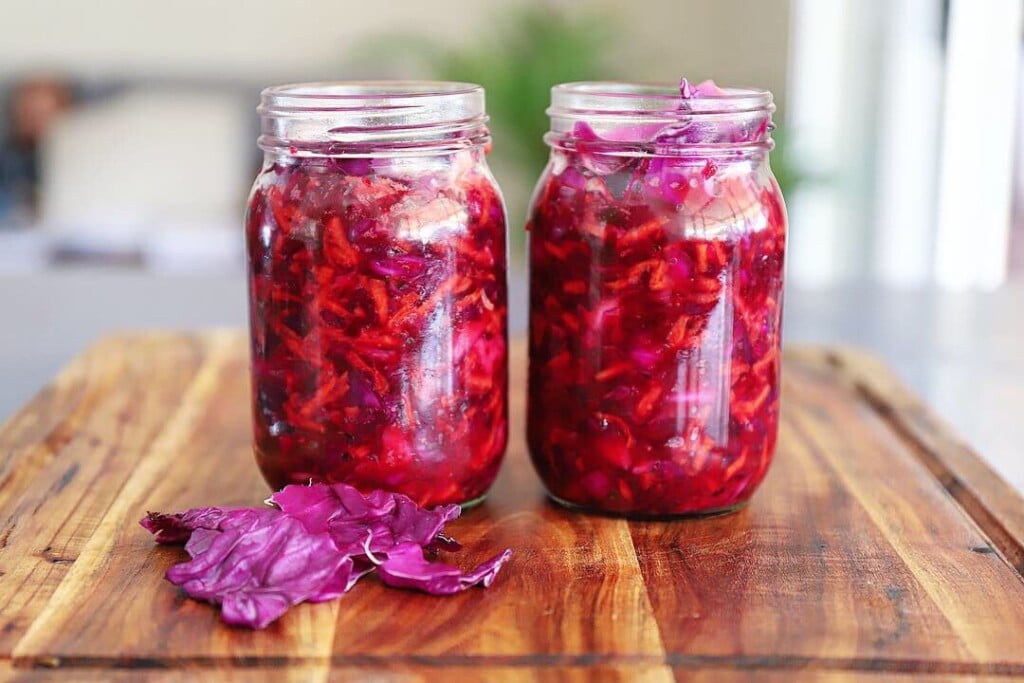
Give the mixture a final squeeze and mix. Then add to a sterilised jar. This mix will fit a 700gram jar so you could also use two smaller jars. Allow 2cm of empty space at the top of the jar. Press the mixture down to remove air bubbles and pour over any remaining liquid from the bowl. The liquid should cover the cabbage. Add a little bit of filtered water if you need it. Place a piece of cabbage leaf over the top to keep the mix submerged in liquid.
Store in a cool dark place for 3-5 days or until you like the flavour. It will get increasingly sour the longer you ferment it. Once you are happy secure the lid and place it in the refrigerator. This will mellow out the smell and slow the fermentation down.
Notes
- Peel the beets and carrots if the skin is particularly dirty and hard to remove or if you have purchased the beets from the store.
- Don't use pre-shredded store-bought cabbage as it will not have the active bacteria.
- Check the mix daily to ensure it is fully submerged in liquid. You may need to add a small weight to keep it down.
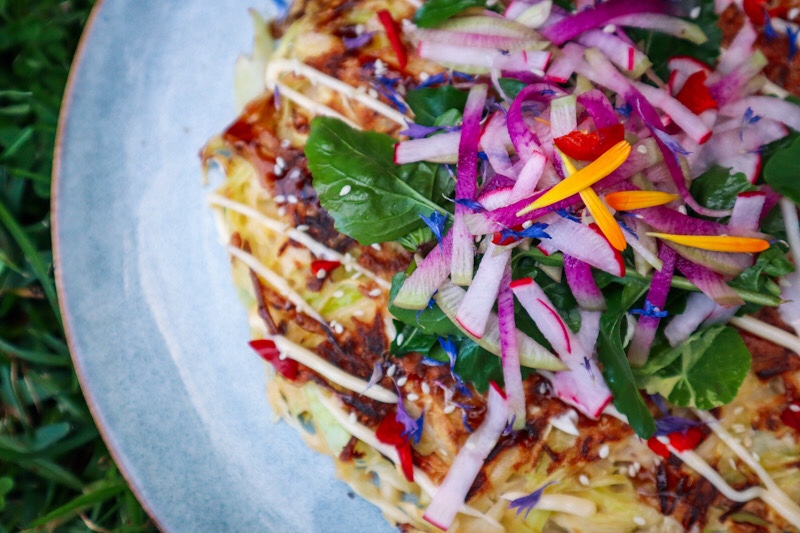
Okonomiyaki is a delicious cabbage dish similar to a fritter or hash brown (although referred to as a pancake). They make a great base to build any toppings you like! Add a fresh salad, pickles, or anything really! As the dish translates to “how you like it”.
Cabbage Pancake - Okonomiyaki
Prep Time: 10 minutes
Cook Time: 10 minutes
Total Time: 20 minutes
Delicious and easy cabbage meal for breakfast, lunch, or dinner!
Ingredients
3 cups of tightly packed finely sliced cabbage
2 eggs
1/2 cup flour
1/4 cup water
1/2 tsp salt
pinch chilli flakes
To serve
Japanese Mayo
Tonkatsu Sauce
Fresh chilli
Sesame seeds
Salad
Instructions
Finely slice the cabbage. A mandoline is a great way to do this quickly. The finer the cabbage the easier it will stick together. Add to a large mixing bowl.
In a small bowl whisk eggs and add the remaining ingredients. Whisk to form a batter.
Add the batter to the cabbage and stir until the cabbage is fully coated in the batter.
Heat a frypan to medium heat. Drizzle with a little oil (or butter for a browner crust).
Add the cabbage and press to form one large fritter or make two smaller ones.
Cook for 5mins and flip onto a plate. Carefully transfer the uncooked side back to the pan (push off the plate.
Cook for a further 4-5mins.
Top with sauces and sesame seeds. Add a fresh garden salad.
Notes
For a vegan alternative replace the eggs with 2 TBSP Sushi seasoning and allow the full cabbage mix to sit for 5 minutes before cooking. This will make the pancakes a pack more vinegary flavour so balance with a creamy salad.
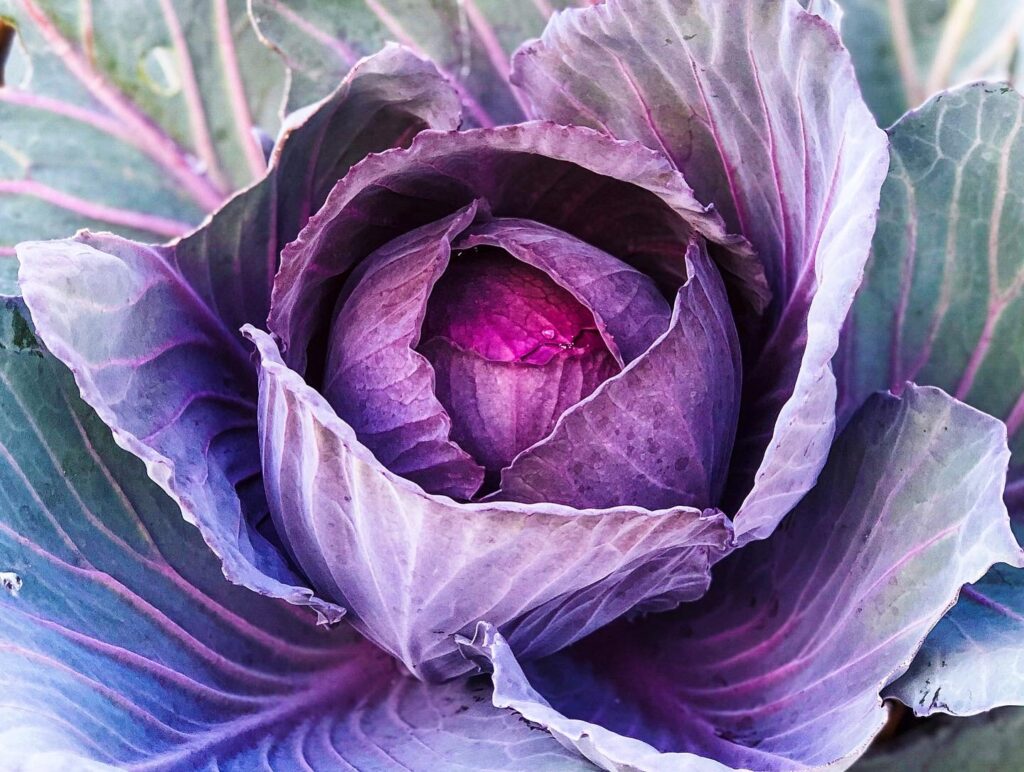
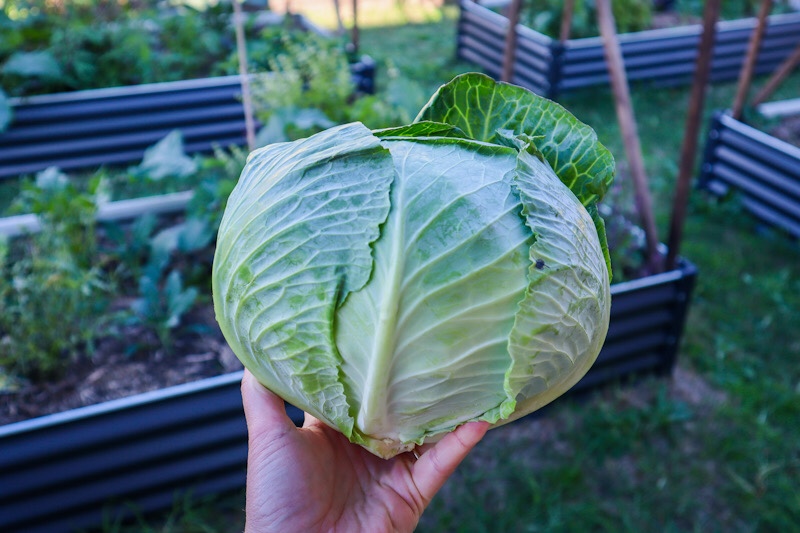
Cabbage (Brassica oleracea) is a classic staple winter veggie that provides your homestead with a hearty base crop to build many dishes.
Cabbage is a great supporting veggie BUT it can also be the star of the show! Learning to grow, cook and preserve cabbage will go a long way to supporting your ability to become more self-sufficient. Cabbage is low-calorie but packed with vitamins, antioxidants, and nutrients.
Feed with compost and with liquid seaweed fertiliser.
PESTS
Slaters, slugs, snails, green caterpillars.
HARVEST
When heads are firm. Cut with a sharp knife.
REPRODUCE
Seeds can be saved in the second year of growth. See below.
Why Grow Cabbage?
Cabbage is a great crop to grow to feed the family and they look beautiful and ornamental in the garden.
Here are some of the many reasons to grow Cabbage:
Easy to grow
Low maintenance
Produce a lot of food
Can be used raw or cooked.
Rich in vitamin C, K, B12
High in anti-oxidants
High in fibre
Nutrient-dense
Can be used as a food colouring
Promote cardiovascular health
Popular Cabbage Varieties
‘Mini’ – Small green cabbage great for urban gardens. Slow blot. 18 weeks to harvest. 1.3kg size.
‘Early Jersey Wakefield’ – Tight cone-shaped green cabbage. Space-saving for urban gardens. Harvest small or allow to 2-3kg size.
‘Brunswick‘ – German heirloom green cabbage. Late season crop. Large 3kg Cabbage.
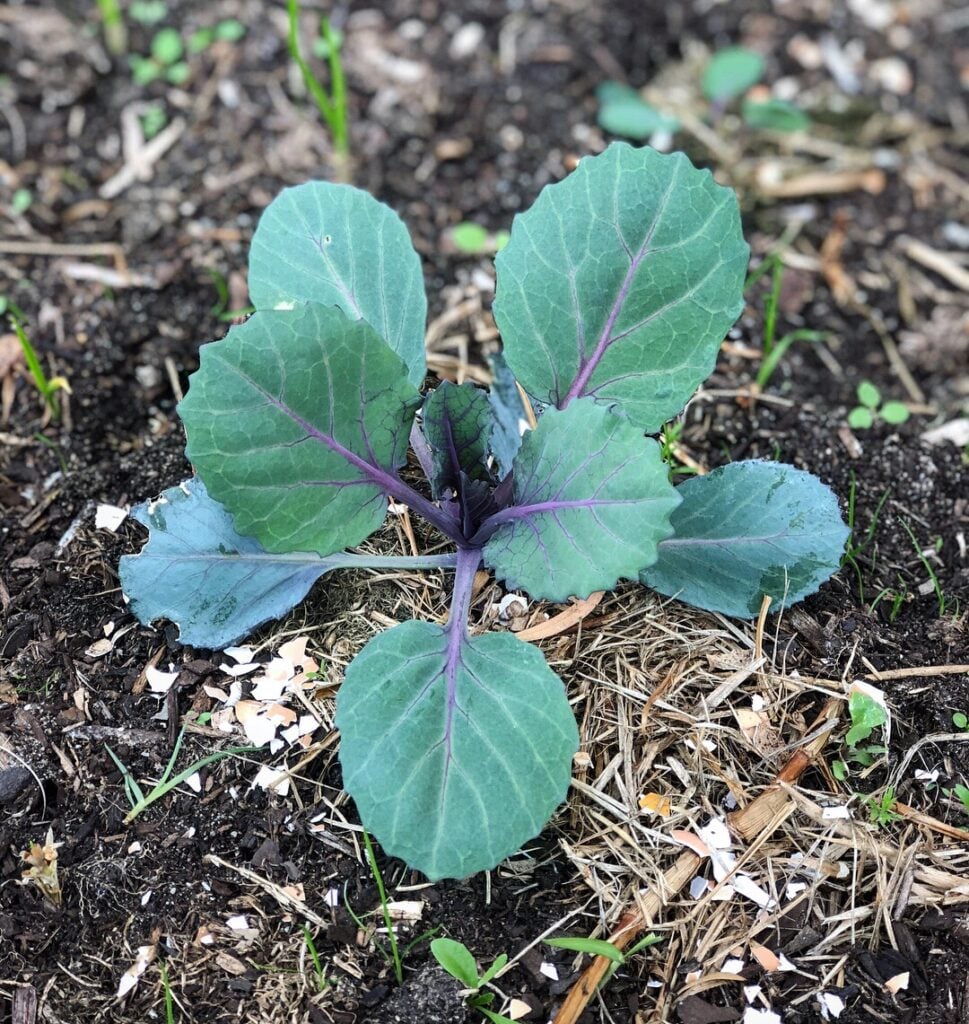
‘Red Drumhead‘ -Heirloom red cabbage with beautiful purple leaves. Large 3kg+ size. Caterpillar resistant so good for warmer months.
‘Red Express’ – Compact small red cabbage. Quick to grow and will produce an early harvest.
‘Savoy‘ –Green cabbage with distinctive curly texture. Mild flavour. Rich in vitamins.
When to Plant Cabbage
Cabbage is mainly grown in the colder seasons of Autumn and winter but some varieties can be grown in the warmer months to allow for a full year of cabbage harvests. Plant seeds at the start of Autumn.
How to Grow Cabbage
Choose a sunny location.
Prepare compost-rich soil ( pH 7.5 preferred)
Direct sow or plant your seeds in seed trays.
Plant seeds or seedlings 40cm apart
Protect young seedlings from slugs and snails but adding a ring of crushed eggshells
Add mulch to keep retain moisture
Care/ Maintenance
Cabbage are heavy feeders and can benefit from a liquid fertilizer every 2-3 weeks
Regular watering
Pests / Disease
Slugs and snails may eat young seedlings. Use natural pest management. Green caterpillars from the white butterflies are usually the main culprits. Especially during warmer months of the year. In some cases, exclusion nets over your cabbage plants or entire patch may be the best option.
How/ When to Harvest
When the cabbages form a tight ball and look about the right size to harvest (check the variety to how big you can expect them to grow) Use a sharp knife to slice the cabbage stem at the base. Remove some of the old outer leaves and rinse well checking for bugs and poop.
Reproducing
Cabbage plants are biannual meaning they will produce seeds in their second season. This means saving seeds from cabbage can be quite time consuming and will take up space in your patch. Cabbages grown in warm months will also attract a lot of white butterflies to your veggie patch. Most of the time it is easier and more effective to purchase cabbage seeds. If you would like to try to save your own – leave a few cabbages without harvesting them for a year to produce flowers and then seeds. Once the seed pods start to dry on the plant, pick and dry further inside. Separate out the seeds from the seed pods and store them.
Cooking and Using Cabbage
Cabbage is a versatile veggie that can be used raw, cooked, roasted and pickled.
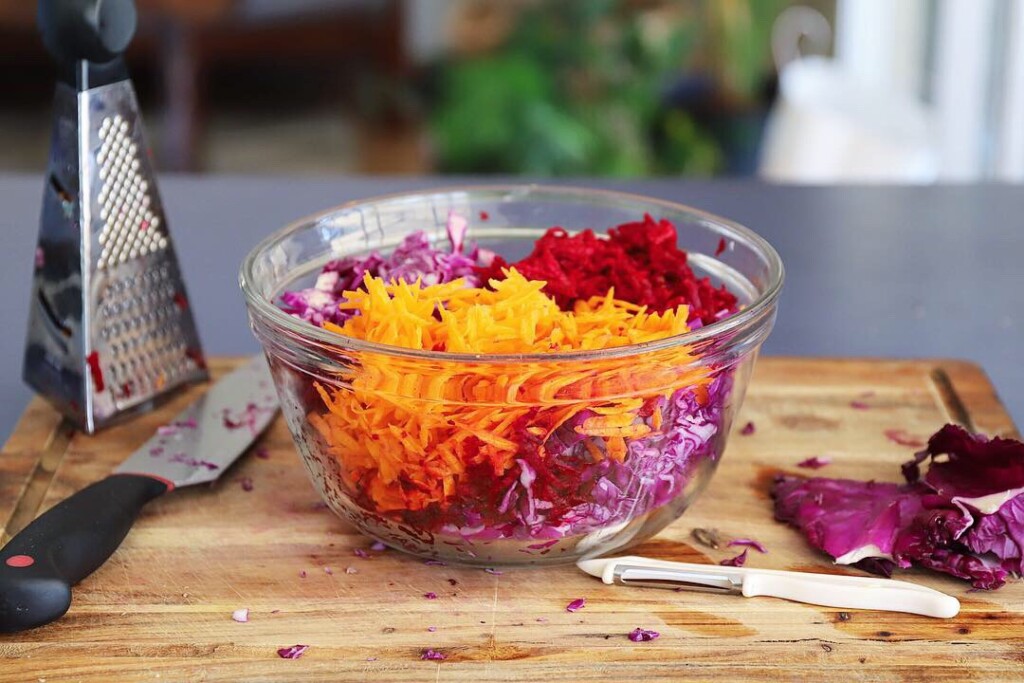
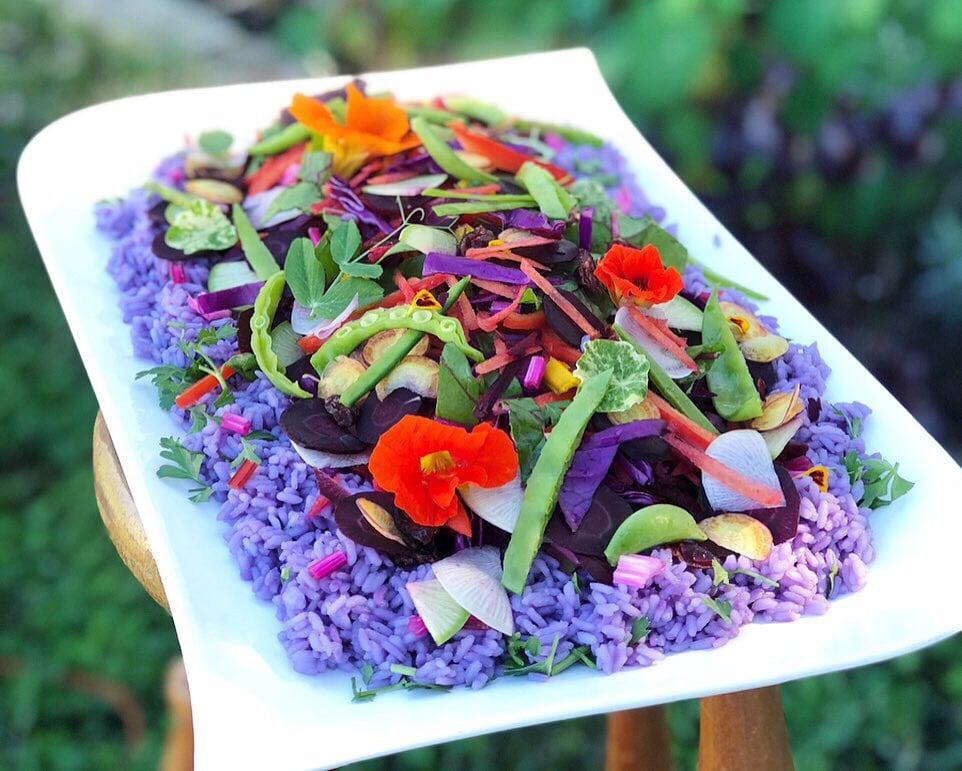
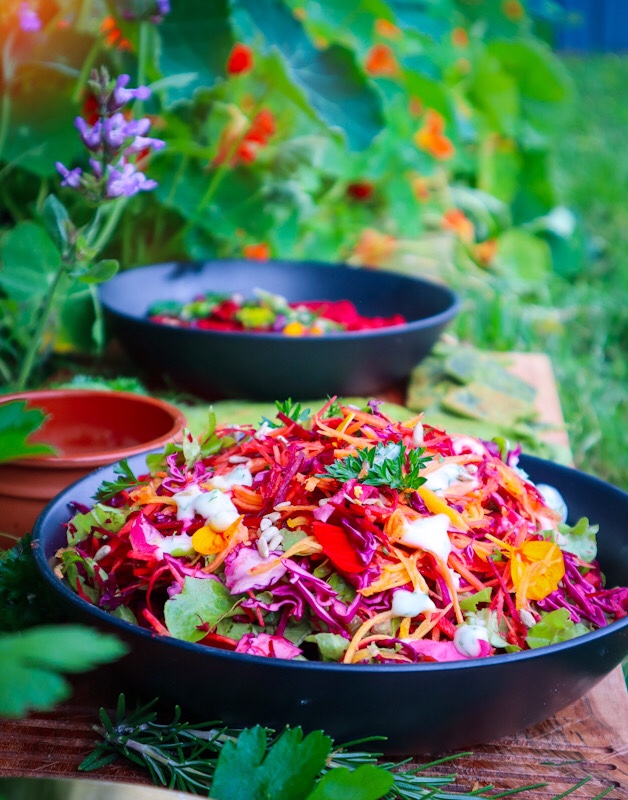
Rainbow slaw not only looks amazing but it’s also packed full of nutrients. Just like planting diversity creates a healthy garden, eating diversely also has many health benefits. Each vegetable has different levels of vitamins, minerals, phytochemicals, dietary fibre, and antioxidants. This slaw can be adjusted to suit your seasonal produce – see the notes for other vegetables to try out. Rainbow slaw is very quick and easy to make and can be a delicious and wholesome accompaniment to any meal.
Rainbow Slaw
Vibrant and full of nutrients, this Rainbow Slaw is the ultimate Spring side salad.
Ingredients
1 cup shredded Red Cabbage
2-3 Carrots
1 cup chopped Lettuce
1 medium Red Beetroot
3-4 Radishes
5cm cube Butternut Pumpkin
2 TBS Sunflower Seeds
Dressing
3 TBS Coconut (or greek) Yoghurt
1 tsp Lemon Juice
1 Clove Garlic
2 tsp finely chopped fresh Fennel Frond or Parsley
1 TBS Water
1 Tbs Olive Oil
1/2 tsp Chilli Flakes
Salt and Pepper to season
Instructions
Rinse your veggies and clean off any grit or soil.
Finely slice the Cabbage using the thin-medium section of the mandolin. If you don't have a mandoline, you can either grate or finely slice using a knife.
Peel the Carrot, Butternut, and Beetroot (The skins dressed in olive oil and seasoned make delicious chips - see notes below).
Using the Julienne teeth on the mandoline, finely slice the Carrot, Radish, Butternut, and Beetroot into thin strips. Use a grater if you do not have a mandoline.
Roughly chop your lettuce into small pieces.
Add a little of each vegetable to a bowl so they are all mixed without having to stir through (otherwise the beetroot will turn everything red and you will lose some of your colours).
Drizzle with olive oil and a squeeze of lemon juice. Lightly toss.
To make the dressing, add yogurt to a small bowl. Then add crushed garlic, finely chopped fennel frond, lemon juice, water, chilli flakes, and salt and pepper to season. Stir well and taste. Add extra salt or lemon juice if needed.
When ready to serve, drizzle the dressing over the salad and top with sunflower seeds and edible flowers - I used nasturtium petals.
Notes
- Use vegetable skins from Carrot, Beetroot, and Butternut to make vegetable chips
Coat your skins in a light drizzle of oil.
Place your vegetable skins on a baking tray and sprinkle with a little salt.
Cook at 190 degrees celsius for about 5 minutes turning once halfway through. Keep an eye on them as they are so thin they will overcook easily.
Remove when they are golden and slightly crispy. They will also crisp up as they cool.
- Other vegetables that would be great in this slaw are: coloured Capsicums, Fennel, Nasturtium leaves, other Beetroot Varieties.
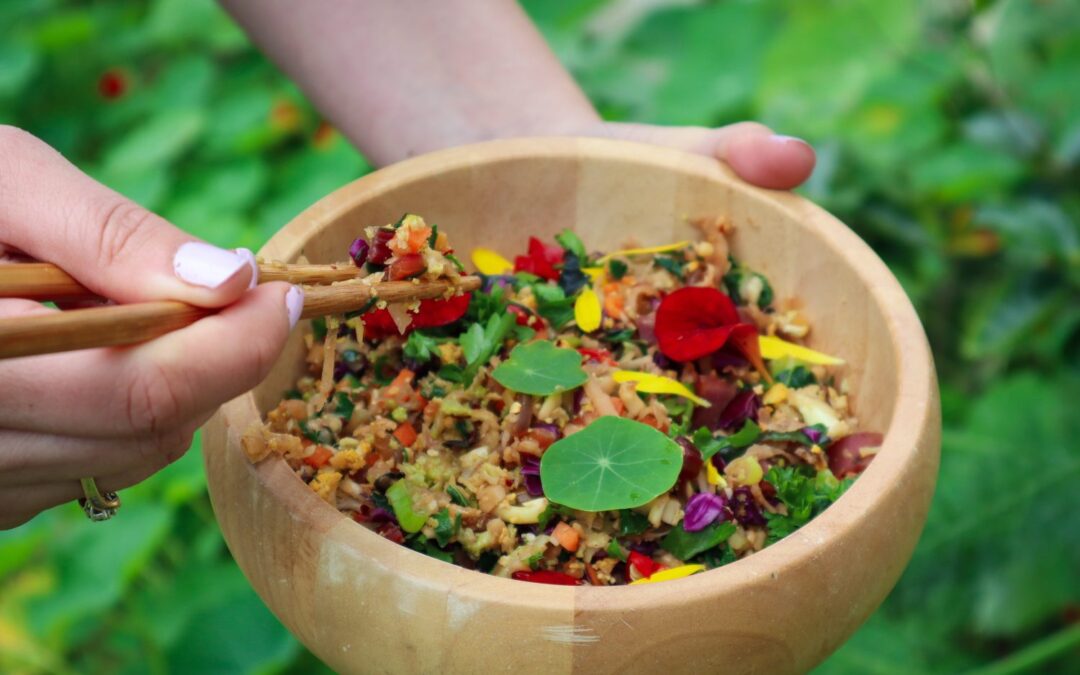
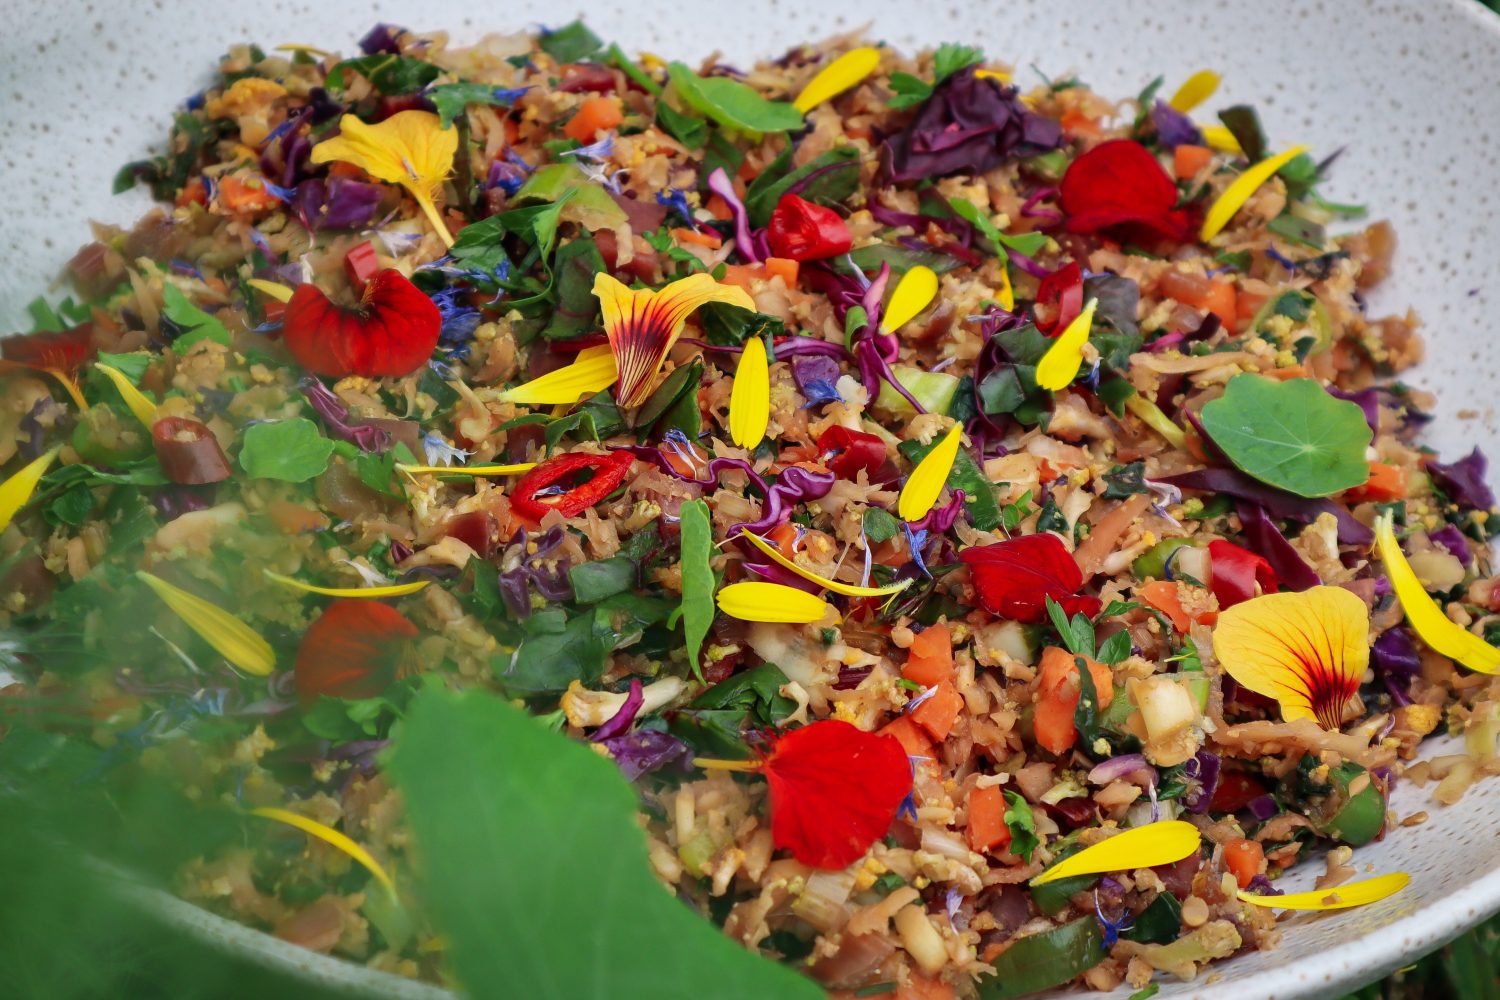
Cauliflower is fantastic at absorbing flavour which makes it a perfect substitute for rice. This Cauliflower fried rice is simple, easy to make, packed full of nutrients and tastes so so good! This recipe is flexible, so use whatever in-season veggies you have available. I have added a list of alternatives at the bottom of the recipe.
Cauliflower Fried Rice
Yield: Serves 4
Prep Time: 15 minutes
Cook Time: 20 minutes
Total Time: 35 minutes
Ingredients
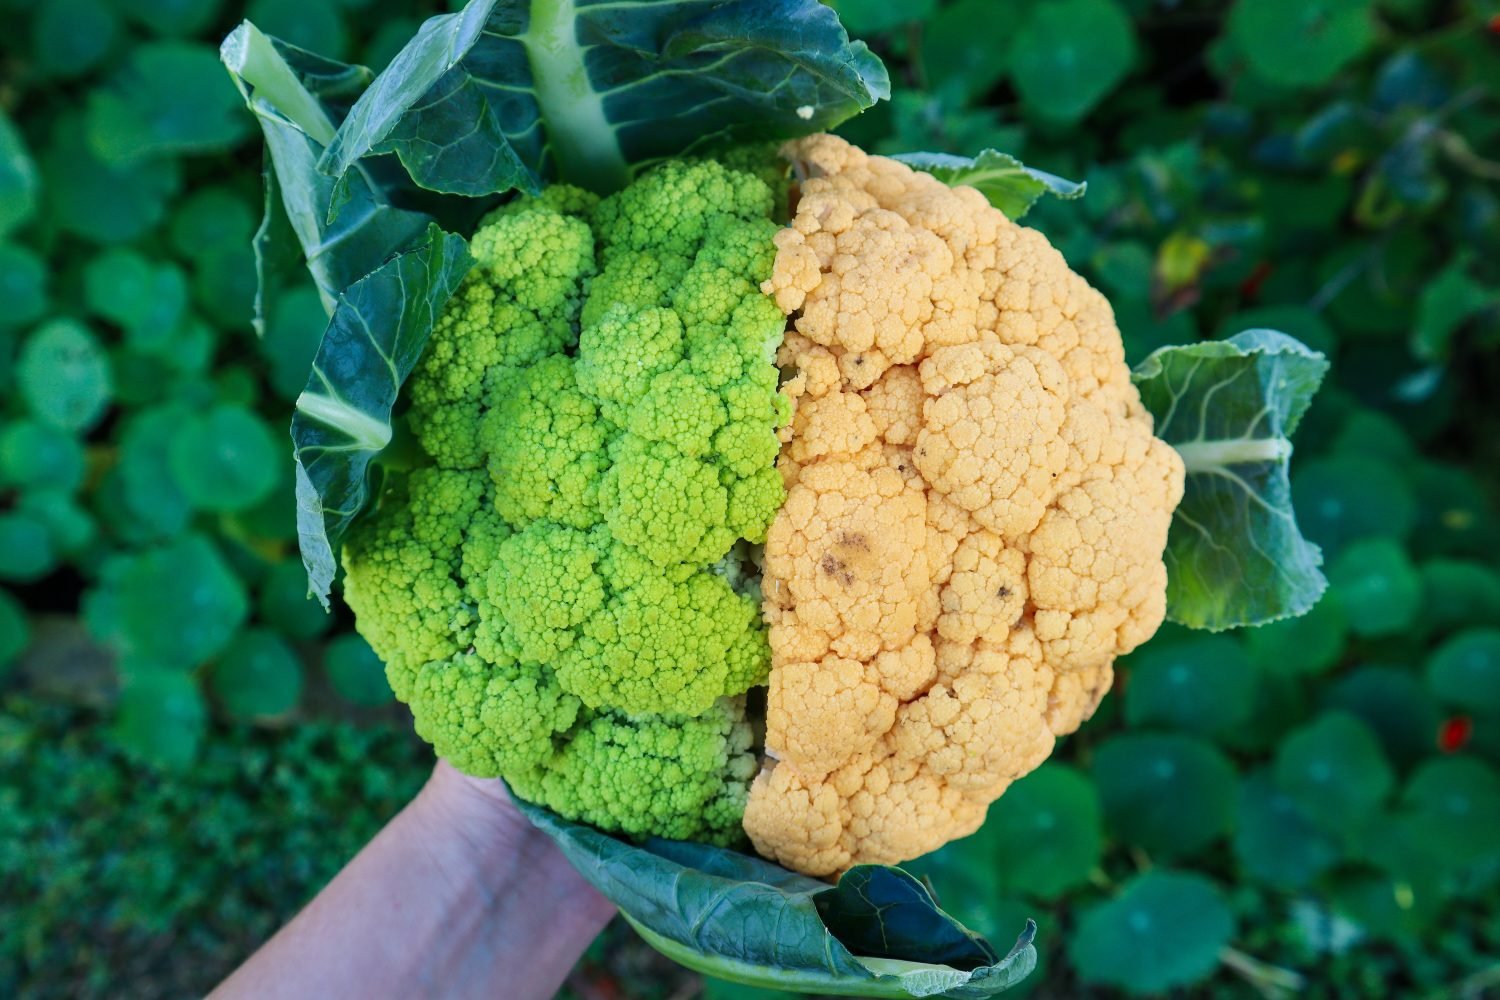
1 whole cauliflower (I used half green and half yellow varieties)
1/2 tsp Ground Smoked Paprika
1/2 tsp Cumin Powder
1/2 Red Onion
2 Garlic Cloves
1 Carrot
1 Spring Onion
1 Red Chilli
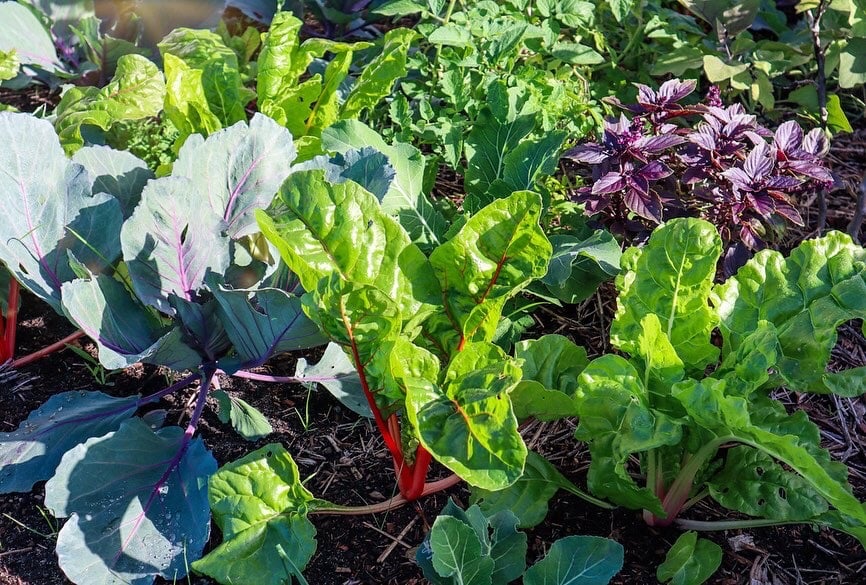
1/2 cup chopped Purple Cabbage
1/2 cup chopped Sweet Potato (roughly 1/2 a sweet potato)
4-5 Rainbow Chard stems and leaves
1/2 cup chopped Parsley
2 TBS Tamari (soy sauce)
1 TBS Water
2 tsp sugar or sweeter (honey,agave)
2 tsp lemon juice
1/2 tsp sea salt flakes
Instructions
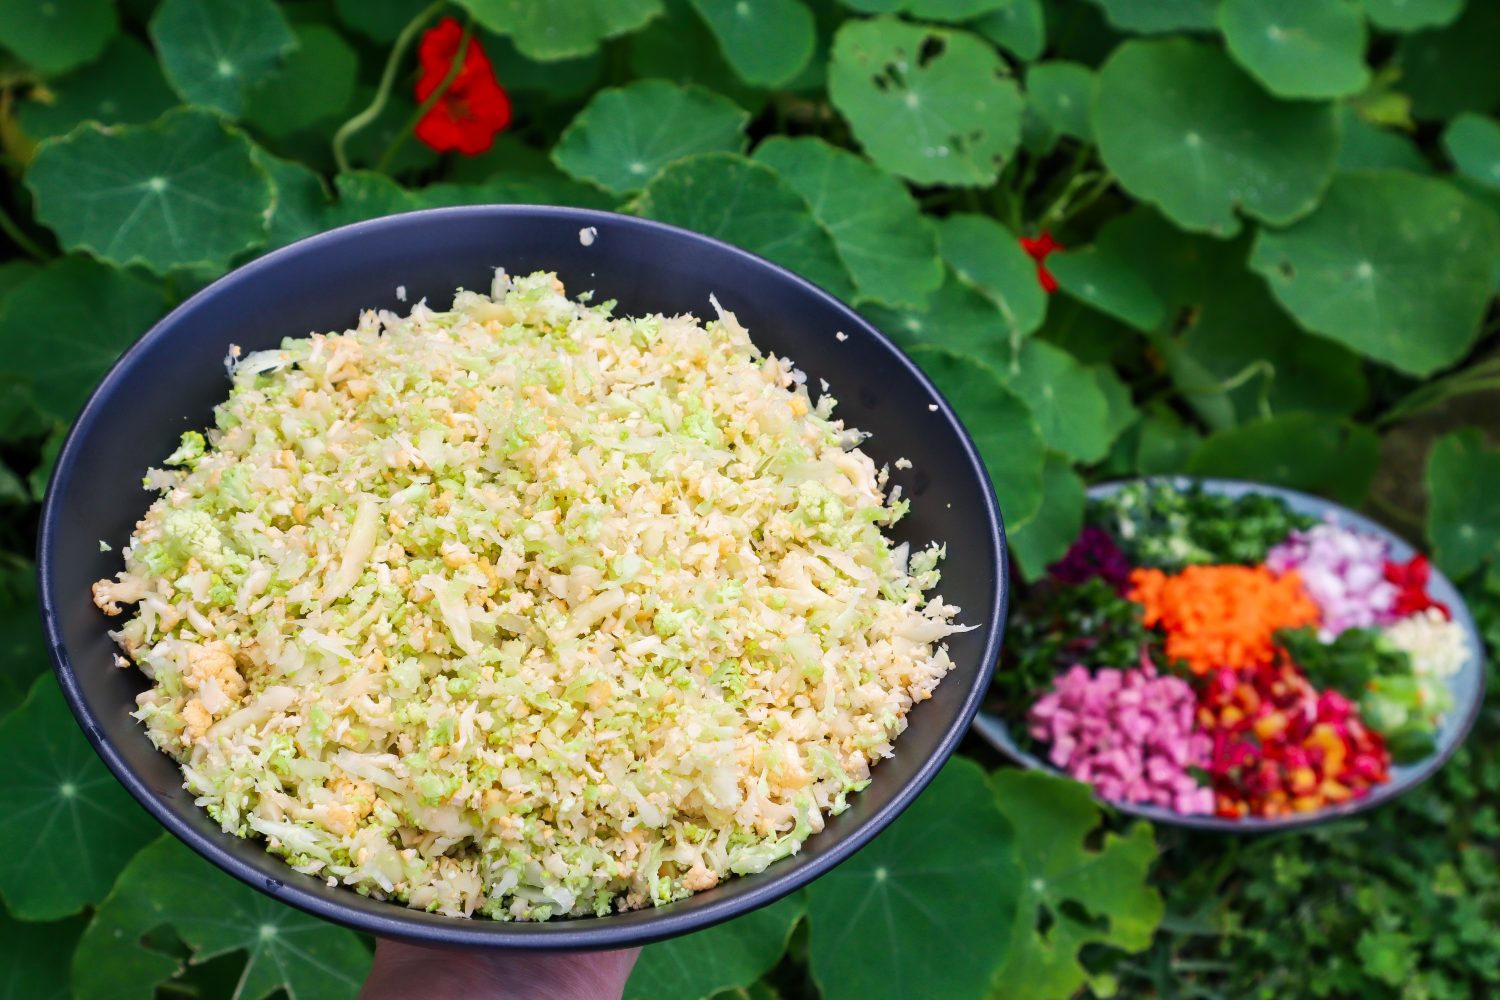
Grate or chop the Cauliflower into rice sized pieces. You can also use a food processor if you have one. You want it to still be a little chunky and no smaller than the size of a long grain rice granule.
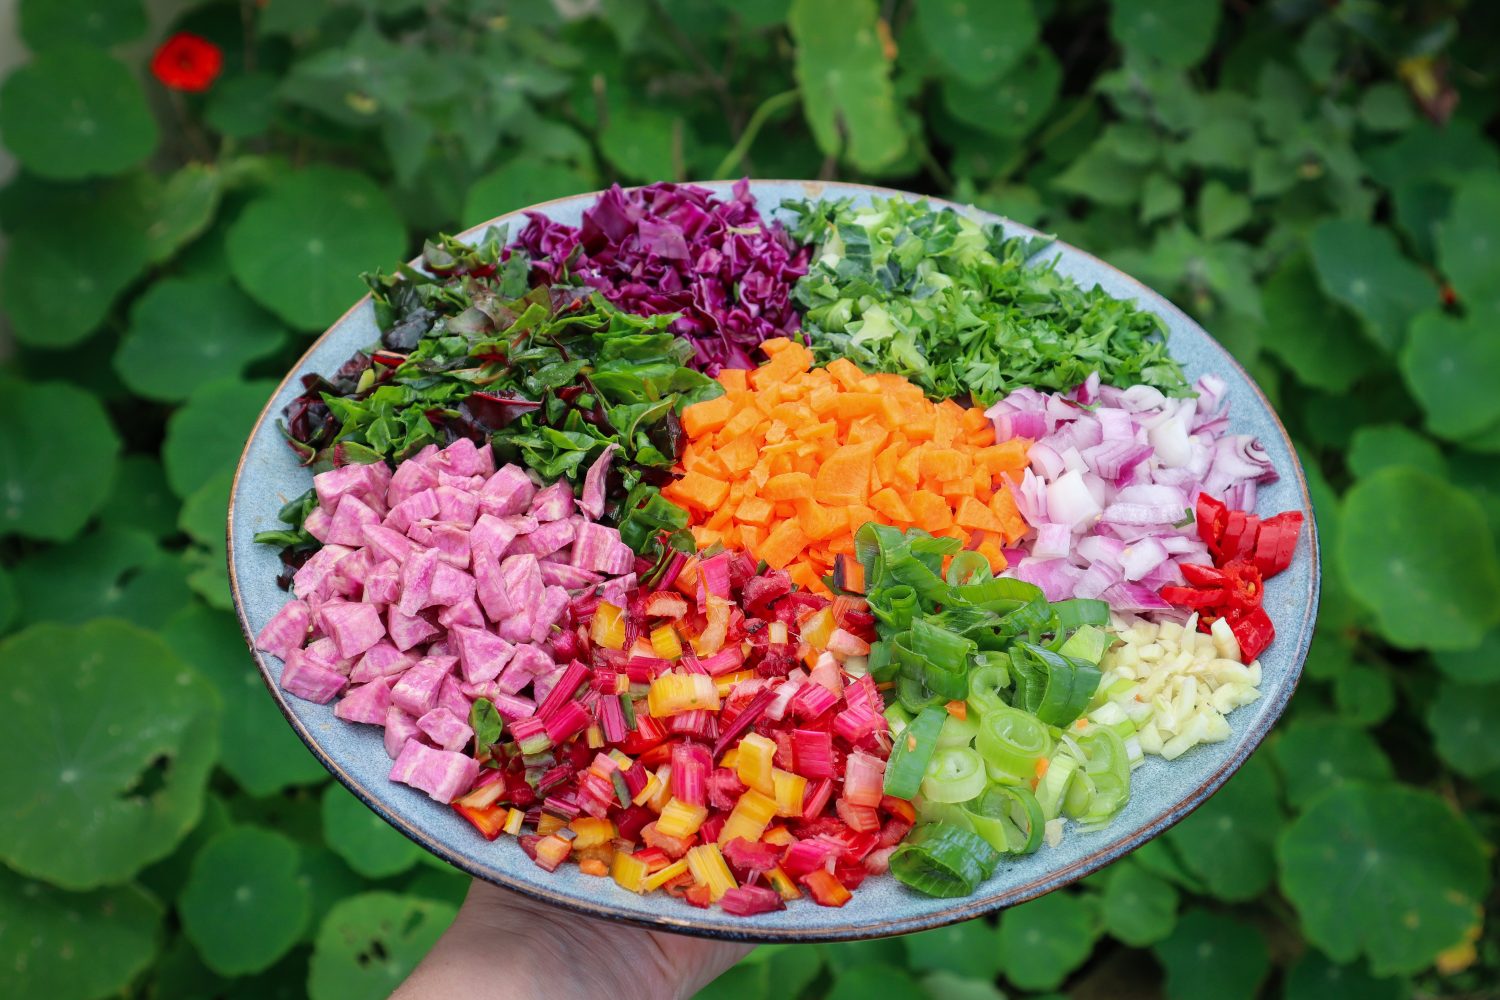
Prepare all your vegetables: Finely dice the Onion, Carrot and Sweet Potato into 1/2 cm cubes or chop up in a food processor. Finely chop the Cabbage, Rainbow Chard Stalks, Leaves and any Cauliflower leaves into small 1/2cm pieces. Thinly slice the spring onion. Finely chop the garlic.
Prepare the sauce by mixing in a small bowl: Tamari, Water, Lemon Juice and Sugar. Stir until sugar is dissolved.
Heat a large frying pan or wok with a drizzle of oil on a medium-high heat and cook the Onion and Sweet Potato until they soften (5-10mins). Stir regularly for even cooking.
Add Cumin, Paprika and Garlic to the pan and mix to combine for 1 minute.
Then add the Carrot and mix to combine.
Then add in the Cauliflower and mix to combine. Sprinkle over Sea Salt Flakes. Cook for 2-3 minutes.
Add in the Cabbage, Rainbow Chard, and Leaves. Mix to combine.
Drizzle over the sauce and mix to combine. Cook for a further 5 minutes or until vegetables are soft but still have some texture or crunch to them.
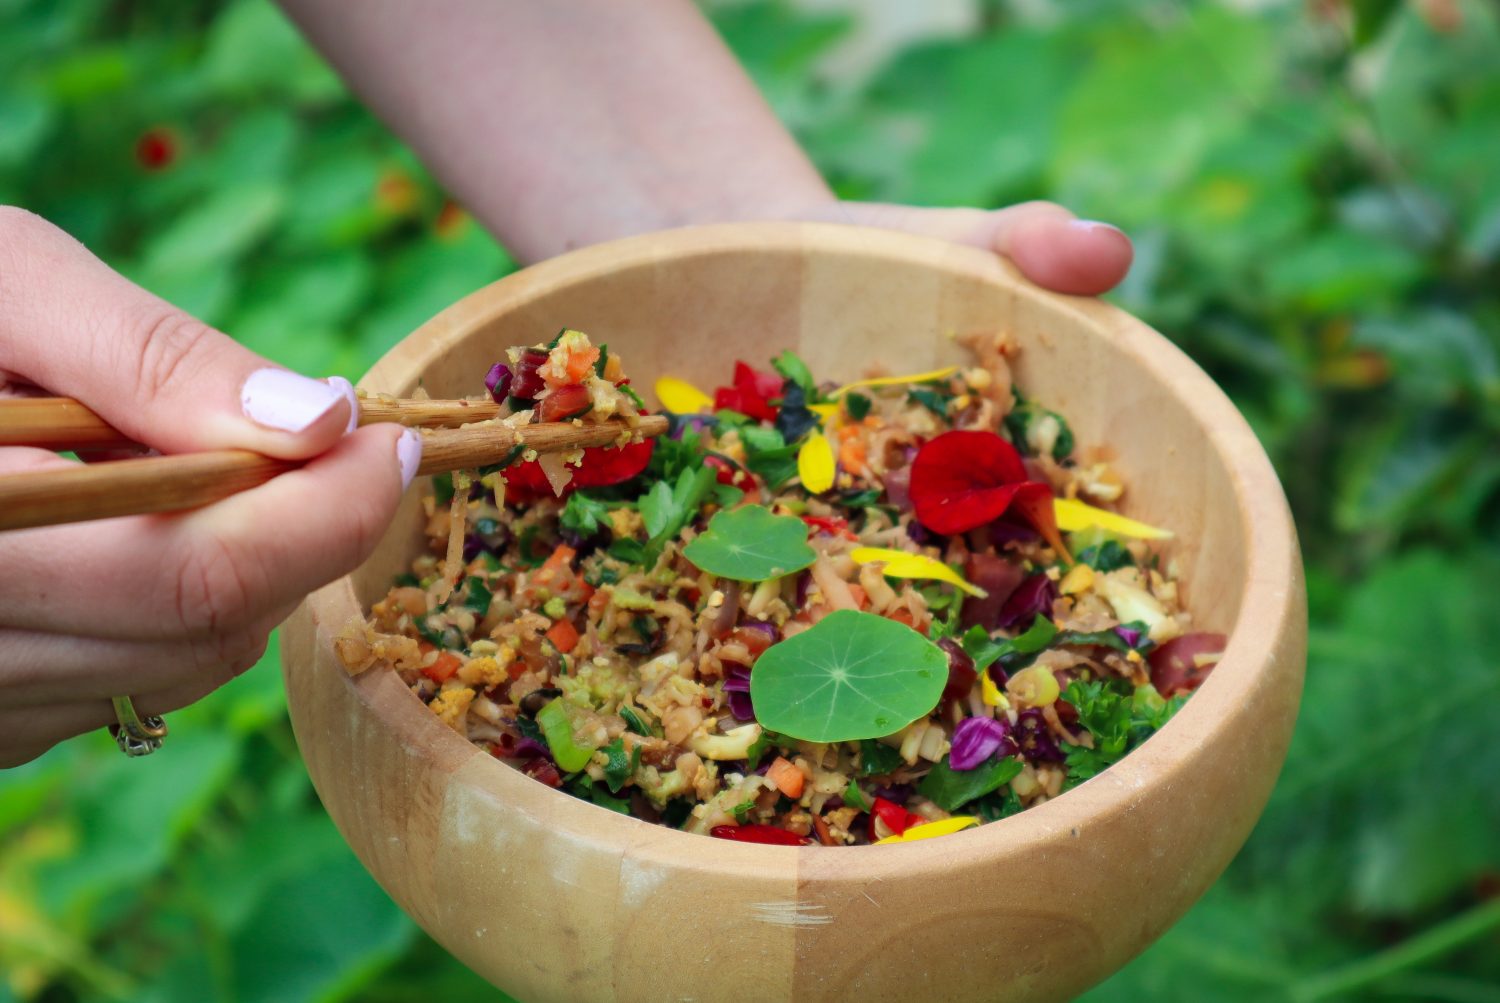
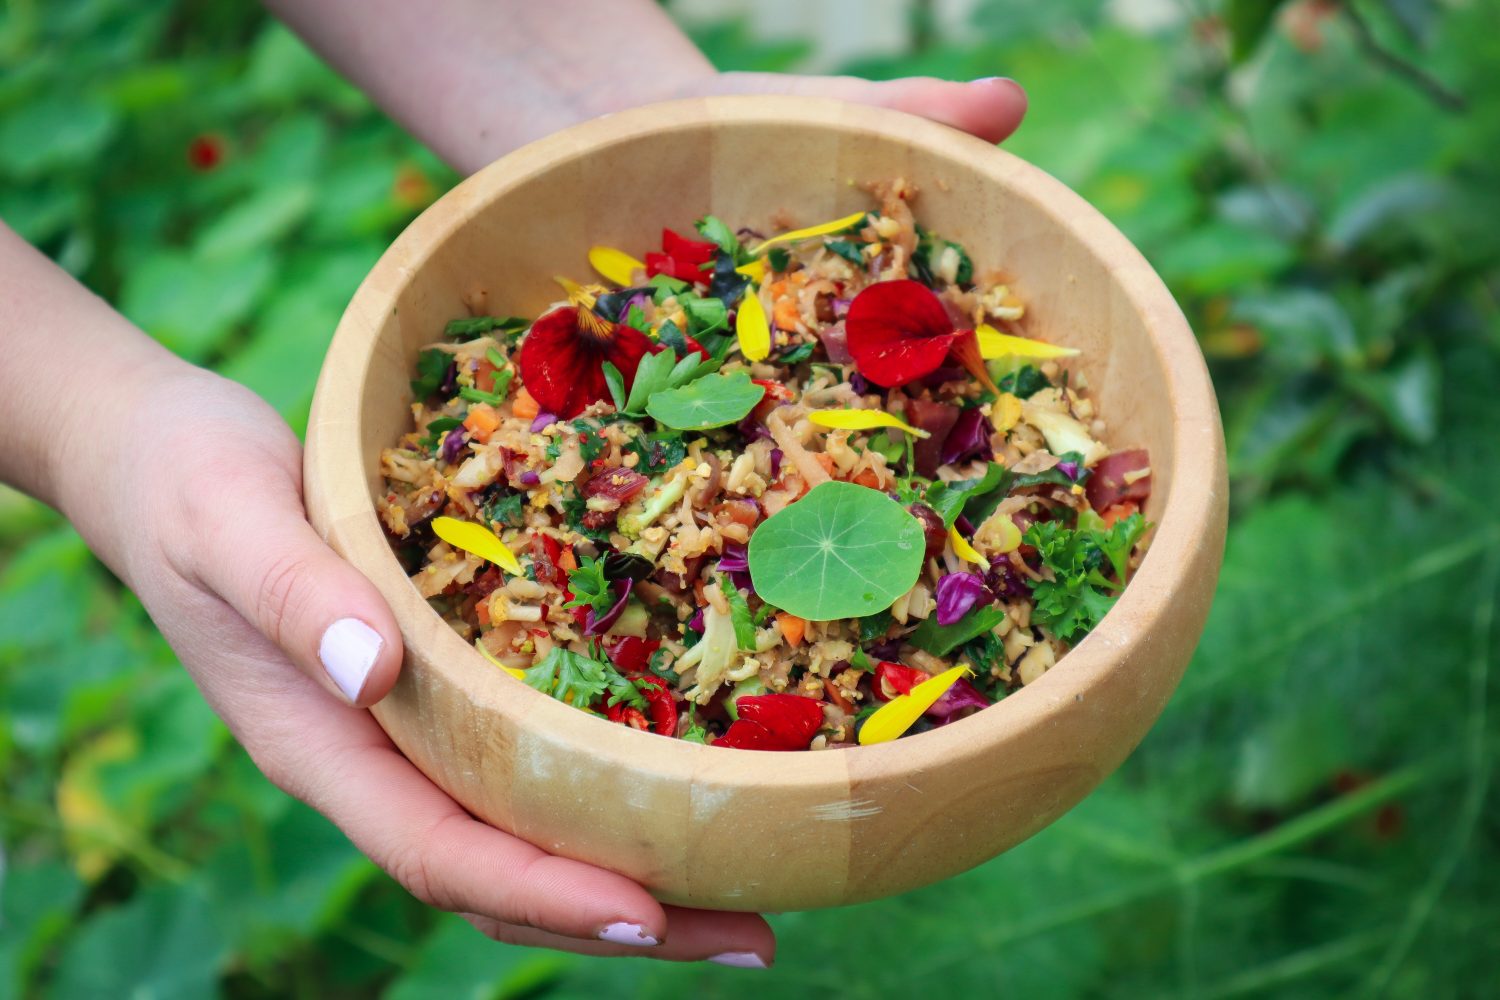
Remove from the heat and add to a large serving dish or individual bowls. Garnish with fresh chopped parsley, baby nasturtium leaves and edible flowers ( I used Nasturtiums, Calendula and Blue Cornflowers).
Notes
This recipe is flexible and you can use the vegetables you have in season. A total of 2-3 cups of diced vegetables. Other vegetables to try: Capsicum, Pineapple, Bokchoy, Spinach, Sugar Snap Peas, Beans,