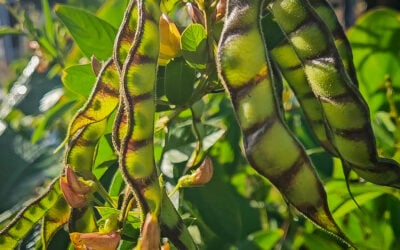
Worms are an amazing addition to a self-sufficient homestead as they turn scraps into nutrient-rich organic fertilizer to help you grow more food. Creating a sustainable lifestyle is all about taking small steps and changes to close the loop and nurture thriving ecosystems. You don’t have to do it all at once and I highly recommend starting small, mastering a manageable garden, and then start adding layers one by one. If you overwhelm yourself and don’t have habits and systems in place it won’t be sustainable long term and you can end up with unproductive chaos.
Click to watcha warm farm tour
Tips for setting up a backyard worm farm
1. Source a Worm Farm or Home for your Worms
There are many options for backyard worm systems from kit-set to DIY. You will also more than likely be able to pick up a second-hand worm farm so keep an eye out on your local listings and marketplace. Be mindful of your local climate and do a little research. In Perth, Australia, we have extremely hot summers that reach over 40 degrees. Cool shady locations are a must for worms. If you do live in a hot climate there are some great DIY options using old fridges and freezers to offer more protection. This is something I will be creating very soon!
2. Choose a Location
Choose a location for your worms that is out of direct sunlight and is well protected. On the flip side if you get snow or cold temperatures you would need to make sure you can bring your worm farm somewhere warmer.
The other important consideration to make is to keep it close and convenient. Worms like to be fed a little and often so you don’t want them down the back of your property where they may get forgotten about. Permaculture zone 1-2 would be great or have them located on a path that you frequent regularly. For example: on the way to the chicken coop or the washing line. Having things in convenient locations is the absolute key to being consistent and having systems in place that easily become habits means you don’t even have to think about it just becomes part of everyday life.
3. Source Composting Worms
There are many times of worms in your garden and they all play different roles so it’s important to get the right worms for your worm farm to make sure they are happy and thriving. Tiger worms are a popular type of worm for this system and can be purchased at many plant nurseries or hardware stores that sell worm farms. You may also be able to get set up with worms from friends that have their own form farms established.
4. What to Feed your worms
Feed your worms little and often! Be consistent.
What to feed: Coffee grinds, tea leaves, vegetable scraps, egg shells, banana peels, shredded paper or cardboard, dried leaves, greens, vacuum dust, and hair. The more variety the better as this will help keep a balanced pH. Add a little sprinkle of soil when you feed as the grit can help the worms break down the scraps. Keep the food scraps in smaller pieces if possible.
What to avoid feeding your Worms?
Avoid citrus, garlic, or the onion family as this will create an acidic environment that will harm the worms. No meat – as this can create bad bacteria and attract rats and other unwanted pests.
5. Water your Worms
Worms like a moist environment of around 70% moisture, so it’s important to give your worms a regular drink. Keep a damp sheet of cardboard, hessian sack, or newspaper on top of the food scraps to retain moisture and regulate temperatures. This also acts as a slow-releasing food source.
6. How to care for Worms when you go on Holiday
If you are going away for a few weeks your worms should be fine if you get them prepared. Flush water from the top tray, add plenty of food and some slow-release food such as pea straw, hay, and place some layers of wet newspaper or cardboard on top. This will help keep the worms nice and moist. If you are worried or going away for longer ask someone to stop by and feed your worms.
How to harvest the Worm Tea and Worm Castings?
The by-products of worms are both castings and worm tea. Castings are the worm poo which is your food scraps converted into soil. Add scoops of worm castings to your garden beds to feed and enrich the soil. Warm castings are quite concentrated so it’s best to mix this through with other soil first.
Once the worm bin starts to fill up with worm castings and the worms start trying to get out it may be time to change the bins over. Depending on the size of your worm farm and the population of worms this can be done 2-4 times a year. The active worm bin should be in the top layer so it is time to move this down and place an empty bin on top. Lift out as much of the uneaten food as possible and add it to the empty tub. Put in some fresh food and bedding and pour water over the top to moisten it all down. The worms will start to come up to the top layer to access the food and leave the bin of castings behind.
This may take a while for the worms to move up depending on how much uneaten food is left behind and how dense the population of worms is.
If you don’t have multiple layers in your worm farm another way to harvest the castings is to tip it all out onto some cardboard. The worms don’t like sunlight so they will move to the bottom of the pile and you can harvest off the top layer before putting the worms back in.
Worm tea can be watered down 10:1, especially on young seedlings but we also use a much more concentrated version of 50:50 on fruit trees. Just be careful when using it around young plants as they will be more sensitive, that’s when I would water it down more. Like with everything in the garden, when you are unsure or just starting out do sections and test it out first.
Use the worm tea within a month or two as you want to ensure the living organisms stay alive as that is the key to healthy soil!
If you have extra worm concentrate, bottle it up for gifts or this could be a great little side hustle for kids to sell.
Today I’m going to share with you 10 tips to grow more food from your edible home garden. These tips are so easy and you can implement them today to boost your garden’s production. No matter whether you are renting or living in an apartment.
It is no secret that we are facing a very real food security and shortage with many supermarket shelves completely empty. There has never been a better time to start growing your own food or ramp up your home gardens production. These tips will help you maximize the amount of fresh homegrown food you can produce from home. Starting NOW!
WATCH 10 tips to Produce more Food
10 tips to Produce more Food at Home
1. Trim your Herbs
Especially if they are starting to flower. Herbs such as Basil, Mint, and Thyme can all be grown in pots, and trimming the tops will promote a bigger bushier plant. When plants get hot, stressed, or are just left to just grow, they will send off flowers to produce seeds for another generation. Trimming off these seeds will let your herbs know that it’s not time yet, and to keep producing. Just chuck the tops and seeds back in the garden and they will sprout new plants, dry or preserve your herbs, or pop the purple stems in vinegar and make a vibrant basil infusion! You can then use this to make salad dressings by mixing with a little olive oil and lemon juice.
2. Regularly Plant “quick-to-grow” Crops
Quick-growing crops are great to continuously interplant in your garden to get quick wins. Edible plants such as Radish and Rocket are super quick to germinate and grow. Plant radish in the gaps of your garden for quick and easy food production. Radish isready from seed to table in just 28 days and is one of the quickest things you can grow! Radish not only provides fresh crunchy vegetables to add to salads but you can also eat the leafy tops by making pesto or chimichurri. If you are not a fan of the spicey radish, then try them with your roast veggies! So sweet and delicious!
3. Succession Planting
A little planning goes a long way in an edible home garden. If you know your veggies will be finishing up soon, plant new seeds to have seedlings ready to go. You can plant your new seedling out before you have pulled out the old ones so that you can transition straight away and prevent empty spaces from going to waste without producing food. I also like to grow different varieties so I plant each type two weeks apart to help stagger the crops.
4. Hand Pollinate
In an ideal world we will have lots of bees and pollinators in our home gardens to do the work for us. This isn’t always the case, especially if you live in an apartment or your gardens are new. Hand-pollinating can help ensure more of your fruit and veggies are pollinated and set to form full-sized fruit. We definitely want to encourage bees and pollinators by planting flowers but hand-pollinating can be an added insurance. This works best on plants such as Melon, Squash, Zucchini, and Pumpkin. Click here for more info on how to hand pollinate.
Your plant’s main goal is actually not to make delicious food to feed us humans… but to produce seeds to secure its future generation. If the plant feels it has enough fruit or vegetables produced with seeds it will slow or stop producing. Regularly picking your harvest when it is just ready will make the plant think that it has lost its seeds to predators so it will continue to produce more and more. So try not to leave things too long on the plant once they look ready. This also reduces the risk of other critters nabbing your produce first too.
7. Learn more about Root to Shoot
Conventionally 30-50%, maybe even more of the edible plants are discarded. Crops such as Beetroot leaves, Carrot tops, Brassica leaves and stems, Sweet Potato leaves, male Pumpkin or Zucchini flowers, and so much more! Learn what parts of the plant are edible and you could double the amount of food you have in your garden in a matter of hours!! I have some recipes on my blog but this is something we dive deeper into inside my membership.
8. Plant Perennials
Perennials are plants that last longer than 2 years. These may be a little slower to establish but once they do, they produce an abundance of food with just a little maintenance. These are plants such as Berries, Fruit trees, Artichoke, Asparagus, perennial Spinach varieties, Rhubarb and so much more! Having perennials in your garden will help you maintain your food supply. I also have an article on A-Z edible perennials available inside my membership.
9. Stack in Time and Space
Use the space you have in your edible home garden to grow both horizontally and vertically. This can maximize the amount of food you can grow. Having a trellis at the back of your garden or container can help create structure and expand your food production capabilities. I also let plants use my fruit trees to grow up. Whether that’s beans, tomatoes, melons, or pumpkins. Growing vertically can double the amount of food you can grow in a single space. Stacking in time is just like succession planting. Plant crops that will be starting to take off as the previous ones are finishing up. If you have a vertical crop that may produce more shade on the lower levels this can also provide a cooler climate to grow some more sun-sensitive crops such as lettuce. Especially in these hot summers.
10.Utilise Space with Container Gardens
Even if you have a large veggie patch, container gardens still have plenty of use. Container gardens are great for growing prolific plants that can be a little invasive. These are plants such as Mint, Nasturtium, and Sunchokes. Not only will you get lots of food but your precious garden space won’t be overrun with the weed-like growth of these plants. Containers are also good for maximizing the sun and shade. You can move them around during the year to follow the sun or reduce the amount of direct sunlight in summer.
Start TODAY with these 10 tips to produce more food from your edible home garden! Let me know if any of these tips sparked inspiration with you in the comments below.
I grow a lot of edible flowers in my urban permaculture garden. That way, I not only have plenty of flowers for the bees, but also lots of beautiful edibles to brighten up any meal. Edible flowers have so many health benefits and valuable nutritional qualities. Flowers don’t often last long on the plant and a great way to preserve and harness their energy is to press or dry them. This way you can make infused oils, herbal teas and still have beautiful bright flowers to use throughout the year.
What Time of Day is Best to Pick Edible Flowers?
Pick your edible flowers in the morning but after the sun has come up. First thing in the morning the flowers will still be closed so wait until they fully open up. They will be at their best in the morning, full of life and well hydrated. Throughout the day they can lose moisture and become damaged by insects or wind. Make sure you select flowers that you know don’t have any chemicals or sprays on them. I only use flowers I have grown in my backyard as I can have more control over their surroundings.
Should you Dry the Whole Flower or just the Petals?
You can do both! If the flower has a thick base or bud I tend to remove the petals. Flowers such as Sunflower and Hibiscus, I usually remove the petals. The base will take a very long time to dry and most of the time will not be palatable/hard and bitter. Calendula has many healing properties in the base, leave this on if you are going to use it for infused oils and balms.
Air Drying Flowers Naturally
The main way that I preserve my edible flowers is to air dry them naturally. I keep a bowl or plate in my pantry and add petals and flowers to it regularly. Each time I go out to the garden to pick veggies, I will pick edible flowers as well. If I don’t use them fresh in my meals I will just pop them aside to dry. It is very hot and dry here in Perth, Australia during the summer, so they will dry within a couple of days. If you live in a humid or cool climate or it is winter, it would be best to oven-dry or use a dehydrator. You want to get the flowers as dry as possible with no moisture left. This is to prevent them from going mouldy or growing bacteria.
Oven drying flowers
Turn your oven on to 40-50degrees Celcius and spread your flowers out on a tray. If your flowers have thick buds or bases it will be best to separate them out and just dry the petals. This may take a while depending on the size and moisture levels of your flowers. It may take around 4-6 hours and gently turn and mix your flowers around during that time to help them dry evenly.
Drying flowers in the dehydrator
Lay your flowers out flat on a tray and turn your dehydrator on to 40-50 degrees Celcius. It will depend on the moisture levels and size of your flowers but it will take between 4-6 hours to dry. Make sure they are completely dry and they may sound crunchy to touch.
Pressing Edible Flowers
Another way I like to preserve my edible flowers is to press them. You can do this with any flower press or to press flowers without a flower press, simply place your flowers between sheets of paper or a notepad and stack some heavy books on top. Press whole flowers or petals but if the bud or base of the flower is quite thick, I would remove it and just press the petals. Pressing flowers will take a while to ensure that they are completely dry. Depending on your temperatures and climate it can take between 2-4 weeks to dry your edible flowers.
How to Store Edible Flowers
Once your flowers are completely dry you can store them in an airtight container out of sunlight. I keep all my air-dried flowers in jars in my pantry. My pressed flowers that I want to keep intact, I store in a glass container with a bit of paper towel. In dry conditions, these will last quite a while. I have some from a year ago that are still great.
How to use Dried Edible Flowers?
There are so many ways to use your dried flowers. Here are some of my favourite ways to use them.
DISCLAIMER: Links included in this description might be affiliate links. If you purchase a product or service with the links that I provide I may receive a small commission. There is no additional charge to you! Thank you for supporting my page so I can continue to provide you with free content!
Composting is a great way to reduce waste, build soil and grow healthy thriving plants. Part of a naturally occurring cycle that feeds an ecosystem. Urban composting may mean smaller systems need to be used but they can still be very effective. I have a tumbler compost bin and now I have made a DIY worm tower to go in my Container Gardens. This tower is made from recycled PVC pipe we had left over and a recycled plant pot was used for the lid. The worms love it and so do my plants!
Urban Composting
You don’t need to have a large garden to start composting your veggie scraps at home. There are some great urban composting solutions including Tumbler Composts, Bokashi and Worm Farms. There is even an app called Share Waste that connects people to others that have composts in your local area. Whichever solution you choose it is a fantastic way to reduce your waste and stop it from going to landfill. Food scraps that end up in landfill do not break down in the correct environment so they produce methane emissions that contribute to our climate change crisis. The more scraps you can use up or put back into the earth the better!
How to Make a DIY Composting Worm Tower?
Using things you already have at home is a great way to recycle and get the most out of everything you use. Left over PVC pipes are great for turning into worm towers. The worms can go between the garden and the worm tower to feed and help break down the veggie scraps. This will in turn provide natural fertiliser for the plants to thrive. Creating a balanced and diverse ecosystem is so import for healthy gardens.
To make these I used a 6 inch PVC pipe and cut it down so that it was the height of my pallet plants.
We then drilled holes around the bottom half of the pipe approximately 10mm in diameter. Big enough for worms to fit through.
I then dug a hole in the centre of my pallet planter and buried the pipe with the holes at the bottom and covered the sides back up with soil. Try to bury as much of the pipe as you can as to reduce it’s exposure to the sun.
A lid is important to stop any flies, rats, mice or household pets from getting in and eating the scraps. It will also keep any smells away so your gardens don’t give off a bad odour. The lid we made from the bottom of a plastic garden pot we had spare. I tested out a few for size and chose on that fit tightly over the pipe. It needs to be secure so that the wind won’t blow it off or animals cant easily overturn it. If your pot has drainage holes in the bottom cover them up too.
Once the pipe and lid are secured in place you can start adding your veggie scraps. Use only scraps that will break down relatively quickly and do not place any meat or dairy scraps. You can also add a sprinkle of soil on top of the layers to reduce odours if it is a concern.
IMPORTANT
Make sure your recycled materials are food safe and haven’t been used previously with any chemicals.
DISCLAIMER: Links included in this description might be affiliate links. If you purchase a product or service with the links that I provide I may receive a small commission. There is no additional charge to you! Thank you for supporting my page so I can continue to provide you with free content!
There is no better time to start growing your own food than NOW. Creating your own food security and using your time to help create a greener world is win-win. I have always had the dream of growing my own food and living a more sustainable lifestyle and it is something that I have been continually building and working towards for years. I don’t want to be 100% self-sufficient because there are just some things I either won’t be able to grow or choose not to grow. But there are plenty of ways to supplement my homegrown food supply such as trading, swapping, and local farmers markets. I have put together (in no particular order) 18 simple ways you can start living a more self-sufficient lifestyle today.
1. Start a Herb Garden
No matter whether you have a big garden or live in a tiny apartment, growing herbs can be easy and takes up very little space. Grow in small pots, recycled containers, hanging planter,s or windowsill planters. If you like to use herbs it is a great first step towards self-sufficiency. And no, that does not mean buying those packed herb pots from the supermarket…. they are often grown hydroponically and then placed in the soil so they rarely survive long and don’t handle being planted out into real life. Get a packet of seeds and try growing your own π
2. Start a Vegetable Patch
The best way to learn how to grow vegetables is to simply start trying! Start small with either a planter box or convert one small patch of your garden or even driveway into an edible vegetable patch. You can also start by simply integrating edibles into your established garden. Once you start growing some things you can start expanding bit by bit. Goodbye grass π
3. Plant Fruit Trees
I love fruit trees because although they take a while to get going, once they do, they are abundant and don’t require as much care as vegetables. You can plant them in either a large pot or directly into the garden. I would recommend going to a local specialist fruit tree nursery so they can help you choose the best fruit tree for your location. Also, make sure you get something with fruit you actually enjoy! With the abundant produce you can then preserve, swap, and trade with others!
4. Grow Base Crops
I couldn’t think what else to call them but growing crops that will feed you for longer and create a good base to fill your pantry. Crops such as Pumpkins, Potatoes, Onions, Garlic, and Sweet potatoes will provide decent amounts of food that you can store and use throughout the year! A great base vegetable to feed a family.
5. Grow Soil
Composting is not only great for the fertility of your soil and the secret to AMAZING vegetables but also stops waste from going to landfill. There are a whole bunch of ways to do this depending on your living situation. You can make your own compost bin out of recycled wood, find a second-hand tumbler online or purchase one. You can also simply dig a hole in the garden and bury it (be careful of attracting pests though). There are also some new ways for people with no land to connect with others that do and give them your compost scraps. Either community gardens, local Facebook groups or now in Australia there is even an app! Sharewaste
6. Save Seeds
This is just as important as growing food and will be a huge step towards your self-sufficient journey. Saving seeds helps you maintain food security knowing that you have more healthy seeds to grow next year. Save seeds from your healthiest plants that thrive in your garden. Keep them in a dry dark place.
7. Grow Community
Get your friends involved! Take them over a basket of homegrown food or preserves. Once they see your delicious fresh food they may also get inspired! Help them out with seeds, and cuttings and surround yourself with like-minded people. Community gardens can be a great place to learn, get involved, and even seed/ produce swap. It can be an amazing network of knowledge, especially in relation to your local climate and growing conditions. There are also some great social media forums and groups that are great for finding answers to your questions and local knowledge.
8. Shop Local
Explore your local farmer’s markets! Grab a friend and go have a browse! They are usually on a Saturday or Sunday morning and I look forward to it every week. Although I love my local farmers market (Kalamunda) every few months I like to check out other farmers markets to mix things up and find new and interesting produce. Bulk food stores have been making a come back and I am sold! Lucky for me there is a fantastic Bulk Store ( Replenish Kalamunda) right by my local farmer’s markets. So I head there straight after I have picked up some fresh veggies. They may seem daunting at first but there are always plenty of signs explaining how to do it. I also love how each product clearly states where they have come from as I try to only choose Australian products.
9. Learn to Cook from Scratch
This is a big one! Learning to cook a wide range of meals from scratch using simple ingredients is key! I mean we can all make a butter chicken right…you just get the sauce and pour it in… Ditch the sauces from the supermarket and learn to make your own. I am constantly experimenting and expanding my knowledge so I can make a wide selection of meals from the produce I grow. Try to buy vegetables that are in season and fruits and vegetables that you are planning to grow. That way you can practice and become a pro at recipes for YOUR future harvests!
10. Grow Food From Scraps
Ok, this is one of my favourites! It is so quick and easy and a lot of fun! Plus you are getting the most out of your food. Buy one get multiple free!! Cut off the ends of your farmers market vegetables such as Spring Onion, Leek, Pineapple, Sweet Potato and regrow!
11. Forage and Trade
Keep an eye out on your walks and day trips for wild or excess food. So often there are olive trees, fruit, nuts or wild apple trees going to waste. Do your research and learn how to identify plants. That way you will know what you are looking at. It is also important to be careful if things have been sprayed by the council. I would be always cautious of things such as blackberries. You may even notice a neighbours tree loaded with fruit that is going to waste on the ground. Politely ask if you can have some in exchange for some preserves or baking you make with it. They will probably be happy for it to be used!
12. Repair and Upcycle
Get the most out of your things by fixing or updating them! Even if you don’t know how you may be able to pay someone a fraction of the cost to fix it rather than buying brand new. We often are so quick to throw out and buy new, we don’t even stop to consider if it can be fixed or repurposed. My hair straighteners and been fixed multiple times by electrician friends over the past 12 years and are still working amazingly! Recovering cushions, and couches, DIY, get creative, and even find a local seamstress if you don’t have access to a sewing machine.
13. Shop Second Hand
I try my best to not buy new and it is something I am continuing to work on. Most items you want can be found on Facebook market place, Gumtree (Trademe, Craigslist, etc). You can usually pick up a bargain and keep things in the loop rather than consuming more new things. You can even post in your local community groups and borrow or buy. Especially with things like appliances as many people often have them sitting in the cupboard collecting dust…Pasta maker, I’m talking about you π
14. Backyard Chickens
Chickens make an excellent addition to sustainable living. They provide eggs, eat leftover scraps, produce manure for fertilising your garden, and can they also be incorporated into an integrated pest management system to help you keep your slugs and snails at bay. Many councils will allow backyard chickens in suburbia. Although I do not have chickens …yet (Pictured above is mums ‘Chick Inn’) my council allows x6 backyard chickens on properties 600sqm -2000sqm.
15. Back to Basics
Bread/milk/butter/pizza dough. The age-old skill of baking your own bread is a fantastic skill to have! How amazing to just whip up a fresh loaf of bread or make your own pizza bread without the preservatives or plastic packaging. Milk is super easy and you can make delicious plastic, preservative-free milk whenever you want! Whether that’s oat, rice or almond milk.
16. Learn to Preserve Harvests
I am not really at a point yet where I have an abundance of produce to preserve but I have planted a lot of fruit trees…so I am starting to learn different ways to preserve things so that when I am flooded with produce (yay!) I will be able to make the most of it! Get some produce from the farmer’s markets and give it a go! Jams, chutneys, sauces, pickles, nasturtium capers and all those delicious things. They also make great gifts and can be used to swap for other produce with your friends and family and community.
17. Make your Own
Ditch the toxic chemicals and pesticides and start making your own natural cleaning and garden products. You can get a few ingredients from your local bulk stores such as white vinegar and bicarb soda and make a huge range of cleaning products. Check out my Citrus cleaner here. I also used crushed eggshells to keep slugs and snails at bay. Natural pest management
18. Learn, Read, Practice
I can’t stress how important this is! Knowledge is power. Join your local library and get a book on jam making or search YouTube for “how to prune a lemon tree”. Educating yourself and giving things a go will get you a long way on your journey to living a more self-sufficient lifestyle. Take things one a time and really try and master it before moving on. It can be overwhelming if you try to do it all at once and may lead to failure and giving up.
DISCLAIMER: Links included in this description might be affiliate links. If you purchase a product or service with the links that I provide I may receive a small commission. There is no additional charge to you! Thank you for supporting my page so I can continue to provide you with free content!