Kumquat and custard scrolls are delicious! If you have a Kumquat tree overflowing with fruit, then whip up a batch of Kumquat jam and make these scrolls. There’s nothing quite...

Kumquat and Custard Scrolls – What to Make with Kumquats
read more
Kumquat and custard scrolls are delicious! If you have a Kumquat tree overflowing with fruit, then whip up a batch of Kumquat jam and make these scrolls. There’s nothing quite...

Feijoas or pineapple guavas come in thick in fast over the Autumn month. Their sweet, perfumey flavour is delicious and eaten fresh but once the trees are established you will...

Quick and easy creamy garlic sauce that is perfect for burgers, salads, wraps, fritters, or grilled veggies. You do need to be prepared a little ahead of time to soak the nuts....

Looking for a healthy, homemade wrap alternative? These DIY spinach sushi wraps are a delicious and nutritious way to use up garden greens and create quick, wholesome meals....

This coconut and lemon verbena loaf is so easy to make. Whip up a loaf or two for a Sunday Afternoon tea and sit back and enjoy your garden. Crunchy and chewy on the outside and...

Lemon balm has calming and soothing properties that can reduce stress and anxiety. This refreshing summer drink may help you chill out and unwind. Nothing beats an iced cold...

Ginger and Pear is a match made in heaven. This spiced ginger and pear tea cake is the perfect way to refuel after knocking out some tasks in the garden. Enjoy whilst sitting out...

Simple and so delicious this really is the best Kale salad! Garden-to-plate in a couple of minutes. Kale can be a struggle for many people to like but the curly edges and small...

Deliciously sweet, and tart Rhubarb Crumble Slice with hidden garden greens. This gooey-centered slice is easy to make and will make a yummy dessert or sweet treat for lunches....

Packed with fresh greens from the garden these garden green pikelets are so fun to make. With subtle, fragrant herb flavours and vibrant green colour these pikelets are a delight...
Loquat trees are incredibly productive, often producing more fruit than you can eat fresh! If you're lucky enough to have a tree loaded with fruit, this homemade loquat sweet...

Beautiful and delicious floral shortbread with subtle flavours of orange and thyme. This basic shortbread recipe can easily be adjusted to add seasonal edible flowers and herbs...

This Sweet Potato and White Chocolate Slice is so so delicious. The sweet potato makes it fudgy and the white chocolate gives it a caramel flavour with crisp and chewy edges....

Garden toast is something I created one day when I was scraping together something for lunch and all I had was a crust and some cottage cheese in the fridge. I didn't have any...
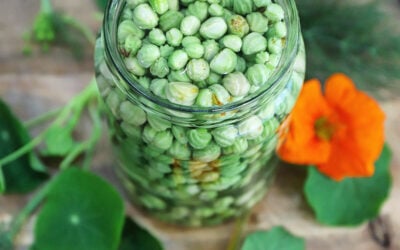
If your nasturtiums are starting to slightly take over the garden...this quick-pickled nasturtium caper recipe is a great way to put some of those seed pods to good use! These...

These nasturtium leaf mini quiches are a quick, easy way to use up an abundance of nasturtium leaves straight from the garden. They’re simple, flexible, and packed with seasonal...