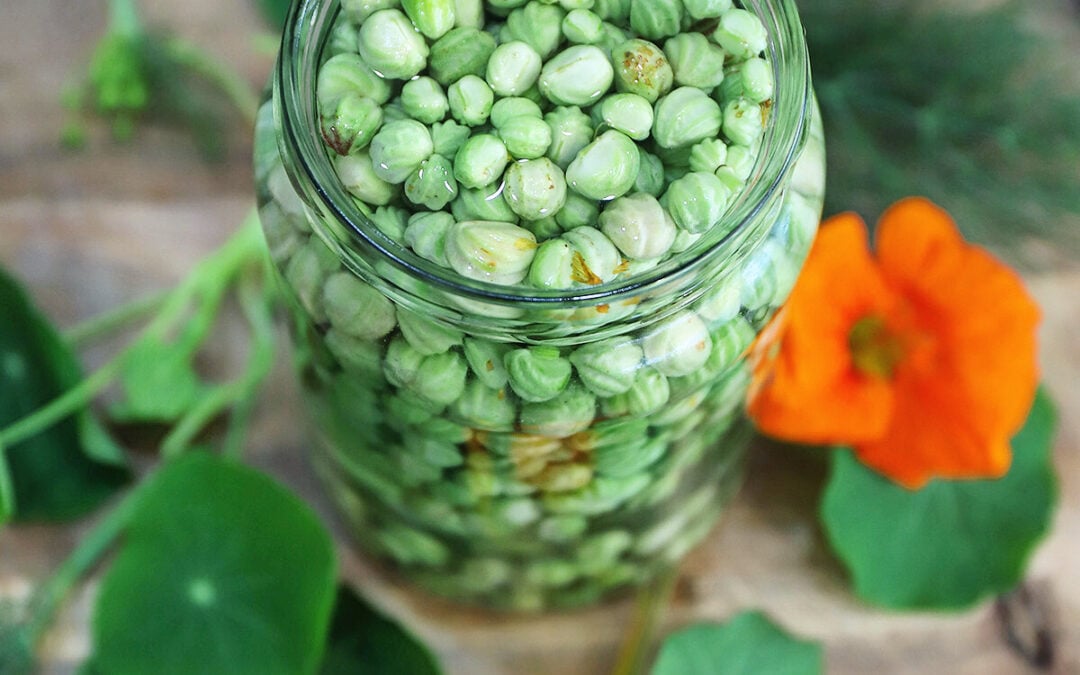
If you have been following me for a bit you will know I have been on a Nasturtium recipe craze! One of the things I am trying to do is learn as many recipes as I can for things that I grow in my garden. It turns out Nasturtiums have a lot more uses than just a pretty edible flower!! My plants were getting a bit wild and overtaking the garden so I picked all the flowers and collected a whole bunch of seed pods to make Nasturtium Capers. This is a two-part process where I soaked the seed pods for 5 days before pickling.
INGREDIENTS
Jar of Nasturtium Seed pods
White Vinegar
Sugar
Mustard seeds
Dill leaves
METHOD
Part 1: Soaking – Wash the seed pods well with water and place in a jar filled with water. Leave to soak in the fridge for 2 days. Then rinse again and refill the jar with water and add a teaspoon of salt to make a brine. Leave to soak for another day or so. This process should help remove some of the bitterness from the seeds. After a few days in the brine rinse and leave in plain water while you prepare the vinegar.
Part 2: Pickling liquid – In a saucepan on a low heat add a jar (whatever one you are going to be pickling in) of white vinegar and then about 1/4 of the jar of water. Add 1 teaspoon of salt and I like my pickles sweet so I added 1 Tablespoon of sugar. Stir until the sugar and salt have dissolved. Taste and add more sugar or salt depending on your liking. Set aside to cool.
Wash your jar well with hot water to sterilise and add your seed pods and pick out any that don’t look the best or any leaves etc. I added a teaspoon of mustard seeds, small dill leaf and a sprinkle of chilli flakes. You could mix this up with whatever flavours you like.
Once the pickling liquid has cooled down add it to your jar and place in the fridge. I noticed from my research that they go brown once pickled so tried one batch with Nasturtium flowers added to it (on top pushed down into the liquid) and this turned out great with an orange pickling liquid. I removed the flowers at the end when I opened them to eat. I waited two weeks to try mine because I got busy but I’m sure after a few days to a week you could try them.
As these Nasturtium Capers are just a refrigerated pickle I would eat them within 3 months.
How to eat Nasturtium Capers?
These are a delicious accompaniment to most meals! Try served on an omelette, pizza, salad or with a fish dish.
Lettuce wraps with Avocado, Haloumi, Basil and Nasturtium Capers.
MY GARDENING ESSENTIALS // Fertiliser spray gun: https://bit.ly/366nL1t Retractable Hose: https://bit.ly/2TSC0Bo More gardening tools: https://bit.ly/32IQmbD
DISCLAIMER: Links included in this description might be affiliate links. If you purchase a product or service with the links that I provide I may receive a small commission. There is no additional charge to you! Thank you for supporting my page so I can continue to provide you with free content!
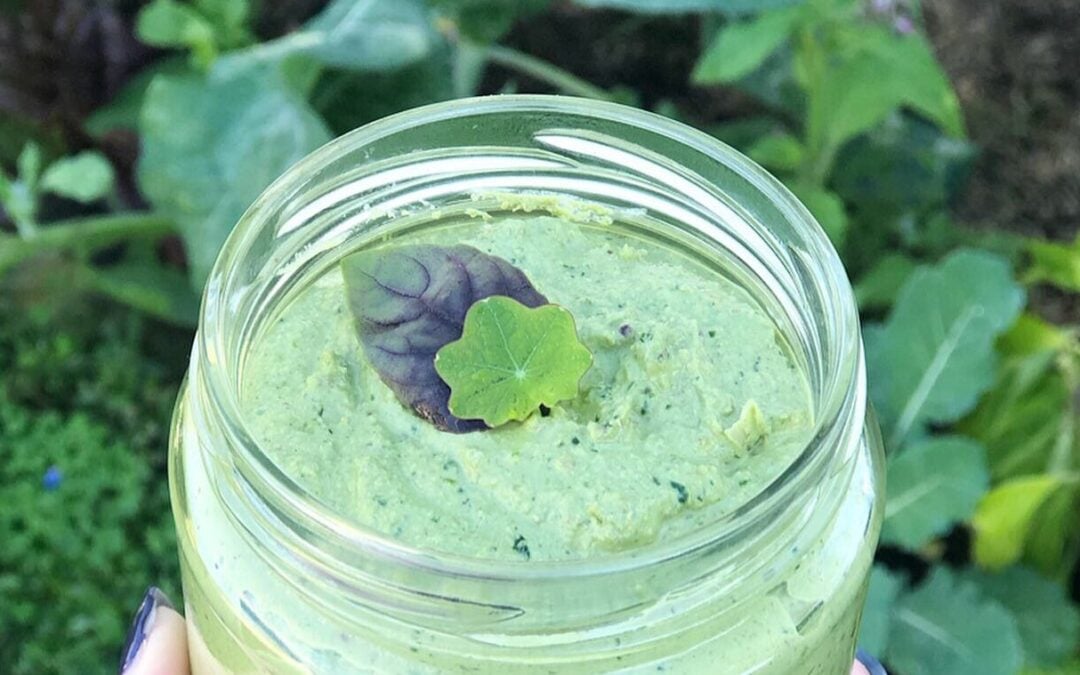
I had homemade Garden Pesto on my (Giant) list of things to try and when I finally did… omg I will never buy pesto again! Quick, easy and so delicious!! Also, you can really just add whatever garden greens and herbs you have growing in your garden. I even use the ones with holes from bugs. Just wash and check there are no bugs before using.
Garden Pesto Recipe
2 cups of greens and herbs. I used Nasturtiums (flowers and leaves), young sweet potato leaves, basil, cauliflower leaves, kale, bokchoy, tatsoi, rainbow chard, and parsley.
1 Small garlic clove
1 cup walnuts
1/4 cup Olive Oil
Splash of water
1TBS Lemon juice
Pinch of salt to season
Wash and quickly blanch the greens in boiling water for 30secs then add into iced water. This will help them keep their vibrant green colour.
Strain off and then blend all ingredients except the nuts until combined.
Then add in the nuts and blitz until mixed or chunky if you prefer. I just have NutriBullet and it’s OK, I just need to stop and mix quite a few times. A mixer would be better. Then place it in a recycled glass jar. I kept mine in the fridge and used it that week. You could freeze smaller portions in IceCube trays for later.
Mix your Garden Pesto with some pasta for a deliciously easy, low-waste meal!
Holly 🌱
MY GARDENING ESSENTIALS // Fertiliser spray gun: https://bit.ly/366nL1t Retractable Hose: https://bit.ly/2TSC0Bo More gardening tools: https://bit.ly/32IQmbD
DISCLAIMER: Links included in this description might be affiliate links. If you purchase a product or service with the links that I provide I may receive a small commission. There is no additional charge to you! Thank you for supporting my page so I can continue to provide you with free content!
Nasturtium is in absolute abundance in my garden right now and I want to learn how to make the most of this fruitful time. I think learning how to use a plant is just as important as learning how to grow it. This month I have been exploring lots of different ways to use Nasturtium. Nasturtium mini quiches are so quick, easy, and taste delicious. Get the most out of your garden by growing things that have a multitude of uses to really help you maximise your space.
Nasturtium Mini Quiche
12 Medium – Large Nasturtium Leaves
Quiche Mix
5 eggs
1/4 cup milk or cream (i used coconut cream)
1/2 cup water
Salt and Pepper to season
Whisk Quiche mix in a bowl and set aside.
Fillings
Red onion
Feta
Spring onion
Marinated olives
Red capsicum
Parsley
Broccoli
Rainbow Chard
Grated Cheese
Finely chop your filling vegetables. I overshot how many veggies I needed. My muffin trays are on the smaller side and you don’t need much to fill them. So just chop a little bit and you can always chop more if needed. You could add any vegetables you have available these are just what I had.
Assembly
Preheat Oven to 170-180 degrees celsius.
Grease a muffin tray well with oil.
Place your Nasturtium leaves top side down.
Add your filling (except grated cheese), just a couple of pieces of each as it will soon fill up.
Using a measuring cup or jug pour your Quiche mix in and try not to fill over the top of the leaves.
Sprinkle with grated cheese.
Bake for 30mins or until the filling has been set.
Remove and allow to cool for 10mins.
Carefully remove from trays using a spoon. You may need to run a knife around the top of the cheese has stuck to the sides.
Please note my recipes are more of a guide.. ( I am not a technically accurate baker, I just wing it).
If you have plenty of Nasturtiums check out my other recipes.
You can share your version on Instagram using #sustainablehollyskitchen or tag me @sustainable_holly so I can see your beautiful creations!!
Holly 🌱
MY GARDENING ESSENTIALS // Fertiliser spray gun: https://bit.ly/366nL1t Retractable Hose: https://bit.ly/2TSC0Bo More gardening tools: https://bit.ly/32IQmbD
DISCLAIMER: Links included in this description might be affiliate links. If you purchase a product or service with the links that I provide I may receive a small commission. There is no additional charge to you! Thank you for supporting my page so I can continue to provide you with free content!
Nasturtium wraps with green papaya salad, Haloumi, garden greens, and edible flowers. I can’t even describe how incredible this tastes! The sweetness from the salad, salty Haloumi, and mild peppery nasturtium is an absolute combo I’m telling ya!! Get amongst it ⚡️
Nasturtium Wraps
This recipe will serve about 4 people so halve it if necessary or just store the leftover salad for another meal!
Papaya Salad
2 cups grated green papaya
1 carrot
1 cup garden greens ( i used rainbow chard and kale)
1 packet of halloumi
8-10 fresh sugar snap pea pods
Dressing
1 TSB soy sauce
1 TBS sweet chilli sauce
1 garlic clove
1 TBS lemon juice
1 tsp lemon zest
3-4 mint leaves
Nasturtium Wraps for Serving
10-15 Medium size nasturtium leaves
edible flowers to garnish
Method
Grate the green papaya and carrot and place in a salad bowl.
Slice up the garden greens (roughly 1/2cm wide strips) and add to salad.
Finely chop or mince garlic and add to a small bowl.
Slice mint leaves and add the remanding dressing ingredients and mix.
Pour dressing over the salad, mix and leave to marinate while you cook the Halumi.
Rinse nasturtium leaves and layout to dry on tea towel.
Finely slice pea pods and set aside.
Slice the haloumi into 1cm wide strips and add to a heated frypan on medium-high heat until lightly brown on each side. Slice in to bite size cubes and set aside.
Place nasturtium on a serving board and add a heaped tablespoon of salad to the centre of each. Add 3-4 cubes of haloumi on top.
Finally, place pea pod strips and edible flowers on top to serve.
Nasturtium wraps could be used for many different flavour combinations. They are so vesitile and a completely underated plant in my opinion! What have you used Naturtium leaves for? Let me know in the comments below.
MY GARDENING ESSENTIALS //
Fertiliser spray gun: https://bit.ly/366nL1t
Retractable Hose: https://bit.ly/2TSC0Bo
More gardening tools: https://bit.ly/32IQmbD
DISCLAIMER: Links included in this description might be affiliate links. If you purchase a product or service with the links that I provide I may receive a small commission. There is no additional charge to you! Thank you for supporting my page so I can continue to provide you with free content!
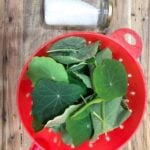
Delicious and beautiful Nasturtium Salt is a great way to add some fun and flavour to your meals. The beautifully abundant Nasturtium is back for the Autumn/ Winter season and this year I’m giving this humble plant time to shine! It is so often under-utilised and I will admit that previously I have only ever used the flowers and leaves in a salad and as a garnish. So I am on a mission to put together a series of recipes and tips to help you get the most out of your Nasturtiums.
Nasturtium Salt
Packed full of flavour, vitamin C and beneficial minerals, this Nasturtium salt is a magical addition to your pantry staples.
Ingredients:
Two cups/ handfuls of Nasturtium flowers and leaves
1 cup of Salt – I used a mix of Australian blossom salt and pink Himalayan rock salt
1 teaspoon lemon zest
Method:
Rinse and check Nasturtium for any bugs.
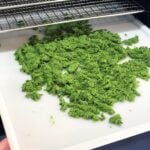
Blitz all the ingredients in a mixer, blender or NutriBullet until the leaves are all broken down.
Then spread on to a tray and dehydrate on low 30-40 degrees Celcius until completely dry. It will lighten in colour so if you break up any larger pieces and they are still dark green it needs longer. Mine took 3 hours in the dehydrator. You can use the Oven too if you do not have a Dehydrator.
Pour into a bowl or mortar and pestle and break up any larger pieces.
Place in a jar and you have a beautiful, nutrition-packed salt! I used the Pink Himalayan salt for added beneficial minerals. A mild peppery salt to enjoy on your morning eggs on toast and add a nutritious flavour boost to any cooking.
What ways do you like to use Nasturtiums? Another great way is these delicious Nasturtium Wrap – Recipe Here. Leave me a comment below.
Holly 🌱
DISCLAIMER: Links included in this description might be affiliate links. If you purchase a product or service with the links that I provide I may receive a small commission. There is no additional charge to you! Thank you for supporting my page so I can continue to provide you with free content!