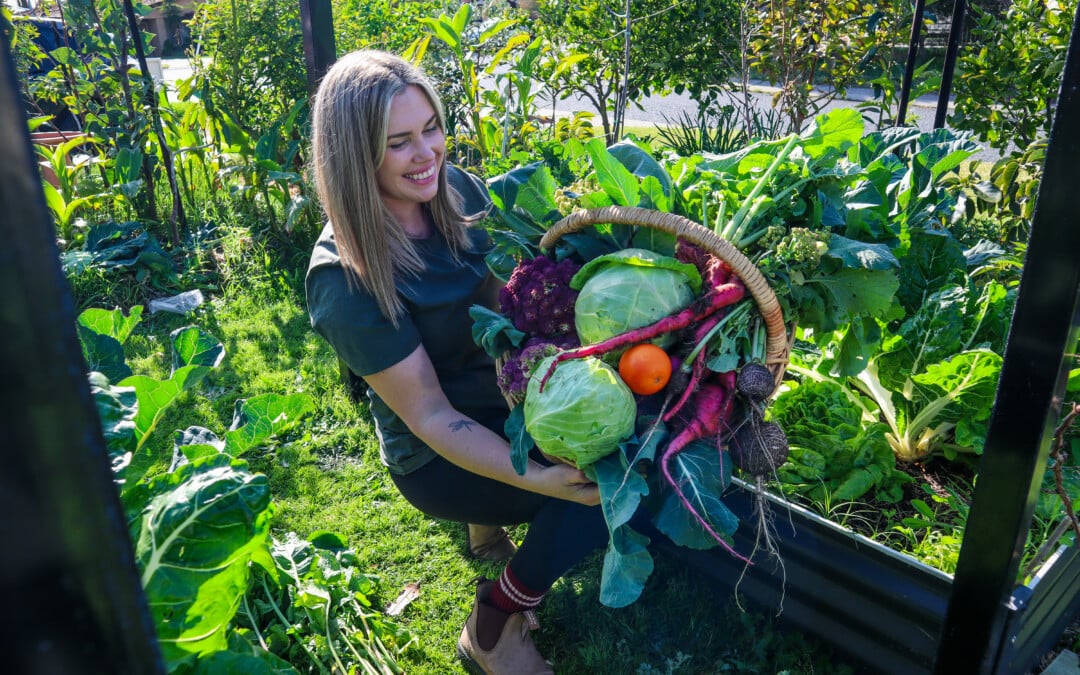
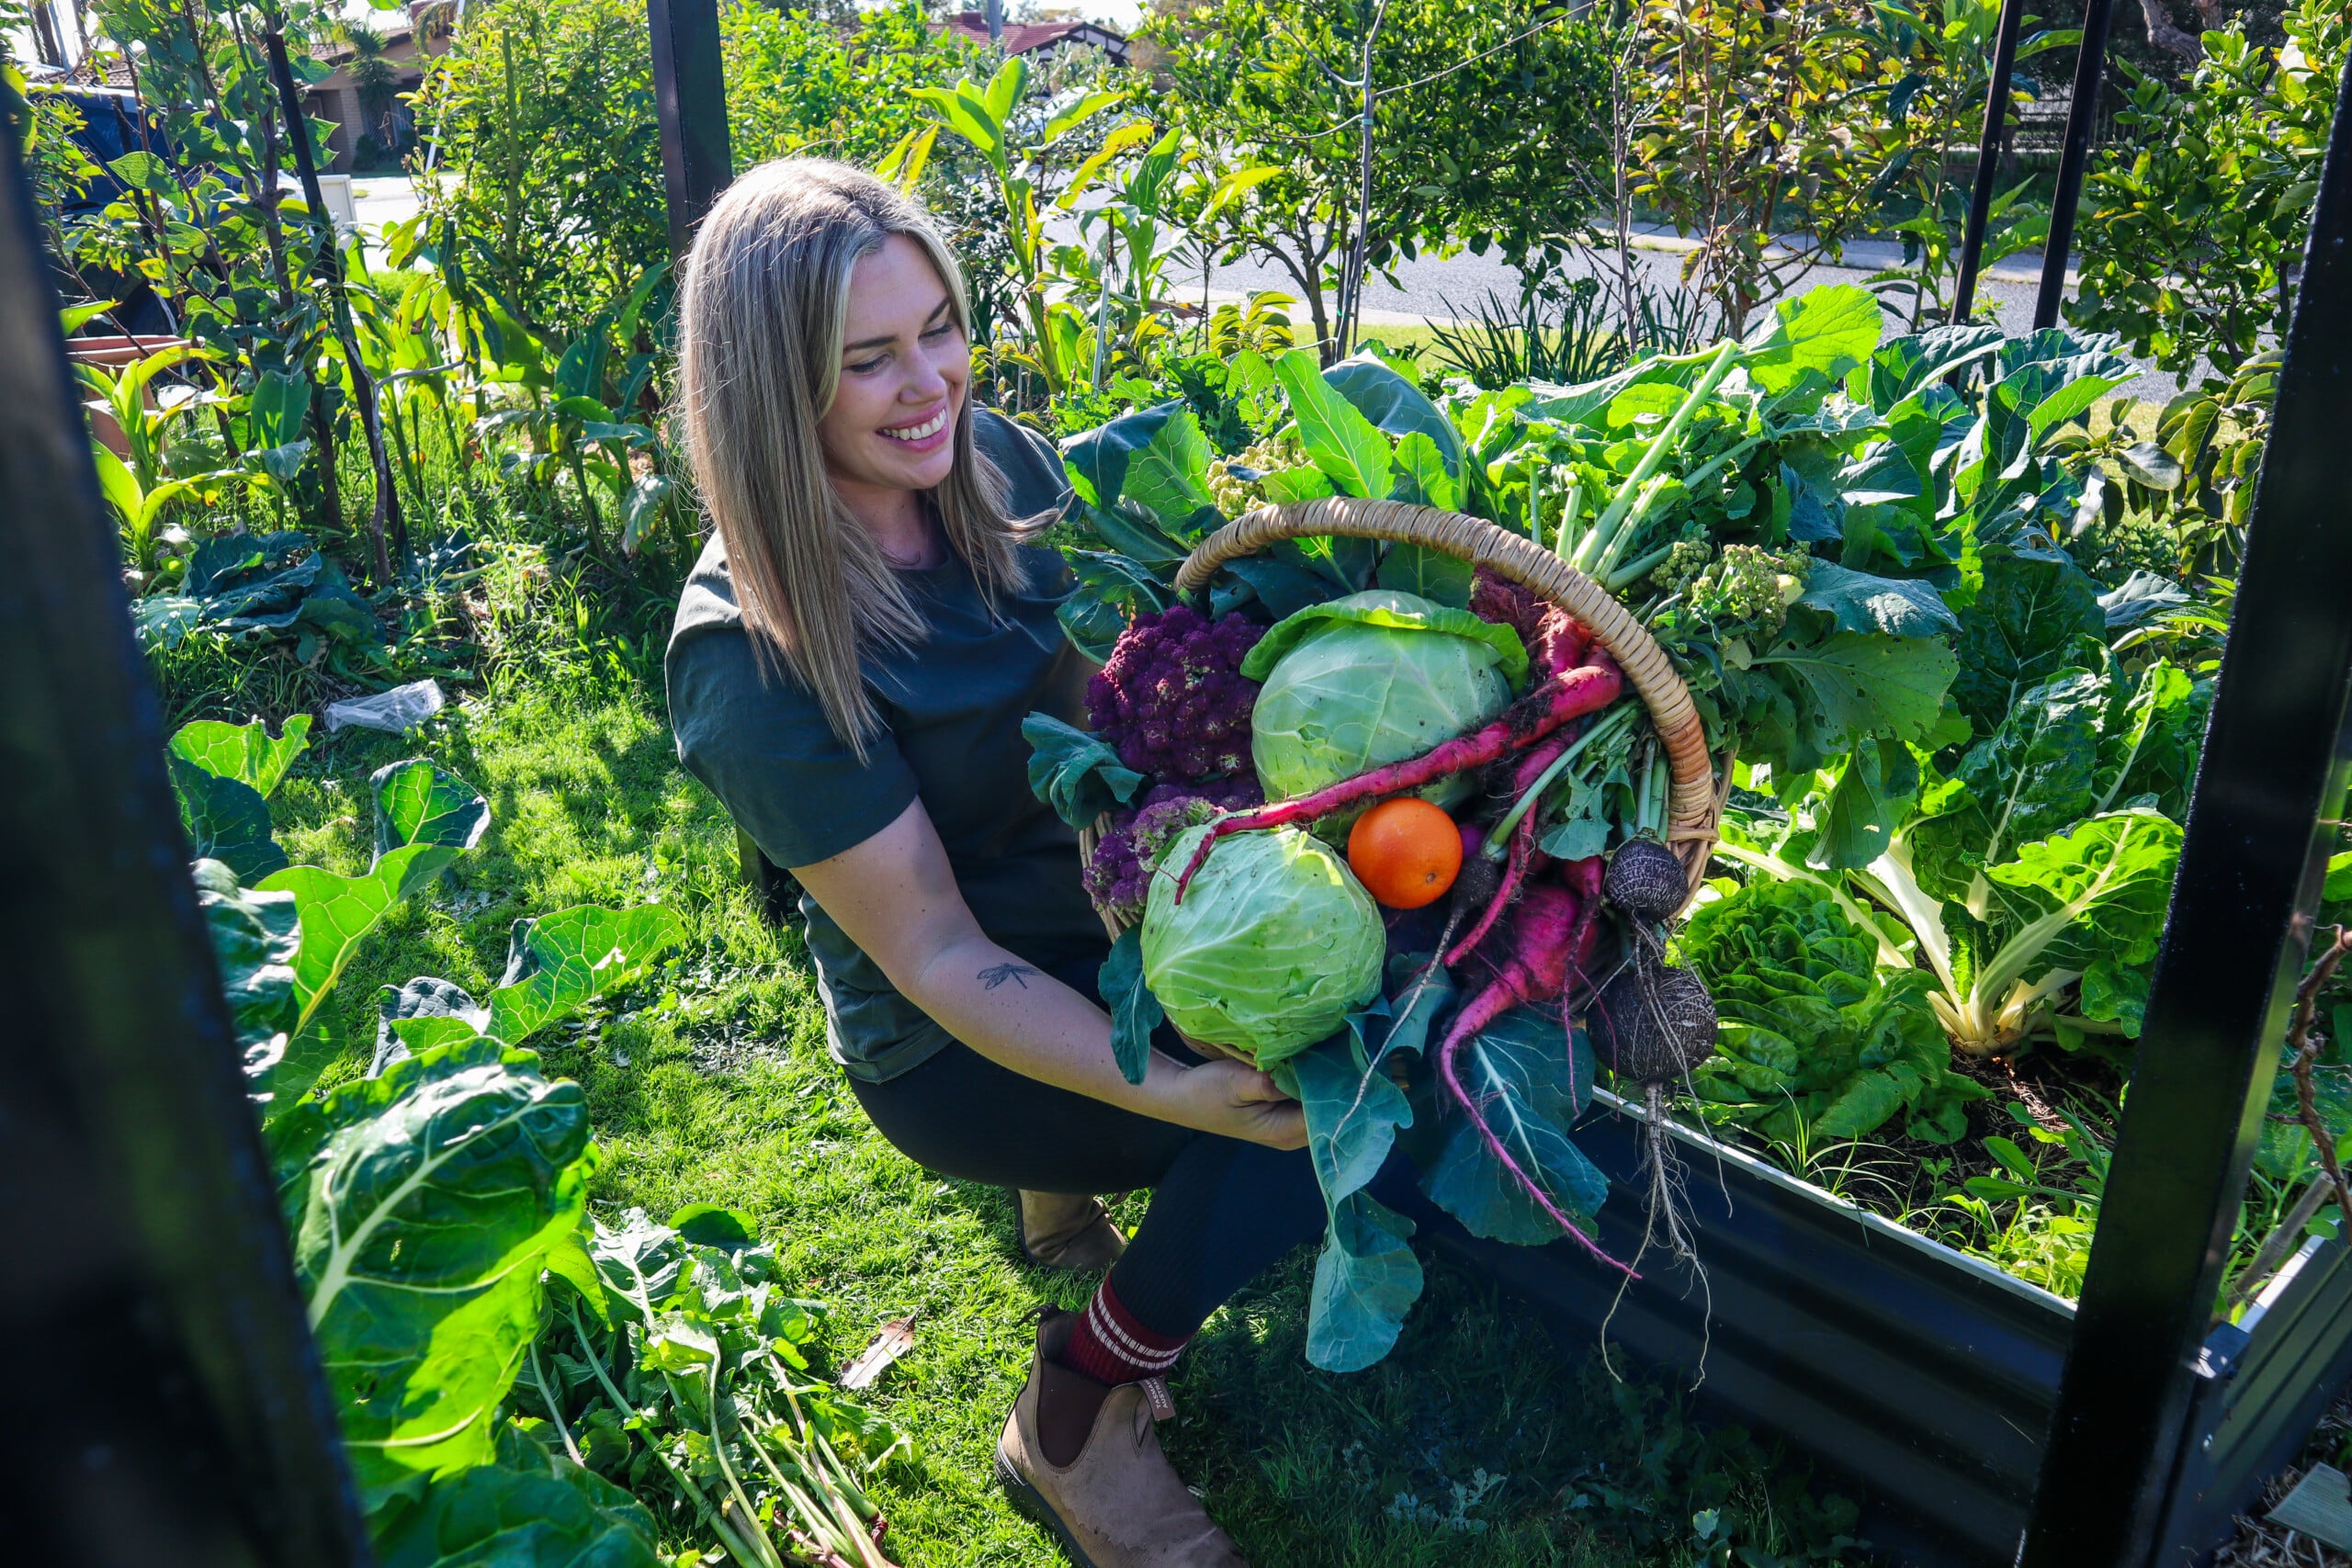
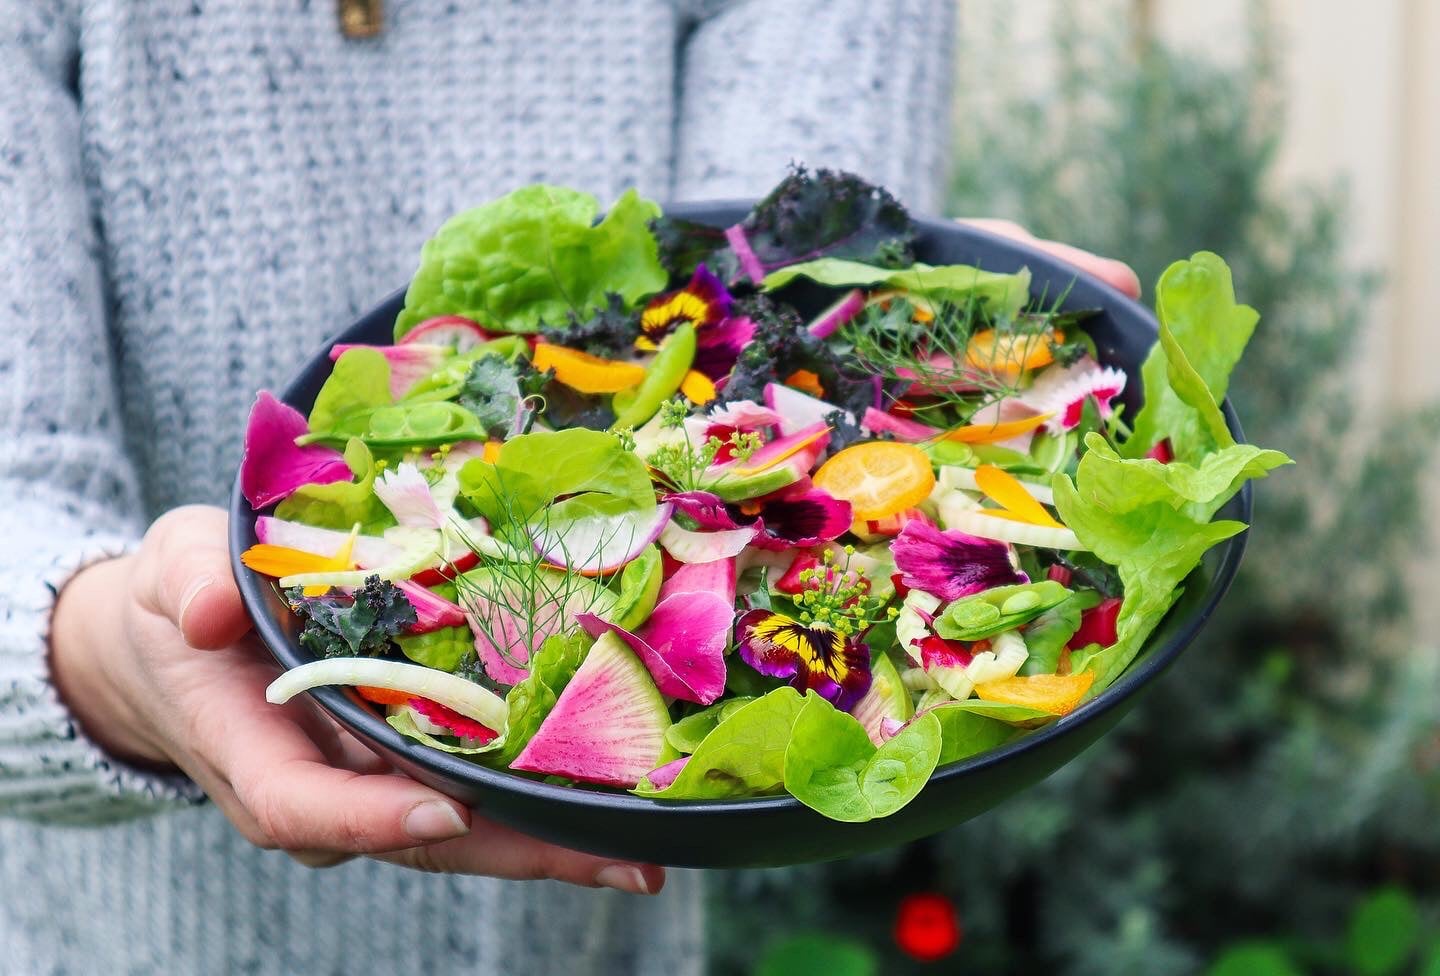
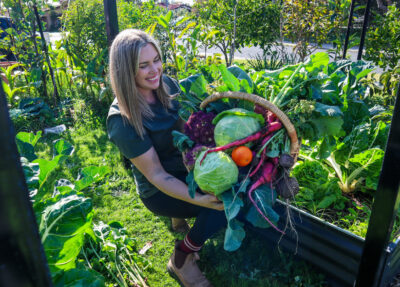
If you’re looking for the best vegetables to plant in autumn in Perth (zone 10b), these 15 vegetables and herbs will set your garden up for a productive season. After months of trying to keep the garden alive through relentless heat, autumn gardening in Perth feels like a breath of fresh air.
This is the season where growing food in Perth actually starts to feel enjoyable again (my favourite season!)….and it’s when my garden puts on some of its best growth all year.
If you’ve been waiting for the right time to start a veggie garden or refresh tired summer beds, it doesn’t get any easier than Autumn (if you can get the pests in check…don’t worry, I will share my top tips for this at the end of the post!).
In this post, I wanted to share 15 vegetables that genuinely thrive during autumn in Perth, along with bonus tips on how to sow and get the most out of your harvests!
Why Autumn Is One of the Best Gardening Seasons in Perth
One of the biggest mistakes I see beginner gardeners make in Perth is trying to start everything in the middle of summer. Our summers can be brutal. Between the dry heat, intense sun, warm nights, and sandy soil that dries out quickly, young seedlings can struggle fast. I do very little planting in summer.
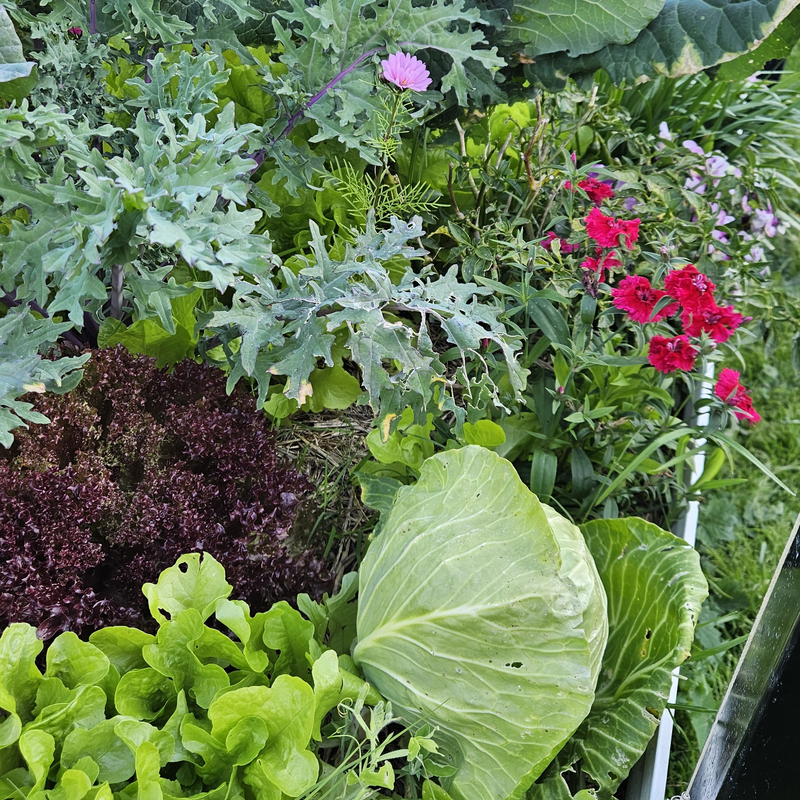
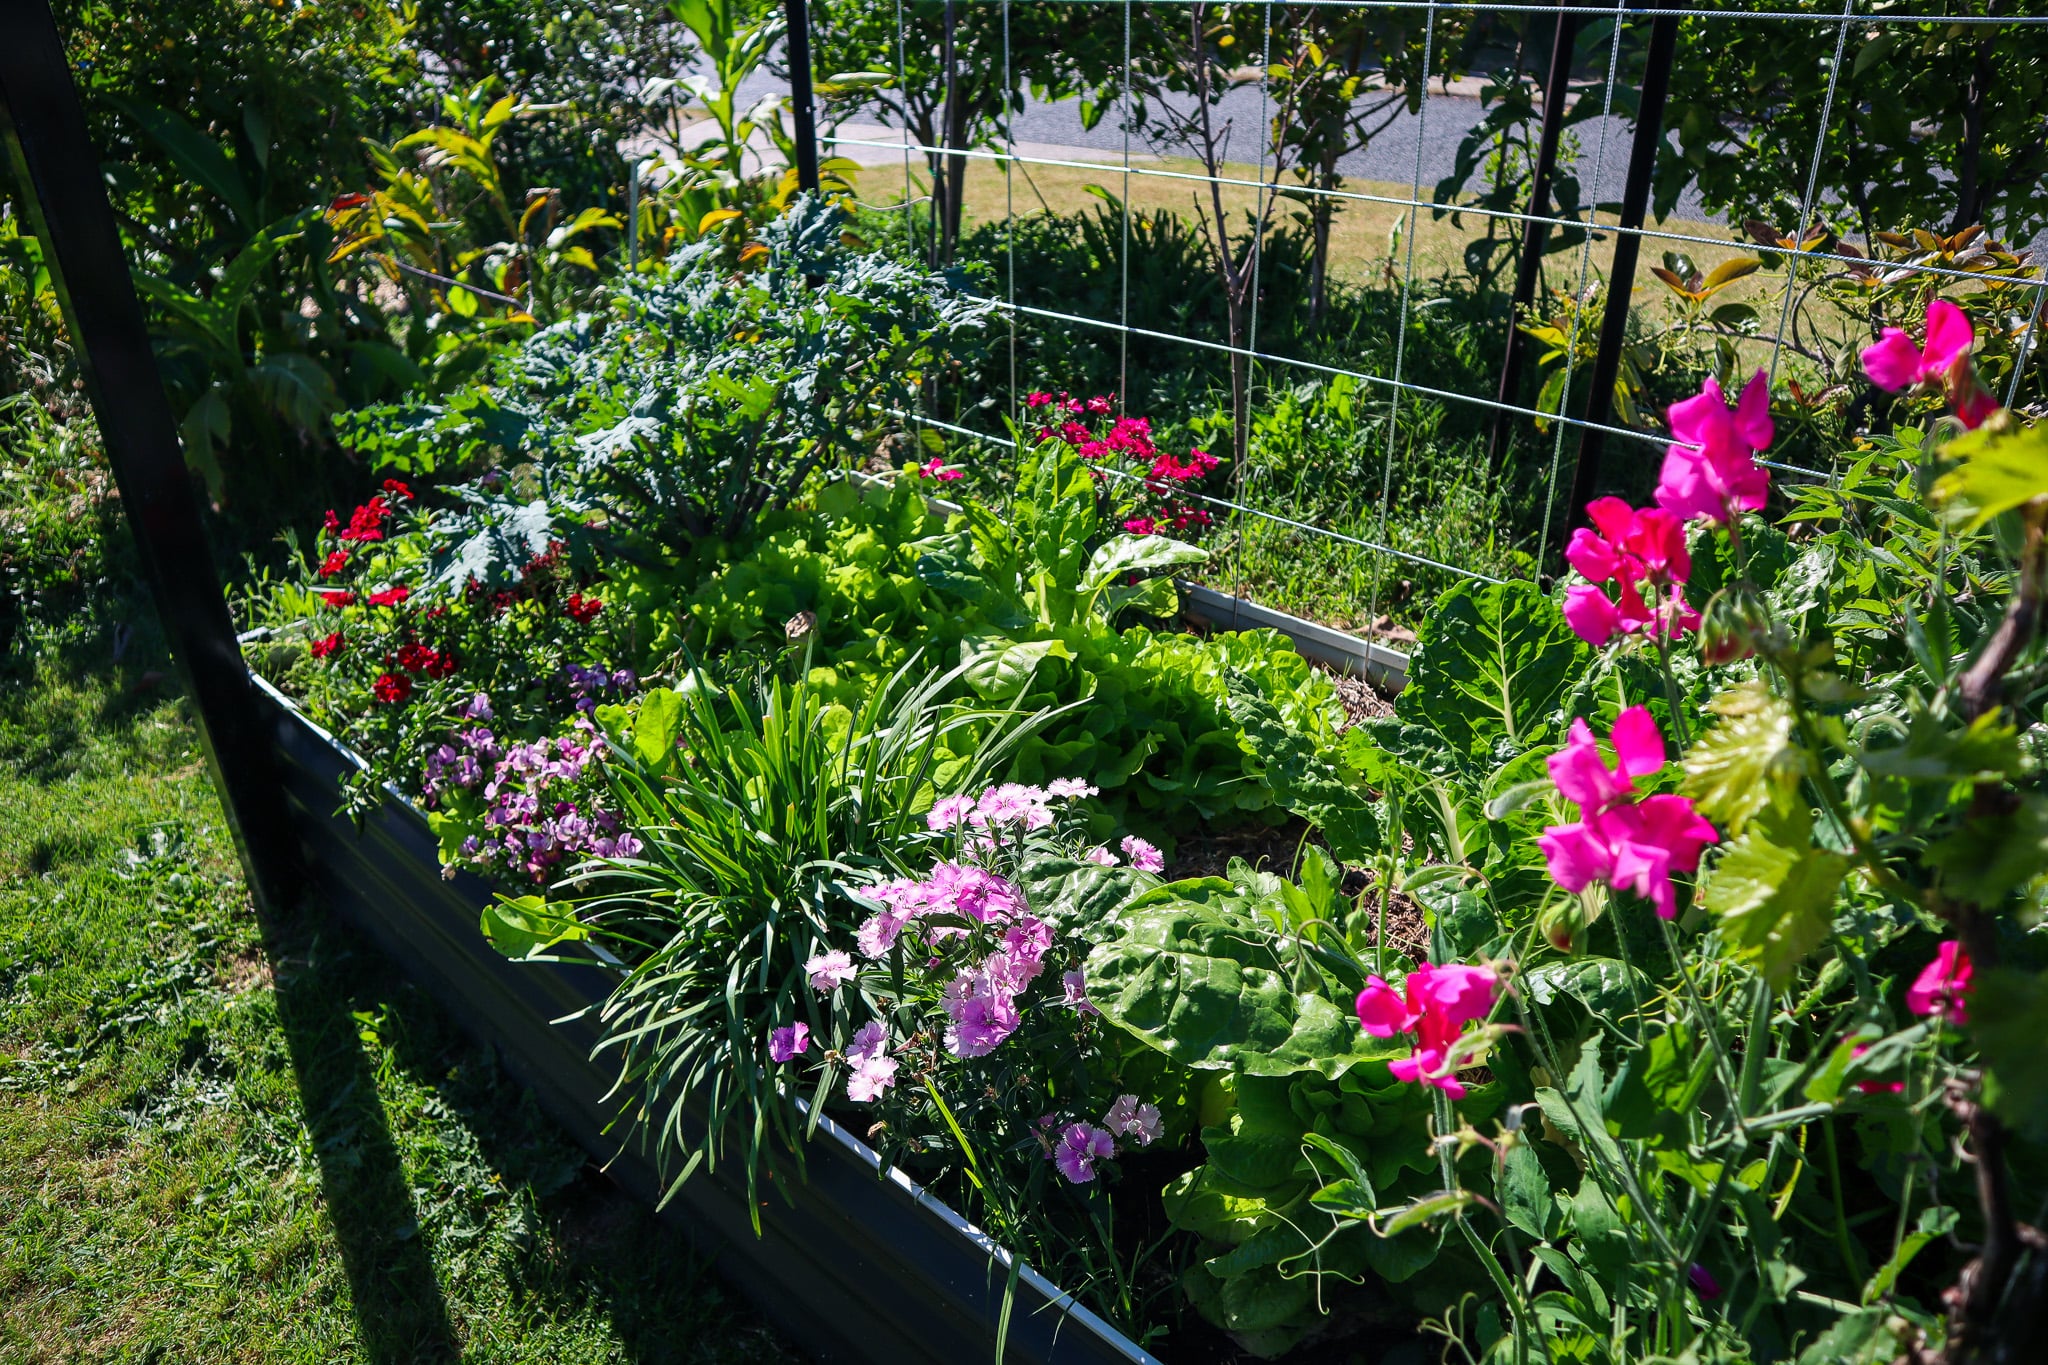
Autumn, everything starts bursting out of the soil! I let a lot of plants go to seed, so my gardens often have seeds popping up everywhere! Including cracks in the pavement and lawn. The soil is still warm from summer, which helps seeds germinate quickly, but cooler air temperatures dramatically reduce stress on plants (and help retain moisture!). It’s this sweet spot where growth really takes off again.
I honestly find autumn gardening the MOST enjoyable. Instead of constantly trying to save plants from heatwaves, you can focus on building healthy soil, succession planting, and enjoying the garden again. Take the time to slow down, observe and enjoy your garden!
I recently shared a full autumn garden tour over on YouTube, showing what’s growing, what I’m planting right now, and how the food forest is transitioning into the cooler season 👇
15 Vegetables and Herbs to Grow in Autumn (Perth)
Lettuce
Lettuce absolutely shines in autumn. During summer, it bolts almost instantly in my garden (or just goes pure crisp!), but once the weather cools down, it becomes one of the easiest and most rewarding crops to grow. I love filling gaps throughout my raised garden beds with loose-leaf varieties because you can harvest them continuously over months.
SOWING TIP: Lettuce seeds are delicate, so don’t bury them too deep. I sprinkle them on the surface and only barely cover them with a light sprinkle of soil (or none at all).
ABUNDANCE TIP: I let a lettuce go to seed every year (around spring / early summer), and the seeds fall into the soil and regrow on their own once the weather cools in autumn! I literally did not plant lettuce this year, and yet I have 100s of plants throughout my garden (and the lawn and pavers). Or pop the seed head upside down in a paper bag and dry out for the next season.
Carrots
Carrots grow well during Perth’s cooler months. The milder temperatures help roots develop properly without the stress and inconsistent growth that often happens during hot weather. One thing that’s made a huge difference in my sandy soil is keeping carrot beds consistently moist during germination.
SOWING TIP: I like to lay the seeds directly on the surface and cover with a hessian sack or a plank of wood. Come back and check in a few days to see when they have sprouted. This keeps them moist, stops them blowing away, or birds eating the seeds. I like to sow seeds every couple of weeks for an extended harvest.
ABUNDANCE TIP: Let a carrot continue to grow until it flowers and goes to seed. Not only will the bees and beneficial insects love you, but you will get 100s of free carrot seeds. I find that carrot success is in overplanting, so having excess seeds is always a huge benefit.
Pineapple Sage
This is my favourite herb! I have not had success growing it as a perennial in my garden, so it is something I replant every autumn. Sweet, fragrant leaves and edible flowers, pineapple sage is amazing in teas, salads, and baking. Plus, the small birds love harvesting the nectar from the bright red flowers.
GROWING TIP: I suggest planting from a seedling. They like a warm sunny spot with adequate watering. I have struggled to grow this in the past, so I tried a few different spots in the garden until I found a place where it was happy!
ABUNDANCE TIP: Prune or pinch out the tips of the plant to encourage a bigger, bushier shrub. Once established, pineapple sage becomes an incredible living pollinator plant in the food forest. Helping your fruits and veggies get better pollination (and grow more fruit).
Spinach
Spinach thrives once temperatures cool down. I grow a mix of traditional spinach and perennial spinach throughout autumn because they produce so much reliable food. NZ spinach/ Warrigal greens makes a great living ground cover. Longevity Spinach is packed with so many nutrients and grows easily from cuttings. Traditional spinach in the raised garden beds offers a regular supply of cut-and-come-again greens.
SOWING TIP: Keep spinach consistently watered while young to encourage tender leafy growth. I like planting it along bed edges where it’s easy to harvest regularly.
ABUNDANCE TIP: Perpetual spinach can continue producing for months if regularly harvested. Instead of removing the whole plant, pick the outer leaves continuously for a much longer harvest. Perennial spinach, such as NZ Spinach, Brazilian Spinach, Longevity Spinach, Okinawa Spinach, Malabar Spinach or Chaya (tree spinach) are a great way to have a continuous supply of leafy greens.
Peas
Peas are one of those crops that instantly make the garden feel productive again. Autumn is the perfect time to sow them in Perth because they establish well before winter and love the cooler nights. I usually grow climbing peas along trellises on the back (southern) side of my raised beds, which helps maximise space (without shading out the other plants) while creating beautiful vertical greenery.
SOWING TIP: Peas germinate best in consistently moist soil, so don’t let young seedlings dry out during establishment. Trellising early also makes a huge difference once growth takes off.
ABUNDANCE TIP: Leave the roots in the ground after harvesting. As legumes, peas help add nitrogen back into the soil, which benefits the next crop planted nearby. Leave some peas to fully mature on the plant and save your own seeds. Seeds that have grown from plants in your garden will be well adapted to growing in your exact conditions.
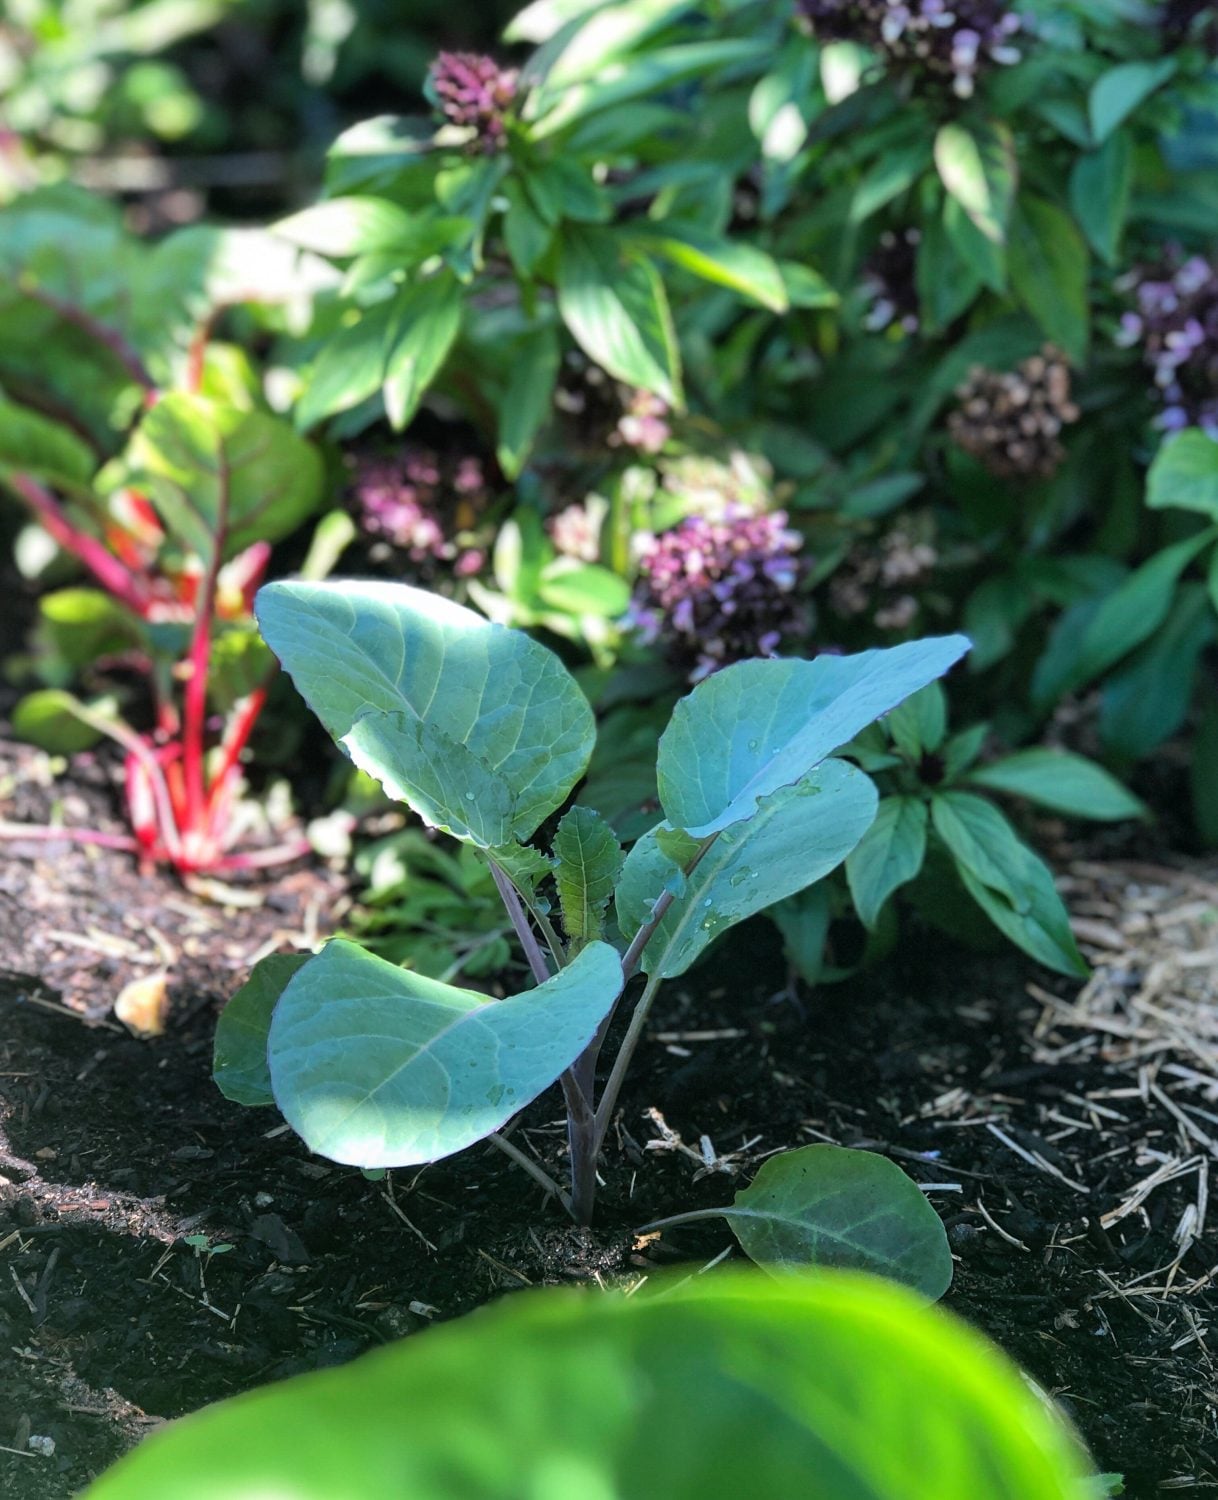
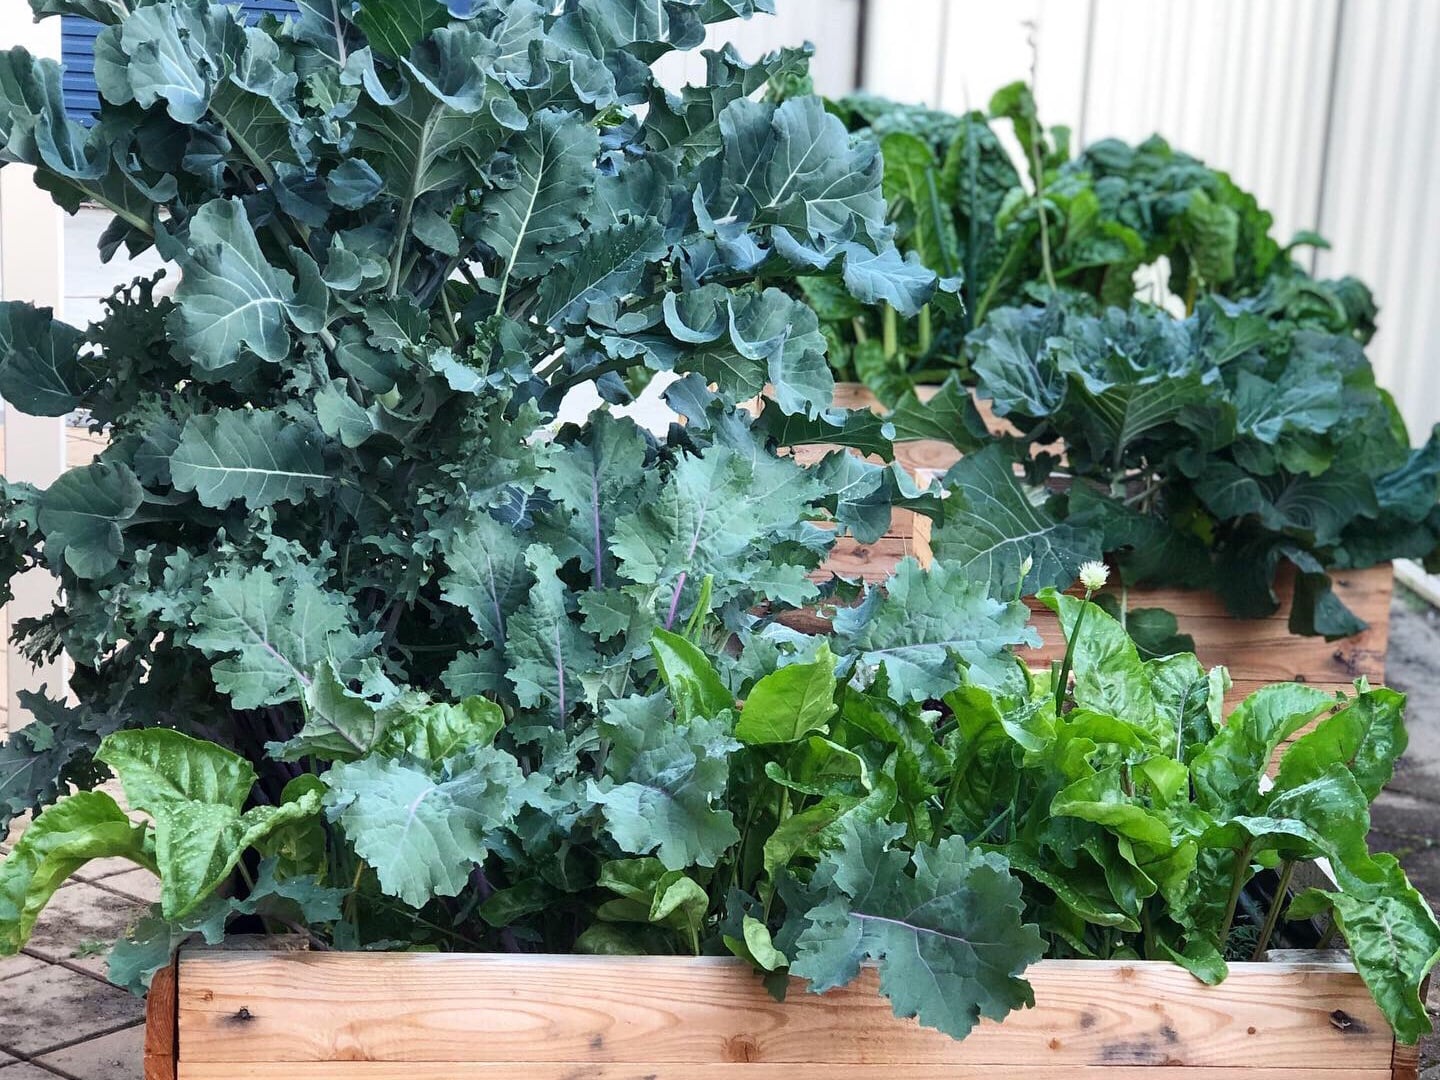
Broccoli
Broccoli can struggle badly in heat, but autumn gives it the conditions it actually wants. This is the time I start planting out seedlings so they can mature through winter. A big lesson I’ve learnt with broccoli is not to skimp on soil fertility. Heavy-feeding crops like this need rich compost soil and consistent moisture to really thrive. I love to grow purple broccoli because it adds colour to a winter garden!
GROWING TIP: Mulch heavily around broccoli seedlings early. This helps regulate soil moisture and reduces stress while the plants establish. I tend to plant seedlings rather than seeds because they do take a while to grow, so you want to make sure they have enough time to produce before the spring heat arrives. So seeds in late summer to early autumn or plant seedlings in mid-late autumn.
ABUNDANCE TIP: The leaves are edible, too! Chop up and cook the leaves just like you would chard for a nutritious bonus harvest! Just take a few from each plant so that there are still plenty of leaves for the plant to grow. Often, if you cut the main head off, some side shoots will appear, so leave the plant in the garden for some smaller side shoots.
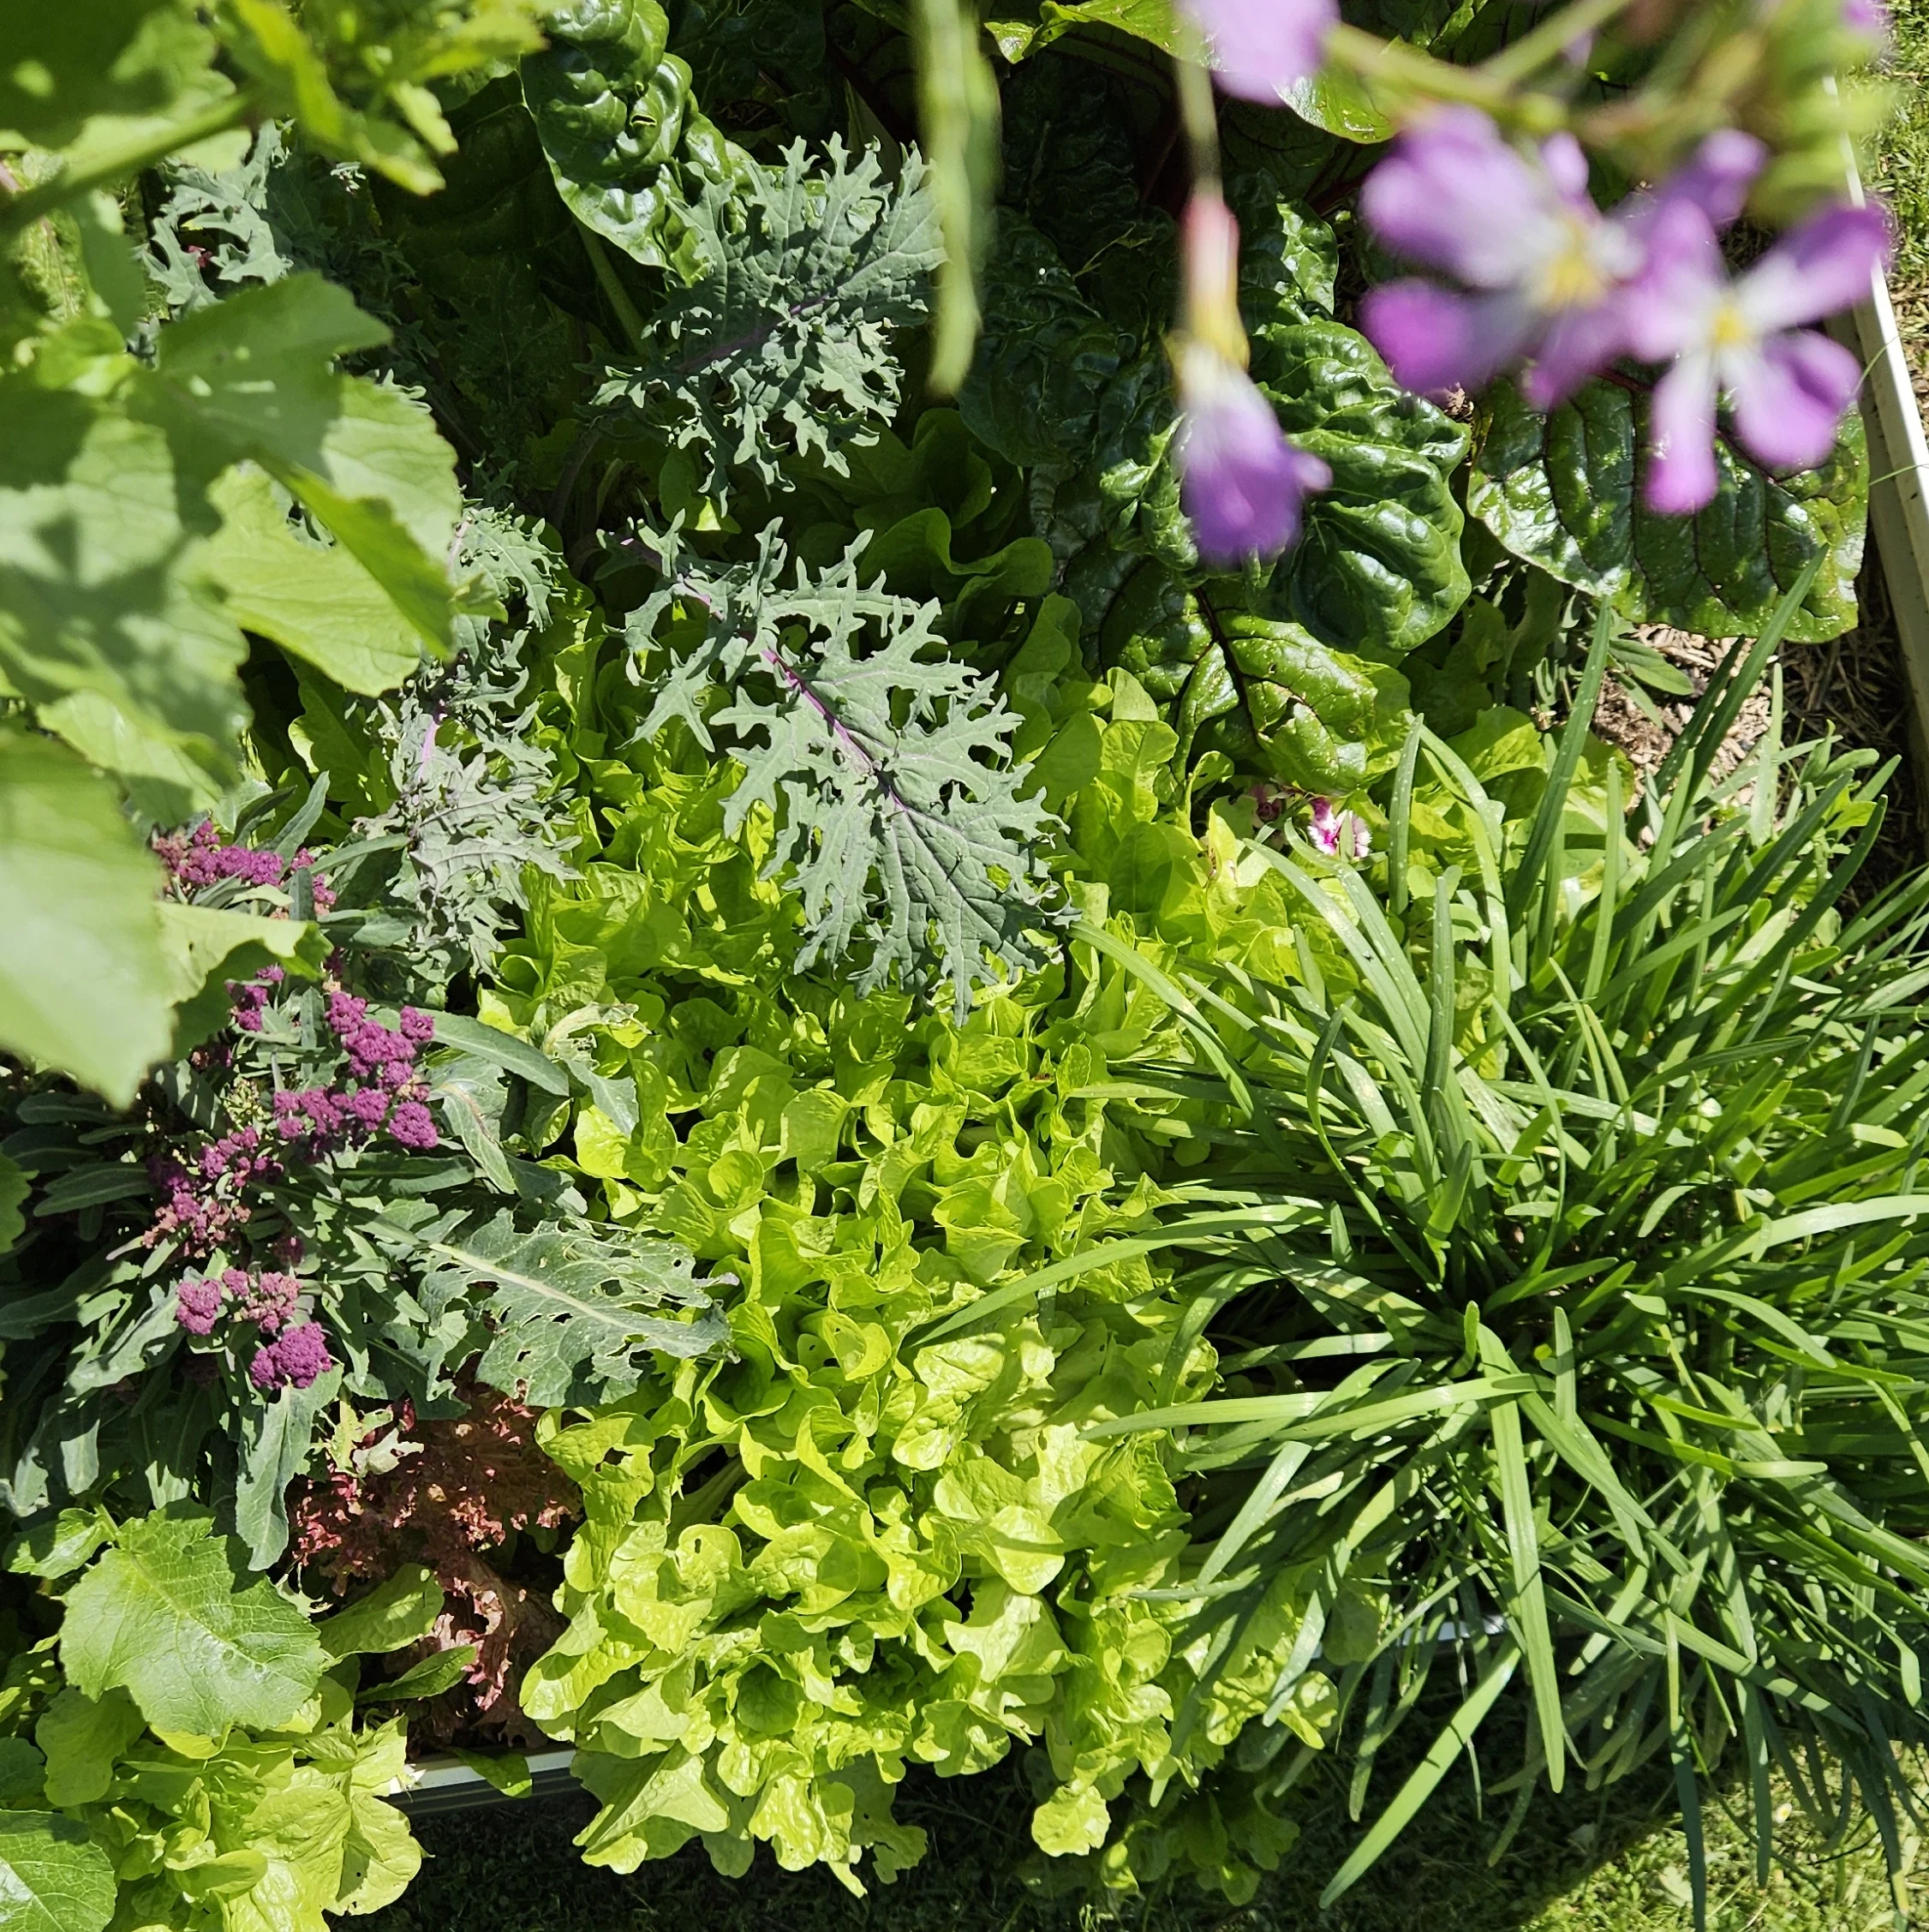
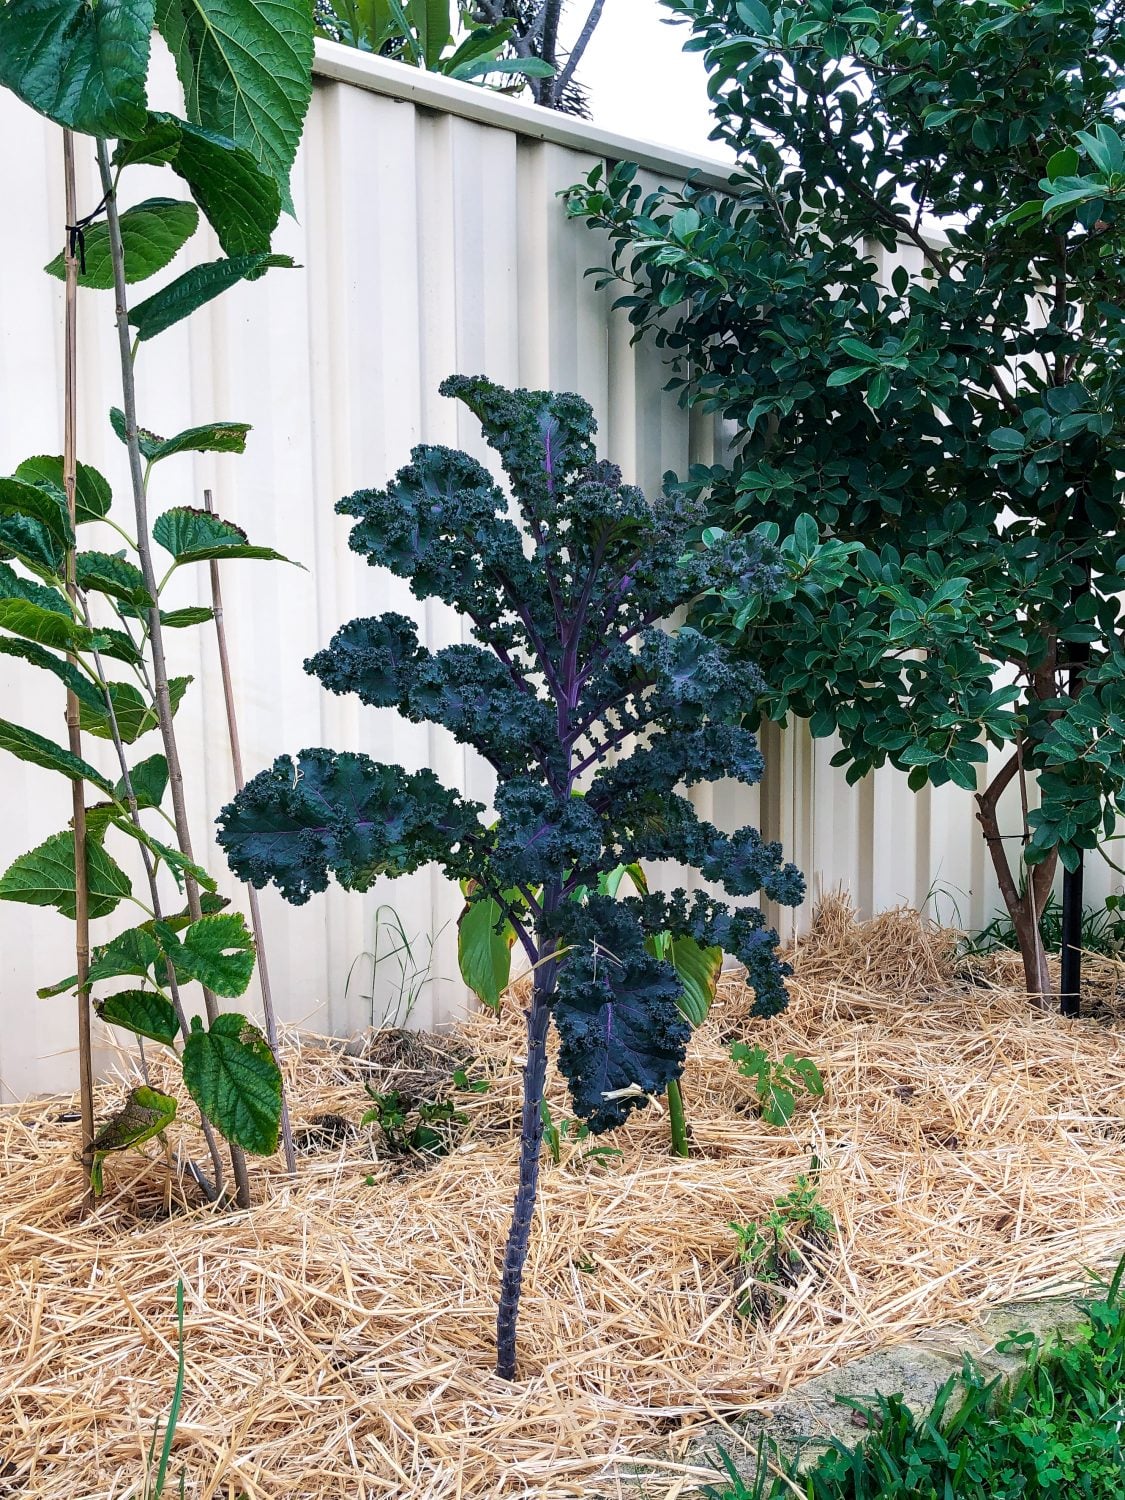
Kale
Kale is one of the easiest and most reliable vegetables in my autumn garden. Once established, it handles cool weather beautifully and produces continuously for months. It’s also one of those crops that makes the garden feel abundant because you’re constantly harvesting leaves without needing to replant immediately.
GROWING TIP: Not all Kale is the same…some are spikey and tough. Try out a few varieties and see which one you prefer. My favourite is the Black Tuscan Kale. It is smoother and easier to use meals.
ABUNDANCE TIP: Rather than harvesting the entire plant, pick the lower leaves continuously while allowing the top to keep growing taller. I also prune my kale in spring and let it grow through summer. This means come the following autumn, you already have an established plant ready to start producing!
Beetroot
Beetroot grows surprisingly easily during autumn and doesn’t need a huge amount of space. I often tuck beetroot throughout raised beds and around larger crops because it fits into small gaps really well. The cooler weather also helps produce sweeter roots. For sweeter, less earthy-tasting varieties, try the Golden Beetroot or Chioggia candy-striped Beetroot.
SOWING TIP: Sow directly where you want them to grow because beetroot dislikes being transplanted. Keeping soil consistently moist helps improve germination rates. Sow multiple seeds 2-3 weeks apart for a continuous harvest.
ABUNDANCE TIP: Don’t forget the leaves! Young beetroot greens are delicious and productive long before the roots are fully mature. They are part of the chard family, so you can use the leaves and stalks in soups and stir-fries just like you would silverbeet or chard. Just harvest a few from each plant so they still have enough energy to produce healthy roots.
Cabbage
Autumn is the perfect time to establish cabbages before winter. I’ve found they perform much better once the cabbage moth pressure starts easing compared to spring and summer. Here in Perth, our winters can be short. I love to grow the smaller mini cabbage varieties (Diggers Seeds).
SOWING TIP: Cabbages are heavy feeders, so I always plant them into beds with plenty of compost and organic matter already added. I like to plant cabbage from seedlings, as they can be slow-growing, and pests do love to eat them when they are young. Late summer and early autumn, sow seeds in seed trays. Late autumn or early winter, I would stick to seedlings to have enough time for them to form before the hot weather arrives in spring. Because cabbages a low-growing plant, plant them on the northern or western side or edge of your garden beds, so they don’t get shaded out by taller plants.
ABUNDANCE TIP: Smaller “mini” cabbages not only take up less room (allowing you to fit in more plants), but they are also the perfect size to make sure none goes to waste.
Parsley
Parsley is such an underrated herb in an edible garden. Once the weather cools, it explodes with growth and becomes one of the easiest productive herbs in the garden. It’s also fantastic for filling edges throughout a food forest system. I often cut back extra growth to use as chop and drop mulch. Fresh parsley can be topped on so many meals or added to salads for a boost in nutrients.
SOWING TIP: Parsley appreciates regular moisture while establishing. Once settled in, though, it becomes surprisingly resilient. I tend to direct sow into the garden.
ABUNDANCE TIP: Allow some parsley plants to flower. The flowers attract huge numbers of beneficial insects and pollinators into the garden. Then the seeds can scatter to regrow in their own next autumn. Free plants and zero effort gardening! If you want to extend your growing season and keep parsley well into spring and summer, sow some in a shady part of your garden. This can help stop it from going to seed and allow longer harvests.
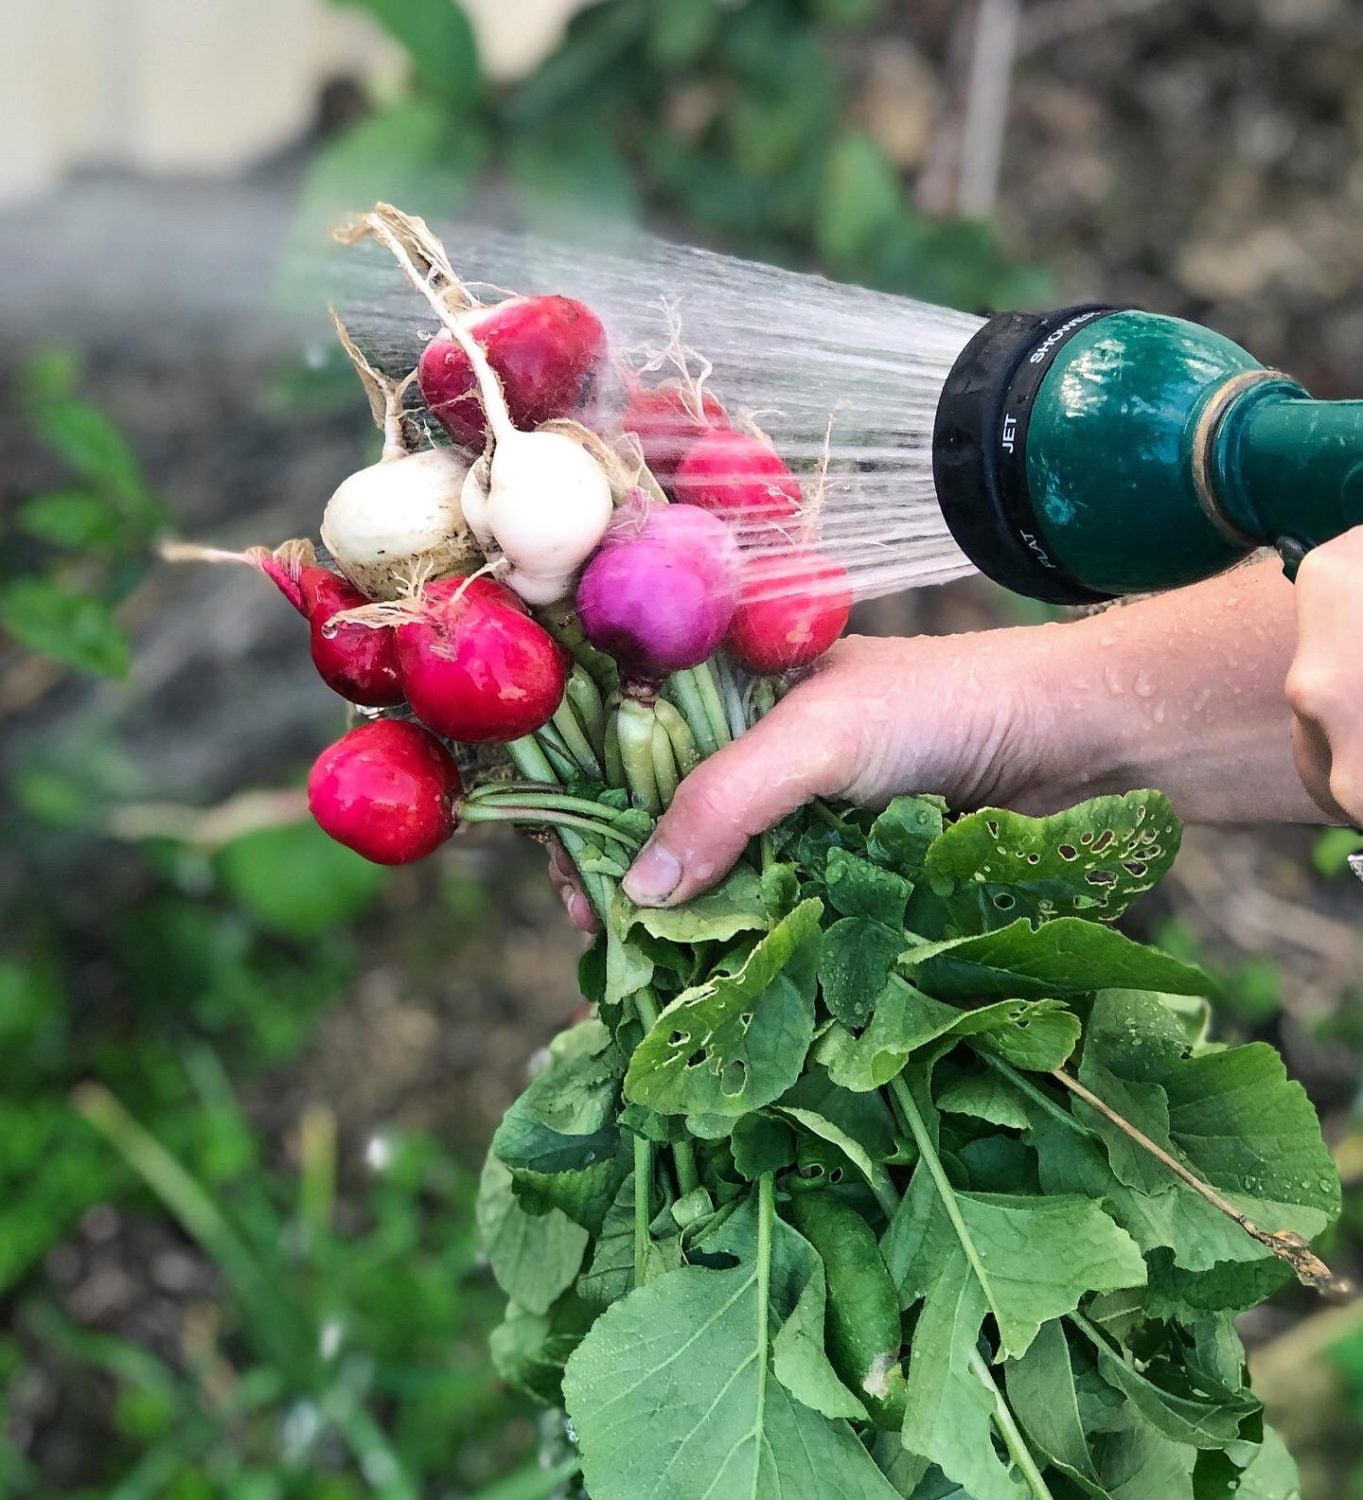
Radish
Radish is perfect if you want quick results. Some varieties go from seed to harvest in just 4 weeks, making them ideal for filling empty garden spaces while slower crops establish. They’re also one of my favourite crops for beginner gardeners because they give such fast rewards. If you are not a fan of radish, try roasting them! So delicious.
SOWING TIP: Sow radish frequently and in small batches rather than all at once for a continuous harvest. I sprinkle seeds in the gaps after I have planted in my large crops like cabbage and cauliflower.
ABUNDANCE TIP: Allow a few radishes to flower and go to seed. The young green seed pods are edible, and the flowers are loved by pollinators. Once the seed pods go brown, dry and crack open to release the radish seeds. The leaves are also edible and can be used in meals like soup, pesto or chimichurri.
Spring Onion
Spring onions are one of the lowest-maintenance crops I grow. They fit almost anywhere, handle cooler weather well, help repel pests and are incredibly useful in the kitchen. I usually scatter them throughout beds rather than planting in neat rows. They grow quickly and are much easier to grow here in Perth with our short, mild winters.
SOWING TIP: Direct sow spring onions densely around the gaps between larger crops to maximise small spaces throughout the garden.
ABUNDANCE TIP: Instead of pulling the whole plant out, cut above the roots and allow them to regrow multiple times.
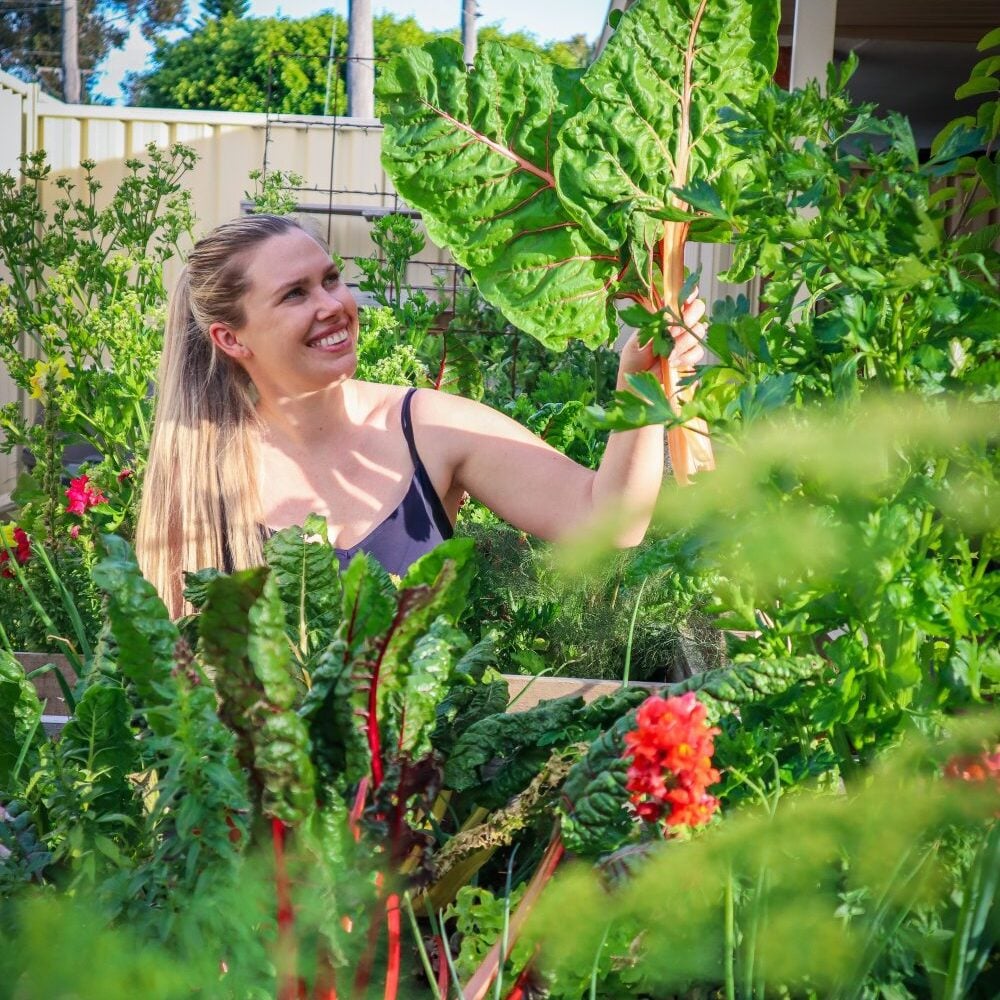
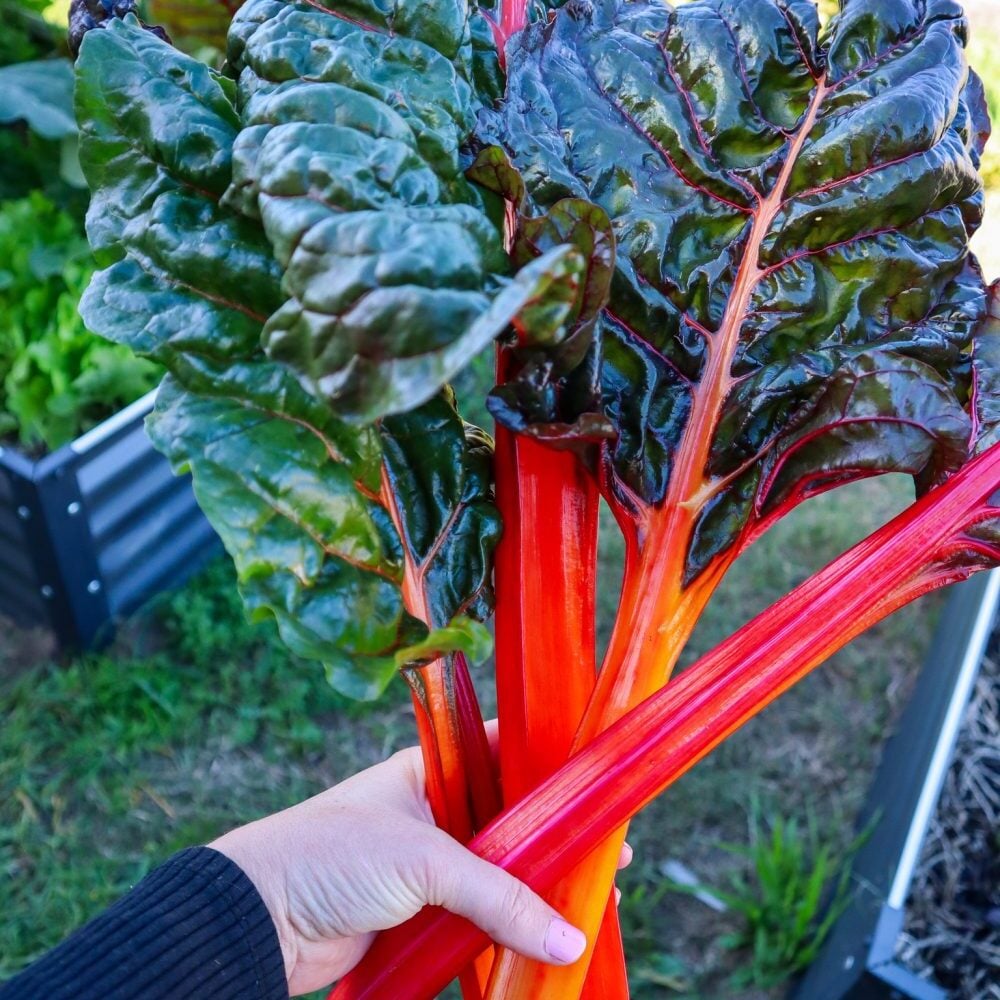
Rainbow Chard and Silverbeet
Rainbow chard is a staple must-grow in my autumn and winter gardens. I love the bright colours, and it provides continuous (generous) harvests through the cooler months. It’s one of those dependable crops that keep producing even when other plants struggle.
SOWING TIP: Give chard/silverbeet plenty of compost and regular water for lush leafy growth. Direct sow or seed trays, but I tend to direct sow mine.
ABUNDANCE TIP: Harvest outer leaves continuously instead of removing the whole plant. One or two healthy chard/silverbeet can feed you for months!
Asian Greens
Pak choi, bok choy, tatsoi, and other Asian greens thrive during autumn and winter when it cools down. They grow quickly and are perfect for succession planting. Early autumn in Perth can still be quite warm, plant asian greens mid-late autumn to reduce the chance of them bolting and going straight to flower.
SOWING TIP: Asian greens grow incredibly fast, so sow regularly every couple of weeks for constant harvests. Direct sow and seed trays, as they can be eaten by pests when they are little.
ABUNDANCE TIP: Cut with a sharp knife at the base instead of removing the whole plant, and they can regrow to get multiple harvests.
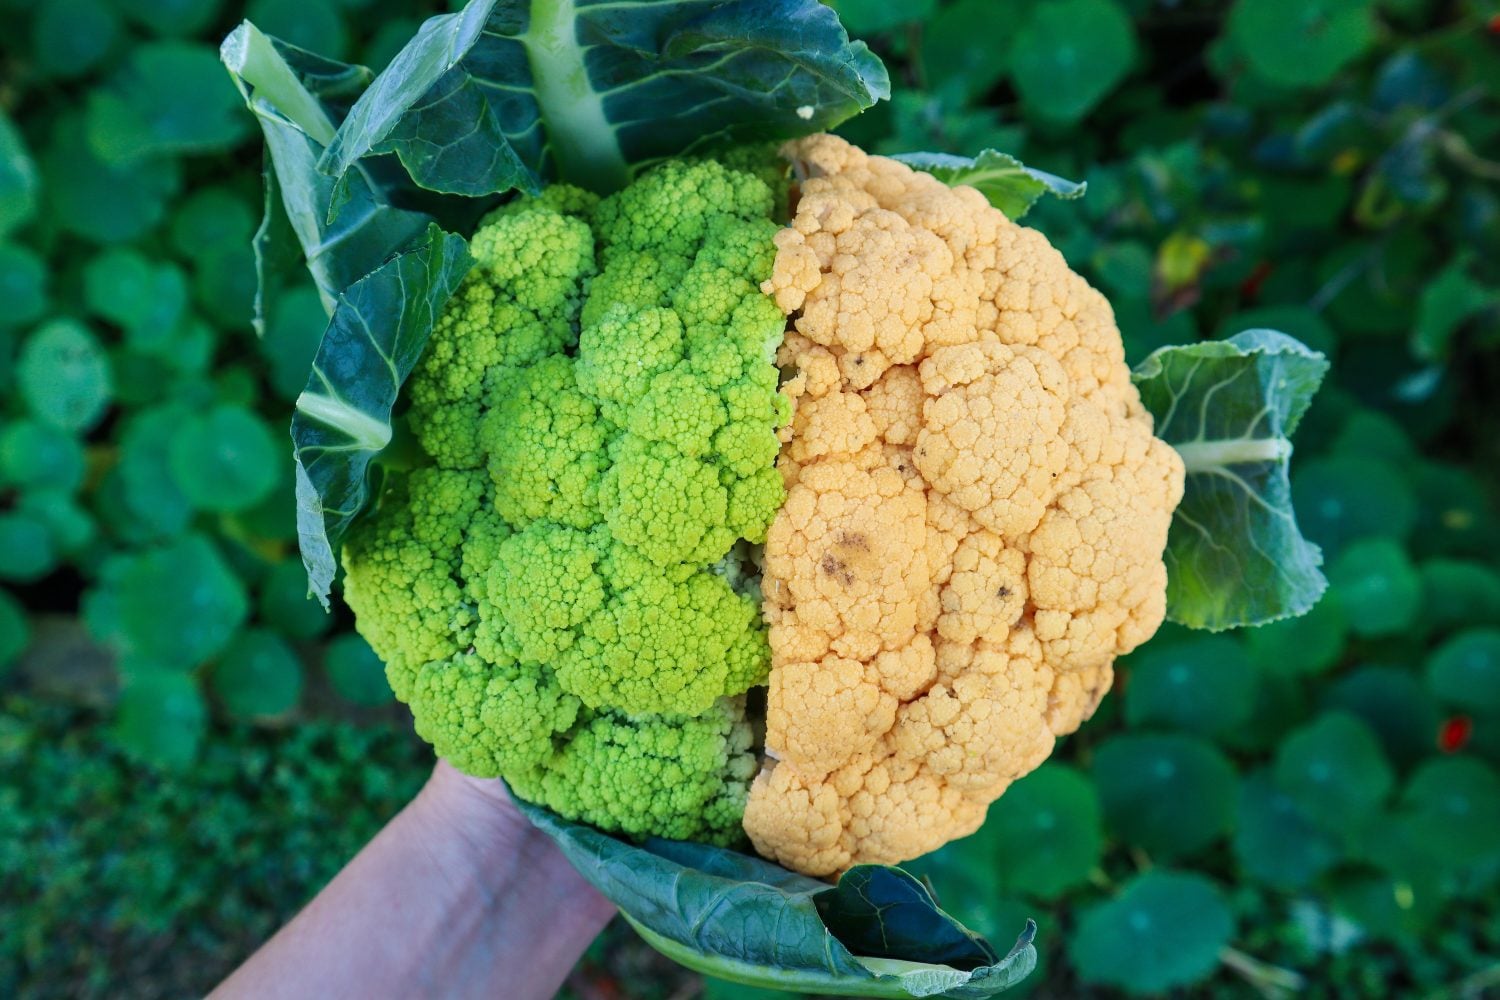
Cauliflower
Cauliflower can be a little slow and patience-testing at times, but autumn gives cauliflower the stable conditions it needs to properly develop. I love to grow the Purple Sicily variety for the bright colour it adds to the garden; it tastes good too!
SOWING TIP: Sow in seed trays and plant out seedlings in Autumn. Enjoy the soil has fresh compost as they are quite heavy feeders.
ABUNDANCE TIP: Don’t pull the whole plant out after harvesting the main head. Some varieties continue producing small side shoots, which give you extra harvests from the same plant. Plus, the leaves are edible too! Great for slicing into soups and stir-fries.
My Biggest Autumn Vegetable Gardening Tips for Perth
1. Plant Extra
Sow a few rounds of seeds or seedlings as backups in case the pests get to them first. Slugs and snails are busy during the cooler months, and it’s best to hang all your hopes on a select few seedlings.
2. Focus on Soil Building
Early Autumn is the perfect time to add compost, worm castings, and organic matter back into tired summer beds.
3. Plant Little and Often
I usually pop a few seeds in for successional sowing or as backup reserves every couple of weeks, which creates more consistent harvests.
4. Don’t Rush Winter Crops Too Early
Even though it’s cooling down, early autumn days can still be quite warm in Perth. Timing matters. I would plant asian greens mid-late autumn to reduce bolting.
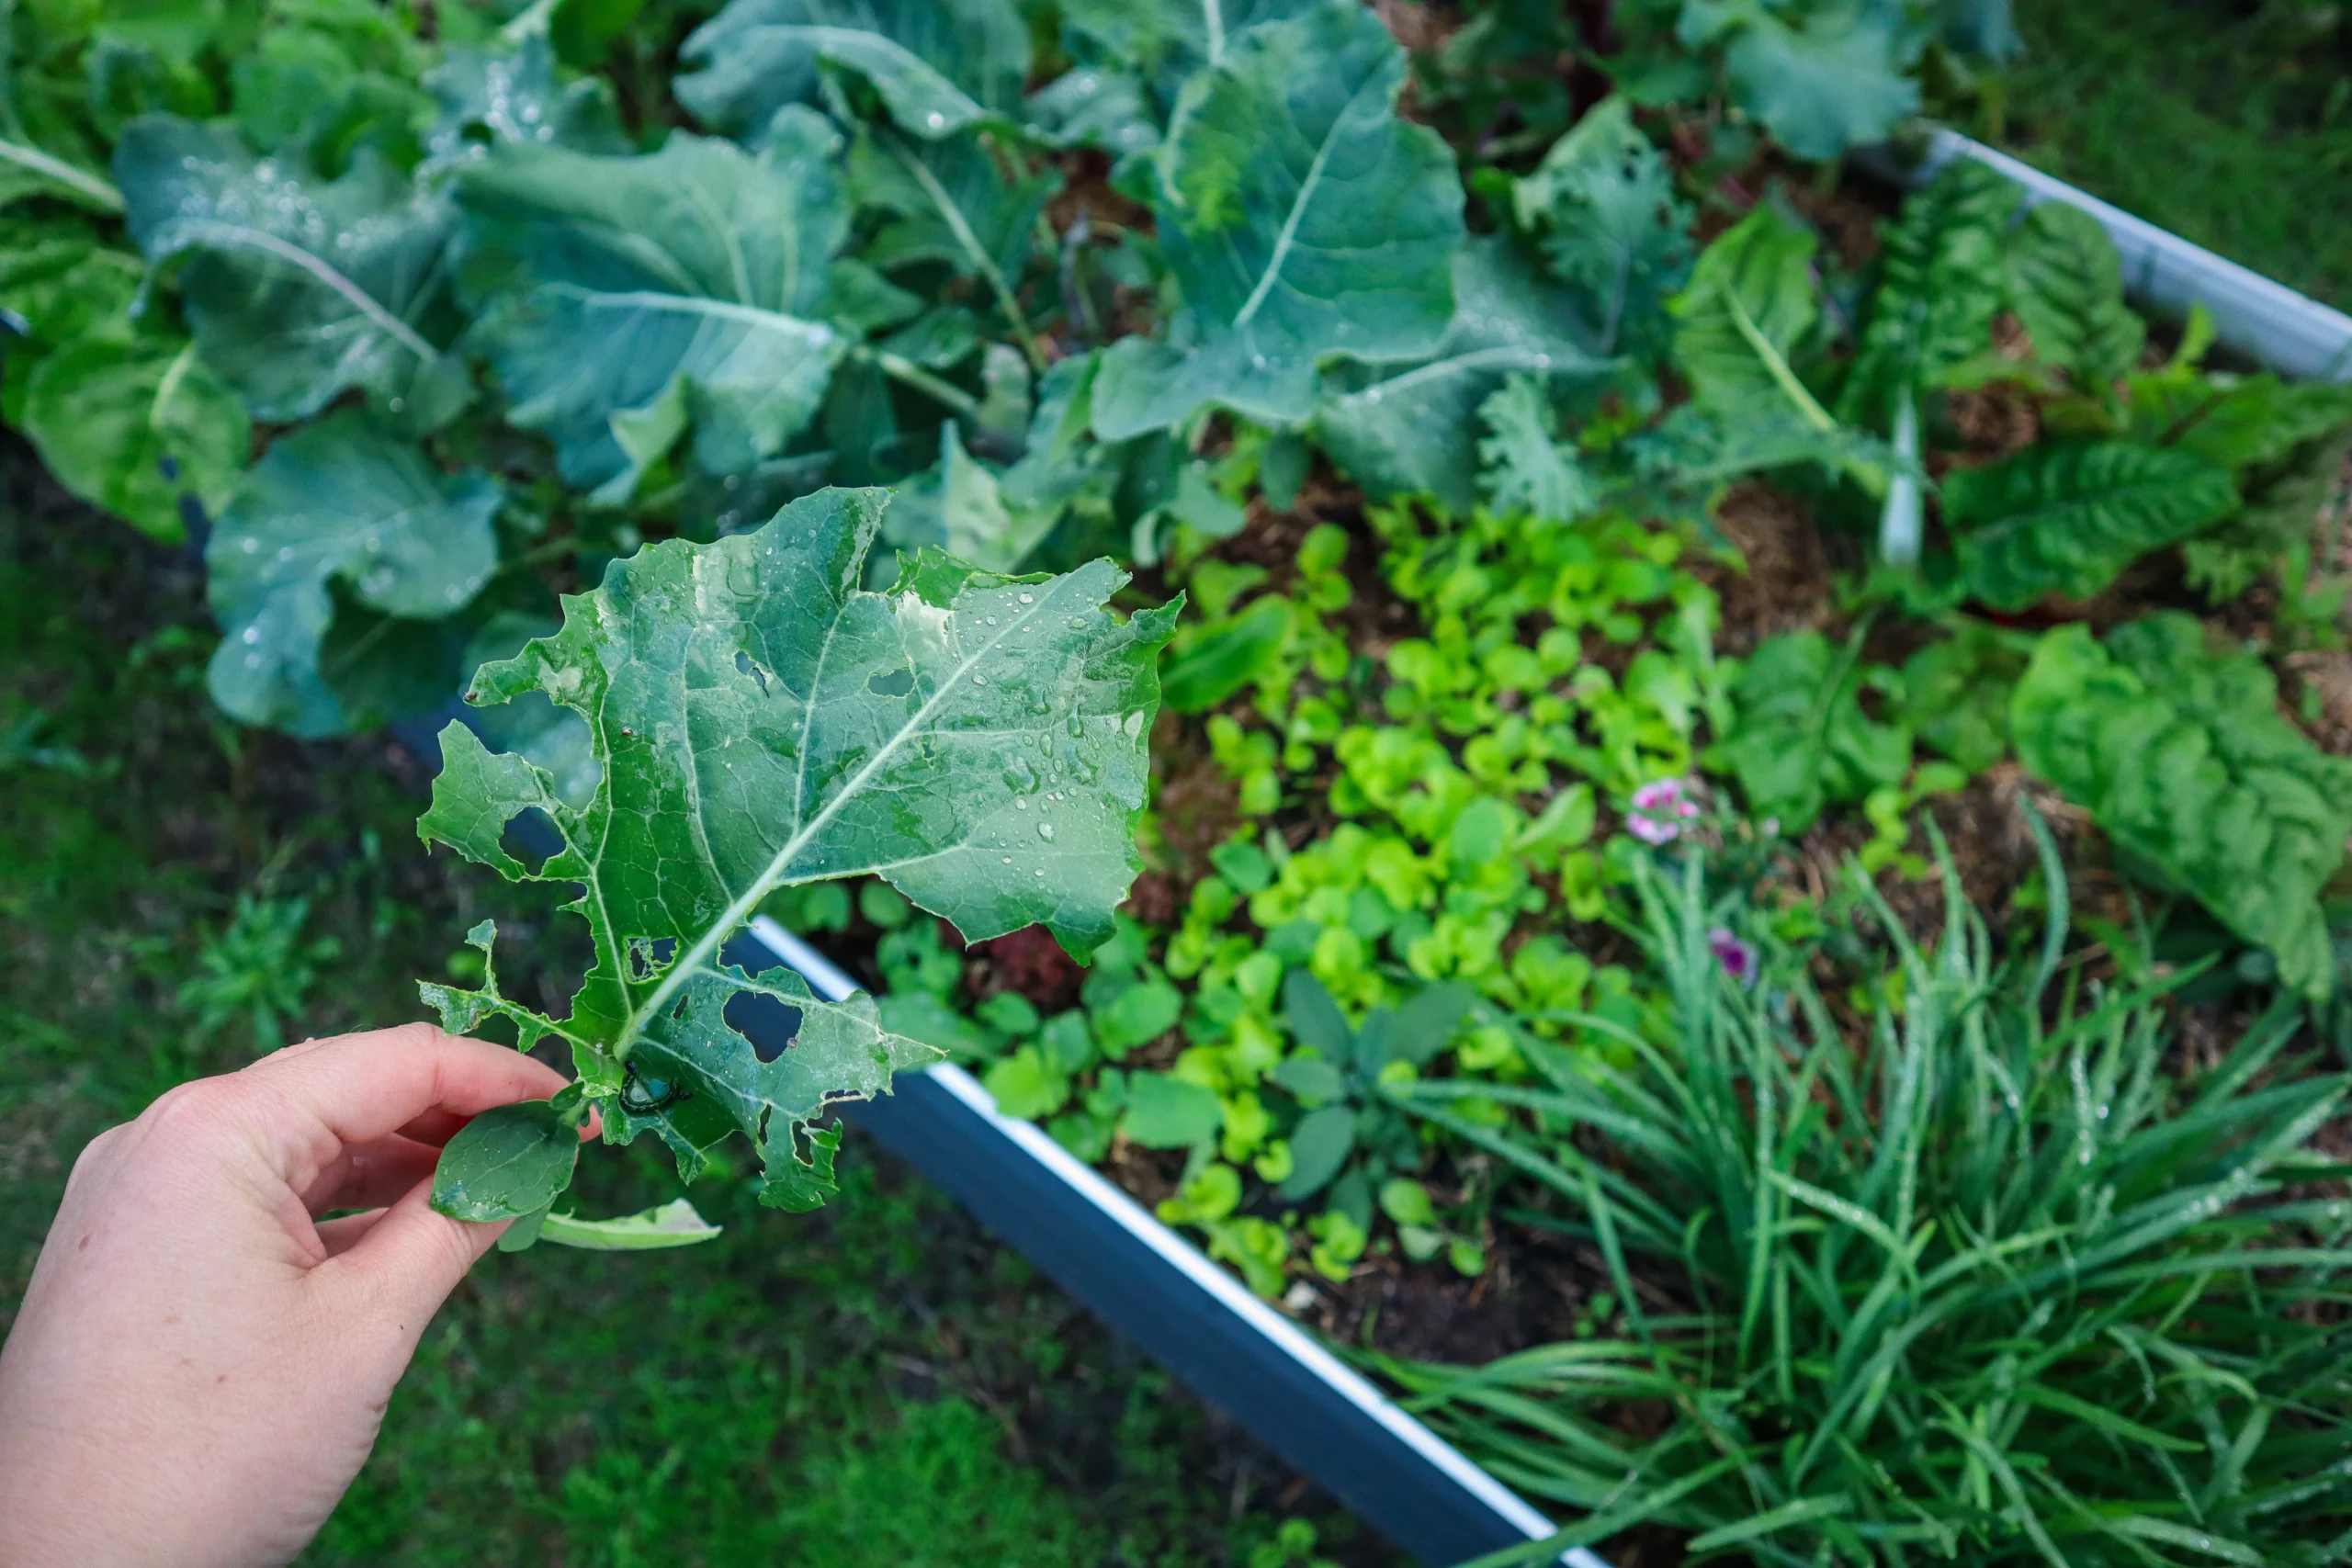
How to Stop Pests from Eating Your Seedlings in Autumn?
Over the last 10+ years, growing my own food here in Perth, I have tried many different techniques to reduce pest pressure during the cooler months. These are the most effective solutions I have found.
1. Used Coffee Grounds
This is really my number one secret weapon for stopping the slugs, slaters and snails eating my young seedlings!! I pick up bags of used coffee grounds from a local cafe for free – saves them going to landfill and makes a huge difference to my garden! Grounds that have been through a large machine with water are close to pH neutral. We also have naturally alkaline soil and water here in Perth, so if there was any slight acidity left, this would help balance that out. Apply small sprinkles over your seedlings.
NOTE: This does need to be regularly applied after any watering or rain. I usually just find the bigger chunks from the last application and re-crumble them on top.
2. Remove Lower Leaves
As your seedlings start to grow and get large enough that their leaves touch the soil. Start to remove the older leaves. The leaves that touch the soil act as a ladder for pests.
3. Plant Extra
In a natural garden, pests are totally normal! I would be more concerned if nothing wanted to eat your veggies! Plant extra so that you always have some backups available and more chance of getting a productive harvest.
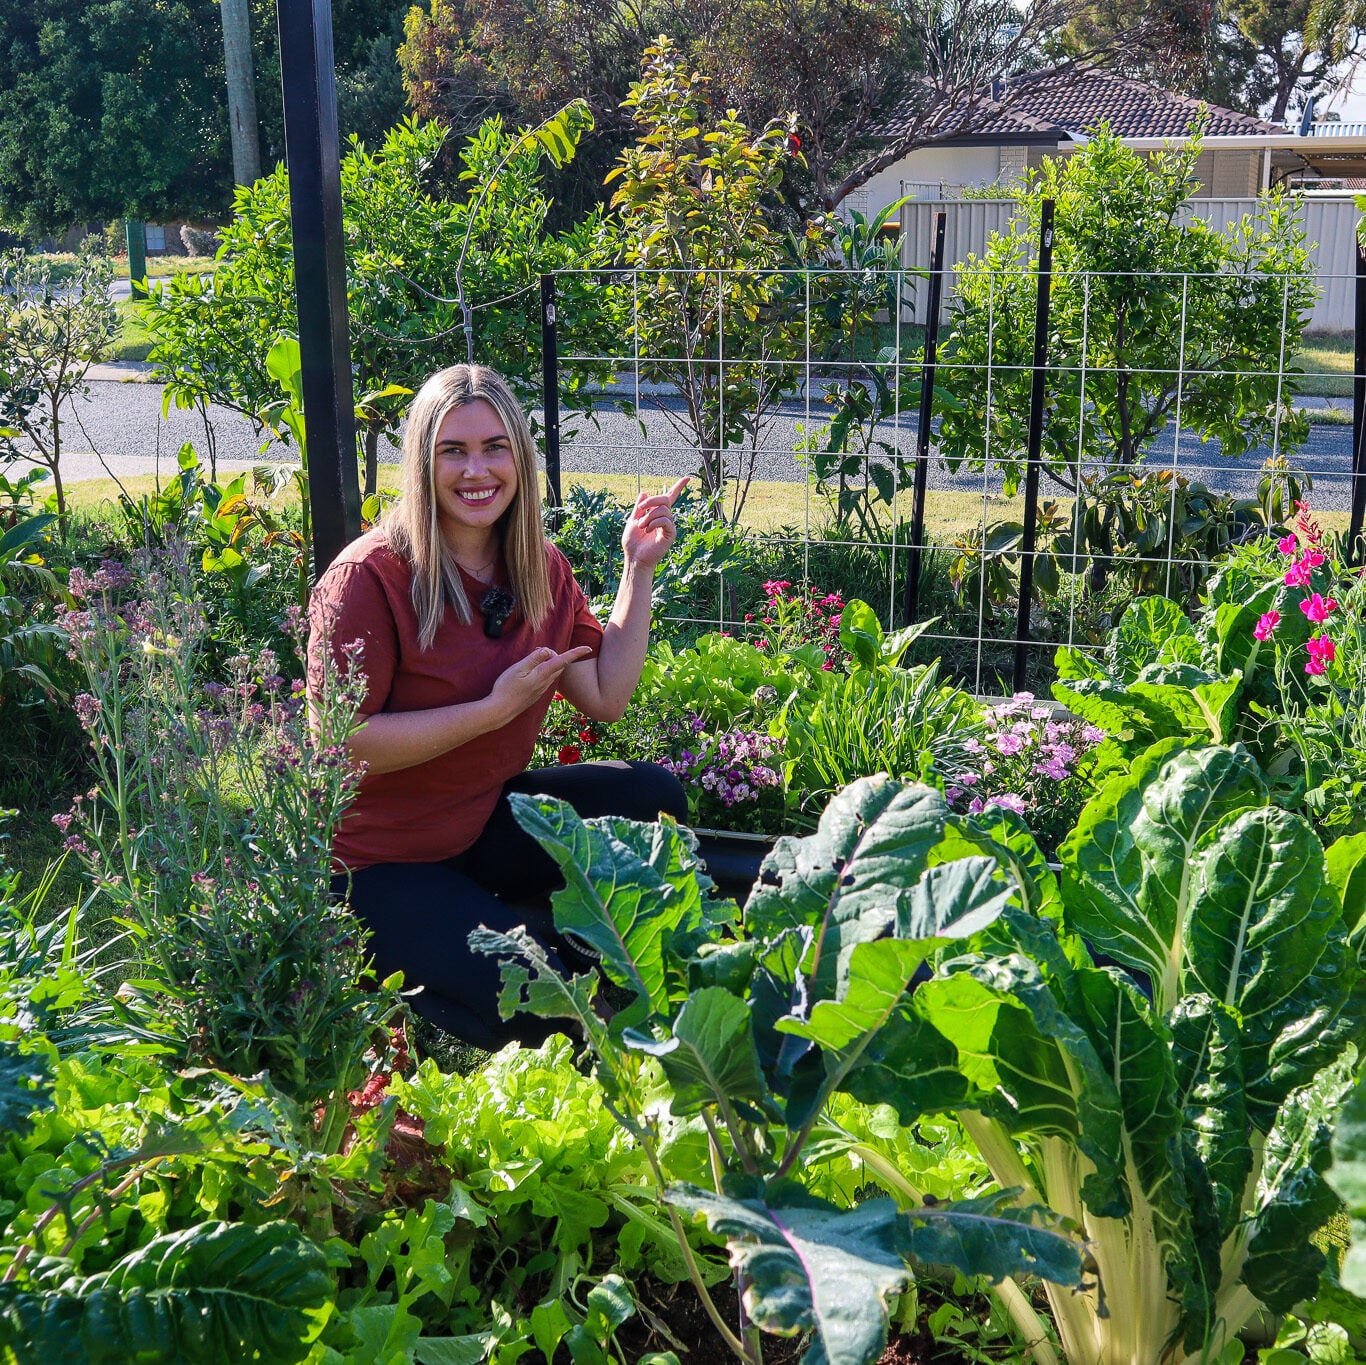
🎥 A Look Around My Autumn Food Forest
This season is honestly one of the busiest and most exciting transitions in the garden. The sweet potatoes are slowing down, new greens are filling the beds, and the entire space is shifting back into lush growth again after a crispy summer. There’s something really motivating about seeing fresh seedlings establish quickly after months of struggling through heatwaves 😅
If you’d like to see exactly what’s happening in the garden right now, I shared a full autumn garden tour here:
Autumn gardening in Perth truly is one of the best times to grow food. The combination of warm soil, cooler air, and reduced plant stress creates incredible growing conditions for so many vegetables. Whether you’re starting a new garden, refreshing old beds, or simply trying to grow more food at home, this is such a rewarding season to lean into.
Start with a few vegetables that thrive in cooler weather, focus on building healthy soil, and let the garden evolve season by season 🌿
Edible ground covers are a crucial element in any permaculture or food forest garden. They serve as living mulch, protect and feed the soil, suppress weeds, and give you more food in less space. Whether you’re growing sweet potatoes for stir-fries or nasturtiums for a colorful salad, there are so many ways to make your ground layer both beautiful and functional.
Tired of weeding and bare soil? These low-growing edible plants cover the ground, feed your soil, and you!
By layering your garden with diversity in plant heights, root systems, and edible yields, you’ll create a more balanced, resilient system that supports you and the ecosystem around you. Let your mulch work to feed your soil and your family at the same time!
Welcome back to my garden! Today, we’re diving into edible ground covers that I use in my urban permaculture garden as living mulch. Creating layers in a food forest system helps you grow more diversity (and food) in a small space. Edible ground covers help suppress weeds to create a low-maintenance, sustainable garden that feeds us year-round and doesn’t demand daily upkeep.
We love to go camping, and that means I often leave my garden for days at a time. While I still love growing annuals like tomatoes and cucumbers, they require more hands-on care and come with a higher risk if I’m away. I’ll still grow them, but I want to shift the balance toward a more resilient garden using perennial plants and edible ground covers that do more of the heavy lifting while I’m off exploring.
Watch or read more below
Top 10 Edible Ground Covers for Living Mulch
So, what exactly are edible ground covers? These are low-growing plants that serve multiple functions: they protect the soil, retain moisture, reduce weeds, prevent erosion, and provide food for both humans and beneficial wildlife. In a food forest-style garden, ground covers are just one layer in a multi-tiered system that also includes tall trees, shrubs, flowers, and root crops.
Below are 10 of my favorite edible ground covers that are beautiful, functional, and delicious!
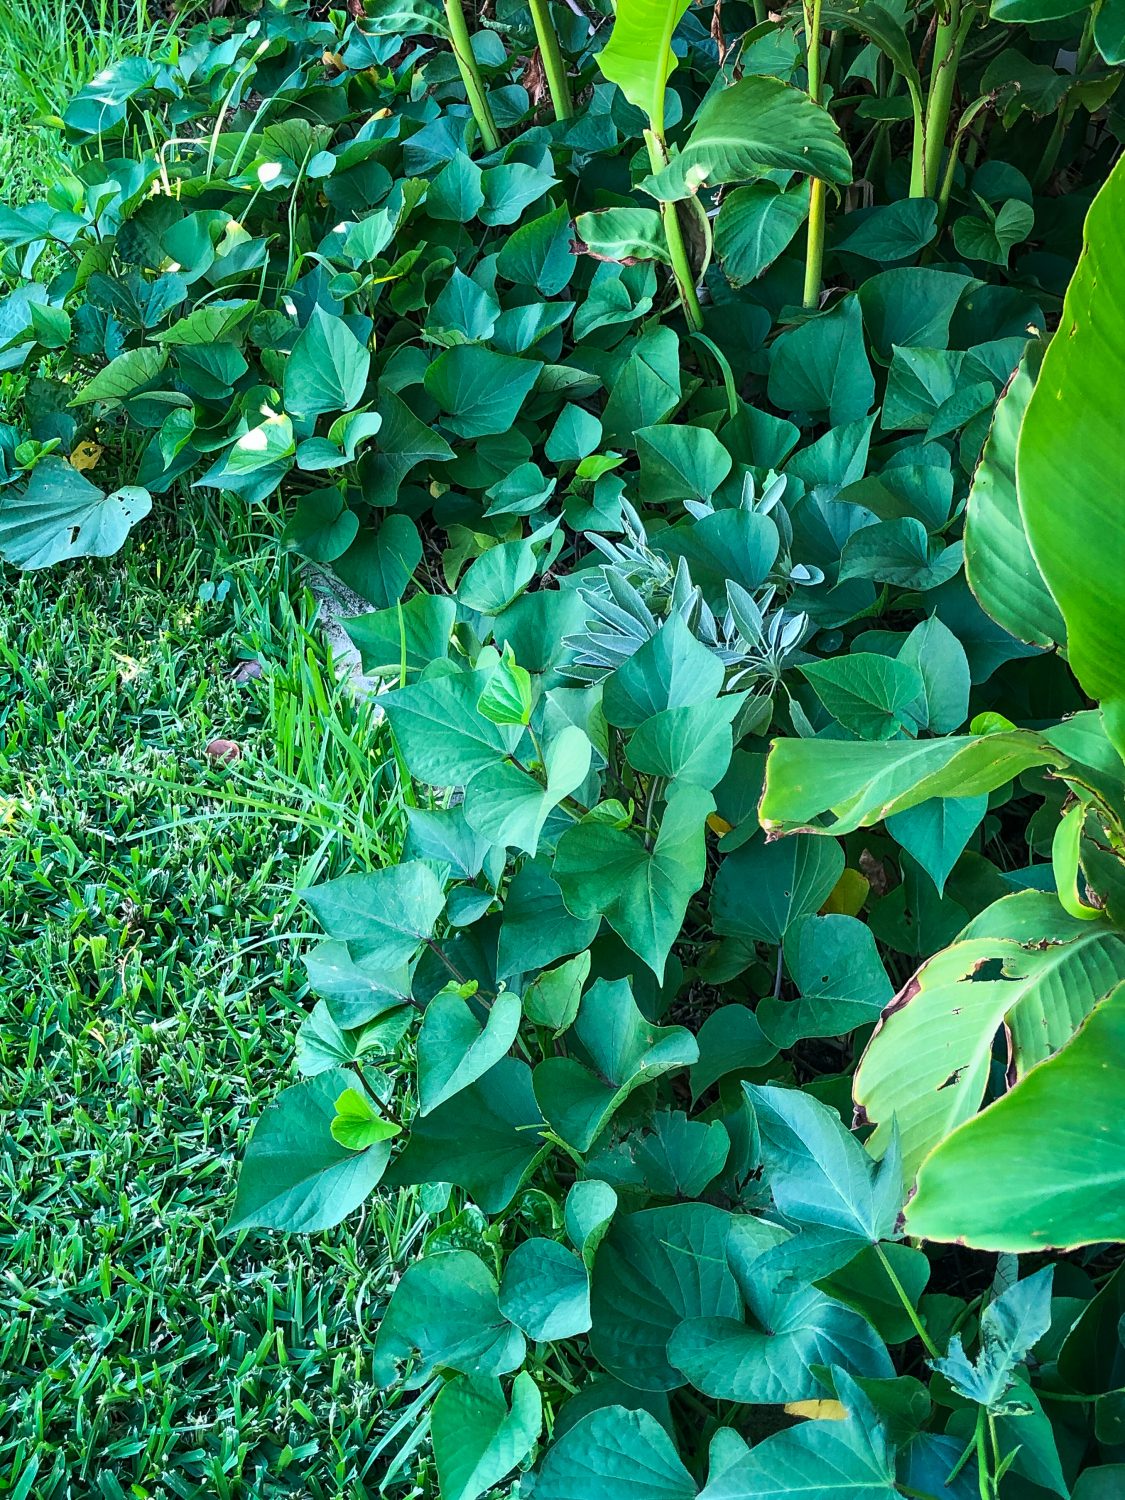
1. Sweet Potato
Sweet potato is hands-down my favorite edible ground cover. Its thick, lush vines protect the soil from the harsh sun and help retain moisture. The leaves are edible and can be used like spinach—sautéed with garlic, tossed in soups and curries, or even made into green wraps. And of course, the roots themselves are a delicious, substantial food source for both sweet and savory dishes. Sweet potatoes are also a haven for beneficial insects and frogs (yes, frogs!). I often find them nesting among the vines, even without a pond nearby. They’re super easy to propagate, making them perfect for sharing, selling, or expanding your patch.
2. Nasturtium
Nasturtiums are another edible ground cover that, once you plant them, you will have forever! Their bright flowers and peppery leaves are both edible and beautiful. I use the leaves in salads and as mini wraps, and the flowers as edible garnishes or pesto ingredients. They self-seed prolifically, meaning once you plant them, they often come back on their own every year. This means they can easily take over parts of your garden, so it’s important to keep them pruned if you want them to remain in one area.
Nasturtiums attract beneficial pollinators and act as a trap crop, luring pests like slugs and snails away from other plants. You can prune back areas to feed to your chickens as a natural pest management system. Even their seed pods are edible—you can pickle them to make homemade capers!
Naturtiums die off during the hot summer months, and so I pair these with sweet potato, which has an opposite growth pattern. Sweet potatoes thrive in summer and die back in the cooler months. These two work well to keep the soil covered all year round.
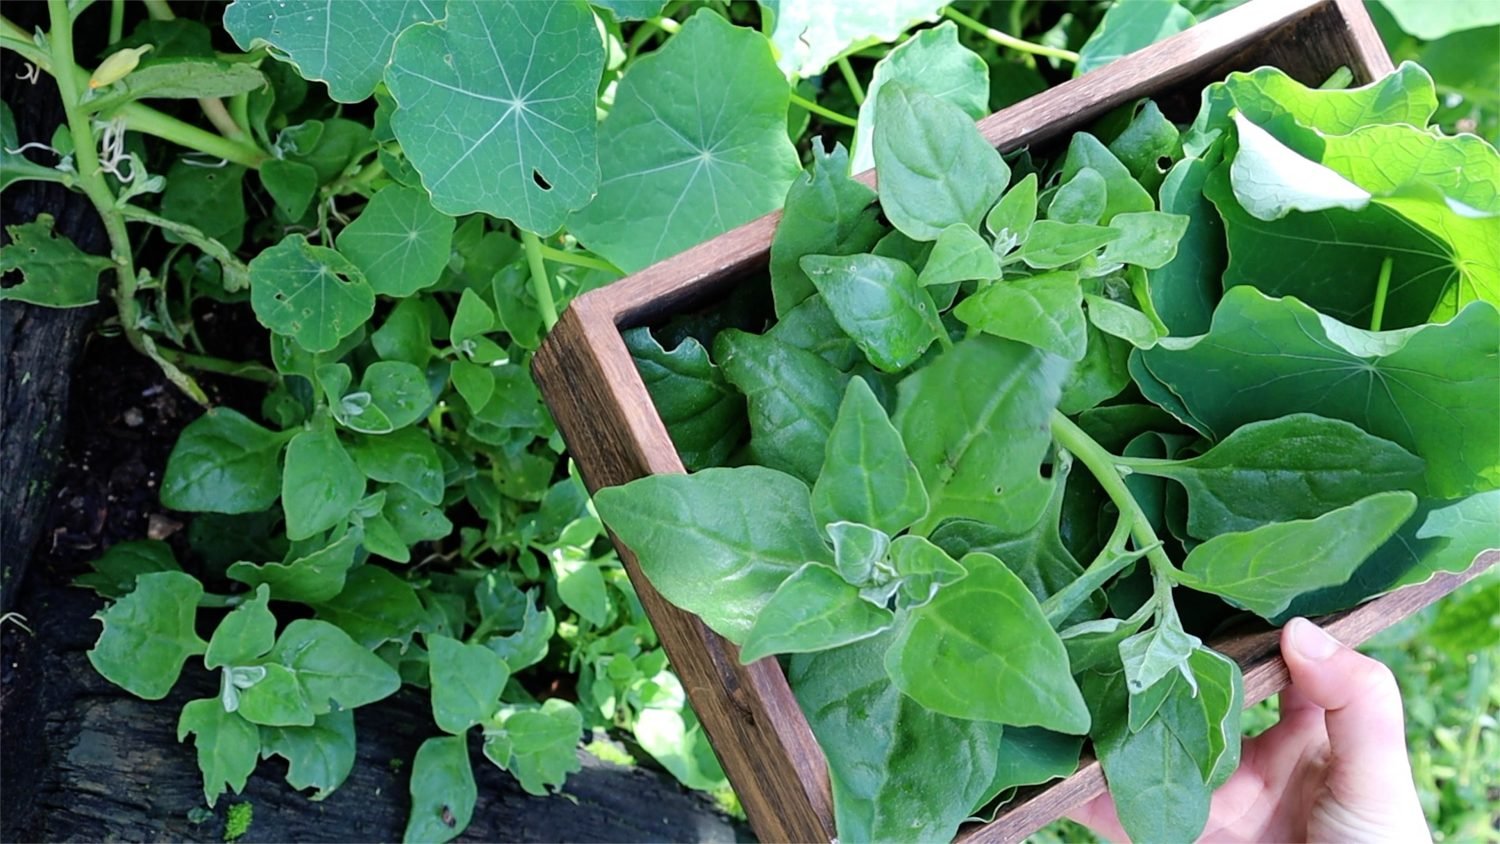
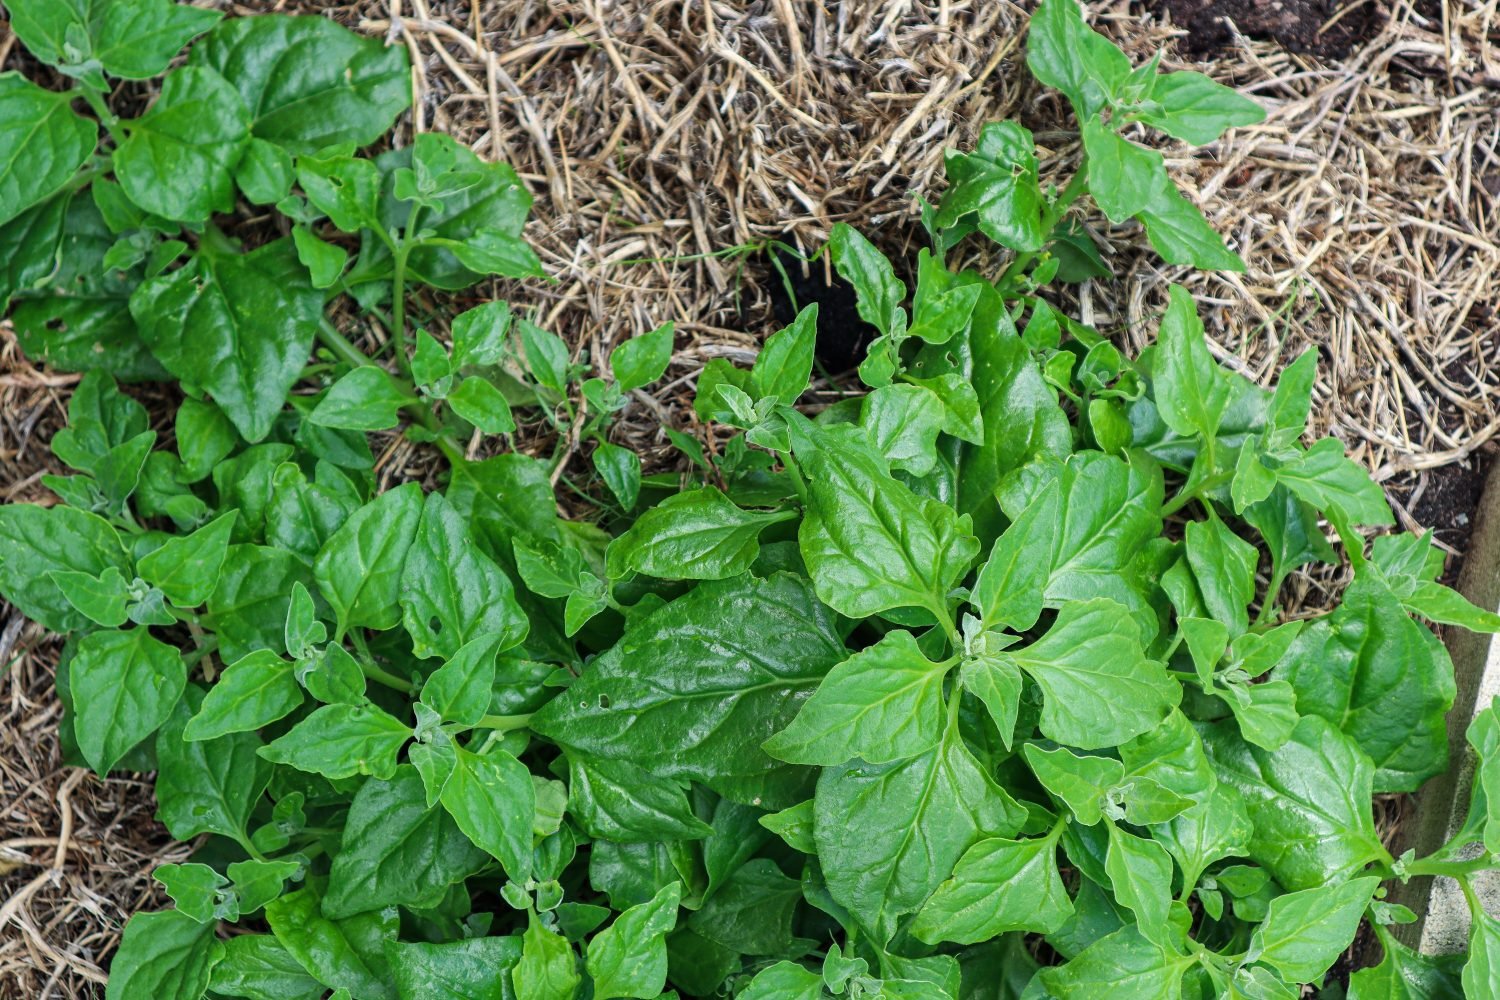
3. New Zealand Spinach (Tetragonia tetragonioides)
New Zealand Spinach is one of my go-to ground covers, especially in warmer weather when traditional leafy greens struggle. It spreads beautifully and creates dense, weed-suppressing coverage. The leaves are succulent and can be eaten cooked, much like regular spinach. It’s drought-tolerant, hardy, and perfect for low-maintenance edible landscaping. Due to its ability to self-seed easily, it can be a good idea to keep it contained.
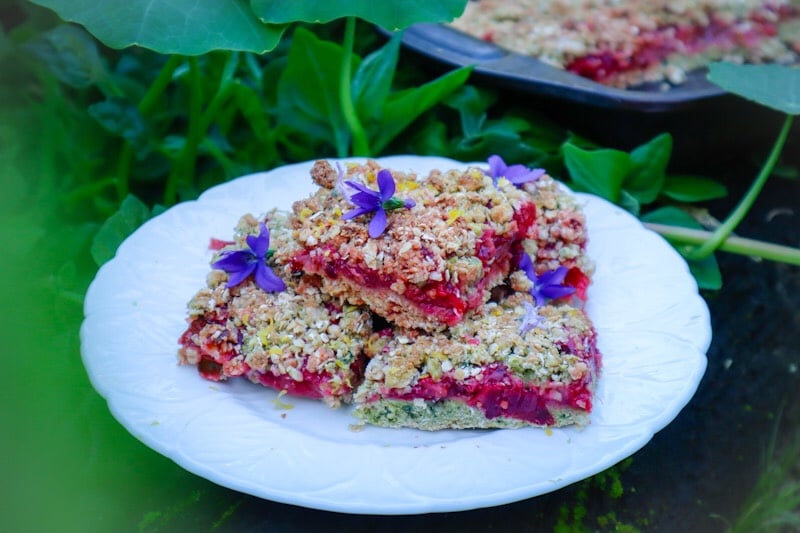
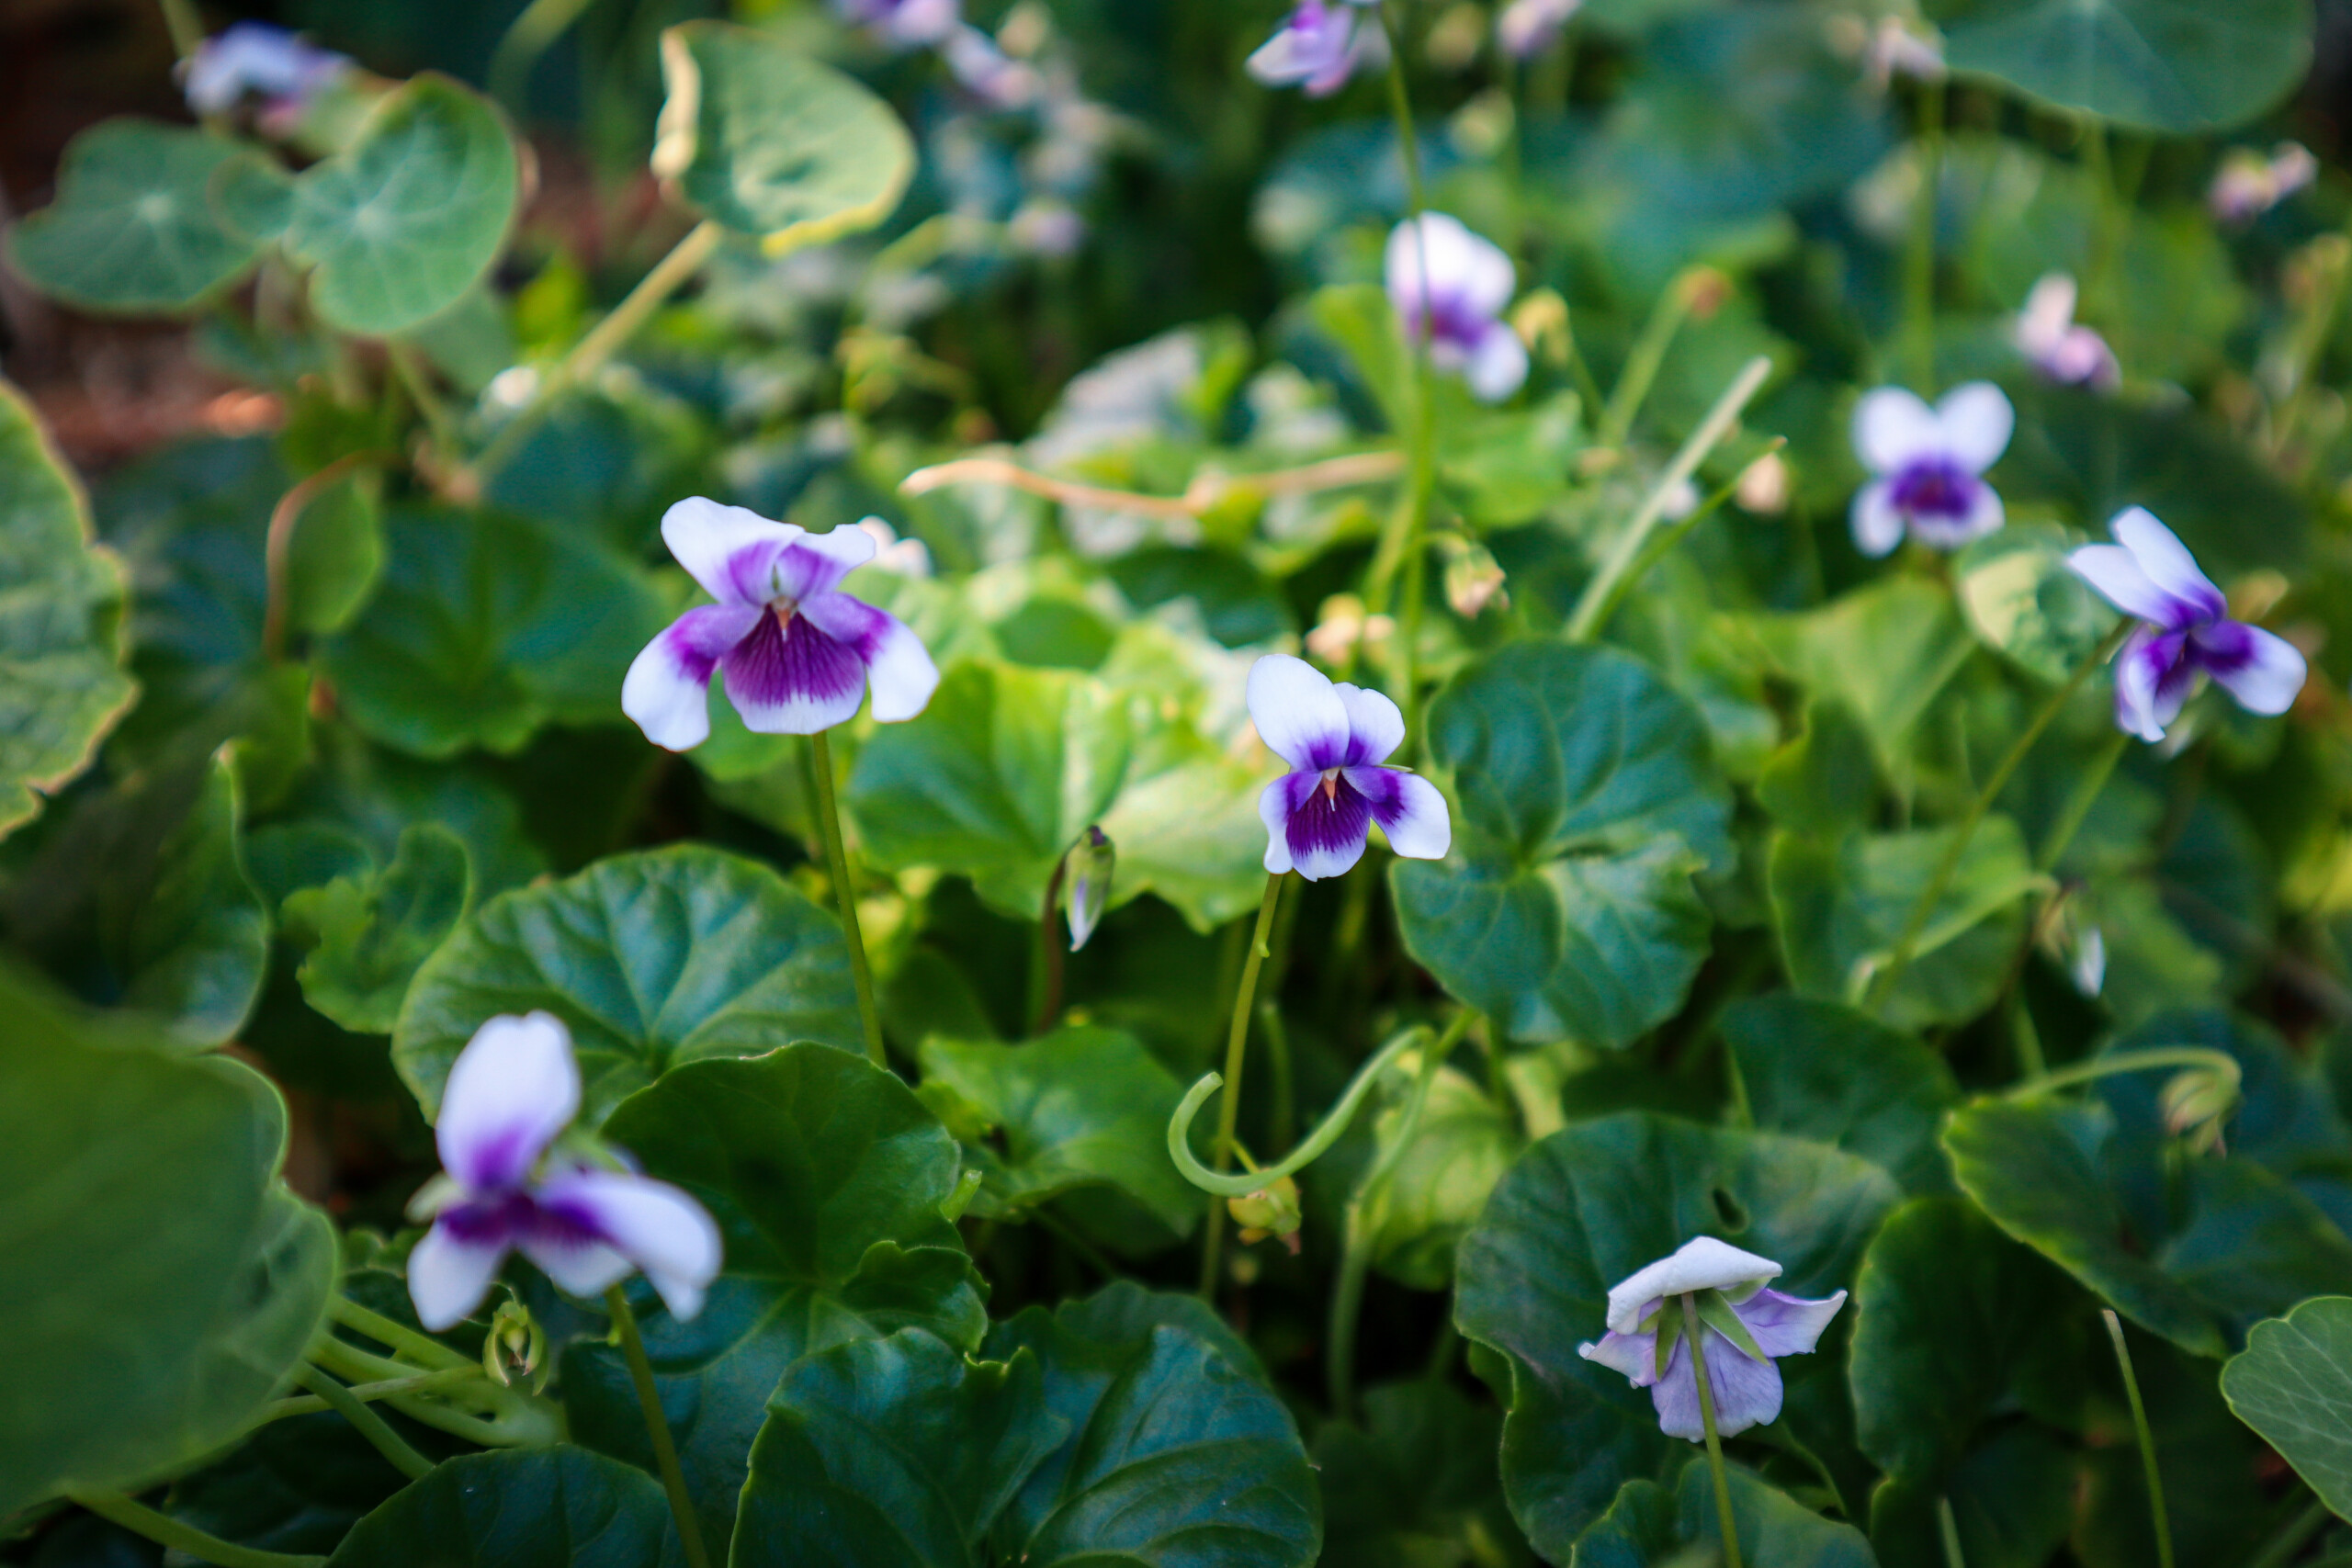
4. Sweet Violet
Sweet violets (Viola odorata) make a lovely ground cover for shady areas, which become more common as fruit trees mature and cast more shade. They have heart-shaped edible leaves and delicate purple flowers that make beautiful decorations for cakes and salads. While I usually use the flowers more than the leaves, the entire plant helps retain soil moisture and suppress weeds, making it an excellent living mulch.
5. Strawberries
Strawberries are a classic edible ground cover that needs little introduction. They spread easily, especially alpine varieties, and can handle partial shade. While their leaves and flowers are edible, the fruit is the real star. Just note they do better in sunnier patches of your garden.
6. Prostrate Rosemary
This low-trailing form of rosemary hugs the ground and is well-suited to hot, dry, sandy, or rocky soils. It’s evergreen, hardy, and incredibly useful in the kitchen. I love having rosemary nearby to flavor dishes, and the edible flowers are great for attracting bees. It also has a host of medicinal benefits—anti-inflammatory, digestive support, and calming properties.
7. Thyme & Oregano
Thyme and oregano are aromatic culinary herbs that make wonderful low-growing ground covers in sunny areas. Their spreading habit helps protect the soil, and both are drought-tolerant and resilient. These herbs can be used fresh or dried for flavoring food, making teas, and for natural remedies. Their tiny flowers also attract pollinators to your garden.
8. Yarrow
Yarrow is a powerhouse plant often overlooked as an edible. While the leaves can be used in teas or medicinally (always research before consuming), their greatest strengths in the garden are as a soil protector with dense fern-like leaves and a pollinator magnet. It has deep roots that help break up compacted soil and draw nutrients up to the surface, improving fertility over time. It sends runners underground, so it’s a good idea to treat this plant like you would mint and keep it contained to one area.
9. Chamomile
Chamomile creates a fragrant, low-growing cover that’s sometimes used as a lawn substitute. It’s most well-known for its daisy-like flowers, which are harvested for calming teas that support sleep and digestion. It thrives in sunny areas and adds a beautiful, soft texture to garden beds.
10. Red Clover
Red clover is one of those quiet achievers in the garden, it’s beautiful, useful, and so easy to grow. I love using it as a living mulch in my food forest because it grows low to the ground, helps suppress weeds, and is constantly feeding the soil with nitrogen through its roots. The bees absolutely adore the flowers, and if you’re into herbal teas, the blossoms are edible and can be harvested and dried too! It’s the kind of plant that gives so much without asking for much in return—perfect for filling in those bare spots while still being productive and pretty.
Many common weeds are edible and make great opportunistic ground covers. Purslane, for example, has succulent leaves rich in omega-3 fatty acids and grows rapidly to fill bare spots. Chickweed and dandelion also have edible and medicinal parts. While these can spread quickly, learning to identify and harvest them helps you turn a problem into a resource.
Living Mulch: Edible Ground Covers That Feed You and Your Garden
Start small by adding one or two edible ground covers to your garden beds or under fruit trees, and watch how quickly they transform the space. These hardworking plants not only fill gaps and reduce maintenance, but they also invite more life into your garden, as a wildlife habitat. Whether you’re building a full food forest or just looking to get more out of your patch, edible ground covers are one of the simplest ways to grow smarter, not harder.
Are you growing any edible plants as living mulch? Let us know below 👇
Links included in this post might be affiliate links. If you purchase a product or service with the links that I provide I may receive a small commission. There is no additional charge to you! Thank you for supporting my blog so that I can continue to provide you with free content.
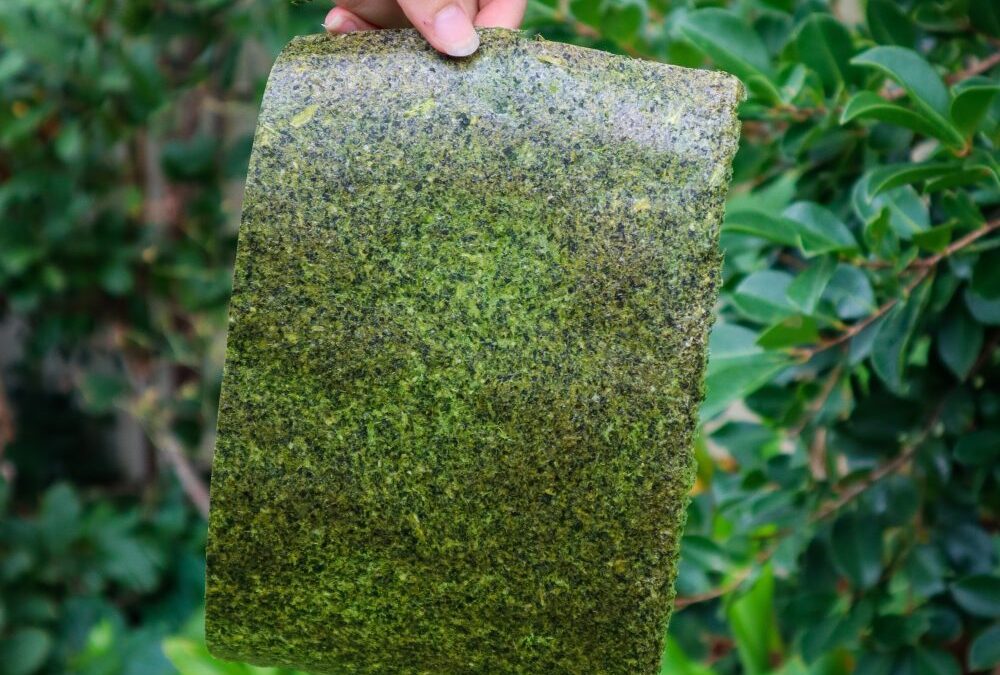
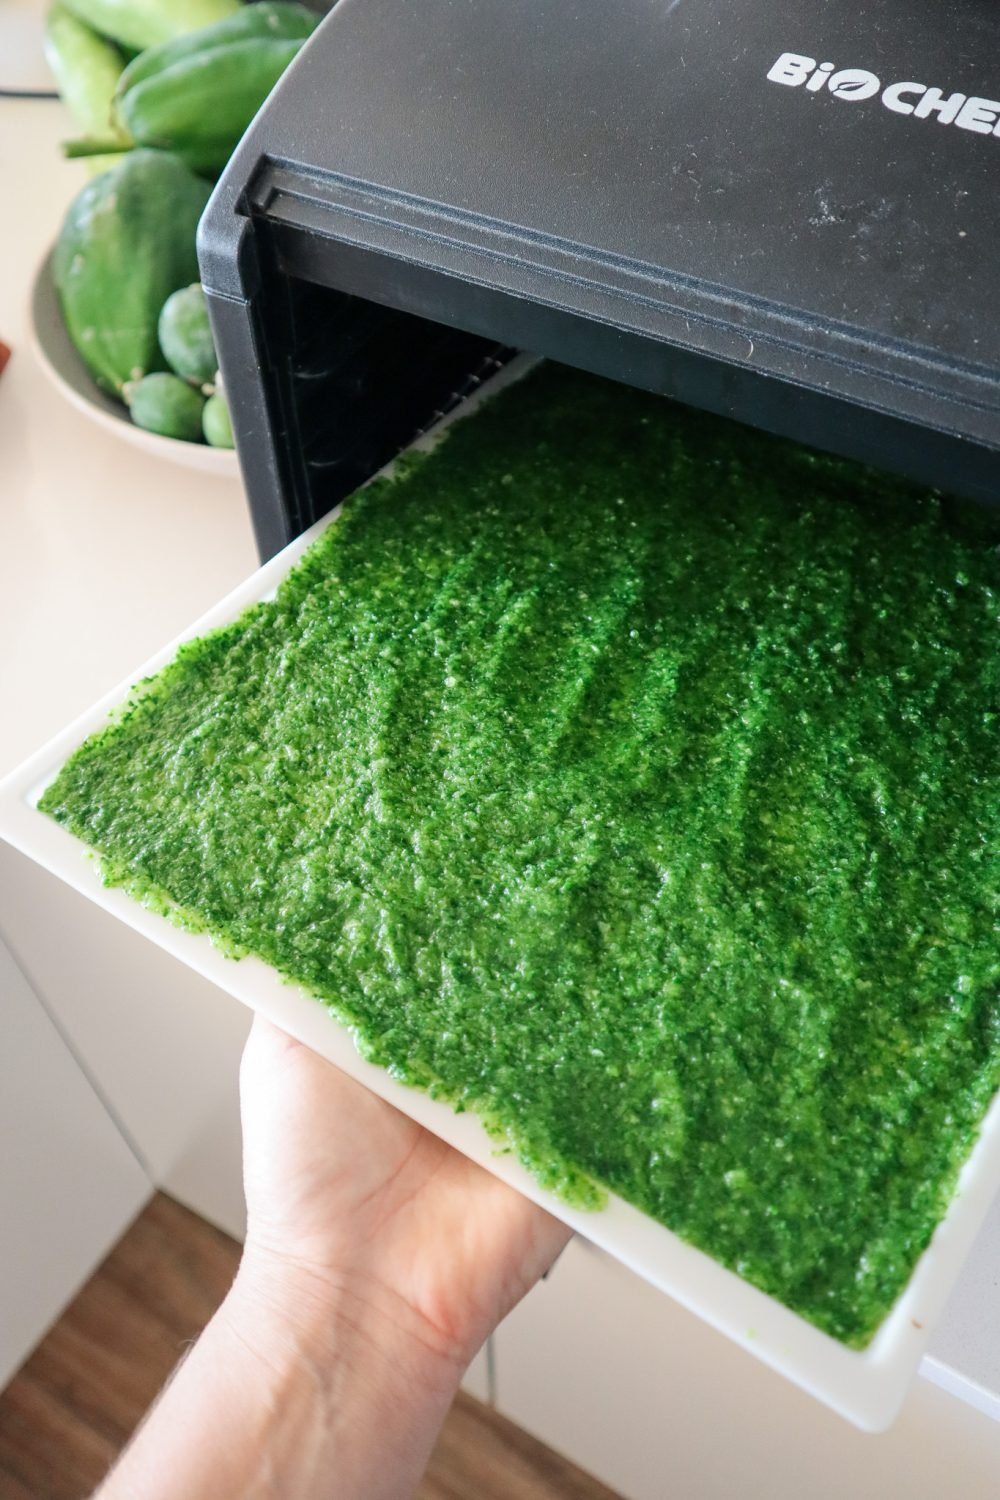
Looking for a healthy, homemade wrap alternative? These DIY spinach sushi wraps are a delicious and nutritious way to use up garden greens and create quick, wholesome meals. Whether you follow a gluten-free, low-carb, or plant-based lifestyle, these wraps are a game-changer. Made from fresh spinach, herbs, and garden vegetables, they’re packed with nutrients and completely free from preservatives and additives.
These wraps have the texture of nori but are 100% vegetable-based. Use them for sushi, wraps, or as a healthy tortilla alternative. This is the perfect recipe for zero-waste gardeners who want to make the most of their seasonal harvests. I am so impressed with how amazing these are!
These dehydrated spinach sushi wraps taste and feel just like the real deal but I know exactly what is in them. Use excess garden greens along with bottle gourd or zucchini to make a batch of sushi wraps for a quick and easy lunch. Like most of my recipes, you can mix and match different greens and herbs depending on what’s in season or in abundance in your garden.
Garden Vegetable Variations
Don’t have spinach? No problem. Try other leafy greens such as:
NZ spinach (Tetragonia)
Swiss chard
Rocket/arugula
Sweet potato leaves
Amaranth greens
You can even mix in edible weeds like chickweed or purslane for extra nutrition.
Recipe Notes
Psyllium Husk helps bind the mixture and gives flexibility.
Herbs are optional but add great flavor.
Dehydration Time varies depending on water content and thickness.
Spinach "sushi" wraps
Yield: 8
Prep Time: 10 minutes
Cook Time: 6 hours
Total Time: 6 hours10 minutes
Easy way to preserve excess produce and have wraps on hand for a quick garden-to-plate lunch when you need it.
Ingredients
4 cups spinach or greens*
1/2 cup fresh herbs*
1 TBSP psyllium husk
1 - 2 TBSP water
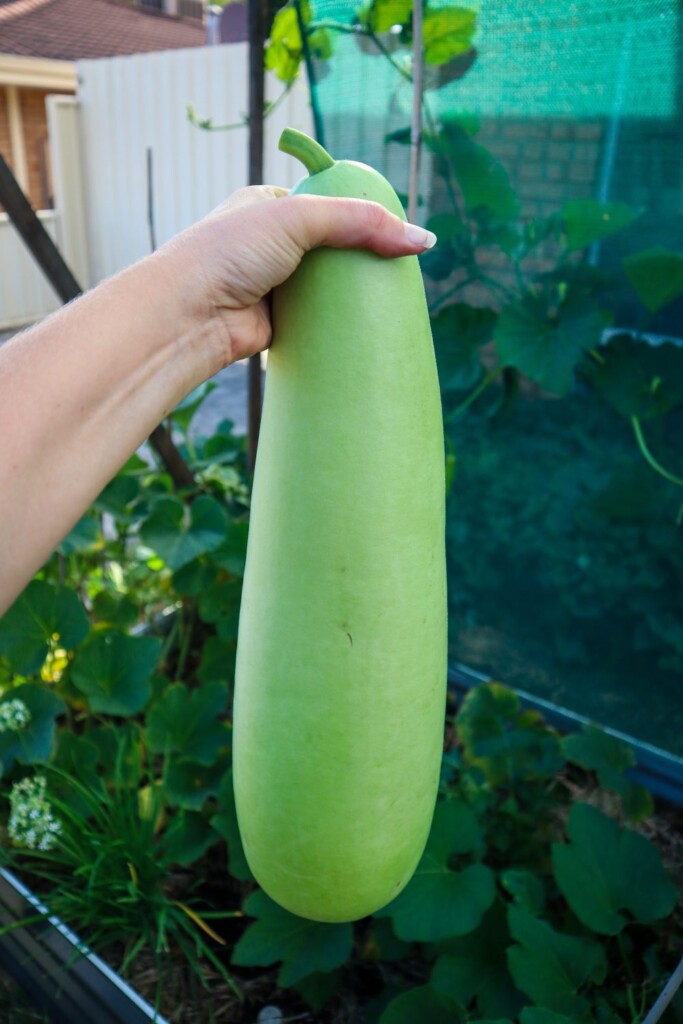
2 cups chopped bottle of gourd or zucchini
Instructions
Rinse the greens and quickly blanch for 30 seconds in hot water then transfer to iced water to cool.
Strain and add to a mixer or blender. (use the blanching water on the garden once it has cooled down)
Peel Bottle gourd using a vegetable peeler, remove the center seeds and pith then chop into 2-3cm cubes. If using zucchini there is no need to peel.
Add all the ingredients to a blender or mixer and blitz until combined. You may need to move things about with a spoon to get it mixed or add a dash more water. You want a thick paste-like consistency not too watery.
Spread the mixture onto 3-4 silicon dehydrator trays. You may need to do this in batches or use baking paper and a tray if you do not have enough of the silicon trays. The mixture should be thick enough to not see through to the tray or paper but also as thin and even as you can (before seeing through to the tray)
Dehydrate at 50 degrees celsius until dry. Check after 2-3 hours as the time will vary depending on the water content of the greens you used.
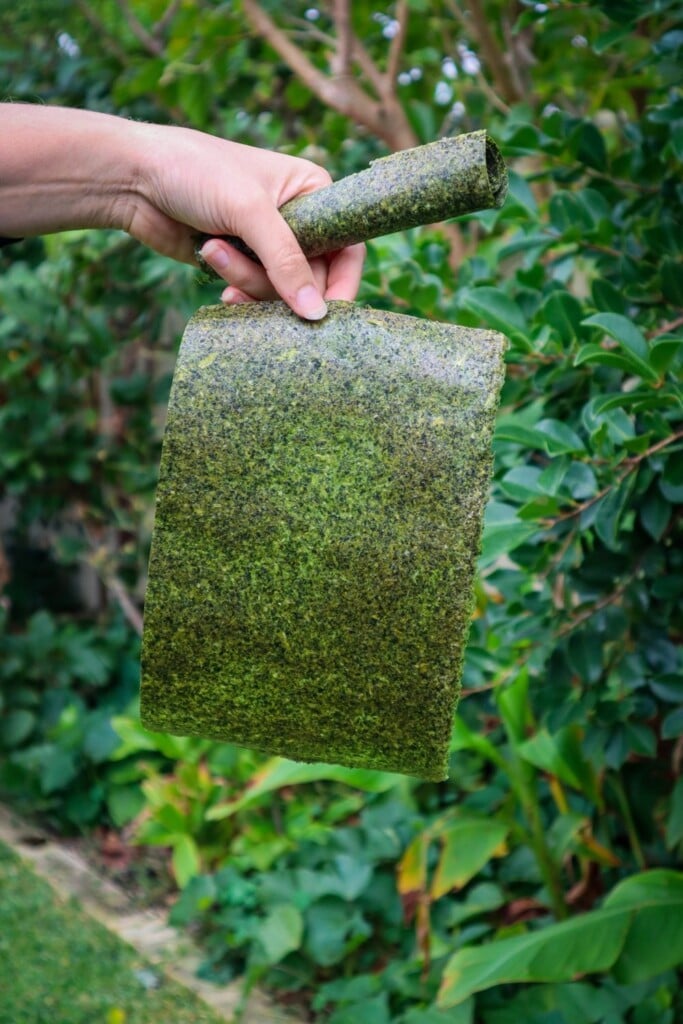
Remove and carefully run a knife around the edges to loosen it. Carefully peel off the sheet it is best to do this one bit at a time holding the sheet as close to the tray as possible as to not tear it.
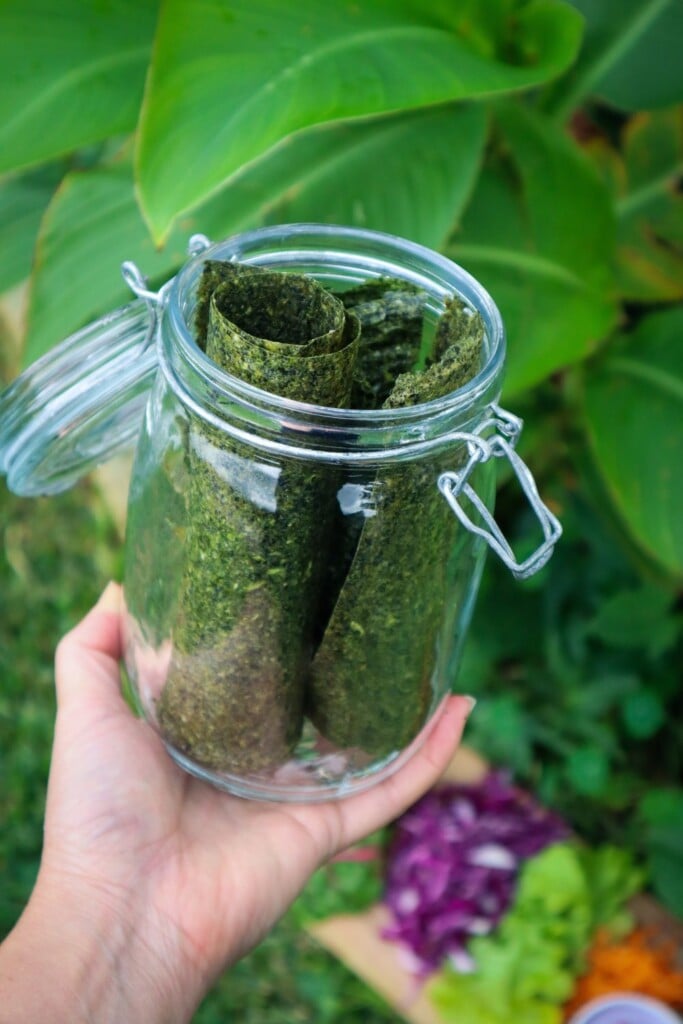
Once removed from the tray cut the sheets into the desired size (I cut in half for wraps but I keep them whole for sushi rolls) then roll them up and place them in an airtight storage jar. Or use them straight away. would
Use the wraps with your favorite salad ingredients and grilled chicken, haloumi or similar.
Notes
Greens - I used NZ spinach including the young stems but you could use any spinach or greens such as chard, rocket, sweet potato leaves etc just remove any thick stems.
Herbs - add herbs or leave them out (replace with more greens) completely up to you. Try adding 1/2 cup of herb such as parsley, chives or coriander for added flavour.
If you do not have a dehydrator you can use an oven on low to 50 degrees but be aware it may take up 6 hours so ensure you are home and not leaving the oven unattended.
These homemade spinach sushi wraps are a sustainable way to reduce kitchen waste and boost your nutrition. Whether you’re preserving an abundant garden harvest or just trying to eat healthier, they’re a delicious, eco-friendly addition to your kitchen staples.
Have odd fruit and veggies to use up? This leftover breakfast loaf is a great way to reduce waste and make a delicious and healthy breakfast (or anytime) alternative. This recipe is flexible to allow a range of fruits, nuts, and seeds you have available.
Leftover Breakfast Loaf
Prep Time: 15 minutes
Cook Time: 45 minutes
Additional Time: 20 minutes
Total Time: 1 hour20 minutes
Have random odd fruit and veggies that need to be used up? This leftover breakfast loaf is a delicious way to make sure they don't go to waste.
Ingredients
Dry ingredients
2 cups flour
1 cup oats
1 tsp cinnamon
1 tsp mixed spice
1 TBSP Baking Powder
1/2 cup seeds (i used 50:50 pumpkin and sunflower)
1/2 cup walnuts (choose your favourite nuts)
1 TBSP Poppy Seeds
1/2 cup chopped mixed dried fruit (Goji berries, apricot, raisons)
Wet ingredients
1/2 cup coconut oil (liquid)
1/2 cup quality maple syrup
3/4 cup oat milk (or preferred milk)
Fruit & Veggies
1 cup grated zucchini
1 cup grated carrot
1 cup chopped greens/ spinach
1 cup grated pear (or apple)
1 cup diced Apricot & strawberry (swap for berries or cherries)
Instructions
Preheat oven to 180 degrees.
Mix dry ingredients in a bowl.
Grate and add chopped fruit and veggies to a bowl along with all the wet ingredients. Stir to combine.
Fold in the dry to the wet mix and combine with minimal mixing (don't over-mix).
Grease a loaf or bread tin and add in the mix. Bake for 45 minutes or until the skewer comes out clean.
If there is a little too much for the tin ( in my case) add to muffin trays (but these will only take 20 minutes).
Allow the tin to cool for 10 minutes then remove the loaf and cool for a further 10-15mins on a wire rack (do not slice straight out of the oven or it will fall apart and turn dry).
Notes
To freeze the extra loaf cut it into slices first and pop it in the compostable ziplock bags.
Mix and match fruit, veggies, nuts, and seeds to make your own delicious blends.
Frozen berries can be used add them in frozen don't thaw them out first.
Soft pillowy spinach gnocchi with crispy potato skins. Serve with herbed butter or the simple roasted tomato sauce recipe. Delicious! Unlike most spinach varieties the NZ Spinach / Warrigal greens produce in abundance over the summer! This edible ground cover is a powerhouse in the garden and pairs well with so many dishes. Spinach gnocchi is so vibrant and delicious! Making gnocchi can seem scary but this recipe has just 4 ingredients and is so worth it! I have used NZ spinach but you could swap it out for regular spinach, chard, or any other leafy greens you have growing in the garden.
Most recipes call for the skins to be removed so after the potatoes are baked we fry them up and add them on top for a low-waste delicious meal!
Which Potatoes work best?
Floury potatoes work best (not waxy) such as Desiree, Yukon Gold, and Creme Royle. AVOID – Red Royle, Kipler. Normal “white potatoes” at the supermarkets tend to be quite waxy. This means your gnocchi will have more little lumps in but still possible.
Can I use different greens?
Yes! I love my recipes to be flexible with what is in season and growing in my garden. Try swapping NZ spinach for: Chard (remove stalks and fry them up to add to the dish), other spinach varieties, Kale, Beetroot leaves, Sweet potato leaves, or a mixed combination!
NZ Spinach Gnocchi with Crispy Potato skins
Yield: serves 4
Prep Time: 45 minutes
Cook Time: 1 hour30 minutes
Total Time: 2 hours15 minutes
Soft pillowy spinach gnocchi with crispy potato skins. Serve with herbed butter or the simple roasted tomato sauce recipe. Delicious!
Ingredients
Spinach Gnocchi
4 medium-large potatoes (see notes)
2 cups NZ Spinach (or other leafy greens such as chard or spinach)
1 1/4 cups flour (see notes)
1 tsp salt
Crispy Potato Skins
1-2 sprigs of fresh Thyme
1 TBSP Butter
Instructions
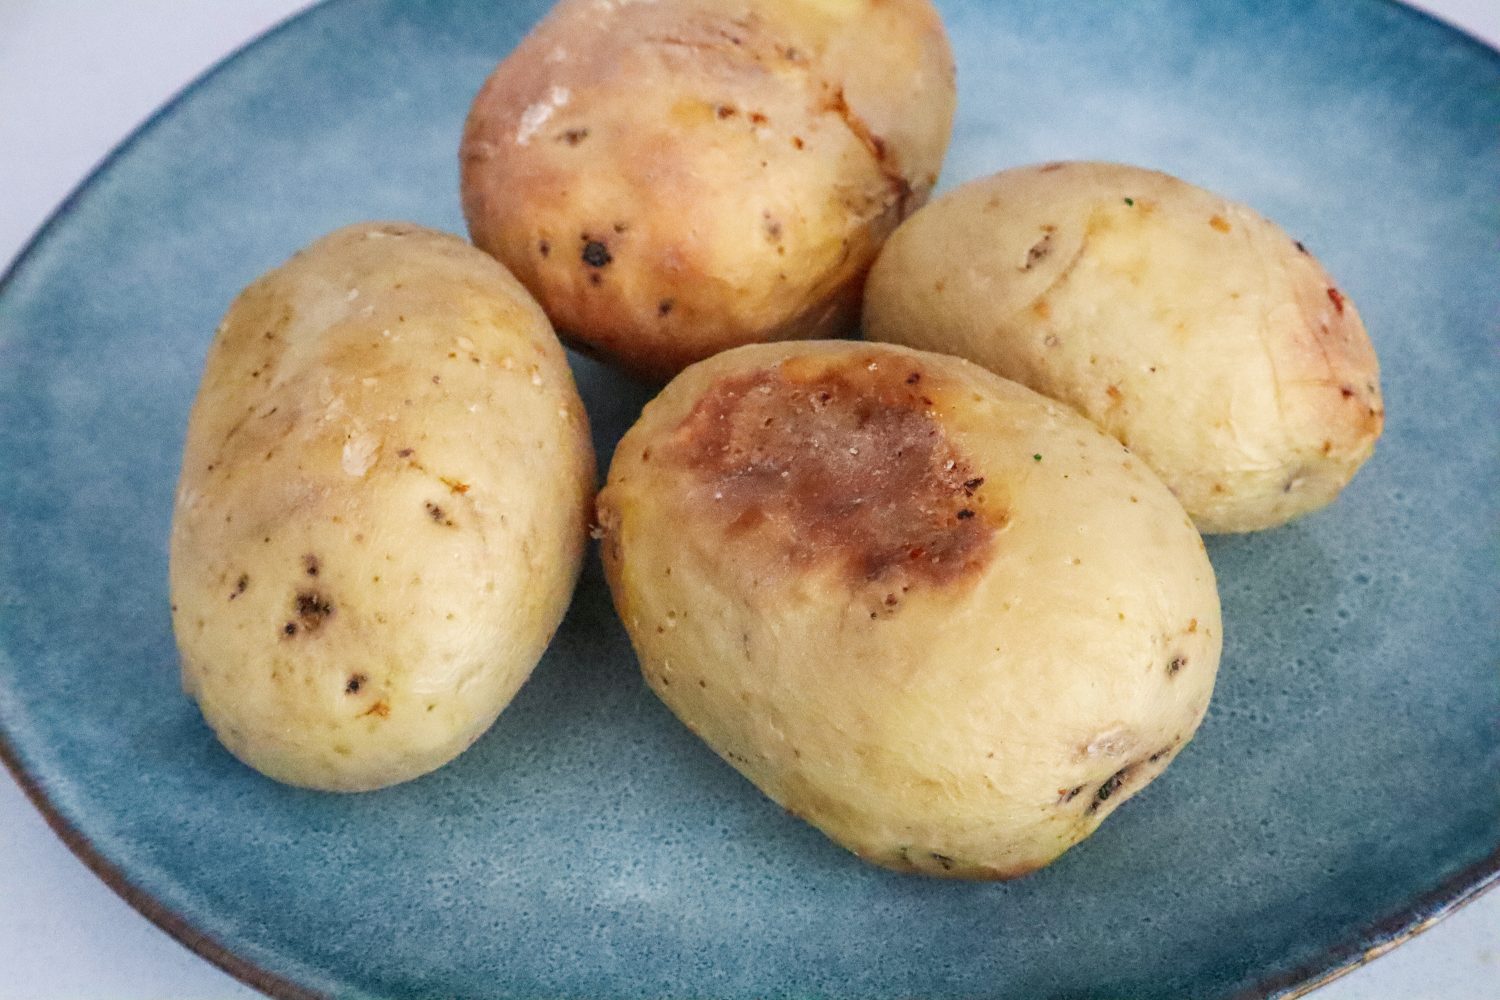
Preheat oven to 180 degrees. Wash your potatoes and stab holes all over with a fork. Sprinkle with 1/2 tsp of salt and bake for 45-1hour or until a fork easily goes right through. If some are larger than others keep them in a little longer. You don't want any hard potato bits for this.
While the potatoes cook blanch your greens. Remove hard stems and cook them in simmering water until vibrant green (40 seconds - 1 minute) then plunge into a bowl of iced water. Strain and blitz using a blender or mixer until a puree. Add a splash of water if needed to get blended.
Remove potatoes from the oven and allow them to cool (until you can easily peel them).
Peel the skins off using a knife or just peel them back with your fingers. They are quite easy to peel once the skin is cooked and slightly golden. Don't waste these delicious skins! Put them on a plate and set them aside.
Mash the potatoes into a fine mash. Use a potato ricer or a potato masher and fork to get all the little lumps out.
Add mashed potato to a bowl and mix in 1/2 cup of greens puree and 1 tsp salt. Mix until fully combined.
Add in flour in parts and mix to form a dough. You may need a little less or a little more flour depending on how much moisture was in the potatoes and greens. You want it to still be slightly sticky but easy enough to roll. Similar to cookie dough. The more flour you add the tougher they get so try to keep less is more approach but it needs to be workable.
Divide the dough into 1/4s and roll long sausage lengths onto a floured surface. Cut into 1-inch lengths.
Have a floured tray or plate ready to put your finished gnocchi on.
Using your thumb push down and roll each gnocchi piece over the back of a fork or a gnocchi board ($4 at most kitchen stores) to create the lines. This is optional. The lines make them look the part and also allow more space for flavour to cling to.
In a pan add butter and thyme and fry potato skins until crispy. Set aside.
There are two ways to cook gnocchi - boiled or pan-fried, both are delicious. For this recipe, I used the boiling method because I was serving it with crispy potato skins. To boil add your gnocchi to a pot of boiling water seasoned with salt. Cook until they float to the surface (roughly 1 minute). Do this in batches so you don't overcrowd the pot and all the gnocchi have room to float to the surface. Strain and add to a serving bowl. To pan fry - add butter or oil to a pan (chuck in some more thyme and cook the gnocchi until slightly golden on each side)
Pour over hot tomato sauce or herb-infused brown butter and top with crispy potato skins.
Notes
Make the tomato sauce at the same time while you wait for your potatoes to cook. Tomatoes can be roasted in the oven along with the potatoes.
Choosing potatoes - Floury potatoes work best (not waxy) such as Desiree, Yukon Gold, and Creme Royle. AVOID - Red Royle, Kipler. Normal "white potatoes" at the supermarkets tend to be quite waxy. This means your gnocchi will have more little lumps in but still possible.
Flour - low protein flour is best for Gnocchi but all-purpose flour also works.
Made extra? Freeze your uncooked gnocchi pieces on a floured tray and once frozen add them to a freezer bag or container. Next time you want a meal simply pull out and boil from frozen or defrost and panfry.
Simple Roast Tomato Sauce
Yield: 2 cups / 400-500g
Prep Time: 10 minutes
Cook Time: 45 minutes
Additional Time: 5 minutes
Total Time: 1 hour
Simple and delicious tomato sauce. Staple condiment and the backbone of so many garden-to-plate dishes!
Ingredients
6-8 medium tomatoes (or 2-3 cups of cherry tomatoes)
2-3 Garlic cloves
1 tsp salt
4 TSBP Olive oil
1 medium brown onion
1 TBSP Balsamic vinegar
5-6 sprigs of fresh thyme (2inch long)
1/2 cup fresh basil
1/2 tsp chilli flakes
Instructions
Preheat oven to 180 degrees Celcius. Drizzle roughly 1 TSBP oil in a roast dish.
Cut tomatoes in half and add to the roasting dish skin side down. Add Garlic cloves (skin on) and thyme throughout the tomatoes.
Drizzle another TBSP of olive oil on top and season with salt.
Roast for 40-45 minutes until cooked and slightly golden. Time will be significantly less for cherry tomatoes (20 minutes).
While the tomatoes are roasting, dice the onion and add to a pan with 1 TBSP olive oil. Cook until soft and slightly brown. Pour in the balsamic and deglaze the pan (get all the delicious flavour off the bottom). Remove from the heat.
Remove the garlic from the skins and add the roasted ingredients to a blender (or jug and use a stick mixer). Allow the tomatoes to cool slightly before blitzing so the mixture isn't piping hot. Add in the chopped fresh basil, chilli flakes, and cooked onions. Blitz to combine. Smooth or chunky however you prefer.
Taste and season with extra salt or chilli to your liking.
Notes
Tomatoes will have varying amounts of liquid. If you get a lot of liquid in the bottom of the roasting dish, pour some to the side and blitz then add if you want a runnier sauce.
Add excess to a jar and keep in the fridge for 2-3 days or freeze for longer storage.