Learn how to grow Avocado (Persea americana) at home and what to make with your abundant avocado crops! Avocado is a popular fruit that can be a little tricky to grow. Choosing the right variety for your climate and getting some key care points right should have you picking homegrown avocados for years to come!
Avocados can be used as evergreen shade trees or grown in pots for urban areas. Avocado trees can reach heights of 12+ meters if they are not pruned. Smaller dwarf trees will reach maximum heights of around 4 meters, but can also be pruned to keep them smaller.
Avocados are best grown from grafted trees. Growing an Avocado from seed can take anywhere from 4 to 13 years or longer to get fruit. Even then, you have no idea what the fruit will be like, as it will not be identical to the plant the seed came from. Grafted trees have mature fruiting stems grafted onto allow the tree to bear fruit within a year or two.
Free-draining compost-rich soil.Mounded above ground in clay soil.
LOCATION
Full sun – part. 6-8 hours.Can benefit from afternoon shade.
CARE
Keep weed-free and well-mulched.Protect from wind and hot afternoon sun when young.
FERTILISE
Feed with compost and mulch.
PESTS
Excess water and fungal diseases are the most common cause. Rats may eat the fruit.
HARVEST
Fruit takes about 1 year on the tree to ripen. Skin goes dull and some may drop from the tree.
REPRODUCE
Can be grown by seed but may take 10+ years to fruit. Mature wood grafted from fruiting-age trees is best.
Why Grow Your Own Avocado?
Here are some of the many reasons to grow Avocados.
Evergreen shade-giving tree
Perennial crops
It can be expensive to buy!
Can be used in sweet and savoury dishes
Prolific producer
Long harvests
High in vitamin E and folate
High in fibre
Substitute for butter
Popular Avocado Varieties to Grow
Avocados come in A and B varieties. Each type flowers has male and female at different times of the day. Having both an A and a B-type Avocado will mean you will get more avocados due to an increase in pollination. Most avocados will be self-fertile, but having a second will increase the amount you get. Dwarf or semi-dwarf avocados will grow to be smaller trees, but unlike other dwarf fruit trees, they will still be up to 4m high. Keeping them pruned can maintain their size.
Type (A) Varieties
Hass – Popular small dark-skinned avocado. Most commonly found in stores due to its tough skin for transport. Small fruit, a great producer.
Reed – Large green round fruit 200-800 grams. Mild and buttery flavour. The tree tends to grow upright rather than outwards.
Choquette – Large green round fruit weighing over 1kg! Creamy, rich flesh. A cross between a Guatemalan and a West Indian type.
Semi Dwarf
Lamb Hass – Large dark-skinned avocado. Semi-dwarf tree growing 3-4 metres. Late-season fruits.
Pinkerton – Medium-sized green-skinned fruit. Semi-dwarf tree growing 3-4 metres. High oil content.
Wurtz – Medium-sized green pear-shaped fruit. Semi-dwarf tree growing 3-4 metres. Weeping branches that hang downward.
Type (B) Varieties
Shepard – Popular commercial variety. Green skin and yellow firm flesh. Smaller tree size 6-8 metres.
Bacon – Most cold-tolerant variety (may survive -5 degrees). Large pear-shaped fruit with green skin.
Fuerte – Small – medium-sized green fruit. Thin skin and buttery flesh. Produces both normal-sized and mini seedless avocados called “cukes”. Crops more biannually (every second season). Vigorous spreading tree.
Zutano – Pear-shaped fruit with green glossy skin. Low oil content and can be quite watery.
Sharwill – Medium-sized oval fruit with green skin. Rich flavour and small seeds. Frost sensitive.
Linda – Large fruit with dark purple skin. Fruits from 400-1100g each. Thick skin that is easy to peel.
TOP TIPS TO GROW AVOCADO
Choose a sunny location
Shelter from the wind or able to create shelter
Prepare the soil with plenty of compost
Free draining is key!
Avocados hate clay soils – mound up above the ground rather than planting down in a hole
Do not disturb roots when removing from the pot!
Protect from the hot afternoon sun
Keep grass and weeds away from the base
Keep weed-free and well-mulched
When to PlantAvocados
Avocados don’t like the cold or the extreme heat, so avoid planting them in winter or summer. Choose a day when the weather will be mild for a few consecutive days.
How to Grow an Avocado
Choose a sunny location with 6-8 hours of sunlight.
Choose a location that can be protected from winds (shade cloth can help)
Dig a hole and prepare the soil with compost. Mix compost and sandy soil together. For clay soils, backfill with compost and sandy soil, and create a mound above the ground.
Carefully remove the Avocado carefully by cutting the bag or gently easing it from the pot. Try not to disturb roots when possible.
Gently push soil against the root ball and push down with your hands to remove air pockets.
Add a stake to help secure the tree, but do not push it through the root ball.
Add mulch as wide as you can approx 1m but pull back from the trunk so it does not touch (this can cause collar rot)
Add a shelter of shade cloth to the side that gets wind and afternoon hot sun.
Paint any exposed stems with water-based white paint (nontoxic) at a ratio of about 50% paint and 50% water. This acts as sunscreen, which is important for Perth summers!
Care/ Maintenance
Avocados like plenty of food, regular top-ups with compost and mulch are important. The biggest issue with Avocados is too much water, sun or wind.
Feeding
Feed with compost or composted manure at the end of winter, before spring, and end of summer.
Watering
Deep water, especially in summer. Push your finger into the soil to the second knuckle; if it comes out dry, water well. If the soil on your finger sticks and is mois,t leave it be.
Harvesting
Avocados, like many fruit trees, should be prevented from fruiting for the first 1-3 years. Wait until the flowers sprout on long stems, then remove them. Once you start letting your Avocado fruit, it will take 1 year from when the fruit sets until it is ready to harvest. Some Avocados stay green when they are ready and ripen off the tree, so here are a few ways to tell if they are ready to pick.
Skin turns from glossy to dull
Stem lightens
It’s within the varieties’ “mature fruit months” (research for your variety and area)
Pick one and let it ripen on the bench for a week or two. If it is delicious and buttery, you can harvest more. If it shrivels and goes black, it is not ready and try again in 2-3 weeks.
Fruit starts falling on the ground.
Pruning
The Avocado tree can grow to be a huge 10 m+ tree if left unpruned. Once your tree reaches 2m or your desired height, you can start pruning it. Be selective and try to remove branches whilst still allowing shade to the other parts of the tree. Try not to remove the bottom “skirt branches” as these protect the stem from being burnt. If once you prune the tree, there are areas of stem exposed, paint with white water-based paint (50:50 water mixed) to add protection.
Pests / Disease
Avocados mainly succumb to bacterial diseases due to excess water. Don’t water the leaves when possible and allow good drainage for the roots.
Reproducing
Seeds from the Avocados can be grown and will produce a new variety. Seed-grown Avocados can take 10+ years to actually fruit, and you never know what the fruit will be like. The best way to reproduce is to grow an Avocado from seed and then graft onto it from a tree that is already fruiting and mature. But also, if you have the room, there is no reason not to try seed-grown as you may end up with an exciting new variety.
Cooking and Using
Avocado is a powerhouse in the kitchen and can be used in a wide array of ways.
Learn how to grow Kumquat trees at home and what to make with your harvests with this ultimate guide! Kumquats (Citrus japonica and hybrids) or Cumquats are very ornamental citrus that produce masses of small fruit. Kumquats can be eaten straight from the tree, with the skin being edible too. They make beautiful, abundant additions to the garden, especially if you like jams and marmalades.
Kumquats are evergreen and provide dense bushy foliage, which makes them great for wind protection or screening.
Can be grown by seed but may differ from the parent plant.
Why Grow Kumquats at home?
Here are some of the many reasons to grow Kumquat
Hardy, low-maintenance fruit tree
Perennial
Ornamental and edible
Prolific producer
Dense busy shrub
Grows well in pots and containers
The whole fruit is edible
Great for making jams and preserves
Popular Kumquat Varieties
Nagami – Japanese variety with small oval-shaped fruit. Bright orange when ready. Sweet skin and tart flesh. 1-2 seeds in each fruit.
Meiwa – Larger round orange fruits. Sweet skin and flesh. A hybrid of Nagami and Marumi varieties.
Marumi – Round fruits that are quite sour or tart. Mainly used for preserving.
Variegated Kumquat – Stand out ornamental variegated leaves and fruit. Variegation disappears on fruit usually once ripe. Also known as Calamondin or Calamansi.
TOP TIPS TO GROW KUMQUAT
Choose a sunny location
Mulcharound the base (avoid touching the trunk)
Free-draining, slightly acidic soil
When to PlantKumquat
Ideally, plant your trees in Spring or Autumn. If you are growing in containers, protect new plants from extreme heat or cold.
How to GrowKumquat
Choose a sunny location with 6-8 hours of sunlight.
Dig a hole twice as big as the pot and loosen the roots if they are tightly bound.
Free-draining soil with compost.
Mulch to regulate temperatures and reduce weeds.
Give it a deep water.
Care/ Maintenance
Feeding
Feed with compost or liquid fertilisers in late winter after fruiting.
Watering
Deep water especially in summer.
Pruning
Prune after fruiting for shape. This can make it denser and bushier. Always check and remove growth below the graft.
The great thing about growing Kumquats is that they can last a long time ripe on the tree. This makes them really beautiful and ornamental and gives you time to preserve the fruit in batches. The fruit is ready when it is rich in colour. It can be a good idea to harvest using scissors or snips as the branches are thin and can rip or break if you pull the fruit off.
Reproducing
Kumquats often have 1-2 seeds inside. These can be grown, but results can vary but why not give it a try! Most citrus are grafted onto rootstock for disease resistance.
Cooking and Using
Kumquats fruit prolifically, so it’s a good idea to have a few recipes on hand. The great thing is that you don’t need to peel them as the skin is edible too!
Kumquats can be made into jams, chutney, marmalade, and relish. They can also be preserved whole in salt or liquor. Dehydrating slices is another easy way to preserve the harvest.
Learn how to grow Feijoa and what to make with their abundant crops! Feijoas or Pineapple Guava (Feijoa Sellowiana) are an abundant-producing fruit tree with green, sweet-tasting fruit. The trees are evergreen with dark green and silver foliage. Feijoas are easy to grow and, due to their thick foliage, they make a great screening tree or edible hedge!
This fruit tree is a prolific producer and can grow in a range of climates from temperate to subtropical, but grows best from zones 8-11.
Prune for size in autumn. Keep well watered in summer when fruiting.
FERTILISE
Feed with compost and keep well mulched.
PESTS
Rats, fruit flies, birds, guava moth, possums, scale.
HARVEST
Ripe when they fall from the tree. Collect daily.
REPRODUCE
Can grow from seed but best results are from grafted plants.
Why Grow Feijoa?
Here are some of the many reasons to grow Feijoa
It produces in abundance!
It is self-fertile
Evergreen – ornamental all year round
Delicious juicy fruit that are sweet with a perfumey flavor
Green fruit, which is harder to see from pests
Hardy tree – easy to grow
The whole fruit is edible!
Flowers are edible
Foliage is said to have fire-retardant qualities
Drought tolerant
Dense foliage can be pruned into a hedge for screening areas
Popular Feijoa Varieties
Feijoas are commonly sold as seedling plants under the name Pineapple Guava or Feijoa Sellowiana these will perform with mixed results and can take 6+ years to start fruiting. Choosing a grafted or named variety will offer a quicker-producing tree that will be true to type. Varieties will vary from country to country.
Duffy – Medium – large-sized fruit. Popular all-around variety.
White Goose – Large fruit with juicy white flesh. Early season fruiting that can last quite a long time.
Mammoth – Large round fruit with thick wrinkled skin. Can benefit from a pollinator tree. Tall upright tree.
Apollo – Medium – large oval fruit. Smooth light green skin. Tall upright tree. Semi-self-fertile – benefits from another pollinator tree.
Unique – Medium-sized fruit. Smooth, juicy, and sweet. Starts fruiting from a young age.
Triumph –Medium-sized fruit. Slightly gritty but good flavour. Late season bearing.
Nazemetz – Large oval/pear-shaped fruit. Smooth skin with sweet flesh. Self-fertile but will bear heavily with cross-pollination.
QUICK TIPSON HOW TO GROW FEIJOA
Choose a named variety (x2 different ones for bonus pollination)
Choose a sunny location
Add plenty of compost
Mulch
Ensure plenty of water during fruiting (summer)
Fruit is ready in Autumn
When to PlantFeijoa Trees
Plant your Feijoa plants in Spring or Autumn to avoid added stress from summer and winter temperatures.
How to GrowFeijoa
To plant your Feijoa, pick a sunny spot, they like full sun for 6-8 hours at least. And quite a bit of space, as these trees will grow quite large (2-5m). You can prune them back heavily though, so it’s not a major issue. They will also grow well in a large pot.
Dig a hole twice as big as the pot and mix a little compost in with the soil. If your plant has tightly bound roots, free them up before planting them out. Firmly pack the soil back around and cover it with mulch. Just pull back the mulch from the trunk so you don’t rot the trunk. Feijoas have shallow feeder roots so keep weeds and plants at a minimum under the tree line.
Give it big water! Now you basically don’t have to do anything for the first couple of years except keep it watered, especially during the dry season. You may get flowers in the first year or it makes take a couple of years until it is established enough to put out flowers. It flowers in spring and the fruits are usually ready and ripe in Autumn.
How to Care and Maintain Feijoa Trees
Feeding
Once your tree is established and starting to flower and fruit you can look at more fertilizing and watering. You can feed your plants near the end of winter, spring, and summer with compost or worm teas, or liquid seaweed. I don’t do a lot of feeding but I do chop and drop the prunings and add layers of mulch each year.
Watering
Another key tipis to ensure your plants get plenty of water during summer and late summer as the fruits are developing. This is something we struggle with here in Perth because we basically get no rain in summer. This last summer was so dry in Perth, and my trees were loaded with fruit. I obviously didn’t water them enough for the amount of fruit they had and the results are a strange hollow center. The fruit still tastes delicious, just not quite as juicy as it should be.
So I will have more mulch and more water next season. From memory, I was only hand watering max twice a week, and it was extremely hot here, so I’m not surprised really.
Pruning
Once your feijoas have finished fruiting, and you have picked up all the dropped fruit. It can be a good time to prune your trees if you want. I like to prune mine each year so that the fruit is always within reach. Otherwise, it ends up over the neighbor’s fence or is bruised from falling so far to the ground. Feijoas love a prune and it can actually improve fruiting. I cut back about 20-30% each year and I find that it grows back about that much so my trees stay relatively the same height by doing this.
Plus, by cutting back 20% of the tree, I get a whole lot of green material to chop and drop. In my food forest-style garden, I don’t remove anything so all prunings go directly back into the garden. I prune using hedge shears or loppers for larger branches and then run them through my small mulcher. You can also chop them into small pieces, then lay them around the trees. This will break down and act as a natural fertilizer.
Pollination
You may notice lots of small birds in your trees when they are flowering. Don’t worry as they are helping pollinate the flowers. They harvest the nectar and also eat the petals but generally allow the main flower to stay put and fruit. Bees and small birds are the main types of pollinators.
One tree will still perform amazingly as they are self-fertile but having multiple just increases your harvests. It can also extend your season. Meaning different varieties take longer or shorter to flower or ripen and you can get extended harvests.
One thing to note is that feijoas ripen quickly and in bulk. So they come in hard and fast.
Pests / Disease
Rats and possums will love your fruit, and also parrots and birds. You may want to net or bag fruits if you are worried. I definitely have rats and parrots but so far I haven’t needed to bag fruit as they are doing minimal damage to my large harvests. Fruit flies and guava moths are also a problem in other areas. Again, this would mean you need to bag the fruit or net the tree when the fruit is young before they get stung.
How/ When to HarvestFeijoa
Now comes the fun part – harvesting. How do we tell when the fruit is ripe if it remains green? Well, it falls off the tree. So each morning, you can go out and pick up all the fruit from the ground. It is important to pick all the fruit up because otherwise, you will attract pests like rats and possums, or fruit flies. Feijoas do continue to ripen off the tree so you want to eat them quite quickly or use and preserve them. I like the tartness of fresh feijoas, and they get sweeter and more perfumy as they ripen, which is why I never like feijoas from the stores, as I find them too overripe.
Most people will cut the fruit in half and scoop out the inside to eat but you can eat the whole fruit. Especially when they are quite ripe the skin is sour and the inside is sweet it has a nice balance.
Reproducing
Ripe feijoas may have small brown seeds inside. These can be planted in moist soil. Feijoas do not grow true to type from seed so they may produce fruit different from the one you saved the seeds from.
Ways to cook and use Feijoa
Feijoas are delicious when eaten fresh off the tree. You can eat the whole fruit or cut it in half and scoop out the insides. Once they fall from the tree, they may still be a little tart. Allow them to ripen for a few days, and they will become softer, sweeter, and juicier. However, they will continue to ripen and become over-ripe. Fruit flies may also find them on the bench, so I like to keep them in the fridge.
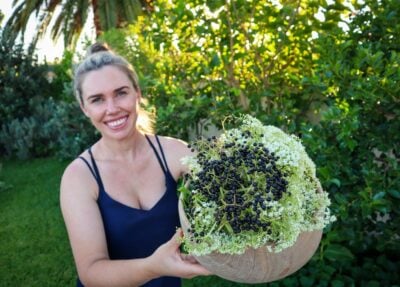
Feijoa flowers are beautiful, and the petals are edible. I saved a bunch to add to teas. Just carefully remove the soft white and pink petals without removing the whole flower.
Feijoa pairs well with: Ginger,Coconut, Apple, Cinnamon, Chilli, Citrus, Pear, Nuts, Dark chocolate, Yogurt
Feijoa ideas:
Juices
Smoothies
Cakes
Jam
Crumble
Muffins
Icecream
Preserving your Feijoa Harvest
Feijoa trees, once mature, will produce bucketloads of fruit! They can be frozen to use in smoothies and juices or baking, or preserved in jams, chutney, alcohol infusions, and bottled.
Passionfruit are a prolific edible climber that produces delicious tasting fruit. Semi-deciduous and have a thick layer of lush green leaves over the warmer months. Passionfruit have a sweet and sometimes tart tropical flavour depending on their ripeness.
Like many edible plants, they come in a huge range of varieties! They are hardy and easy to grow in even hot dry climates. There are a few important things to know before choosing a variety that will be best for your garden. Read more below.
Full-part sun. Protect from harsh midday sun in summer.
CARE
Regular water and feeding. Training new shoots.
FERTILISE
Heavy feeders. Compost teas or added compost.
PESTS
Snails, slaters, rats, mice.
HARVEST
Harvest regularly. Fruit will drop from the plant when ripe.
REPRODUCE
Allow to go overripe and save seeds.
Why Grow Passionfruit?
Here are some of the many reasons to growPassionfruit
Easy to grow
One plant provides an abundance
Lush evergreen leaves
Cover or screening
Shade protection
Immune booster
High Vitamin A and C
High antioxidants
Attracts Butterflies to flowers
Important Information
Many Passionfruit are sold grafted which means they are two types of passionfruit merged together. The rootstock often used in Australia is extremely invasive and can cause issues for many years to come. I recommend avoiding grafted passionfruit at all costs. Check carefully before purchasing. Not all passionfruit flowers and leaves are edible – the blue passionfruit flowers from the rootstock are not edible. Check you do not have a rootstock variety that has taken over!
WATCH below for more info on grafted passionfruit.
Popular Passionfruit Varieties
Passionfruit come in many different types a few key types are:
Note: some types of Banana Passionfruit are classified as an invasive weed in some countries including New Zealand.
Sunshine Special – Passiflora edulis – Popular purple passionfruit for Perth Gardens. Heavy fruiter and no invasive suckers.
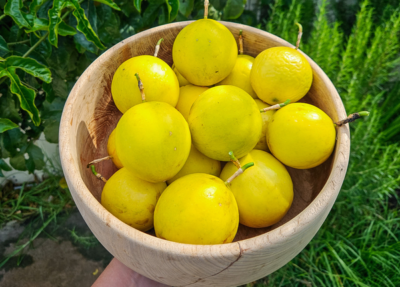
Panama Gold – Passiflora flavicarpa – Popular tropical passionfruit with yellow skins. Allow to fully ripen and drop before harvesting. Fast-growing and more frost/cold tolerant than many.
Black Nugget –Passiflora edulis – Popular purple-black fruit. Harvest late summer to winter.
Panama – Passiflora edulis – Large red/burgundy fruit with sweet gold flesh.
Banana Passionfruit – Passiflora mollissima – Long yellow fruit with sweet pulp. frost hardy. Light pink flowers. Can be invasive.
When to Plant
It is best to plant new Passionfruit plants in Spring so they have time to get established before winter.
How to Grow
Choose a sunny spot with 6-8 hours of sunlight
Prepare the soil with free-draining compost
Keep well watered, especially during summer
Fertilise in Spring and benefits from high Potassium
Prune in Autumn after fruit – Passionfruit fruit more on new growth.
Fertilize with compost or all round fertilizer after pruning
Care/ Maintenance
Keep plants well watered. Train and direct new shoots regularly to keep under control. If you are growing a grafted variety, check and remove any suckers or side shoots from below the graft – weekly.
Passionfruit do not like soggy or wet ground – if you receive a lot of rain it is best to grow passionfruit on mounds to allow water to run off and prevent root rot.
Pests / Disease
Check for slugs, slatters and snails when the plants are young. Barriers may need to be put around the main stem. Ripe fruit are popular with Rats and Possums. Harvest regularly and you may need to net some fruit to ensure you get a harvest.
How/ When to Harvest
Passionfruit will usually start fruiting by the start of their 1st year – may be longer in cold climates.
Passionfruit drop from the vine when they are fully ripe. They can be picked earlier if you like fruit with a little more tart flavour. Choose deep-coloured fruit.
Passionfruit varieties will fruit at different times of the year but many are ripe during late Summer – Winter.
Reproducing
Passionfruit can be grown from both cuttings and seeds.
Save seeds from mature well ripe fruit. Rinse off the flesh and soak in a jar of water for 24 hours. Plant seeds in quality compost nd potting mix and keep warm and well watered until they sprout. Transplant to a larget pot once they have 4-5 leaves.
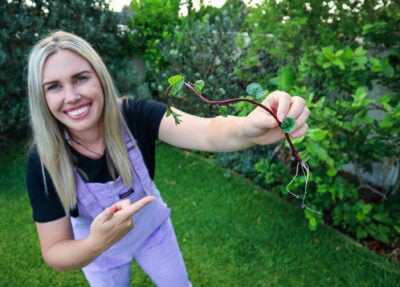
Take 20cm cuttings from semi-hardwood. Remove the bottom half of the leaves and place in a jar of water or moist soil to root.
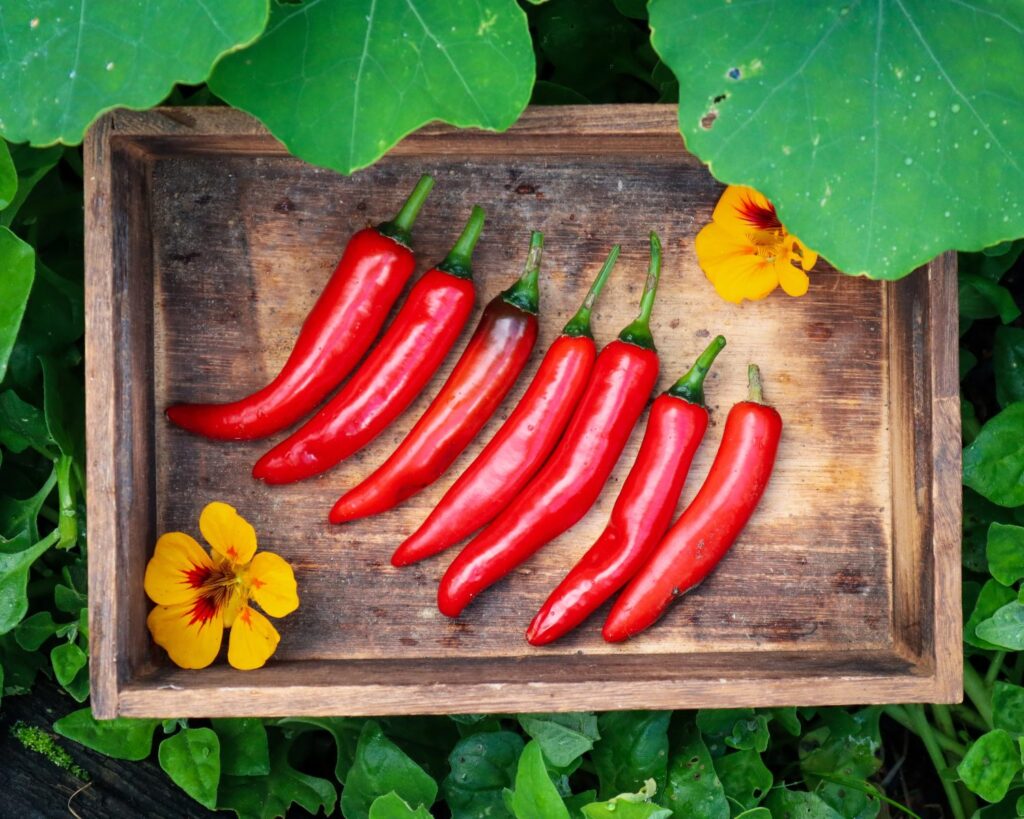
Chillies (Capsicum annuumor variationsof species) are a popular staple for a kitchen garden because they produce an abundance of fruit on a single plant.
There are over 400 different species of chilli that vary in heat/spice 🌶 Chillies are part of the Solanaceae family along with Tomatoes, Capsicum, Eggplant and Potato.
Chillies thrive in warm weather and are mainly grown over summer. The great thing about Chillies is that you can grow more than enough in a pot or container. Great for renters or those with limited space.
Chillies are measured in heat using the chilli Scoville rating. The hottest part of the Chilli is often in the seeds. Removing the seeds can reduce some of the heat. Chilli also often get hotter and sweeter as they mature and ripen.
Sow seeds indoors at the end of winter or early spring. Or plant seedlings after last frost.
SOIL
Will grow in most soil typesbut benefits from added compost.
LOCATION
Full-part sun. Protect from harsh midday sun in summer.
CARE
Regular water.
FERTILISE
Easy to grow and doesn’t need much help.Compost teas or added compost.
PESTS
Snails, slaters, spider mites and aphids.
HARVEST
Harvest regularlyto encourage more production.
REPRODUCE
Allow to go over-ripe and save seeds.
Why Grow Chilli?
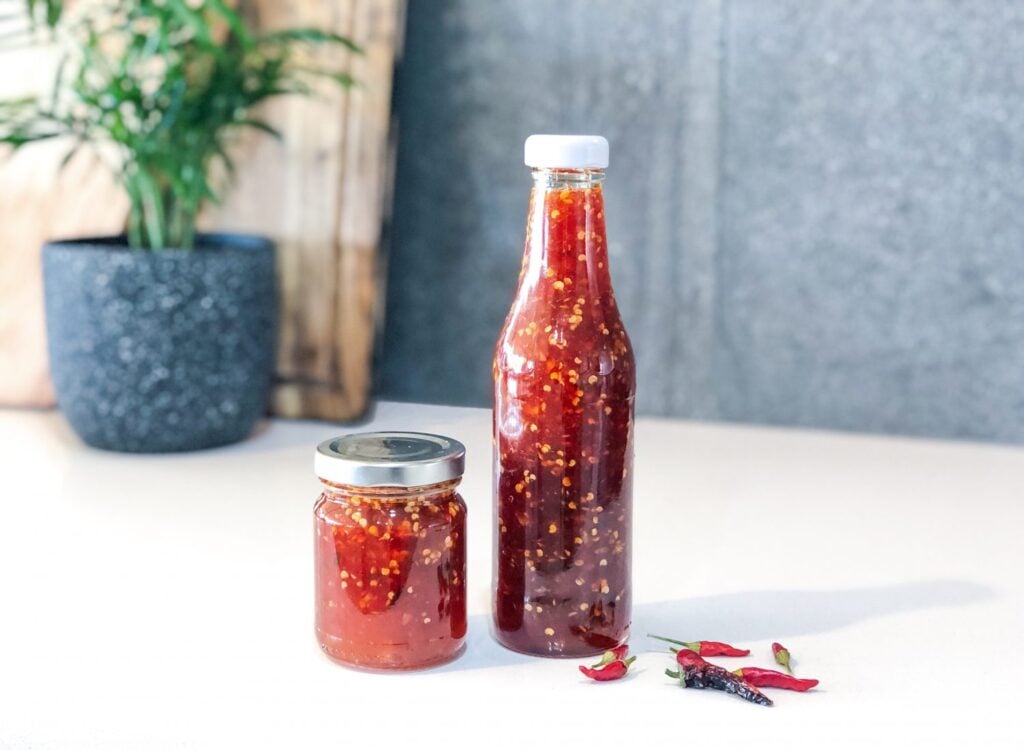
There are many reasons to grow Chillies and they are so easy to preserve!
Here are some of the many reasons to grow Chillies
Easy to grow
One plant provides an abundance
Grows well in containers
Low maintenance
Flavour enhancing
Easy to preserve
Immune booster
High Vitamin A and C
Popular Chilli Varieties
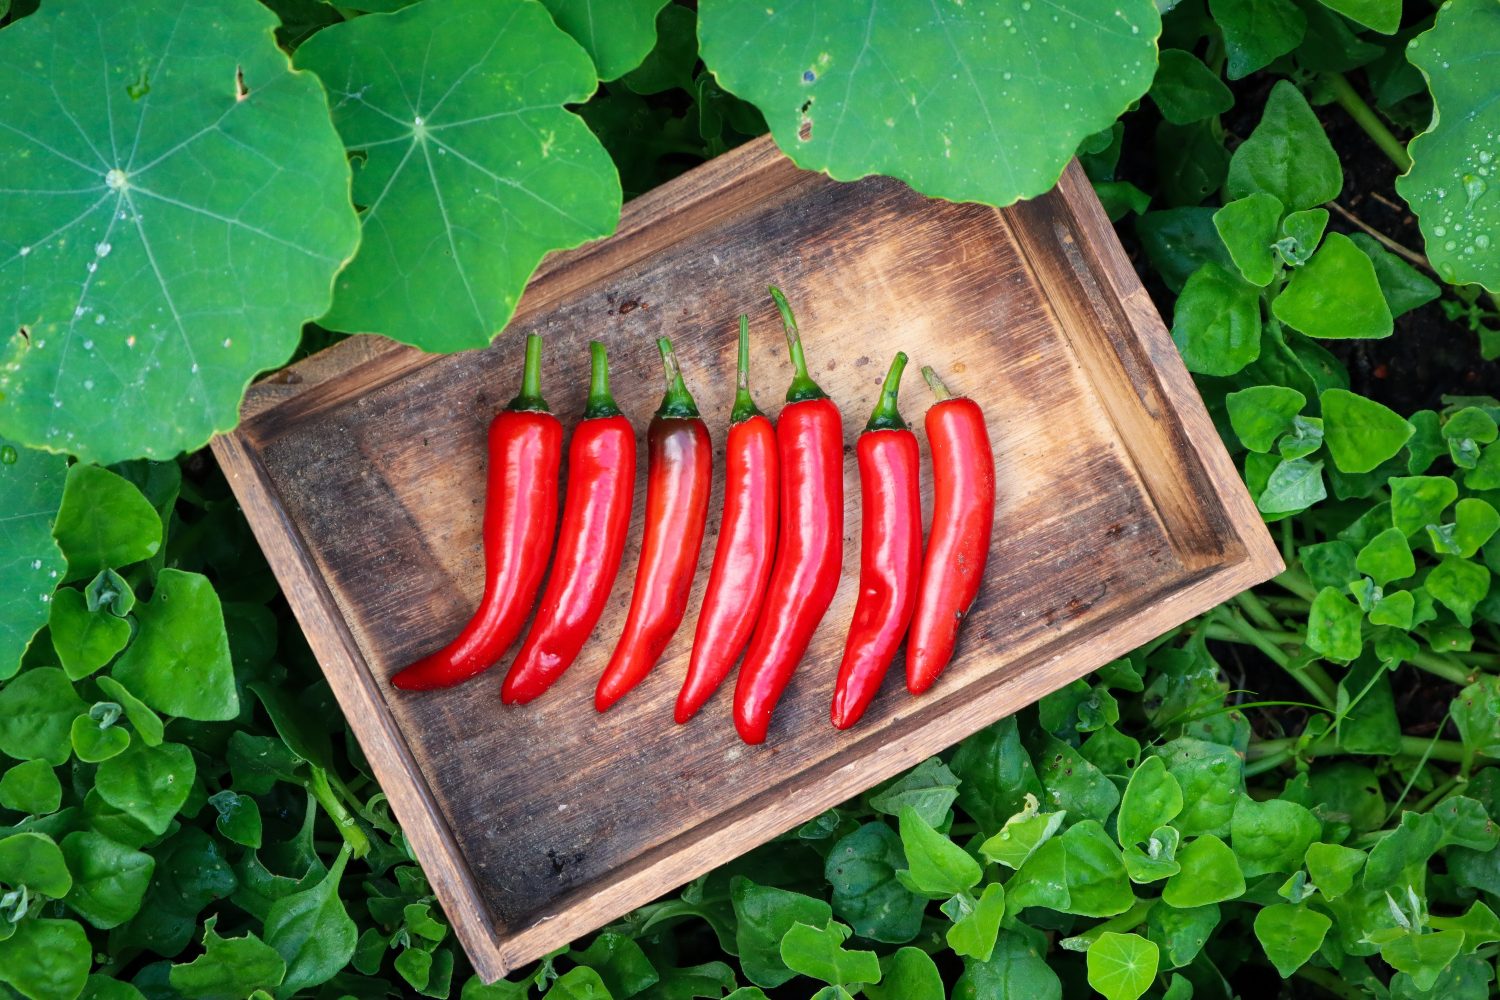
Long Cayenne –Capsicum annuum – Long chilli that turns from green to vibrant red. Mild heat and seeds can be removed to be even milder. Popular all round Chilli. Produces around 1kg per plant.
Jalapeno – Capsicum annuum – Popular Mexican chilli that is best suited to pickling and cooking (stuffed jalapenos!). Prolific producer. Pick green or red.
Padron –Capsicum annuum ‘Pimientos de Padron’ – Popular Spanish chilli. Great for stir-fries. Mostly mild but some will randomly be HOT! Heat increases as they get Redder.
Hungarian Hot Wax – Capsicum annuum – Yellow – orange colour and a popular mild chilli. Can get hot the more mature they get. Great fresh, as garnishes, pickled or stir-fried.
Birds Eye Thai – Capsicum annuum – Small hot chilli popular in Thailand. Prolific producing and although small you don’t need much! Upright standing chilli. Colder tolerant than other varieties.
Carolina Reaper – Capsicum chinense – Named the hottest chilli in the world 😳 Be very careful handling these (gloves and eyewear). Needs a heat mat to promote seeds to germinate.
When to Plant
Chillies thrive in warm temperatures and don’t like the cold. Plant your Chillies from seed in late winter – early spring inside or in a greenhouse. Plant seedlings out in Spring after your last frost. In tropical Australian locations plant in Autumn.
How to Grow
Choose a sunny spot with dappled or part shade in the heat of summer.
Prepare the soil with free-draining compost
Plant one seedling per pot or in the garden bed at least 50cm apart
1 plant is plenty or try different varieties
Can benefit from protection during the heat of summer.
Plants will tend to die off in winter and are often grown as an annual. You can overwinter your plants to get a few extra years out of them – Click here
Care/ Maintenance
Chilli plants are pretty low maintenance. Ensure they don’t dry out during hot weather. Plants can be pruned and “over-wintered” to get a second season out of them.
Pests / Disease
Chilli are pretty hardy and will thrive with minimal effort. Birds and rats will still eat your bright colourful chillies and are not put off by their heat! If this happens you might need to construct a cage or net around them. Care for young seedlings using natural pest management.
How/ When to Harvest
Once the plant is well-established it will start producing flowers and that turn to chilli. Some plants produce upright chillies and others hang down.
Most chilli will start off green and ripen to other colours. You can harvest chilli in all colours. The more mature reds and purples will be sweeter and have different flavour profiles.
Harvest the chilli often to promote new fruit.
Harvest in the morning or evening when the plants are hydrated and fresh.
Harvest before heavy rains. Chillies can split open with excess water and spoil.
Reproducing
Chillies can be grown from cuttings but it is easiest to save seeds and re-grow each year. Allow a few chillies to go over-ripe and start to shrivel on the plant before harvesting. Be careful handling chillies and wash hands thoroughly after or use gloves. Scrape out the seeds and allow them to fully dry on a plate for a week before storing them.
Cooking and Using
Chillies can be used fresh, dried or frozen. They defrost quickly and can be used just as you would fresh ones.