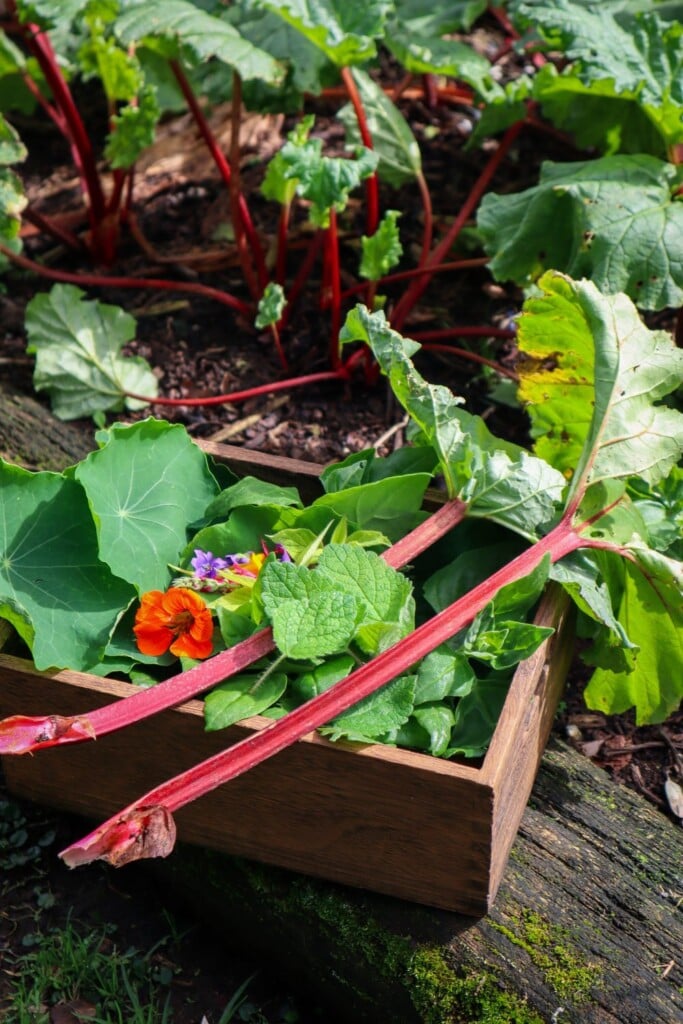
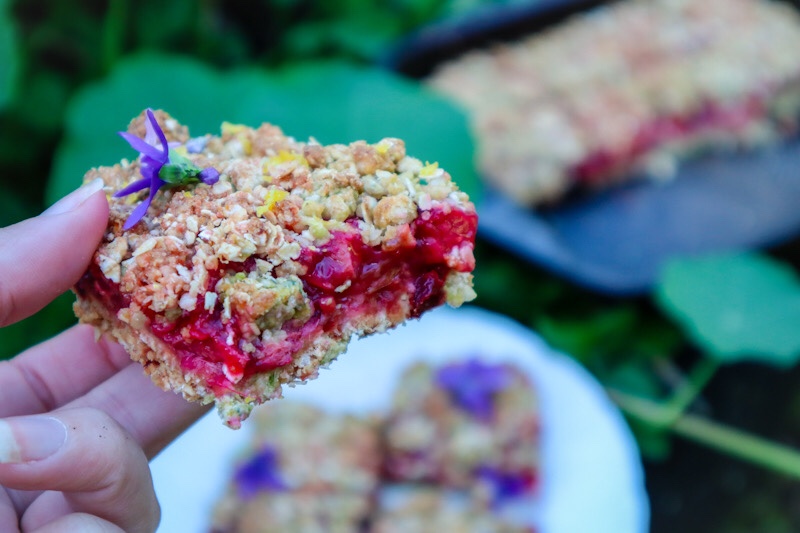
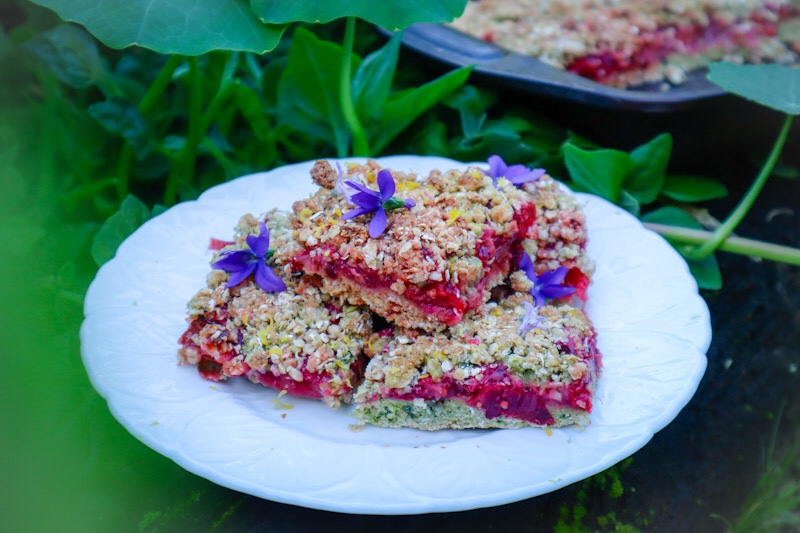
Deliciously sweet, and tart Rhubarb Crumble Slice with hidden garden greens. This gooey-centered slice is easy to make and will make a yummy dessert or sweet treat for lunches.
Rhubarb Crumble Slice
Yield: 12- 15 slices
Delicious sweet and tart slice with refreshing hints of lemon. An easy snack for lunches or serve with yogurt or icecream for a yummy dessert!
Ingredients
Crumble / base
1 1/2 Cups Rolled Oats
1 3/4 Cups Plain Flour
1 tsp Baking Powder
1/4 tsp Salt
1 tsp Lemon Zest
1/2 cup Melted Butter
3/4 cup brown sugar
2 TBSP Pureed Spinach Greens (1 1/2 cup fresh greens)*
Rhubarb Filling
2 Cups Chopped Rhubarb (2cm chunks)
1/4 Cup Sugar
2 TBSP Cornflour
3/4 Cup Water
3 TBSP Fresh Lemon Juice
Instructions
Preheat the oven to 180degrees Celcius. Grease a 25cm square dish.
Add all the filling ingredients into a saucepan on medium-low heat until the Rhubarb has softened. Add a little extra water if it is too thick. You want it to be thick but still be able to roll off the spoon.
Allow to cool while you prep the base.
Mix together all the dry ingredients for the crumble. Add in the melted butter and greens. (You can skip the greens and add an extra TSPB of butter).
Press 3/4 of the mixture into the dish to form the base. Bake for 10 minutes and remove from the oven.
Pour over the filling and sprinkle the remaining crumble on top.
Bake for 30-40minutes until slightly golden.
Grate extra lemon zest on top to serve.
Notes
*Blanch greens such as spinach or chard leaves, blitz to puree, and add into crumble for added nutrition.
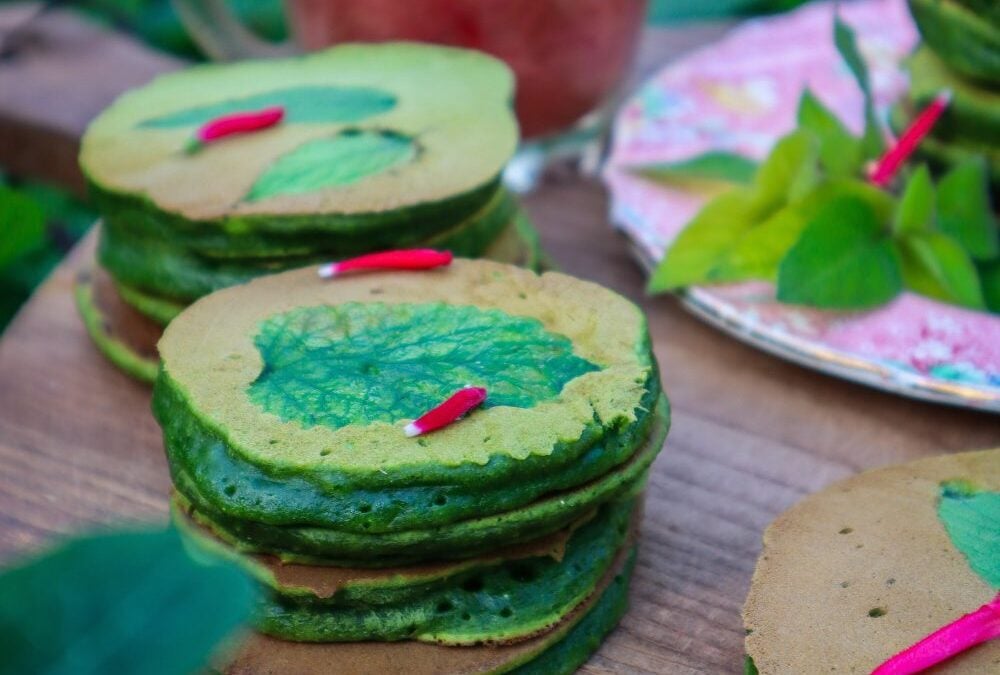
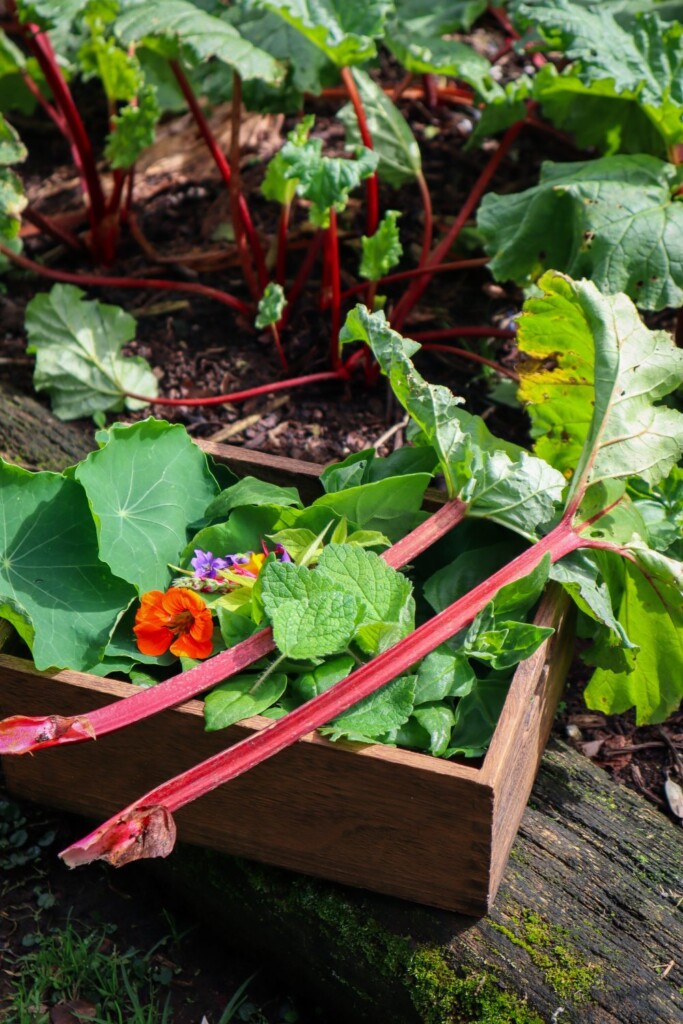
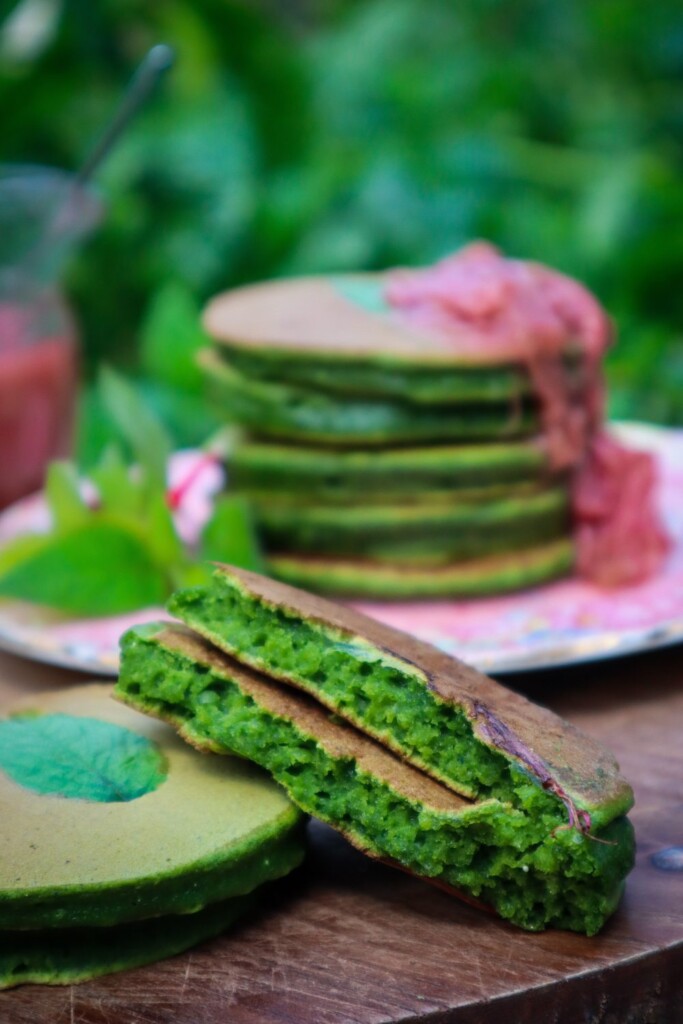
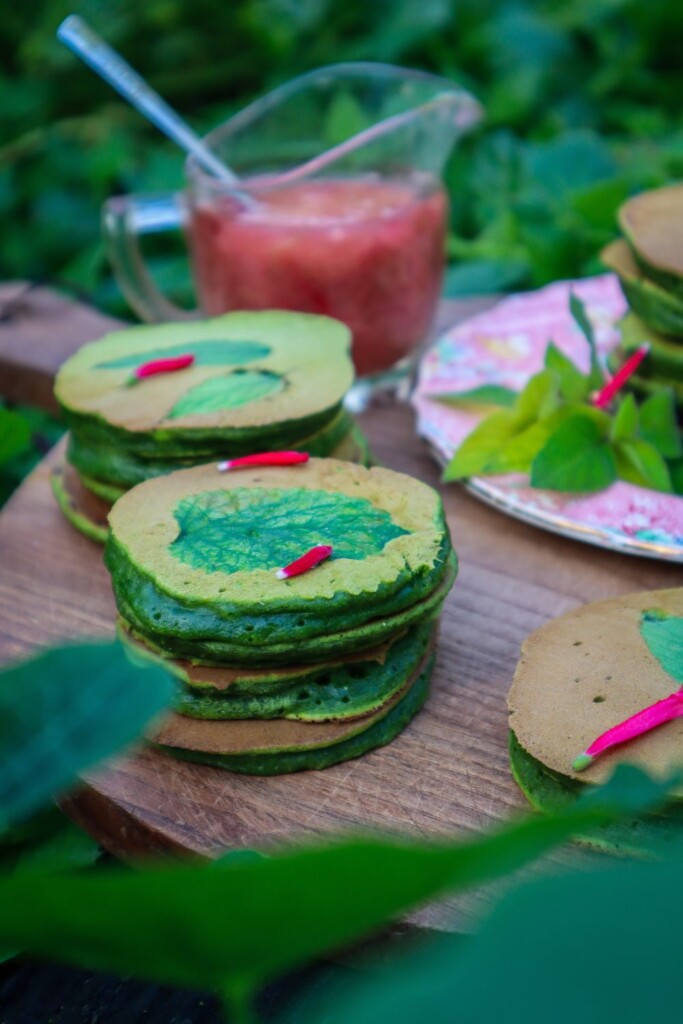
Packed with fresh greens from the garden these garden green pikelets are so fun to make. With subtle, fragrant herb flavours and vibrant green colour these pikelets are a delight to eat. Served with a delicious Rhubarb compote.
Garden Green Pikelets
Yield: 20-25 pikelets
Prep Time: 15 minutes
Cook Time: 15 minutes
Total Time: 30 minutes
Vibrant green pikelets packed with fresh greens from the garden.
Ingredients
1.5 cups of raw leafy greens*
1 cup flour
3 TBSP Sugar
1 tsp Baking Powder
1/4 cup milk
1 egg
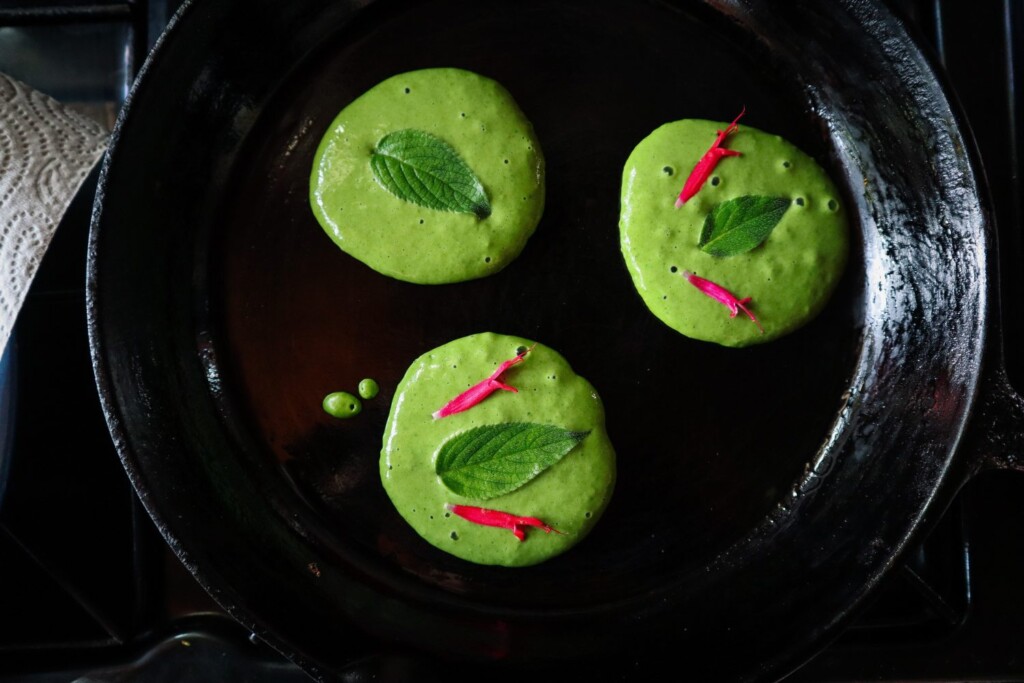
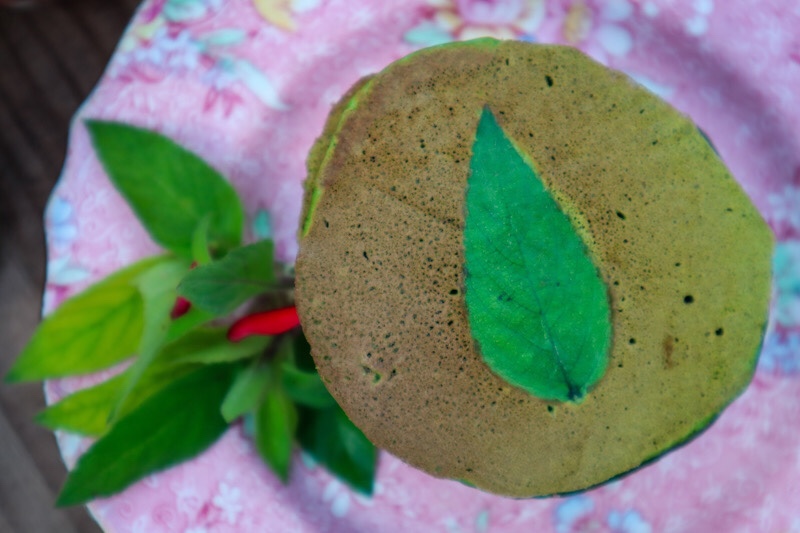
20-25 herb leaves (Pineapple Sage and Lemon Balm)*
Instructions
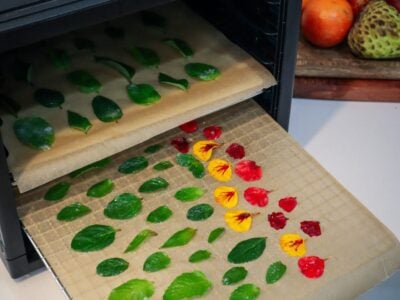
Rinse the leafy greens and remove any hard stems. Blanch the leaves by submerging them in a pot of simmering hot water for 30-40 seconds and then add them straight to a bowl of ice-cold water. This step will help the pikelets retain their vibrant green colour. Skipping this step may result in a duller green.
Strain the greens and place them in a blender or mixer along with the milk. Blitz until all the greens are combined to create green milk.
Add in the egg and lightly blitz to combine.
In a mixing bowl add flour, baking powder, and sugar. Stir to combine. Add the green mix slowly and stir to combine. Add about 1/4 cup of water to the empty green mixer or blender jug and shake to clean the residual green mix from the sides. Use this if the mixture needs a little more liquid. It should fall from the spoon quite easily.
Clean your herb leaves and remove any hard stems. have these laid out ready to add while cooking your pikelets.
Place a frying pan on low-medium heat and coat with a little vegetable oil. Spoon in your pikelets and add a leaf to the top. Once the pikelet has 3-4 bubbles appear carefully flip and cook for a further minute.
Serve with Rhubarb compote and yogurt or cream.
Notes
Leafy Greens - I used Warrigal Greens (NZ Spinach) and a few Nasturtium leaves. You could use any mild flavoured leafy greens such as spinach or chard.
Herbs - Pineapple Sage and lemon balm worked the best as they handled the heat. I also tried Mint and pineapple sage flowers and they were ok too.
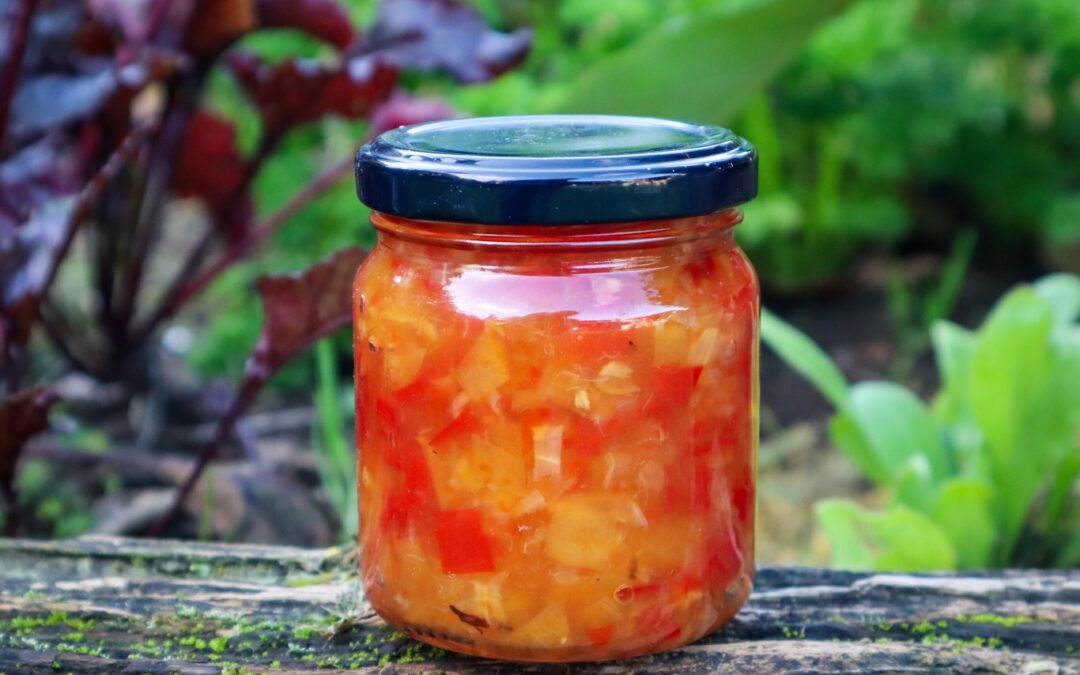
Loquat trees grow fruit in huge abundance and this Loquat and Chilli jam is a delicious preserve to go on a platter. Choose your level of heat by adding or removing seeds and using mild or spicey chilli varieties.
Loquat and Chilli Jam
Yield: 1 small Jar
Prep Time: 10 minutes
Cook Time: 30 minutes
Total Time: 40 minutes
Sweet and spicey Chilli jam that is great for serving on platters.
Ingredients
1 cup chopped Red Chillies (approx 6 large whole chilli)
1 cup chopped Loquats
1/2 cup of Vinegar
1/2 cup of Sugar
1/4 tsp Salt
1cm cube of fresh Ginger
Instructions
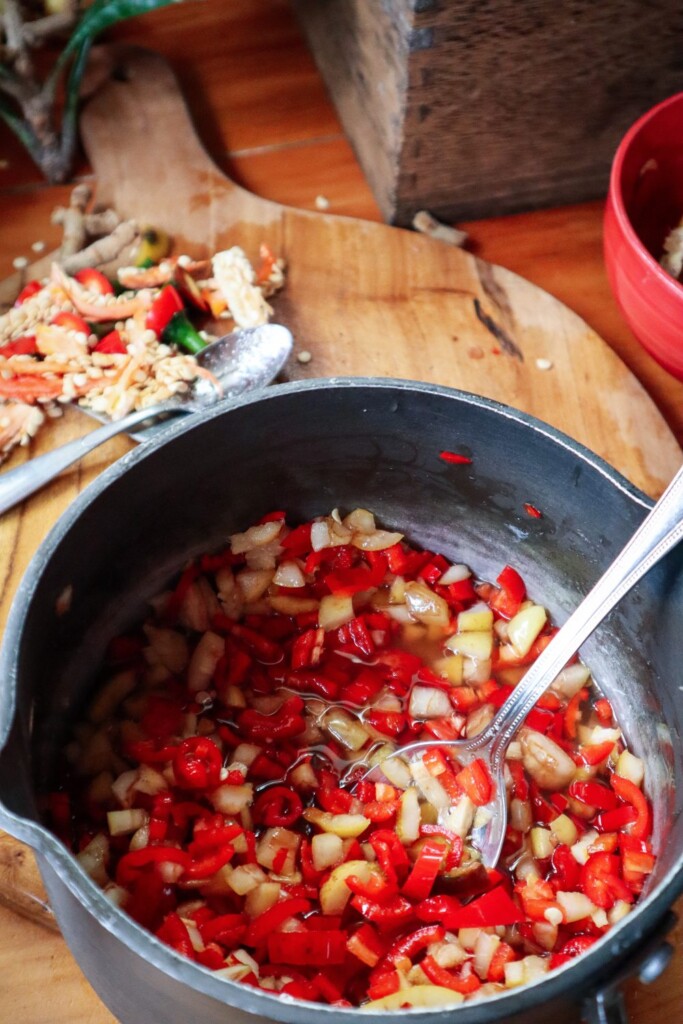
Wash the Loquats and remove the seeds including the seed membrane. Cut the hard end pieces off and dice them into small pieces.
Place the Loquats in a saucepan with the sugar and mix to combine allow to sit while you prepare the Chillies.
Chop the Chilli and remove the seeds. Keep them to the side as you can add them extra if you want to increase the heat later. Dice into small pieces or use a food processor.
Peel the ginger and finely dice.
Add the chillies, vinegar, salt and ginger to the saucepan and turn on a low heat. Cover and allow to lightly simmer for 20-30minutes. Keep an eye on it so that the mixture doesn't burn or get too thick. Add a 1/4 cup of water if it does start to clump together or stick to the bottom. Once the chilli and loquats have softened taste and add extra chilli seeds if you like.
Spoon the hot mixture into a sterilized small preserving jar. Invert for 5 minutes to help the seal. Allow to cool. Store in the refrigerator and use within 2 months.
Notes
If it is too sweet add a splash more vinegar or a pinch of salt.
This Chilli Jam is quite spicey so I did not add any seeds. If you want it to be more mild add more loquats and less Chilli.
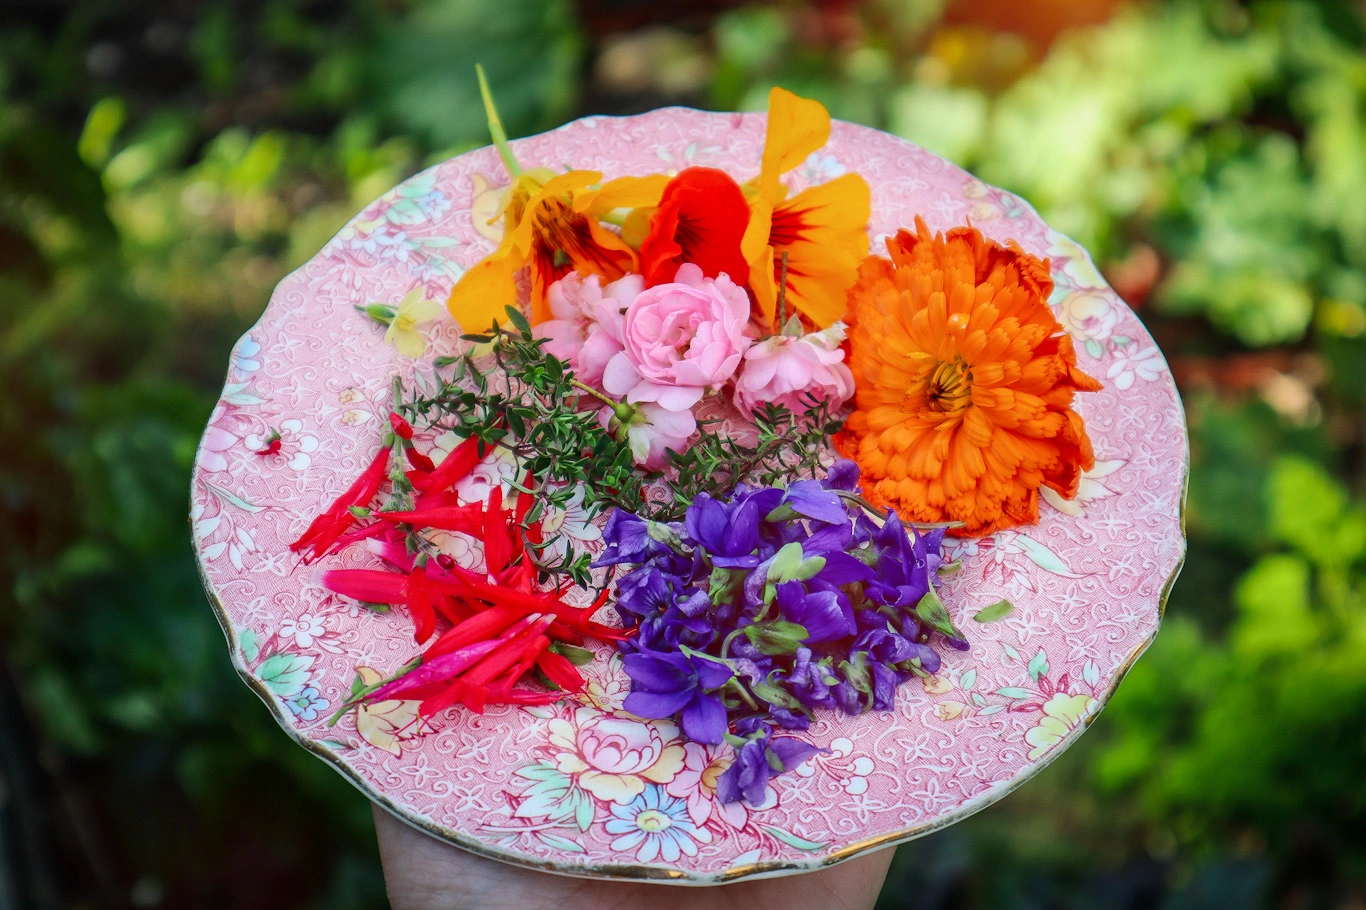
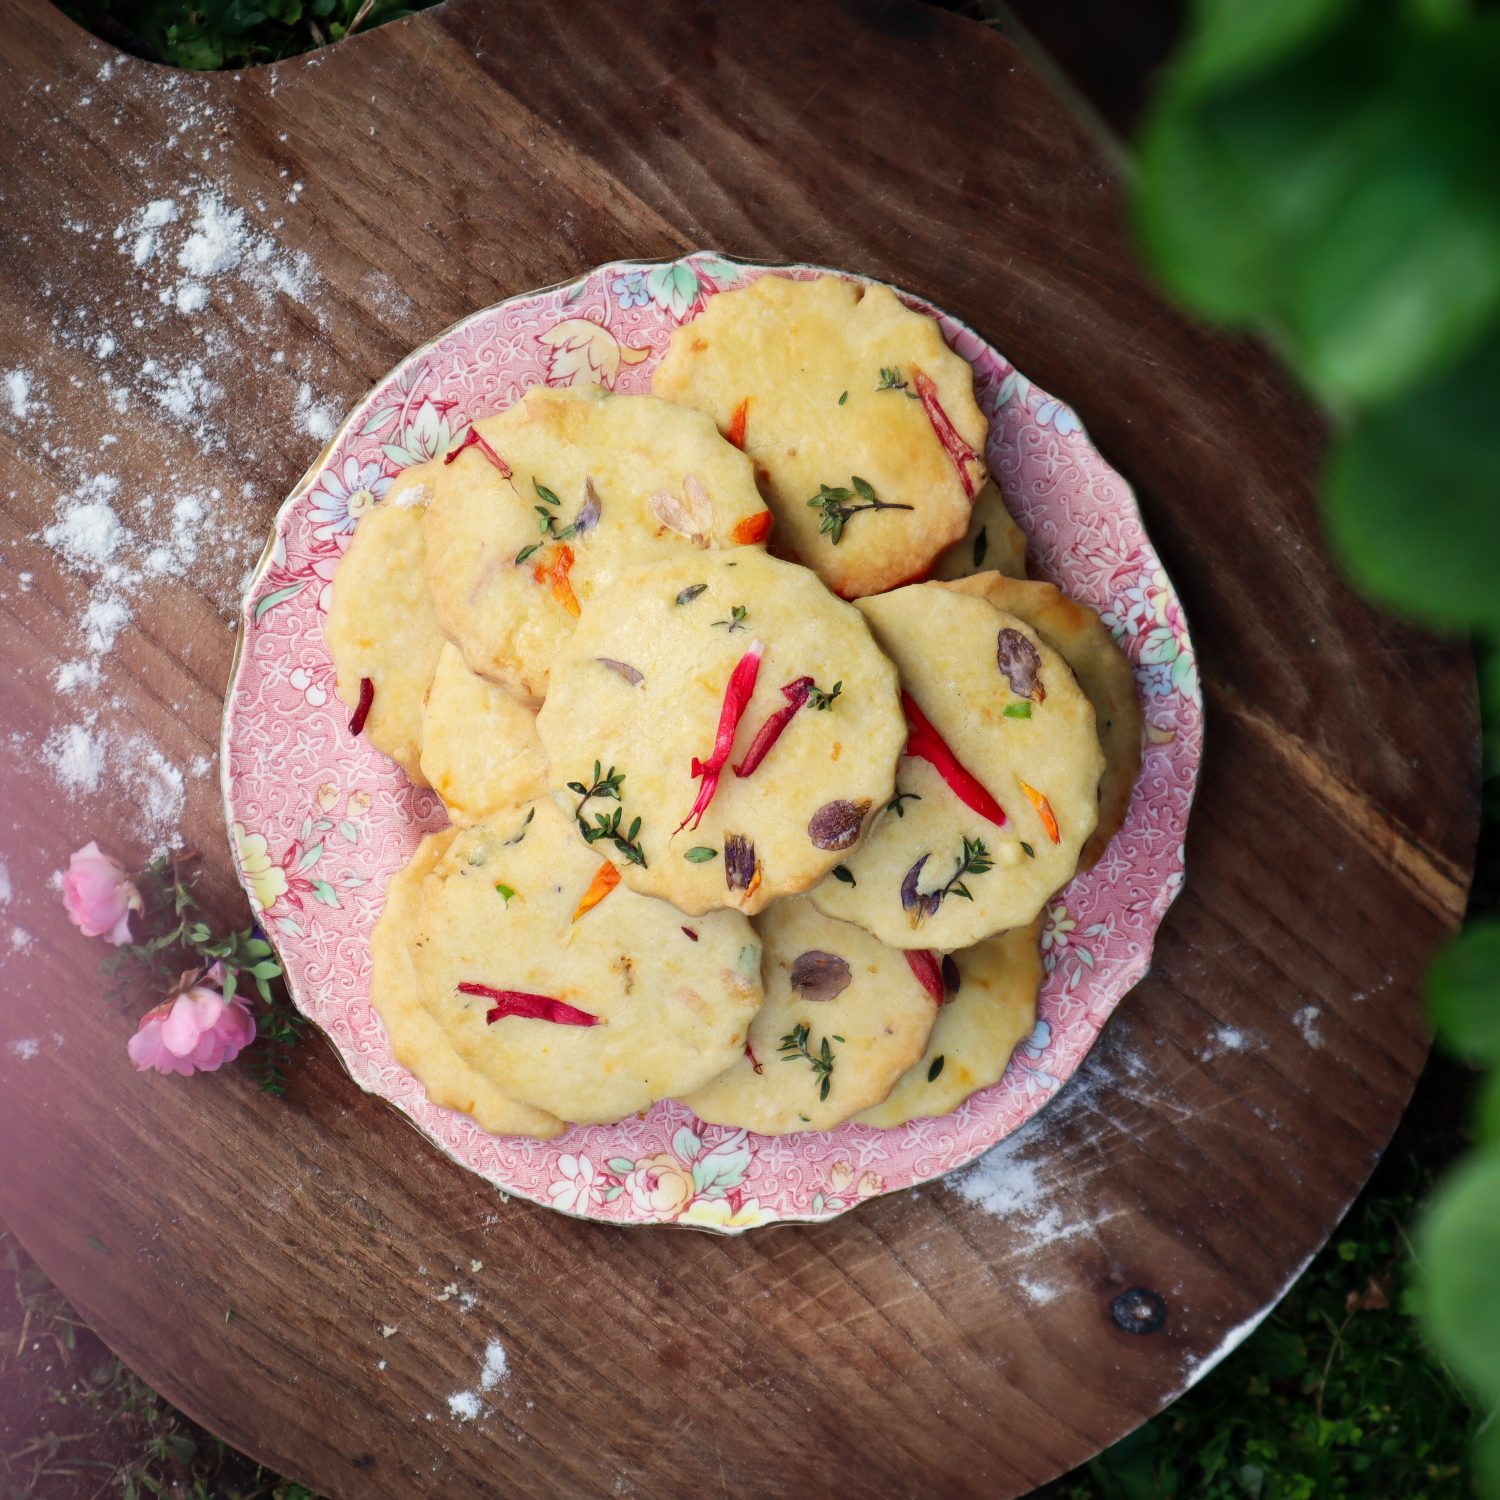
Beautiful and delicious floral shortbread with subtle flavours of orange and thyme. This basic shortbread recipe can easily be adjusted to add seasonal edible flowers and herbs from the garden. I created this recipe when I was home (New Zealand) in my mum’s garden. Although she has very limited baking equipment….she made up for it with her inspiring gardens and the perfect eclectic set of vintage floral tea cups and saucers. I hope you also find some inspiration. The perfect treat to spoil your friends and celebrate spring with a tea or coffee in the garden.
Orange and Thyme Botanical Shortbread
Prep Time: 20 minutes
Cook Time: 20 minutes
Additional Time: 1 hour
Total Time: 1 hour40 minutes
Fresh, subtle flavours infused in soft melting biscuits. These botanical shortbread biscuits can be made using seasonal edible flowers and herbs.
Ingredients
250gram butter
1 cup icing sugar
3 cups flour
2 tbsp orange juice
2 tbsp ( 1 orange) zest
1 tsp chopped fresh thyme
1 /2 cup edible flowers
Instructions
Beat sugar and butter until very pale yellow/white and creamy.
Grate the zest of one large orange and add to the mix along with 2 TBSP of juice.
Mix through the flour to make a soft dough.
Wrap or cover the bowl and refrigerate for at least 1 hour.
Preheat the oven to 140 degrees. Lightly dust a baking tray with flour.
Remove the dough and lightly knead to bring it together.
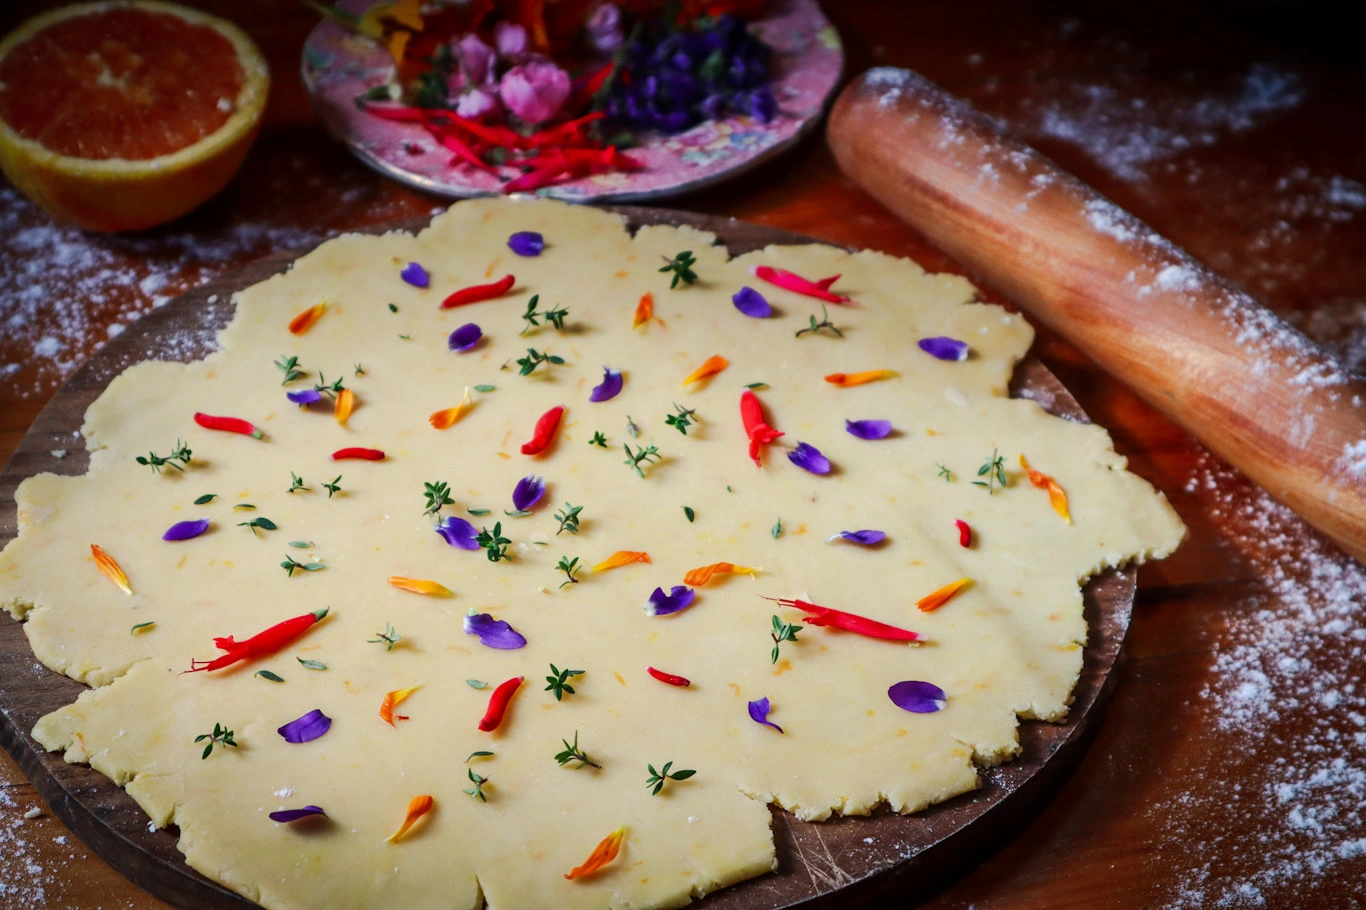
Roll out the dough on a lightly floured surface to approximately 1 cm thick (easier to manage using 1/2 the dough at a time)
Sprinkle over edible flower petals and fresh thyme leaves (removed from the stalk).
Gently roll over the flowers. Some may not stick, so just lightly press them into place. Cut out shapes using a cookie cutter and place them onto the baking tray.
Merge the leftover edges and re-roll out, and continue to cut shapes. The second roll will incorporate the flowers into the dough, so you may want to add extras on top.
Bake for 15-20mins or until very slightly starting to go golden. You want to keep them pale so they don't become too dry and crumbly. Remove and allow to cool on a wire rack.
Notes
Edible flowers I used: Pineapple Sage (red flowers), Calendula, Rose, Sweet Violet, and Nasturtium.
Use seasonal edible flowers and herbs: other options to try are Lemon and Lavender, Lemon and Rosemary, or Mint.
Calendula-infused salts or sugars make perfect gifts from the garden. It is a great way to preserve calendula to use throughout the year. Infused sugars can be great for finishing cakes, desserts, cookies, cocktails, or other sweet treats. There are two easy ways to make infused salt or sugar:
Mix dried herbs and flowers with Salt or Sugar and place in a jar.
Blend equal parts (1:1) of fresh herbs or flowers with Salt or Sugar and lay flat on a tray and allow to dry completely in a dehydrator or oven at 40 degrees celsius. Once the herbs are dry you can loosen the mix back up and place in a jar.
Note: blended sugar will turn to fine powdered sugar, similar to icing sugar. If you want more of a granular salt or sugar just blend a small amount with the herbs and mix the rest through at the end.
Calendula and Lemon Sugar
Ingredients
Zest of 1 lemon
1 cup Raw Sugar
6-8 fresh Calendula Flowers
Instructions
Zest Lemon using a fine grater.
Remove petals from the fresh calendula flowers and add to a bowl with the sugar and lemon zest.
Lightly blitz in a mixer or blender.
Spread on a tray to dry. Use a dehydrator at 40degrees celsius or the oven for 4-5 hours or until lemon zest and flowers are completely dry.
Place in an air-tight jar to store.
Notes
To make an infused salt simply swap the sugar with salt.
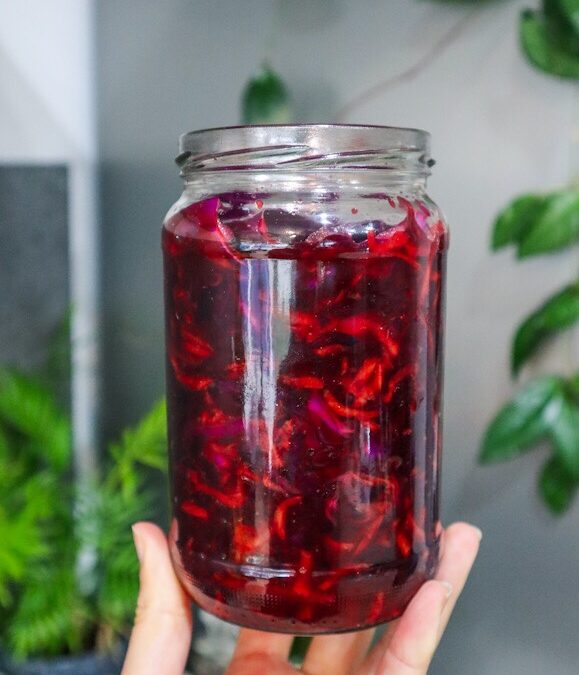
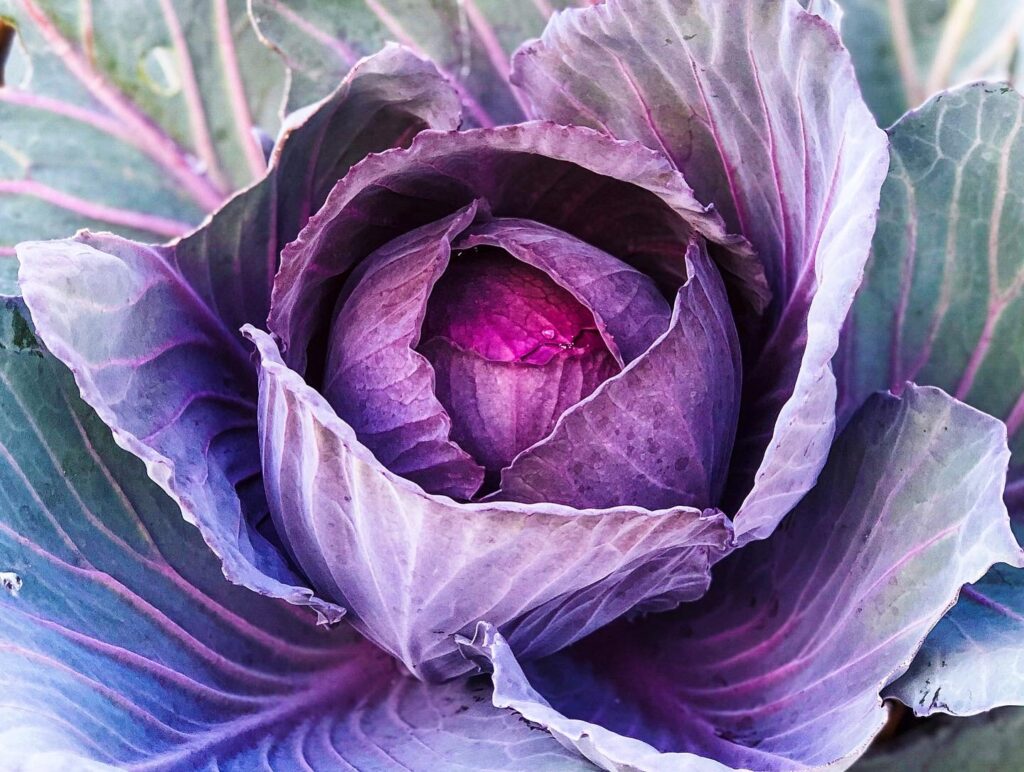
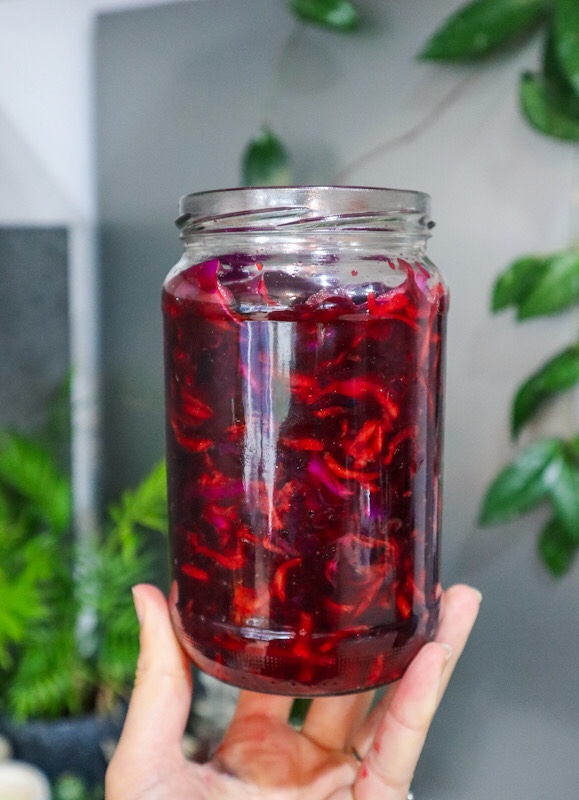
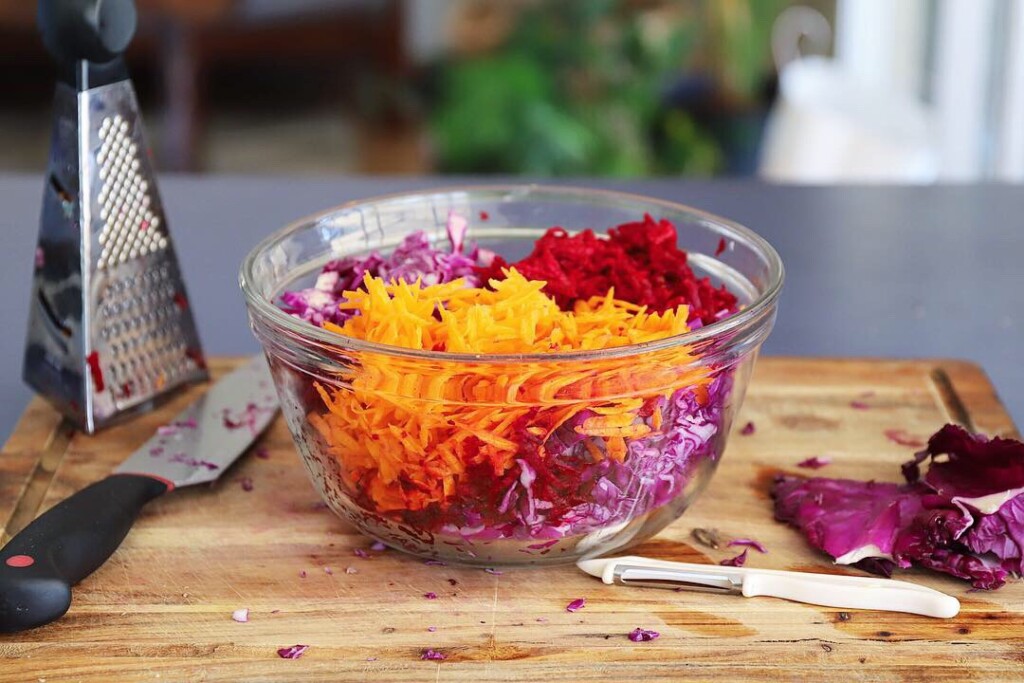
Sauerkraut is a great way to preserve extra cabbage and make a delicious probiotic accompaniment. Red Cabbage, Carrot, and Beet make this a vibrant colourful Sauerkraut but you could use regular cabbage.
Cabbage, Beet and Carrot Sauerkraut
Prep Time: 10 minutes
Total Time: 10 minutes
Vibrant kraut full of gut-loving probiotics. This is a quick and easy way to see up extra Cabbage harvests.
Ingredients
3 cups shredded cabbage (1/4 of a whole cabbage)
1 medium Beetroot
2 Medium Carrots
1 1/2 tsp Salt
Instructions
Finely slice or grate cabbage using a mandoline or grater. Reserve a whole piece to cover the contents at the end. Add to a large mixing bowl and sprinkle over the salt. at the
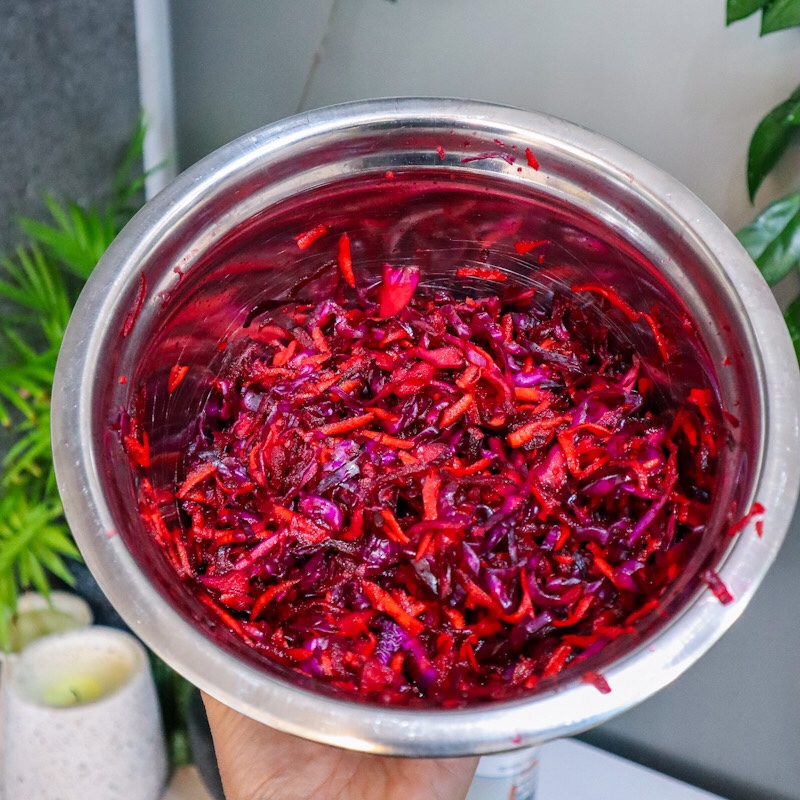
Squeeze the salted cabbage to extract the moisture. Do this for 5-7 minutes.
Grate carrot and Beetroot and add to the cabbage bowl. Peeled or unpeeled is optional - see notes.
MIx to combine. Cover and let it sit for 5 minutes.
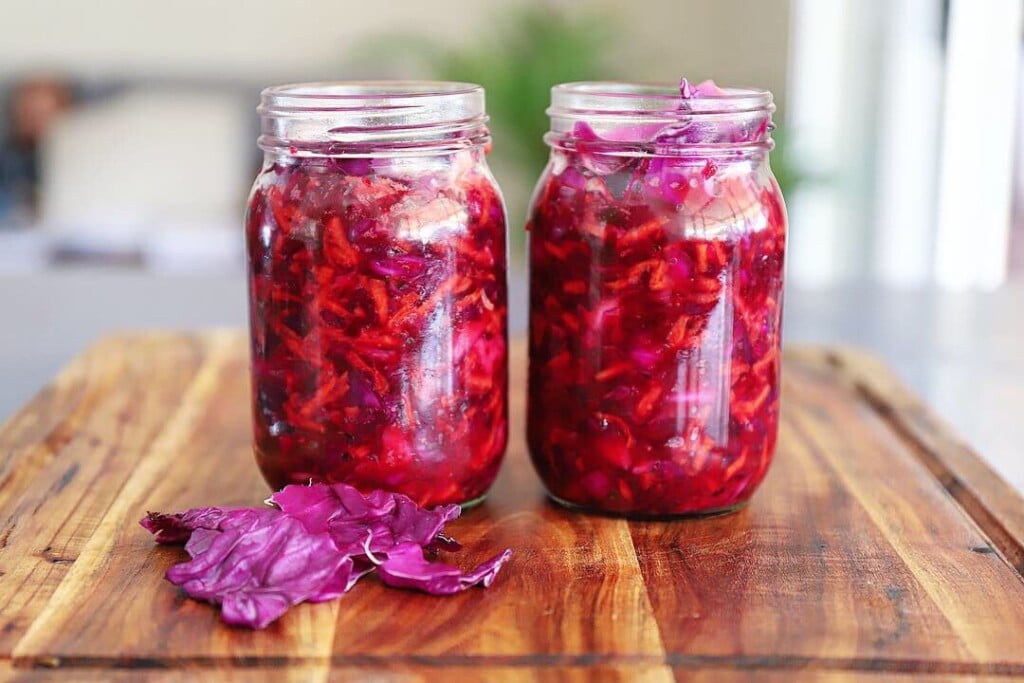
Give the mixture a final squeeze and mix. Then add to a sterilised jar. This mix will fit a 700gram jar so you could also use two smaller jars. Allow 2cm of empty space at the top of the jar. Press the mixture down to remove air bubbles and pour over any remaining liquid from the bowl. The liquid should cover the cabbage. Add a little bit of filtered water if you need it. Place a piece of cabbage leaf over the top to keep the mix submerged in liquid.
Store in a cool dark place for 3-5 days or until you like the flavour. It will get increasingly sour the longer you ferment it. Once you are happy secure the lid and place it in the refrigerator. This will mellow out the smell and slow the fermentation down.
Notes
- Peel the beets and carrots if the skin is particularly dirty and hard to remove or if you have purchased the beets from the store.
- Don't use pre-shredded store-bought cabbage as it will not have the active bacteria.
- Check the mix daily to ensure it is fully submerged in liquid. You may need to add a small weight to keep it down.