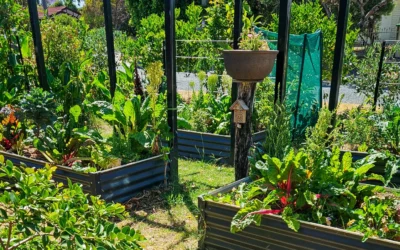
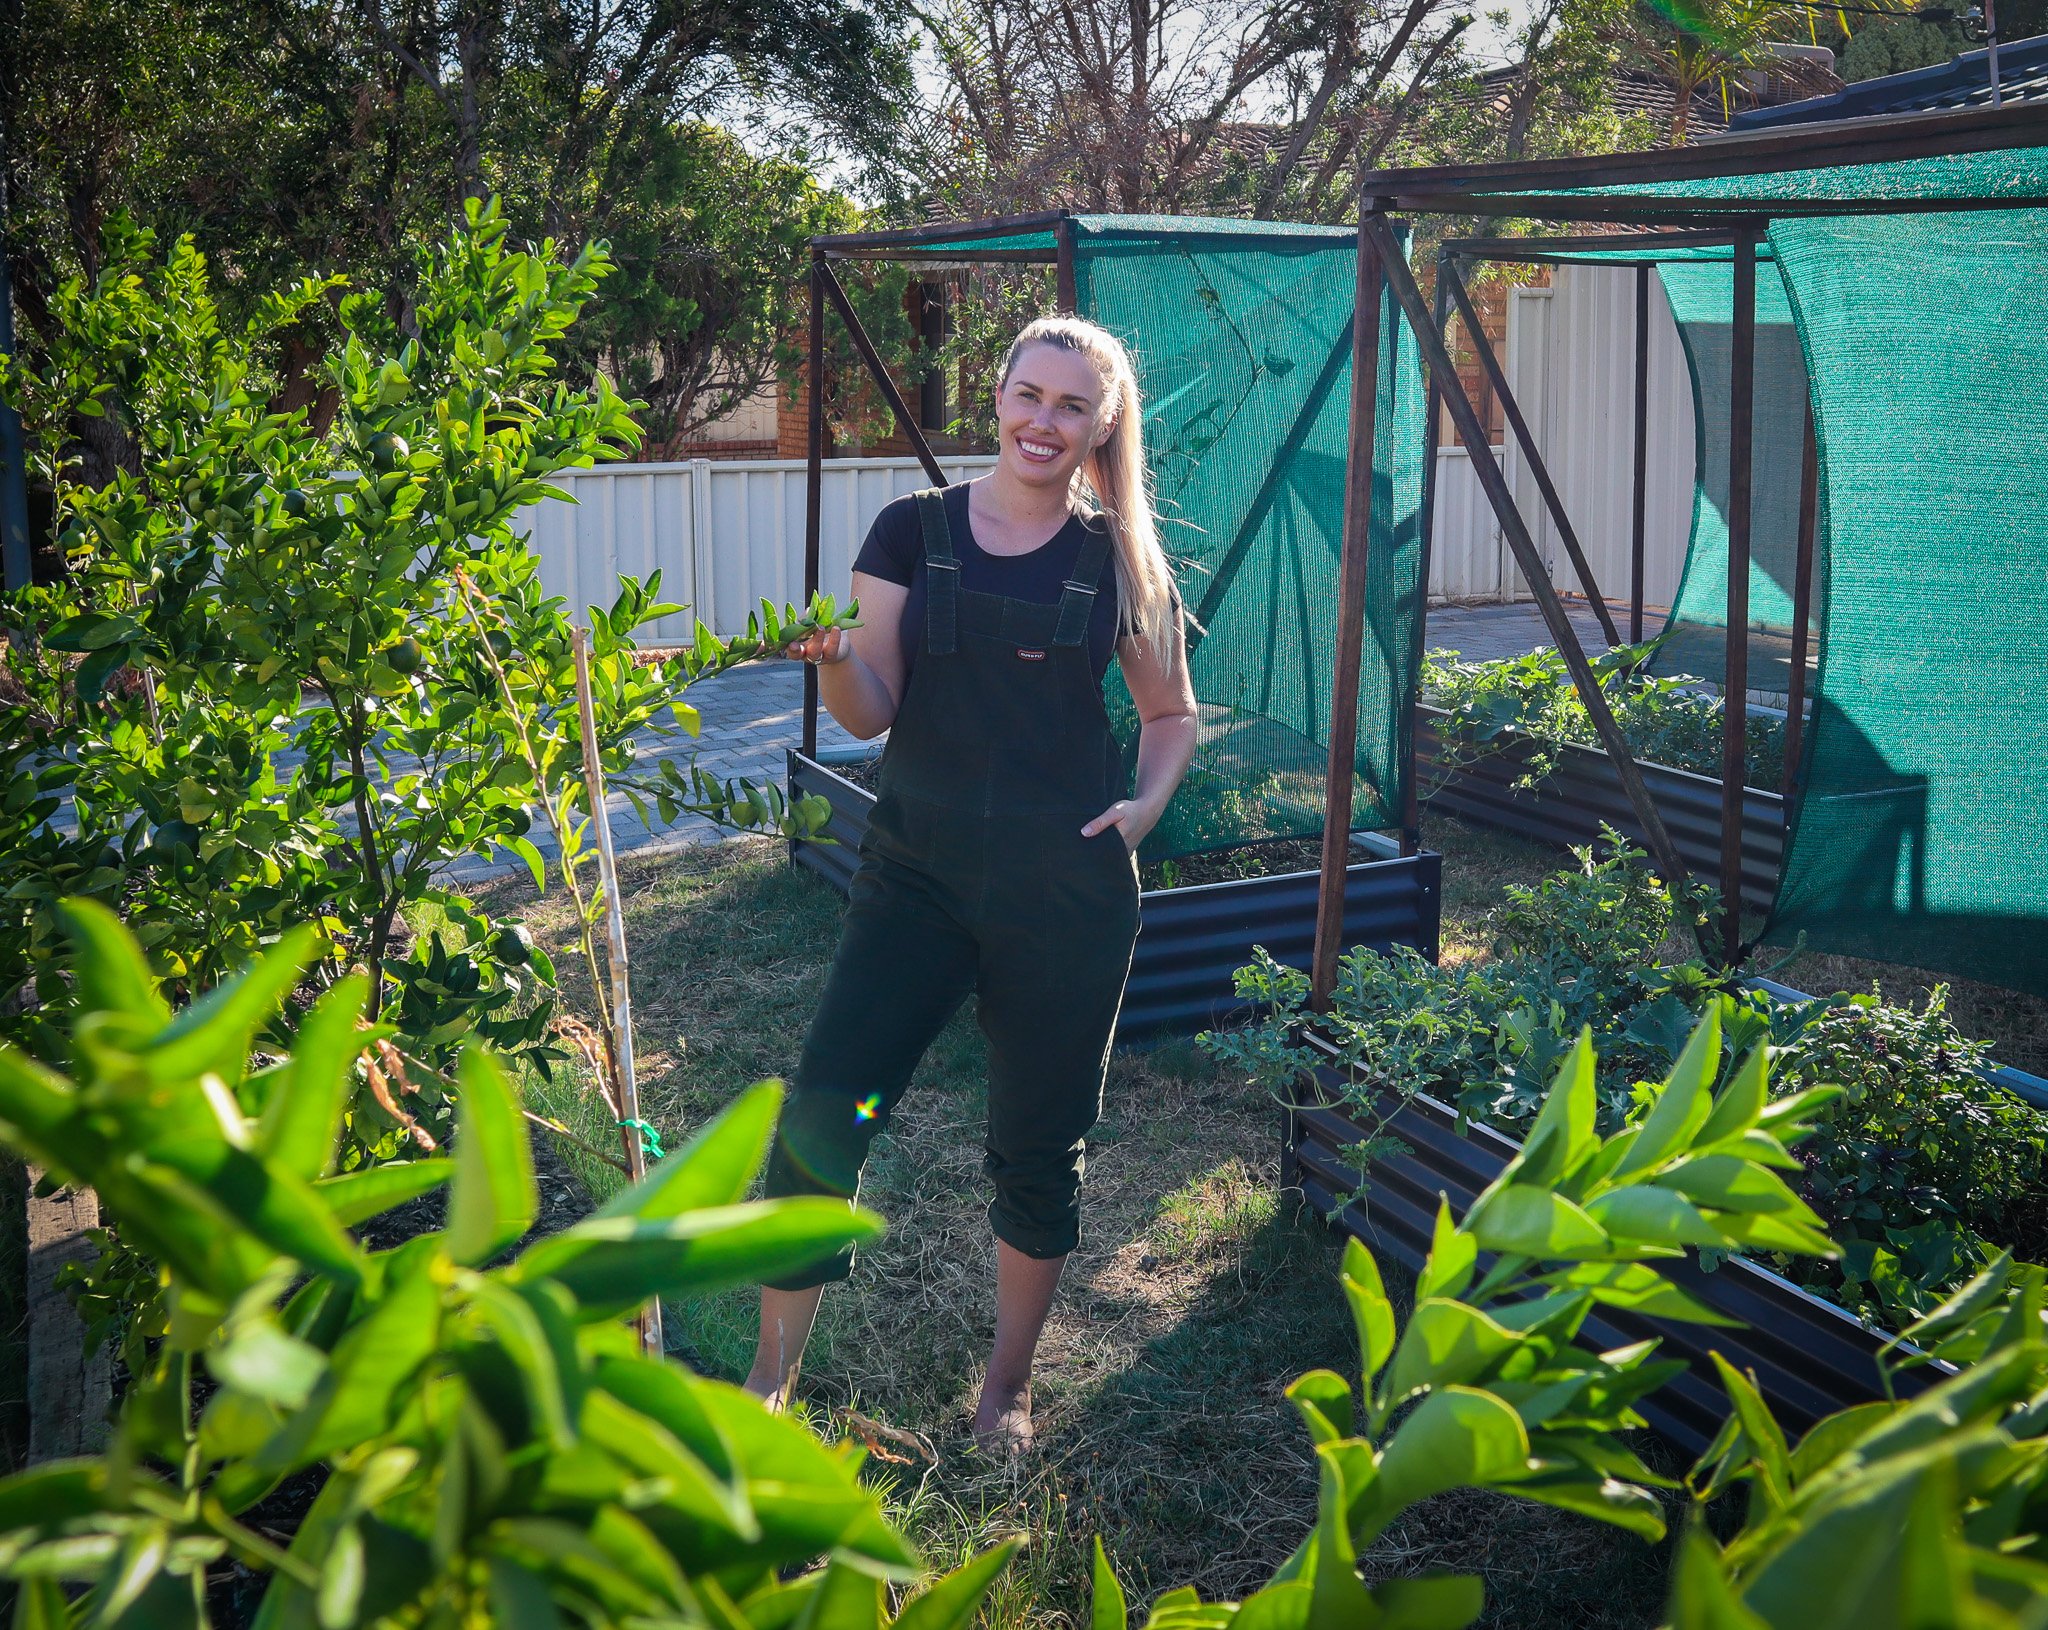
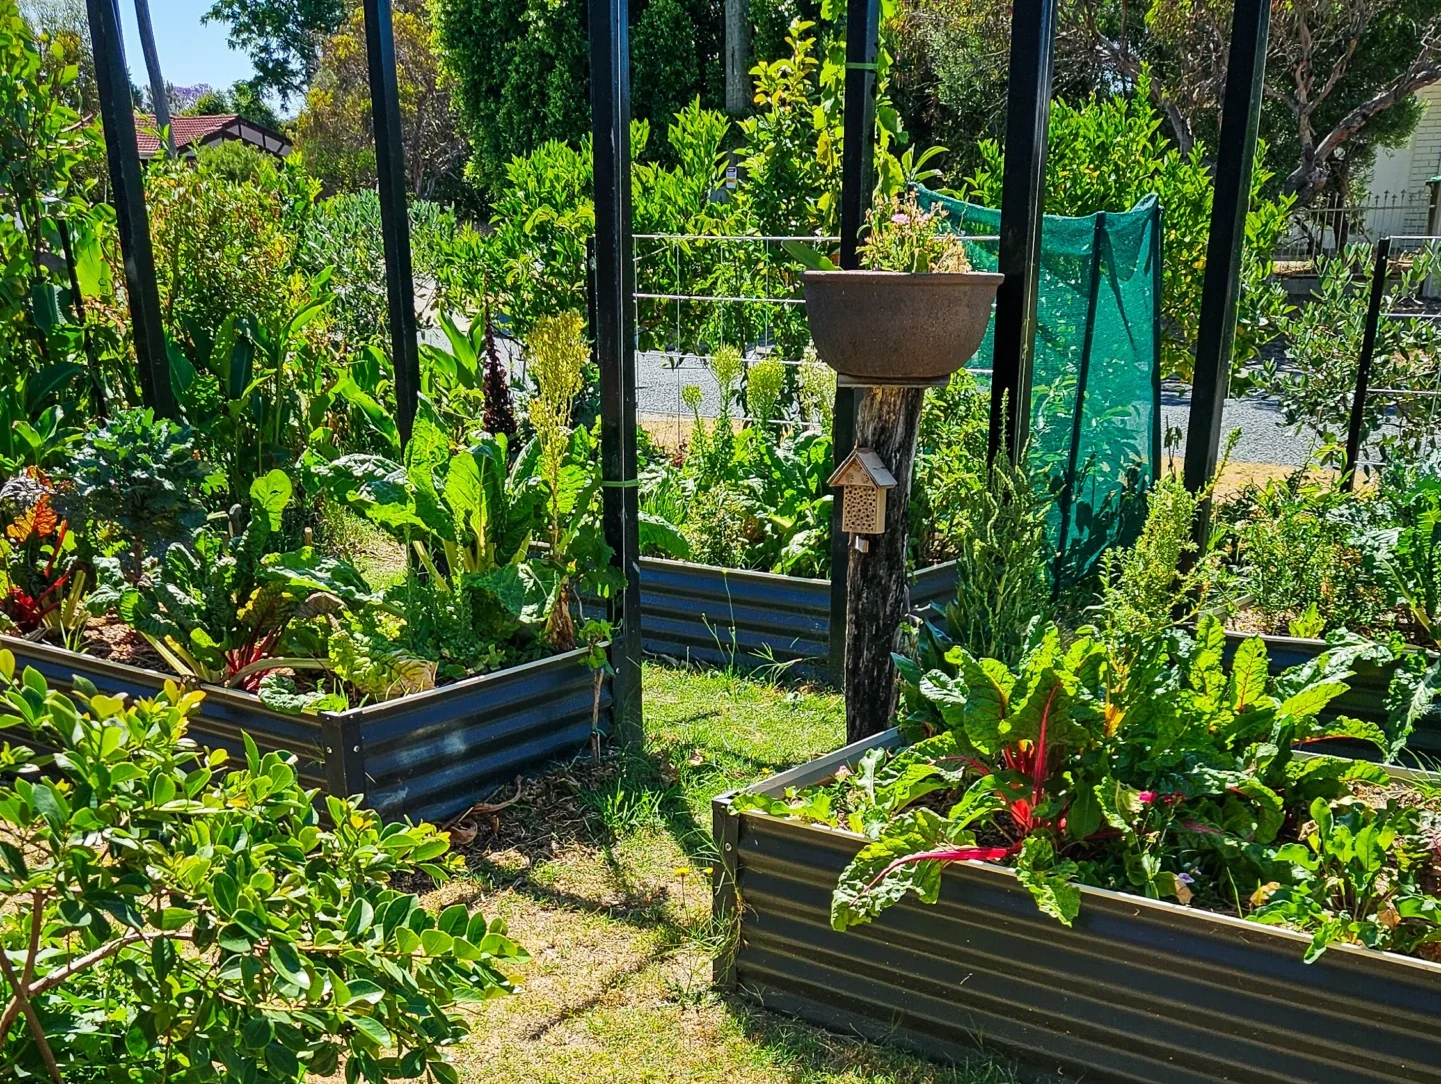
How to Make Spinach Wraps – Easy, Healthy & Gluten-Free Recipe

How to Make Spinach Wraps – Easy, Healthy & Gluten-Free Recipe

Looking for a healthy, homemade wrap alternative? These DIY spinach sushi wraps are a delicious and nutritious way to use up garden greens and create quick, wholesome meals. Whether you follow a gluten-free, low-carb, or plant-based lifestyle, these wraps are a game-changer. Made from fresh spinach, herbs, and garden vegetables, they’re packed with nutrients and completely free from preservatives and additives.

These wraps have the texture of nori but are 100% vegetable-based. Use them for sushi, wraps, or as a healthy tortilla alternative. This is the perfect recipe for zero-waste gardeners who want to make the most of their seasonal harvests. I am so impressed with how amazing these are!

These dehydrated spinach sushi wraps taste and feel just like the real deal but I know exactly what is in them. Use excess garden greens along with bottle gourd or zucchini to make a batch of sushi wraps for a quick and easy lunch. Like most of my recipes, you can mix and match different greens and herbs depending on what’s in season or in abundance in your garden.

Garden Vegetable Variations

Don’t have spinach? No problem. Try other leafy greens such as:

  • NZ spinach (Tetragonia)
  • Swiss chard
  • Rocket/arugula
  • Sweet potato leaves
  • Amaranth greens

You can even mix in edible weeds like chickweed or purslane for extra nutrition.

Recipe Notes

  • Psyllium Husk helps bind the mixture and gives flexibility.
  • Herbs are optional but add great flavor.
  • Dehydration Time varies depending on water content and thickness.

Spinach "sushi" wraps

Yield: 8
Prep Time: 10 minutes
Cook Time: 6 hours
Total Time: 6 hours 10 minutes

Easy way to preserve excess produce and have wraps on hand for a quick garden-to-plate lunch when you need it.

Ingredients

  • 4 cups spinach or greens*
  • 1/2 cup fresh herbs*
  • 1 TBSP psyllium husk
  • 1 - 2 TBSP water
  • 2 cups chopped bottle of gourd or zucchini

Instructions

  1. Rinse the greens and quickly blanch for 30 seconds in hot water then transfer to iced water to cool.
  2. Strain and add to a mixer or blender. (use the blanching water on the garden once it has cooled down)
  3. Peel Bottle gourd using a vegetable peeler, remove the center seeds and pith then chop into 2-3cm cubes. If using zucchini there is no need to peel.
  4. Add all the ingredients to a blender or mixer and blitz until combined. You may need to move things about with a spoon to get it mixed or add a dash more water. You want a thick paste-like consistency not too watery.
  5. Spread the mixture onto 3-4 silicon dehydrator trays. You may need to do this in batches or use baking paper and a tray if you do not have enough of the silicon trays. The mixture should be thick enough to not see through to the tray or paper but also as thin and even as you can (before seeing through to the tray)
  6. Dehydrate at 50 degrees celsius until dry. Check after 2-3 hours as the time will vary depending on the water content of the greens you used.
  7. Remove and carefully run a knife around the edges to loosen it. Carefully peel off the sheet it is best to do this one bit at a time holding the sheet as close to the tray as possible as to not tear it.
  8. Once removed from the tray cut the sheets into the desired size (I cut in half for wraps but I keep them whole for sushi rolls) then roll them up and place them in an airtight storage jar. Or use them straight away. would
  9. Use the wraps with your favorite salad ingredients and grilled chicken, haloumi or similar.

Notes

Greens - I used NZ spinach including the young stems but you could use any spinach or greens such as chard, rocket, sweet potato leaves etc just remove any thick stems.

Herbs - add herbs or leave them out (replace with more greens) completely up to you. Try adding 1/2 cup of herb such as parsley, chives or coriander for added flavour.

If you do not have a dehydrator you can use an oven on low to 50 degrees but be aware it may take up 6 hours so ensure you are home and not leaving the oven unattended.

How to Use Your Spinach Wraps

  • As sushi wrappers with your favorite fillings
  • Wrap up grilled veggies, haloumi, or chicken
  • Cut into strips and serve with hummus or dip
  • Roll and slice for a fun lunchbox snack
  • Use as a gluten-free tortilla swap

Try wraps with this creamy garlic sauce

These homemade spinach sushi wraps are a sustainable way to reduce kitchen waste and boost your nutrition. Whether you’re preserving an abundant garden harvest or just trying to eat healthier, they’re a delicious, eco-friendly addition to your kitchen staples.

Happy Gardening,

Holly 🌿

Zucchini Wrapped Haloumi on Rosemary Skewers

Zucchini Wrapped Haloumi on Rosemary Skewers

These Zucchini wrapped haloumi skewers are so delicious and easy to make! Marinated in my favourite green sauce plus the Rosemary flavour also infuses during cooking. I made this during one of my YouTube live streams and had to share the recipe! Serve on a fresh salad or with a charcuterie board. These would also be great for summer BBQs.

Rosemary (Rosmarinus officinalis) is a fragrant perennial herb. Rosemary is a hardy, drought-tolerant shrub and can also be used as an ornamental due to its evergreen foliage and purple or white edible flowers. Rosemary is a great herb to plant on your journey to sustainability, as it has a large list of beneficial uses for the garden, home, kitchen, plus many medicinal qualities. When Rosemary flowers it will attract an abundance of beneficial pollinators to increase your garden’s production.

Zucchini wrapped Haloumi on Rosemary Skewers

Zucchini wrapped Haloumi on Rosemary Skewers

Yield: 9
Prep Time: 25 minutes
Cook Time: 8 minutes
Total Time: 8 minutes

Easy and delicious these Rosemary Skewers make a quick lunch or entertaining dish.

Ingredients

  • 1 medium Zuchinni
  • 1 packet Haloumi
  • Olive oil
  • 9 Rosemary sprigs
  • Green Dressing (available below for logged in members or see notes)

Instructions

  1. Soak the Haloumi in a bowl of water for 5-10 mins while prepping the rest of the dish (optional but reduces the salt and makes the halloumi softer).
  2. Cut the Zucchini into thin ribbons using a wide vegetable peeler.
  3. Prepare the green sauce or marinade (available below for logged-in members or see notes)
  4. Pour half the marinade over the zucchini Ribbons.
  5. Remove the haloumi from the water, cut it into squares roughly 1-2cm, and place in the bowl with the remainder of the marinade.
  6. Place the ribbons and halloumi in the fridge to marinate further for 10-20min.
  7. Heat a pan with olive oil on medium heat.
  8. Lay a zucchini strip out flat and place a haloumi cube at the beginning then roll to wrap the square.
  9. Strip 3/4 of the leaves from the rosemary skewers (see notes if you are using the leaves for the marinade you will need to do this at the beginning).
  10. Place 3 wrapped cubes on a skewer and place in the pan. Cook until golden on each side - roughly 3 minutes each side.
  11. Serve on a fresh salad with lemon or lime wedges and extra green sauce or a creamy yogurt dressing.

Notes

  • Non-member's alternative to the green dressing - Strip 3/4 of the leaves from the Rosemary sprigs. Roughly chop and add 1/4 cup of Olive Oil and use that as the marinade.
  • Swap Haloumi for Feta or Vegan Cheese
  • P.S - I make the members green dressing in the YouTube live.

Green Sauce Chimichurri

This vibrant green dressing is packed full of flavour and is a delicious way to add a fresh zing to your meals.

Content is protected for Garden to Plate members only. Sign up for full access https://sustainableholly.com/join-the-club/

Watch the Live Video 👇

Want more Recipes?

Join the Garden to Plate club to learn more about growing thriving gardens and wholesome Garden to Plate meals.

  • Monthly workshops
  • Edible plant grow guides
  • Seasonal Grow Guides
  • Garden-to-plate recipes
  • Community to get help when you need it!
22 heat-tolerant edible plants to grow in HOT full-sun locations

22 heat-tolerant edible plants to grow in HOT full-sun locations

Do you have areas that get very hot full sun and nothing seems to survive? These 22 heat-tolerant edible plants to grow in HOT full-sun locations will help you grow productive edible gardens. I’ve been growing food here in Perth, Australia for the last 10 years, and let me tell you, it was a big change and learning curve coming from the lush green of new Zealand.

Today, I’m sharing some plant ideas to plant in those super hot locations but keep reading to the end because it’s not just about what you plant but also when and how! Bonus tips on that, so you can turn your hot barren wasteland into productive edible gardens.

Click to WATCH 22 heat-tolerant edible plants

22 Heat-tolerant Edible Plants

1. Rosemary

Attracts bees 🐝 Has healing properties and is great for skin and hair care. Flavour enhancing culinary herb🌿 When I first moved here I wondered why so many houses had Rosemary hedges out the front – and it’s because it thrives on neglect and our poor sandy soils. Rosemary is a great heat-tolerant addition to your edible garden. Try making your own Rosemary Salt.

2. Strawberry Guava

Strawberry/cherry and lemon cherry guavas are really hardy, low-maintenance fruit trees, that produce bucketloads of fruit!

3. Mulberry

Another powerhouse perennial that survives on neglect – they grow super fast so you can use these as a nanny plant or a pioneer plant. If you have a barren hot area you could plant a Mulberry to get quick shade established and later on remove it or heavily prune if it gets too big. Mulberry also loses leaves in winter to let light in.

4. Lavender

Lavender is drought tolerant – a great pollinator plant with many medicinal (calming and sleep) and culinary uses. In my garden (which will be different with climates and varieties) Lavender flowers at the same time as my Feijoas so I have it planted in between them to attract pollinators and increase my Feijoa harvests.

5. Feijoa / Pineapple Guava

If you have been following me on Instagram or subscribed to my YouTube you will have guessed this plant would make the list 😂 Low maintenance, super hardy, and produced plenty of food! Feijoas do taste better when they get 50 chill hours a year so they aren’t optimally grown here in Perth but they do grow well and are drought-tolerant. They are evergreen and super bushy so can be grown as an edible hedge. They are known to have fire retardant qualities which is very handy for hot dry climates. If you are looking to purchase a Feijoa, choose a named variety (such as Duffy, White Goose, Mammoth plus more) as these will perform better and produce fruit faster than generic seedling plants.

6. Passionfruit

Passionfruit is an edible vine that can be used to cover a fence, structure or grown over an arbor to create shade. This can help cool your garden down and provide delicious fruit. Passionfruit flowers can also be used to make calming teas to aid in sleep and anxiety. NOTE: Avoid planting a grafted variety the grafts takeover and become invasive, hard to get rid of, and don’t produce good fruits.

7. Citrus

Citrus like full sun and once established can thrive in hot environments. Avoid planting new trees before or during the hot summer so that they have time to get their roots established before the added stress of summer.

8. Lemon Verbena

A fragrant lemony scent that is similar to lemongrass. Lemon Verbena is great in teas, baking, and all the things!

9. Pomegranate

A hardy fruiting tree that thrives in hot environments.

10. Loquat

Loquats are hardy fruit trees that thrive in hot conditions. Loquats can be a pest plant because they grow so easily and birds spread the seeds so check with your local area.

11. Lilly Pilly

Part of the Syzygium genus is a great dense evergreen hedging plant with bright pink fruits. The fruits are edible and can be made into jams, sauces, and even sparking wine!

heat-tolerant edible plants

12. NZ Spinach / Warrigal Greens

NZ Spinach unlike most spinach can be grown over summer. Although not technically spinach it can be used just as you would use spinach. NZ Spinach grows as a tick edible ground cover to protect the soil and provide nutritious greens.

13. Malabar Spinach

Malabar spinach grows as a climbing vine and can be used to grow up structures and provide shade in summer. With succulent-type leaves, the Malabar Spinach does well in hot conditions but does not like frosts.

14. Quince

Quince is a hardy fruiting tree that thrives in hot conditions. Quince is great for making preserves such as jams, jelly, and chutney.

15. Zinnia

Zinnia is an edible flower that thrives in hot dry conditions. Zinnia has vibrant flowers in a huge range of colours. The great thing about Zinnia is that it produces nectar so it attracts a diverse range of pollinators to the garden such as bees, hoverflies, butterflies, and small birds. Zinnia is susceptible to powdery mildew so great for dry summers.

16. Sunflower

I love growing Sunflowers because they attract a huge amount of pollinators to the garden and you can pretty much eat the whole plant! I use the petals fresh in a salad or press to use on baking as garnishes. The seeds can be used on top of salads, to make oil, or to make spreads and the leaves are also edible. Sunflower stems can even be made into flour! Sunflowers also help remove toxins from the soil so they are a fantastic addition to a hot full-sun garden.

17. Figs

Figs are hardy edible plants that can easily be grown from cuttings. Figs are great for hot locations and the fruit can be used for jams, relish, baking, and just enjoyed fresh!

18. Olive

Olives grow well in hot conditions and also in pots and containers. They are beautiful-looking plants with their slim silvery leaves. Olives can be used to make oils and delicious preserves. Olive leaves also have many medicinal qualities.

19. Grapes

Grapes are great for growing over structures to provide shade to your garden and help other plants grow. Grapes are deciduous so they lose their leaves in winter to let light in and have full leaf coverage in summer to protect from the harsh midday sun. Grape plants have so many uses from fresh delicious table grapes to jams, preserves, and wine! grape leaves also have many uses in the kitchen.

20. Hollyhock

Hollyhocks are an edible flowers that can grow up to 10 feet tall! They attract 100 of pollinators to the garden and their height acts as a flag inviting them in. The leaves are also edible and can be cooked to make wraps. Hollyhocks are an annual so they will need to be planted again each year but are so worth it! They can be susceptible to powdery mildew.

21. Thyme

Thyme is a hardy herb that thrives in hot conditions. Thyme is very versatile in the kitchen and pairs well with tomato dishes, on pizza, and roast veggies. Thyme also produces masses of tiny white flowers that attracts an array of beneficial insects and pollinators. Thyme creeps over the ground so it makes a great edible ground cover plant.

22. Macadamia Nut

Macadamia nut trees can take a long time to start producing (5-7 years) but are really hardy and nuts are great additions to a homestead to make flour and milk from.

8 Tips for Successfully growing heat-tolerant edible plants

Many of these heat-tolerant plants listed are perennials and the reason perennials are so good for hot environments is that they have established roots and have time to get used to their environment. Annuals such as lettuce and tomatoes are planted new and have shallow roots so are more vulnerable to overheating.

Below are some tips to help you get your plants established and thriving through hot periods.

  1. Focus on good soil with plenty of organic matter
  2. Mulch, much, mulch
  3. Have water available nearby
  4. Avoid planting in hot weather (always check the forecast)
  5. Provide temporary protection such as shade cloth or umbrellas during hot periods.
  6. Grow nanny plants or pioneer plants (quick-growing trees that provide dappled shade in summer eg: grapes, mulberry, and deciduous fruit trees)
  7. Plant new trees in pots until after the summer heat has passed
  8. Plant densely – allow other plants to protect and shade each other and the soil.

Need SHADE loving plants? Check out this video 👇

Chill out – Lemon Balm Lemonade

Chill out – Lemon Balm Lemonade

Lemon balm has calming and soothing properties that can reduce stress and anxiety. This refreshing summer drink may help you chill out and unwind. Nothing beats an iced cold lemonade after a busy day working in the garden but this homemade version with fresh ingredients is a winner!

lemon balm lemonade

Lemon Balm Lemonade

Yield: 4-6 glasses
Prep Time: 35 minutes
Total Time: 35 minutes

Refreshing and soothing this botanical lemonade is the perfect summer drink to enjoy in the garden.

Ingredients

  • 1 cup Lemon Balm Leaves
  • 1 fresh lime
  • 1 fresh lemon
  • 3 TBSP Raw local Honey
  • 2 cups sparkling water
  • 1 cup water

Instructions

  1. Roughly chop up the lemon balm leaves.
  2. Bring 1 cup of water to a simmer in a pot. Remove from heat and add lemon balm. Place a lid on and let it infuse for at least 30 minutes.
  3. Using a blunt object such as the end of a rolling pin, crush the leaves and flowers into the water to extract more.
  4. Using a sieve, strain the liquid into a jug, and squeeze out any extra liquid from the leaves..
  5. Add in honey and stir until the honey has dissolved. Use less or more honey depending on how sweet you like it.
  6. Squeeze the juice of the lime and lemon and add to the jug. Stir to combine.
  7. Add in sparking water and serve in glasses over ice.
  8. To serve add extra lemon balm leaves and dehydrated lemon or lime.

Notes

Add in other herbs to create your own unique blends. Try Calendula, Mint, Lemon verbena, and Lavender.

Use lemon or lime or both.

NZ Spinach Gnocchi with Crispy Potato Skins

NZ Spinach Gnocchi with Crispy Potato Skins

Soft pillowy spinach gnocchi with crispy potato skins. Serve with herbed butter or the simple roasted tomato sauce recipe. Delicious! Unlike most spinach varieties the NZ Spinach / Warrigal greens produce in abundance over the summer! This edible ground cover is a powerhouse in the garden and pairs well with so many dishes. Spinach gnocchi is so vibrant and delicious! Making gnocchi can seem scary but this recipe has just 4 ingredients and is so worth it! I have used NZ spinach but you could swap it out for regular spinach, chard, or any other leafy greens you have growing in the garden.

Most recipes call for the skins to be removed so after the potatoes are baked we fry them up and add them on top for a low-waste delicious meal!

Which Potatoes work best?

Floury potatoes work best (not waxy) such as Desiree, Yukon Gold, and Creme Royle. AVOID – Red Royle, Kipler. Normal “white potatoes” at the supermarkets tend to be quite waxy. This means your gnocchi will have more little lumps in but still possible.

Can I use different greens?

Yes! I love my recipes to be flexible with what is in season and growing in my garden. Try swapping NZ spinach for: Chard (remove stalks and fry them up to add to the dish), other spinach varieties, Kale, Beetroot leaves, Sweet potato leaves, or a mixed combination!

spinach gnocchi

NZ Spinach Gnocchi with Crispy Potato skins

Yield: serves 4
Prep Time: 45 minutes
Cook Time: 1 hour 30 minutes
Total Time: 2 hours 15 minutes

Soft pillowy spinach gnocchi with crispy potato skins. Serve with herbed butter or the simple roasted tomato sauce recipe. Delicious!

Ingredients

Spinach Gnocchi

  • 4 medium-large potatoes (see notes)
  • 2 cups NZ Spinach (or other leafy greens such as chard or spinach)
  • 1 1/4 cups flour (see notes)
  • 1 tsp salt

Crispy Potato Skins

  • 1-2 sprigs of fresh Thyme
  • 1 TBSP Butter

Instructions

  1. Preheat oven to 180 degrees. Wash your potatoes and stab holes all over with a fork. Sprinkle with 1/2 tsp of salt and bake for 45-1hour or until a fork easily goes right through. If some are larger than others keep them in a little longer. You don't want any hard potato bits for this.
  2. While the potatoes cook blanch your greens. Remove hard stems and cook them in simmering water until vibrant green (40 seconds - 1 minute) then plunge into a bowl of iced water. Strain and blitz using a blender or mixer until a puree. Add a splash of water if needed to get blended.
  3. Remove potatoes from the oven and allow them to cool (until you can easily peel them).
  4. Peel the skins off using a knife or just peel them back with your fingers. They are quite easy to peel once the skin is cooked and slightly golden. Don't waste these delicious skins! Put them on a plate and set them aside.
  5. Mash the potatoes into a fine mash. Use a potato ricer or a potato masher and fork to get all the little lumps out.
  6. Add mashed potato to a bowl and mix in 1/2 cup of greens puree and 1 tsp salt. Mix until fully combined.
  7. Add in flour in parts and mix to form a dough. You may need a little less or a little more flour depending on how much moisture was in the potatoes and greens. You want it to still be slightly sticky but easy enough to roll. Similar to cookie dough. The more flour you add the tougher they get so try to keep less is more approach but it needs to be workable.
  8. Divide the dough into 1/4s and roll long sausage lengths onto a floured surface. Cut into 1-inch lengths.
  9. Have a floured tray or plate ready to put your finished gnocchi on.
  10. Using your thumb push down and roll each gnocchi piece over the back of a fork or a gnocchi board ($4 at most kitchen stores) to create the lines. This is optional. The lines make them look the part and also allow more space for flavour to cling to.
  11. In a pan add butter and thyme and fry potato skins until crispy. Set aside.
  12. There are two ways to cook gnocchi - boiled or pan-fried, both are delicious. For this recipe, I used the boiling method because I was serving it with crispy potato skins. To boil add your gnocchi to a pot of boiling water seasoned with salt. Cook until they float to the surface (roughly 1 minute). Do this in batches so you don't overcrowd the pot and all the gnocchi have room to float to the surface. Strain and add to a serving bowl. To pan fry - add butter or oil to a pan (chuck in some more thyme and cook the gnocchi until slightly golden on each side)
  13. Pour over hot tomato sauce or herb-infused brown butter and top with crispy potato skins.

Notes

Make the tomato sauce at the same time while you wait for your potatoes to cook. Tomatoes can be roasted in the oven along with the potatoes.

Choosing potatoes - Floury potatoes work best (not waxy) such as Desiree, Yukon Gold, and Creme Royle. AVOID - Red Royle, Kipler. Normal "white potatoes" at the supermarkets tend to be quite waxy. This means your gnocchi will have more little lumps in but still possible.

Flour - low protein flour is best for Gnocchi but all-purpose flour also works.

Made extra? Freeze your uncooked gnocchi pieces on a floured tray and once frozen add them to a freezer bag or container. Next time you want a meal simply pull out and boil from frozen or defrost and panfry.

tomato sauce

Simple Roast Tomato Sauce

Yield: 2 cups / 400-500g
Prep Time: 10 minutes
Cook Time: 45 minutes
Additional Time: 5 minutes
Total Time: 1 hour

Simple and delicious tomato sauce. Staple condiment and the backbone of so many garden-to-plate dishes!

Ingredients

  • 6-8 medium tomatoes (or 2-3 cups of cherry tomatoes)
  • 2-3 Garlic cloves
  • 1 tsp salt
  • 4 TSBP Olive oil
  • 1 medium brown onion
  • 1 TBSP Balsamic vinegar
  • 5-6 sprigs of fresh thyme (2inch long)
  • 1/2 cup fresh basil
  • 1/2 tsp chilli flakes

Instructions

  1. Preheat oven to 180 degrees Celcius. Drizzle roughly 1 TSBP oil in a roast dish.
  2. Cut tomatoes in half and add to the roasting dish skin side down. Add Garlic cloves (skin on) and thyme throughout the tomatoes.
  3. Drizzle another TBSP of olive oil on top and season with salt.
  4. Roast for 40-45 minutes until cooked and slightly golden. Time will be significantly less for cherry tomatoes (20 minutes).
  5. While the tomatoes are roasting, dice the onion and add to a pan with 1 TBSP olive oil. Cook until soft and slightly brown. Pour in the balsamic and deglaze the pan (get all the delicious flavour off the bottom). Remove from the heat.
  6. Remove the garlic from the skins and add the roasted ingredients to a blender (or jug and use a stick mixer). Allow the tomatoes to cool slightly before blitzing so the mixture isn't piping hot. Add in the chopped fresh basil, chilli flakes, and cooked onions. Blitz to combine. Smooth or chunky however you prefer.
  7. Taste and season with extra salt or chilli to your liking.

Notes

Tomatoes will have varying amounts of liquid. If you get a lot of liquid in the bottom of the roasting dish, pour some to the side and blitz then add if you want a runnier sauce.

Add excess to a jar and keep in the fridge for 2-3 days or freeze for longer storage.

Simple Roast Tomato Sauce

Simple Roast Tomato Sauce

There is nothing quite like the taste of homemade tomato sauce! This recipe is so easy – basically, just cook and blitz and you have the most incredible tomato sauce to pour over pasta, pizza base, or dip crunchy potato wedges into. Add fresh herbs from your garden and it’s a winning combo. Try this sauce poured over spinach gnocchi for a mouth-watering garden-to-plate dinner.

tomato sauce

Simple Roast Tomato Sauce

Yield: 2 cups / 400-500g
Prep Time: 10 minutes
Cook Time: 45 minutes
Additional Time: 5 minutes
Total Time: 1 hour

Simple and delicious tomato sauce. Staple condiment and the backbone of so many garden-to-plate dishes!

Ingredients

  • 6-8 medium tomatoes (or 2-3 cups of cherry tomatoes)
  • 2-3 Garlic cloves
  • 1 tsp salt
  • 4 TSBP Olive oil
  • 1 medium brown onion
  • 1 TBSP Balsamic vinegar
  • 5-6 sprigs of fresh thyme (2inch long)
  • 1/2 cup fresh basil
  • 1/2 tsp chilli flakes

Instructions

  1. Preheat oven to 180 degrees Celcius. Drizzle roughly 1 TSBP oil in a roast dish.
  2. Cut tomatoes in half and add to the roasting dish skin side down. Add Garlic cloves (skin on) and thyme throughout the tomatoes.
  3. Drizzle another TBSP of olive oil on top and season with salt.
  4. Roast for 40-45 minutes until cooked and slightly golden. Time will be significantly less for cherry tomatoes (20 minutes).
  5. While the tomatoes are roasting, dice the onion and add to a pan with 1 TBSP olive oil. Cook until soft and slightly brown. Pour in the balsamic and deglaze the pan (get all the delicious flavour off the bottom). Remove from the heat.
  6. Remove the garlic from the skins and add the roasted ingredients to a blender (or jug and use a stick mixer). Allow the tomatoes to cool slightly before blitzing so the mixture isn't piping hot. Add in the chopped fresh basil, chilli flakes, and cooked onions. Blitz to combine. Smooth or chunky however you prefer.
  7. Taste and season with extra salt or chilli to your liking.

Notes

Tomatoes will have varying amounts of liquid. If you get a lot of liquid in the bottom of the roasting dish, pour some to the side and blitz then add if you want a runnier sauce.

Add excess to a jar and keep in the fridge for 2-3 days or freeze for longer storage.