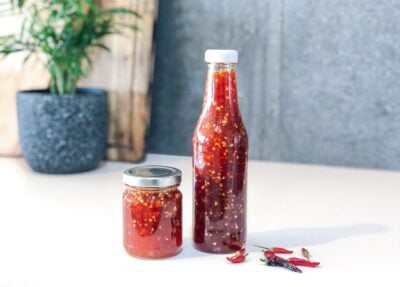
This easy Homemade Sweet Chilli Sauce is a fantastic way to use up a bunch of homegrown chillies. Growing Chillies is a great place to start for Beginner Gardeners or those with limited space, as they are easy to grow and can produce an abundance of chilli on one plant. Chilli plants like warm weather, but they can be grown throughout winter in a greenhouse or warm spot. I will cut back my chilli plants soon, place them in a warm area and let them go semi-dormant for the winter, which is called “overwintering”. That way come spring and summer, the plants are well established and will provide me with a decent crop.
This recipe can be adjusted to be as mild or hot as you like. You can use different chilli varieties, but obviously, the hotter the variety, the more your sweet chilli sauce will pack a punch! If you are concerned, I would remove and save the seeds from 3/4 of the chilli, and once it has cooked down a bit, taste and add more of the seeds to get the desired heat. I just went all-in with the seeds and used a hot Thai Chilli variety, so mine turned out quite hot, but I like that.
Easy Homemade Sweet Chilli Sauce
Yield: 500g
Prep Time: 10 minutes
Cook Time: 1 hour
Additional Time: 5 minutes
Total Time: 1 hour15 minutes
This easy Homemade Sweet Chilli Sauce is a fantastic way to use up a bunch of homegrown chillies. Growing Chillies is a great place to start for Beginner Gardeners or those with limited space as they are easy to grow and can produce an abundance of chilli on one plant.
This recipe can be adjusted to be as mild or hot as you like. You can use different chilli varieties but obviously, the hotter the variety the more your sweet chilli sauce will pack a punch! If you are concerned I would remove and save the seeds from 3/4 of the chilli and once it has cooked down a bit, taste and add more of the seeds to get the desired heat. I just went all-in with the seeds and used a hot Thai Chilli variety so mine turned out quite hot but I like that.
Ingredients
250 - 350g Chilli
8 Cloves Garlic
5 cm piece of Ginger
2 cups Sugar
2 cups White Vinegar
3 teaspoons Salt
Instructions
Wash chilli and cut off the green stems.
Roughly chop the Chilli, Garlic and Ginger and add to a mixing bowl or food processer.
Blitz the mixture into a rough paste using either a food processor or stick mixer. If using a stick mixer make sure you cover the bowl with a cloth to stop bits of chilli flying everywhere!
Add the blitzed chilli mixture to a pot and add Sugar, Vinegar and Salt.
Bring to the boil and then let it simmer on a low - medium heat until the mixture thickens (45min - 1hr).
The mixture will continue to thicken as it cools. Add a dash of water or extra vinegar if need be.
Heat oven to 130 degrees celsius and add your clean jars or bottles to sterilize for 15mins. Put the lids in a bowl of boiling water for 5 minutes.
Carefully pour the warm sauce mixture into your jars while they are still warm and secure the lids on.
Store in the fridge and use within 3-4 weeks*
* For long term storage place in smaller containers or jars and freeze or use canning methods for long term preservation.
Notes
If you want a mild sweet chilli sauce, remove 3/4 of the chilli seeds and set aside. Once the mixture has started to reduce, taste and add extra seeds as desired.
Serve with Sweet Potato Fries, as a Stirfry sauce, burger sauce or even add to noodles and vegetables for a deliciously tasty meal packed full of flavour.
If you have chilli plants that ripen at different times or a smaller amount to harvest, try freezing them whole until you have enough saved up to make the recipe. Other ways to preserve your chillies are to dry them out and keep them whole or try blitzing the dried chillies to make a chilli powder or flakes.
I hope you enjoy this easy homemade sweet chilli sauce!
Watch My Chilli Harvest and How to Make Sweet Chilli Sauce
DISCLAIMER: Links included in this description might be affiliate links. If you purchase a product or service with the links that I provide I may receive a small commission. There is no additional charge to you! Thank you for supporting my page so I can continue to provide you with free content!
Hi everyone! Welcome to my FIRST ever Urban Permaculture Garden tour! See what I have growing in my edible garden this Autumn (May 2020). My garden is constantly changing so I’m excited to finally document the growth! It’s amazing to look back at old photos and see how much has changed since we moved in. I am currently growing food in containers, pallet planters, makeshift garden beds in the driveway and slowly turning my grass into edible gardens. It is all a work in progress and I am constantly expanding my gardens and my knowledge to create my urban homestead. When we first purchased our property it had one tiny lemon tree and a few ornamental grasses along the back fence.
I now have over 15 fruit trees and many other edibles all throughout the garden. I have noticed so many insects and birds starting to frequent my yard and that makes me so happy! Diversity in plants and animals makes for a happy ecosystem.
You do not need to have the “perfect” place to grow food it is important to get to know your surroundings and just start by growing a few things. It’s all part of the journey and you will continue to learn and develop along with your garden. I hope you enjoy this video and get inspired to grow more of your own food.
Comment below if you have any questions about my Urban Permaculture Garden or anything I have growing in this video.
MY GARDENING ESSENTIALS // Fertiliser spray gun: https://bit.ly/366nL1t Retractable Hose: https://bit.ly/2TSC0Bo More gardening tools: https://bit.ly/32IQmbD
DISCLAIMER: Links included in this description might be affiliate links. If you purchase a product or service with the links that I provide I may receive a small commission. There is no additional charge to you! Thank you for supporting my page so I can continue to provide you with free content!
Garden toast is something I created one day when I was scraping together something for lunch and all I had was a crust and some cottage cheese in the fridge. I didn’t have any avocado, eggs or anything special to have with it. So I went out into the garden and found some inspiration! I picked two small tomatoes, herbs and edible flowers. It looked like a mini garden on toast and now I can’t stop making these beautiful, tasty creations!
Here are the creations I have made so far..
Original Garden Toast
My first addition with the last piece of bread I had left! I had fun making this and it definitely tasted delicious! Ingredients: Rye Multigrain toast, Cottage Cheese, Fresh tomato, Parsley, Rosemary, Rosemary flowers, Zinnia Petals and Basil leaves.
Fairy Garden Toast
It’s amazing what a little bit of Beetroot juice can do! Natural colouring and plenty of beneficial nutrients with an array of micro herbs and greens. You may even be able to convince your kids to eat more greens with this Fairy Garden toast. Get them involved in the process by having a bowl each to go outside and collect herbs. Ingredients: White Multigrain Toast, Cottage Cheese mixed with beetroot juice or fresh grated Beetroot, Baby Nasturtium leaves, Parsley leaves, Basil leaves, Sweet Violet flowers, Rosemary Flowers, Baby Pink chard leaves, Pink Zinnia Flower petals and Dill Flowers.
Jungle Garden Toast
Packed full of herbs and flavour! Ingredients: Country Grain Toast, Basil Pesto, Orange Nasturtium petals, Tiger Eye Viola Petals, Strawberry Flowers, Parsley leaves, Rosemary Flowers, Pea tendrils, Burgundy Marigold Petals and Purple basil leaves.
Summer Garden Toast
Summer on toast! Homegrown tomatoes are so sweet and delicious and tomato on toast is one of my favourite ways to eat them! Ingredients: Rye Multigrain toast, Red, yellow, orange cherry tomatoes, Purslane, Red basil leaves, Strawberry Flower, Sweet Violet Flower, Dill flowers, Rosemary Flowers, chopped Purple Kale, baby Nasturtium leaves and Fresh Chilli.
Botanical Garden Toast
Pest on toast is so delicious! I made extra pesto and if you follow me on Instagram you would have seen that I ate this for breakfast for an entire week! It was also so good with a poached egg on top. Ingredients: Sourdough toast, Basil pesto, Cottage Cheese, Chopped walnuts, Fresh Chilli, Basil Leaves, Fennel Flowers, Pink and White Dianthus, Baby Pumpkin Tendrils, Parsley Leaves and Strawberry Flowers.
Unicorn Garden Toast
My latest creation and maybe my favourite yet! Purple sweet potato spread is a vibe! Ingredients: Sourdough Toast, Mashed Purple Sweet Potato and Cottage Cheese, Overnight Pickled Red Cabbage and Red Onion (1/2 cup water, 1/2 cup apple cider vinegar, a teaspoon of sugar heated to dissolve. Pour cooled liquid over Cabbage and Onion), Purple Kale, Grilled Baby Eggplant, Purple Pansy, Multicoloured Dianthus, Rosemary Flowers and Red Basil.
Get Inspired by your Garden
There is always something in my garden to make a toast topping and I love how easy and creative it is! Each piece is so unique and full of fresh garden nutrients! Having these ideas tried and tested means I know I can always whip up something even when my fridge is looking very lean.
Get creative and inspired by your own garden. There is something so satisfying about being able to walk outside and make a meal from your own fresh, homegrown veggies. This is a great meal idea for beginner gardeners who don’t have many established edibles. Just look out for baby leaves and edible flowers (make sure you research and clearly identify they are edible). Baby leaves and flowers can add subtle flavours and turn any dish into a work of art!
Be sure to tag me on Instagram or Facebook so I can see your creations!
Holly 🌱
MY GARDENING ESSENTIALS // Fertiliser spray gun: https://bit.ly/366nL1t Retractable Hose: https://bit.ly/2TSC0Bo More gardening tools: https://bit.ly/32IQmbD
DISCLAIMER: Links included in this description might be affiliate links. If you purchase a product or service with the links that I provide I may receive a small commission. There is no additional charge to you! Thank you for supporting my page so I can continue to provide you with free content!
Unicorn noodles are so easy to make and completely magical to watch the colours change from purple to pink. My kind of Chemistry Lesson! They are made using all-natural colouring and would be perfect for kids in the kitchen. With the current restrictions in place, there may be many parents looking for more creative and healthy ways to entertain their kids. Make sure to share this recipe with your friends. I have posted these a few times over on my Instagram but thought I would put the recipe up here for easy reference.
Roughly chop the red cabbage. Use the outer leaves with a deeper colour.
Add water and cabbage to a pot and bring to the boil. Let it simmer for 5-10 mins bruising the cabbage with a wooden spoon.
Remove the cabbage and discard (compost).
Add the noodles to the purple water and turn over until they spread out in the pot and are fully submerged in liquid.
Turn the heat off and cover the pot for 10-15 minutes until the noodles have absorbed all the liquid.
Stir the noodles and strain off the excess liquid if there is any.
Place your noodles in a bowl and before serving roughly squeeze the lemon over the purple noodles and the acidity will change the colour to pink.
Notes
The more cabbage leaves you use the deeper the colour will be. The key is to get the noodles to absorb all the liquid so don’t add too much water at the start.Try using the noodles to make rice paper rolls or serve as a side dish to a Thai Curry.
SURE TO IMPRESS
These Unicorn Noodles are a great way to get kids interested in cooking! Let their imagination run wild and give them their own slice of lemon to colour change the noodles. Not only for kids these Unicorn Noodles are also a great way to add theatre to the dinner table if you are hosting family or friends. I love creating meals that stand out from the rest and get people talking. We eat with our eyes and colourful food always sparks so much more joy at the table.
You can also use the absorption method to cook white long-grain rice in the purple liquid as well. Check out my other recipes for Unicorn Rice below.
I would love to see your Unicorn noodle creations so be sure to tag me on Facebook or Instagram and let me know how you go!
Unicorn noodles are so easy to make and completely magical to watch the colours change from purple to pink. My kind of Chemistry Lesson! They are made using all-natural colouring…
Unicorn Rice Salad is the perfect dish for entertaining! It’s such a fun dish and so easy to prepare! I’m not one for strict recipes so this one is super…
For more colourful Recipe ideas and Garden tips be sure to subscribe.
MY GARDENING ESSENTIALS // Fertiliser spray gun: https://bit.ly/366nL1t Retractable Hose: https://bit.ly/2TSC0Bo More gardening tools: https://bit.ly/32IQmbD
DISCLAIMER: Links included in this description might be affiliate links. If you purchase a product or service with the links that I provide I may receive a small commission. There is no additional charge to you! Thank you for supporting my page so I can continue to provide you with free content!
Focaccia bread is so easy to make and I use a basic bread recipe that I also use for pizza bases. With heaps of basil still in my garden, I thought I would make some delicious herb focaccia. You can use any herbs and greens you have in your garden for this Focaccia Bread recipe and get creative with the topping design!
Bread Ingredients – makes 2 focaccia
1 tsp Sugar
2 1/4 tsp Active Dried Yeast
4 cups Flour
1 1/2 cups lukewarm water
1 tsp salt
1 TBS olive Oil
Topping ingredients
2 cups of herbs ( I used 70% basil, chives, sage, dill, nasturtium leaves)
4 Chillis
4 Cloves Garlic
1/2 tsp rock salt
2-3 TBS Olive Oil
1 small Red Onion
1 small Red Bunching Onion or spring onion
Baby Rainbow Chard
Dill flowers
Rosemary
Method
To make the bread combine water, sugar and yeast in a jug or bowl. Whisk to mix and set aside for 10mins.
In a large bowl mix flour, salt and Olive oil and then add yeast mix. Stir and form a dough. Add extra flour or water if needed.
Cover and leave somewhere warm for 1-2 hours to rise.
Whilst waiting for the dough start making your herb mix. Finely chop garlic, herbs and chilli (remove seeds if you don’t like too much heat and place in a pestle and mortar. Add rock salt and 1 TBSP Olive oil. Grind to a paste. If you don’t have a pestle and mortar just chop finely and crush in a bowl using the end of a rolling pin or similar.
Add the remaining 2 TBS of oil and stir to combine.
Finely slice rings of red onion. I use the thin fitting on my mandoline. Place in a bowl and add your baby greens, then drizzle with oil.
Cut your spring onion or bunching onion down the middle lengthways.
Once the dough has doubled in size, place on a floured bench and split in half. Roll each half out to form your focaccia. Place on a greased oven tray.
Using the end of a chopstick or teaspoon handle, make small indents into the dough so that the flavour can get right in. Brush on your oily herb mix and then place on your extra toppings as desired. Red onion, spring onion, rosemary, extra herbs or chilli, baby greens.
Add an extra drizzle of olive oil and cover with a tea towel. Let them rise again somewhere warm for about 10mins.
Heat oven to 170degrees celsius and cook for 25mins or until slightly golden.
Top with fresh herbs and serve. Delicious by themselves but amazing with chutney. I had extra herb oil left so I added more herbs/ chilli and made a green curry to eat with my bread and it was so good together!!
Other topping suggestions: Feta, olives, cheese, sundried tomatoes, caramelised onion… the options are endless for Focaccia Bread toppings!
Get creative and make your Focaccia bread your own piece of art. Be sure to tag me so I can see your amazing creations!
Holly 🌱
MY GARDENING ESSENTIALS // Fertiliser spray gun: https://bit.ly/366nL1t Retractable Hose: https://bit.ly/2TSC0Bo More gardening tools: https://bit.ly/32IQmbD
DISCLAIMER: Links included in this description might be affiliate links. If you purchase a product or service with the links that I provide I may receive a small commission. There is no additional charge to you! Thank you for supporting my page so I can continue to provide you with free content!
There is no better time to start growing your own food than NOW. Creating your own food security and using your time to help create a greener world is win-win. I have always had the dream of growing my own food and living a more sustainable lifestyle and it is something that I have been continually building and working towards for years. I don’t want to be 100% self-sufficient because there are just some things I either won’t be able to grow or choose not to grow. But there are plenty of ways to supplement my homegrown food supply such as trading, swapping, and local farmers markets. I have put together (in no particular order) 18 simple ways you can start living a more self-sufficient lifestyle today.
1. Start a Herb Garden
No matter whether you have a big garden or live in a tiny apartment, growing herbs can be easy and takes up very little space. Grow in small pots, recycled containers, hanging planter,s or windowsill planters. If you like to use herbs it is a great first step towards self-sufficiency. And no, that does not mean buying those packed herb pots from the supermarket…. they are often grown hydroponically and then placed in the soil so they rarely survive long and don’t handle being planted out into real life. Get a packet of seeds and try growing your own 🙂
2. Start a Vegetable Patch
The best way to learn how to grow vegetables is to simply start trying! Start small with either a planter box or convert one small patch of your garden or even driveway into an edible vegetable patch. You can also start by simply integrating edibles into your established garden. Once you start growing some things you can start expanding bit by bit. Goodbye grass 🙂
3. Plant Fruit Trees
I love fruit trees because although they take a while to get going, once they do, they are abundant and don’t require as much care as vegetables. You can plant them in either a large pot or directly into the garden. I would recommend going to a local specialist fruit tree nursery so they can help you choose the best fruit tree for your location. Also, make sure you get something with fruit you actually enjoy! With the abundant produce you can then preserve, swap, and trade with others!
4. Grow Base Crops
I couldn’t think what else to call them but growing crops that will feed you for longer and create a good base to fill your pantry. Crops such as Pumpkins, Potatoes, Onions, Garlic, and Sweet potatoes will provide decent amounts of food that you can store and use throughout the year! A great base vegetable to feed a family.
5. Grow Soil
Composting is not only great for the fertility of your soil and the secret to AMAZING vegetables but also stops waste from going to landfill. There are a whole bunch of ways to do this depending on your living situation. You can make your own compost bin out of recycled wood, find a second-hand tumbler online or purchase one. You can also simply dig a hole in the garden and bury it (be careful of attracting pests though). There are also some new ways for people with no land to connect with others that do and give them your compost scraps. Either community gardens, local Facebook groups or now in Australia there is even an app! Sharewaste
6. Save Seeds
This is just as important as growing food and will be a huge step towards your self-sufficient journey. Saving seeds helps you maintain food security knowing that you have more healthy seeds to grow next year. Save seeds from your healthiest plants that thrive in your garden. Keep them in a dry dark place.
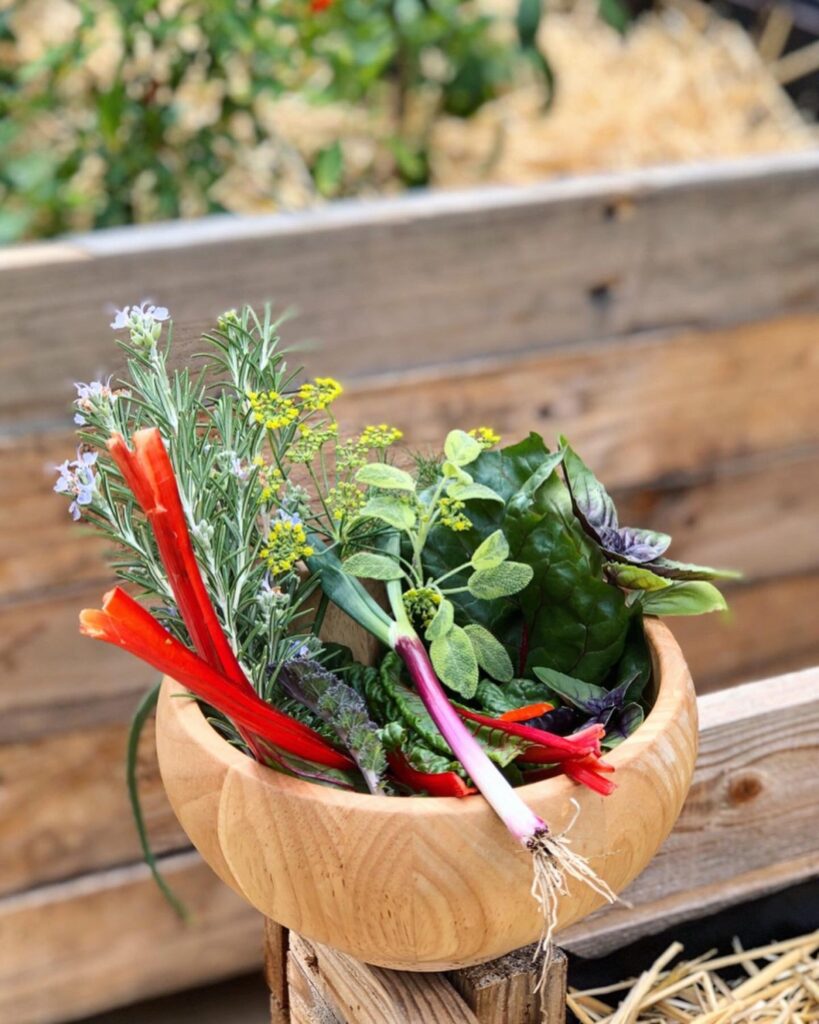
7. Grow Community
Get your friends involved! Take them over a basket of homegrown food or preserves. Once they see your delicious fresh food they may also get inspired! Help them out with seeds, and cuttings and surround yourself with like-minded people. Community gardens can be a great place to learn, get involved, and even seed/ produce swap. It can be an amazing network of knowledge, especially in relation to your local climate and growing conditions. There are also some great social media forums and groups that are great for finding answers to your questions and local knowledge.
8. Shop Local
Explore your local farmer’s markets! Grab a friend and go have a browse! They are usually on a Saturday or Sunday morning and I look forward to it every week. Although I love my local farmers market (Kalamunda) every few months I like to check out other farmers markets to mix things up and find new and interesting produce. Bulk food stores have been making a come back and I am sold! Lucky for me there is a fantastic Bulk Store ( Replenish Kalamunda) right by my local farmer’s markets. So I head there straight after I have picked up some fresh veggies. They may seem daunting at first but there are always plenty of signs explaining how to do it. I also love how each product clearly states where they have come from as I try to only choose Australian products.
9. Learn to Cook from Scratch
This is a big one! Learning to cook a wide range of meals from scratch using simple ingredients is key! I mean we can all make a butter chicken right…you just get the sauce and pour it in… Ditch the sauces from the supermarket and learn to make your own. I am constantly experimenting and expanding my knowledge so I can make a wide selection of meals from the produce I grow. Try to buy vegetables that are in season and fruits and vegetables that you are planning to grow. That way you can practice and become a pro at recipes for YOUR future harvests!
10. Grow Food From Scraps
Ok, this is one of my favourites! It is so quick and easy and a lot of fun! Plus you are getting the most out of your food. Buy one get multiple free!! Cut off the ends of your farmers market vegetables such as Spring Onion, Leek, Pineapple, Sweet Potato and regrow!
11. Forage and Trade
Keep an eye out on your walks and day trips for wild or excess food. So often there are olive trees, fruit, nuts or wild apple trees going to waste. Do your research and learn how to identify plants. That way you will know what you are looking at. It is also important to be careful if things have been sprayed by the council. I would be always cautious of things such as blackberries. You may even notice a neighbours tree loaded with fruit that is going to waste on the ground. Politely ask if you can have some in exchange for some preserves or baking you make with it. They will probably be happy for it to be used!
12. Repair and Upcycle
Get the most out of your things by fixing or updating them! Even if you don’t know how you may be able to pay someone a fraction of the cost to fix it rather than buying brand new. We often are so quick to throw out and buy new, we don’t even stop to consider if it can be fixed or repurposed. My hair straighteners and been fixed multiple times by electrician friends over the past 12 years and are still working amazingly! Recovering cushions, and couches, DIY, get creative, and even find a local seamstress if you don’t have access to a sewing machine.
13. Shop Second Hand
I try my best to not buy new and it is something I am continuing to work on. Most items you want can be found on Facebook market place, Gumtree (Trademe, Craigslist, etc). You can usually pick up a bargain and keep things in the loop rather than consuming more new things. You can even post in your local community groups and borrow or buy. Especially with things like appliances as many people often have them sitting in the cupboard collecting dust…Pasta maker, I’m talking about you 🙂
14. Backyard Chickens
Chickens make an excellent addition to sustainable living. They provide eggs, eat leftover scraps, produce manure for fertilising your garden, and can they also be incorporated into an integrated pest management system to help you keep your slugs and snails at bay. Many councils will allow backyard chickens in suburbia. Although I do not have chickens …yet (Pictured above is mums ‘Chick Inn’) my council allows x6 backyard chickens on properties 600sqm -2000sqm.
15. Back to Basics
Bread/milk/butter/pizza dough. The age-old skill of baking your own bread is a fantastic skill to have! How amazing to just whip up a fresh loaf of bread or make your own pizza bread without the preservatives or plastic packaging. Milk is super easy and you can make delicious plastic, preservative-free milk whenever you want! Whether that’s oat, rice or almond milk.
16. Learn to Preserve Harvests
I am not really at a point yet where I have an abundance of produce to preserve but I have planted a lot of fruit trees…so I am starting to learn different ways to preserve things so that when I am flooded with produce (yay!) I will be able to make the most of it! Get some produce from the farmer’s markets and give it a go! Jams, chutneys, sauces, pickles, nasturtium capers and all those delicious things. They also make great gifts and can be used to swap for other produce with your friends and family and community.
17. Make your Own
Ditch the toxic chemicals and pesticides and start making your own natural cleaning and garden products. You can get a few ingredients from your local bulk stores such as white vinegar and bicarb soda and make a huge range of cleaning products. Check out my Citrus cleaner here. I also used crushed eggshells to keep slugs and snails at bay. Natural pest management
18. Learn, Read, Practice
I can’t stress how important this is! Knowledge is power. Join your local library and get a book on jam making or search YouTube for “how to prune a lemon tree”. Educating yourself and giving things a go will get you a long way on your journey to living a more self-sufficient lifestyle. Take things one a time and really try and master it before moving on. It can be overwhelming if you try to do it all at once and may lead to failure and giving up.
Small and slow solutions!
Holly 🌱
MY GARDENING ESSENTIALS // Fertiliser spray gun: https://bit.ly/366nL1t Retractable Hose: https://bit.ly/2TSC0Bo More gardening tools: https://bit.ly/32IQmbD
DISCLAIMER: Links included in this description might be affiliate links. If you purchase a product or service with the links that I provide I may receive a small commission. There is no additional charge to you! Thank you for supporting my page so I can continue to provide you with free content!