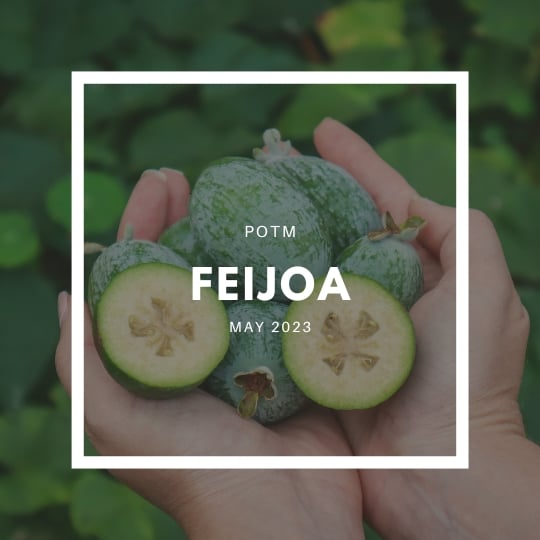
Learn how to grow Feijoa and what to make with their abundant crops! Feijoas or Pineapple Guava (Feijoa Sellowiana) are an abundant-producing fruit tree with green, sweet-tasting fruit. The trees are evergreen with dark green and silver foliage. Feijoas are easy to grow and, due to their thick foliage, they make a great screening tree or edible hedge!
This fruit tree is a prolific producer and can grow in a range of climates from temperate to subtropical, but grows best from zones 8-11.
Prune for size in autumn. Keep well watered in summer when fruiting.
FERTILISE
Feed with compost and keep well mulched.
PESTS
Rats, fruit flies, birds, guava moth, possums, scale.
HARVEST
Ripe when they fall from the tree. Collect daily.
REPRODUCE
Can grow from seed but best results are from grafted plants.
Why Grow Feijoa?
Here are some of the many reasons to grow Feijoa
It produces in abundance!
It is self-fertile
Evergreen – ornamental all year round
Delicious juicy fruit that are sweet with a perfumey flavor
Green fruit, which is harder to see from pests
Hardy tree – easy to grow
The whole fruit is edible!
Flowers are edible
Foliage is said to have fire-retardant qualities
Drought tolerant
Dense foliage can be pruned into a hedge for screening areas
Popular Feijoa Varieties
Feijoas are commonly sold as seedling plants under the name Pineapple Guava or Feijoa Sellowiana these will perform with mixed results and can take 6+ years to start fruiting. Choosing a grafted or named variety will offer a quicker-producing tree that will be true to type. Varieties will vary from country to country.
Duffy – Medium – large-sized fruit. Popular all-around variety.
White Goose – Large fruit with juicy white flesh. Early season fruiting that can last quite a long time.
Mammoth – Large round fruit with thick wrinkled skin. Can benefit from a pollinator tree. Tall upright tree.
Apollo – Medium – large oval fruit. Smooth light green skin. Tall upright tree. Semi-self-fertile – benefits from another pollinator tree.
Unique – Medium-sized fruit. Smooth, juicy, and sweet. Starts fruiting from a young age.
Triumph –Medium-sized fruit. Slightly gritty but good flavour. Late season bearing.
Nazemetz – Large oval/pear-shaped fruit. Smooth skin with sweet flesh. Self-fertile but will bear heavily with cross-pollination.
QUICK TIPSON HOW TO GROW FEIJOA
Choose a named variety (x2 different ones for bonus pollination)
Choose a sunny location
Add plenty of compost
Mulch
Ensure plenty of water during fruiting (summer)
Fruit is ready in Autumn
When to PlantFeijoa Trees
Plant your Feijoa plants in Spring or Autumn to avoid added stress from summer and winter temperatures.
How to GrowFeijoa
To plant your Feijoa, pick a sunny spot, they like full sun for 6-8 hours at least. And quite a bit of space, as these trees will grow quite large (2-5m). You can prune them back heavily though, so it’s not a major issue. They will also grow well in a large pot.
Dig a hole twice as big as the pot and mix a little compost in with the soil. If your plant has tightly bound roots, free them up before planting them out. Firmly pack the soil back around and cover it with mulch. Just pull back the mulch from the trunk so you don’t rot the trunk. Feijoas have shallow feeder roots so keep weeds and plants at a minimum under the tree line.
Give it big water! Now you basically don’t have to do anything for the first couple of years except keep it watered, especially during the dry season. You may get flowers in the first year or it makes take a couple of years until it is established enough to put out flowers. It flowers in spring and the fruits are usually ready and ripe in Autumn.
How to Care and Maintain Feijoa Trees
Feeding
Once your tree is established and starting to flower and fruit you can look at more fertilizing and watering. You can feed your plants near the end of winter, spring, and summer with compost or worm teas, or liquid seaweed. I don’t do a lot of feeding but I do chop and drop the prunings and add layers of mulch each year.
Watering
Another key tipis to ensure your plants get plenty of water during summer and late summer as the fruits are developing. This is something we struggle with here in Perth because we basically get no rain in summer. This last summer was so dry in Perth, and my trees were loaded with fruit. I obviously didn’t water them enough for the amount of fruit they had and the results are a strange hollow center. The fruit still tastes delicious, just not quite as juicy as it should be.
So I will have more mulch and more water next season. From memory, I was only hand watering max twice a week, and it was extremely hot here, so I’m not surprised really.
Pruning
Once your feijoas have finished fruiting, and you have picked up all the dropped fruit. It can be a good time to prune your trees if you want. I like to prune mine each year so that the fruit is always within reach. Otherwise, it ends up over the neighbor’s fence or is bruised from falling so far to the ground. Feijoas love a prune and it can actually improve fruiting. I cut back about 20-30% each year and I find that it grows back about that much so my trees stay relatively the same height by doing this.
Plus, by cutting back 20% of the tree, I get a whole lot of green material to chop and drop. In my food forest-style garden, I don’t remove anything so all prunings go directly back into the garden. I prune using hedge shears or loppers for larger branches and then run them through my small mulcher. You can also chop them into small pieces, then lay them around the trees. This will break down and act as a natural fertilizer.
Pollination
You may notice lots of small birds in your trees when they are flowering. Don’t worry as they are helping pollinate the flowers. They harvest the nectar and also eat the petals but generally allow the main flower to stay put and fruit. Bees and small birds are the main types of pollinators.
One tree will still perform amazingly as they are self-fertile but having multiple just increases your harvests. It can also extend your season. Meaning different varieties take longer or shorter to flower or ripen and you can get extended harvests.
One thing to note is that feijoas ripen quickly and in bulk. So they come in hard and fast.
Pests / Disease
Rats and possums will love your fruit, and also parrots and birds. You may want to net or bag fruits if you are worried. I definitely have rats and parrots but so far I haven’t needed to bag fruit as they are doing minimal damage to my large harvests. Fruit flies and guava moths are also a problem in other areas. Again, this would mean you need to bag the fruit or net the tree when the fruit is young before they get stung.
How/ When to HarvestFeijoa
Now comes the fun part – harvesting. How do we tell when the fruit is ripe if it remains green? Well, it falls off the tree. So each morning, you can go out and pick up all the fruit from the ground. It is important to pick all the fruit up because otherwise, you will attract pests like rats and possums, or fruit flies. Feijoas do continue to ripen off the tree so you want to eat them quite quickly or use and preserve them. I like the tartness of fresh feijoas, and they get sweeter and more perfumy as they ripen, which is why I never like feijoas from the stores, as I find them too overripe.
Most people will cut the fruit in half and scoop out the inside to eat but you can eat the whole fruit. Especially when they are quite ripe the skin is sour and the inside is sweet it has a nice balance.
Reproducing
Ripe feijoas may have small brown seeds inside. These can be planted in moist soil. Feijoas do not grow true to type from seed so they may produce fruit different from the one you saved the seeds from.
Ways to cook and use Feijoa
Feijoas are delicious when eaten fresh off the tree. You can eat the whole fruit or cut it in half and scoop out the insides. Once they fall from the tree, they may still be a little tart. Allow them to ripen for a few days, and they will become softer, sweeter, and juicier. However, they will continue to ripen and become over-ripe. Fruit flies may also find them on the bench, so I like to keep them in the fridge.
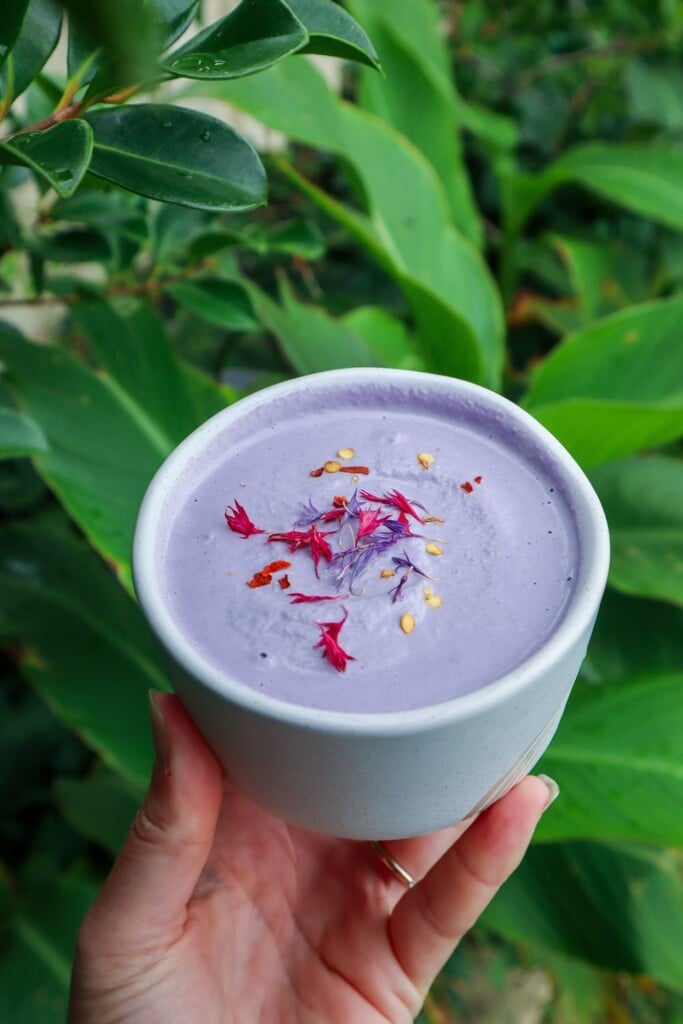
Feijoa flowers are beautiful, and the petals are edible. I saved a bunch to add to teas. Just carefully remove the soft white and pink petals without removing the whole flower.
Feijoa pairs well with: Ginger,Coconut, Apple, Cinnamon, Chilli, Citrus, Pear, Nuts, Dark chocolate, Yogurt
Feijoa ideas:
Juices
Smoothies
Cakes
Jam
Crumble
Muffins
Icecream
Preserving your Feijoa Harvest
Feijoa trees, once mature, will produce bucketloads of fruit! They can be frozen to use in smoothies and juices or baking, or preserved in jams, chutney, alcohol infusions, and bottled.
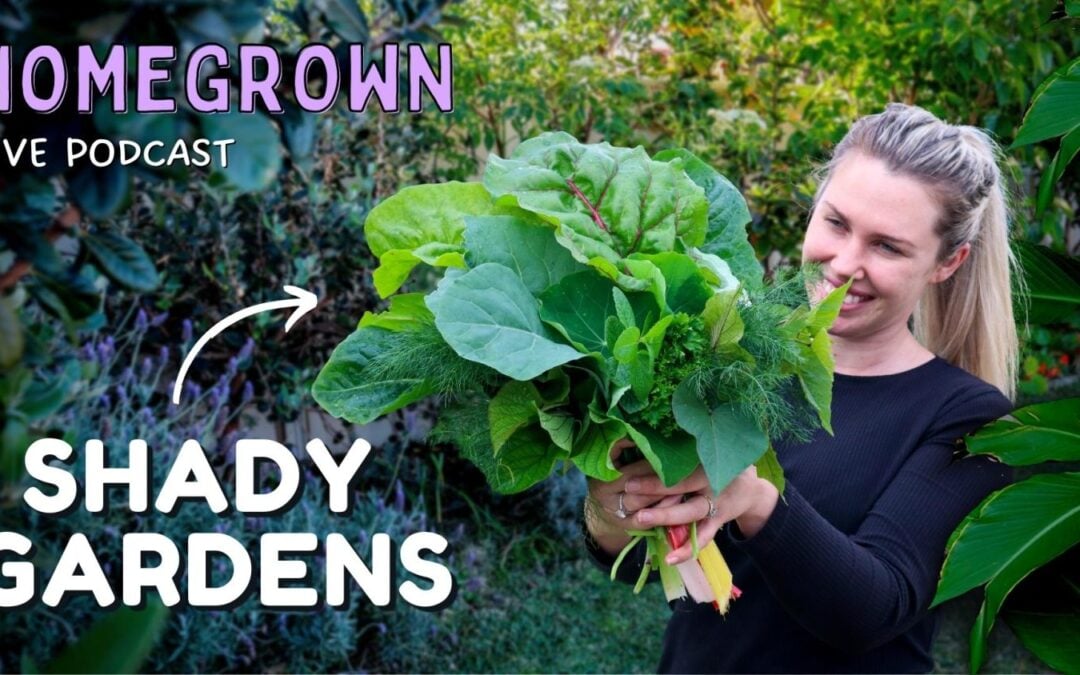
Our gardens will inevitably get shadier as mature trees start to grow. We will also get more shade in our gardens throughout the year during different seasons. In this episode of the Homegrown Podcast, we will discuss how to grow food if you have areas of shade in the garden. What to plant, how to maximise production and minimise disease.
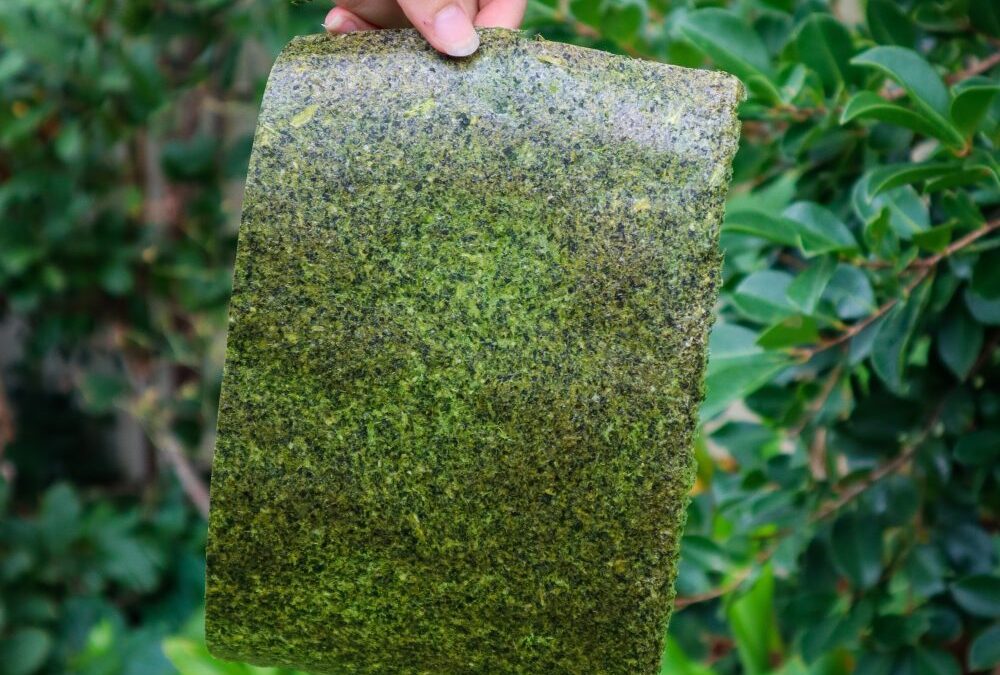
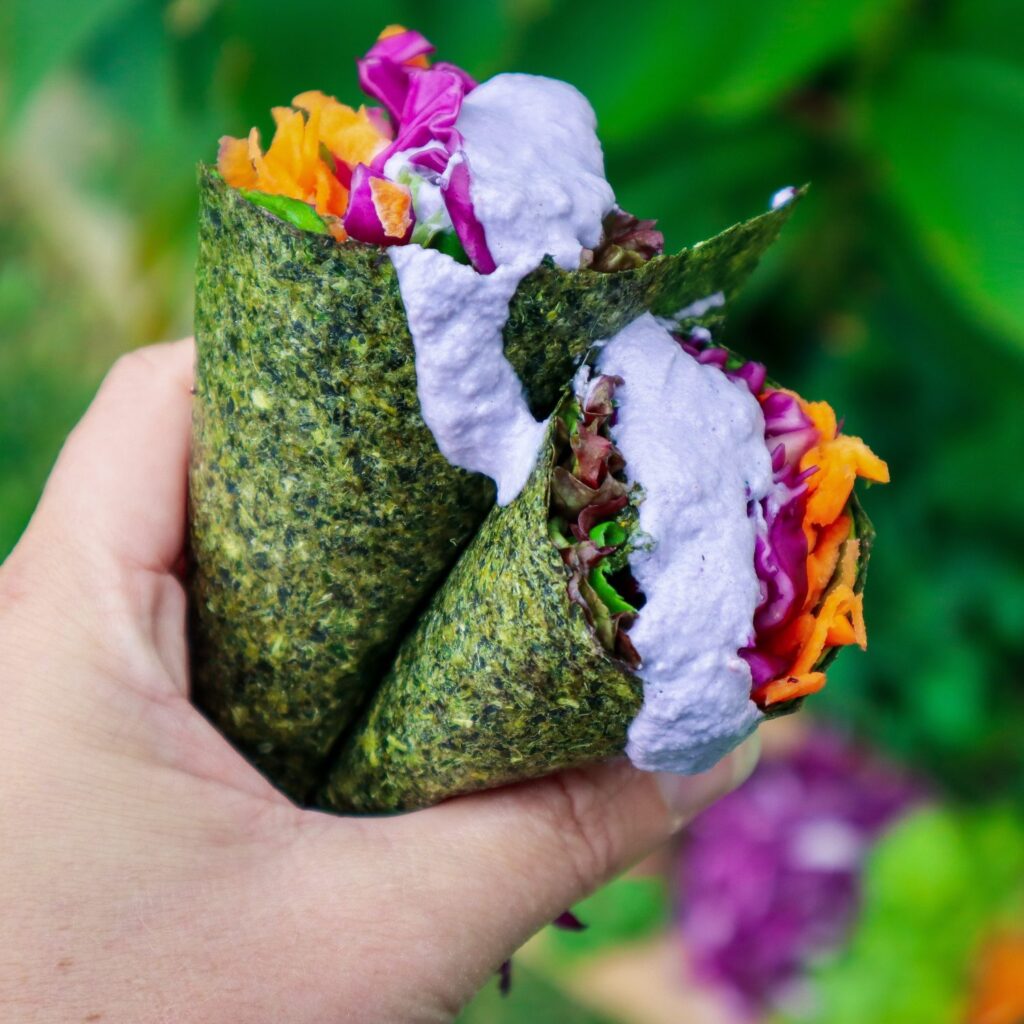
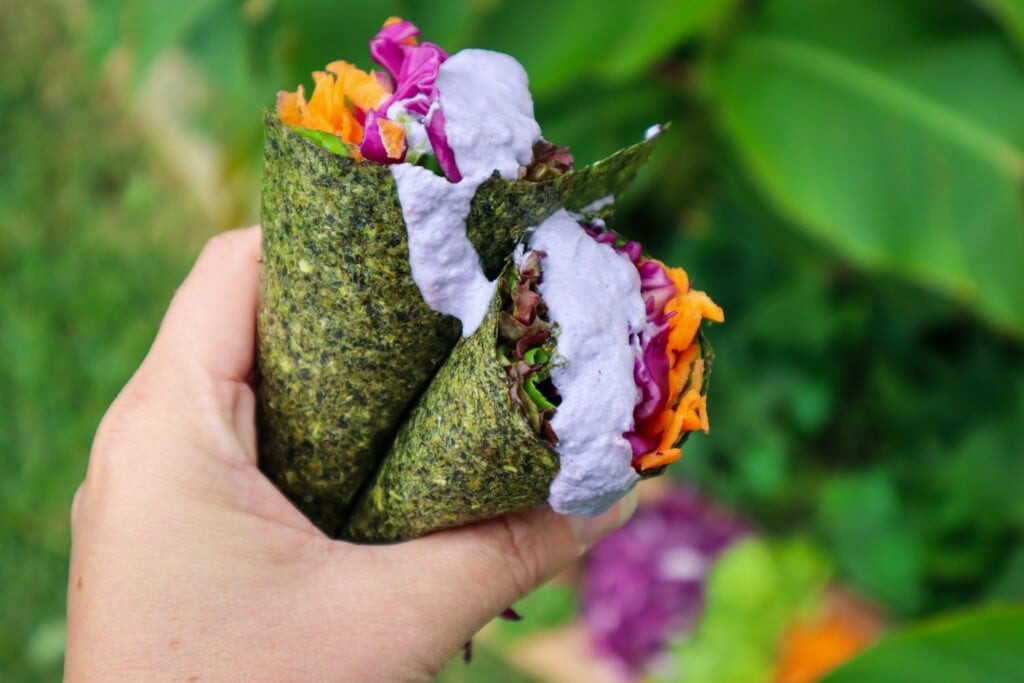
Looking for a healthy, homemade wrap alternative? These DIY spinach sushi wraps are a delicious and nutritious way to use up garden greens and create quick, wholesome meals. Whether you follow a gluten-free, low-carb, or plant-based lifestyle, these wraps are a game-changer. Made from fresh spinach, herbs, and garden vegetables, they’re packed with nutrients and completely free from preservatives and additives.
These wraps have the texture of nori but are 100% vegetable-based. Use them for sushi, wraps, or as a healthy tortilla alternative. This is the perfect recipe for zero-waste gardeners who want to make the most of their seasonal harvests. I am so impressed with how amazing these are!
These dehydrated spinach sushi wraps taste and feel just like the real deal but I know exactly what is in them. Use excess garden greens along with bottle gourd or zucchini to make a batch of sushi wraps for a quick and easy lunch. Like most of my recipes, you can mix and match different greens and herbs depending on what’s in season or in abundance in your garden.
Garden Vegetable Variations
Don’t have spinach? No problem. Try other leafy greens such as:
NZ spinach (Tetragonia)
Swiss chard
Rocket/arugula
Sweet potato leaves
Amaranth greens
You can even mix in edible weeds like chickweed or purslane for extra nutrition.
Recipe Notes
Psyllium Husk helps bind the mixture and gives flexibility.
Herbs are optional but add great flavor.
Dehydration Time varies depending on water content and thickness.
Spinach "sushi" wraps
Yield: 8
Prep Time: 10 minutes
Cook Time: 6 hours
Total Time: 6 hours10 minutes
Easy way to preserve excess produce and have wraps on hand for a quick garden-to-plate lunch when you need it.
Ingredients
4 cups spinach or greens*
1/2 cup fresh herbs*
1 TBSP psyllium husk
1 - 2 TBSP water
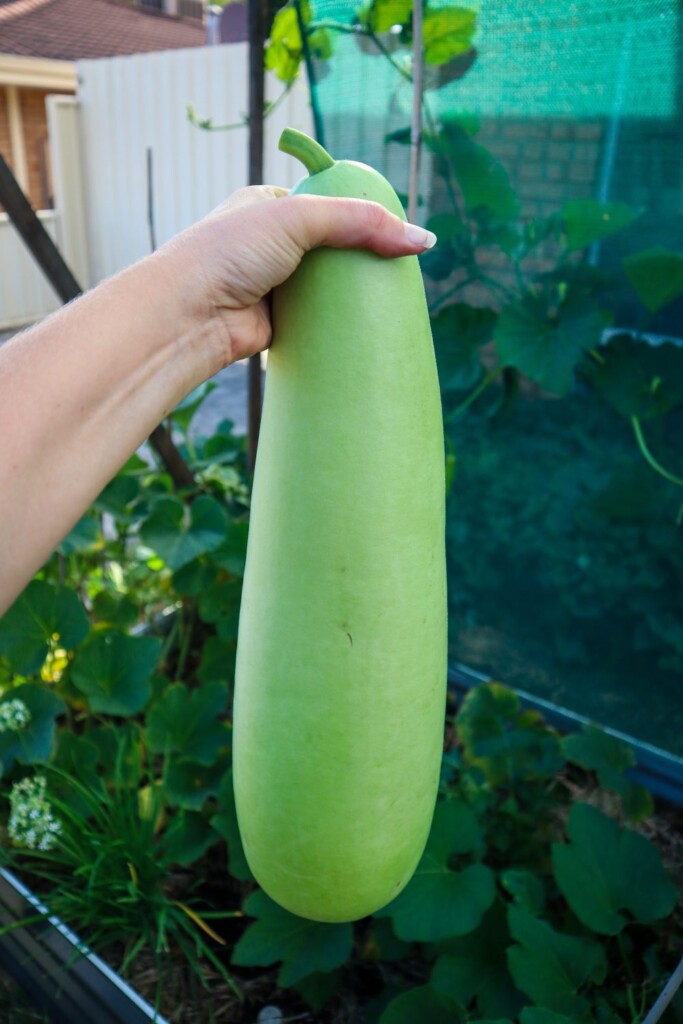
2 cups chopped bottle of gourd or zucchini
Instructions
Rinse the greens and quickly blanch for 30 seconds in hot water then transfer to iced water to cool.
Strain and add to a mixer or blender. (use the blanching water on the garden once it has cooled down)
Peel Bottle gourd using a vegetable peeler, remove the center seeds and pith then chop into 2-3cm cubes. If using zucchini there is no need to peel.
Add all the ingredients to a blender or mixer and blitz until combined. You may need to move things about with a spoon to get it mixed or add a dash more water. You want a thick paste-like consistency not too watery.
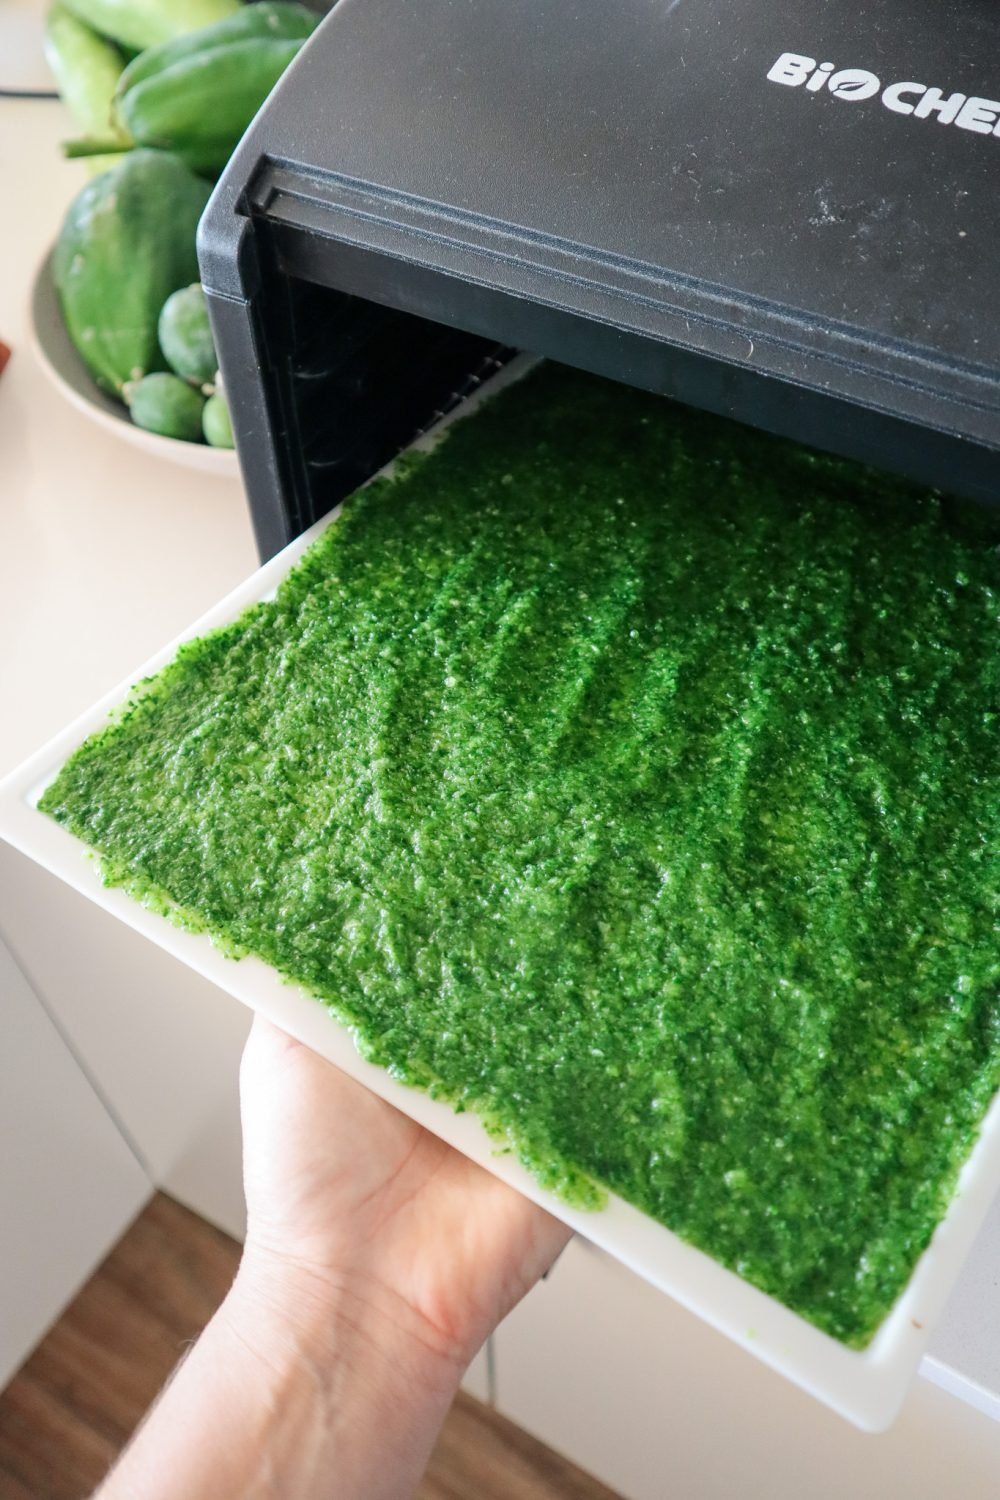
Spread the mixture onto 3-4 silicon dehydrator trays. You may need to do this in batches or use baking paper and a tray if you do not have enough of the silicon trays. The mixture should be thick enough to not see through to the tray or paper but also as thin and even as you can (before seeing through to the tray)
Dehydrate at 50 degrees celsius until dry. Check after 2-3 hours as the time will vary depending on the water content of the greens you used.
Remove and carefully run a knife around the edges to loosen it. Carefully peel off the sheet it is best to do this one bit at a time holding the sheet as close to the tray as possible as to not tear it.
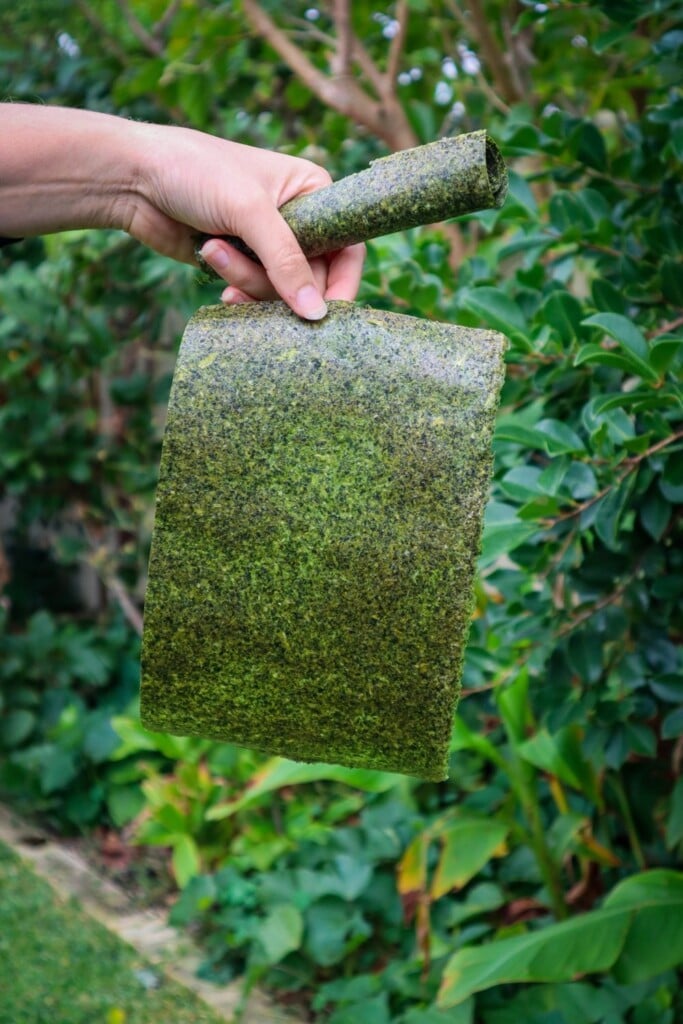
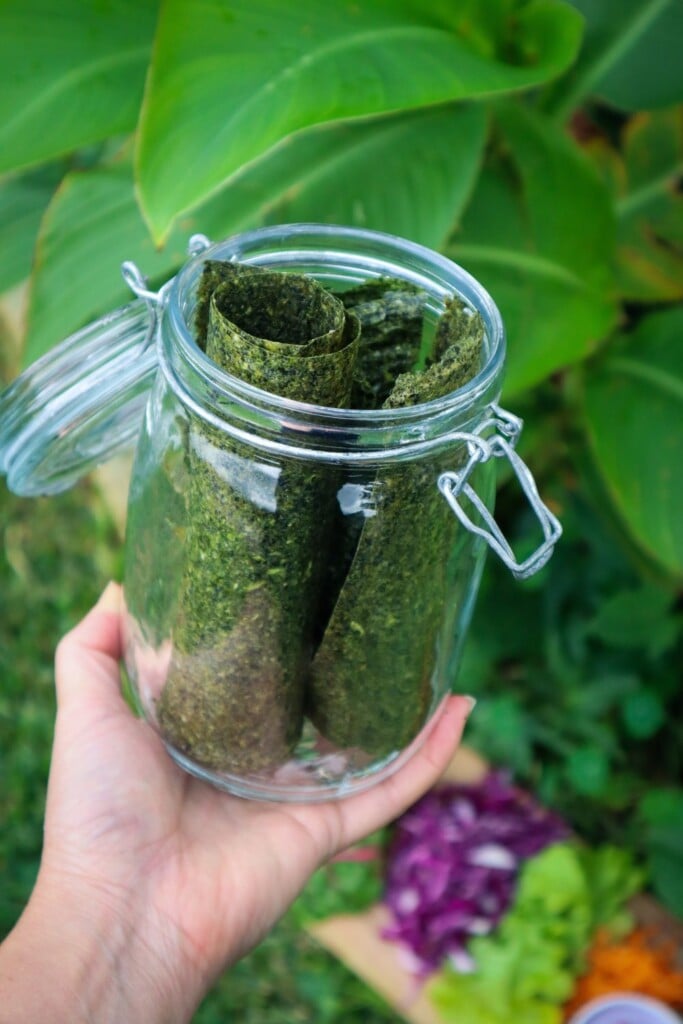
Once removed from the tray cut the sheets into the desired size (I cut in half for wraps but I keep them whole for sushi rolls) then roll them up and place them in an airtight storage jar. Or use them straight away. would
Use the wraps with your favorite salad ingredients and grilled chicken, haloumi or similar.
Notes
Greens - I used NZ spinach including the young stems but you could use any spinach or greens such as chard, rocket, sweet potato leaves etc just remove any thick stems.
Herbs - add herbs or leave them out (replace with more greens) completely up to you. Try adding 1/2 cup of herb such as parsley, chives or coriander for added flavour.
If you do not have a dehydrator you can use an oven on low to 50 degrees but be aware it may take up 6 hours so ensure you are home and not leaving the oven unattended.
These homemade spinach sushi wraps are a sustainable way to reduce kitchen waste and boost your nutrition. Whether you’re preserving an abundant garden harvest or just trying to eat healthier, they’re a delicious, eco-friendly addition to your kitchen staples.
Explore how to grow Bottle Gourd in your garden and how to preserve the harvest! Bottle Gourds are an abundant climbing plant that produces a range of different-sized and shaped fruits depending on the variety. Not only do they produce a huge amount of food, but they can also be dried to use as bowls, cups, bottles, and other vessels or containers.
So far this season, each vine has produced over 30kg of food with the potential for much more! Once you know how to grow and use bottle gourd, it may just become one of the most-used vegetables in your garden.
Help train the vines up structures. Prune older leaves to improve airflow. Hand pollinate when possible.
FERTILISE
Feed with compost teas and keep well mulched.
PESTS
Rats, aphids, snails.
HARVEST
Harvest when large and still green for eating or leave to dry out for bottles.
REPRODUCE
Grows easily from seed.
Why Grow Bottle Gourd?
Here are some of the many reasons to grow Bottle Gourds
Easy to grow
One plant provides an abundance!
Climbing vine – vertical gardening
Cover or create shade for the garden
Versatile crop
Make bowls or vessels
Base crop to make many dishes
Grows well in containers
Popular Bottle Gourd Varieties
Gourds come in many different shapes.
New Guinea Bean – Lagenaria siceraria – Italian heiloom. Popular in India where it grows easily. Large pale green tube-like gourds that can grow over 1m if left. Harvest at 40cm for eating. creamy white flesh simular to Zucchini.
Birdhouse Gourd – Lagenaria siceraria – Round bowl-shaped gourds with a narrow neck that can be used green as a zucchini substitute or left to dry and make into bowls and hanging bird feeders.
Round Bottle Gourd –Lagenaria siceraria – Large round bottle gourds that are perfect for making bowls. Can be eaten when young and green.
Mini bottle Gourd –Lagenaria siceraria – Popular for crafts. Round on the bottom then a skinny center with another bowl at the top similar to an hourglass shape.
Cucuzza Squash – Lagenaria siceraria– Slim elongated pale yellow-green gourd. Can be used as a Zucchini substitute.
Speckled Swan or Gooseneck Gourd –Lagenaria siceraria – Dark green with light speckles. Bowl-shaped base with a curved neck to look like a swan. Very decorative gourds.
When to Plant Bottle Gourd?
Gourds love warm weather! Plant your seedlings out into the garden after your last frost when the weather is starting to warm up. Seeds can be started indoors until it is warm enough to go into the garden.
Top Tips on How to Grow Bottle Gourd
Choose a sunny spot with 6-8 hours of sunlight or dappled part shade.
Plant seeds directly in the garden or in seed trays first.
Ensure you have a decent-sized trellis or arbor for them to grow up. Bottle gourds are vigorous growers similar to a pumpkin. It is best to train them up off the ground. Pergola-type structures or tunnels work best so that the bottle gourds can hang down.
Keep new plants well watered, especially during summer
Prune older leaves off that are starting to go brown or damaged to allow more airflow. Bottle gourds, like pumpkins, can get powdery mildew in wet or humid weather.
Hand pollinate to ensure successful harvests. I have found that even with bees about hand-pollinating is often necessary. Remove the petals from the male flower (which has no baby fruit on it) and dust the female flowers with pollen (they have baby fruit at the base of the flower)
How to Care and Maintain Bottle Gourd
Bottle Gourd plants will grow quickly in late summer and may need help to be trained or directed in the right direction to remain on the trellis. Hand-pollinate for added success. Remove powdery mildew leaves.
Pests / Disease
Rats may eat the fruit. Slugs and snails can be an issue when the plants are still small.
How/ When to HarvestBottle Gourd?
Bottle gourds can be harvested at many stages. While the skin is still soft and can be easily scratched, they are best for eating.
To get a continuous crop harvest regularly, so the plant has more energy to keep producing. Near the end of summer, when the plant slows dow,n you can leave the gourds on the vine to dry and go brown for crafts and vessels.
ReproducingBottle Gourd
Bottle Gourds grow easily from seed.
Allow the gourd to mature on the plant (until it stops getting bigger and starts to get harder skin or go brown and dry). Cut the gourd open and scoop out the seeds. Separate from the flesh and allow to dry completely on a plate. Pop in a container or brown paper bag, label and date, then store in a coo,l dark location until next spring.
Ways to Cook and Use Bottle Gourd
Bottle Gourd can be used fresh, dried, or frozen. Bottle gourd is used in a similar way to Zucchini. Peel the outer skin off using a vegetable peeler. If the gourd has started to go hard on the outside, you may need to use a knife to slice the outer skin. Remove the center pith and seeds.
Bottle gourd has very little flavour and makes a great vegetable to use as a filler or to carry flavours via dressings and marinades. Bottle gourd is a great way to thicken up smoothies.
Bottle Gourd can be frozen to use in soups, curries, or smoothies. Dehydrated strips using a vegetable peeler or zoodle maker can be dried and used as an alternative to pasta.
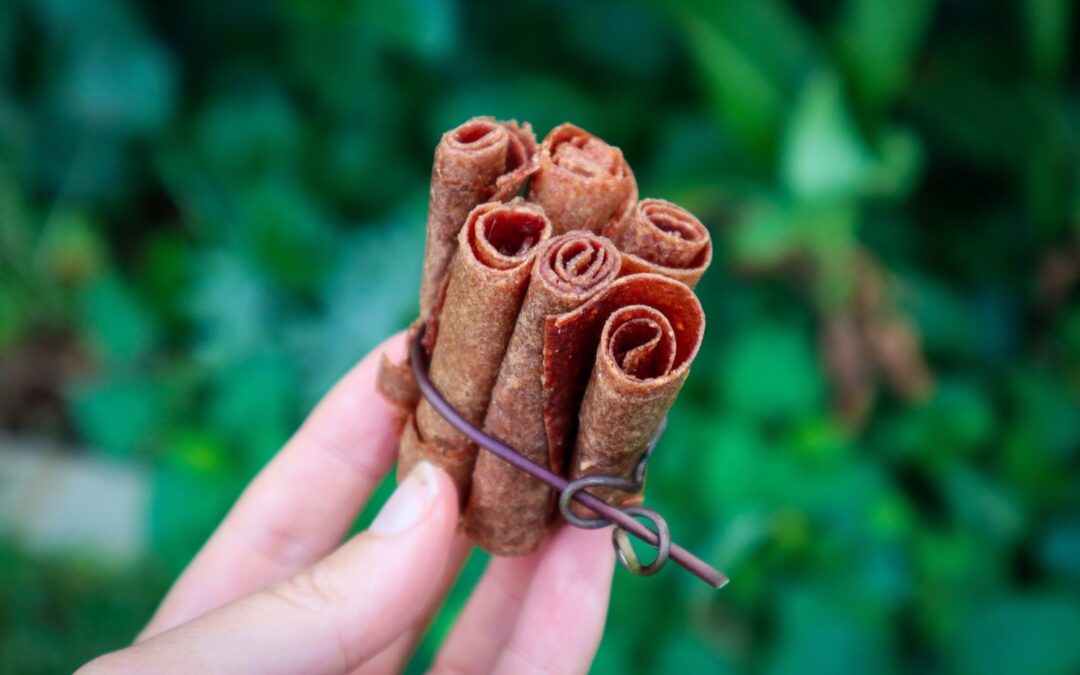
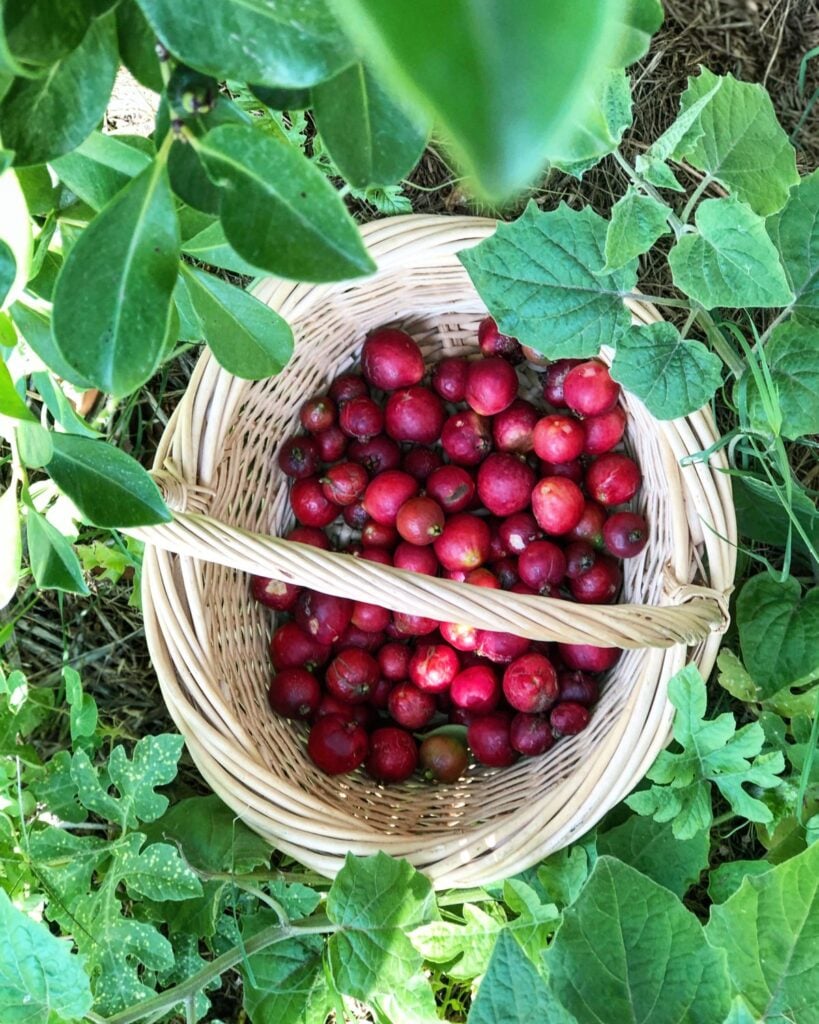
If you are growing Strawberry Guava you will almost certainly experience huge bowls of fruit after a few years. They ripen quickly and new fruits are ready each day during summer or autumn. These can be eaten fresh or extras frozen to collect a bulk amount to preserve. This fruit leather is sweet and delicious and a great way to preserve and enjoy your guava harvests without the hard seeds.
Naturally sweet and delicious garden-to-plate snacks.
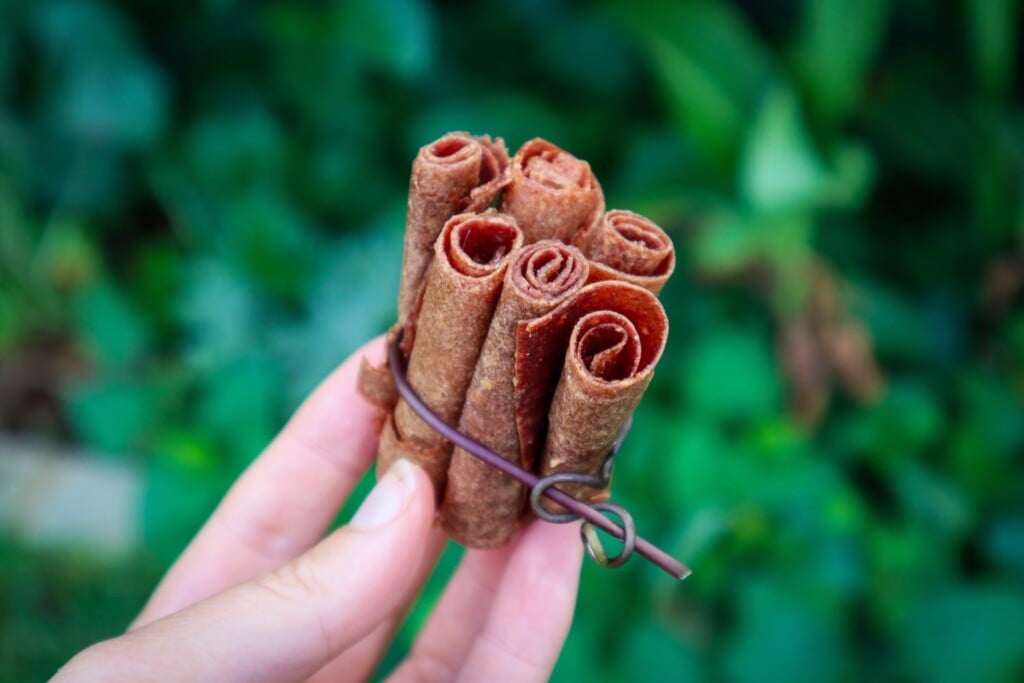
Strawberry Guava and Apple Fruit Leather
Prep Time: 20 minutes
Cook Time: 6 hours
Total Time: 6 hours20 minutes
Sweet and tangy this fruit leather is a great way to enjoy your bumper crops without the hard seeds.
Ingredients
3 Cups (or large hand fulls) of Strawberry Guava (fresh or frozen)
2 Apples
1 tsp fresh lemon Juice
1 TBSP Honey or raw sugar (optional)
Instructions
Wash and cut the ends of the guavas (the pronged part). Place the guava in a blender and the ends in a jar to make a scraps vinegar (see below recipe) or add to the compost.
Wash, peel, and core apples (peels can go in the scraps jar too). Slice the apples and cook in a saucepan with a splash of water until soft.
Blend the guava, apple, lemon juice, and honey until you get a smooth consistency with no chunks - there will still be seeds.
Using a mesh strainer pass the mixture through a sieve to separate out the seeds. This is best done in small batches. Push down and mix around until the mixture comes out the bottom and the seeds are left behind. It seems hard at first but only takes about 10 minutes to complete. Remove the seeds (add to scraps jar or compost).
Taste and add more sweetener or lemon juice (if too sweet).
Using the fruit leather plastic tray of your dehydrator (or wax-free baking paper and tray) spread the mixture out to form one flat layer. Try to get it as even as possible.
Dehydrate until dry and only slightly sticky approx 6 hours at 60 degrees Celsius. Can take up to 10 or 12 with high moisture or thicker trays.
Remove and slice into long strips while still warm then roll up in wax-free baking paper to form roll-ups.
Store in an air-tight jar for 1-2 weeks or store in the fridge for 1 month.
Notes
Any fruit can be used for this. If they are firm fruit like apple or stonefruit, cook down first until soft or try Mango raw, so yum!
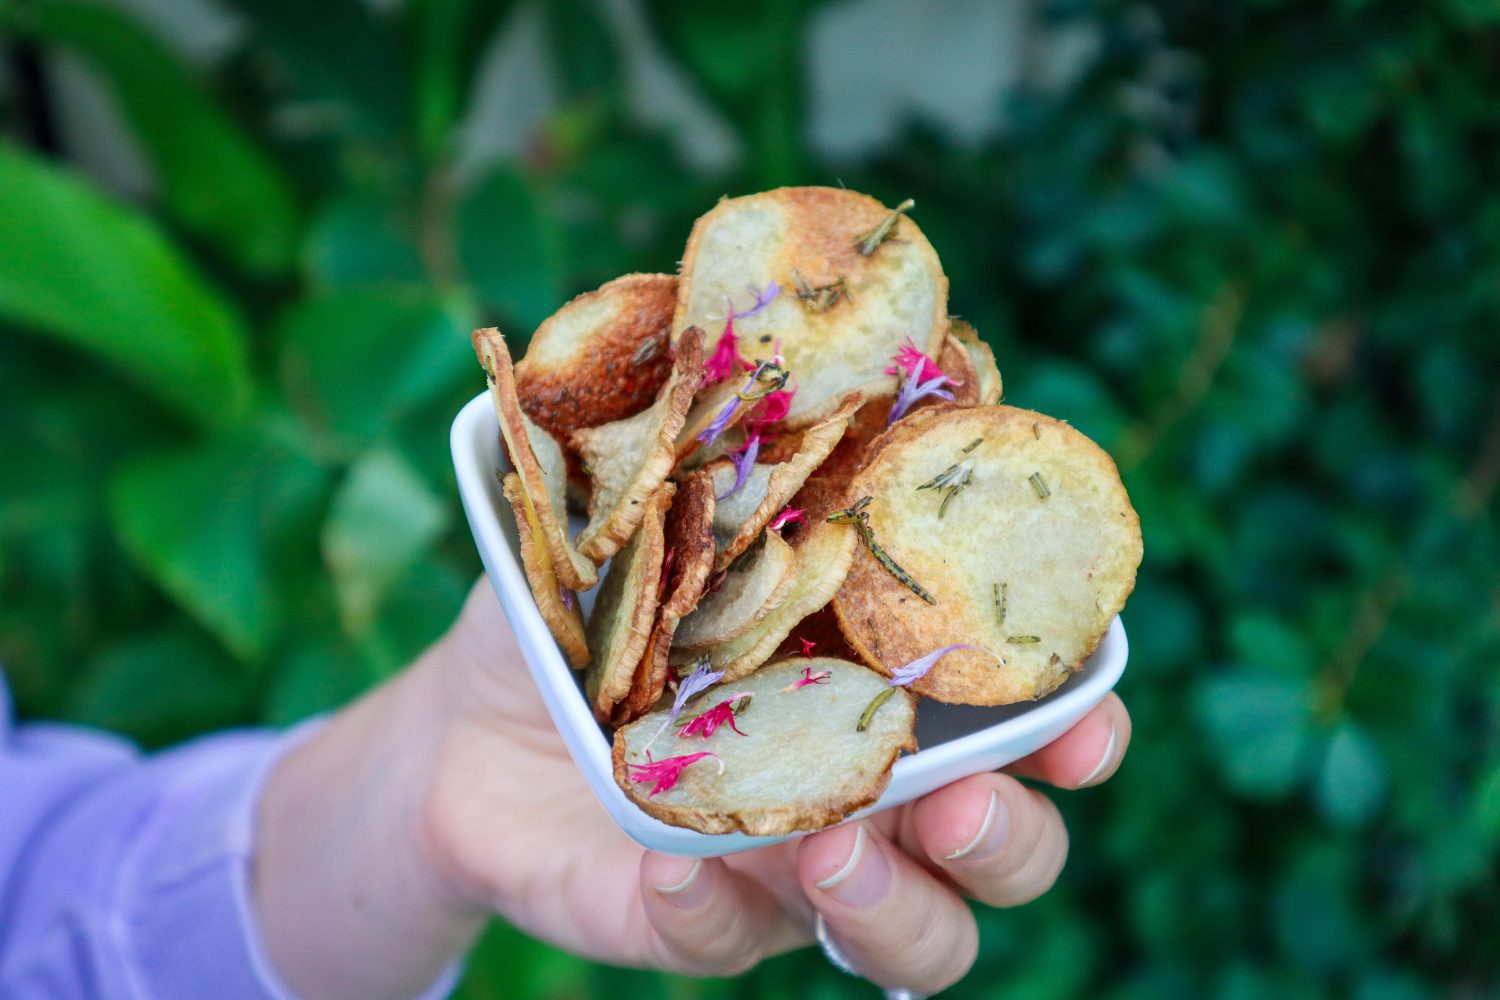
Extra crunchy chips using the Queensland Arrowroot or Canna Edulis. This is a beautiful tropical plant that can be used as a perennial substitute for potatoes. It creates a fantastic middle layer in a food forest-style garden and has lush green leaves and grows rhizomes under the ground. Both the young shoots and the rhizomes are edible.
Crispy Queensland Arrowroot Chips
Prep Time: 15 minutes
Cook Time: 10 minutes
Total Time: 25 minutes
Crunchy and delicious snacks made using the perennial Queensland Arrowroot. Quick and easy to make.
Ingredients
2 young Queensland Arrowroot Rhizomes*
1 Sprig Rosemary
Sea Salt
1 TBSP Olive Oil
Instructions
Wash and peel the Queensland arrowroot and quickly submerge it in water. Using a mandoline (or hand cut) evenly slice into thin slices then quickly submerge in cold water.
Allow to sit in cold water for 5 minutes then change the water and sit again for a further 5 minutes repeat if necessary until the water remains clear (it will be murky brownish the first time).
Preheat oven to 200 degrees fan bake.
Remove the chips from the water and pat dry. Drizzle over olive oil and season with salt and chopped rosemary.
Oil a baking tray and add chips.
Bake for 5 minutes then turn over and bake until slightly golden and crispy. Remove and place on a tray to cool (they will get a little crispier as they cool).
Enjoy!
Notes
Choose young Rhizomes that only have small shoots starting. Older ones will be more bitter. Gently pull and separate from the main older rhizome.
The Queensland arrowroot oxidizes quickly and goes brown. Keeping it in water helps reduce this.
For extra flavour try soaking in a mix of vinegar and sugar for salt and vinegar chips!