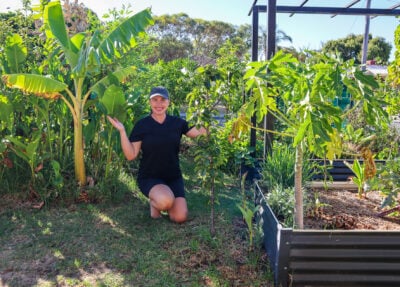
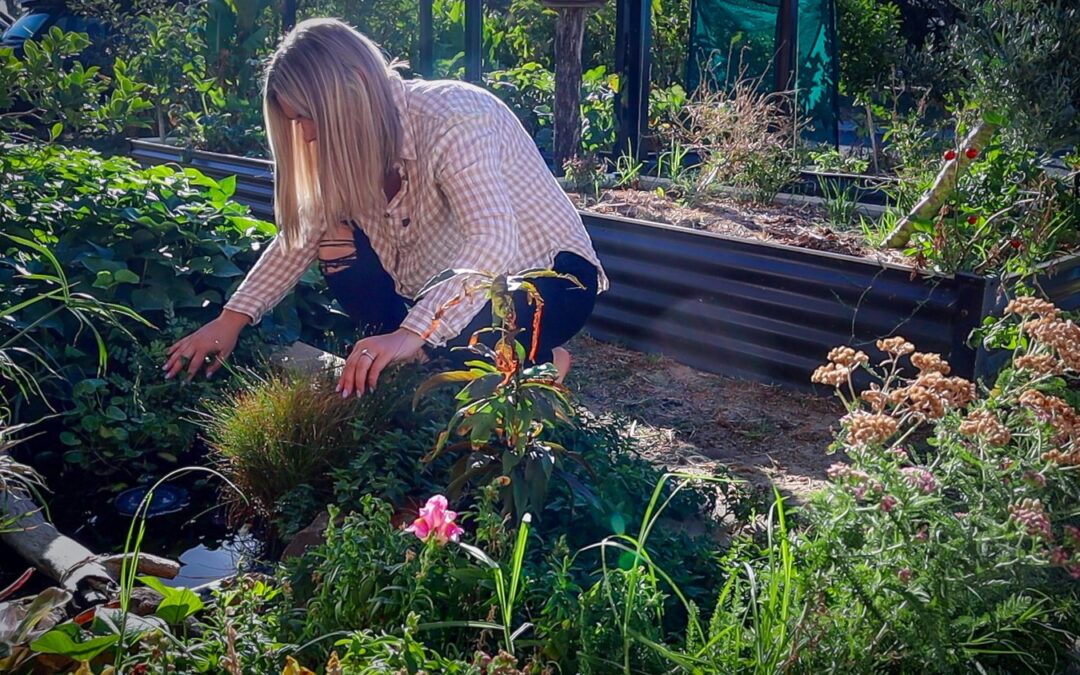
Welcome to my urban food forest garden in Perth, Australia. It’s currently the end of autumn, the mornings are finally starting to feel cooler, but we still haven’t had much rain….not since last year before the summer, so the garden is just hanging in there. Today, I want to share an update on my urban food forest progress and the wide range of fruit I’m growing in a small space!
🎥 Watch the full Urban Food Forest Garden Tour
Starting a Productive Urban Food Forest on Less Than 1/5 Acre
My garden is high-density, featuring over 200 types of fruit trees, as well as herbs and annual vegetables, all within a property of less than 1/5 of an acre in total. My goal is to have small amounts of many different types of fruit and be able to harvest fruit 365 days a year. This means I’ve said goodbye to spacing rules, utilised dwarf fruit trees, vertical gardening, learnt to multi-graft, and I keep my trees pruned to not only let light in but also create more green material to chop and drop and feed my soil.
I first became inspired by this style of gardening after creating an edible fence screen using food forest style planting in my backyard, which we will take a look at soon, but more recently, I have taken over the front! If you have been a regular YouTube subscriber, you would have seen the process of how we have transformed my front yard from a bare lawn to a mini high-density food forest with lots of tropical fruit trees, raised garden beds to grow annual veggies and a mini wildlife pond home to small fish and frogs. Below is a current update on where we are now!
Tropical Fruits Growing in my Front Yard
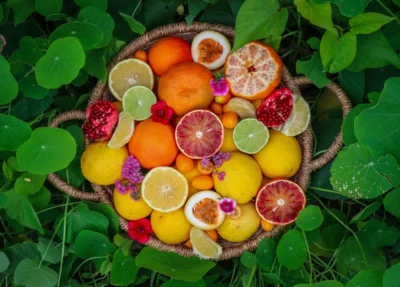
I started off this front garden by planting evergreen hardy fruit trees to create an edible screen that could withstand the temperatures out here. I have a lime, feijoa, blood orange, guava, mandarin, more feijoa and a lemonade. I have since gone in and added 3 mangos, an avocado, dwarf grimichama, mulch plants, nitrogen fixing plant and edible ground covers.
I have 4 different custard apples now planted, and I definitely have a passion for collecting new varieties of these. It’s a fruit that was rare back home in NZ, but we could grow the Cherimoya, and I was lucky enough to be introduced to that by a rare fruit grower when I was a kid. Now being in Perth, I am lucky enough to have the heat to grow more varieties, and I have (so far) Africa Pride, Paxton Prolific, Hilary White and a Bullock’s Heart, along with a bunch of seed-grown ones. These tend to lose their leaves a bit in winter, so they let light into my raised bed patch in winter, but in summer, they help keep it cool.
I have two different nashi pears, which are another favourite of mine and fruit well in warmer climates, unlike many other pears.
Some of the other fruit trees I have in the front yard include: Louisa Plum, unknown yellow Plum, multigrafted 4-way Plum (Satsuma, Mariposa, Santa Rosa, unknown), Indian Blood Peach, Lemon Mango, Orange Sherbet Mango, Sweet Tart Mango, Thai Mango, Linda Avocado, Choquette Avocado, Soursop, Starfruit, Lychee and more!
Living Shade: Building a Grape Arbour in Hot Climates
We have also constructed a metal arbour to grow living shade with x4 types of grapes planted. But with such intensely hot and dry summers, the grapes have not done much growing, but I am determined to make my dreams grape arbour happen!
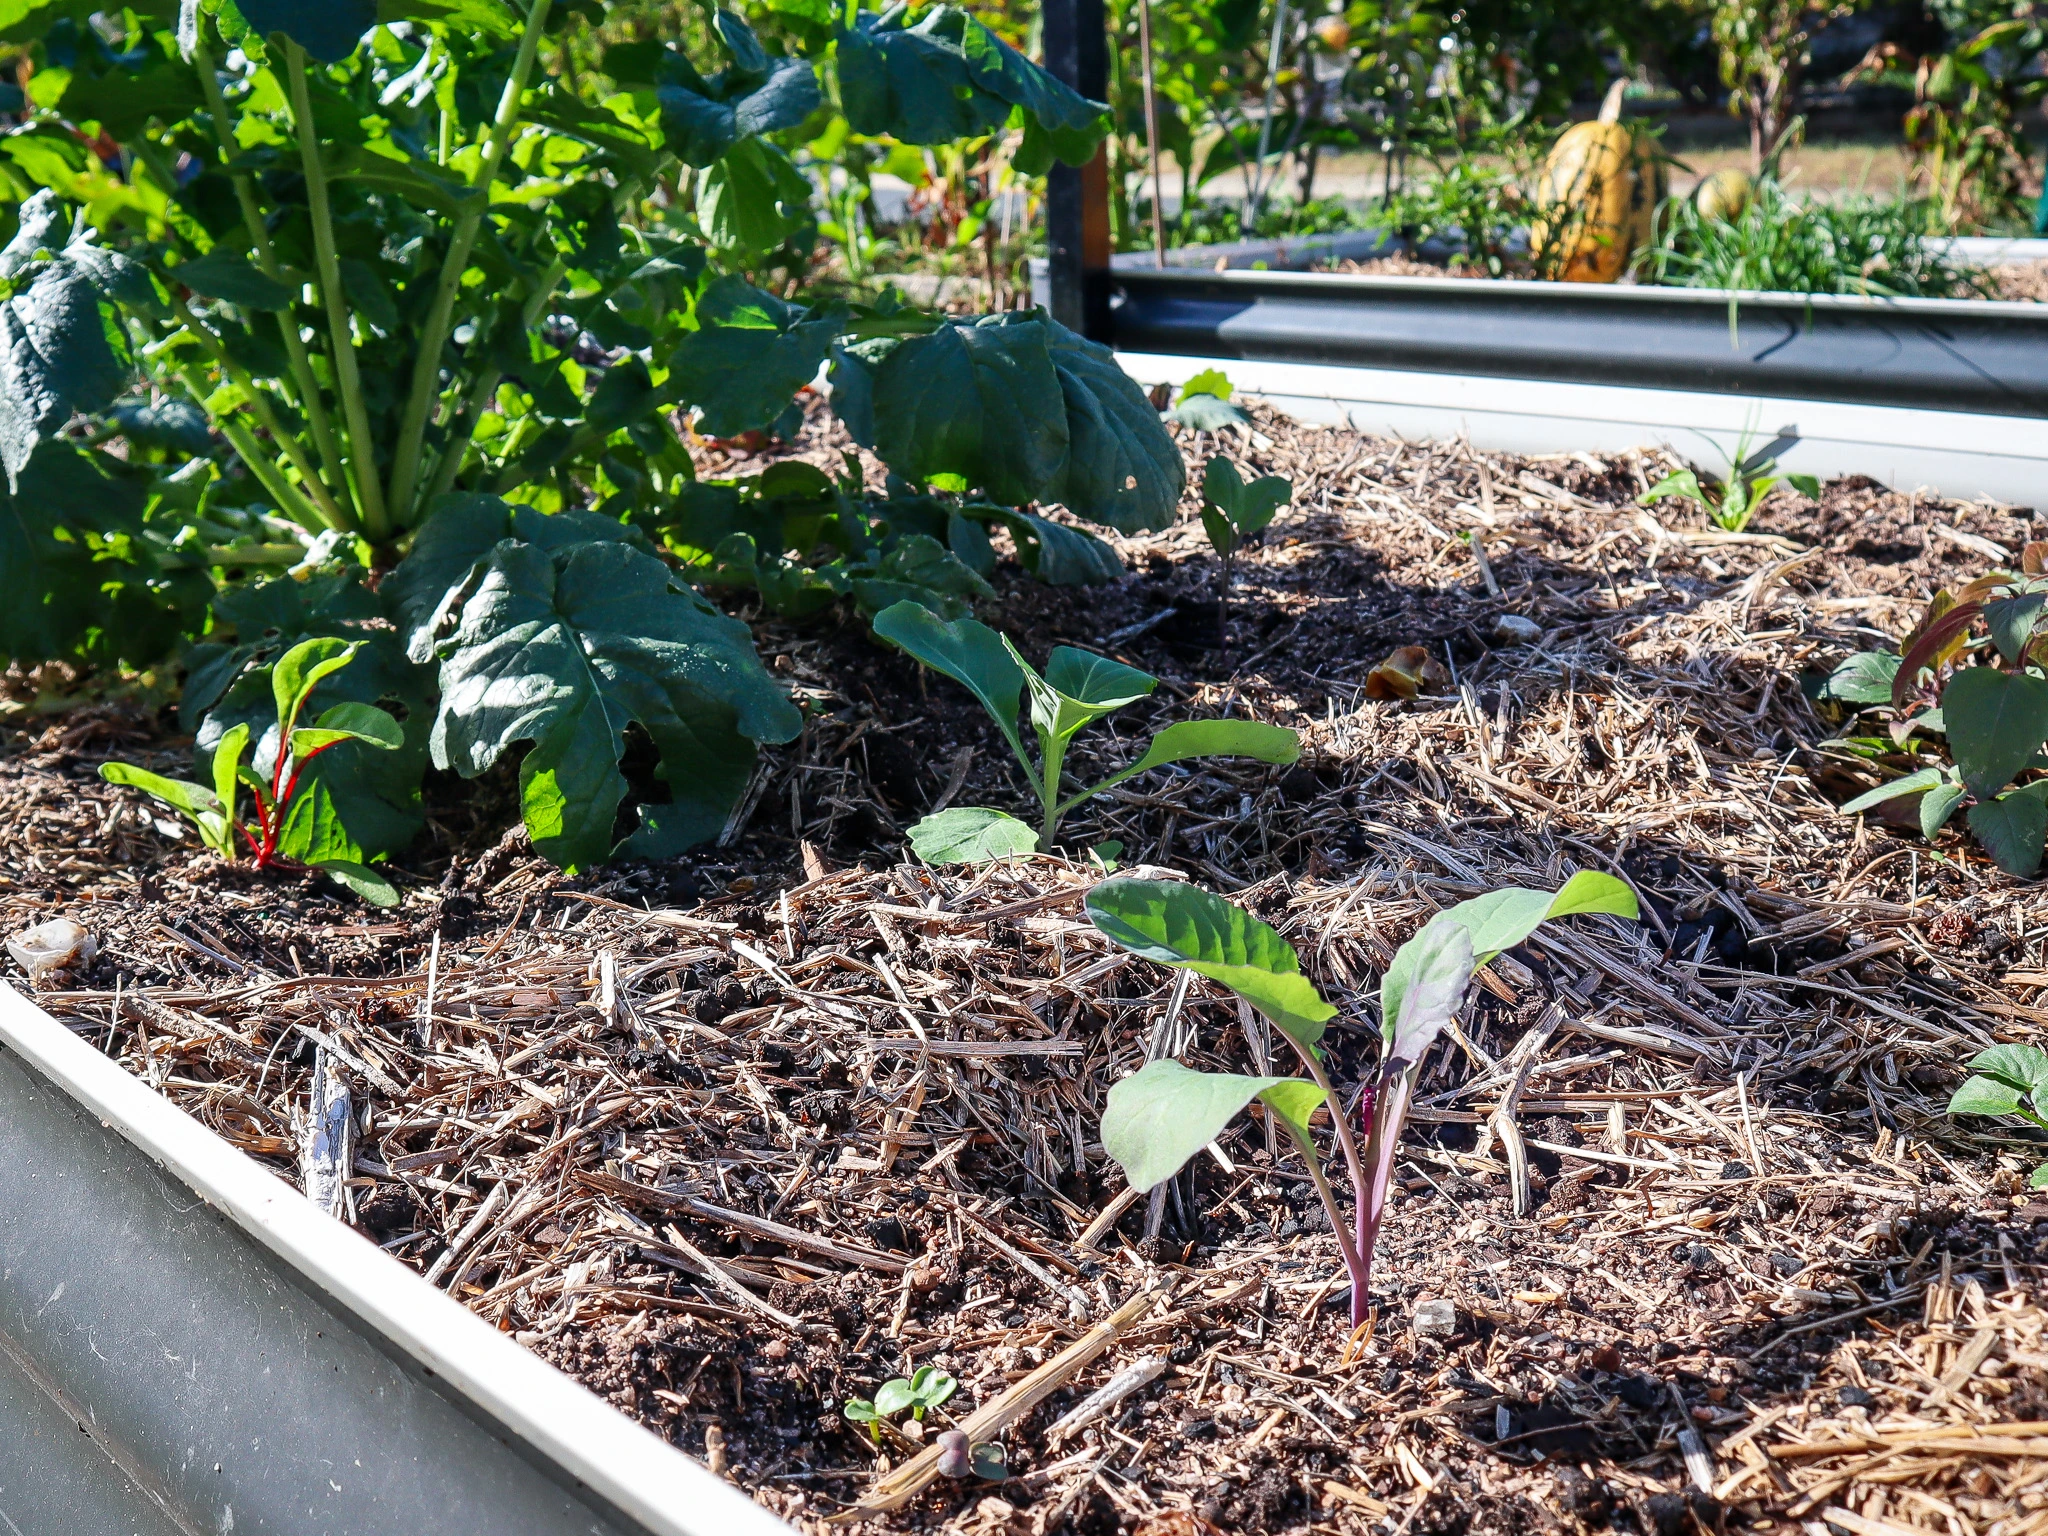
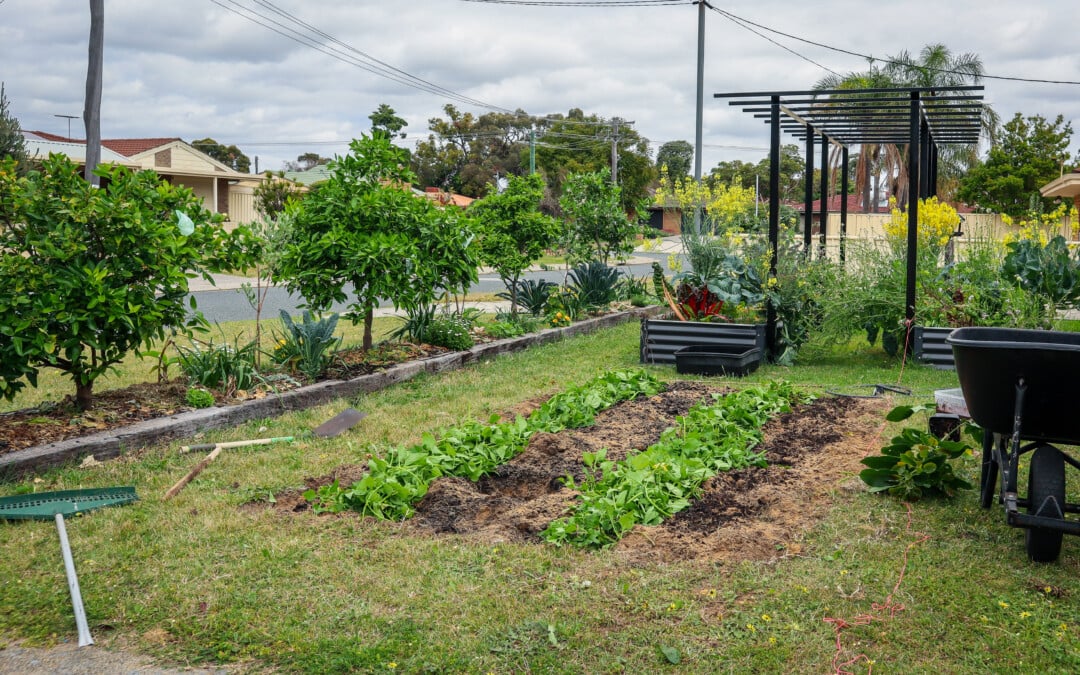
What I’m Growing in my Raised Gardens this Autumn 🌱
I have only just planted out my raised beds (at the end of Autumn) with seedlings and seeds because it’s just been so hot and dry, it didn’t seem worth it. But the cooler mornings and with rain forecast for this weekend, I think we might be ready to start the cool-season crops.
Just like my fruit tree planting, I also densely plant my raised beds. This helps stop any weeds from growing and gives me lush garden beds full of food. Currently, I have planted:
Edible Flowers ( Pansy/viola, Snapdragon, Dianthus and Calendula)
Edible Flowers for Beauty and Biodiversity
Edible flowers are a non-negotiable in my gardens. I love having the added colour as well as providing food for pollinators and beneficial insects. Plus, by choosing edible flowers, you can also use them to brighten up your meals. It’s a win-win.
Wildlife Pond: Attracting Frogs, Pollinators, and Beneficial Insects
The wildlife pond is getting a lot more shade now with the winter sun lower in the sky. The frogs have mostly disappeared as they go to find more sun or hibernate until warmer temperatures. There are still plenty of tadpoles, but I think these will stay like this until spring and summer because I believe they need more sun to transform. The wildlife pond has been one of my favourite projects out here in the front yard. There’s always so much wildlife to see, and it has become the main hub of my gardens to feed and nourish all my pollinators and beneficial insects.
The Driveway Patch: An Urban Food Forest Extension
Now for an update on my driveway patch! This was a new extension, and I have mainly planted deciduous fruit trees in here. This spot gets lots of hot sun during summer, but in winter, it gets a lot of shade. That’s why choosing deciduous fruit trees is a great idea. They go to sleep during winter, so they don’t mind at all.
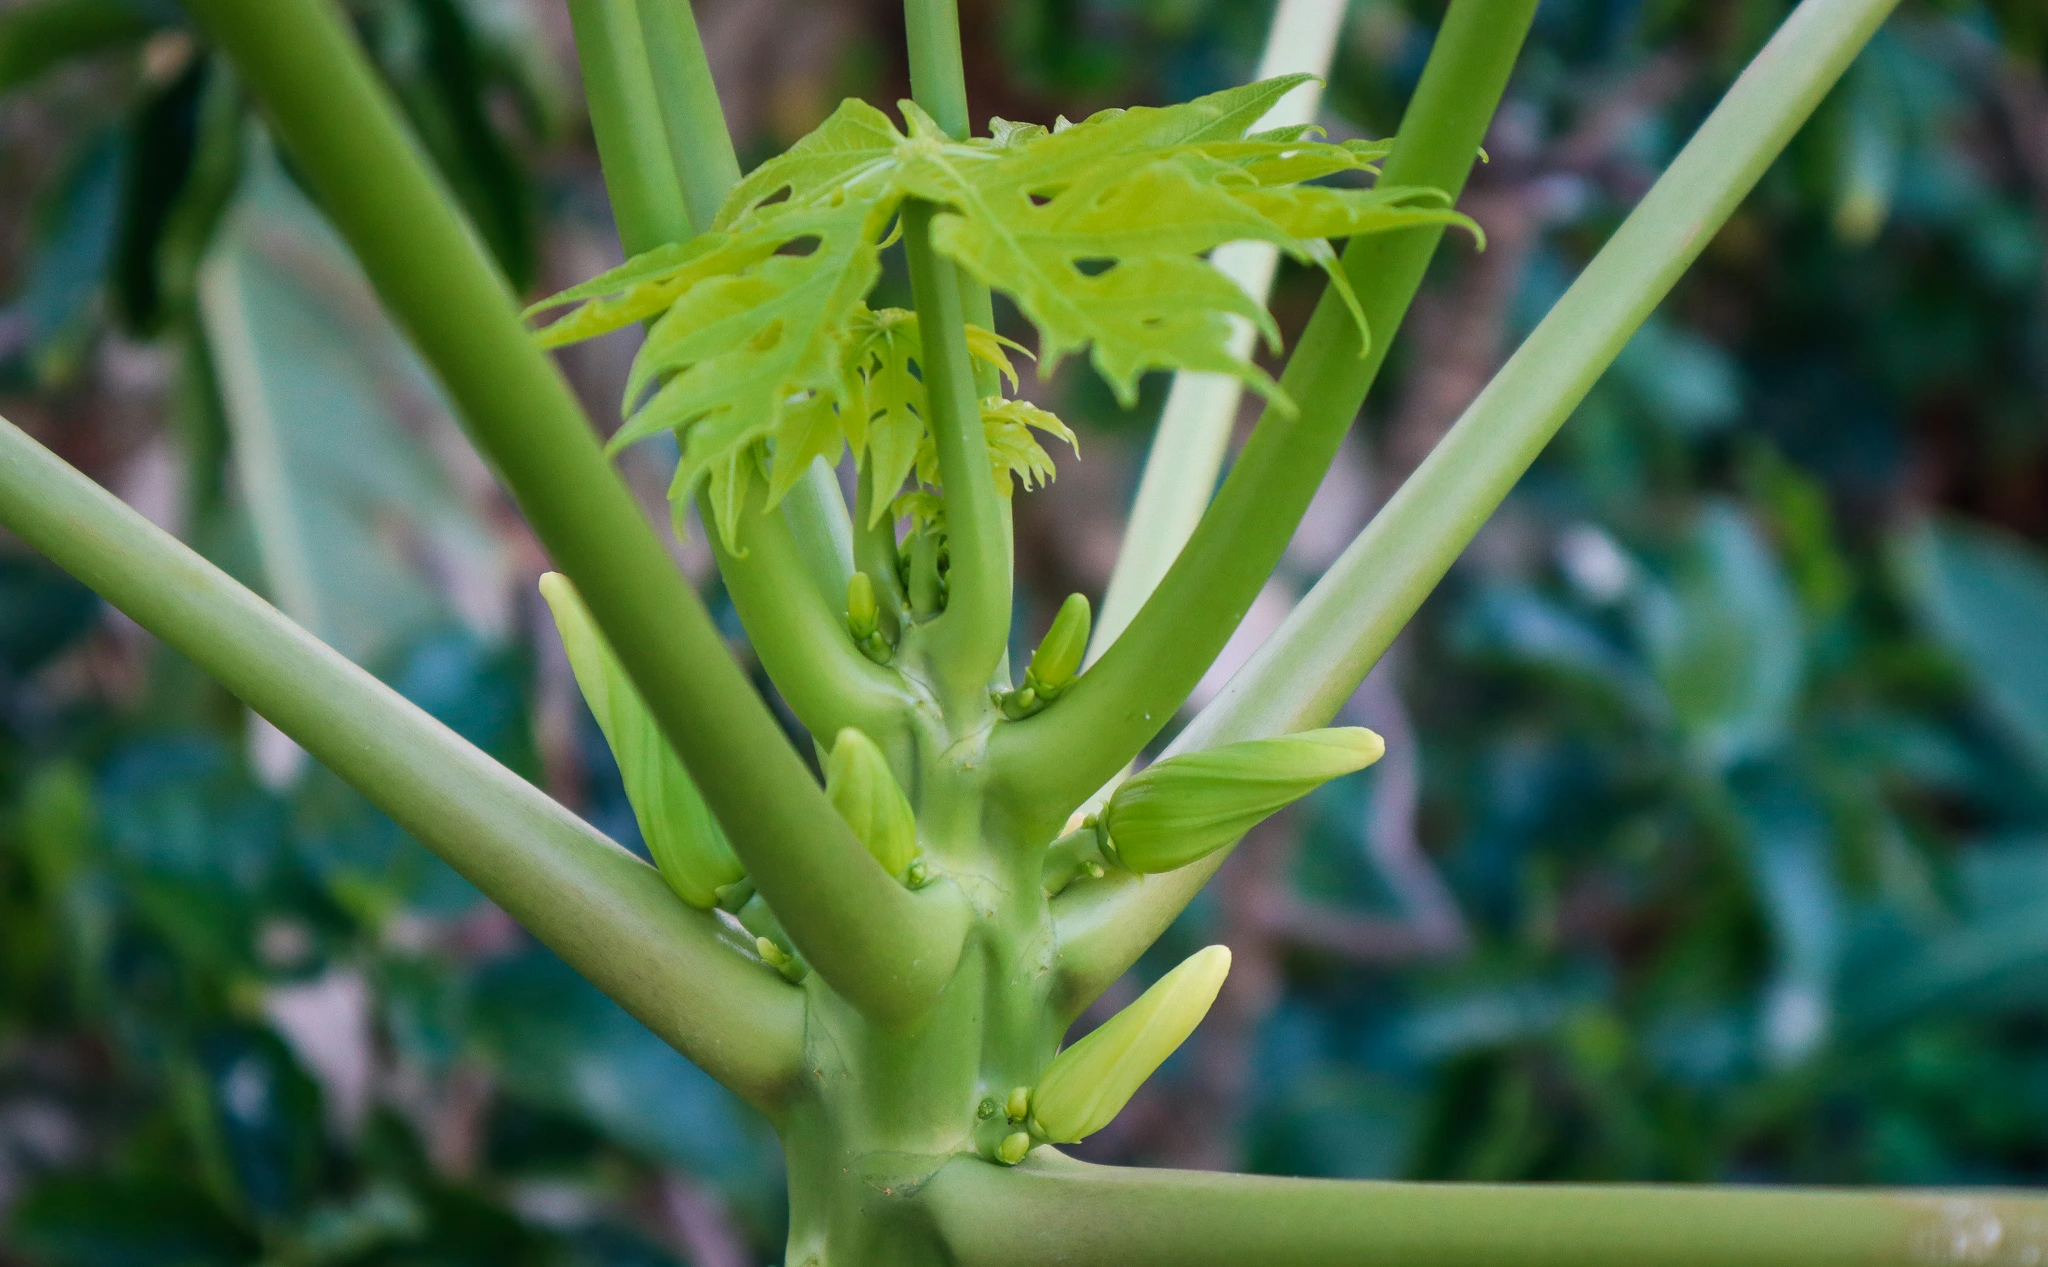
I have planted a seed, growing papaya, and it is thriving! It has started flowing along with another 5 I have planted throughout the rest of my gardens. Papayas grow well from seed and quickly! In warm climates, you can go from seed to harvesting fruit in just 1 year! In cooler climates, you may have to utilise greenhouses for winter. My plan is that this will get nice and tall to act as a bit of a natural umbrella for summer.
Summer in Perth is relentless, and with many days over 40 degrees, this garden will very much appreciate an umbrella. I have been adding more shade plants like this throughout the garden to try and help cool my summer gardens.
Creating Shade and Microclimates in an Urban Food Forest
Using plants strategically is something I have been doing a lot in my gardens.
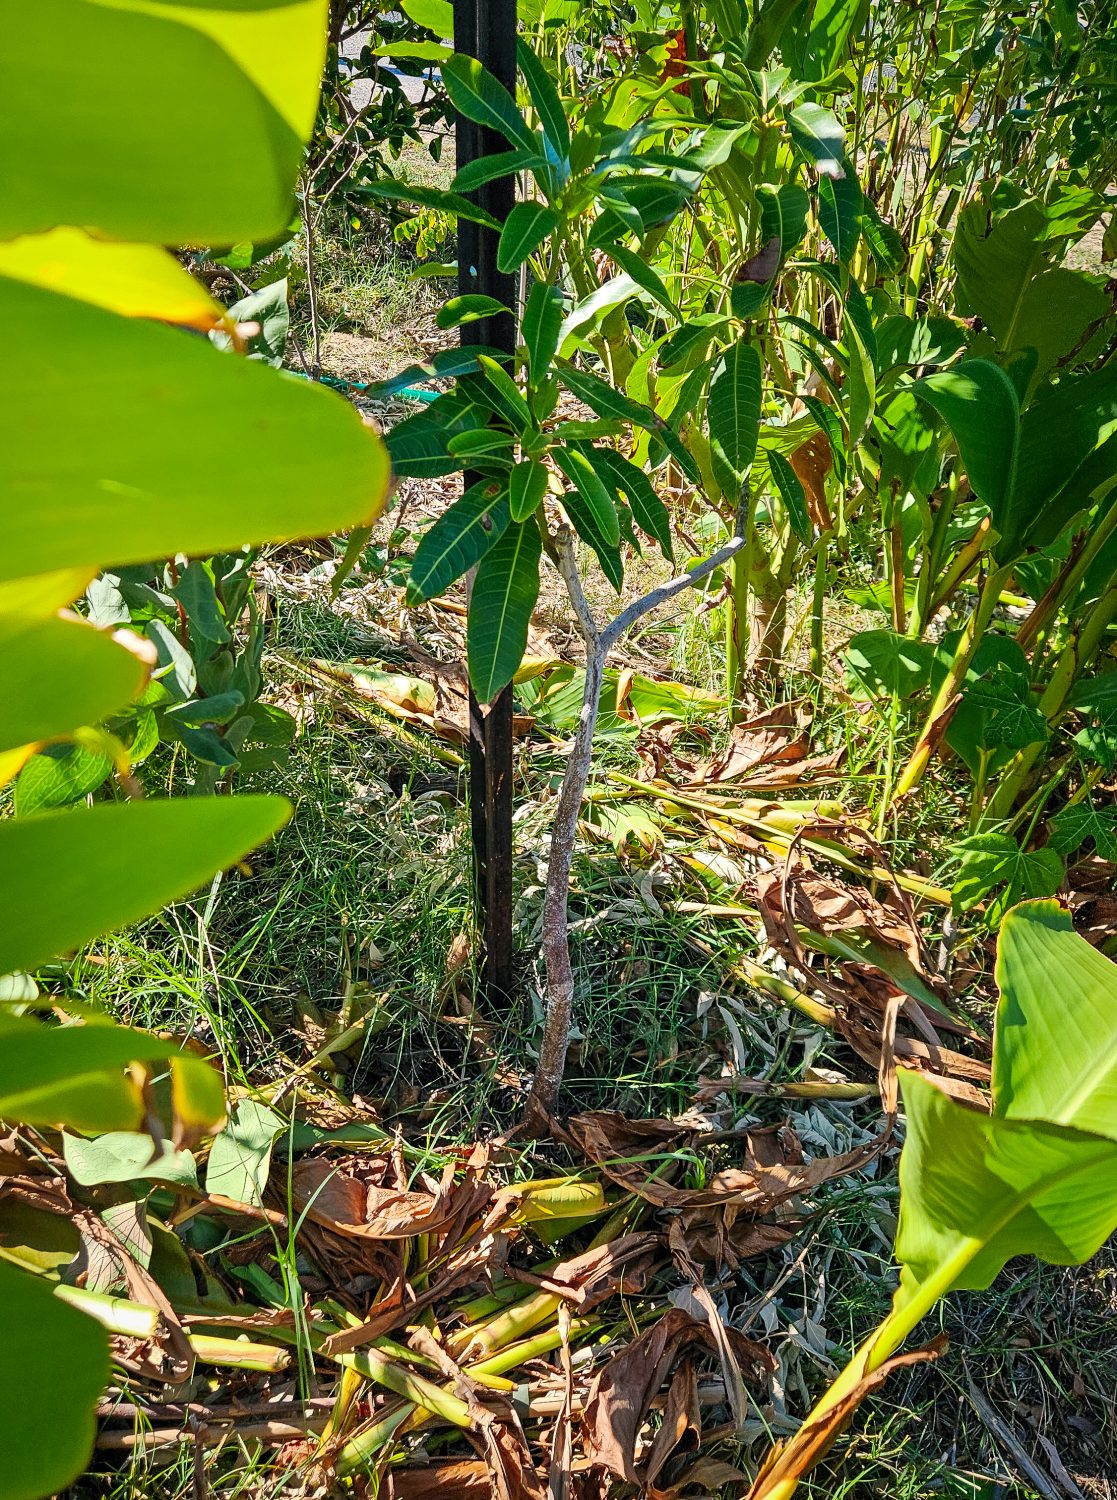
Creating shade: I have a miringa planted in the middle of my tropical section to create beautiful dappled shade for my Soursop, Starfruit, Lychee and Avocado. I also have native plants such as Hakea that grow in poor soil and have quickly become the tallest plants in my new garden. They offer shade and wind protection, plus stunning flowers that the bees love.
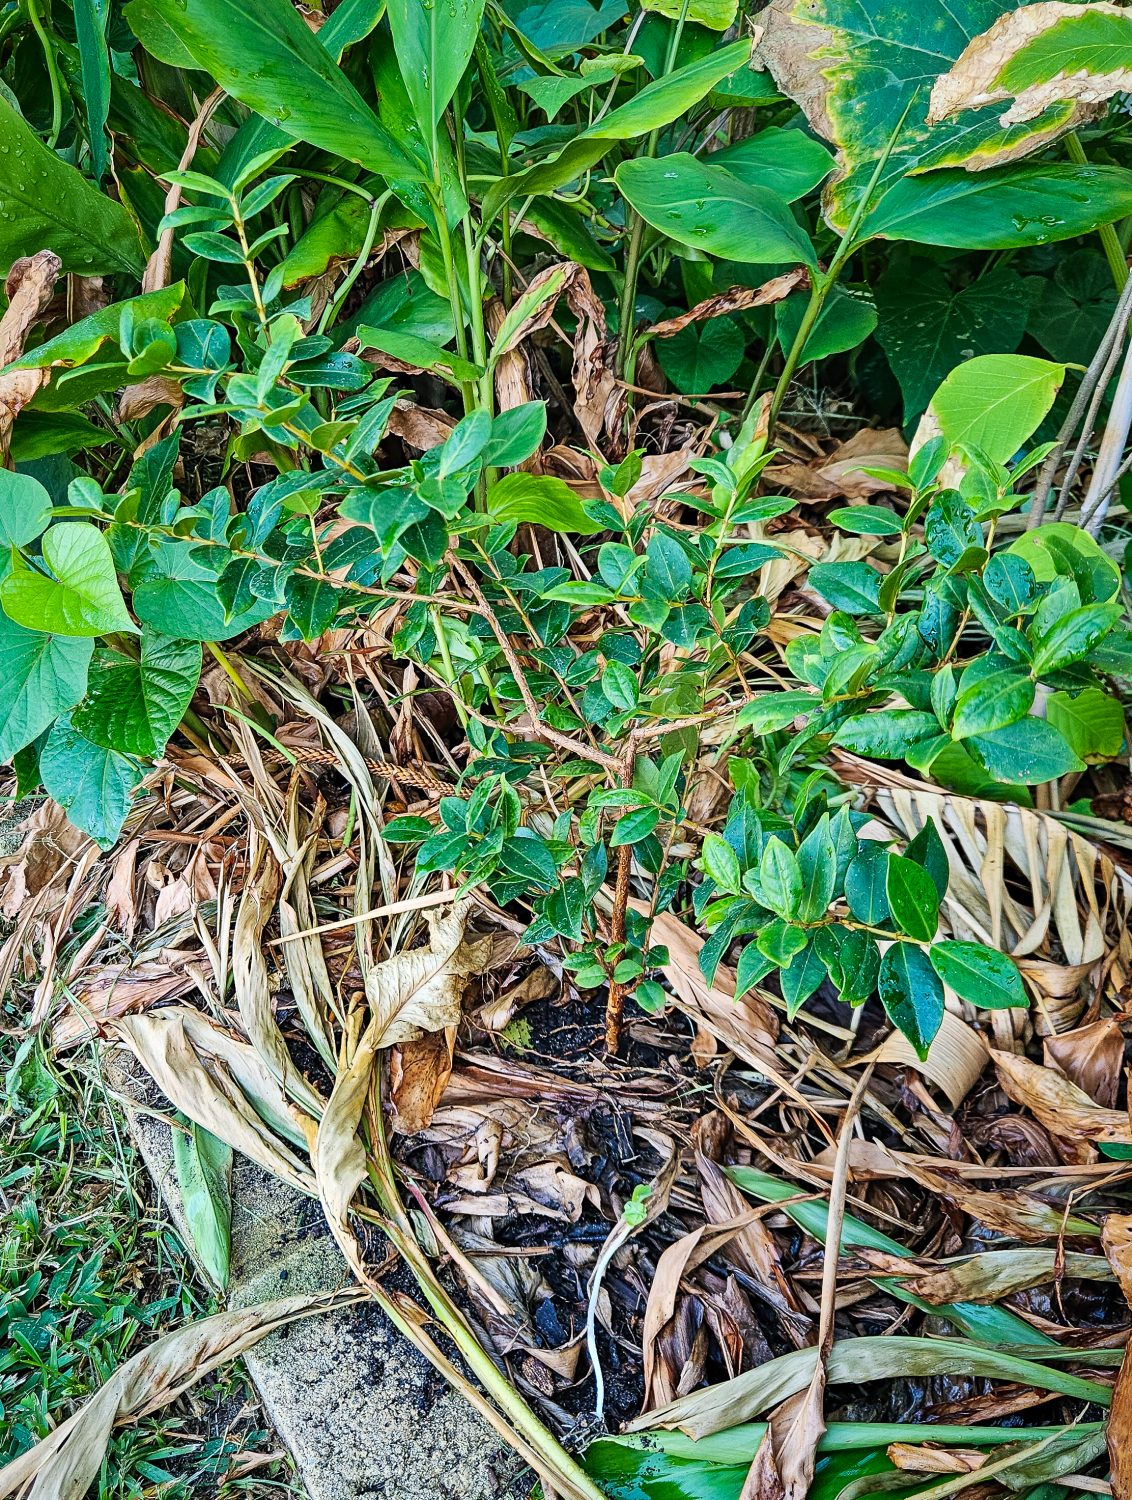
Creating Mulch:Mulch plants are another thing I have throughout my gardens that I use for shade, wind protection and then I can chop them back to let light in and feed the soil and act as moisture retention. These are plants such as Pigeon Pea and Queensland Arrowroot.
Out the back, my original food forest garden has been getting lots of upgrades. I have just planted another mango, this one is the ‘lemon zest’, I also have the ‘Irwin’ and the ‘dwarf palmer’. My biggest seed-grown papaya is flowering, and I am hanging out to see it start to fruit! With more plants starting to flower, hopefully, I get some pollination happening!
In my last video, we took out the lemon tree that was just getting hammered with gall wasp and planted a giant avocado. It’s already pushing new growth, which is a good sign.
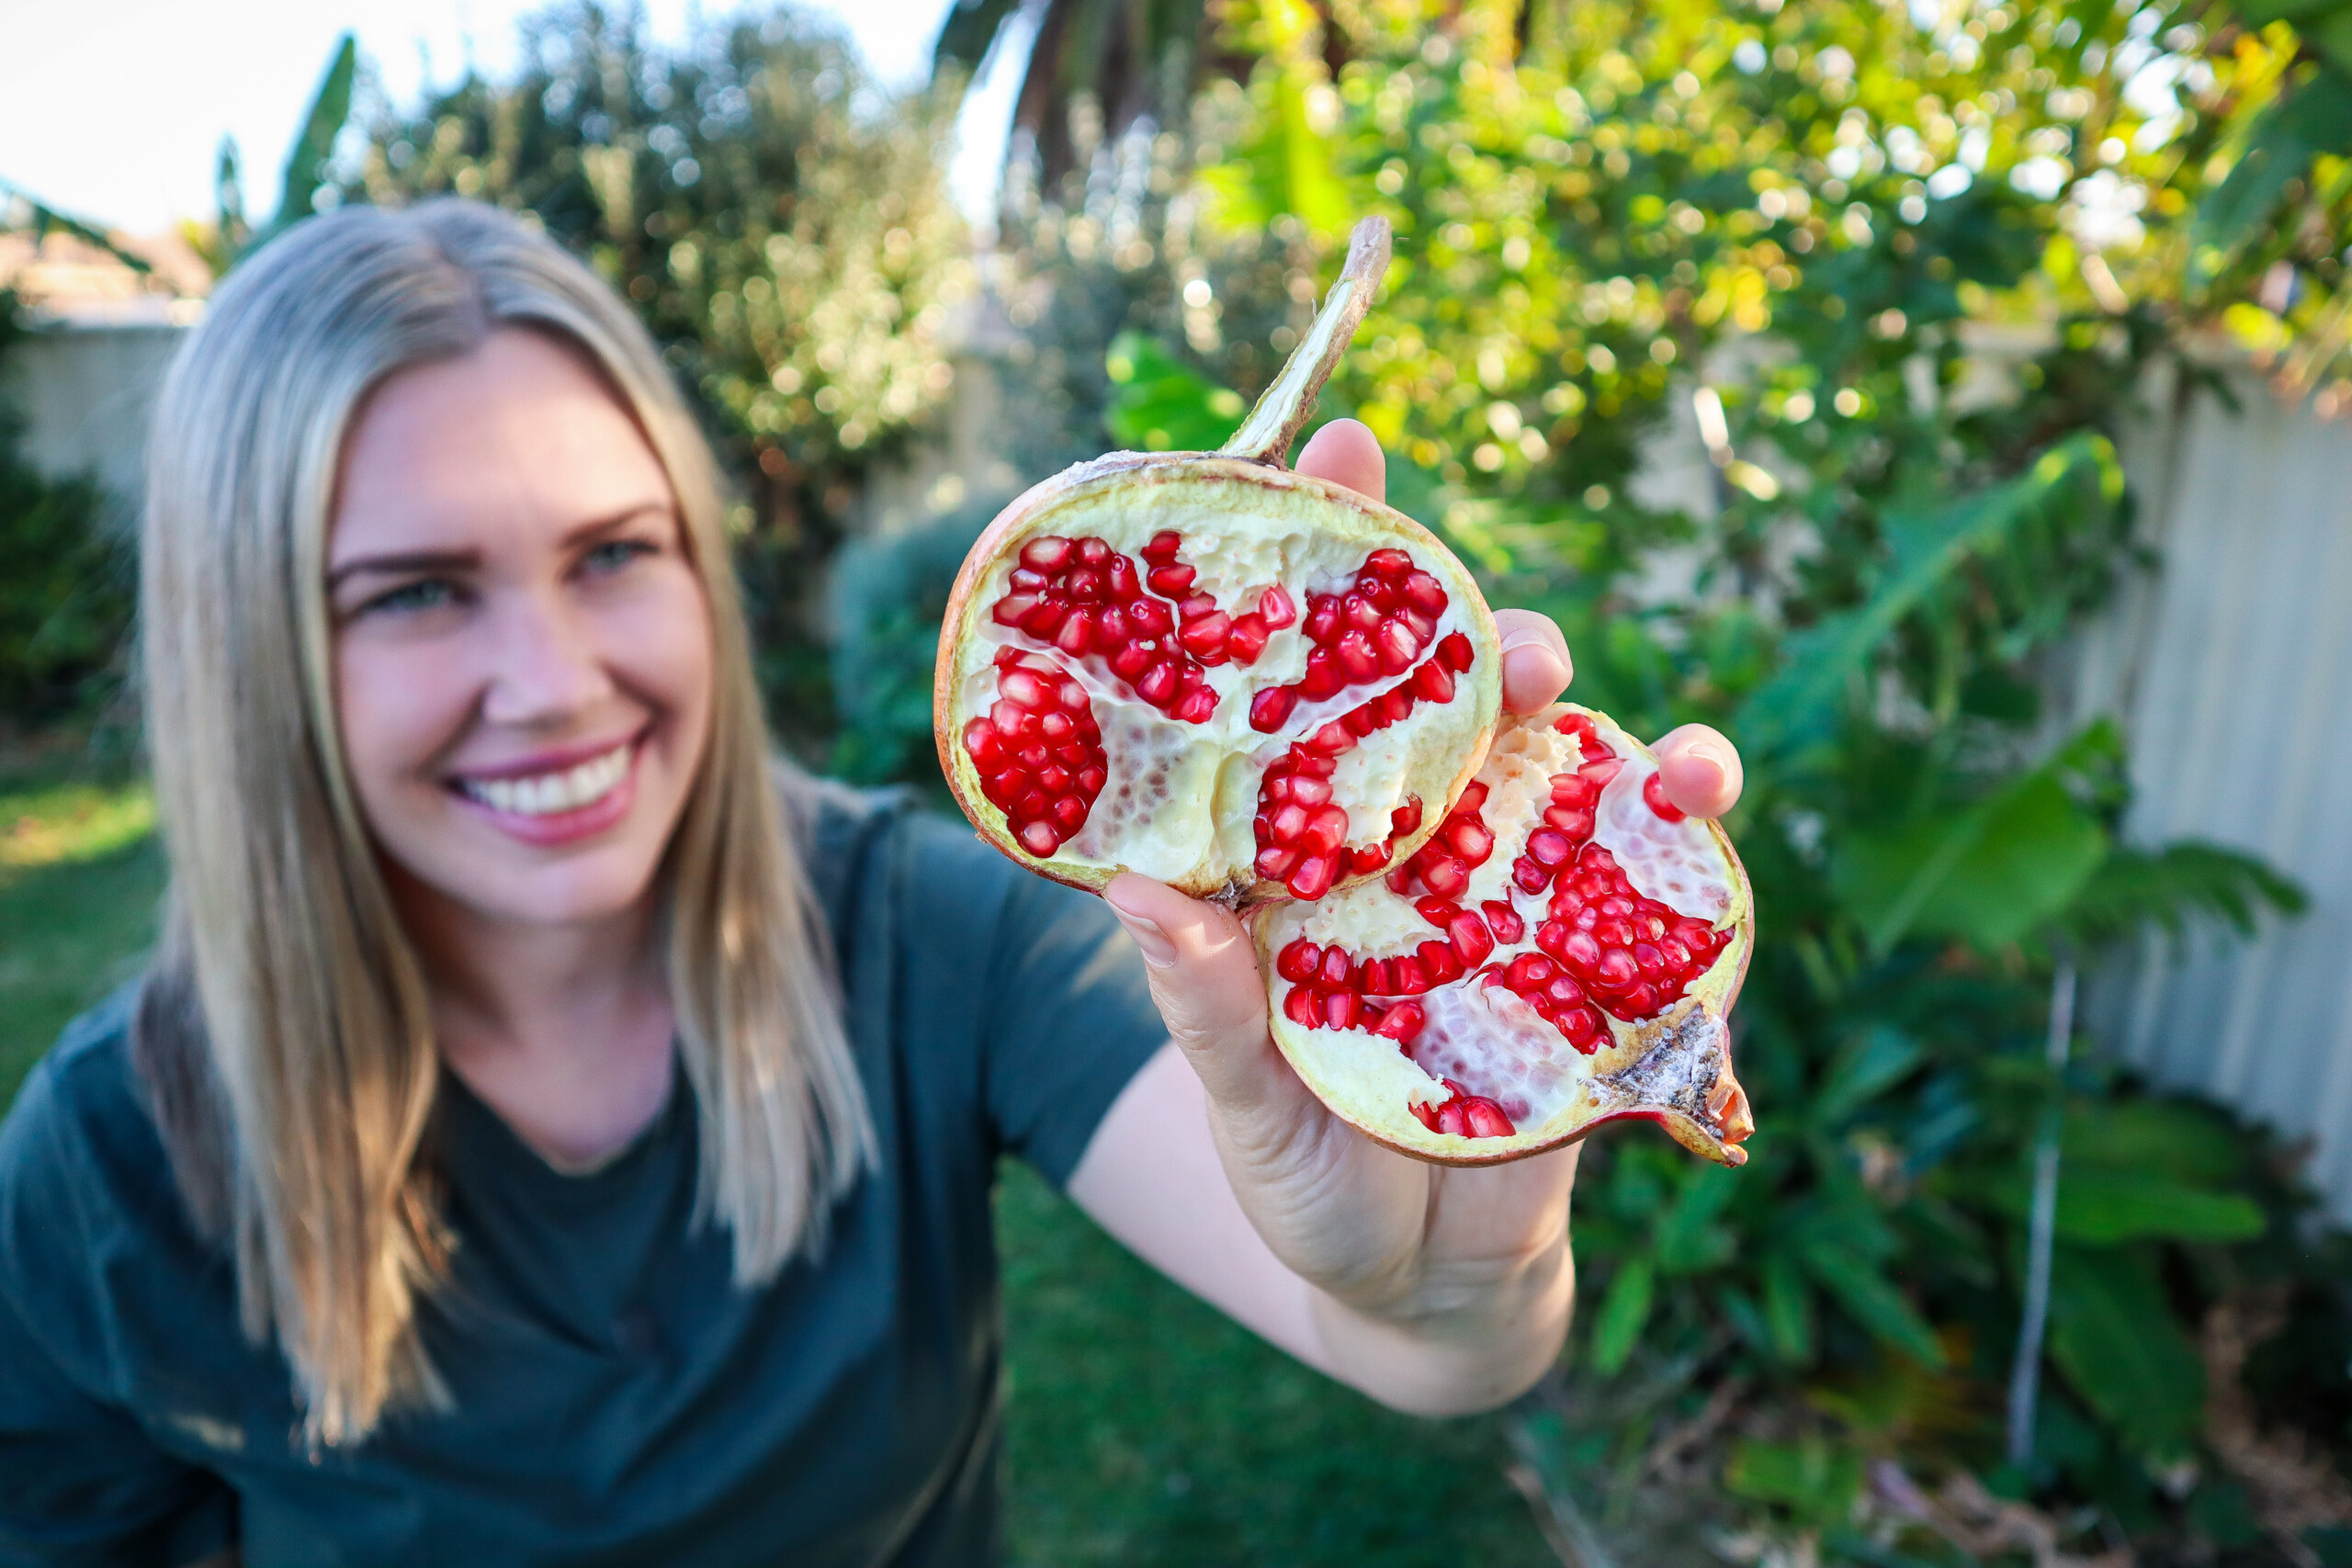
Pomegranates are ripe, and I should have harvested them, but I left it too late, and something else has beaten me to it! This Pomegranate has multiple different varieties grafted on it, but so far, just the main Azerbajani has fruited. These are amazing, like nature’s candy!
My bananas are looking good, and the plantain has shot up! My Pinkerton Avocado is looking nice and bushy, and next to that, another seed-grown papaya that has just started to flower. The rollinia is looking rather sad but has started to push all new growth off the side so fingers crossed! Behind that, we have my golden passionfruit growing vertically along the fence and a small sweet granadilla down below that I am cautiously optimistic about.
In my patio nursery, the shade cloth has come down for winter, and I am trying my best to find homes for as many things as I can in the garden. I want to downsize this a lot! I have lots of seed-grown plants here, like mango and custard apple, that I want to use for grafting practice, plus I have blueberries, finger limes and a lot of other things.
I hope you enjoyed this Autumn update of my urban food forest, and make sure you are subscribed to follow along with the progress!
Links included in this post might be affiliate links. If you purchase a product or service with the links that I provide I may receive a small commission. There is no additional charge to you! Thank you for supporting my blog so that I can continue to provide you with free content.
Do you want to grow more fruit and utilise vertical space? Then these 17 fruits that grow on vines will help you not only grow more delicious fruit to eat, but by growing vertically, you can save space and create more shade to protect your garden and more delicate plants during the hot months. I’m sharing my favourite fruits that grow on vines – perfect for urban food forests, backyard trellises, and small-space gardens. Whether you’re new to gardening or looking to expand your edible garden vertically, there’s something here for every garden.
If you’re looking to make the most of your vertical space, growing fruit on vines is one of the easiest and most rewarding ways to do it. From delicious grapes to exotic, rare passionfruit, there are so many climbing fruits that not only taste amazing but also help create lush, edible walls in your garden.
Why Grow Fruits on Vines?
Vine fruits are great space-savers. They climb up rather than spread out, meaning you can grow more food in less ground space. They’re ideal for small gardens, balconies, or food forests where every layer of the garden is put to work. Plus, many vine fruits are perennial or self-seeding, making them low-maintenance once established. I also love them for fence screening or adding more green to the backyard, with walls of green vines covered in fruit, they are not just productive, they’re beautiful too!
1. Passionfruit
One of my absolute favourite perennial fruiting vines!Passionfruit vines are fast-growing, evergreen in warmer climates, and produce deliciously tangy fruit. They’ll need strong support, plenty of sun, and a bit of pruning to keep them in check. Passionfruit can also be easily grown from seed to fruit in just 1-2 years.
Growing Tips: Plant in well-drained soil with plenty of compost, and water regularly during the growing season. Allow a lot of water during the summer season to allow them to produce abundant crops.
2. Grapes
Whether you’re growing table grapes or wine grapes, these deciduous vines are classic for a reason. Grapes love full sun and rich, well-drained soil. In winter, prune heavily to encourage fruiting in spring and summer. Grapes are great for areas that get full sun in summer but maybe get more shade in winter(because they are asleep). They can also be used to help offer shade to your veggie patch in summer and let light in during winter when they lose their leaves. I have mine planted over my main veggie patch on a strong arbour.
Growing Tips: Prune annually to control growth and increase yield. Provide sturdy support and full sun.
3. Choko (Chayote)
A vigorous vine that’s great for covering fences or pergolas, but must be kept in check with regular pruning. Chokos produce crisp, mild-flavoured fruit that’s incredibly versatile in the kitchen. Great for making preserves or used to bulk up pies as a substitute for apple or potato! They love warmth, regular watering, and space to sprawl. Chokos are a great option for providing summer shade to your garden in areas like Perth that have scorching hot summer days.
Growing Tips: Plant a whole chayote fruit in rich, moist soil and give it something to climb. It loves heat and humidity.
4. Kiwi Fruit
A beautiful deciduous vine with fuzzy fruit packed with vitamin C. Kiwi fruits need a male and female plant to produce fruit, and prefer a cold winter and warm summer. Provide sturdy support, these vines are strong!
Growing Tips: Train along a strong trellis and prune yearly. Kiwi prefers rich, well-drained soil and full sun (although protect during their first year in hot climates like Perth)
5. Cucamelon
These tiny watermelon lookalikes are actually closer to cucumbers. They’re crunchy, a little tangy, and perfect for pickling or snacking. Cucamelons are easy to grow from seed and do best in full sun with something to climb.
Growing Tips: Easy to grow in warm climates with full sun. Trellis them like cucumbers and harvest regularly.
6. Blackberry
While technically a bramble, many blackberry varieties can be trained like vines. Choose thornless varieties for ease of harvest, and plant them along fences or trellises. Great for attracting pollinators too.
Growing Tips: Plant in full sun with rich, well-drained soil. Train along a fence or wire support.
7. Raspberry
Like blackberries, raspberries can be trained vertically. They’ll reward you with handfuls of juicy berries and are surprisingly low-maintenance. Summer or autumn fruiting varieties are available depending on your climate.
8. Kiwi Berry
Kiwi berries are like miniature kiwifruits without the fuzz — bite-sized, smooth-skinned, and bursting with sweet, tropical flavor. These hardy vines are a great option for gardeners in cooler climates, and once established, they’re prolific producers. Unlike regular kiwis, you can pop these straight into your mouth without peeling! The vines are vigorous climbers and benefit from strong support and annual pruning.
Growing Tips: Some Kiwi berries need both a male and female plant for pollination. Plant them in well-drained soil with plenty of sun and compost, and keep them well-watered in dry periods. Patience pays off — they usually start fruiting in their third year, but reward you with loads of delicious fruit for years to come.
9. Giant Granadilla (Passiflora quadrangularis)
Giant Granadilla is the largest of the passionfruit family, producing fruit that can grow over a foot long! Its flavour is mild and slightly sweet, with edible pulp that can be eaten fresh, juiced, or added to desserts. One unique feature is that the white inner rind (or pith) is also edible when cooked, often used in stews, curries, or candied as a sweet treat. The plant also produces large, show-stopping flowers, making it both productive and ornamental. It’s ideal for gardeners who want something bold, tropical, and a little bit out of the ordinary. This one is tricky to grow and needs a warm tropical climate or a greenhouse to thrive.
Growing Tips: Plant in full sun and well-draining, compost-rich soil. This vigorous vine needs a very strong support structure and plenty of room to spread. Keep it well-watered during hot weather and feed regularly to support its large fruit. It prefers warm, frost-free climates but can be grown in large containers and moved to shelter if needed. Prune after fruiting to encourage new growth and airflow.
10. Dragonfruit (Pitaya)
A striking cactus vine that needs support and warmth. Great for hot and dry areas of your garden. Dragon fruit plants produce stunning flowers followed by bright pink or yellow fruit with speckled flesh. Perfect for tropical or subtropical gardens. Prune regularly to shape the plant and encourage flowering. With a bit of patience and care, you’ll be rewarded with stunning blooms and unique, nutrient-packed fruit.
Growing Tips: Choose a sunny, sheltered spot with well-draining soil. Water deeply but allow the soil to dry out slightly between waterings — too much water can lead to rot.
11. Loofah (Luffa)
While often grown for its spongy interior, young loofah fruits are edible when cooked. This vine loves the heat and needs a long growing season. Let a few mature fully for bath sponges and save the rest for dinner!
Growing Tips: Start from seed in spring. Let fruits mature fully on the vine if you want to harvest them as sponges.
12. Pumpkin
Though typically considered a ground crop, pumpkins will happily climb a strong trellis if you support the fruit. This is a great way to save space and get a better shape on the pumpkins too. Growing vertically can help reduce pest pressure and increase airflow. Choose smaller varieties to help reduce the risk of the stems breaking off the vine. Add small hammock supports to the fruit if you think they are too heavy.
Growing Tips: Plant in mounds with compost-rich soil. Allow plenty of space or use a strong vertical support for smaller varieties.
13. Melons (Rockmelon, Cantaloupe, etc.)
Melons can also be trellised to save space and reduce rot. Use slings or mesh bags to support the fruit as it grows. They love full sun, compost-rich soil, and warm temperatures. Melons are a great choice for annual fruits that grow on a vine.
Growing Tips: Choose smaller varieties. Consistent watering during the hot months will help get the best-tasting melons.
14. Muscadine Grapes
Native to the southeastern United States, muscadine grapes are hardy, disease-resistant vines that produce sweet, thick-skinned grapes perfect for fresh eating, jams, and winemaking. These grapes love warm, humid climates and are a great low-maintenance option for edible gardens. I haven’t been able to find any yet in Perth, but when I do, I will definitely be testing them out!
Growing Tips: Plant in full sun with well-drained soil. Muscadines prefer slightly acidic soil and benefit from a yearly layer of compost. Provide a strong trellis or arbor to support their vigorous growth. Prune in winter to encourage productive fruiting wood and good airflow. They’re self-fertile, but planting more than one variety can increase yields.
15. Climbing Tomato (Indeterminate Varieties)
While technically a fruiting shrub, indeterminate tomatoes behave like vines and can be grown vertically with supports. Perfect for patios and small garden beds where space is tight. Plant at the back of your container or garden to and train up whilst still utilising the front for short plants like lettuce and carrots.
Growing Tips: Use stakes, cages, or trellises. Pinch off suckers and prune to improve airflow and production.
16. Kiwano (Horned Melon)
This spiky, alien-looking fruit is sure to turn heads in the garden. Native to Africa, Kiwano grows on a vigorous climbing vine and produces bright orange, horned fruit filled with lime-green, jelly-like flesh. It has a mild, refreshing flavor, somewhere between cucumber, kiwi, and banana — perfect for smoothies or eating chilled with a spoon.
Growing Tips: Plant Kiwano in warm, frost-free conditions with full sun and well-drained soil. Like cucumbers, it appreciates regular watering and trellising. Start seeds indoors or direct sow after the last frost. It thrives in hot climates and is drought-tolerant once established.
17. Cucumber
A garden classic, cucumbers are refreshing, fast-growing vine fruits that are perfect for salads, pickling, and even chilled soups. With so many varieties — from crisp slicing cucumbers to cute pickling types — there’s one for every garden. Cucumbers also make a super nutritious and refreshing juice in summer.
Growing Tips: Plant cucumbers in full sun after the danger of frost has passed. They love warmth, regular watering, and rich, well-draining soil. Train them vertically with a trellis to save space and improve air circulation, which helps prevent powdery mildew. Harvest often to keep plants productive.
Tips for Growing Vine Fruits
Support Structures: Use trellises, arches, pergolas, or fences.
Mulch and Compost: Feed the soil with organic matter to keep your plants thriving.
Water Consistently: especially in dry or windy weather.
Prune as Needed: Keep vines manageable and productive.
Growing Fruit Vertically to Save Space
Growing fruits on vines is such a rewarding way to get more out of your space and your harvest. Whether you’re trailing cucamelons up a balcony rail or letting passionfruit take over a fence, vertical gardening adds beauty, abundance, and a lot more greenery to any garden. So pick one (or a few!) of these climbing fruits and get growing – your future self will thank you for the baskets of delicious fruit!
Maximize Garden Space with Espaliered Fruit Trees
While vine fruits are amazing for vertical gardening, espalier fruit trees are another clever way to grow food in tight spaces. Trained flat against a wall or fence, espaliered trees not only save space but also turn your garden into a living work of art. Apples, pears, figs, and even citrus can be grown this way with a little patience and pruning. They make excellent use of sunlight, are easier to harvest, and can add structure and charm to garden borders or sunny walls. If you’re short on space but big on fruit dreams, espalier might just be your next favorite technique!
Links included in this post might be affiliate links. If you purchase a product or service with the links that I provide I may receive a small commission. There is no additional charge to you! Thank you for supporting my blog so that I can continue to provide you with free content.
Edible ground covers are a crucial element in any permaculture or food forest garden. They serve as living mulch, protect and feed the soil, suppress weeds, and give you more food in less space. Whether you’re growing sweet potatoes for stir-fries or nasturtiums for a colorful salad, there are so many ways to make your ground layer both beautiful and functional.
Tired of weeding and bare soil? These low-growing edible plants cover the ground, feed your soil, and you!
By layering your garden with diversity in plant heights, root systems, and edible yields, you’ll create a more balanced, resilient system that supports you and the ecosystem around you. Let your mulch work to feed your soil and your family at the same time!
Welcome back to my garden! Today, we’re diving into edible ground covers that I use in my urban permaculture garden as living mulch. Creating layers in a food forest system helps you grow more diversity (and food) in a small space. Edible ground covers help suppress weeds to create a low-maintenance, sustainable garden that feeds us year-round and doesn’t demand daily upkeep.
We love to go camping, and that means I often leave my garden for days at a time. While I still love growing annuals like tomatoes and cucumbers, they require more hands-on care and come with a higher risk if I’m away. I’ll still grow them, but I want to shift the balance toward a more resilient garden using perennial plants and edible ground covers that do more of the heavy lifting while I’m off exploring.
Watch or read more below
Top 10 Edible Ground Covers for Living Mulch
So, what exactly are edible ground covers? These are low-growing plants that serve multiple functions: they protect the soil, retain moisture, reduce weeds, prevent erosion, and provide food for both humans and beneficial wildlife. In a food forest-style garden, ground covers are just one layer in a multi-tiered system that also includes tall trees, shrubs, flowers, and root crops.
Below are 10 of my favorite edible ground covers that are beautiful, functional, and delicious!
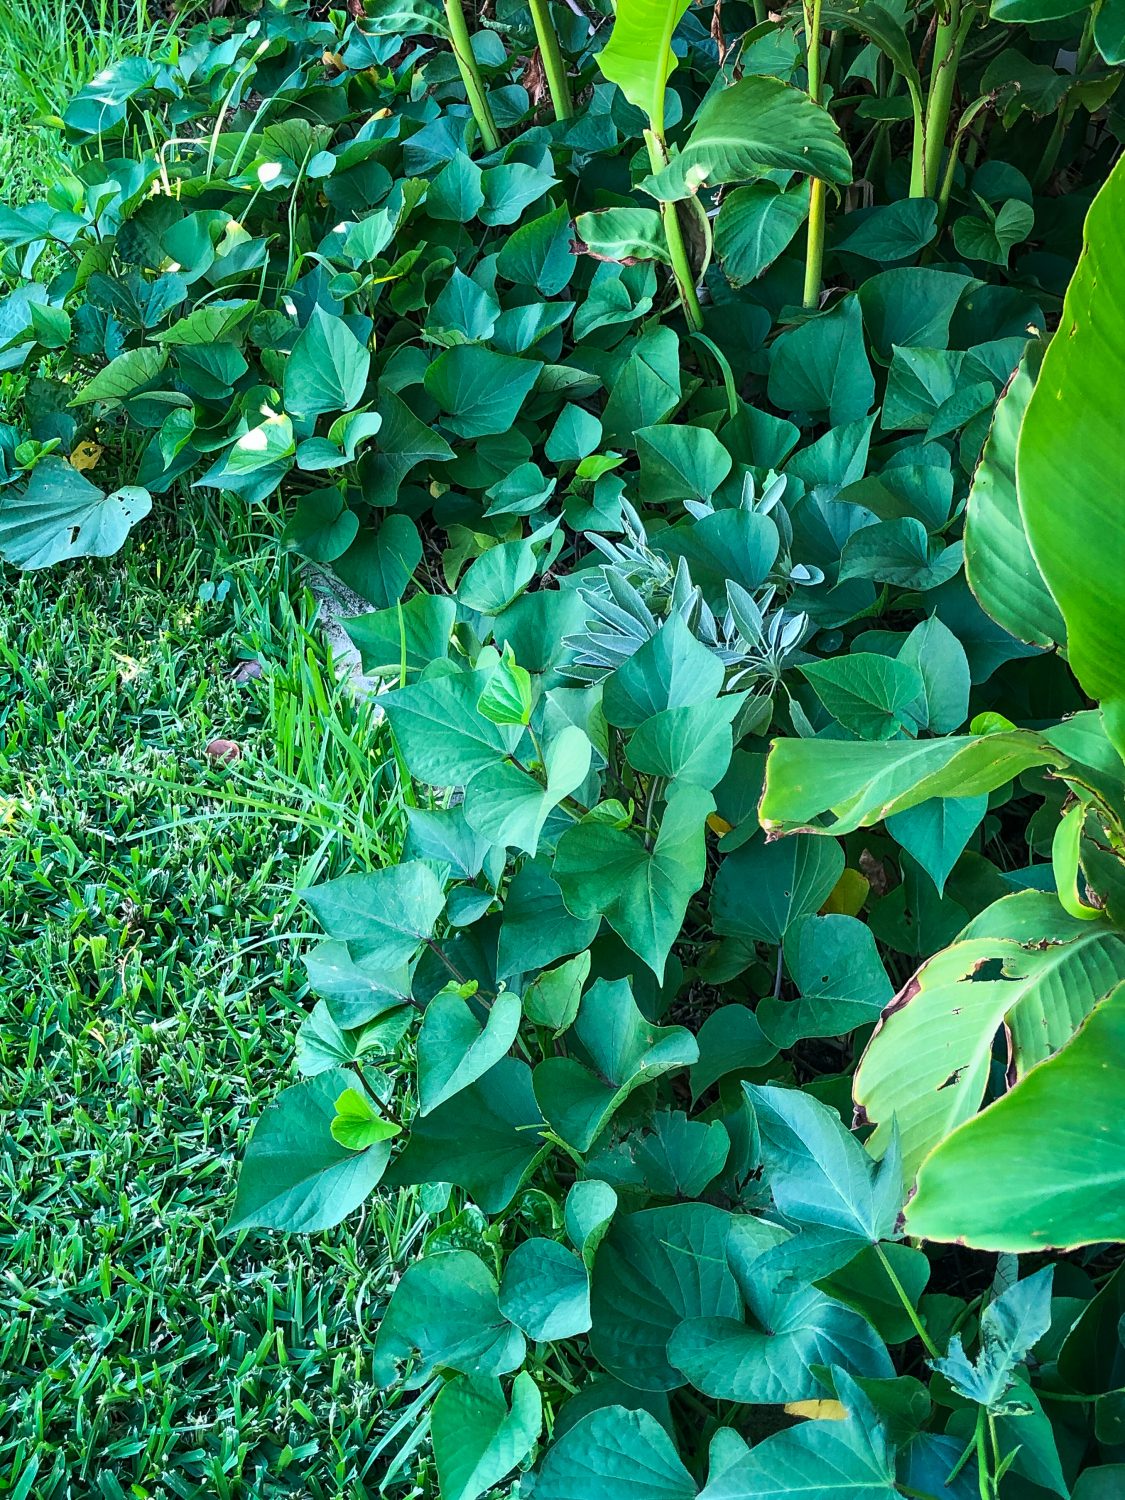
1. Sweet Potato
Sweet potato is hands-down my favorite edible ground cover. Its thick, lush vines protect the soil from the harsh sun and help retain moisture. The leaves are edible and can be used like spinach—sautéed with garlic, tossed in soups and curries, or even made into green wraps. And of course, the roots themselves are a delicious, substantial food source for both sweet and savory dishes. Sweet potatoes are also a haven for beneficial insects and frogs (yes, frogs!). I often find them nesting among the vines, even without a pond nearby. They’re super easy to propagate, making them perfect for sharing, selling, or expanding your patch.
2. Nasturtium
Nasturtiums are another edible ground cover that, once you plant them, you will have forever! Their bright flowers and peppery leaves are both edible and beautiful. I use the leaves in salads and as mini wraps, and the flowers as edible garnishes or pesto ingredients. They self-seed prolifically, meaning once you plant them, they often come back on their own every year. This means they can easily take over parts of your garden, so it’s important to keep them pruned if you want them to remain in one area.
Nasturtiums attract beneficial pollinators and act as a trap crop, luring pests like slugs and snails away from other plants. You can prune back areas to feed to your chickens as a natural pest management system. Even their seed pods are edible—you can pickle them to make homemade capers!
Naturtiums die off during the hot summer months, and so I pair these with sweet potato, which has an opposite growth pattern. Sweet potatoes thrive in summer and die back in the cooler months. These two work well to keep the soil covered all year round.
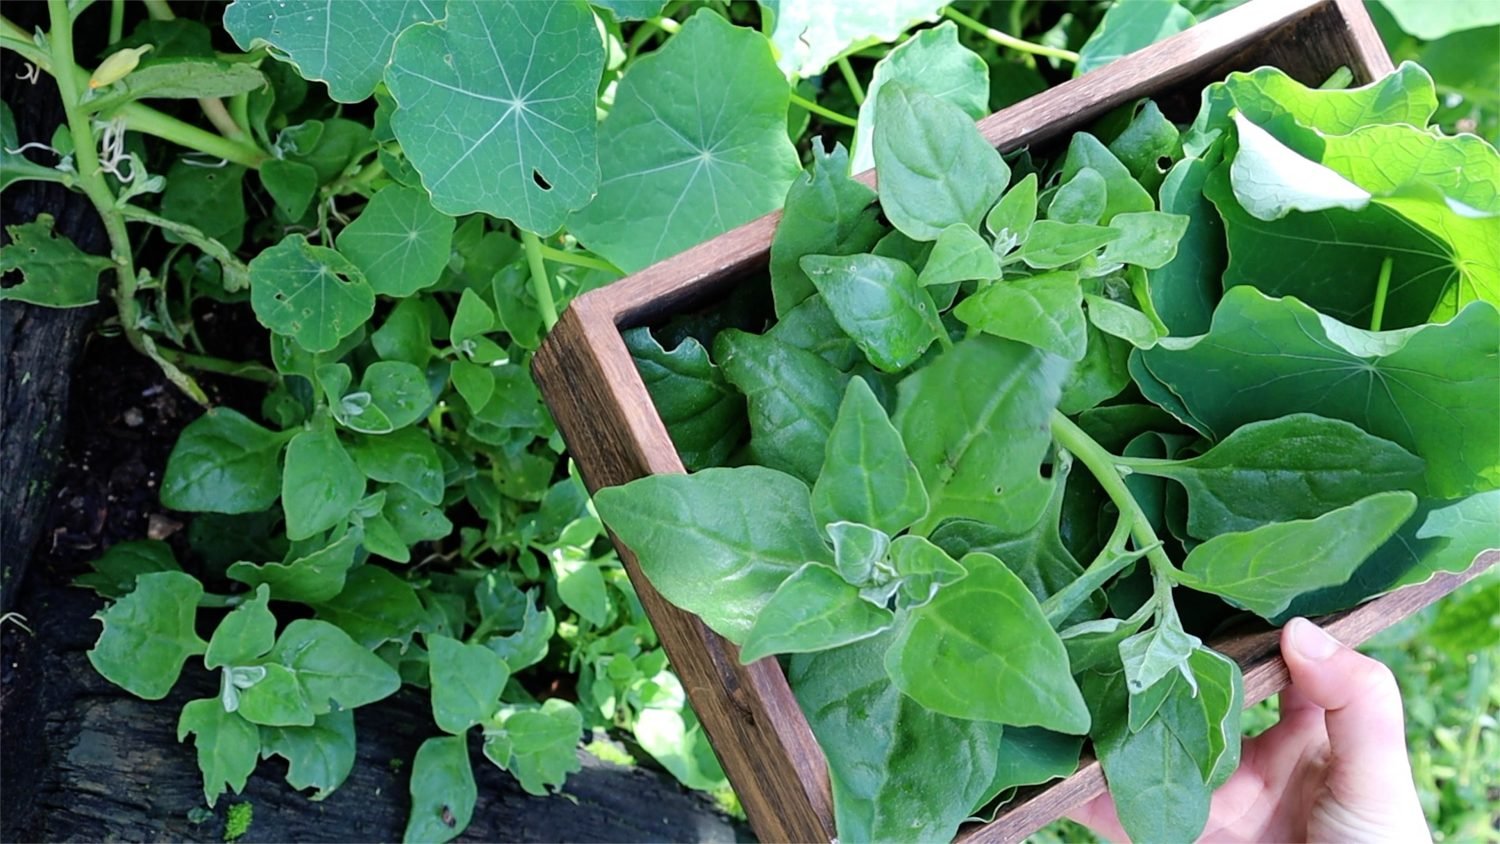
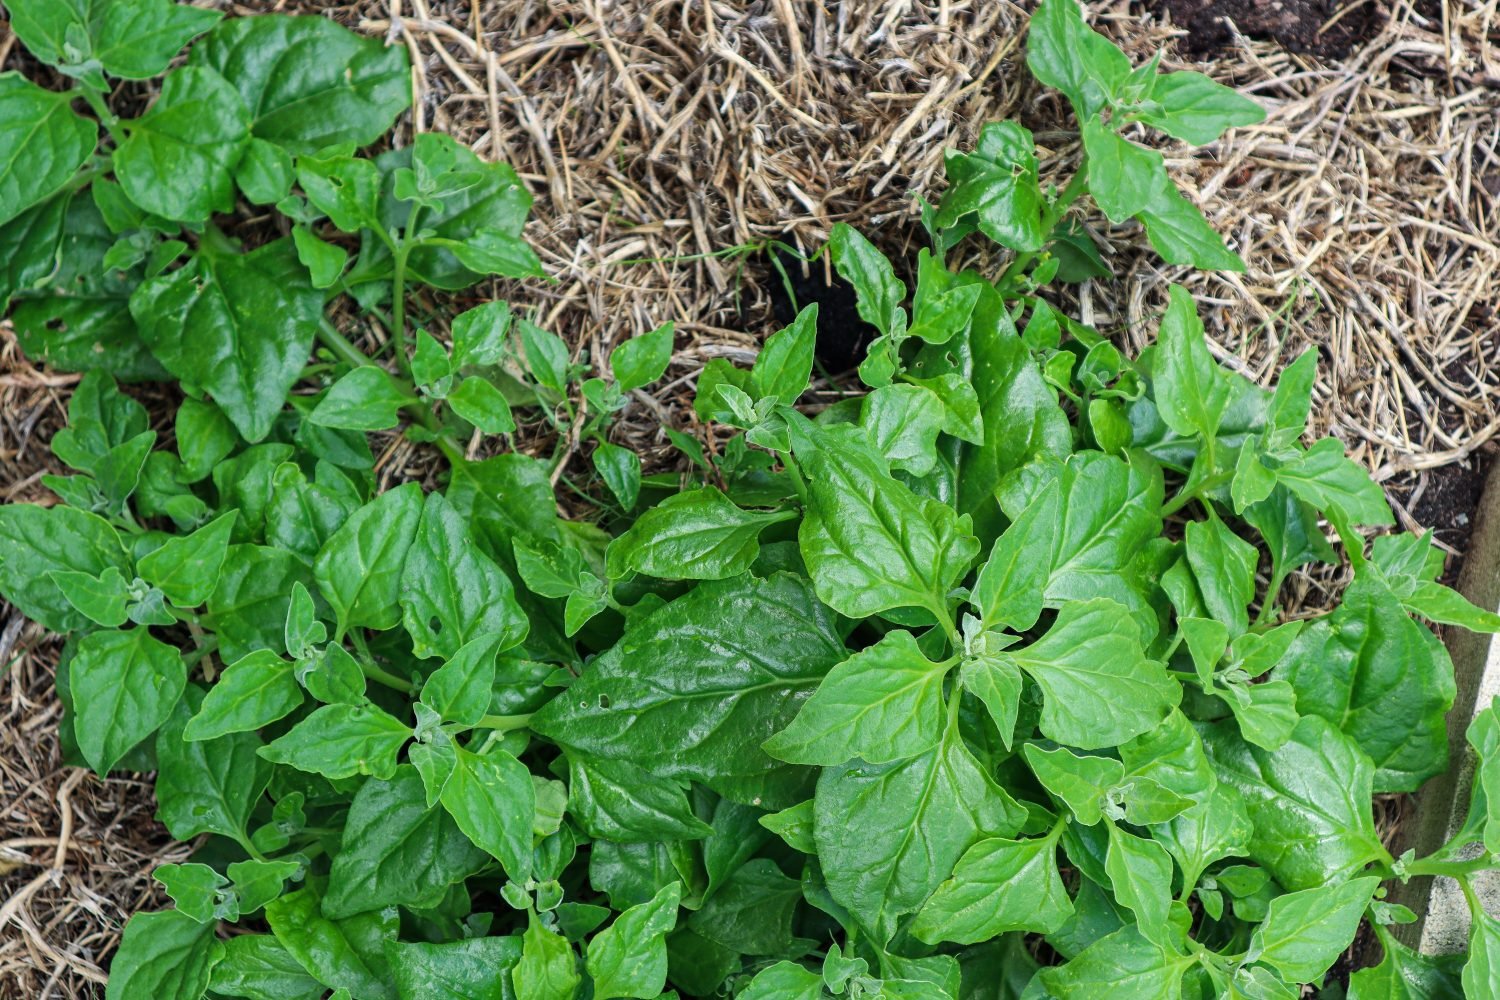
3. New Zealand Spinach (Tetragonia tetragonioides)
New Zealand Spinach is one of my go-to ground covers, especially in warmer weather when traditional leafy greens struggle. It spreads beautifully and creates dense, weed-suppressing coverage. The leaves are succulent and can be eaten cooked, much like regular spinach. It’s drought-tolerant, hardy, and perfect for low-maintenance edible landscaping. Due to its ability to self-seed easily, it can be a good idea to keep it contained.
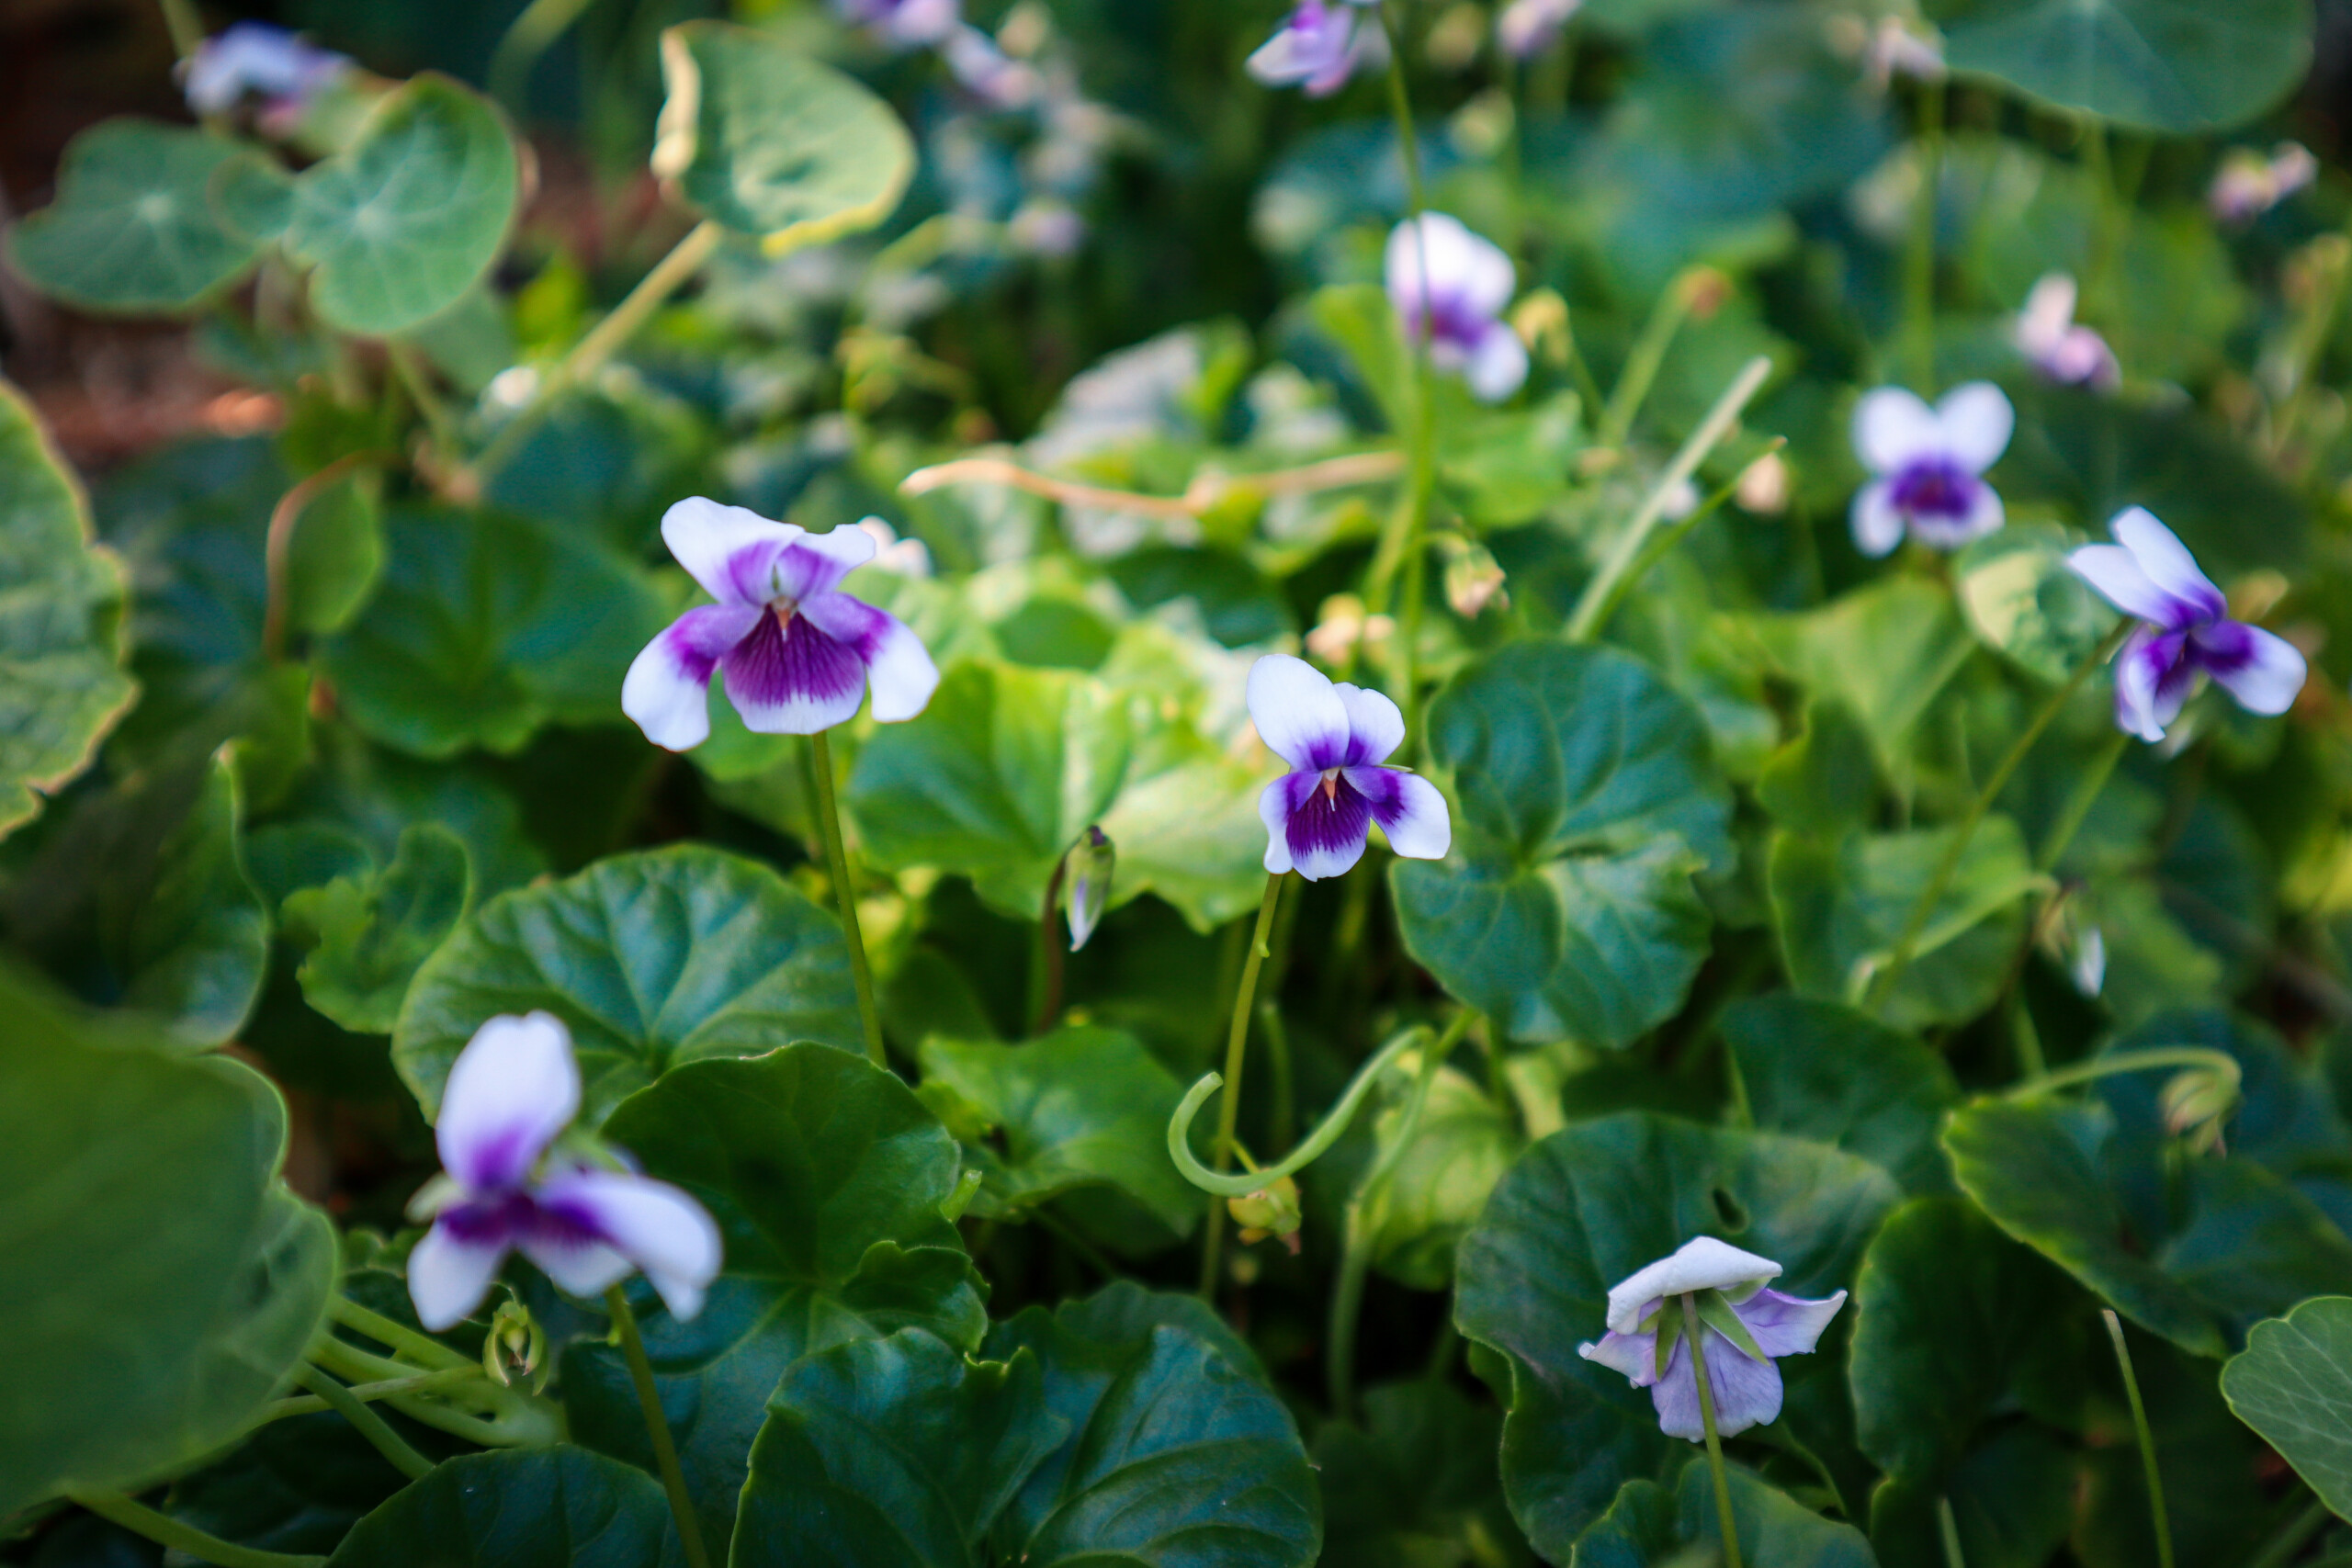
4. Sweet Violet
Sweet violets (Viola odorata) make a lovely ground cover for shady areas, which become more common as fruit trees mature and cast more shade. They have heart-shaped edible leaves and delicate purple flowers that make beautiful decorations for cakes and salads. While I usually use the flowers more than the leaves, the entire plant helps retain soil moisture and suppress weeds, making it an excellent living mulch.
5. Strawberries
Strawberries are a classic edible ground cover that needs little introduction. They spread easily, especially alpine varieties, and can handle partial shade. While their leaves and flowers are edible, the fruit is the real star. Just note they do better in sunnier patches of your garden.
6. Prostrate Rosemary
This low-trailing form of rosemary hugs the ground and is well-suited to hot, dry, sandy, or rocky soils. It’s evergreen, hardy, and incredibly useful in the kitchen. I love having rosemary nearby to flavor dishes, and the edible flowers are great for attracting bees. It also has a host of medicinal benefits—anti-inflammatory, digestive support, and calming properties.
7. Thyme & Oregano
Thyme and oregano are aromatic culinary herbs that make wonderful low-growing ground covers in sunny areas. Their spreading habit helps protect the soil, and both are drought-tolerant and resilient. These herbs can be used fresh or dried for flavoring food, making teas, and for natural remedies. Their tiny flowers also attract pollinators to your garden.
8. Yarrow
Yarrow is a powerhouse plant often overlooked as an edible. While the leaves can be used in teas or medicinally (always research before consuming), their greatest strengths in the garden are as a soil protector with dense fern-like leaves and a pollinator magnet. It has deep roots that help break up compacted soil and draw nutrients up to the surface, improving fertility over time. It sends runners underground, so it’s a good idea to treat this plant like you would mint and keep it contained to one area.
9. Chamomile
Chamomile creates a fragrant, low-growing cover that’s sometimes used as a lawn substitute. It’s most well-known for its daisy-like flowers, which are harvested for calming teas that support sleep and digestion. It thrives in sunny areas and adds a beautiful, soft texture to garden beds.
10. Red Clover
Red clover is one of those quiet achievers in the garden, it’s beautiful, useful, and so easy to grow. I love using it as a living mulch in my food forest because it grows low to the ground, helps suppress weeds, and is constantly feeding the soil with nitrogen through its roots. The bees absolutely adore the flowers, and if you’re into herbal teas, the blossoms are edible and can be harvested and dried too! It’s the kind of plant that gives so much without asking for much in return—perfect for filling in those bare spots while still being productive and pretty.
Many common weeds are edible and make great opportunistic ground covers. Purslane, for example, has succulent leaves rich in omega-3 fatty acids and grows rapidly to fill bare spots. Chickweed and dandelion also have edible and medicinal parts. While these can spread quickly, learning to identify and harvest them helps you turn a problem into a resource.
Living Mulch: Edible Ground Covers That Feed You and Your Garden
Start small by adding one or two edible ground covers to your garden beds or under fruit trees, and watch how quickly they transform the space. These hardworking plants not only fill gaps and reduce maintenance, but they also invite more life into your garden, as a wildlife habitat. Whether you’re building a full food forest or just looking to get more out of your patch, edible ground covers are one of the simplest ways to grow smarter, not harder.
Are you growing any edible plants as living mulch? Let us know below 👇
Links included in this post might be affiliate links. If you purchase a product or service with the links that I provide I may receive a small commission. There is no additional charge to you! Thank you for supporting my blog so that I can continue to provide you with free content.
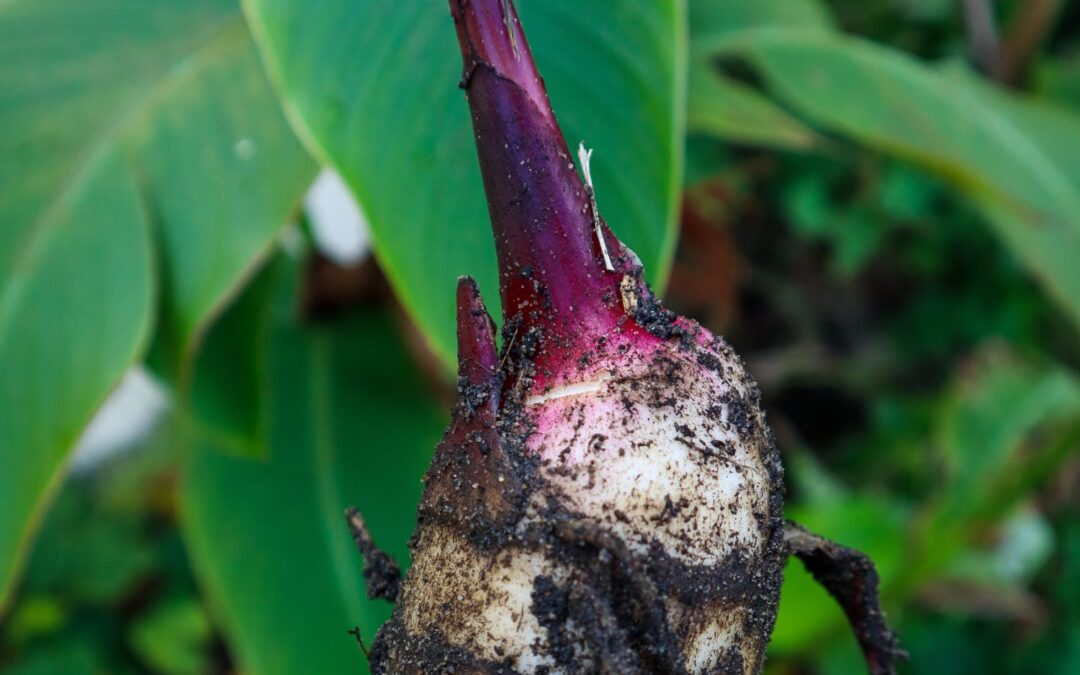
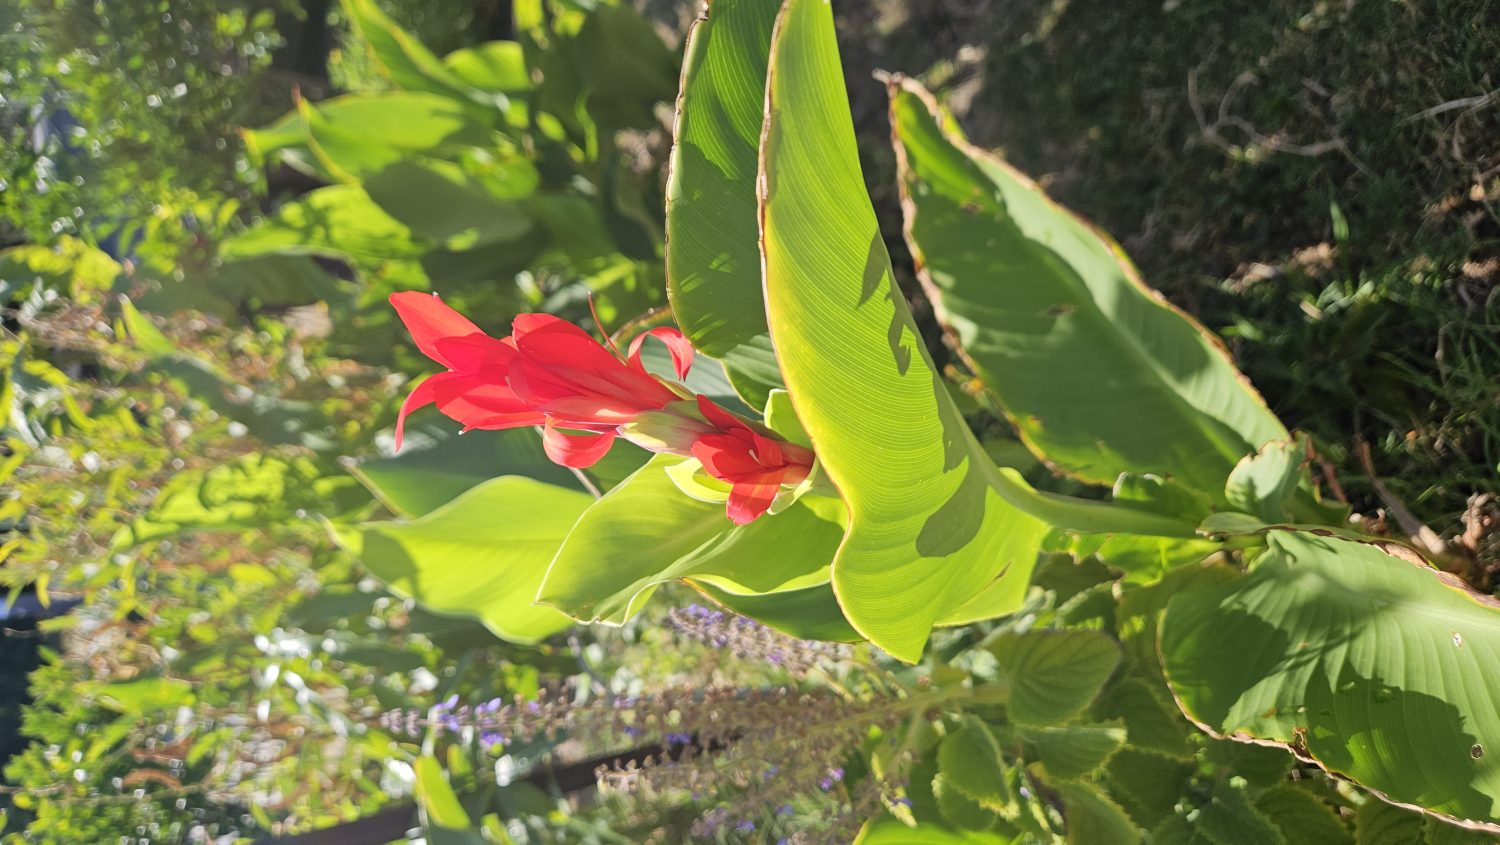
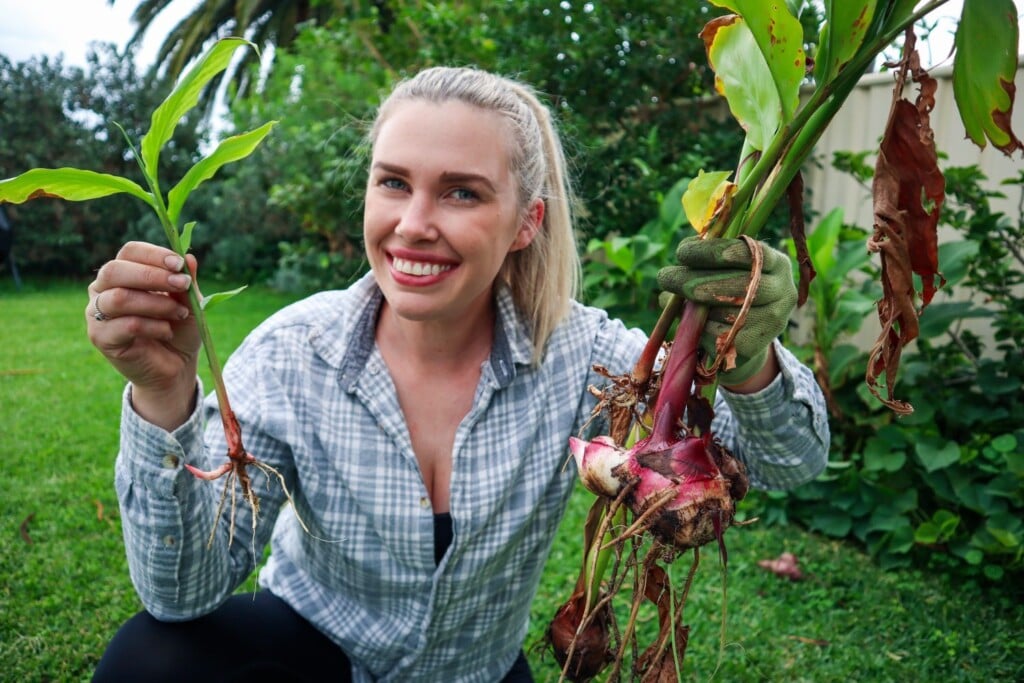
Edible canna or Queensland Arrowroot (Canna edulis) is a highly resilient, fast-growing plant that thrives in a variety of conditions, making it a valuable addition to any permaculture or sustainable garden. With its striking tropical foliage, edible rhizomes, tropical lush green leaves, and excellent mulching properties, edible canna is one of my favourite edible mulch plants to grow. Find out more about how to grow and use this incredible permaculture plant plus, where and how to find it!
Benefits of Growing Edible Canna in a Sustainable Garden
Edible and Nutritious Rhizomes
Edible canna produces large, round, red rhizomes that are highly versatile in the kitchen. These rhizomes:
Can be eaten raw or cooked like potatoes
Can be dried and ground into flour for baking and thickening sauces
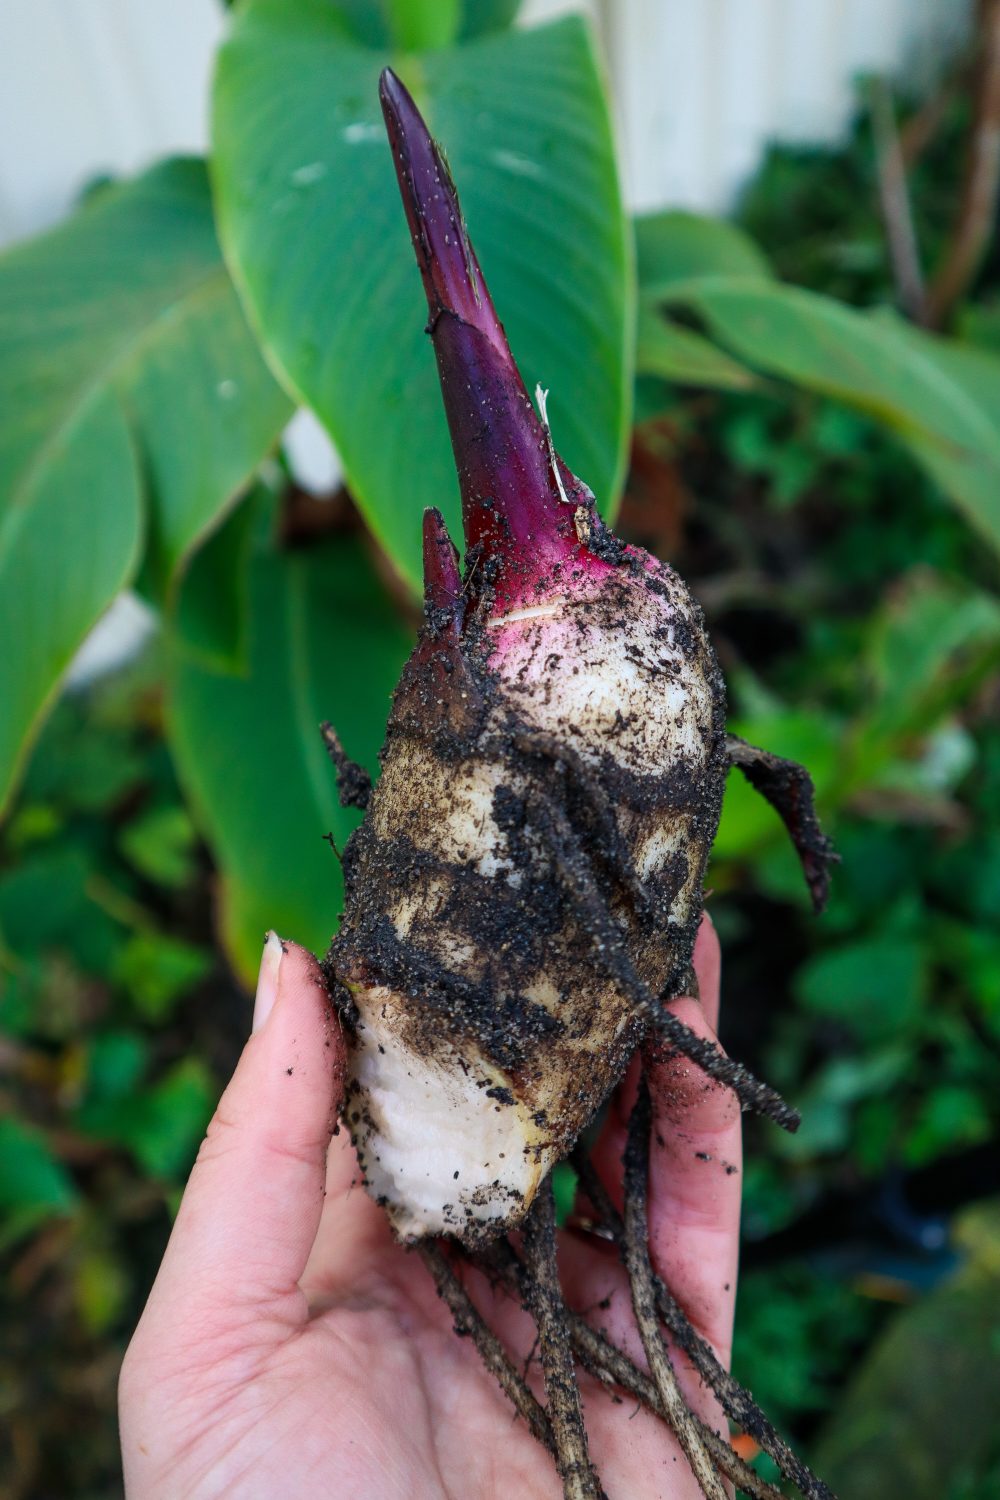
The young shoots of edible canna are also edible, containing around 10% protein. They can be used as a nutritious green vegetable, adding diversity to your homegrown food supply during thin months.
Extremely Fast-Growing and Easy to Cultivate
Edible canna is incredibly easy to plant, grow, and harvest. It quickly repopulates, ensuring a continuous supply of rhizomes and biomass without much effort. The rhizomes send off side shoots that can be harvested to eat or to move and regrow in other areas of the garden.
Adaptable to Various Climates and Soils
Thrives in warm climates even the toasty hot Perth summers
Grows well in very poor soil, making it ideal for degraded or sandy areas
Highly drought-tolerant, but will produces better eating rhizomes in well-watered conditions
Grows well in wet conditions and even along pond edges, helping to stabilize soil and prevent erosion
Provides Biomass for Mulching & Soil Improvement
The large leaves and water-filled stems, similar to banana plants, make excellent chop-and-drop mulch. This is a game changer for establishing new gardens with poor soil. Regular pruning encourages new growth while giving you green material to add organic matter to the soil. Enriching your gardens fertility and helping protect the soil from the harsh sun to helps retain moisture, suppress weeds, and build soil health.
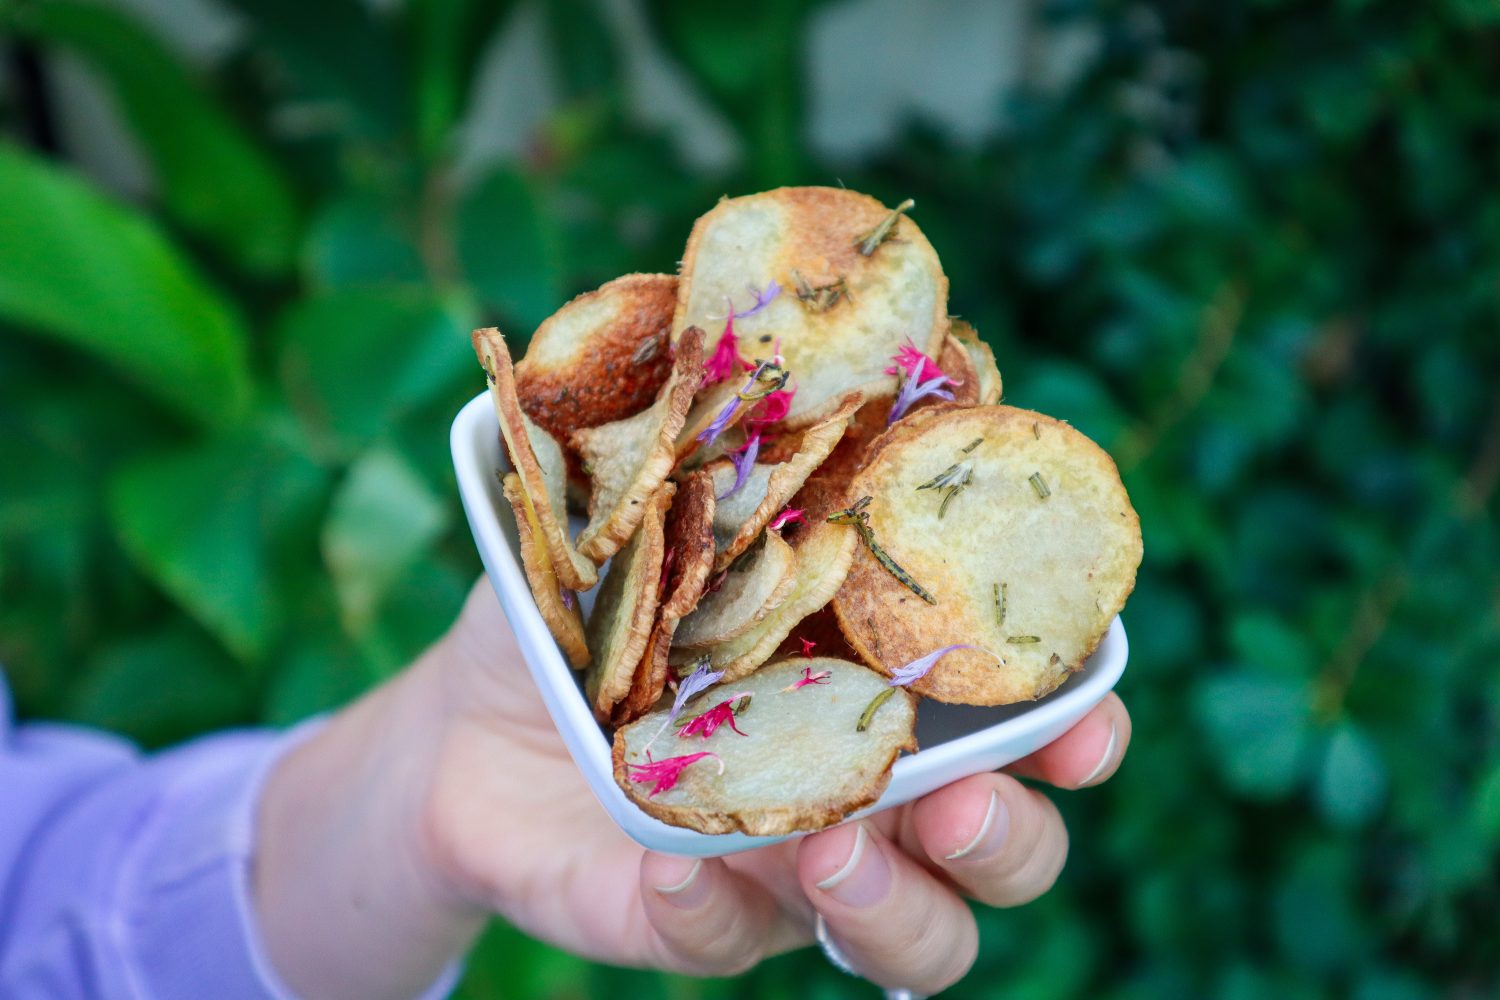
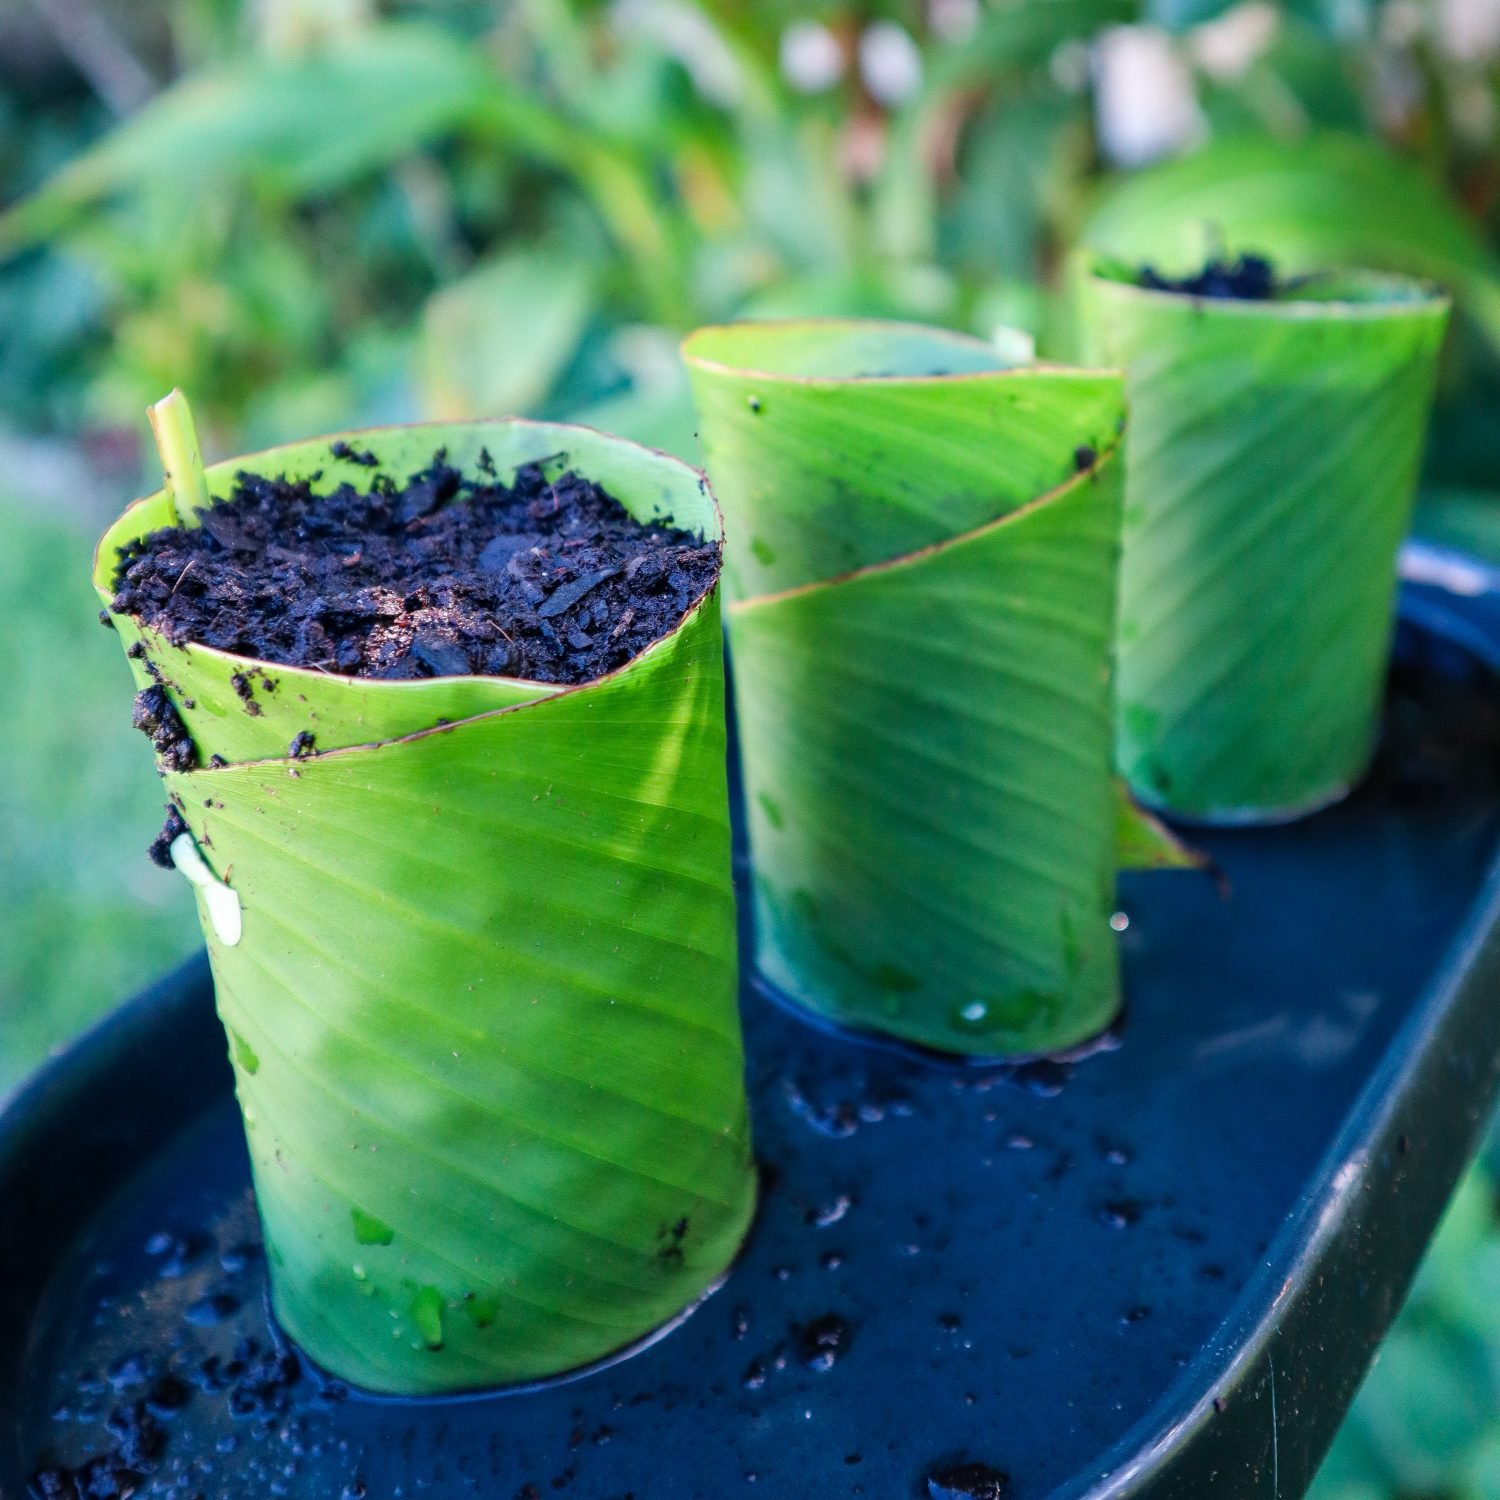
The leaves can also be used like Banana leaves to decorate tables or even make DIY eco pots.
Windbreak & Habitat for Wildlife
Dense clumping growth makes edible canna an effective windbreak, protecting more delicate plants. I often plant these first next to new plants to help protect them while they get established and then later on cut them back to use as mulch. The vibrant red flowers attract pollinators and small birds, enhancing biodiversity. They also provides shelter for beneficial insects and small wildlife which are key to creating a thriving sustainable garden.
How to Grow Edible Canna / Queensland Arrowroot
Planting & Soil Requirements
Prefers full sun but can tolerate partial shade
Grows well in poor, sandy, or wet soil conditions
Can be planted from rhizome divisions, making propagation easy
Maintenance & Care
Requires minimal maintenance once established
Regular pruning helps maintain vigorous growth and maximizes mulch production
Can be interplanted with fruit trees and vegetables to enhance soil health
Harvesting & Usage
Harvest rhizomes when they reach full size, usually after a year of growth
Young shoots can be harvested as needed for fresh greens
Leaves and stems can be pruned periodically for mulch
Where to Find Edible Canna or Queensland Arrowroot?
I get a lot of questions on where to find Canna Edulis so here are some place to check out if you are in Perth: Tass1 trees, Primal Fruits, Bloomings Nursery. Otherwise check out your local nurseries that are not “chain” stores. They can often be found in the pond sections alongside the edible plants. Be sure to check the variety for ‘Canna Edulis’ as there are many types of ornamental Canna.
Powerhouse plant for sustainable gardens
Edible canna is a powerhouse plant for sustainable gardens, offering food, mulch, and ecosystem benefits with minimal effort. Its ability to grow in tough conditions, provide edible rhizomes, and support soil health makes it a must-have for any permaculture system.
Incorporate edible canna into your garden today to enjoy its lush tropical look and numerous practical benefits!
Links included in this description might be affiliate links. If you purchase a product or service with the links that I provide, I may receive a small commission. There is no additional charge to you! Thank you for supporting my blog so that I can continue to provide you with free content.
Turn Your Garden or Homestead into a Profitable Venture
Are you dreaming of turning your love for gardening or homesteading into a steady income? Whether you live on a suburban block or a sprawling rural property, there are countless ways to earn money directly from your land. From selling fresh produce and seeds to hosting workshops or creating digital content, your garden or homestead can become a powerful income stream with the right strategies.
Make Money from Your Garden – No Matter the Size
In this post, you’ll discover 100 creative and practical ways to make money from your garden or homestead. Whether you’re a beginner gardener or a seasoned grower, there’s something here for everyone—from hands-on ideas like growing microgreens and making preserves to online options like starting a garden blog or selling educational resources.
Don’t wait to start living your dream life, start it today!
🎥 Watch: 100 Ways to Make Money From Your Garden or Homestead – Creative Ideas!
Some of these income ideas I’m already doing or currently setting up on my own garden and homestead, while many are still on my “someday” list! But pulling together this list has been incredibly motivating for me, and I hope it gives you plenty of inspiration to get started today, too.
Just a quick note before we begin: Always do your own research and check the local laws, permits, or council requirements in your area before starting any of these ideas. These suggestions are in no particular order, and some links in the description may be affiliate links, which help support this channel at no extra cost to you.
100 ways to make money from your Garden or Homestead
1. Make cuttings to sell – often when pruning your plants, you can replant and make heaps more plants.
2. Sell seedlings – plant extra seeds each season to sell.
3. Sell extra produce at the local markets – a great place to connect with your community.
4. Craft DIY pots and plants – paint fun prints or slogans, upcycle tea cups or whatever it is.
5. Create an ebook – share your knowledge. Ebooks are great because you do the work once and sell it to anyone in the world forever. It can be set up for free so it costs you nothing to start! Try using Canva.
6. Create a garden club in person or online
7. Start an Instagram monetized account or to share links to your shop
8. Start a Facebook monetized page to share links to your shop
9. Start a Tiktok monetized or to share links to your shop
10. Write paid blog posts for companies – use your knowledge to write articles
11. Create a blog – Grow your audience and sell your own products, affiliate links or join ad networks
12. Start a YouTube channel – AdSense, affiliate, sponsored, your products, and grow an audience. This could be anything from sharing your journey, how to do things, or even just funny goat videos, or homestead vlogs
13. Make an online course (gardening, homesteading, growing flowers)
16. Design templates and labels (gardening layout plans, preserves, animal maintenance) Canva makes this so easy.
17. Sell stock images – Businesses need images all the time for their advertising or marketing campaigns. That can be anything from photos of snails, flowers, people picking vegetables, farm dogs, the possibilities are endless. And the great thing is you take the photo once you upload it, and you can be making money for years and years to come. Another great passive income stream that can make you money while you sleep.
18. Hold workshops – If you have a set of skills, then share them with others by holding workshops. This can be absolutely anything from how to grow flowers, how to prune fruit trees, how to build a chicken coop, canning, preserving, cheese making, or whatever it is that you have experience in.
19. Zoom and phone consultations – Whether you have skills and knowledge in Garden design, permaculture, animals, business or whatever it is you can charge an hourly rate to offer phone or video one-on-one consultation.
20. Sell seeds – Saving seeds is a vital part of growing and building a sustainable homestead. Saving seeds can also mean you have far more than you will need so you can sell your extra seeds. You may also be growing rare or unusual fruit and vegetables that you could save and sell seeds from
21. Host retreats – if you have built a beautiful oasis or peaceful garden, why not host retreats for others to feel the inspiration and beauty of your property too. You could include homegrown produce, nature walks, yoga, cooking classes, natural healing with herbs, art, crafts, whatever it is that you are passionate about or have some experience in you can package it up to a retreat. Collaborate and get other guest speakers or artists in to help you offer unique and inspiring experiences.
22. Air BnB – Create small accommodations or rent our part of your home to guests. Get creative, have fun, and offer unique accommodations and experiences. This can work well with many other offerings on your property.
23. Beekeeping – bees are great for aiding in pollination so keeping bees on your property may increase your harvests. You will also be able to harvest honey, beeswax, and honeycomb to eat or sell. If keeping bees is too much, then you can let other beekeepers rent space on your land in return for income or honey.
24. Bed and breakfast – if you have a spare room, cabins, or studios, you can offer bed and breakfast stay with your homegrown produce. This is a unique experience that many people would travel further to stay.
25. Grow specialty crops – such as vanilla bean, saffron, and other rare or special products. These may take time to grow, but time is going to pass anyway. If you have a unique growing environment or a hothouse, you may be able to grow things out of season or tropical fruit and vegetables that others can’t grow.
26. Dried flowers – these are really popular at the moment and last for a long time. You could provide local florists with dried foliage or flowers. You could also produce your own bunches or sell them individually for home decor.
27. Public tours – if your friends and family are wowed by your garden or property, then why not offer paid public tours. Even if you have a small garden, but you utilize it well you may be able to offer advice and show others how they can achieve this too.
28. Microgreens – microgreens are easy to grow and very popular. Restaurants use microgreens as garnishes. Contact your local restaurants and find out if they would be interested in purchasing. They may even be able to tell you which ones they like the most.
29. Trending houseplants – This new craze is unbelievable! If you haven’t heard about variegated monsters, then you may have been living under a rock! One even sold recently in NZ for like $25k! Wild. So take a look at what is trending and you may be able to purchase one plant and make a cutting to make your money back and start profiting. Obviously, there is a risk so be sensible as the plant may die before you make a profit or go out of trend.
30. Medicinal herbs – herbs have historically been used to aid and cure many ailments. With a return to natural living and health, many people are interested in medicinal herbs. Whether you sell wholesale or package your own products, there are many options for selling medicinal herbs.
31. Pressed flower art – press your seasonal flowers and turn them into art.
32. Firewood – extra trees or plant your own trees specifically to harvest for wood.
33. Timber – sell specialty timber for building or crafts
34. Lease or rent part of the property – for other hobby farmers or gardeners. Many people have ideas and dreams of buying land and starting a market garden, cut flowers, free-range eggs, or even just a vegetable patch but want to test the idea or start small with low upfront investments. Offer up spare paddocks or a small plot for a garden and I’m sure you will have many people jumping at the opportunity. Make sure if you do this you get contracts in place so both parties are on the same page.
35. Animal manure – if you have animals, you will have plenty of manure. This is highly sorted after for growing fruit and veggies so if you have extra or more than you need then offer it up for sale. Especially if your property is organic and spray-free, this will be highly valued.
36. Fresh Free-range eggs – nothing beats fresh free-range eggs, and you will have no trouble selling these. Make it fun and get a custom stamp for your farm or chickens. You may also be able to get your local community to drop off used egg cartons to use and recycle. Always make sure with produce you have enough for your family before selling.
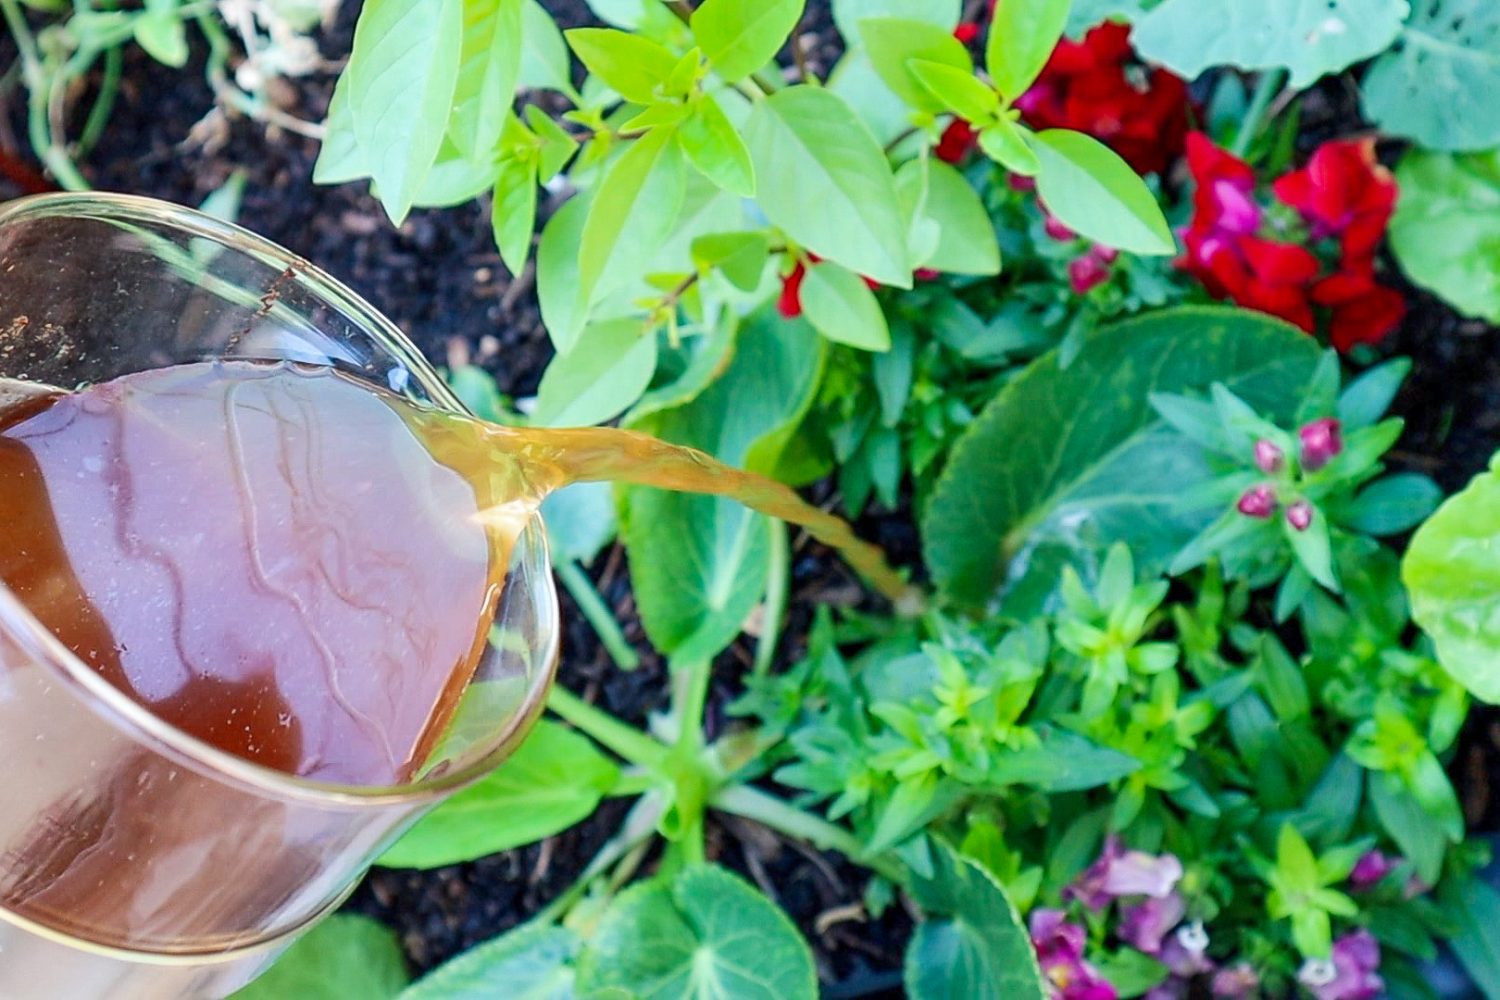
37. Worm tea – worm wee and worm casting are gold for the garden! if you have extra then you will easily be able to sell this locally.
38. Mature Animals – this one is self-explanatory, but raising animals to sell.
39. Milk – doesn’t have to be cow milk, goat, sheep, and nut milk are also great niches
40. Cheese – I would love to make my own cheese super fun skill to have and add in other homegrown produce like chilies and herbs.
41. Stud animals – Not everyone wants to keep stud animals, and that is males for breeding. If you have a good quality breeding animal you can hire that out so people can make baby animals…
42. Timber art or signs – Use reclaimed timber of wood you find on your property to make signs. These could be decor, custom-made for events etc
43. Landscape designs – If you are skilled at landscape design, you could do consultation and design or even some basic premade food growing designs to sell.
44. Basket weaving from natural fibers – another one i can’t wait to try is weaving and making baskets. Very popular and useful for vegetable harvesting and farmers’ markets.
45. Create garden starter packs – help beginner gardeners get started with complete start packs. Could be seeds, pot, soil, tools etc
46. Fresh herb containers for kitchen gardens – plant up kitchen herb planters and sell as ready-to-go herbs.
47. Make insect hotels – insects are great for the garden and you can make insect hotels using forages, sticks, and materials you have found around your property.
48. Fresh bread – amazing! and you could add in other homegrown produce like olives, herbs, and sundried tomatoes!
49. Kombucha scoobys – such a weird thing to sell but also very popular! if you are brewing your own kombucha you will likely end up with too many scobbies so you can sell them and even offer tutorials or ebooks on how to make it.
50. Sourdough starters – same as the kombucha, don’t waste the extra sourdough starter, sell it, and offer tips and tricks to newbies. These products that need to be sold locally may help you connect and find like-minded people in your community.
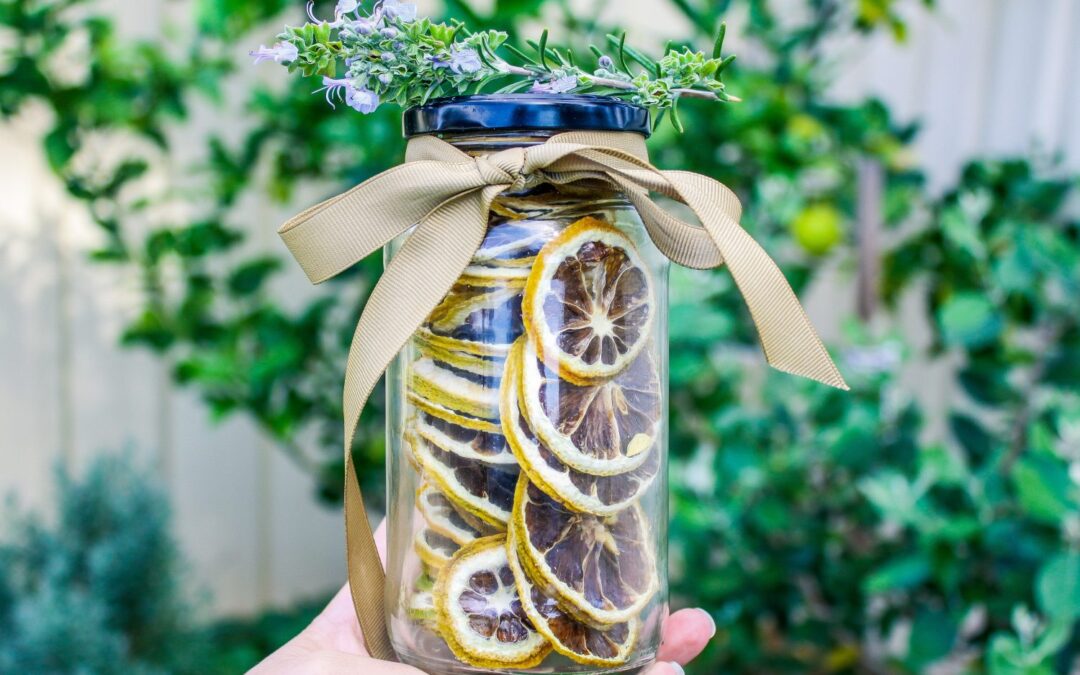
51. Jerky or dried fruits – preserve you extra produce by dehydrating them and selling them as snacks or garnishes to restaurants and bars.
52. Plant labels – have you come up with an innovative plant label idea? It is something that is always a pain point for gardeners, so it would sell like hotcakes.
53. Hay or straw – If you have spare paddocks, why not make some hay or straw for animal feed. to feed your stock but also sell extras.
54. Grow Halloween pumpkins – A Seasonal thing to do is to grow jack-o-lantern pumpkins and sell them to those wanting to carve pumpkins. You can also let people come and pick their own and set up fun displays or photoshoots to market your homestead or brand.
55. Chilli and hot sauce – easy to make and a popular condiment to sell. Make fun labels to help promote your homestead.
56. Wooden spoons, platters, and bowls – you can make beautiful spoons using timber and sticks on your property. This is another one on the top of my to-try list.
57. Recycled or upcycled art – don’t waste leftover supplies. If you are creative, turn them into art or installations to sell.
58. Honesty box/roadside stall – if you want a more set-and-forget option, this is a good one. Make a creative little stall to attract passers-by and sell your extra produce, jams, flowers, and crafts. If you don’t live in a place with lots of through traffic, you could advertise it on your social media or local pages. Be sure to secure the honesty box well and empty it regularly…
59. Affiliate marketing – this is where you can sign up to promote brands and products you love. If people use your links to purchase any products, you will receive a small commission. This can be a really passive way to create income as you just leave links on your videos or website.
60. Paid newsletter – come up with an offer and send out regular paid newsletters. This could be recipes, tips, or guides. I use Convertkit.
61. Hiring out equipment – If you have purchased specialty equipment that you don’t use every day, why not hire it out to those who just want to use it once or twice. This can be things like horse floats, tractors, fencing equipment, woodworking, welders, whatever it is. It could help you pay for the product itself.
62. Strawberry runners – strawberries send off heaps of runners and small plants. You can sell extras for people to start growing their own strawberries quickly.
63. Garlic seed – Sell your leftover garlic as seed for others to grow their own.
64. Wreaths – season-themed wreaths or as decor using foraged foliage, sticks and other materials from your garden.
65. Bugs – for animal feed. Crickets, worms lots of bugs can be sold for animal feed for people with small pets such as lizards etc.
66. Meat – raising animals for meat.
67. Wool from sheep
68. Baby animals/ breeding
69. Christmas Trees – have extra space and not sure what to do. You could plant Christmas trees and people could come and pick out their own.
70. Hatching eggs – sell fertilized eggs for people wanting to raise their own chicken, ducks, or quails.
71. Flower crowns – special occasions, weddings, bridal showers or birthdays. Flower crowns are easy to make and can be kept as keepsakes. You can sell them or even set up workshops and help people make their own.
72. Grazing – allow people to keep their animals on your property if you have extra pasture.
73. Horse agistment – similar to grazing, but a little more infrastructure is involved. Shelter, food, and possibly feeding and putting rugs on and off. But if you have horses and extra space to house more then this can be a very lucrative extra income.
74. Photography shoot location – offer up parts of your property as photoshoot locations. Very easy and if you are creative you could really get into it. Plant a field of sunflowers or if you have a cute cabin, a pond, a themed garden or even just a beautiful veggie patch. Contact local photographers and let them know. Once photographers start using your locations and tagging you its free advertising and you may get more customers.
75. Wedding venue – Very lucrative if you have a beautiful property. you may need to invest in a few things to start with like power etc but for the most part weddings can be set up anywhere as toilets can be hired, food trucks, etc. As you grow you could add more things such as all-weather barns, kitchens, or catering. This would allow you to offer different pricing tiers. and many other things on this list can tie in with wedding venues. Such as Airbnb and cabins can be rented to wedding parties, flower crowns, etc.
76. Grapes for wine – wholesale grapes to vineyards or make your own small-batch wine.
77. Write a book – put your personal experience or skills in a book! Even a photo book for inspiration as a coffee table book.
78. Nature or animal Yoga classes – have fun with it offer locations to local instructors or become one yourself. If you have tranquil locations or I’ve even seen goat yoga! where baby goats hang out and jump on your back.
79. Cooking classes – offer up your skills and teach others to cook or bake using homegrown produce.
80. Seasonal dinner parties – I love this idea as each season should be celebrated. Host beautiful long table dinners using what you have grown or involve other local growers.
81. Create sustainable gift baskets using produce – businesses are often looking for new and exciting gift ideas. Put together some gift baskets and contact local companies. You may even be able to work with them to customize it to suit. Real estate and builders are often great places to start as they gift clients at the end of sale or the finished build of each property.
82. Regular in-season produce subscription box – if you grow plenty of food, offer seasonal produce boxes where people sign up to receive a box of fruit and veggies each week or fortnight with whatever you have from the garden.
83. Sponsored posts – if you have a following on any of your platforms, you may be asked or can reach out to companies for sponsored posts. The reason these work so well is that you have a very specific target audience that is interested in what you are doing. Which is gold for advertisers.
84. Herbal tea blends – Dry your extra organic herbs and make up some fun tea blends.
85. Innovative inventions – ( animal feeders, planting seeds), things that you have come up with to save you time, that could help others.
86. Naturally dyed clothing – use leaves, berries, avocado seed,s and other natural materials to make interesting clothing or fabric.
87. Mulch, sawdust, or woodchips – great for gardens or animal bedding.
88. Hire out specialty areas or infrastructure – stockyards, round pens, arenas, shearing sheds, commercial-grade kitchens, pottery kiln, and things like that.
89. Share knowledge and expertise with consultations – Beekeeping, hydroponics, milking goats, starting a vegetable patch, canning, and preserving. Whatever you have mastered, you can help others set up.
90. Sculptures using clay, timber, or other foraged materials
91. Timber rounds for signs, displays, and platters. This is so simple and very popular! Sliced rounds of wood go for $50 or $100, and people without access to timber will pay for them!
94. Home decor – painted timber, shelves, wall hangings, ladders,
95. Remedial ointments, salves, and lotions
96. Mature fruit trees – you could buy young trees for cheap, $20 – $30 fruit trees, and once they are mature and fruiting, they sell for over $200. Might take a few years, but time will pass anyway.
97. Merchandise. Established brands with the following sell garden-related clothing or home products.
98. Fresh cut flowers – whether you have a roadside stall, sell wholesale to florists, or offer a subscription service where people get a fresh bunch of seasonal flowers delivered on a regular basis. I would love that!
99. Subdivide and sell part of your property – this is not really a recurring income or you would have no land left but if you are looking for land to buy maybe if you buy more than you need you can subdivide off a section of it and it could help you go debt-free or pay for a new barn or business idea.
100. Sell baked goods. I’m talking apple crumble, strawberry tarts, rhubarb pies, lemon meringue pies, ok I love pies…
Keep it simple. Start small and build on it.
Don’t get overwhelmed by these ways to make money from your garden or homestead. Start with your strengths and what excites you the most. This will go a long way to ensuring you succeed. For me, photography, video, and visually creative platforms are my strength and my passion. So those are the areas I have focused on to start with. If you are more social and love interacting with people, maybe holding workshops and garden tours would be more your thing.
Don’t worry about what everyone else is doing. Focus on you. Focus on what feels exciting and sparks inspiration.
Let me know in the comments what you are starting with or hoping to start next. I would love to know!
DISCLAIMER: Links included in this description might be affiliate links. If you purchase a product or service with the links that I provide I may receive a small commission. There is no additional charge to you! Thank you for supporting my channel so I can continue to provide you with free content each week!
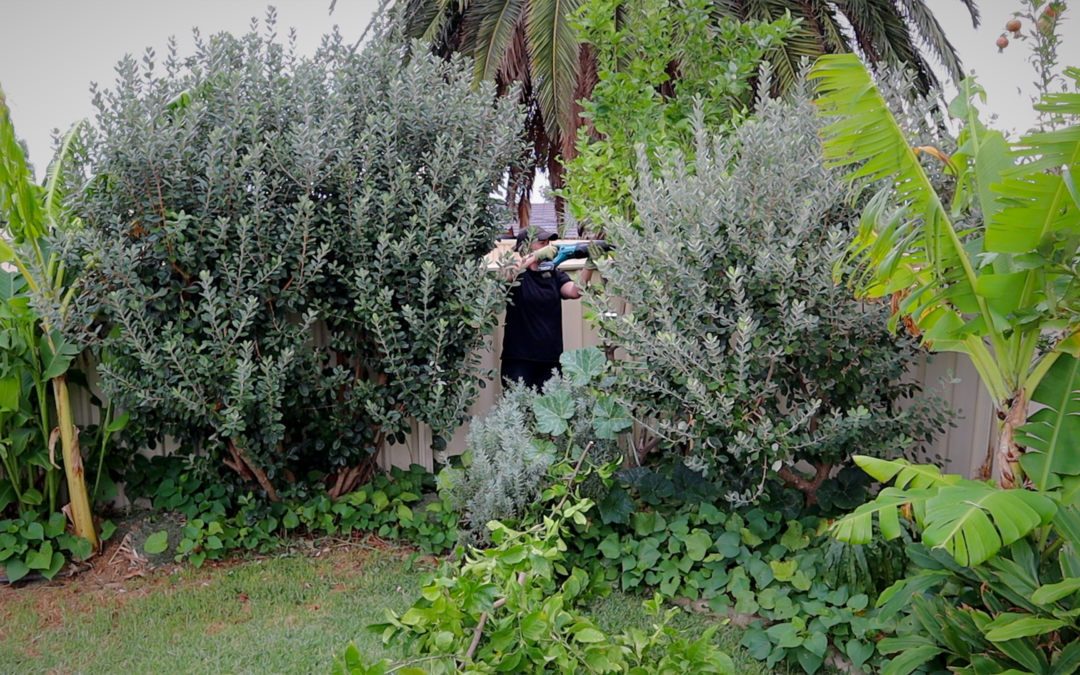
There’s a big change happening in the food forest… and honestly, this wasn’t an easy decision. This is something I’ve been avoiding for months, but it had to happen. One of my most mature and productive Citrus trees had to be removed. For months, I had been avoiding it, but I want my food forest to be productive and easy to maintain, and this was turning into a maintenance nightmare.. read below to find out what pest has forced me to remove a mature lemon tree and find out the exciting new addition I’ve planted in its place…
🎥 Click play to watch the full transformation:
The Problem: Citrus Gall Wasp
If you are growing citrus in Perth, you may already know the challenges citrus gall wasps can bring. They lay their eggs inside the soft new branches, which swell into lumpy galls and deformed growth that weakens the tree over time. They emerge from the stems as wasps and instantly set about infecting new growth. It’s a constant battle!
Despite careful pruning, timing, and trying to manage the problem organically, the gall wasp pressure on my Lemon tree became too much. Removing a Citrus tree is never ideal, but I was constantly cutting the tree back before the lemons were ripe, and so it was more work than reward. Because I live in an urban environment and many houses have lemon trees nearby, I also relied on others to keep theirs in check. Which, unfortunately, is not a reliable method.
Eventually, I realized that despite loving the productive crops I once had, the best thing to do for my high-density garden was to remove it entirely. If I didn’t have so many trees to care for, I might have chosen to keep it and manage the Citrus Gall wasps by the following methods:
How to Manage Citrus Gall Wasps Organically
Pruning back Galls before they hatch in Winter (prune Feb to June in Perth)
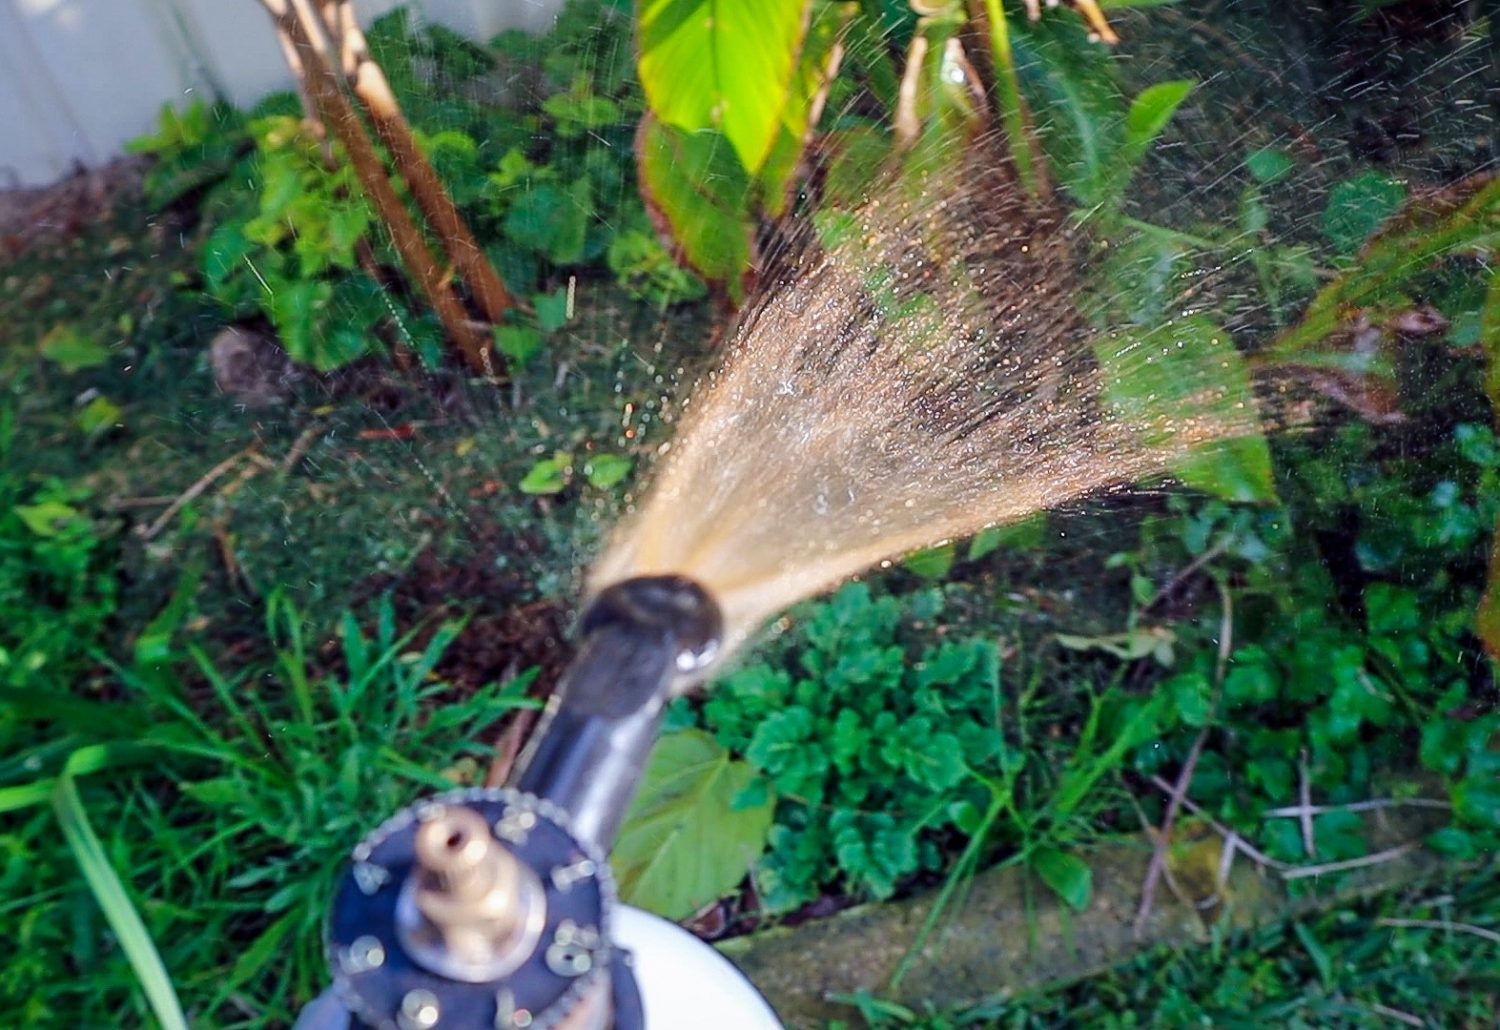
Spray the young branches with Kaolin clay to act as a barrier during spring
Avoid fertilising in winter to reduce new growth around the time the wasps are active.
Regularly check trees as new lumps can form and be hard to see in one go
IMPORTANT: How to Dispose of Citrus Gall Wasps Correctly
Even if you cut the galls off, they can still hatch and not only reinfect your trees, but if you put them in green waste, you could infect new areas by transporting them. Here are some ways to dispose of the galls you remove to help stop the spread of Citrus Gall Wasp.
Place galls in a plastic bag and solarize them in the sun for at least 4 weeks.
Burn in the fire (check fire bans).
Solarize, then run through a mulcher, or mulcher then ferment for fertilizer in an air-tight container
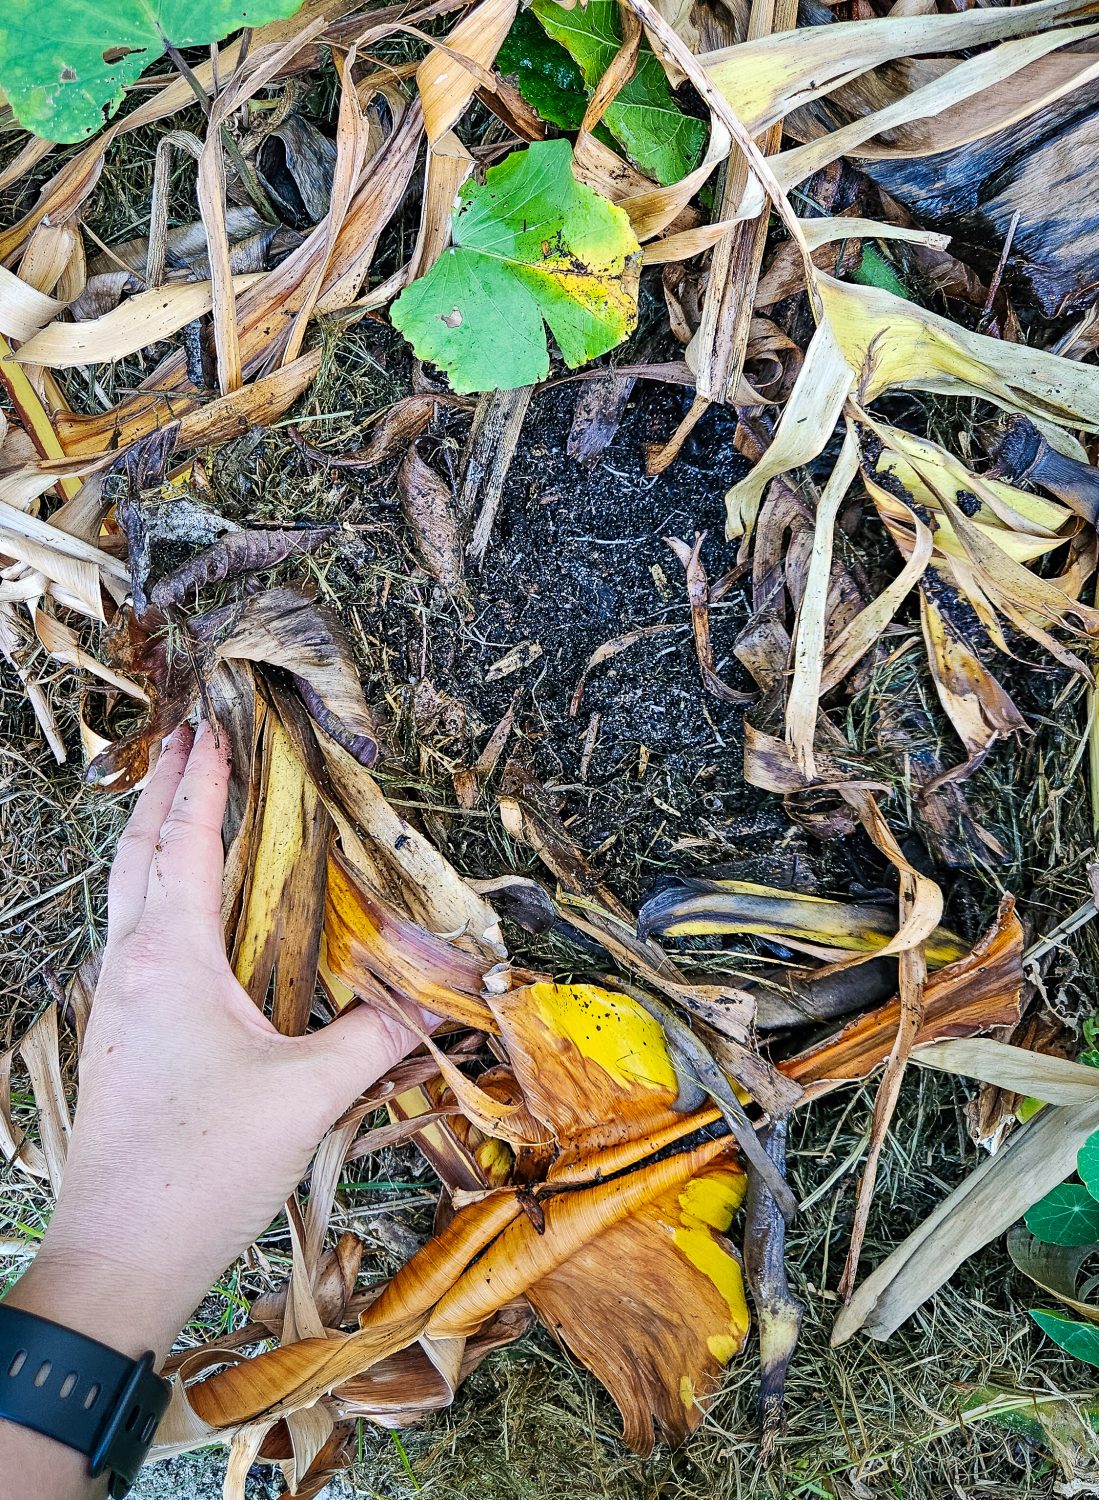
Due to the amount of galls I had on my lemon tree, I went with the third option. I mulched the stems to break open the galls and then put them in a large bucket filled with water and a lid to rot down and make some fertilizer to feed my garden.
What I planted instead
In an urban garden, space is valuable, and with space finally opened up, I had the chance to plant something new and very exciting! I chose a tree that I’ve been wanting to grow for a long time, and I have had it waiting in a pot for the perfect spot. This was the giant avocado. Unlike regular avocados, the fruit on this tree grows to be up to x5 bigger! It is a fun and novel thing to grow because it’s unusual and not often found in the shops – I paid $10 for 1 Avocado the size of my staffys face and I’ve only seen them once before! I managed to find a grafted tree, and I have had it growing in a pot for a few years. I love growing weird and unusual fruits, so I’m very excited to see the potential crops this tree brings. Plus, I LOVE Avocados and have quite a few rare varieties in my collection.
Continuing to Expand my Front Yard Food Forest
While I wasn’t happy about losing my most productive fruit tree, I have been continuing to grow and plant more fruit trees in my front yard food forest. What was once a patch of plain grass is now densely planted with many weird and unusual fruit trees, herbs, perennials, and mulch plants. Plus, my beloved mini pond that currently has frogs!
I focus on variety over quantity in my food forest garden—I’d rather harvest small amounts from 10 different fruit types than be overwhelmed with one massive harvest. This diversity keeps the garden productive year-round, helps with pest resilience, and makes gardening much more exciting!
Know when to let go: Sometimes removing a tree is the best long-term decision, even if it feels hard in the moment.
Plant with diversity in mind: A mix of fruit types spreads out harvests and gives you fruit throughout the year
Manage pests regularly: Check your trees for gall wasp lumps regularly, especially at the end of summer and autumn. Prune before spring and dispose of affected material properly.
Look at change as an opportunity: Removing one tree makes room for something new, and sometimes, even better.
Like every garden, this space is constantly evolving. Sometimes we have to make the tough calls, but that’s part of growing a resilient, productive food forest — especially in an urban setting. Let me know in the comments what you would have planted instead — and I’ll keep you updated on how the avocado (and all the new fruit trees) settle in!
One of the biggest game changers in my food forest has been learning to stop removing things from the garden (yes, even to the compost bin!) and instead, using them in situ.. I’m not just tidying up every time I prune my fruit trees. I’m actually feeding the garden and growing soil. The secret? It’s called chop and drop mulching, and it’s honestly one of the easiest, most sustainable ways to improve your nutrient-deficient or sandy soil. If you’ve been composting your prunings, or worse…sending them off in the green bin — you’re not only creating more work for yourself…but you’re also missing out on a free, zero-waste way to build healthier, more productive trees and soil. It’s such a simple system to create a more sustainable garden.
PLUS, there’s one key reason WHY I feed plants back their OWN prunings... Find out more below and why it’s such a game-changer for a self-sufficient garden 🌱
What Is Chop and Drop Mulching?
Chop and drop mulching is essentially exactly what it sounds like. You chop your trees or plants and drop them right back onto the soil. That’s it. There’s no hauling branches to a compost pile, no bagging up green waste, just letting nature do what it does best.
But… there are a few tips to follow to maximise the results and create the best free fertilizer for your garden!
Think of it as mimicking a forest. In nature, no one is clearing up leaves or broken branches. They fall, decompose, and feed the soil. We’re just copying that same cycle in a more intentional way in our backyards.
Because I plant my food forest and gardens so densely, I need to prune them back regularly. This not only lets light in to the lower levels, but I like to keep my trees at a height that I can always reach the fruit. That way, it is easy to pick and bag or net the trees to reduce pests from getting my precious harvests. In my urban permaculture garden, I would rather have many small trees than only a couple of large, high-yielding trees.
I use chop and drop under all my fruit trees, shrubs, perennial beds — anywhere I’ve got plants that love a healthy, rich soil layer. There is one exception that I will explain below…
Why It Works: Benefits of Chop and DropMulching
This super simple method packs in a whole heap of benefits:
Nutrient Recycling: The prunings are full of nutrients your tree has already put the effort and energy into absorbing. Returning them directly to the soil means those nutrients go straight back to the roots. Exponentially increasing the fertility of the soil for that fruit tree or plant.
Moisture Retention: The mulch layer helps keep the soil cool and moist, especially in hot climates like here in Perth! This is crucial! By consistently covering the soil it blocks light, and builds nutrients to help your ground covers and lower-level plants compete.
Soil Health: It adds organic matter, supports fungi and microbes, and builds better soil structure over time. Fruit trees LOVE the fungal properties that small branches and mulch provide.
Less Work & Less Waste: No wheelbarrow trips to the compost or green bin, just prune and leave it be. Find out what size to cut your prunings below.
I’ve seen huge improvements in my soil by doing this consistently. Soil is THE KEY to a thriving garden, and it is actually more important to grow and build soil than to care for your fruit trees. Healthy soil will naturally grow strong, healthy trees with so much LESS EFFORT. Trees that looked stressed or slow to grow have bounced back once I started feeding the soil this way.
How Do You Chop and Drop Properly?
Prune Your Tree: Generally, the best time to prune trees is directly after they have fruited. Once you have picked the ripe fruit, you can prune the tree to keep the size manageable and give nutrients back after it has put the effort into fruiting. Avoid pruning during hot weather. Focus on removing dead, damaged, or crossing branches. Keep your trees open, airy, and manageable.
Chop It Up: Use CLEAN and SHARP secateurs. This will reduce any disease being spread and sharp cutting tools allow for clean cuts. Clean cuts will heal quicker and easier, putting less stress on the tree.
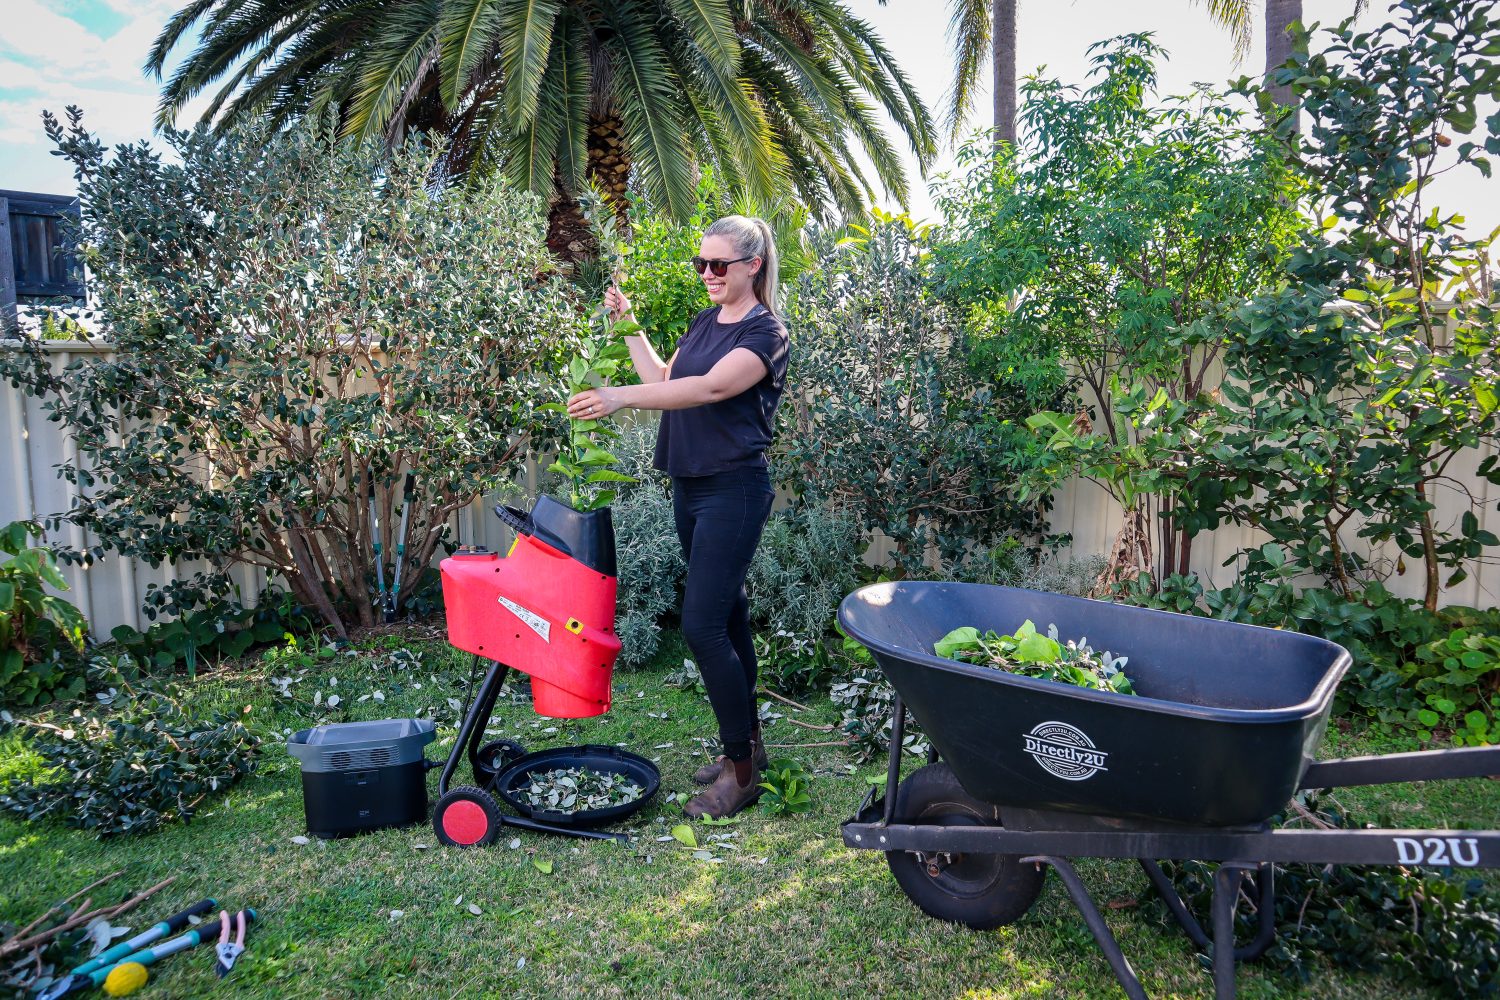
Pick a Size: How big or small to cut up your prunings depends on the effort you wish to put in and the thickness and density of the tree. Obviously, the smaller you cut up the pieces, the quicker they will break down and feed the soil. But if you want to hand-cut everything into inch-sized pieces, you could be there all day or even weeks…. which is not EASY or MANAGEABLE. With smaller tree branches, I like to use a small mulcher to break the branches into smaller pieces. The softer plants like shrubs, Banana,Queensland Arrowroot,Pigeon Pea, etc I just cut up very roughly into 10-30cm pieces, but you could even leave them as is if you have space to lay them down
Drop It Under the Tree: Spread it out evenly under the canopy line — not too thick, just enough to cover the soil without suffocating roots. Pull back any clipping from about 30cm from the main trunk – this will reduce any rotting to the main trunk from excess water.
What are the Exceptions??
There are only two main things that I avoid with this method, and they are:
Thorny branches eg, some Citrus. I have done this in the past and have copped many hard, dried thorns in my hands and feet! So I don’t just straight Chop and Drop my Lime or Lemonade prunings anymore. These I will run through the mulcher or add to the compost to break down before they hit the garden.
The other thing I avoid is any fruit. Fruit left on the ground is a magnet for fruit flies, rats, and other unwanted pests, so this all goes into the compost to break down.
Other Ways to Boost Soil Naturally
Want to take it further? Here are a few simple additions that work really well with chop and drop:
Grow Your Own Mulch: Plants like pigeon pea, comfrey, and even moringa are amazing for regular chopping. They add biomass, nitrogen and help shade the soil. Read my top Edible Mulch Plants here.
Fungi are Friends: Let fungal networks grow by using a no-dig approach. Mycorrhizal fungi love working through mulch and help deliver nutrients to your plants.
Hugelkultur-Style Mounds: Got bigger branches? Stack them in a bed and layer soil and mulch over the top — perfect for a no-dig veggie patch or future fruit tree planting spot.
Level up with Chop and Drop Mulching
Next time you’re out pruning in the garden, try leaving those cuttings right where they fall. It’s such a simple habit, but it has a huge impact over time. You’ll build richer, more nutrient-dense soil, reduce garden waste, reduce watering, and your fruit trees will THRIVE!
Have you tried chop and drop in your garden yet? Let me know how it’s working for you, and if you’re curious about more ways to grow healthy, productive trees, make sure you check out my next post on GROWING YOUR OWN EDIBLE MULCH PLANTS
Links included in this description might be affiliate links. If you purchase a product or service with the links that I provide I may receive a small commission. There is no additional charge to you! Thank you for supporting my blog so that I can continue to provide you with free content.
Creating a mini wildlife pond is one of the best ways to attract beneficial insects, frogs, and birds to your garden while adding a beautiful, natural water feature. I built my own mini pond 1.5 years ago, and over time, I’ve observed how it has evolved, what worked well, and what I would do differently.
When I decided to add a wildlife pond to my garden, I knew it would be fun to watch it develop, but it has really blown all expectations.
In this post, I want to give a full update on the mini wildlife pond and share everything I have learnt so far. Including plants, keeping the pond clean, fish, tadpoles, and frogs. What has worked, what hasn’t, and even a few things that were a little shocking…
If you have been thinking about creating a wildlife pond in your garden, this post will be perfect for you.
Mini Wildlife Pond update – click to watch or continue reading
Why Build a Mini Wildlife Pond?
A small pond can provide a water source for wildlife, improve biodiversity, and even help control pests naturally. Whether you have a large garden or a small space, a mini pond can make a big impact. The wildlife pond has become the heart of my gardens, with bees, lizards, flies, and wasps all frequenting the post daily. It also provides so much joy as it is located outside my office window. It has been my favorite addition to the garden so far!
Choosing the Location – I picked a location that gets morning sunlight to protect it from the hot afternoon sun. It is outside my office window to be able to enjoy it. It is in my front yard, away from my dog, who would happily use it as his own personal pool. It is also located in an existing garden bed to act as a wildlife corridor to give more protection and access without the wildlife being out in the open to predators. It is important to have a water source nearby to fill up your pond when it gets low.
Selecting a Pond Liner – I used a preformed pond 1m x 1m and about 30cm deep. I found this secondhand off marketplace for free! I love how quick and easy it was to install. Just dig a hole the right size and slot it in.
Filling up the Pond – I filled up the pond using my hose and scheme water. Rainwater would be ideal, but we don’t get a lot of rain here in Perth, Australia.. After filling up the pond, I let it sit for a few weeks before adding any fish. This allowed it time to off gas any chlorine. Before I filled the pond, I pulled back some of the soil around the sides of the pond then, as it started filling up, I pushed the soil back against the edges. This helped keep the edges straight.
Adding Plants and Natural Elements – Firstly, I added rocks around the edge of the pond and then found a stick to go over the middle of the pond. I added old bricks in the pond to act as plant stands to raise potted plants up so they were not completely submerged in the water. The plants I added to the pond were: Lebanese Cress, Chocolate Mint, Fairy Lights, Blue Grass, Gotu Kola, and Water Ribbons. I then added more herbs and edible flowers around the garden bed surrounding the pond. Adding different heights and textures will attract a wider variety of wildlife.
Introducing Water & Wildlife – Over time, the pond will naturally attract insects, birds, and frogs. I did add two types of fish ~ Gold White Cloud Mountain Minnows and West Australian Pygmy Perch Fish. The Perch sadly did not make it with sudden and dramatic spikes and dips in temperature during the first few months. The minnows have thrived and are very hardy and self-sufficient. They also had babies, and my original x3 fish turned into x12! Be selective of what fish to introduce, as Goldfish will eat frogs eggs, so they not a good option if you are hoping for frogs.
Click below to watch my Pond build step by step (or read here)
1.5-Year Update: What I’ve Learned so far
Algae thrives in Sunlight
Algae started to become an issue when the pond heated up in the sun, but adding more floating plants like water lilies helped provide shade and balance the ecosystem. I would go out every few weeks and scoop up any excess algae and place it in the garden for fertiliser. Once the Tadpoles arrived, they ate all the pond algae and kept the pond sparkling clean!
Wildlife Came Quicker Than Expected
Within weeks, I noticed dragonflies, bees, and lizards visiting the pond, showing how effective even a small wildlife pond can be.
Some Plants Will Leave the Pond…
Some plants are vigorous growers and will thrive both in and out of the pond. The Chocolate mint and Gotu Kola were the first to attach themselves to the garden bed and start growing. If you have a small pond it could be a good idea to keep these pruned back. In a larger pond, you could place them away from the edges to keep them contained.
Topping Up Water Is Necessary
In hot weather, water levels dropped as I expected. Using rainwater instead of tap water would be ideal, but I only have a hose with tap water nearby. I topped up my pond in small amounts often to keep the balance right. Having more plants shading the pond helped keep the water from heating up.
Nature does Nature
I was quite shocked to learn that when Tadpoles are starting to transition into frogs and just have a tail left, they can eat other small tadpoles. This was not a pleasant thing to see but I try to just let nature do nature.
Tips for a Healthy Mini Wildlife Pond
Use a mix of submerged, floating, and marginal plants to support biodiversity.
Be selective of what fish you introduce if you want to attract frogs and insects.
Provide shallow edges for easy access to small creatures.
Regularly remove excess leaves and algae to maintain water clarity.
Incorporate different textures of leaves and heights to attract a diverse range of wildlife
Small solar fountains work great in direct sunlight (no clouds); otherwise, opt for a powered one. Having a wide range of plant roots in the pond helps to keep it filtered and clean without a filter or fountain.
Mini Wildlife Pond Success!
Building a mini wildlife pond has been one of the most rewarding additions to my garden. Watching wildlife thrive in a space I created has been a joy, and I’ve learned so much about maintaining a natural pond. If you’re thinking of adding one to your garden, go for it!
Have you built a wildlife pond? Share your experiences in the comments below!
Links included in this post might be affiliate links. If you purchase a product or service with the links that I provide I may receive a small commission. There is no additional charge to you! Thank you for supporting my blog so that I can continue to provide you with free content.
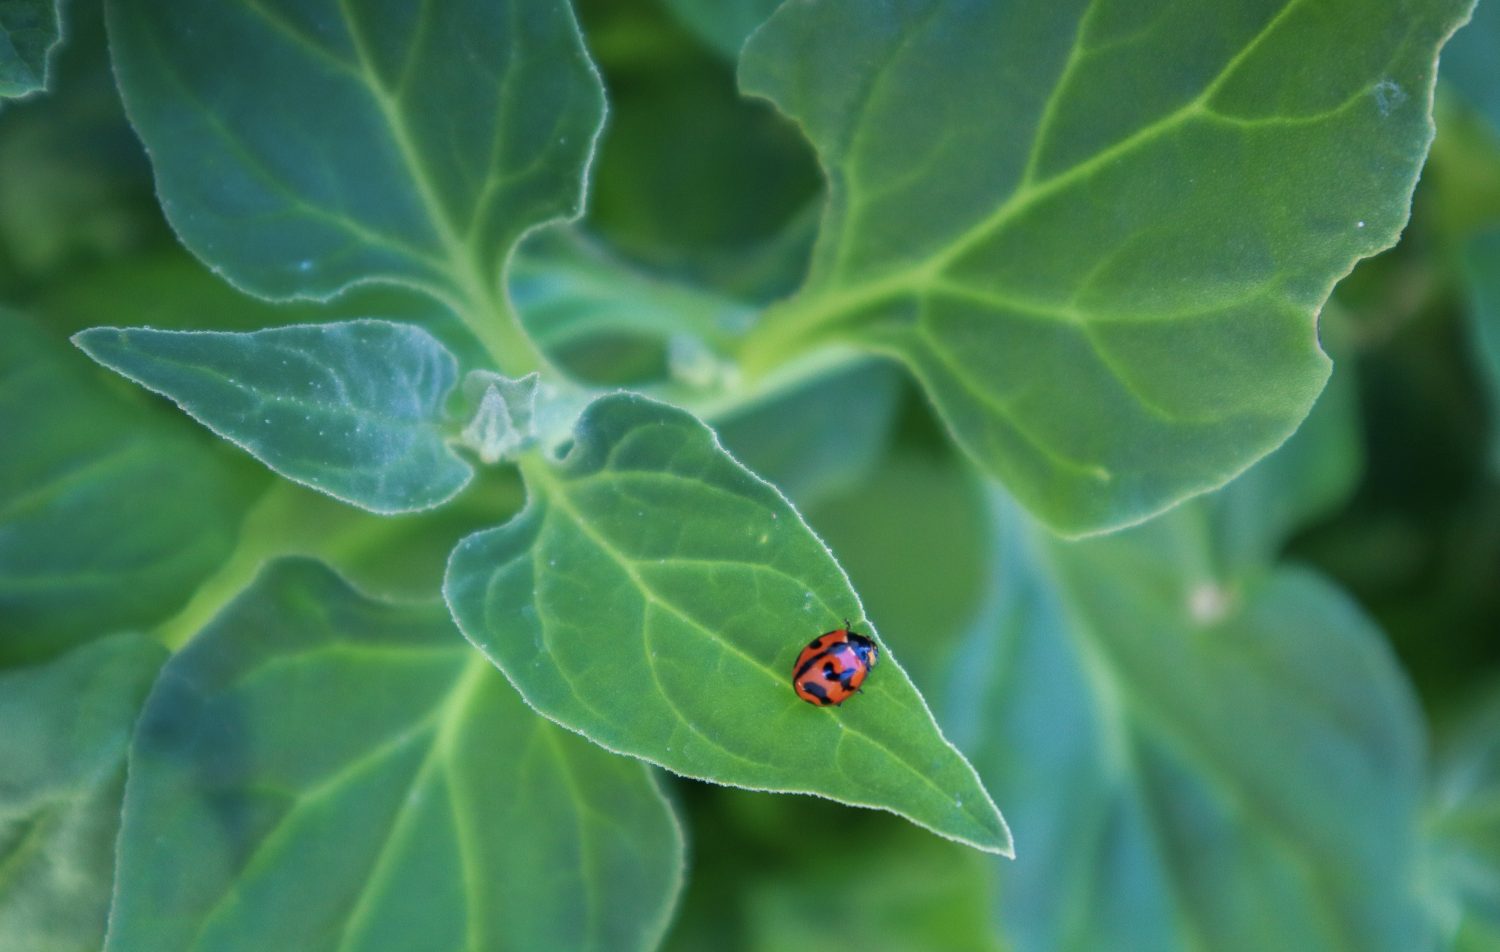
Ladybugs (also called ladybirds) are incredible beneficial insects that play a vital role in maintaining a healthy home garden. If you’re struggling with aphids or simply want to encourage more biodiversity in your garden, learning how to attract ladybugs to your garden is a simple and natural solution.
By growing the right plants and providing a welcoming habitat, you can establish a thriving ladybug population that helps keep pests in check. These tiny predators are natural pest controllers, feeding on aphids, mites, and other small sap-sucking insects that can damage your plants. In fact, a single ladybug can consume 20-50 aphids per day!
Want to know the difference between Red and Yellow Ladybugs? Keep reading below 👇
How to Attract Ladybugs to the Garden
Ladybugs are particularly drawn to dense clusters of small flowers that provide nectar and pollen. Many of their favorite plants are common herbs and flowering perennials that also benefit your garden in other ways.
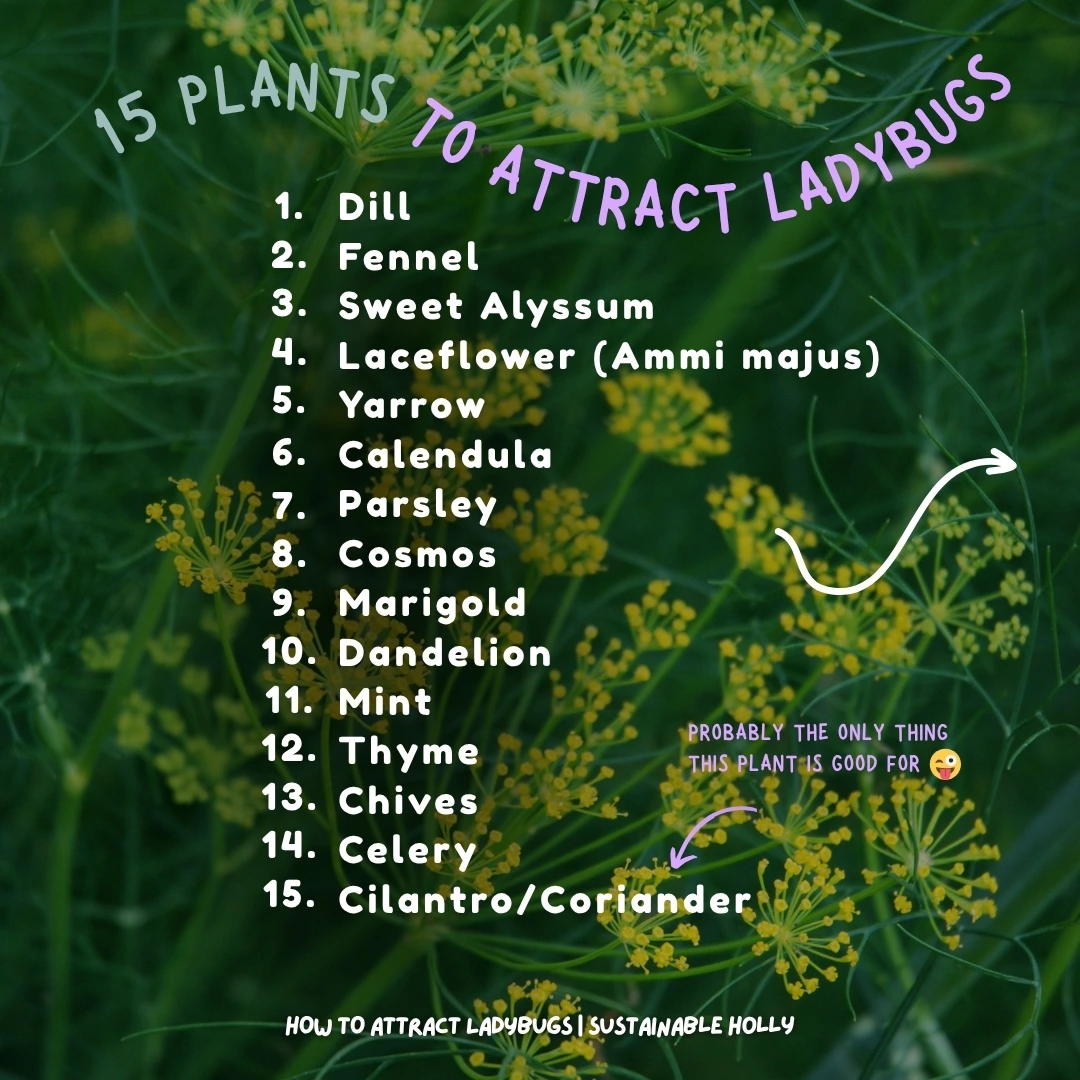
Best Plants for Attracting Ladybugs
Planting these flowers and herbs will help attract and sustain ladybugs in your garden:
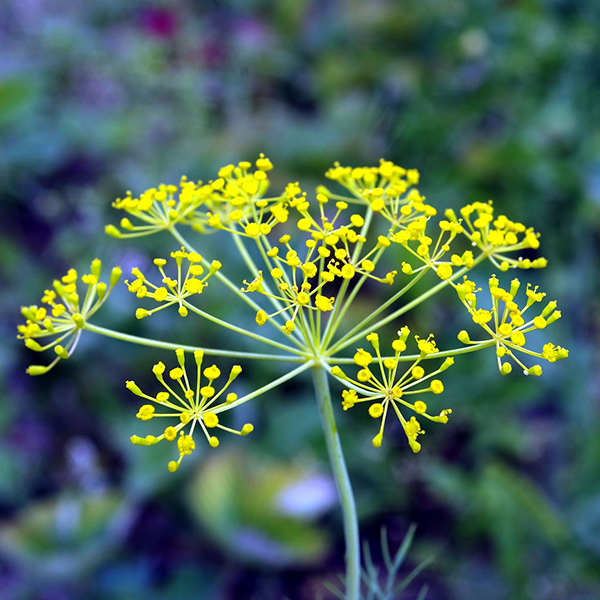
Dill – Produces umbrella-like clusters of flowers that ladybugs love.
Fennel – A great pollen source that doubles as a kitchen herb.
Sweet Alyssum – Tiny white and purple flowers provide a consistent nectar supply.
Laceflower (Ammi majus) – A close relative of Queen Anne’s Lace that attracts pollinators and predatory insects.
Yarrow – Its flat flower heads offer an easy landing spot for ladybugs.
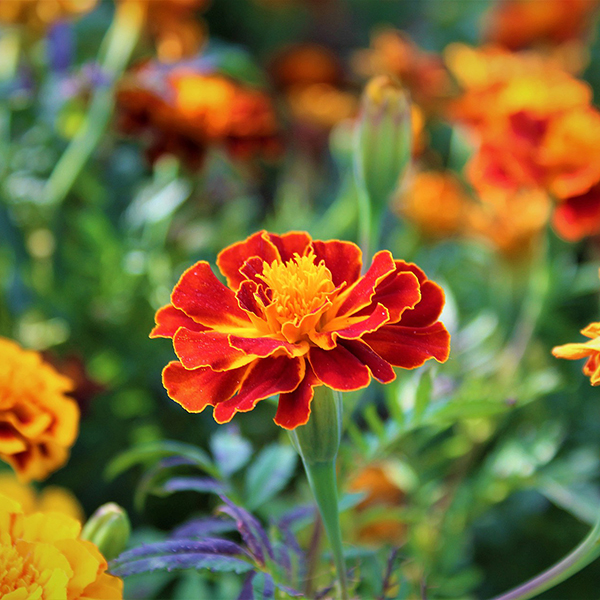
Calendula – Bright and vibrant, calendula attracts ladybugs while repelling harmful pests.
Parsley – If allowed to flower, parsley is a great nectar source for beneficial insects.
Cosmos – An easy-to-grow flower that ladybugs love.
Marigold – Helps repel aphids and attracts ladybugs as a bonus!
Dandelion – Often considered a weed, but a valuable source of early-season pollen.
Mint – The flowers attract ladybugs while the leaves help deter unwanted pests.
Thyme – A fragrant herb that doubles as a ladybug-friendly plant.
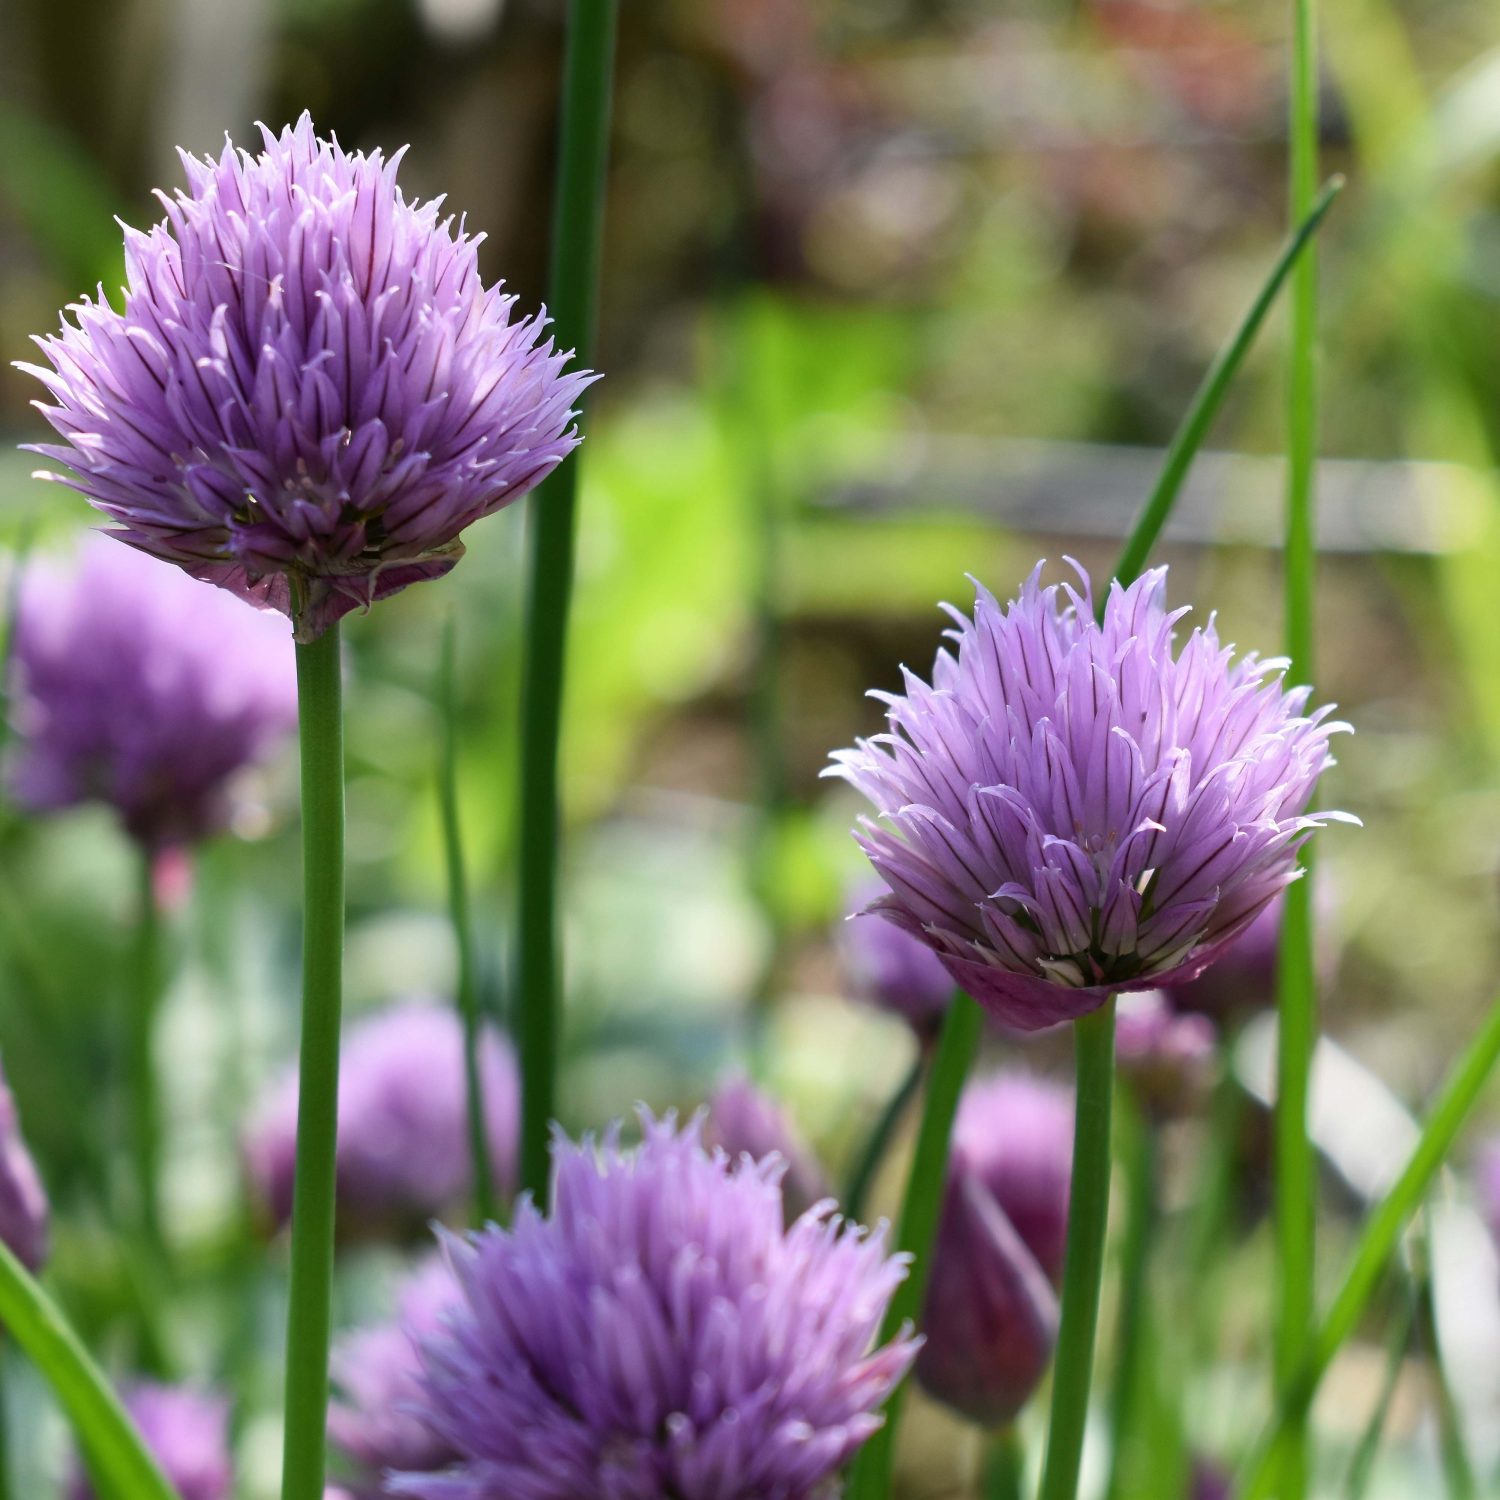
Chives – The purple blooms attract beneficial insects and can be a great companion plant.
Celery – Letting celery flower will draw in ladybugs and pollinators.
Cilantro/ Coriander – A great pollen source
By letting herbs and edible flowering plants go to seed, you not only attract ladybugs but also create a self-sustaining garden where herbs regrow naturally.
How to Keep Ladybugs in Your Garden
Attracting ladybugs is just the first step. To keep ladybugs in your garden, you need to provide food, water, and shelter.
1. Provide a Steady Food Source
While ladybugs love flowers for their nectar, their main diet consists of aphids, scale insects, and other pests. Avoid using chemical pesticides that could eliminate their food supply and harm these beneficial bugs.
2. Create Shelter & Hiding Spots
Ladybugs need safe places to hide from predators and extreme weather. You can encourage them to stay by:
Leaving small piles of leaves or straw in the garden.
Allowing some ground cover plants like clover or creeping thyme to spread.
Providing ladybug houses or stacking small twigs and bark in a quiet corner of the garden.
3. Provide a Water Source
Ladybugs need moisture, but they can easily drown in deep water. Create a safe water source by:
Place shallow dishes of water with small stones for them to land on.
Mist plants with water to create dew-like droplets for them to drink.
4. Avoid Chemical Pesticides
Pesticides and insecticides don’t just kill harmful pests—they also harm ladybugs and other beneficial insects. Instead, try natural pest control methods like companion planting, blasting with the hose, or handpicking aphids to keep your garden ecosystem balanced. This is more for over-populations because without aphids or food sources, your natural predators won’t come.
Ladybug Colors & What They Mean in the Garden?
Ladybugs (or ladybirds) come in a variety of colors and patterns, each with unique characteristics. While all ladybugs play a role in garden ecosystems, some are natural pest controllers, while others feed on fungus or even plants. Understanding their differences can help you make the most of these beneficial insects in your garden.
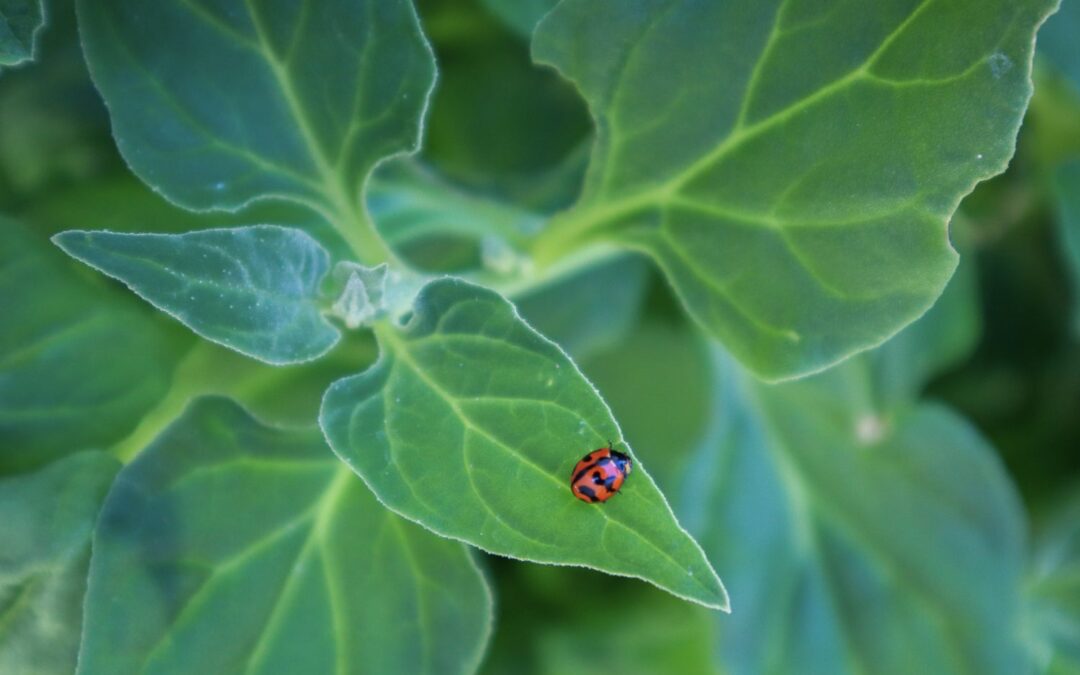
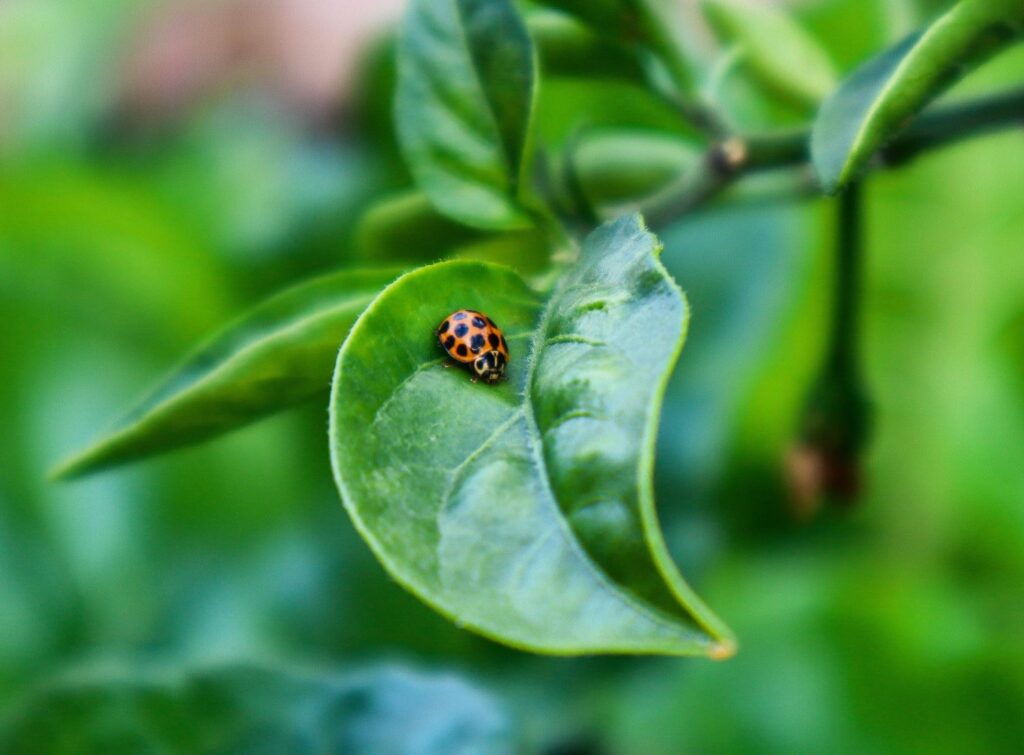
Red, Orange, and Yellow Ladybugs: What’s the Difference?
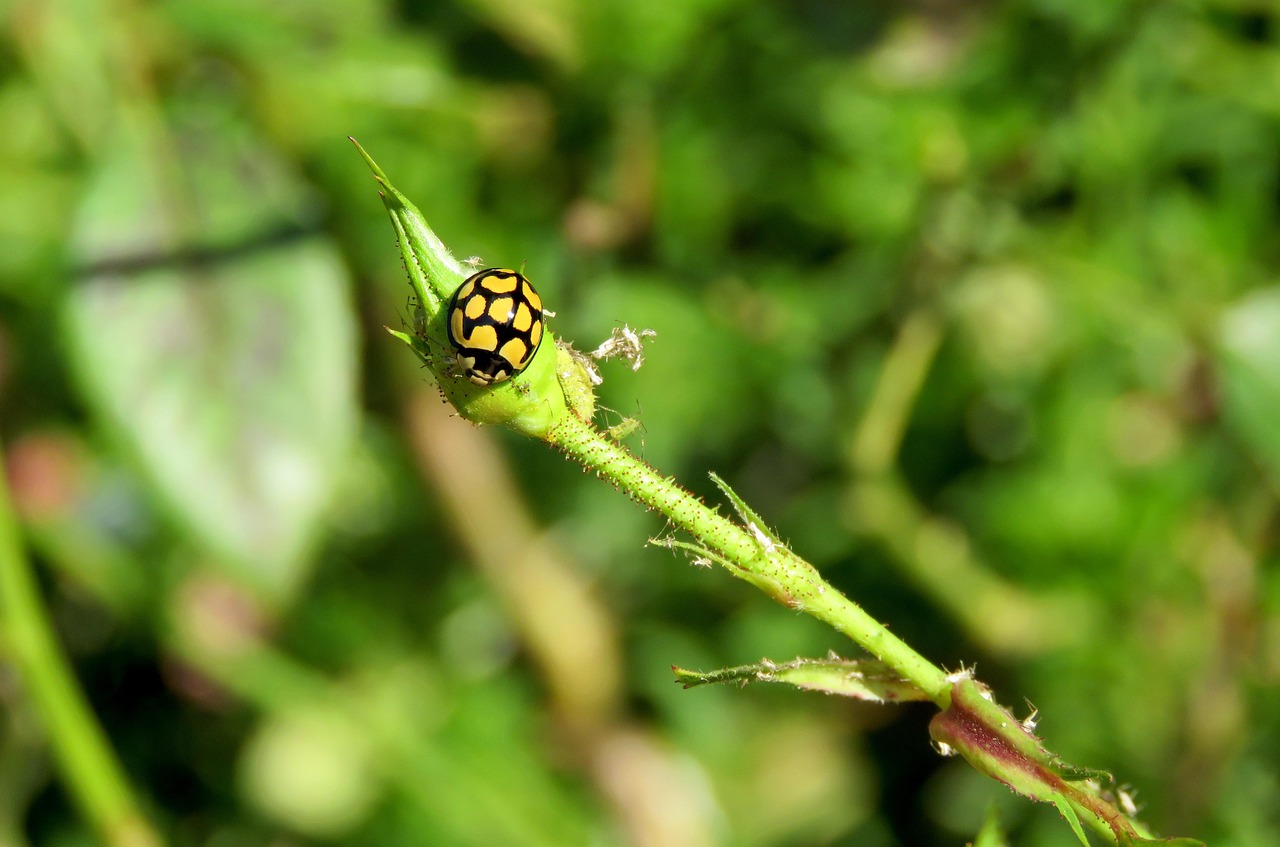
1. Red Ladybugs (Best for Pest Control)
Example Species: Seven-Spotted Ladybug (Coccinella septempunctata), Asian Lady Beetle (Harmonia axyridis)
Spots: Usually 2–10 black spots
Meaning: Red ladybugs are often the most toxic to predators, signaling their role as top aphid predators.
Diet: Feeds primarily on aphids, scale insects, and other soft-bodied pests.
Garden Role:Highly beneficial—these ladybugs are the best natural pest control for your edible garden.
Meaning: Slightly less toxic than red ladybugs, but still a deterrent to predators.
Diet: Some species eat aphids, while others prefer fungi, mildew, or nectar.
Garden Role: Still beneficial, but some species may not be as efficient in pest control as red ladybugs.
3. Yellow Ladybugs (Fungus Eaters, Not Aphid Hunters)
Example Species: 22-Spotted Ladybug (Psyllobora vigintiduopunctata)
Spots: Bright yellow body with 22 black spots
Meaning: Less toxic and not a primary predator of garden pests.
Diet: Feeds on fungus and mildew, rather than insects.
Garden Role: Helpful for controlling powdery mildew, but not effective against aphids.
The 28-Spotted Potato Ladybird (A Garden Pest!)
🚨 Not All Ladybugs Are Beneficial!
Scientific Name:Epilachna vigintioctopunctata
Color:Bright orange with 28 black spots
Diet: Unlike beneficial ladybugs, this species feeds on plants, particularly potatoes, tomatoes, and eggplants.
Garden Role:Harmful to crops—this ladybug is a known pest that chews holes in leaves, leading to plant damage.
Although this type of ladybug can eat your crops, I have not found it makes much of a difference. I plant extra and never seem to have overpopulation in my garden. The more diversity you have, the more there is balance in the ecosystem.
How to Manage 28-Spotted Potato Ladybirds:
Handpick them off plants when spotted.
Encourage natural predators like birds or beneficial insects.
Use row covers to protect vulnerable crops.
What to Remember
Encouraging ladybugs in your garden is one of the easiest and most effective ways to manage pests naturally. By planting ladybug-friendly flowers and herbs, providing shelter and water, and avoiding harmful chemicals, you can create an environment where these tiny helpers thrive.
If you’ve been wondering how to attract ladybugs to your garden, start by adding some of their favorite plants and watch as nature takes care of the rest! I have found that letting herbs go to seed has been the most effective method for bringing a large, diverse range of insects to the garden. Plus, then my weeds suddenly become parsley in the cracks of the pavers 😂
Have you noticed more ladybugs in your garden after planting certain flowers? Let me know in the comments!
From invasive root systems to aggressive self-seeding, I will share why urban gardeners should Avoid Planting these in the Ground. These 15 Fruit Trees & Edible Plants can take over your garden, damage nearby structures, or require constant maintenance. Planting fruit trees and edible plants in the ground might seem like the best way to grow them, but some plants can quickly become a headache in urban gardens!
If you have limited space or an urban garden, this will be important info to know BEFORE you plant these in the ground! In this post, I’ll explain why these plants are better suited for containers, raised beds, or controlled areas, helping you avoid common gardening mistakes.
Fig Trees
Figs are delicious and easy to grow, but their strong root systems can cause major problems. They have the potential to damage pavers, concrete, and even underground drains as they search for water. If planted in raised beds, they can take over the space, outcompeting other plants.
A better option? Grow figs in a pot. This allows them to focus on fruit production rather than excessive growth. You may find they fruit quicker and more prolifically in a pot when they focus more on fruit production than on establishing their size. If you have plenty of space, you can plant them in the ground—just keep them away from structures, driveways, and pipes.
Kumquat Trees
Kumquats are a fun citrus tree, but for many gardeners, they end up being more ornamental than practical. While they produce masses of fruit, the small, tart fruits are best suited for jams, chutneys, or cocktails—not for everyday snacking.
A small potted tree will be much easier to manage and will give you great harvests to experiment with. Rather than a full-sized tree overloaded with fruit that becomes a chore to harvest.
Blackberry
Blackberries are known for their invasive growth habits. They send suckers underground, making them hard to contain, and if their stems bend over and touch the ground, they root and spread even further.
To keep them under control, grow blackberries in containers or install a deep garden edge to prevent runners from escaping. Otherwise, they can quickly take over your garden or spread into neighboring gardens or properties.
Blueberry
Blueberries thrive in acidic soil, which can be challenging to maintain in the ground. Without consistent soil pH, they may struggle to produce fruit.
Growing blueberries in pots allows you to control soil acidity, ensuring healthier plants and bigger harvests. Plus, container-grown blueberries take up less space and can be moved easily.
Grafted Passionfruit
Grafted passionfruit vines are notorious for causing problems in the garden, especially for beginner gardeners. The rootstock can take over, killing off the main plant and leaving behind a non-fruiting, invasive vine. The suckers can spread over 50 meters, making them extremely difficult to remove once established.
For a hassle-free option, grow non-grafted passionfruit vines to avoid rootstock takeover.
Mint
Mint is one of the worst plants for spreading aggressively. It sends out underground runners that allow it to jump containment and take over nearby garden beds. Even in pots, it can escape through drainage holes and establish itself in the soil.
Since a single plant can produce more than enough for home use, keep mint contained in a pot or raised bed to prevent it from becoming invasive.
Elderberry
Elderberry bushes are great for their medicinal berries and flowers, but they send out suckers that make them difficult to control. Even if you try to remove them, they can keep coming back for years.
If you’re growing elderberries in a small space, consider pots or designated garden areas to manage their spread.
Goji Berry
Goji berries grow fast and aggressively, spreading through self-seeding and suckering. While they are packed with nutrients, they can quickly take over garden beds if not regularly pruned.
For better control, grow goji berries in a pot to keep them manageable.
Jerusalem Artichoke (Sunchoke)
Jerusalem artichokes send out underground tubers that spread rapidly and uncontrollably. Once established, they are nearly impossible to remove.
To prevent them from taking over, grow sunchokes in large containers or contained garden beds where they can be harvested easily.
Yarrow
Yarrow is a fantastic medicinal herb. It also attracts a lot of beneficial insects and pollinators to the garden. However, it has an aggressive spreading growth habit in the garden. It spreads throughrunners under theground that can invade neighboring properties and garden beds. Yarrow can be hard to get rid of once a patch is established.
If you want to grow Yarrow in an urban garden, try containers or root barriers to keep it in check.
Malabar Spinach
This fast-growing vine can take over trellises and nearby plants. It also self-seeds aggressively, meaning it will pop up all over your garden. It is also more ornamental than edible so you don’t need to have it regrowing everywhere.
For better management, grow it in containers or a dedicated trellis space.
Lemon Balm
Lemon balm is one of my FAVOURITE herbs. It is part of the mint family and spreads rapidly through self-seeding. Once established, it can take over veggie patches.
Keep it pruned to stop flowering and contained by growing it in pots rather than directly in the ground.
Choko (Chayote Vine)
Chayote vines are a great perennial vine but do grow extremely fast, climbing over fences, trees, and garden beds. They also regrow from tuberous roots, making them hard to remove once established.
To prevent it from taking over, grow choko in containers or on a dedicated trellis.
Loquat
Loquats are delicious, but birds spread their seeds, causing them to self-sow aggressively. These trees also grow large, shading out other plants and taking up valuable space.
If you plant a loquat tree, be prepared for regular pruning and fruit netting.
Nasturtium
While nasturtiums are great companion plants, they self-seed aggressively and can quickly take over garden beds. In warm climates, they may become invasive.
To keep them in check, grow nasturtiums in pots or confined spaces.
Where & How to Plant Instead:
1. Large Pots & Containers 🪴
Great for invasive trees like figs, bamboo, or mulberries.
Controls root spread and makes maintenance easier.
Use at least a 50L (13-gallon) pot with good drainage.
2. Raised Garden Beds 🌱
Ideal for shallow-rooted plants that need better soil structure.
Prevents aggressive roots from spreading into pathways or damaging pipes.
Use deep beds (40cm/16” or more) for trees like bananas or certain berry bushes.
3. Root Barrier Systems 🚧
Works well for trees with aggressive or spreading roots (e.g., willows, mulberries).
Install a thick plastic or metal barrier at least 60cm (24”) deep around the root zone.
4. Espalier Against a Fence or Trellis 🌿
Perfect for space-saving and controlling growth (e.g., citrus, apples, pears).
Improves air circulation and prevents disease.
Train branches horizontally along wires or a fence.
5. Food Forest or Dedicated Zone 🌳
Some trees, like guavas or loquats, spread but work well in food forests.
Plant in designated areas where spreading isn’t an issue.
Use companion planting to balance growth and improve soil health.
6. Grow Bags or Air-Pruning Pots 🛍️
Good for trees like figs or pomegranates that do well in restricted root spaces.
Promotes healthy root structure and prevents circling roots.
Use 40L+ fabric pots for long-term growth.
Planting in the ground
While these plants can all be great additions to your garden, planting them directly in the ground can lead to maintenance headaches and invasive growth. By growing them in containers or designated areas, you can still enjoy their benefits without the stress of keeping them under control.
Have you had trouble with any of these plants? Leave a comment below and share your experience! Don’t forget to subscribe to my YouTube channelfor more gardening tips. 🌱
Links included in this description might be affiliate links. If you purchase a product or service with the links that I provide I may receive a small commission. There is no additional charge to you! Thank you for supporting my blog so that I can continue to provide you with free content.