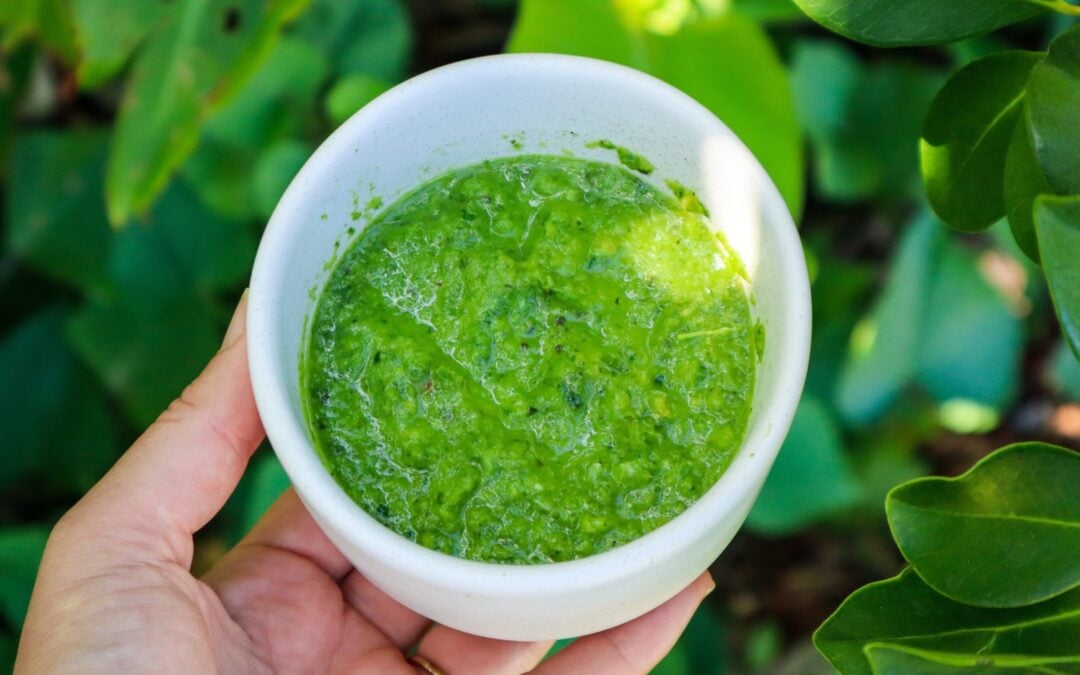
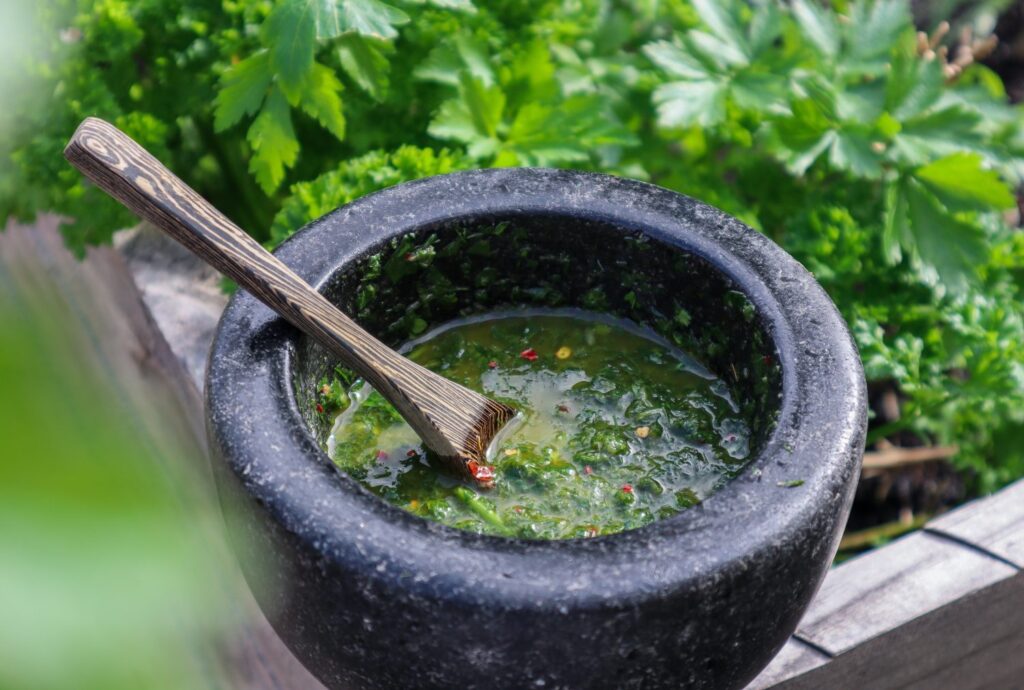
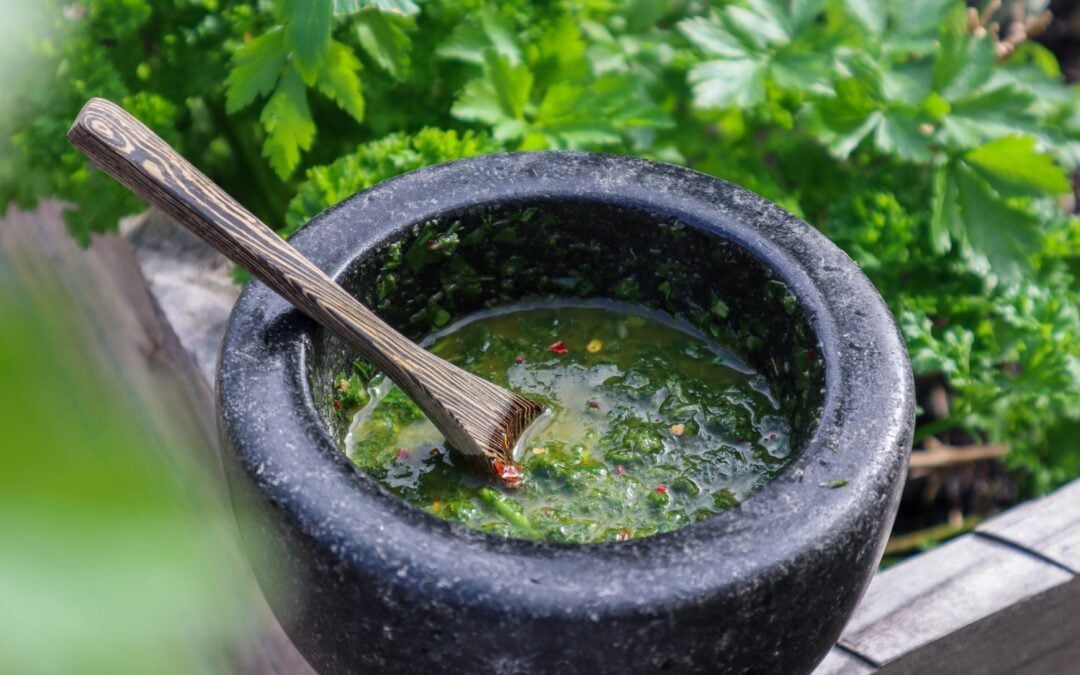
Making your own homemade green curry paste is so easy! You will never want to buy it again after you get the perfect blend. It will need adjusting to your heat tolerance, but mine is quite low, so you can always build on it from there. Using fresh herbs and ingredients from your garden takes this vibrant green curry paste to the next level! Extra curry paste can be frozen for a future quick and easy garden-to-plate meal.
See the bottom of the page for how to turn this green curry paste into a delicious meal.
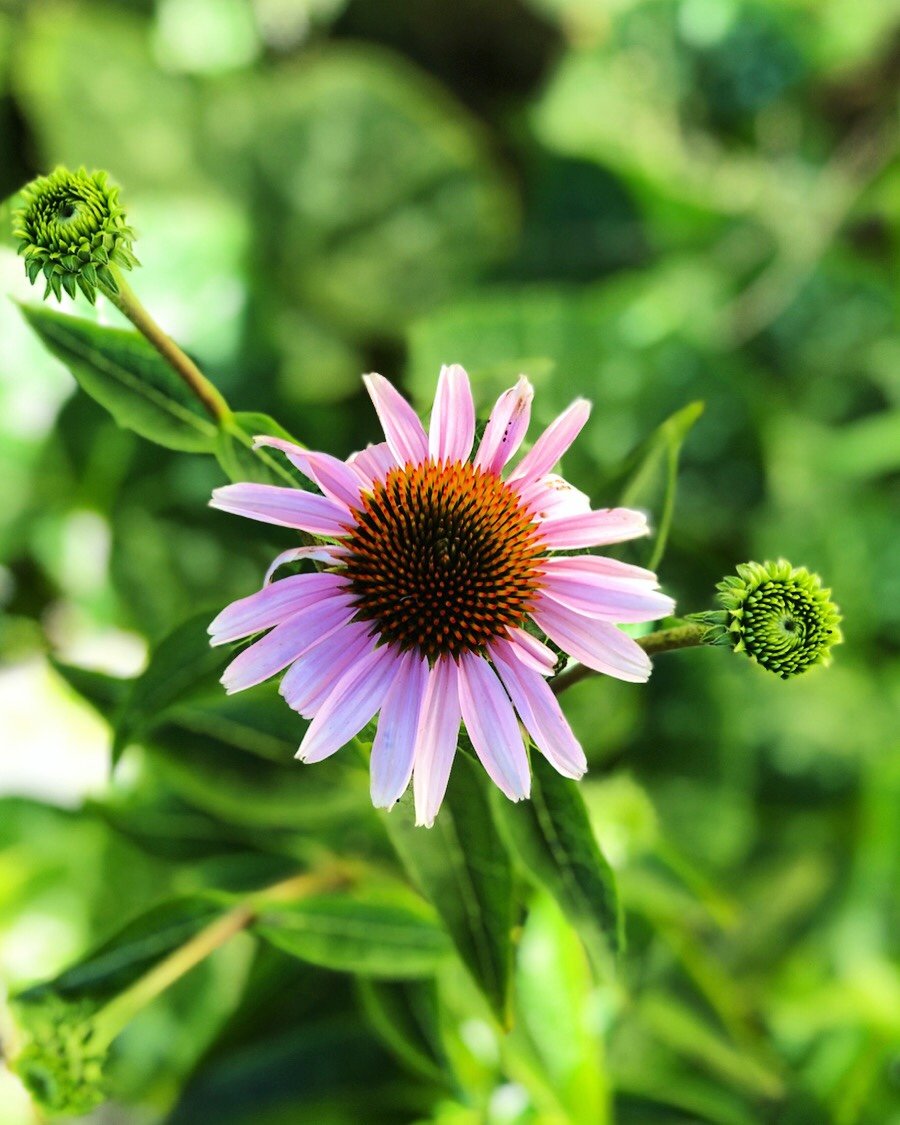
Garden-to-Plate is flavour-packed!
If you grow your own herbs and chillies, this recipe is a fantastic way to use up extra harvests. Here’s a look at a few of the key ingredients and how they contribute to your garden and kitchen:
Green chillies: Long cayenne or similar varieties are perfect for this. They’re productive, easy to grow in pots, and can be frozen or dried for later use.
Lemon balm or lemongrass: Lemon balm is a wonderful lemony herb that grows like a weed. It’s a great lemongrass substitute and adds a bright citrus note.
Basil: Thai basil is traditional, but any sweet basil works. It’s easy to grow and makes this paste extra aromatic.
Spring onion: Grows well in containers or in-ground. The green tops add a mellow onion flavour.
Ginger and garlic: While not always garden-grown, both are staples in many food gardens and can be preserved or grown in pots in warm climates.
This paste also works beautifully as a marinade for grilled veggies or protein or as a punchy flavour boost in soups and noodle dishes.
Swaps & Substitutions
Lemon balm vs. lemongrass: Lemon balm is great if lemongrass isn’t available, but either works well.
Chillies: Use what you have! Bird’s eye chillies for more heat, jalapeños or milder green varieties if you prefer it gentle.
Herbs: Try coriander or mint for a different twist.
Green Curry Paste
Yield: 1-2
Fresh and vibrant green curry paste to make a delicious garden-to-plate meal from scratch!
Ingredients
6 Green Chillies (long cayenne) - see notes
1 Spring onion
3 Garlic cloves
10 cm piece of fresh ginger
1 lime
1/2 cup lemon balm (or 1 stalk lemon grass)
1/4 cup fresh basil
1 tsp Raw sugar
1/2 tsp Sea Salt
Instructions
Cut the ends of the green chillies and remove the seeds (this is optional. Keep to the side if you want to add extra heat) and slice and add to a blender or mortar and pestle.
Peel the ginger using the back of a spoon and slice it into small pieces.
Zest the lime and add the zest and juice to the mix.
Dice and chop all other ingredients and add everything to the mix.
Blitz or pound until a paste-like consistency. You may need to add a splash of water if it is not mixing.
Use immediately or freeze for future use.
Notes
Green Cayenne are on the mild side. If you are using hotter chillies use less or more to your heat preference. I also remove the seeds because I like it mild. Keep the seeds to the side and add extra during the cook if you want to increase the heat.
Other herbs and greens can be added such as parsley or corriander
Tips for Storing and PreservingGreen Curry Paste
Fridge: Store in a sealed jar for 5–7 days.
Freezer: Freeze in tablespoon-sized portions in ice cube trays, then transfer to a container or zip-lock bag for up to 3 months.
Pro tip: Label your frozen curry cubes so you know what’s what when digging through the freezer later!
How to make a Green Curry with the Homemade Paste
To turn your green curry paste into a delicious garden-to-plate meal follow these steps.
In a deep pan or Wok, brown onions in 1TSBP Olive Oil.
Add your protein of choice and brown off.
Add the green curry paste and stir to combine for 1 minute
Add 400ml of Coconut cream.
Stir and taste. Add extra sugar or salt if needed. Salt helps bring out more flavor. Sugar can ease some of the spice.
Add chopped greens and veggies such as Zucchini, Capsicum, Carrot, Snow Peas, Beans, and Chard.
Cook until protein is cooked through and veggies are softened but still have a bit of crunch.
Roasted Sweet Potato rounds are also delicious on top of a green curry!
Homemade green curry paste is a game-changer—flavourful, fresh, and full of your garden’s best. Whether you grow a few herbs on your balcony or have a thriving backyard veggie patch, this recipe is a wonderful way to make the most of your harvests.
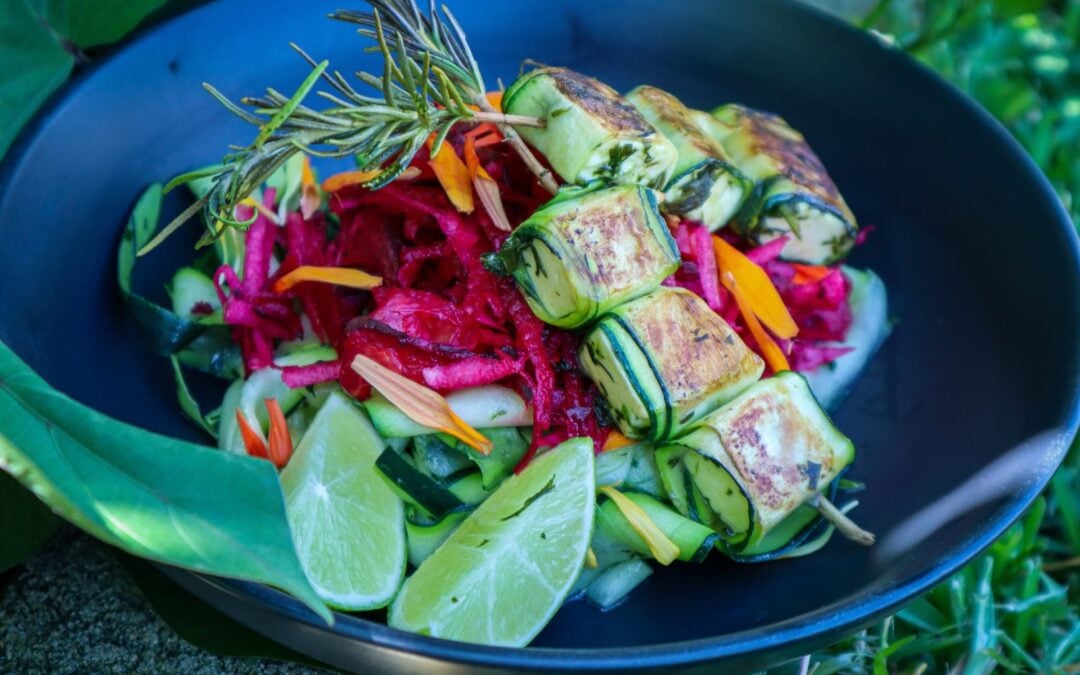
These Zucchini wrapped haloumi skewers are so delicious and easy to make! Marinated in my favourite green sauce plus the Rosemary flavour also infuses during cooking. I made this during one of my YouTube live streams and had to share the recipe! Serve on a fresh salad or with a charcuterie board. These would also be great for summer BBQs.
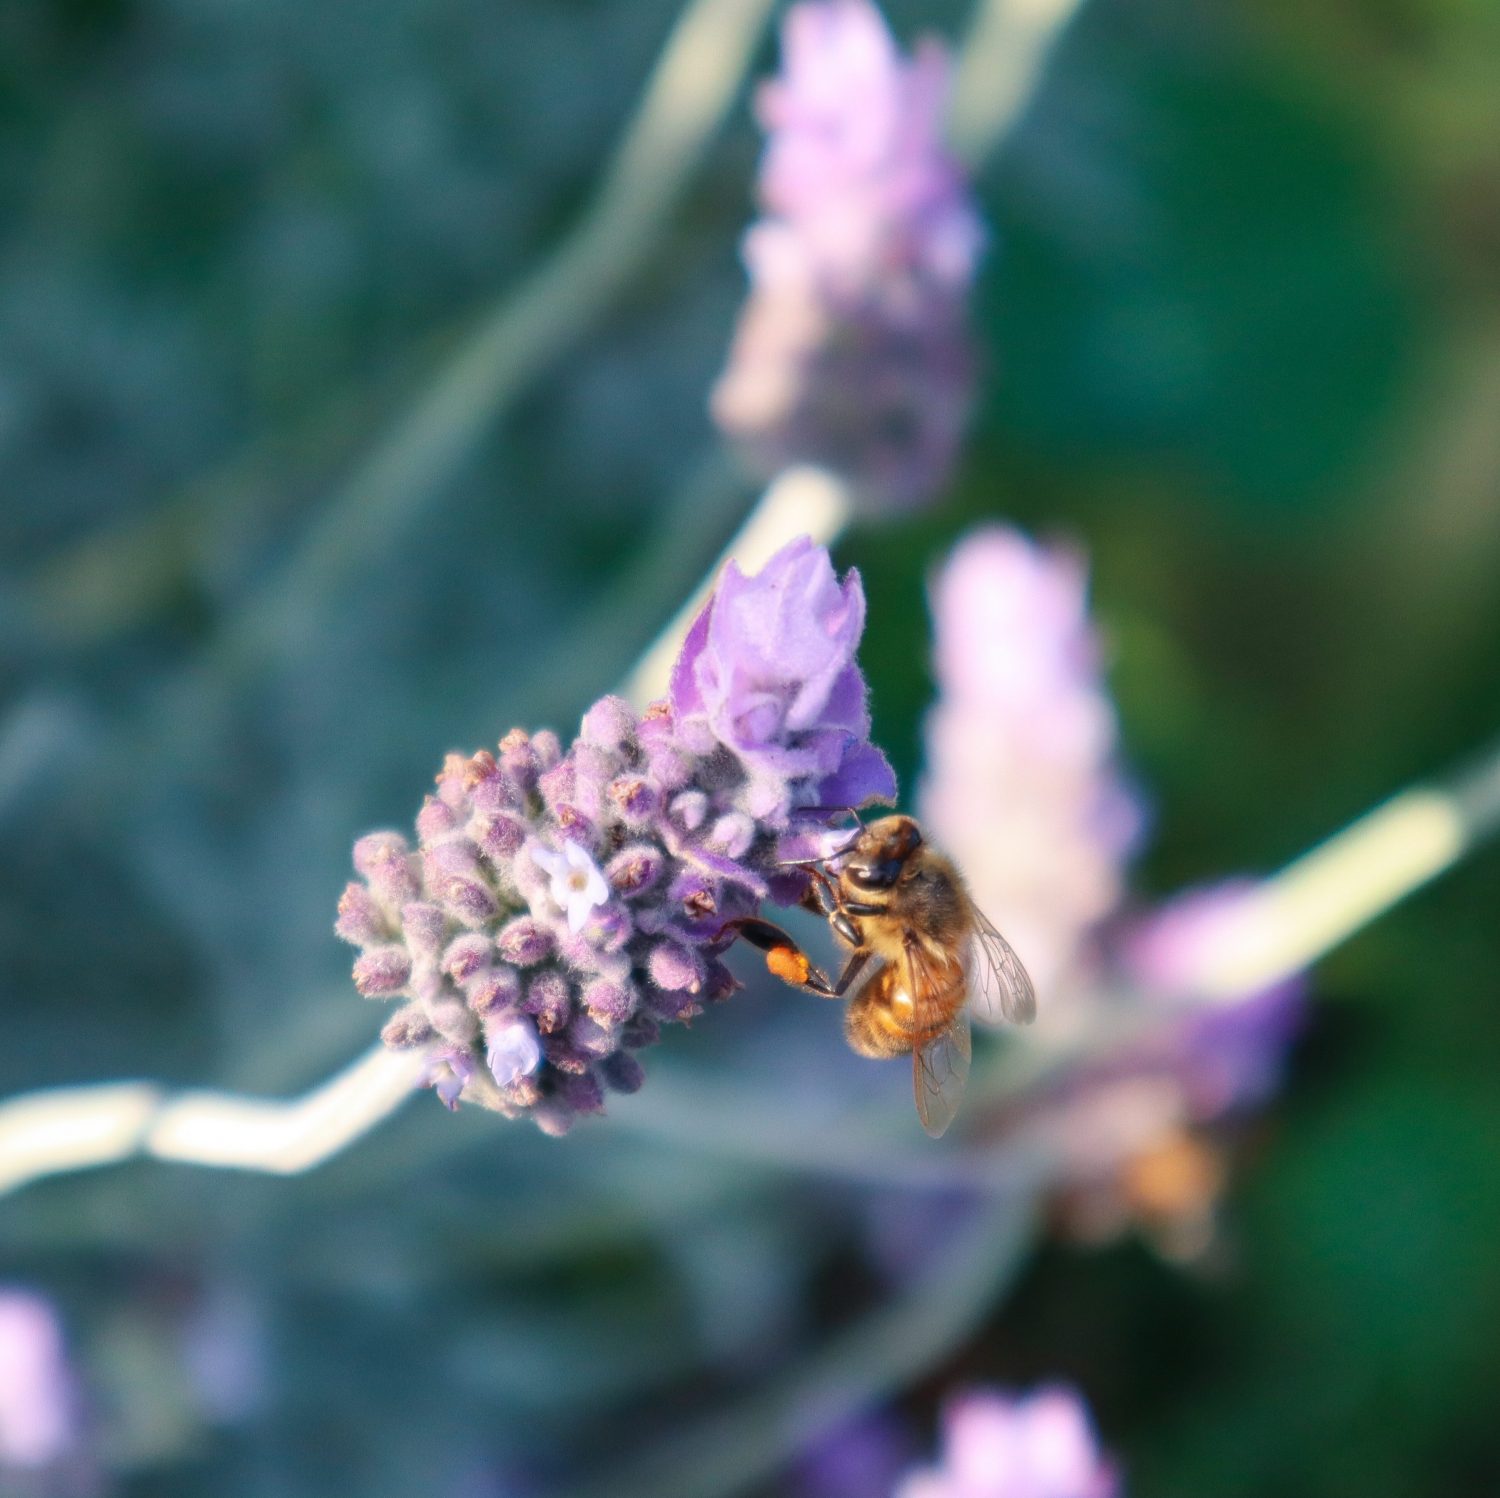
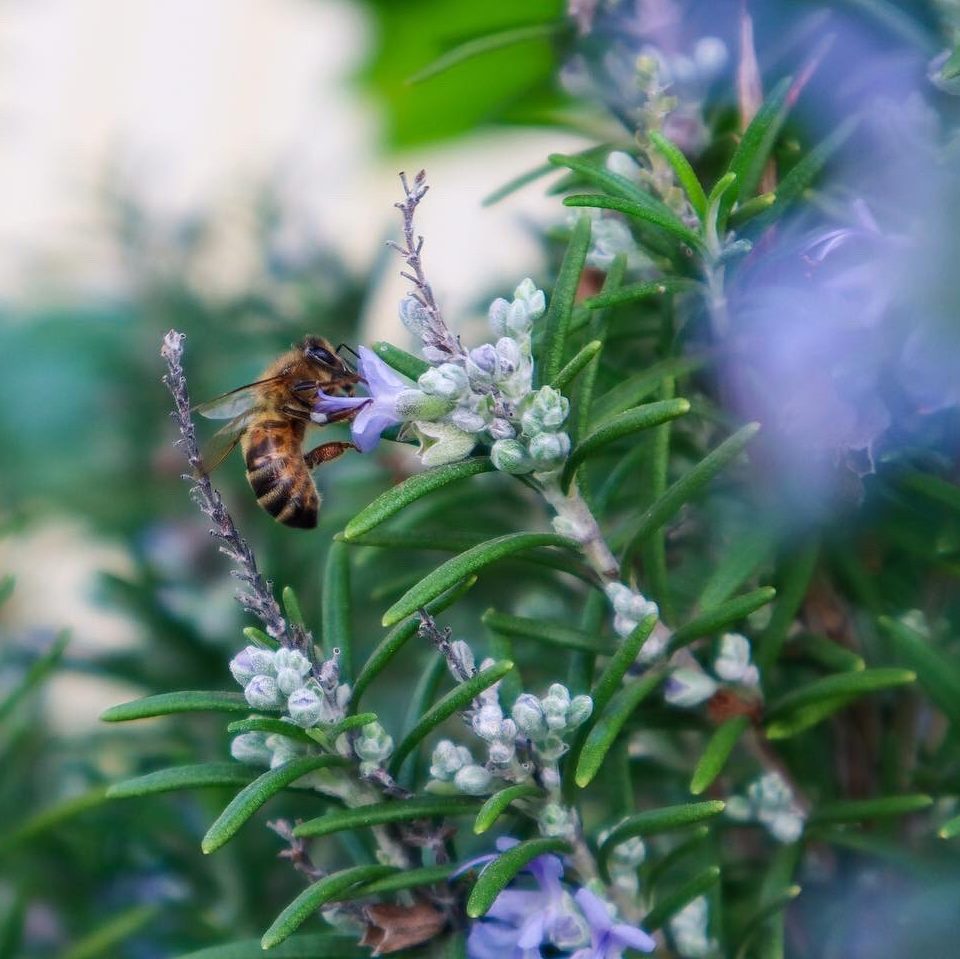
Rosemary (Rosmarinus officinalis) is a fragrant perennial herb. Rosemary is a hardy, drought-tolerant shrub and can also be used as an ornamental due to its evergreen foliage and purple or white edible flowers. Rosemary is a great herb to plant on your journey to sustainability, as it has a large list of beneficial uses for the garden, home, kitchen, plus many medicinal qualities. When Rosemary flowers it will attract an abundance of beneficial pollinators to increase your garden’s production.
Zucchini wrapped Haloumi on Rosemary Skewers
Yield: 9
Prep Time: 25 minutes
Cook Time: 8 minutes
Total Time: 8 minutes
Easy and delicious these Rosemary Skewers make a quick lunch or entertaining dish.
Ingredients
1 medium Zuchinni
1 packet Haloumi
Olive oil
9 Rosemary sprigs
Green Dressing (available below for logged in members or see notes)
Instructions
Soak the Haloumi in a bowl of water for 5-10 mins while prepping the rest of the dish (optional but reduces the salt and makes the halloumi softer).
Cut the Zucchini into thin ribbons using a wide vegetable peeler.
Prepare the green sauce or marinade (available below for logged-in members or see notes)
Pour half the marinade over the zucchini Ribbons.
Remove the haloumi from the water, cut it into squares roughly 1-2cm, and place in the bowl with the remainder of the marinade.
Place the ribbons and halloumi in the fridge to marinate further for 10-20min.
Heat a pan with olive oil on medium heat.
Lay a zucchini strip out flat and place a haloumi cube at the beginning then roll to wrap the square.
Strip 3/4 of the leaves from the rosemary skewers (see notes if you are using the leaves for the marinade you will need to do this at the beginning).
Place 3 wrapped cubes on a skewer and place in the pan. Cook until golden on each side - roughly 3 minutes each side.
Serve on a fresh salad with lemon or lime wedges and extra green sauce or a creamy yogurt dressing.
Notes
Non-member's alternative to the green dressing - Strip 3/4 of the leaves from the Rosemary sprigs. Roughly chop and add 1/4 cup of Olive Oil and use that as the marinade.
Swap Haloumi for Feta or Vegan Cheese
P.S - I make the members green dressing in the YouTube live.
Green Sauce Chimichurri
This vibrant green dressing is packed full of flavour and is a delicious way to add a fresh zing to your meals.
Content is protected for Garden to Plate members only. Sign up for full access https://sustainableholly.com/join-the-club/
Watch the Live Video 👇
Want more Recipes?
Join the Garden to Plate club to learn more about growing thriving gardens and wholesome Garden to Plate meals.
Chimichurri dressing is a delicious and fresh condiment to serve on so many of your homegrown meals. I adapt this sauce regularly using different herbs or greens such as Radish or Carrot tops! Drizzle this dressing over your roasted Radish or veggies for a zero-waste meal. See notes for some of the swaps I often use. This sauce is so fresh and zingy which is great to serve over foods that are rich or creamy to give them a fresh kick!
Chimichurri Dressing
Prep Time: 10 minutes
Total Time: 10 minutes
This vibrant green dressing is packed full of flavour and is a delicious way to add a fresh zing to your meals.
Ingredients
1 cup Parsley*
1 1/2 TBSP lemon juice
1 TBSP Red Wine Vinegar
1/4 cup Olive Oil
1/2 cup Fennel Fronds*
1 tsp Sugar
2-3 Garlic Cloves
Sea salt flakes to season
Fresh Red Chilli or 1/4 tsp chilli flakes
Instructions
Add Parsley, Lemon juice, Vinegar, Sugar, Fennel Fronts, and Garlic to a mixer or mortar and pestle. I prefer a mortar and pestle as I like it chunky and not to blended. Blitz or crush to combine and make a green sauce.
Then gradually add oil to combine. Add Chilli flakes and a pinch of Sea Salt Flakes. Taste and balance with more salt if needed.
Drizzle over the green sauce. Garnish with sliced red chilli, fennel fronts, and edible flowers.
Notes
* Swap Parsley or Fennel fronds for Radish tops, Carrot tops, Corriander, or a mix.
There may be a little extra sauce than needed so you can keep it in the refrigerator to use within a few days or freeze it in ice cubes to use in cooking.
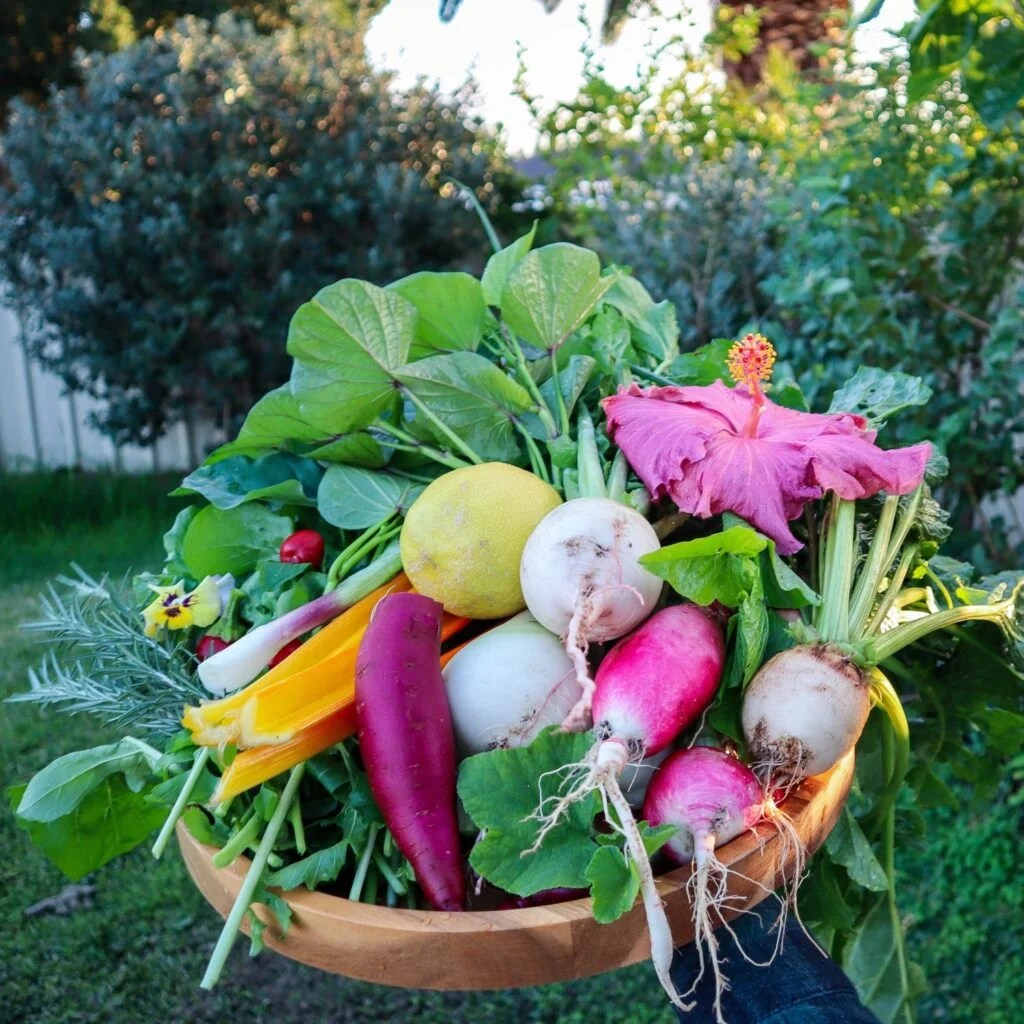
Diversity is so important for creating a thriving and sustainable edible garden. Choosing edible or medicinal plants to use as companion planting can not only boost the health of your garden but also your own! Each plant type has a different root structure, leaf coverage, height, nutrient absorption, and nutrient excretion and attracts different insects and wildlife to the garden. The more diversity we have in plants, the more life we are encouraging both above the soil and below. Diversity also helps reduce severe deficiencies, as all the plants aren’t competing for the exact same nutrients.
Diversity and companion planting are closely related. Companion planting is generally two different plants that grow well together and have a mutually beneficial relationship. With a diverse garden, we want to build on those relationships and continue to add more and more.
Disclaimer: The information included on this site is for inspirational purposes only and is not intended to be a substitute for medical treatment by a healthcare professional. Because of unique individual needs, the reader should consult their physician to determine the appropriateness of the information for the reader’s situation.
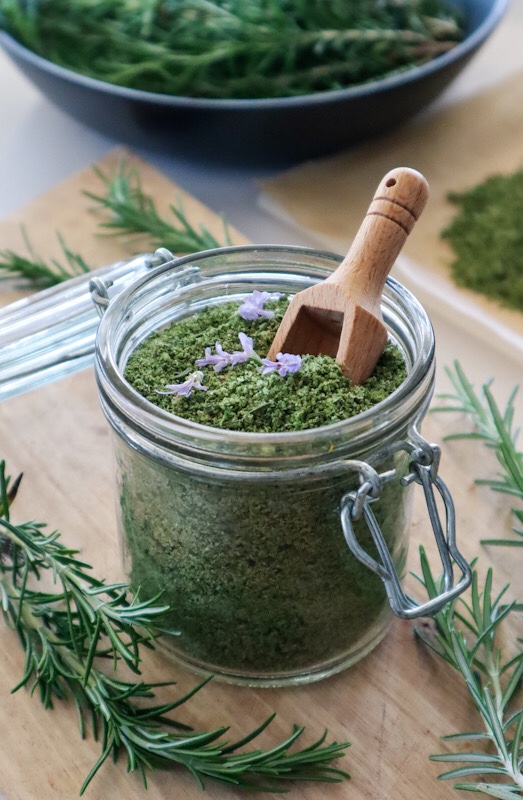
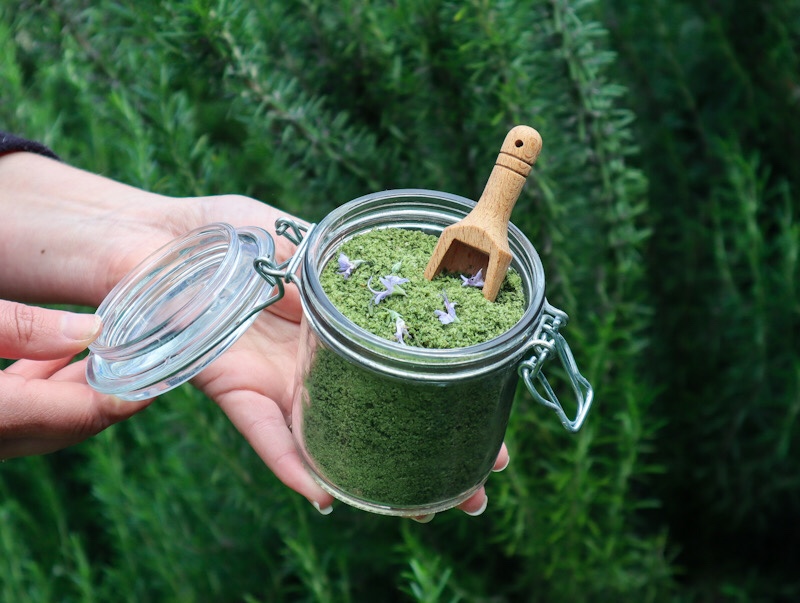
Rosemary and herb salt is a quick and easy way to preserve your homegrown herbs to use throughout the year. Herb finishing salts add so much flavour to meals in a quick and convenient way. Try Rosemary and herb salt on your roast vegetables for a delicious boost of flavour. Get the recipe below 👇
Why Make Rosemary Herb Salt?
Making your own herb salt is a great way to reduce waste and extend your harvest. If your rosemary, thyme, or sage plants are growing abundantly, herb salt is a simple preservation method that retains flavour for months. It also allows you to create custom seasoning blends tailored to your taste.
Plus, it makes a beautiful, homemade gift for Mother’s Day, Christmas, or to share with friends and family—perfect for birthdays or festive seasons.
Benefits of Rosemary in the Garden?
Rosemary is such a versatile herb and works well with both sweet and savoury dishes. It has a fragrant, pine-like aroma. Rosemary offers so many beneficial relationships within your garden. Rosemary is a hardy, drought-tolerant, ever-green perennial herb. A fantastic staple to have to grow in any edible garden. Rosemary also has many healing properties, so it is a handy plant to have near the house or in a kitchen garden.
Rosemary is more than just a tasty kitchen herb—it’s a powerhouse plant in the garden too. It’s hardy, drought-tolerant, and thrives in full sun, making it ideal for warm and dry climates. Rosemary:
Attracts pollinators like bees when in flower
Repels some common pests due to its strong aroma
Helps create structure and evergreen interest in your edible garden
Can be grown in pots or in the ground
Drought-tolerant and easy to grow
Its resilience and low-maintenance nature make it a go-to for beginner gardeners and seasoned growers alike.
When is the Best Time to Harvest Herbs?
The best time of day to harvest your herbs is first thing in the morning. This is when the plants are hydrated and full of life. As the day goes on, they will lose moisture and not be as fresh and vibrant. Early in the morning, the bees are not yet active. As the sun comes up and the dew drys, the bees will be about in a hive of activity. So, if you do pick later in the day, just be cautious, not stress them out and avoid getting stung.
Add to a mixer and blitz until breadcrumb consistency (or leave chunky if you would like too)
Add in salt and blitz quickly to combine.
Spread on to parchment and dry in the oven or dehydrator at 45 degrees celsius until dry. Stir through after one hour to loosen up the mix and allow it to dry faster. The length of time will depend on the water content of the herbs (approx 2 hours). The mixture will go a lighter green colour.
Once dry add to a clean airtight jar.
Notes
The colour may fade over time
Try herbs such as Thyme, Mint, Sage, Chilli, Oregano
How to Use Herb Salt in Cooking
Use your rosemary herb salt:
As a seasoning rub for roasted meats or veggies
Mixed into olive oil for dipping bread
Sprinkled over focaccia before baking
Stirred into soups or stews for an added depth of flavour
On scrambled eggs, grilled halloumi, or oven-baked potatoes
Just remember—herb salt is more concentrated than regular salt, so you often need less of it when seasoning.
Want More Garden Tips and Recipes?
There has never been a better time to learn how to grow healthy, organic food at home. Take back control of your food systems and start the journey to live a more sustainable lifestyle. Say goodbye to nasty chemicals and wax-coated fruit and feed your body with real, nourishing, homegrown food. Subscribe to our FREE weekly newsletter below.