Mint (Mentha) is a classic staple herb to grow that provides your kitchen garden with an abundance of fragrance and flavour. Mint can be used for both sweet and savoury dishes as well as medicinal, cleaning products, teas, and more.
Mint can be very invasive so it is important to choose the right location to grow mint so that it doesn’t take over your garden. Below will be more tips on where and how to grow mint along with creative ways to use your abundant harvests!
Sunny Position 6rs. Contain the roots in a pot or container.
CARE
Water regularly.Protect from the harsh summer sun.
FERTILISE
Feed with compost and with liquid seaweed fertiliser.
PESTS
Slaters, slugs, snails, green caterpillar, aphids. Rust.
HARVEST
Trim regularly. Harvest in the mornings.
REPRODUCE
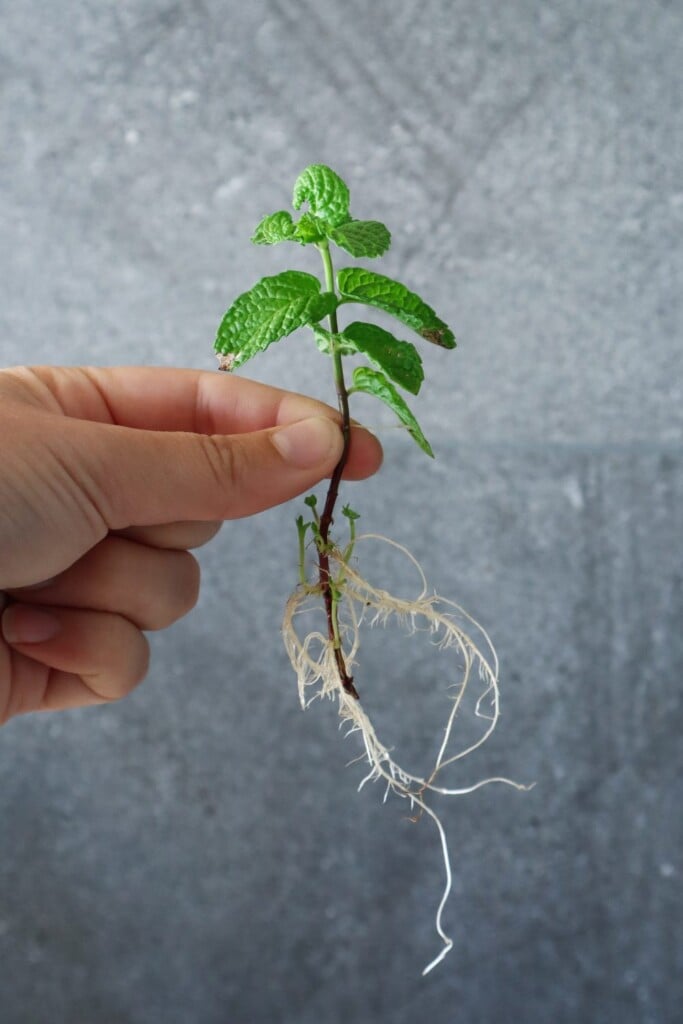
Mint grows quickly from cuttings or dividing the plant up.
Why Grow Mint?
Mint is refreshing and packed full of flavour. Below are just a few of the amazing reasons to grow mint at home.
Here are some of the many reasons to grow Mint:
Easy to grow
Low maintenance / hard to kill
Flavour Teas or drinks
Natural insect spray
Aids in digestion
Calming qualities
Rich in vitamin A
High in anti-oxidants
Aid in upset stomachs
Nutrient-dense
Easy to propagate
Flowers for the bees
Condiments, dressings and dips
Popular Mint Varieties
‘Peppermint’ – Classic mint variety. Sharp flavour. Often larger leaves. Great for sweets, cocktails, teas and scented products.
‘Spearmint’ – Popular mint variety. Rounded leaves. Great for Roasts, sauces, teas, baking and fresh in salads.
‘Chocolate Mint‘ – Fun flavoured mint to grow with a mild chocolate flavour. Dark reddish tinted leaves and stems.
‘Morrocan Mint‘ – Fragrant mint with subtle spiced flavour. Great for roasts, salads and teas.
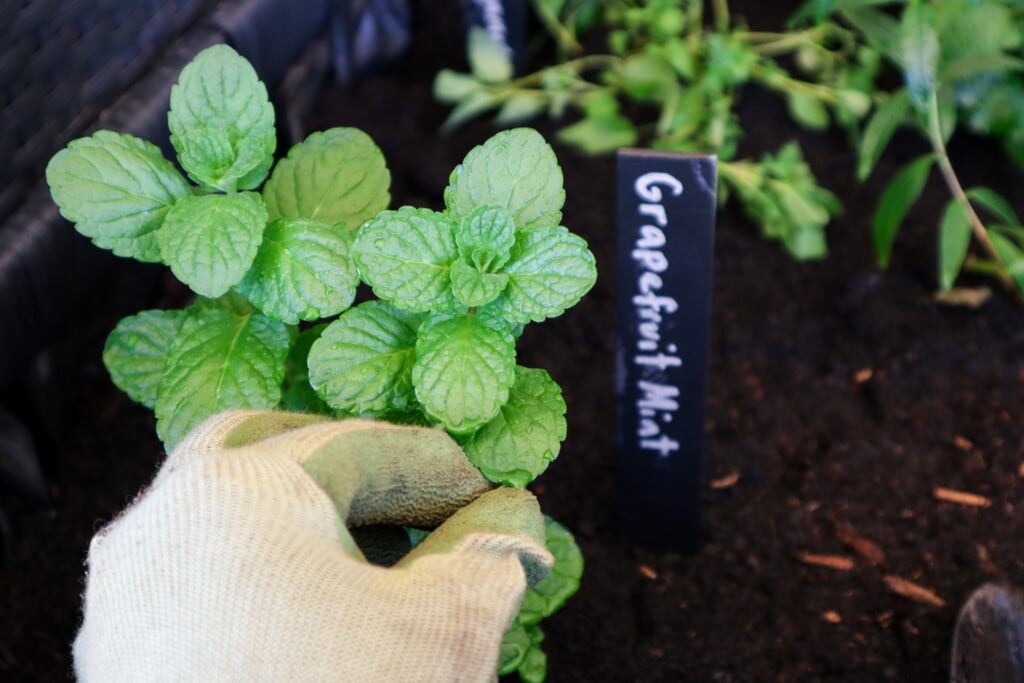
‘Grapefruit Mint’ – Fresh with Grapefruit notes. Summer drinks, salads, teas, cocktails and dressings.
‘Varigated Applemint‘ –Small green and white variegated leaves. Slight fluffy leaves. Sweet apple flavour. Gret for drinks and salads.
‘Ginger Mint’ – Fresh and vibrant flavour. Great for teas, salads and dressings.
‘Berries and Cream’ – Sweet berry notes. Great for desserts, teas and cocktails.
When to Plant Mint
To start off growing Mint it can be best to plant in Spring after the last frost. Mint will do well all year round in most moderate climates.
How to Grow Mint
Choose a sunny location.
BE AWARE – Mint sends out runners under the soil and can become invasive quickly. It is always advised to grow mint in a pot or container. A repurposed garden such as a wheelbarrow also works well!
Mint will grow in nearly any soil but it’s always good to add fresh compost. Ensure the soil is free-draining so that the roots do not get waterlogged.
Protect mint from the harsh summer sun and keep well watered in hot weather.
Trimming the mint regularly will help it stay low and bushy.
Care/ Maintenance
Mint can become root bound in containers quickly so if it starts to look sad it may need to be split up and divided to allow more room for the roots.
Feed with liquid seaweed or homemade fertilizers to help add nutrients into the contained space.
Pests / Disease
Slugs and snails may eat young seedlings. Use natural pest management. Aphids can also be an issue on young shoots. Dip them in soapy water. Green caterpillars can be a problem in summer and are hard to see against the green leaves.
How/ When to Harvest
Use sharp snippers or scissors and cut the tops off regularly. This will stop the plants from getting too leggy and stay low and bushy. Harvest Mint and herbs first thing in the morning when they are hydrated and full of life. You can keep them in a jar of water until you are ready to use.
Reproducing
The best way to reproduce Mint is to take cuttings or pull up a section with roots already attached. This will start growing immediately.
Cooking and Using Mint
Mint is a great flavour enhancing herb for many different dishes.
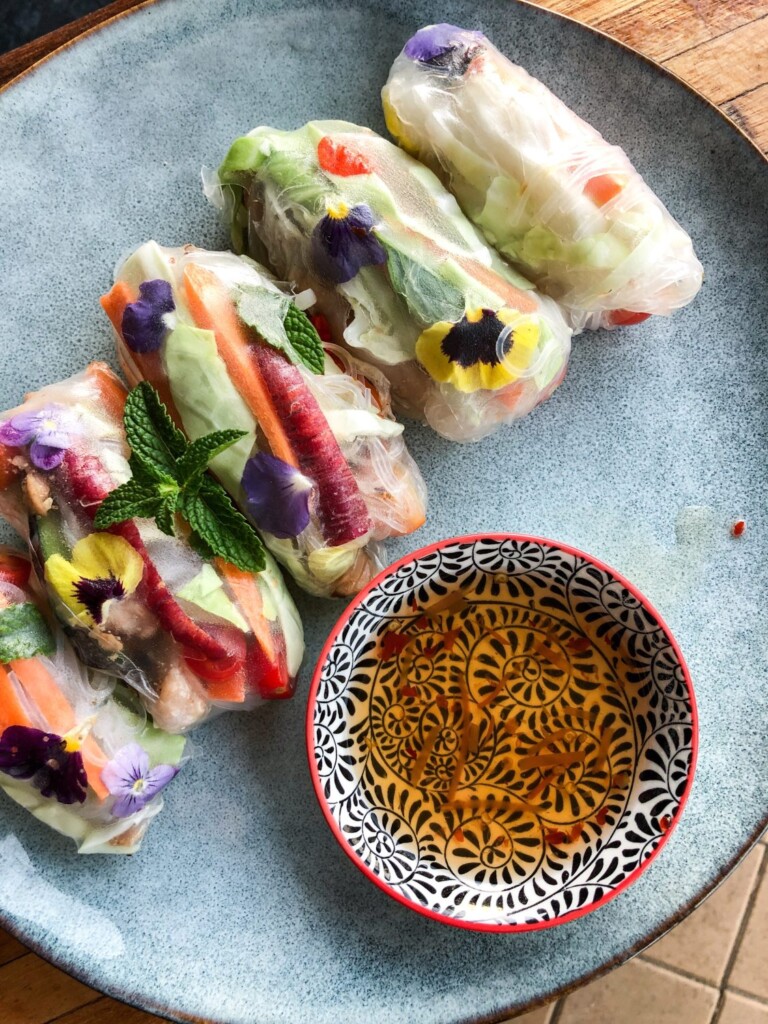
Watermelon salsa is a refreshing and delicious addition to any summer BBQ. Serve with grilled Fish, Chicken, Fritters, Tofu, or Haloumi. This salsa is so quick and easy to make and looks so festive! Watermelon Salsa would be a perfect addition to summer entertaining.
Watermelon Summer Salsa
Prep Time: 5 minutes
Total Time: 5 minutes
Fresh, Vibrant, and refreshing salsa for all your summer BBQs.
Ingredients
1 cup diced Watermelon
1/2 Lime
1/2 cup diced green capsicum
1 TBSP Fresh chopped Mint
Drizzle of olive oil
Sea salt flakes to season
1 small red Chilli
1/4 of a Red Onion
2 TBSP Fresh Chopped Parsley
Instructions
Finely dice the watermelon into small cubes (approx 1/2cm square).
Dice the Capsicum into small cubes.
Finely dice the red onion.
Roughly chop up the fresh Mint and Parsley.
Add the Watermelon, Capsicum, Onion, Parsley, and Mint to a bowl. Drizzle with a little olive oil, squeeze the juice of 1/2 a lime, add sliced red Chilli and mix to combine.
When ready to serve add Salt Flakes and Edible Flowers (I have used Purple Cornflower petals)
Notes
Make this as close to serving as possible, as the watermelon will let go of a lot of water if prepared ahead of time.
Zucchini Fritters with Haloumi and Watermelon Salsa
This is a seasonal match made in heaven. Summer brings an abundance of Zucchini and delicious mouth-watering Watermelon. Serve these fritters on Nasturtium leaves for a nutritious lunch or with a garden salad for a light refreshing meal on those hot summer nights.
Zucchini Fritters with Haloumi and Watermelon Salsa
Ingredients
3 small-medium Zucchini
1/2 cup flour
1 Egg (optional)
1 tsp Salt
1/4 finely sliced Red Onion (could use shallots or spring onion)
1/4 cup chopped fresh Parsley
1 TBSP chopped fresh Basil (or Chives)
Salt and Pepper
1 small fresh chilli finely sliced
1 packet Haloumi
10-12 Nasturtium leaves (or lettuce leaves) to serve (optional)
Watermelon Salsa
Instructions
Rinse your Zucchini and grate them into a bowl. Sprinkle with 1 tsp of ground rock salt (roughly 5-6 grinds) to allow the moisture to extract. Stir through, cover, and set aside for 10 minutes.
Finely chop your Herbs, Onion and Chilli.
After 10 minutes or so place your grated Zucchini in a sieve and squeeze out all the extra moisture.
Then in a clean bowl mix all your ingredients together and season well with salt and pepper.
Heat a pan on medium-high heat with oil. Spoon your mixture into the medium-sized pan and flatten it down a bit. Cook 3-4 minutes on each side or until crispy brown.
While your fritters are cooking, heat a small pan and fry off your sliced Haloumi until lightly golden.
Allow your fritters to cool slightly and serve on Nasturtium leaves with a slice of Haloumi and a spoon full of Watermelon Salsa.
Notes
Alternatively, serve your Zucchini Fritters with a garden salad and top with Haloumi and Watermelon Salsa for a Light and Refreshing Summer meal.
Watermelon jerky or dehydrated watermelon is a great way to use and preserve your leftover or excess watermelon. Some watermelon can grow to over 25kg! That’s a whole lot of watermelon to eat before it goes to waste. This recipe makes a delicious, chewy, sweet treat and helps stop any precious watermelon from going to waste.
Marinated in fresh mint and lime juice, this watermelon jerky is packed full of delicious summer flavours!
Watermelon, like its name suggests, has high water content. By dehydrating and removing that water content, you are left with a high concentration of natural sugars. This Mojito watermelon jerky recipe helps balance some of that sweetness and adds a delicious and refreshing flavour. When making this recipe you can do some with the marinate and some plain to work out which you prefer.
Mojito Watermelon Jerky
Cook Time: 1 minute
Total Time: 1 minute
Naturally, sweet watermelon treats 🍉
Ingredients
1/2 Watermelon
1 Lime
1/2 cup fresh Mint
Instructions
Rinse and finely slice the mint.
Add the juice and zest of one Lime to a bowl and mix through the mint.
Remove the rind and any seeds from the watermelon and slice it into strips roughly 1cm thick. If the strips are too thin they will break apart and be hard to remove from the tray. Too thick and it will take a loooooong time to dehydrate, so I have found around 1cm is a happy medium.
Lay your watermelon strips in a large shallow dish and pour over the lime and mint marinate. Gently turn over to coat. I like to do a mix of some marinated and some plain. Cover your dish and refrigerate for 1-2 hours to allow the flavours to combine.
Place your watermelon onto your dehydrator trays, ensuring you have a drip tray at the bottom to catch excess juices. I have found it is best to use fruit leather trays or parchment paper otherwise the jerky gets stuck to the metal grids. Dehydrate at 60 degrees Celsius until dry (This will take anywhere from 18-24 hours). To speed up the process, turn your watermelon strips over a few times during the process.
They should not be sticky to touch. The thicker parts that aren't quite dry will be a darker red colour. You may need to remove the dried watermelon and let the thicker slices dehydrate a bit longer. This will take anywhere from 18-24 hours.
Allow to cool and add to a clean, dry, airtight container.
Enjoy! 🍉
Notes
Please note that the Watermelon reduces significantly in size once dehydrated and has concentrated, high levels of sugars. Enjoy 2-3 pieces per serve as a treat or natural confectionary.
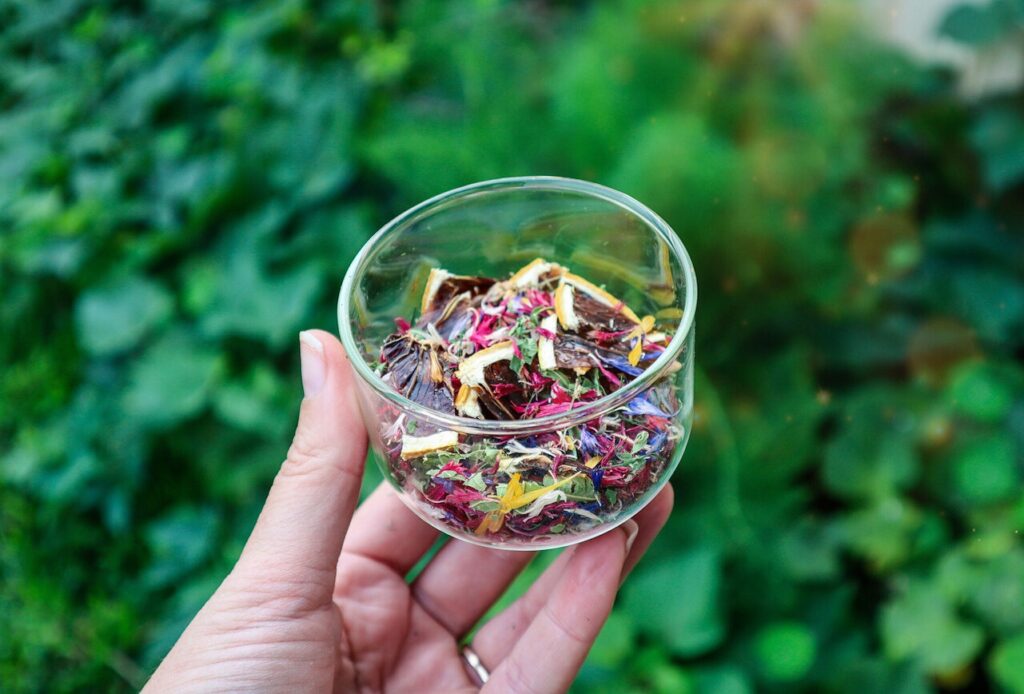
Preserving herbs from your garden is a great way to make the most of their abundance and store them for the winter months when many herbs will not be growing. Herbs are a great way to add flavour to any dish and once you make your own dried mixed herbs you will never want to buy them ever again!
Click below to watch
In this video I share how I pick, dry and preserve my herbs for both a dried mixed herb blend and also to make tea blends.
Why Grow Herbs?
Herbs are the easiest thing to start growing because they are hardy and less susceptible to pests. They also do not require a lot of room to grow. So you can grow herbs in pots or containers if you do not have room for a garden. It is absolutely achievable and you never know where the journey will take you.
Grow Abundant Herbs
Nature provides so much abundance when we learn to see and utilise it. Sometimes cutting your plants can spark new growth and they will continue to flourish in new directions. Young new growth is much nicer to eat than the older woody growth too. Preserving your harvests also allows you to slow down and reconnect with where your food comes from. It just feels so right to go out to the garden and pick food that you know exactly what has gone into creating it. No chemicals, pesticides, or nasty sprays.
Basil is a warm climate herb and will start to die off as the temperatures decrease. So harvesting and storing basil will mean I will be able to have it available during winter. Basil also responds so well to being cut. Especially towards the end of the season as it starts going to flower. By cutting the tops off, it will grow out thicker and will also help prolong the life of the plant.
Take Cuttings for Gifts
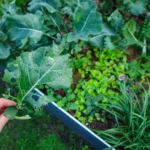
My rosemary is growing a little wild and has even collapsed in the middle under the weight. So I am going to take some cutting to replant and also harvest a big bunch to dry and preserve. Taking cuttings to regrow will give me new plants to gift and trade. It is always good to have some on the go for last minute gifting.
When to Harvest Herbs?
The best time of day to harvest your herbs is first thing in the morning. This is when the plants are hydrated and full of life. As the day goes on they will lose moisture and not be as fresh and vibrant. Early in the morning, the bees are not yet active. As the sun comes up and the dew drys, the bees will be about in a hive of activity. So if you do pick later in the day just be slow and cautious not stress them out and avoid getting stung.
Take time to Slow Down
Spending time in the garden harvesting and caring for your plants allows so much time to observe and learn from your garden.
To slow down and reconnect. Giving your mind time to think. Some of my most creative ideas come when I can quiet the rest of the world. Harvesting also gives such a sense of pride. That you have grown all this delicious food is so special.
How to Preserve and Dry Herbs?
To preserve these herbs I first rinse them off in the sink. Next, I separate the stems and lay the leaves out on my dehydrator trays. I put a layer of brown baking paper to stop them from falling through the tray grid. I keep and reuse the brown baking paper for future dehydrating. I then pop them in the dehydrator on the lowest temperature setting. Between 20 and 30 degrees Celsius. You can also do this in the oven but just be aware it may take 5-8 hours to dry depending on the thickness of the herbs. So it is important you are home when using the oven. To air-dry your herbs, hang them upside down but make sure you have a dry and warm climate. If you live in an area with humidity I would avoid air-drying. You want the herbs to dry as fast as possible.
Dry the herbs until they feel crispy as you do not want any moisture still left in the leaves. If there is still moisture they may spoil or grow mould in the storage process.
Once they are completely dry you can pop them straight into clean, dry jars or storage containers. If you want to save room you can crush them up using a mortar and pestle. Mix some of your herbs together to make a mixed her blend ready for all your winter soups and meals.
Share and Inspire Others
These dried herbs also make great gifts. Taking gifts from your garden to friends and family is something that should become a regular ritual. They will so feel special and you will also feel joy and pride in sharing your homegrown produce. Sharing from the garden can also spark others to try to grow their own food too. You have no idea how many people can be inspired to make changes from your single action of sharing. It should be the way of the future. Because what we are doing in the world right now is not sustainable.
I hope you feel inspired to grow your own herbs at home and make your own dried mixed herbs. They are so easy to make and so vibrant and full of flavour. Nothing like the dull grey herbs you find at the supermarket.
If you have any questions leave me a comment below.
DISCLAIMER: Links included in this description might be affiliate links. If you purchase a product or service with the links that I provide I may receive a small commission. There is no additional charge for you! Thank you for supporting my page so I can continue to provide you with free content!