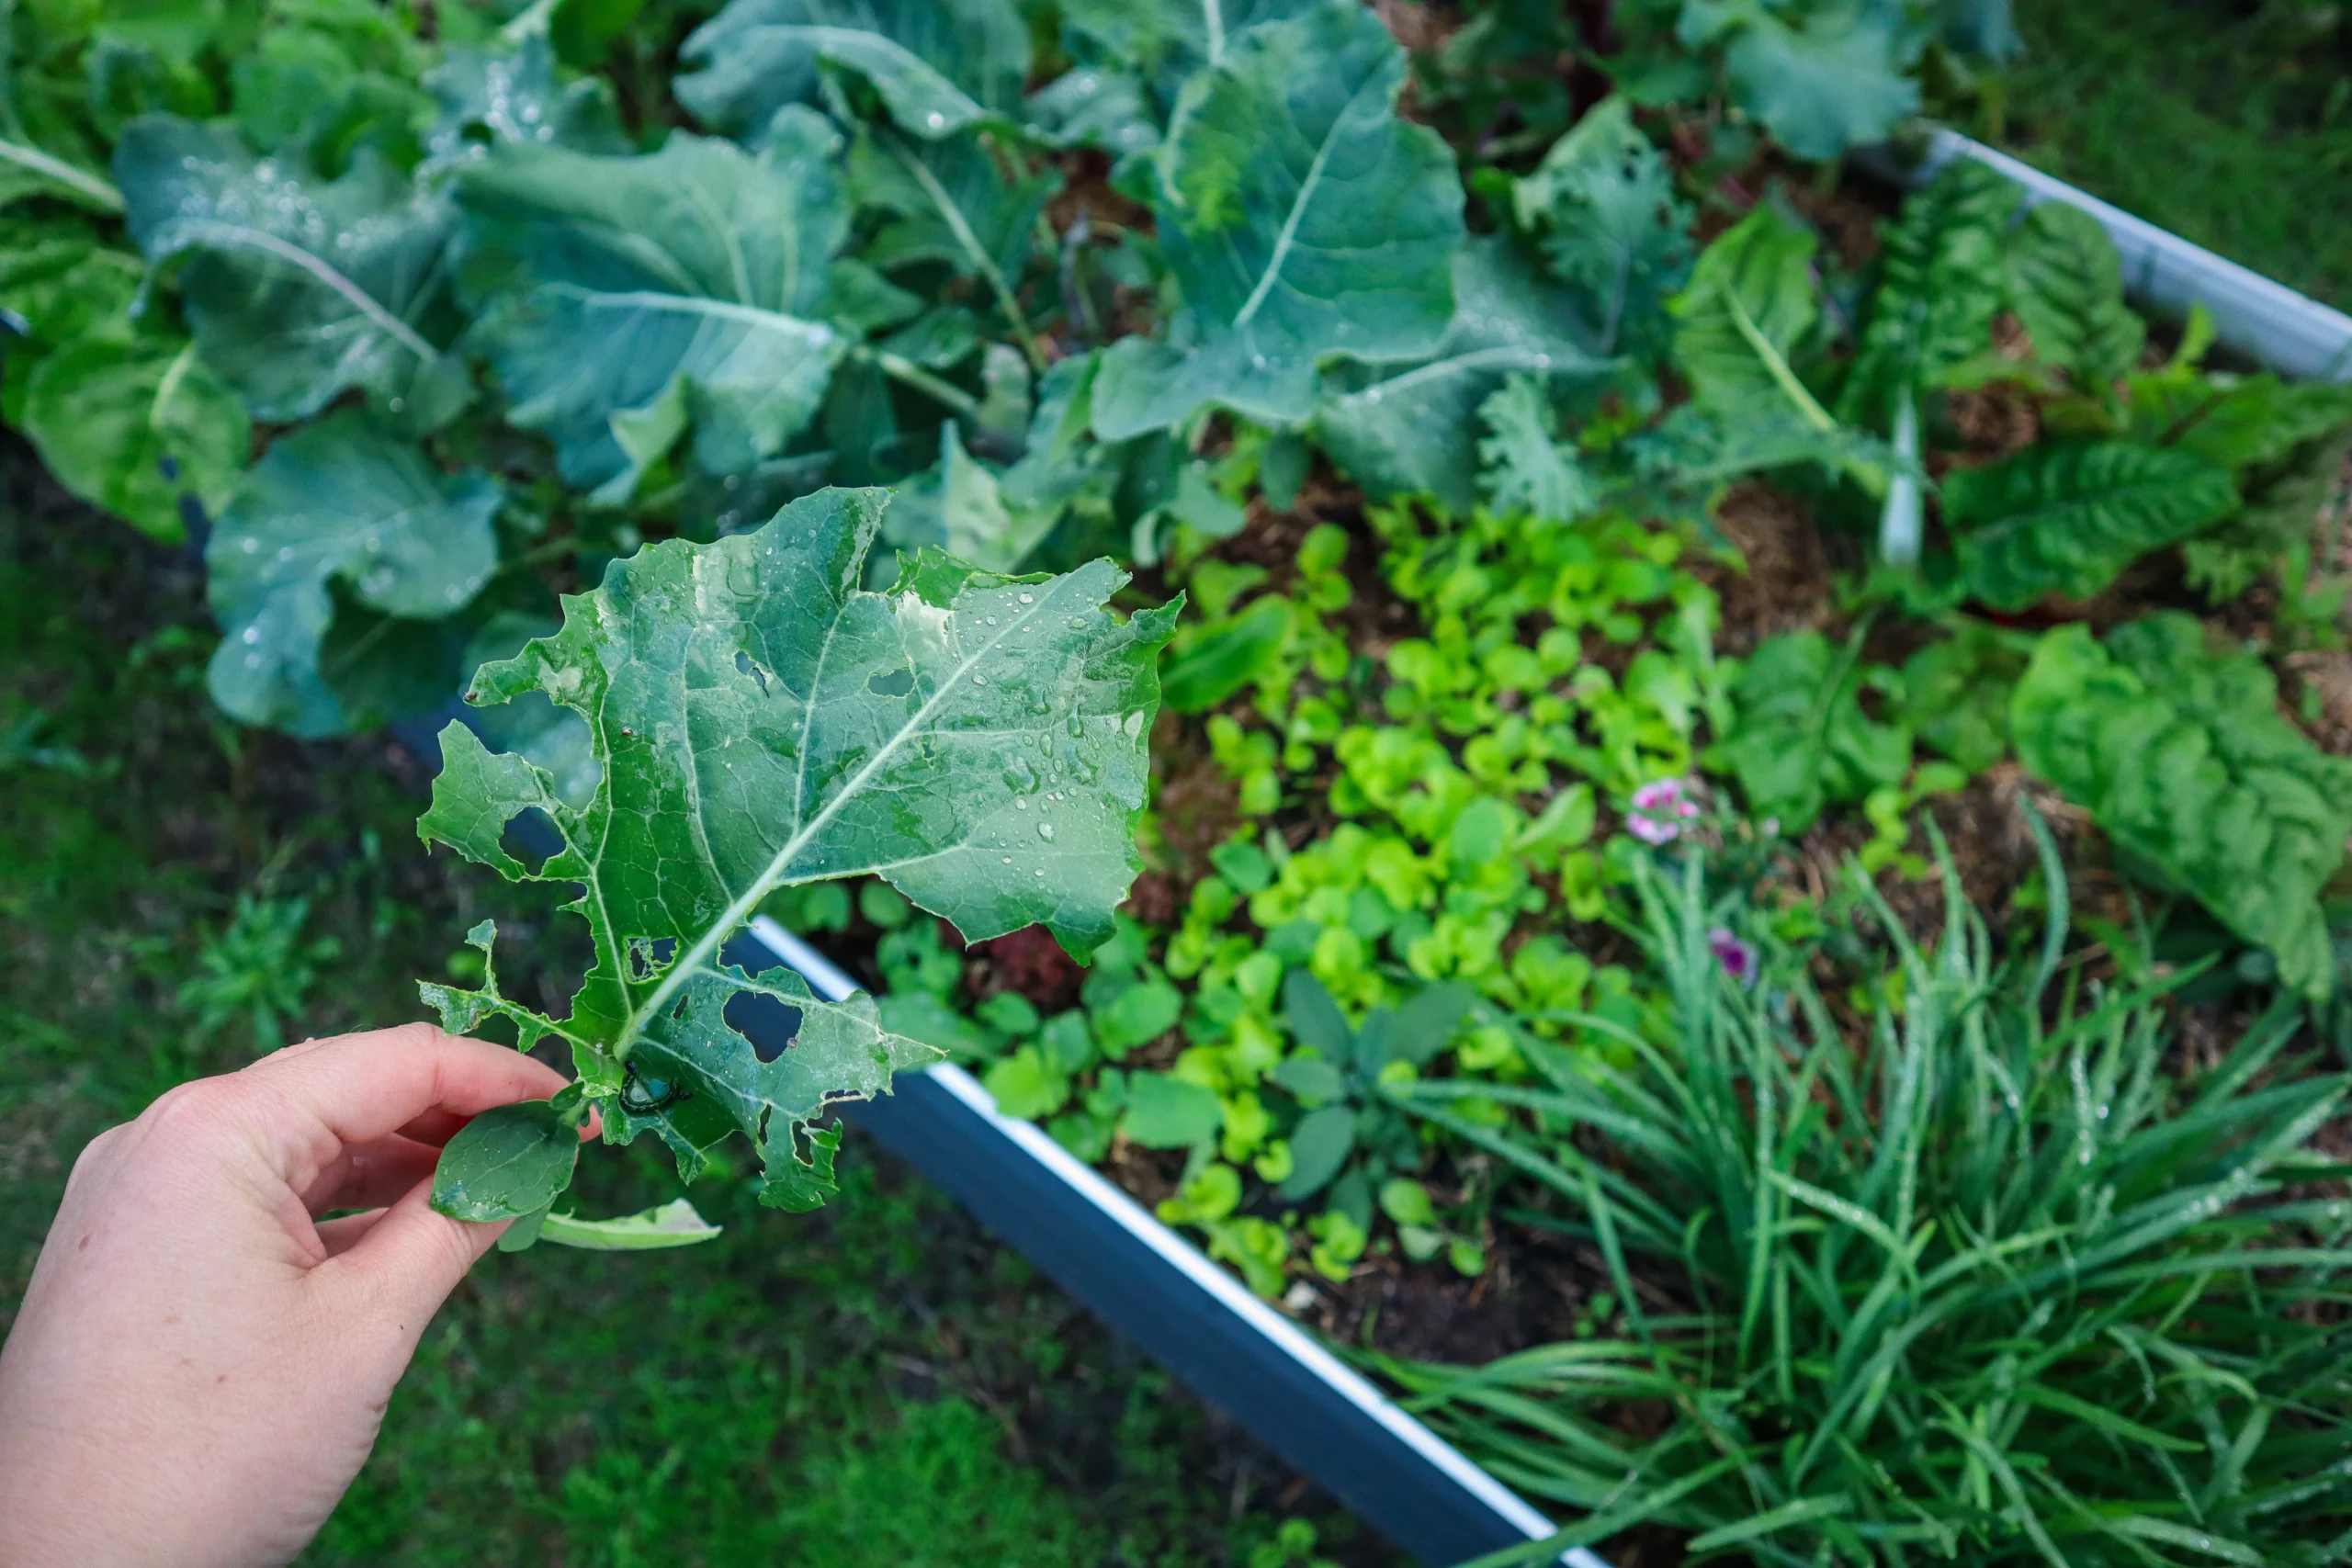
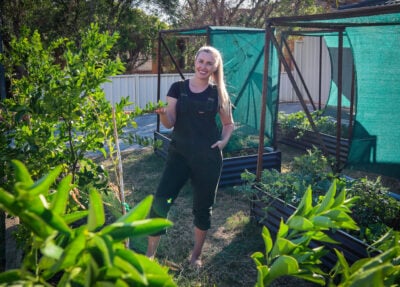
Simple, Spray-Free Solutions for Veggie Garden Pest Problems
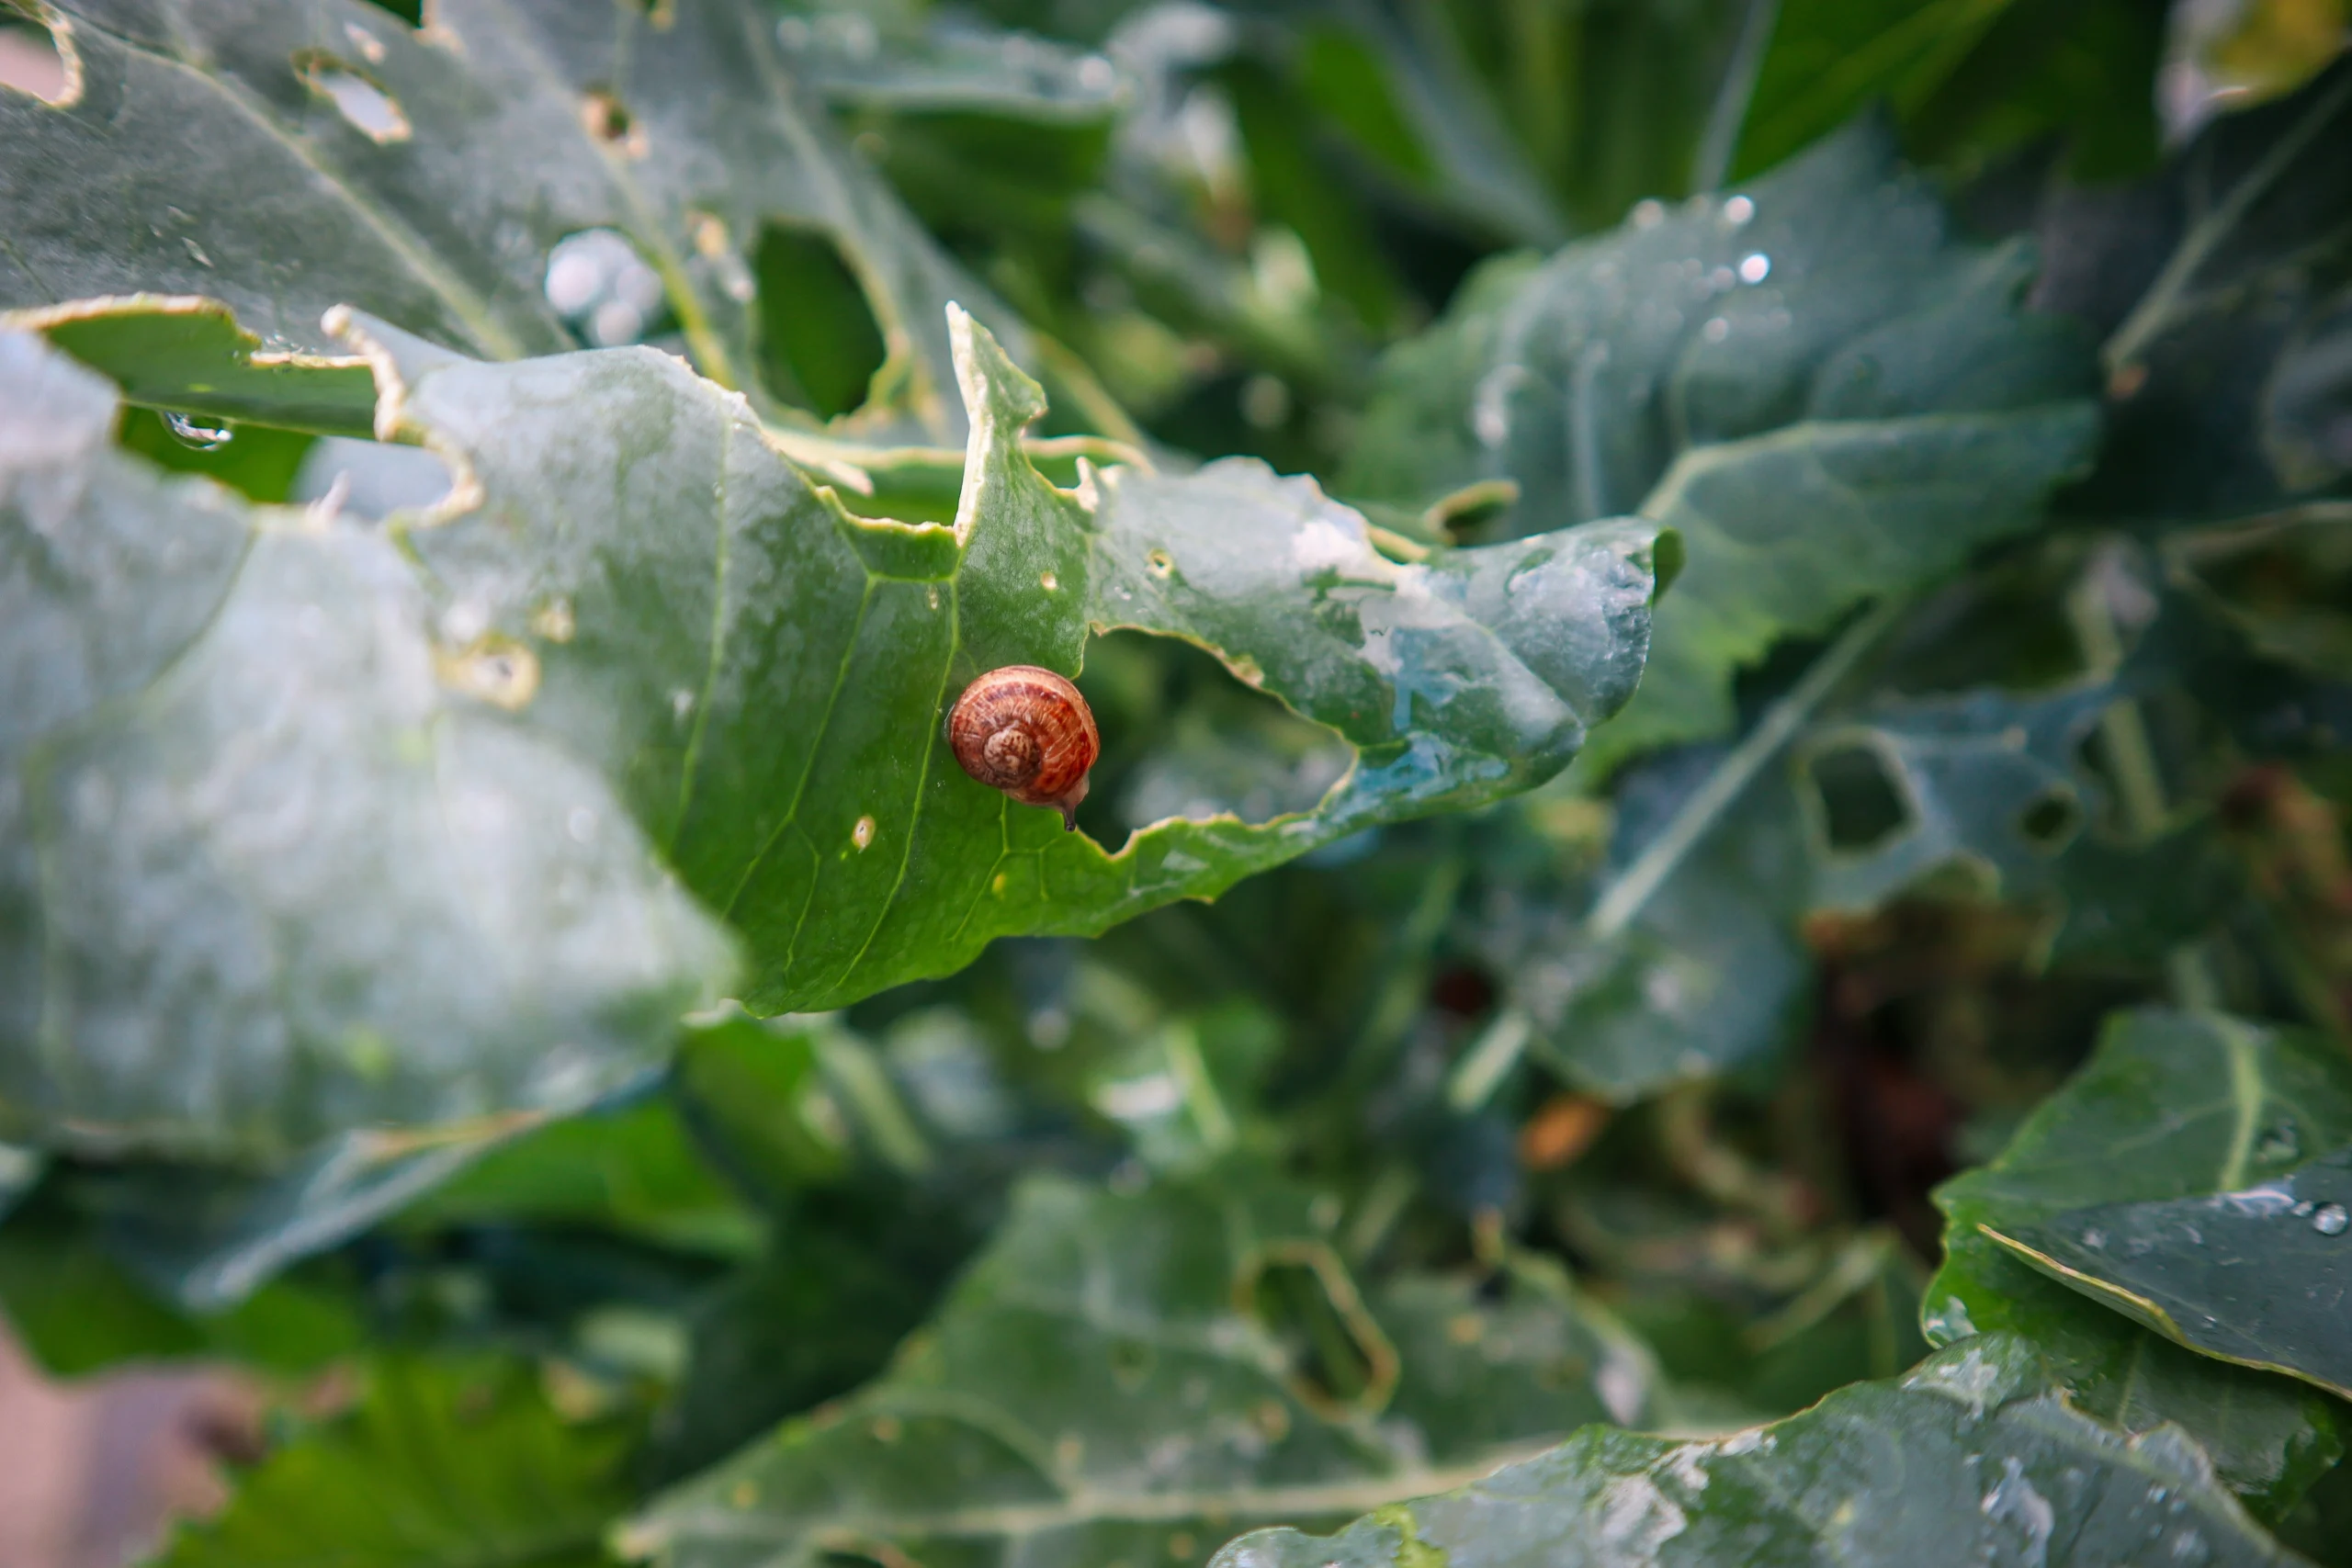
Just when you think the garden is looking good, the bugs show up in force! I often get asked why the bugs don’t eat my veggie garden, but the reality is they definitely do! If they weren’t, I’d be more worried! Because if the bugs aren’t eating your veggie plants, it means your garden isn’t part of the ecosystem. A few nibbles here and there are normal. Even a good sign that your garden is healthy, alive,and balanced. But.. when pests start taking more than their share, these easy & natural solutions will help you control bugs in your veggie garden.
TopTips for Controlling Bugs in the Veggie Garden
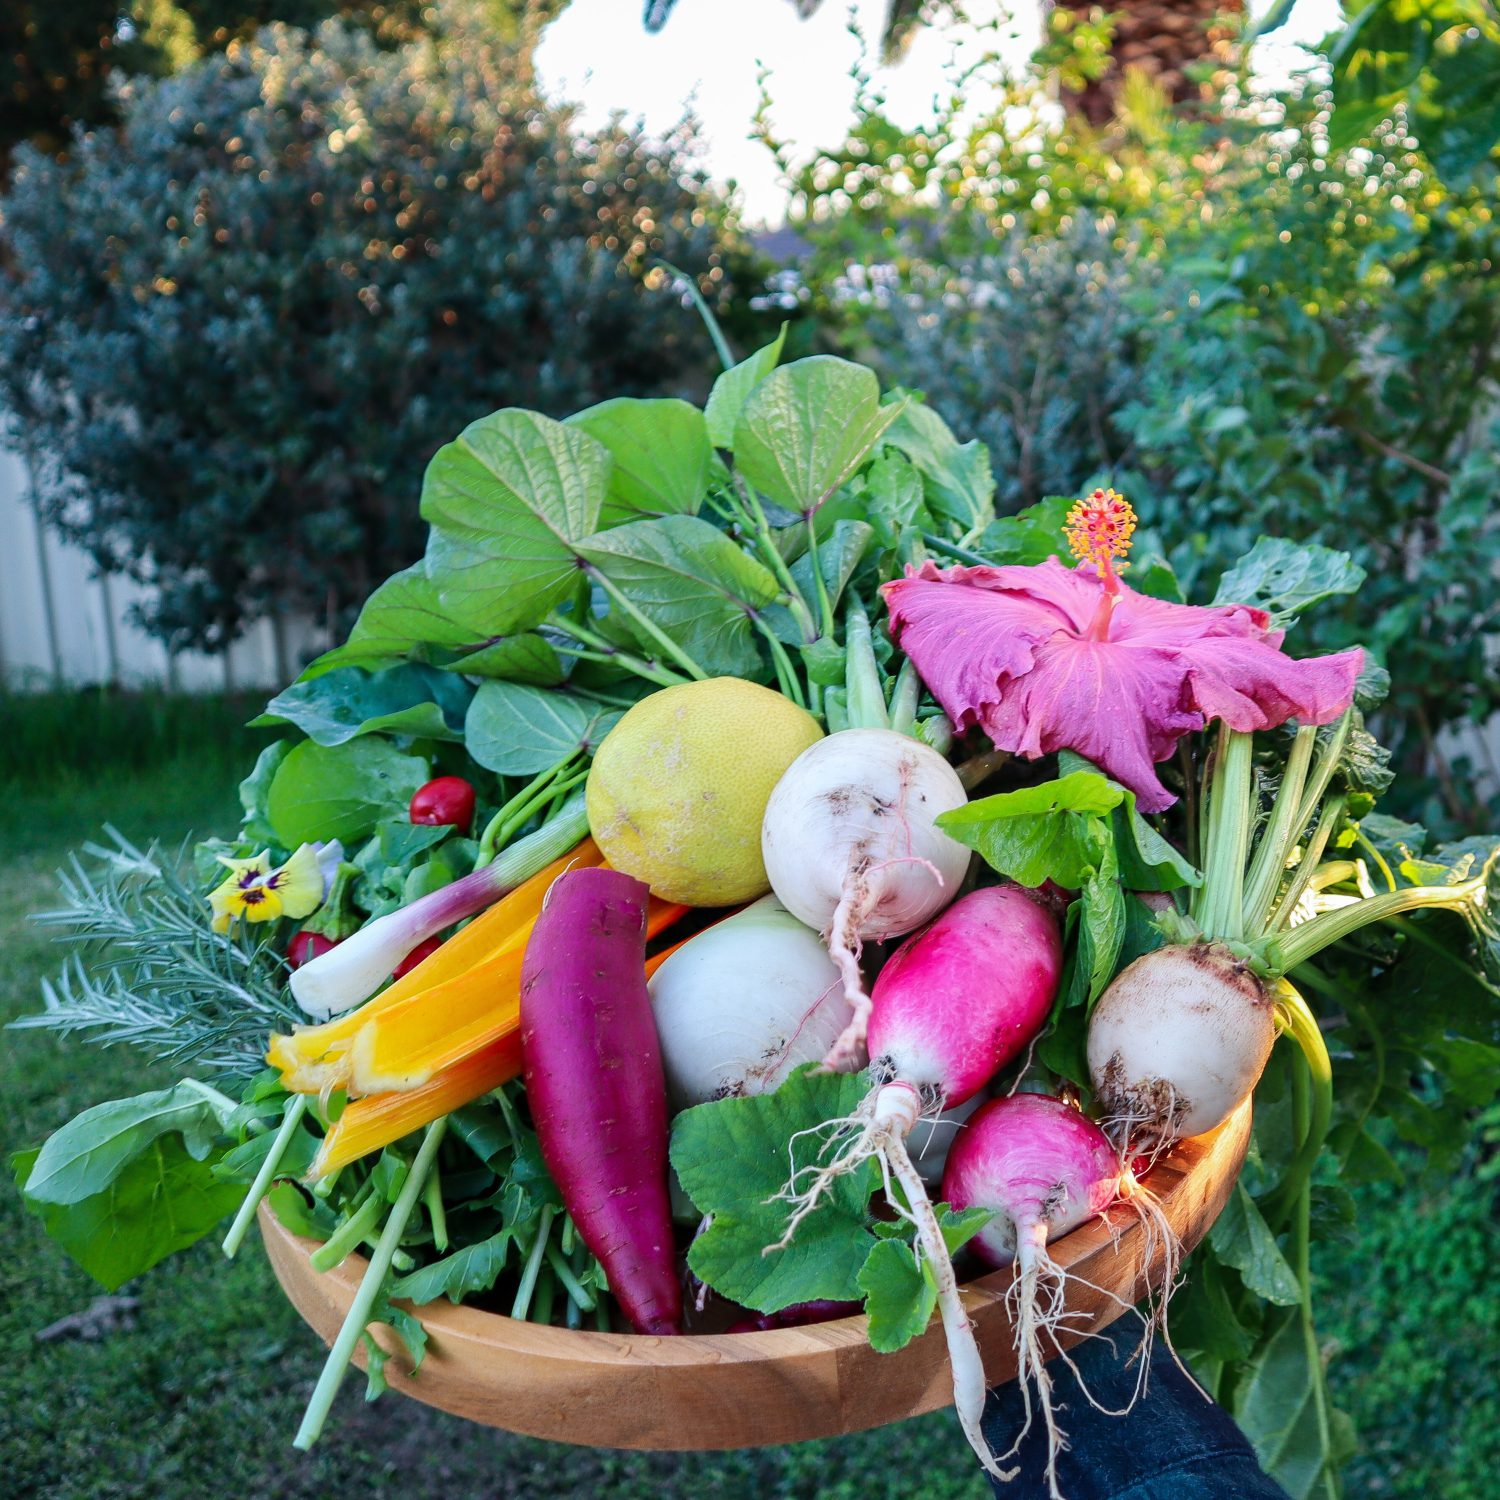
These tips are just second nature to me now, and combined, they reduce the pests in my veggie garden. Allowing me to harvest more of my food without any harmful chemicals or sprays. Each year, this helps improve the strength and resilience of my garden and results in less work for me. I hope these simple solutions help you grow more of your own food at home naturally and sustainably.
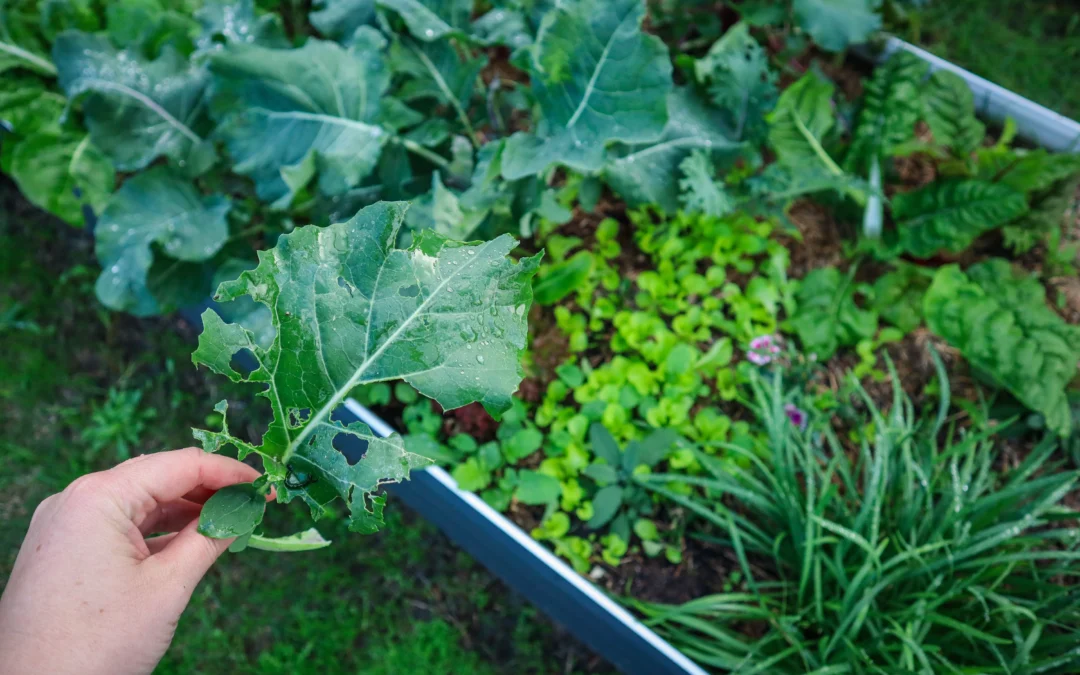
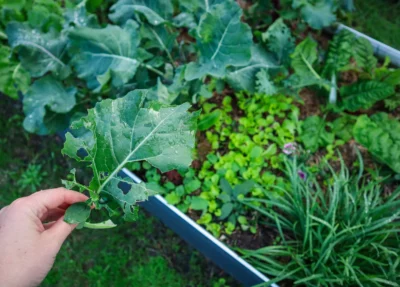
Remove the lower leaves
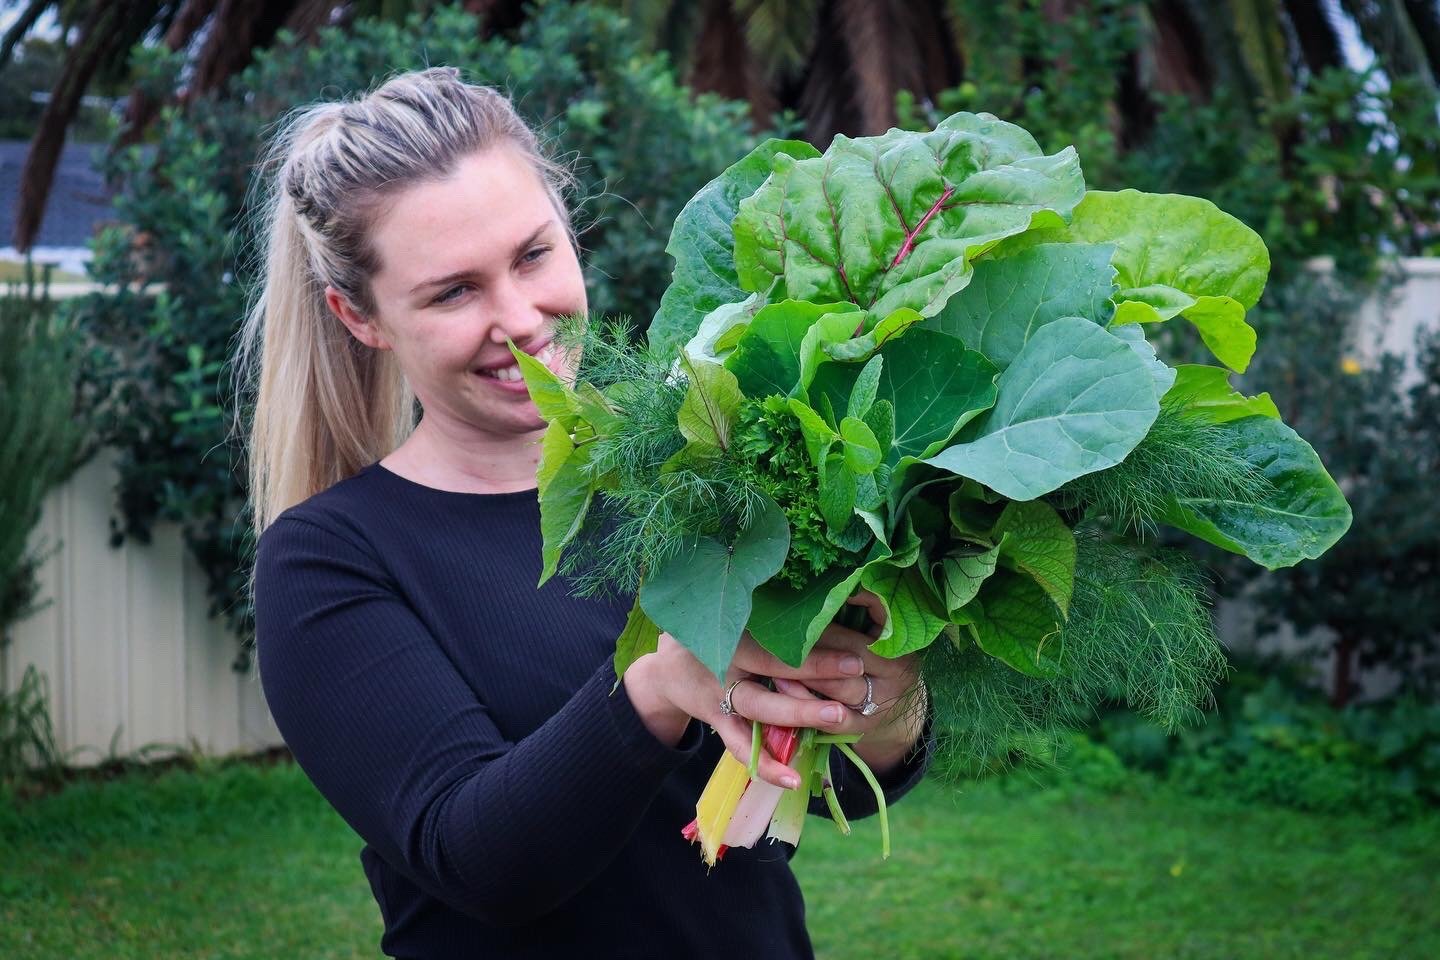
This helps stop slugs, snails, and other crawlers from getting easy access. I check my raised beds every few days. Pick off the lower leaves, both good and the sad, bug-bitten leaves. This allows more light (bugs like slugs and snails love dark, shady, wet spots) and reduces the amount of natural “ladders” up to your veggies. You can always clean off and use your holey veggie leaves to make a delicious, nourishing green soup or garden pesto.
Outplant the pests
This is probably my top tip and my favourite one! If bugs are hitting one patch hard, I just plant more! and randomly… I always interplant different things, so I’m not offering up a buffet of their favourite foods. The idea is to overwhelm the pests with too much choice and increase your chances of getting a harvest. It works especially well with fast-growing seeds like radishes, asian greens, and lettuce. Saving your own seeds is a great way to have more than enough to go around. So you aren’t so precious about using too many seeds or relying on the 6 seedlings you have purchased.
Sprinkle used coffee grounds
Many bugs hate crawling over gritty textures. I’ve been collecting used coffee grounds from my local cafe for years. By sprinkling them around the base of plants and even fully over young seedlings, I found my losses greatly reduced! It works really well to protect young seedlings from getting ring-barked by slaters/roly-poly, too! It’s free, reduces waste, and adds organic matter too!
Keep your plants well-fed
Healthy plants recover faster from pest attacks and are less likely to get smashed. Top up with liquid compost, worm castings, or even just a light mulch of compost to keep your plants thriving.
Relax and let a few “sacrificial” plants go
Sometimes the best defence is distraction! If a few plants just keep getting hit, I let them go and leave them as sacrificial plants. These often allow good predator bugs like Ladybugs or even birds to come visit the patch. The bugs often will focus on plants that have already been eaten…keeping them off your other healthy plants. It’s a simple way to work with nature and keep the peace in the patch.
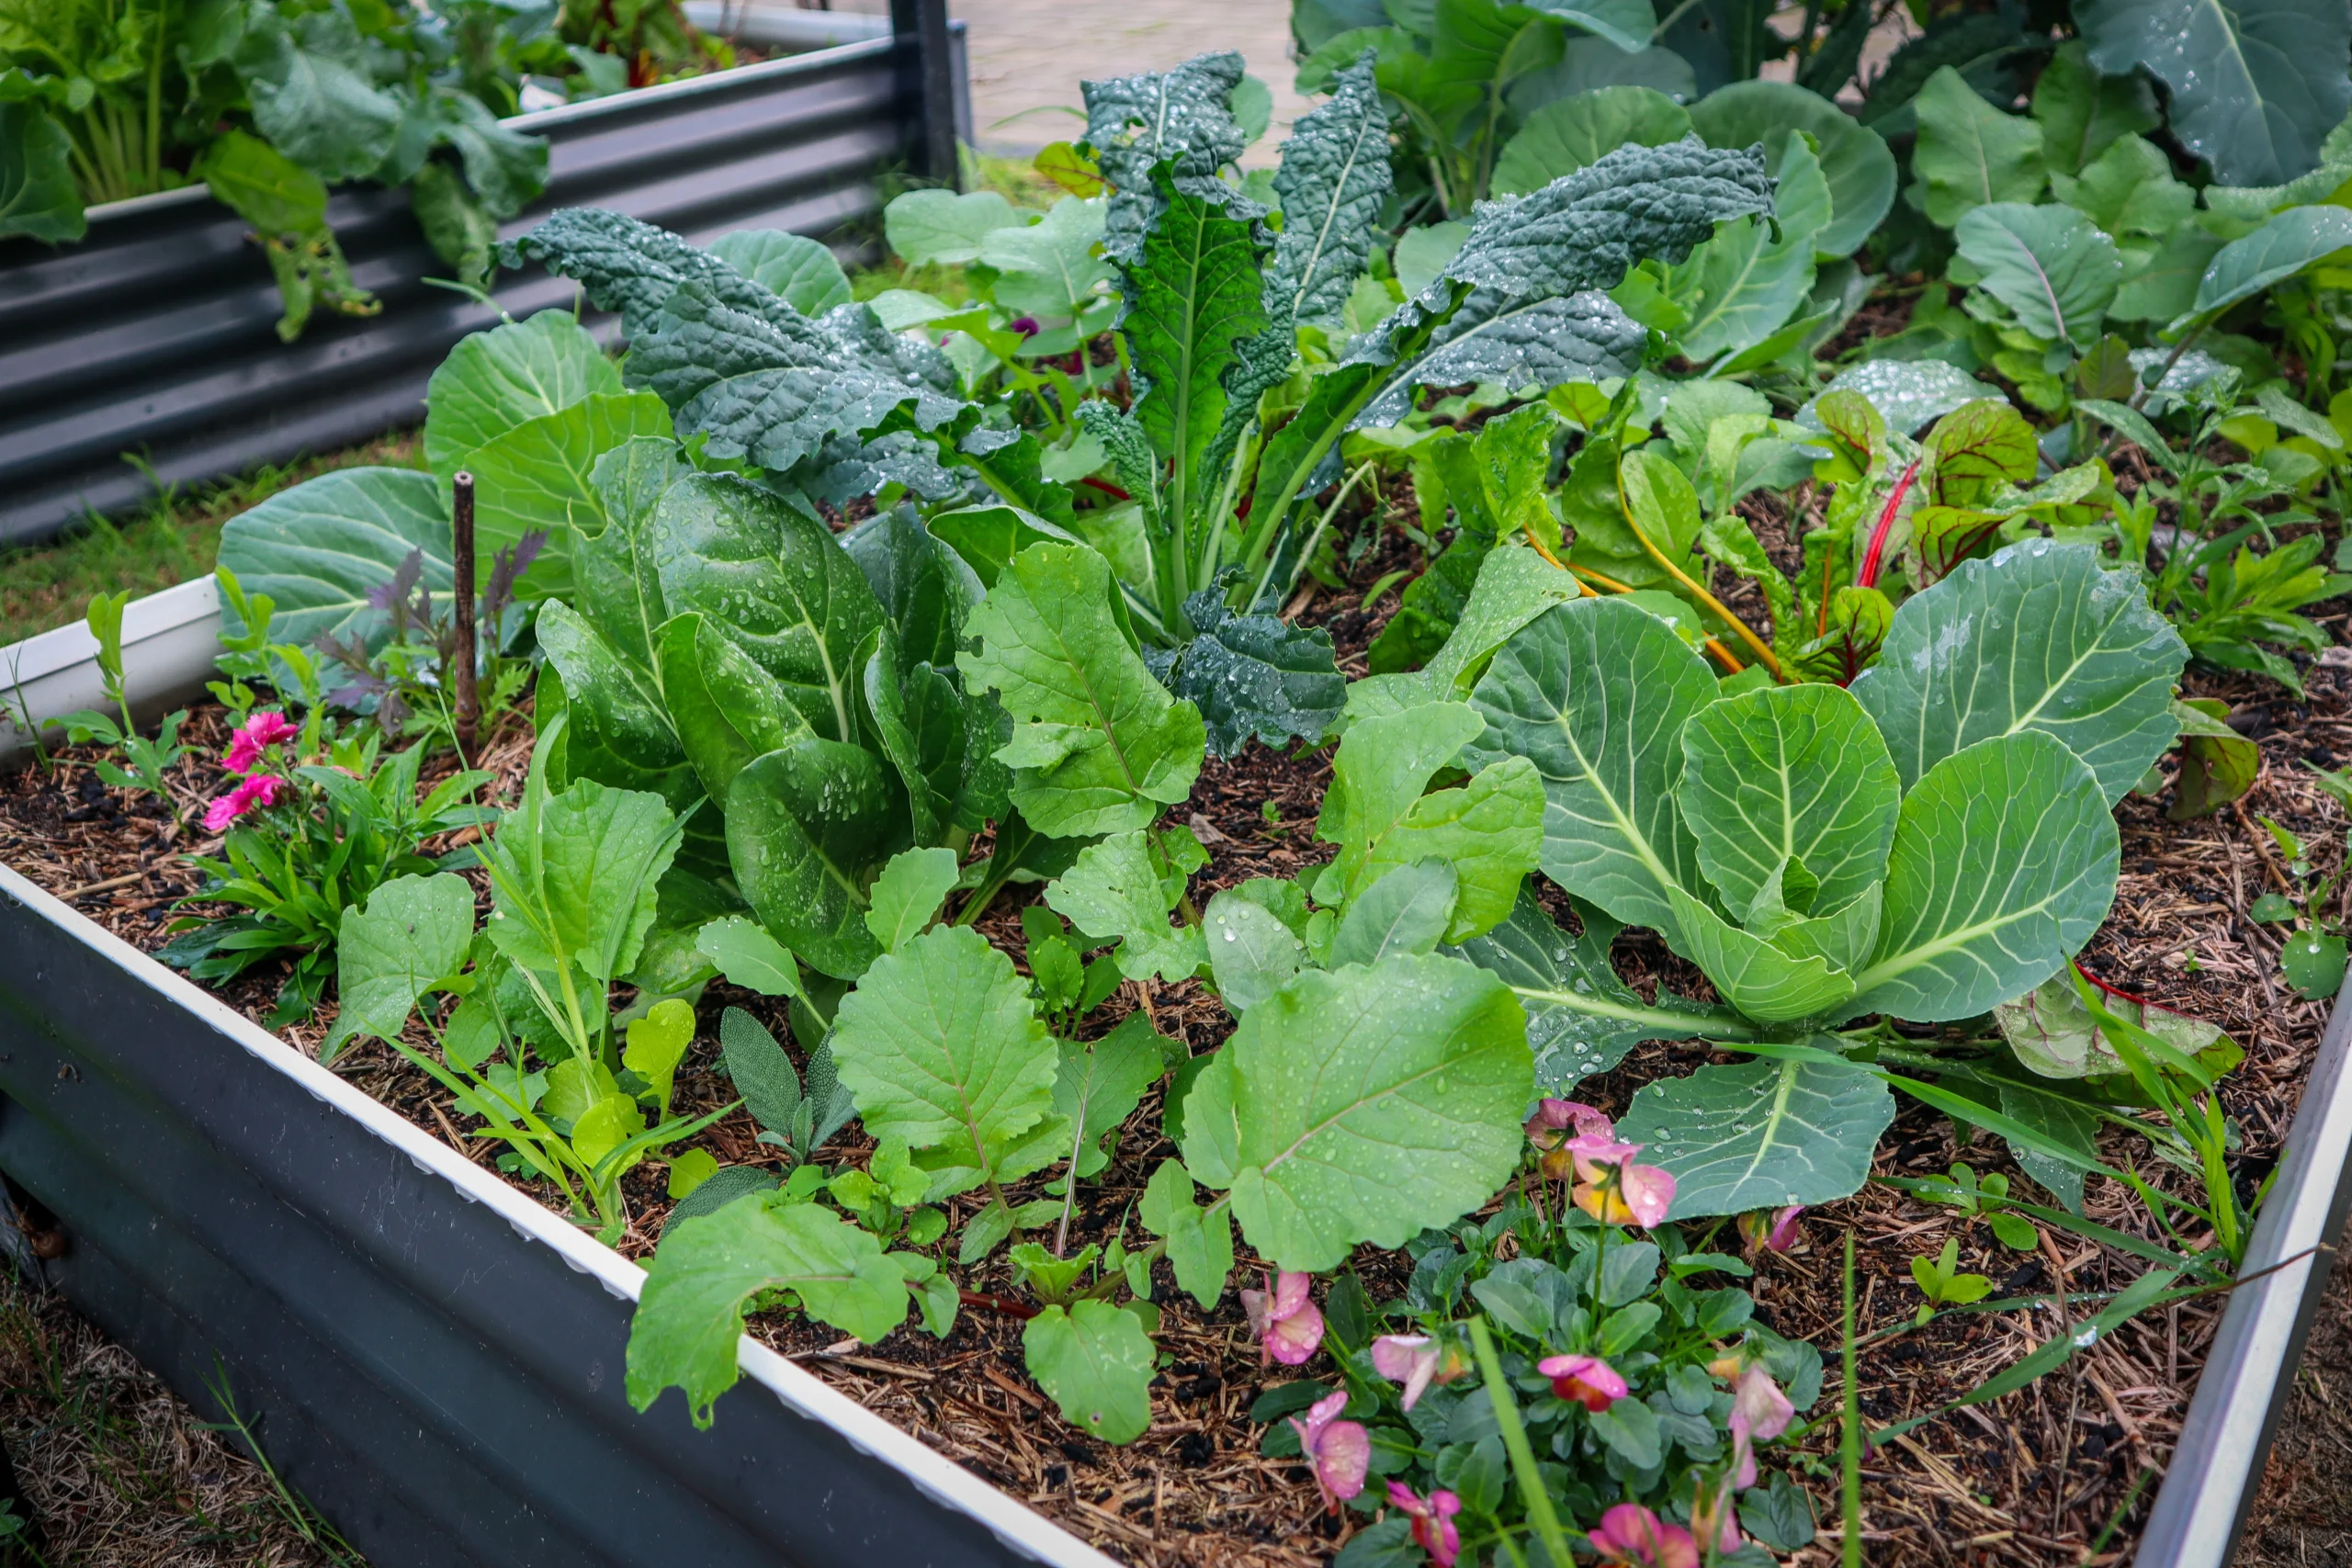
Diversity makes it harder for the bugs
I focus on encouraging diversity in all my gardens. I do not plant the same thing all in one bed because if the bugs show up in my veggie garden and decide they like that plant… I’ve just made an easy-access all-you-can-eat buffet for them! Spreading them throughout different gardens makes it harder for the bugs and results in more food for me! Interplanting strong plants such as onion, chives, garlic, or leeks also helps confuse and ward off the bugs. Spreading plants out also reduces the nutritional depletion in the soil, as each plant takes different nutrients from varying depths due to their root growth and nutritional needs.
Control Bugs in the Veggie Garden Naturally
Dealing with bugs in the garden doesn’t have to mean reaching for harsh sprays or quick fixes. With a few simple, natural strategies, you can keep pests under control while still supporting a healthy, balanced ecosystem in your veggie patch. Caring for your soil’s health and your own at the same time.
I hope these tips help you feel more confident tackling any winter pest problems in your own garden! And remember, bug-bitten veggies are totally normal and even a sign that your garden is alive and thriving!
Want More Seasonal Garden Tips Like These?
Subscribe to my Tuesday Tips newsletter and get practical, organic garden advice delivered straight to your inbox each week 😊
If you’ve ever thought… “I wish I had more space to grow fruit,” This one’s for you! I’ve squeezed over 200+ types of fruit and edible plants into my suburban block… and while this may sound a bit crazy and not for everyone 😂 There are a few key tricks I’ve learnt along the way I want to share to help you grow a wider variety of fruit in a small space 🍊🍑🍓 Below are my top 5 tips to grow more fruit in less space..that actually work!
Top 5 Ways to Maximise Fruit in a Small Garden or Urban Space
Grow Fruit Trees in Pots
Pots make it possible to grow fruit trees almost anywhere.. balconies, patios, rental properties, awkward spaces, driveways. Choose dwarf or compact varieties, and you can move them to catch the sun or protect them in winter. Bonus: Potted trees are naturally dwarfed, so less maintenance and pruning.
Use Vertical Space
Increase the number of varieties by growing vertical fruits. Train passionfruit vines along fences, grow berries on trellises, or espalier apples along walls. Vertical growing = more fruit with less garden bed space used.
Try Multi-Grafted Trees
One tree, multiple fruits! Grafted trees can grow many varieties on a single trunk. You can purchase these as fruit salad trees or learn to graft and do it yourself! Each family type can usually be grafted together eg: stonefruit like peach, apricot, plum, nectarine can all go on one tree (except cherries must go with cherries) or citrus mixes. Great for variety, especially in limited space.
Plant High-Density Style
You probably know by now this is something I practice in my gardens… but there is method to my madness. Fruit trees don’t need to be spaced as far apart as you think. You can either have x2 fruit trees “correctly spaced” or x4 closer together. This means you will need to prune them smaller, resulting in less fruit on each tree, but more trees means more variety AND may extend your fruit season. I don’t need 1000 oranges, I’m happy with 20 😄 This works best by combining dwarf fruit trees and #5 👇
Succession + Seasonal Layers
Grow fast fruiting crops like Cape Gooseberry, Papaya, Tamarillo, and Bananas between slower ones. You’ll get harvests while your trees are still establishing. It’s all about planning for layers and timing. Then, after a few years, once your main fruit trees, say Avocado or Mango, start taking up the space, you can cut the short-lived crops out to make space.
Start Small and Grow in Less Space
You don’t need a huge property to enjoy an abundant, homegrown harvest. Even a small courtyard, rental garden, or suburban backyard has the potential to grow a diverse mix of fruit when planned strategically. Start with just one or two of these tips, like adding a potted citrus or training a passionfruit vine, and see how much more you can grow. With each season, you’ll learn more about your microclimate, sun patterns, and fruit tree behaviour, which will help you maximise your space even further. Over the years, I have edited many of my fruit trees by removing ones I don’t enjoy as much as I thought I would. I have even created multi-grafted fruit trees to then remove one of them to make room for a new tree…But I still get to enjoy the same fruit just on one tree.
Your Backyard Fruit Jungle Starts Here
Urban gardening isn’t about sacrificing abundance; it’s about designing smart, layered systems that work with the space you have. By thinking vertically, embracing container gardening, and planting with both time and growth habits in mind, you can enjoy a steady harvest of fresh fruit almost year-round.
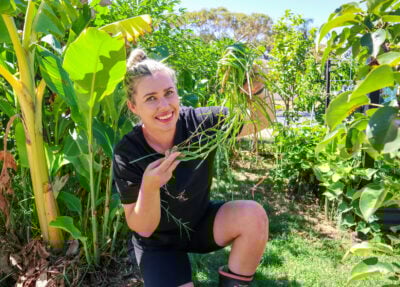
Welcome to my urban food forest garden in Perth, Australia. It’s currently the end of autumn, the mornings are finally starting to feel cooler, but we still haven’t had much rain….not since last year before the summer, so the garden is just hanging in there. Today, I want to share an update on my urban food forest progress and the wide range of fruit I’m growing in a small space!
🎥 Watch the full Urban Food Forest Garden Tour
Starting a Productive Urban Food Forest on Less Than 1/5 Acre
My garden is high-density, featuring over 200 types of fruit trees, as well as herbs and annual vegetables, all within a property of less than 1/5 of an acre in total. My goal is to have small amounts of many different types of fruit and be able to harvest fruit 365 days a year. This means I’ve said goodbye to spacing rules, utilised dwarf fruit trees, vertical gardening, learnt to multi-graft, and I keep my trees pruned to not only let light in but also create more green material to chop and drop and feed my soil.
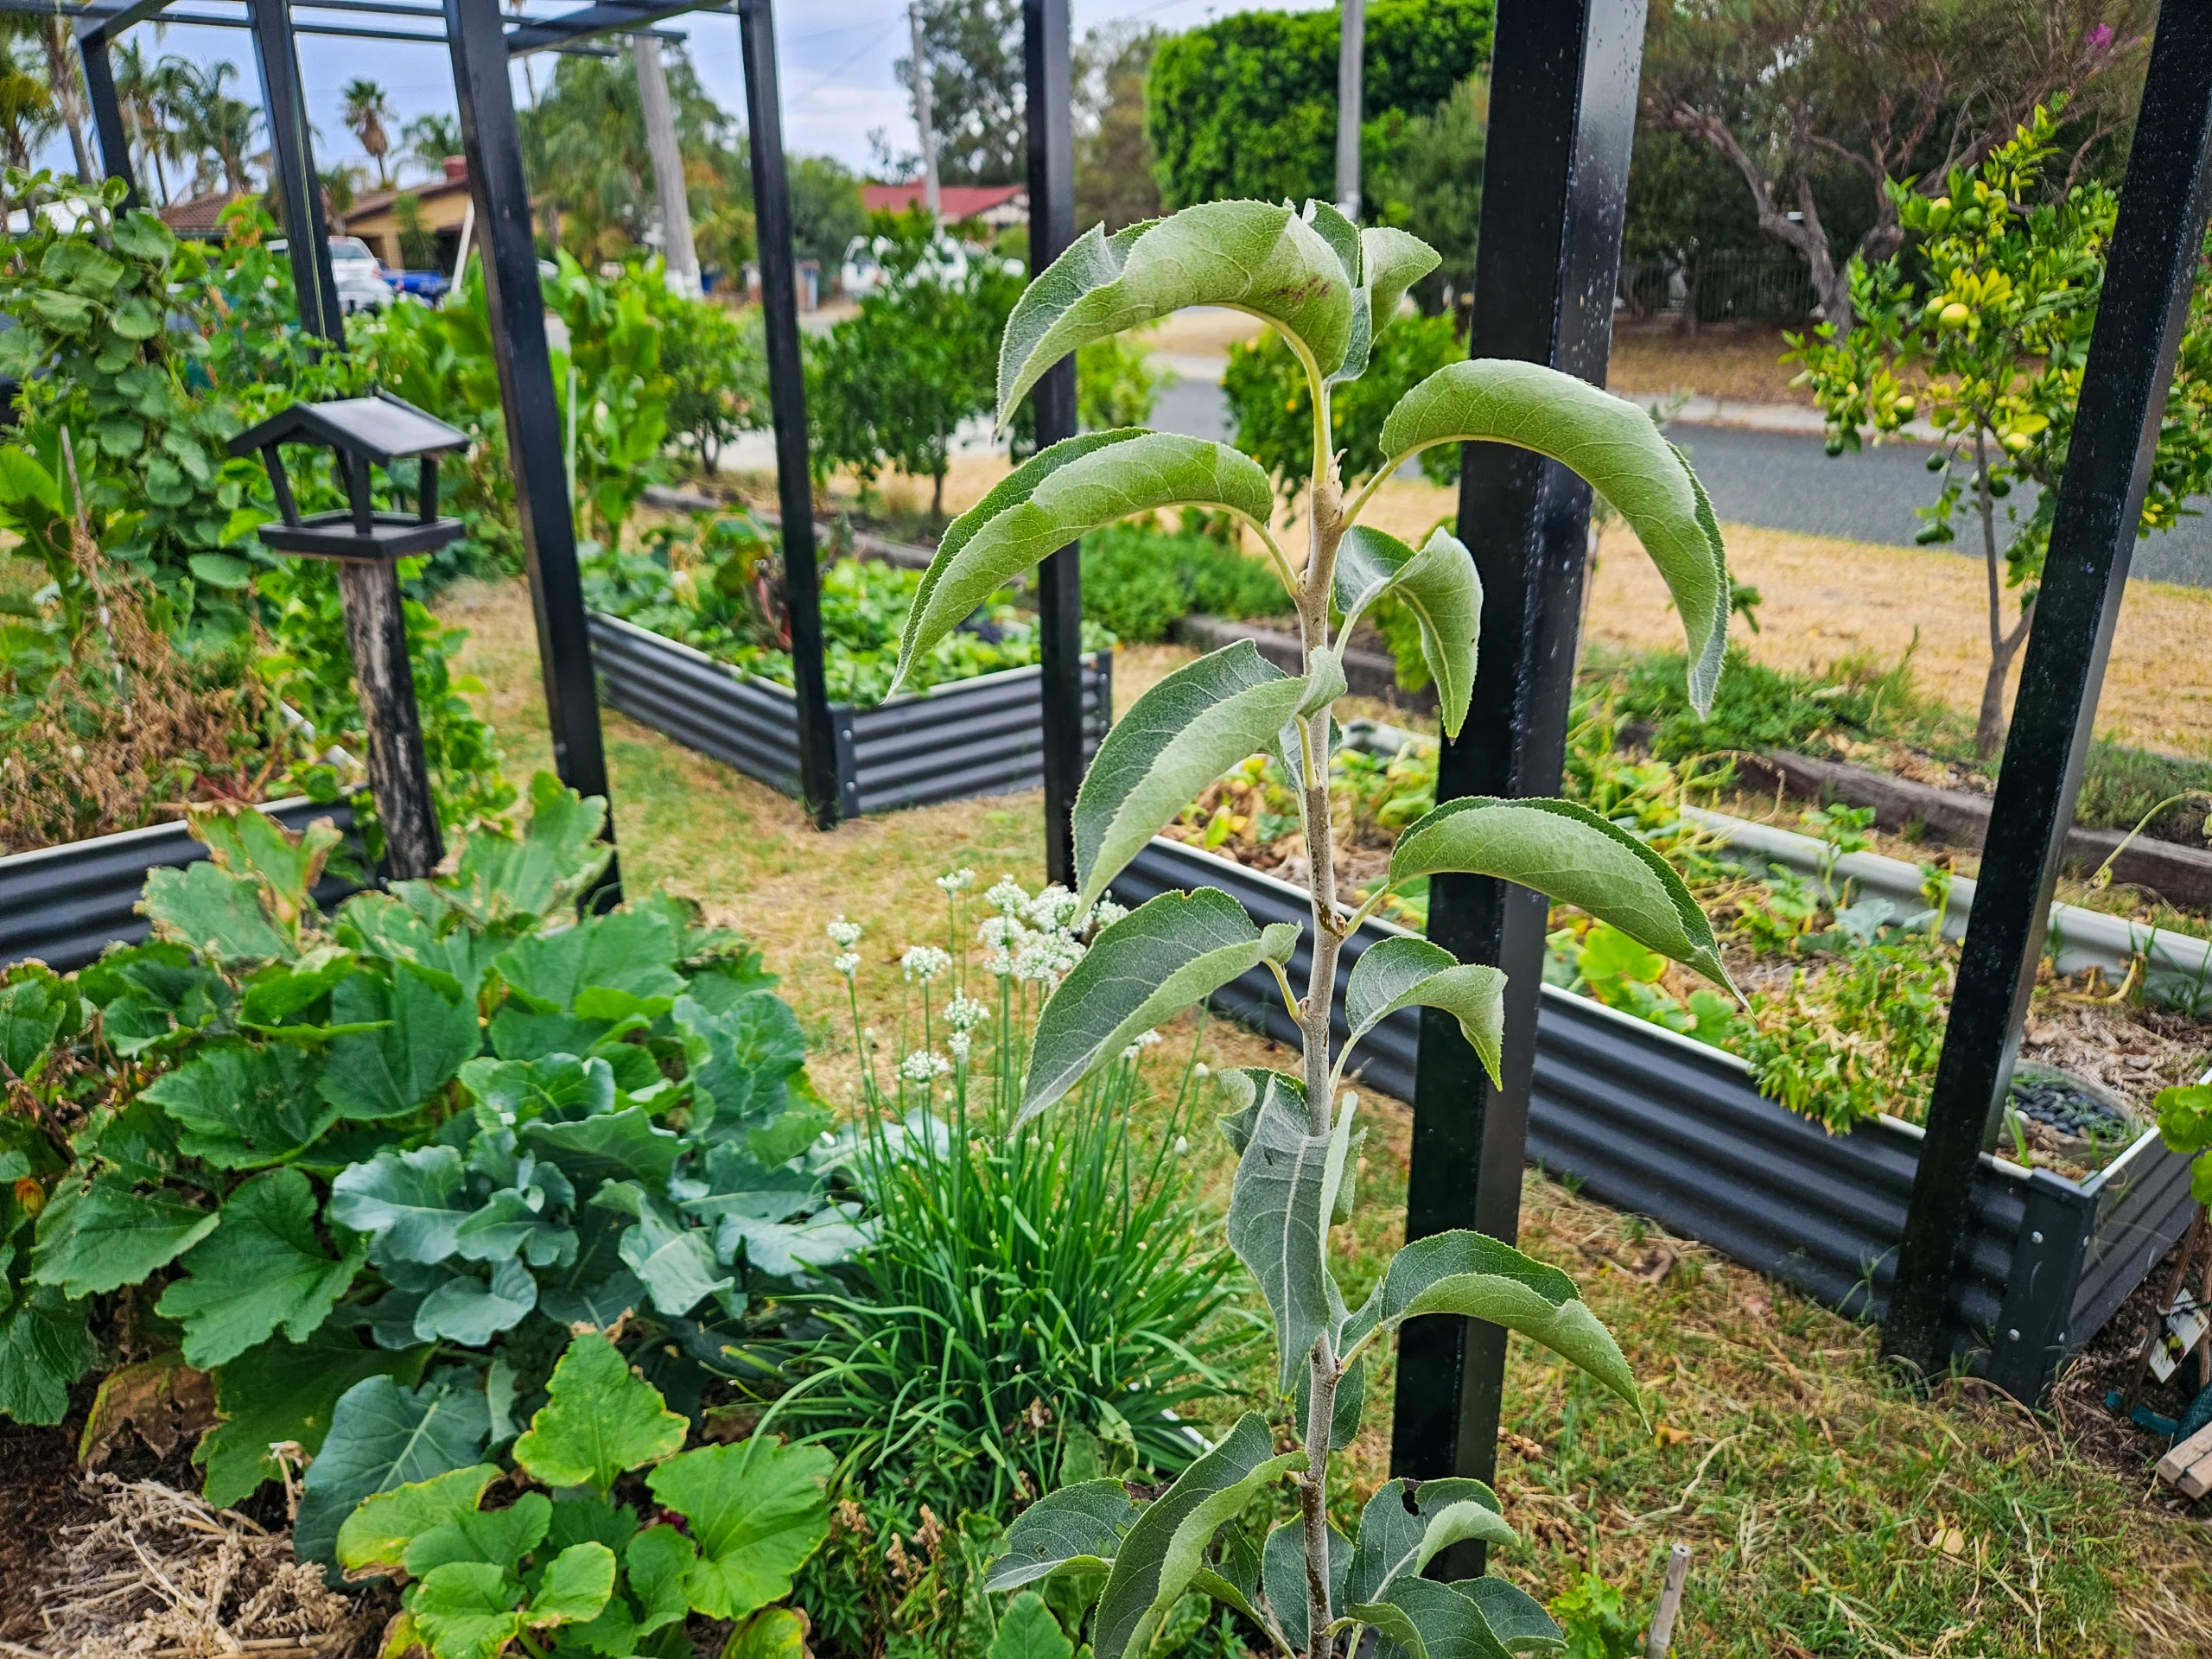
I first became inspired by this style of gardening after creating an edible fence screen using food forest style planting in my backyard, which we will take a look at soon, but more recently, I have taken over the front! If you have been a regular YouTube subscriber, you would have seen the process of how we have transformed my front yard from a bare lawn to a mini high-density food forest with lots of tropical fruit trees, raised garden beds to grow annual veggies and a mini wildlife pond home to small fish and frogs. Below is a current update on where we are now!
Tropical Fruits Growing in my Front Yard
I started off this front garden by planting evergreen hardy fruit trees to create an edible screen that could withstand the temperatures out here. I have a lime, feijoa, blood orange, guava, mandarin, more feijoa and a lemonade. I have since gone in and added 3 mangos, an avocado, dwarf grimichama, mulch plants, nitrogen fixing plant and edible ground covers.
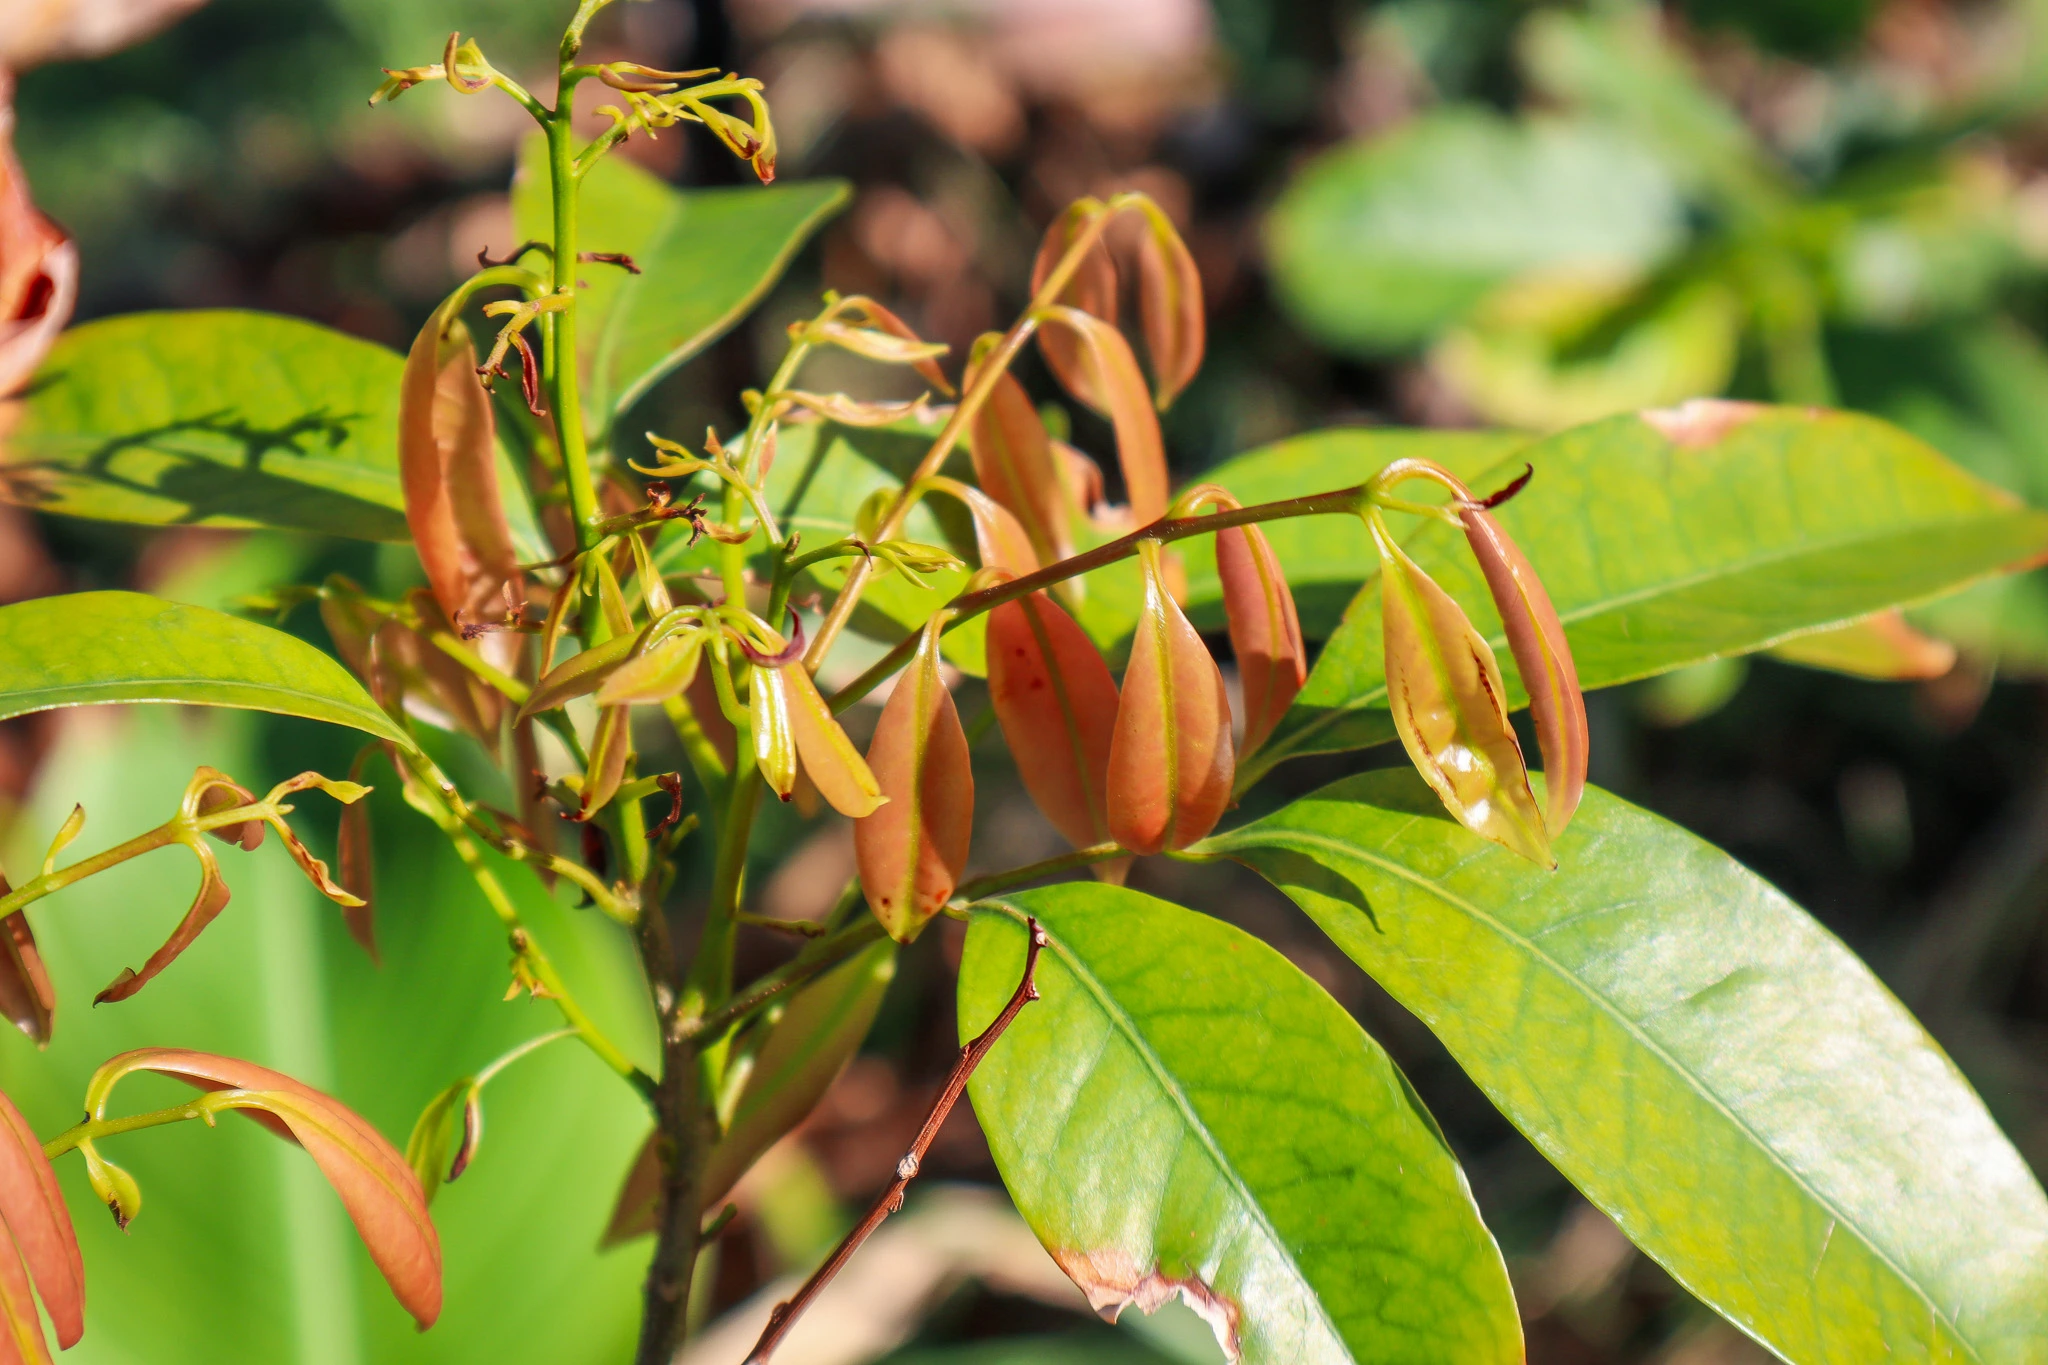
I have 4 different custard apples now planted, and I definitely have a passion for collecting new varieties of these. It’s a fruit that was rare back home in NZ, but we could grow the Cherimoya, and I was lucky enough to be introduced to that by a rare fruit grower when I was a kid. Now being in Perth, I am lucky enough to have the heat to grow more varieties, and I have (so far) Africa Pride, Paxton Prolific, Hilary White and a Bullock’s Heart, along with a bunch of seed-grown ones. These tend to lose their leaves a bit in winter, so they let light into my raised bed patch in winter, but in summer, they help keep it cool.
I have two different nashi pears, which are another favourite of mine and fruit well in warmer climates, unlike many other pears.
Some of the other fruit trees I have in the front yard include: Louisa Plum, unknown yellow Plum, multigrafted 4-way Plum (Satsuma, Mariposa, Santa Rosa, unknown), Indian Blood Peach, Lemon Mango, Orange Sherbet Mango, Sweet Tart Mango, Thai Mango, Linda Avocado, Choquette Avocado, Soursop, Starfruit, Lychee and more!
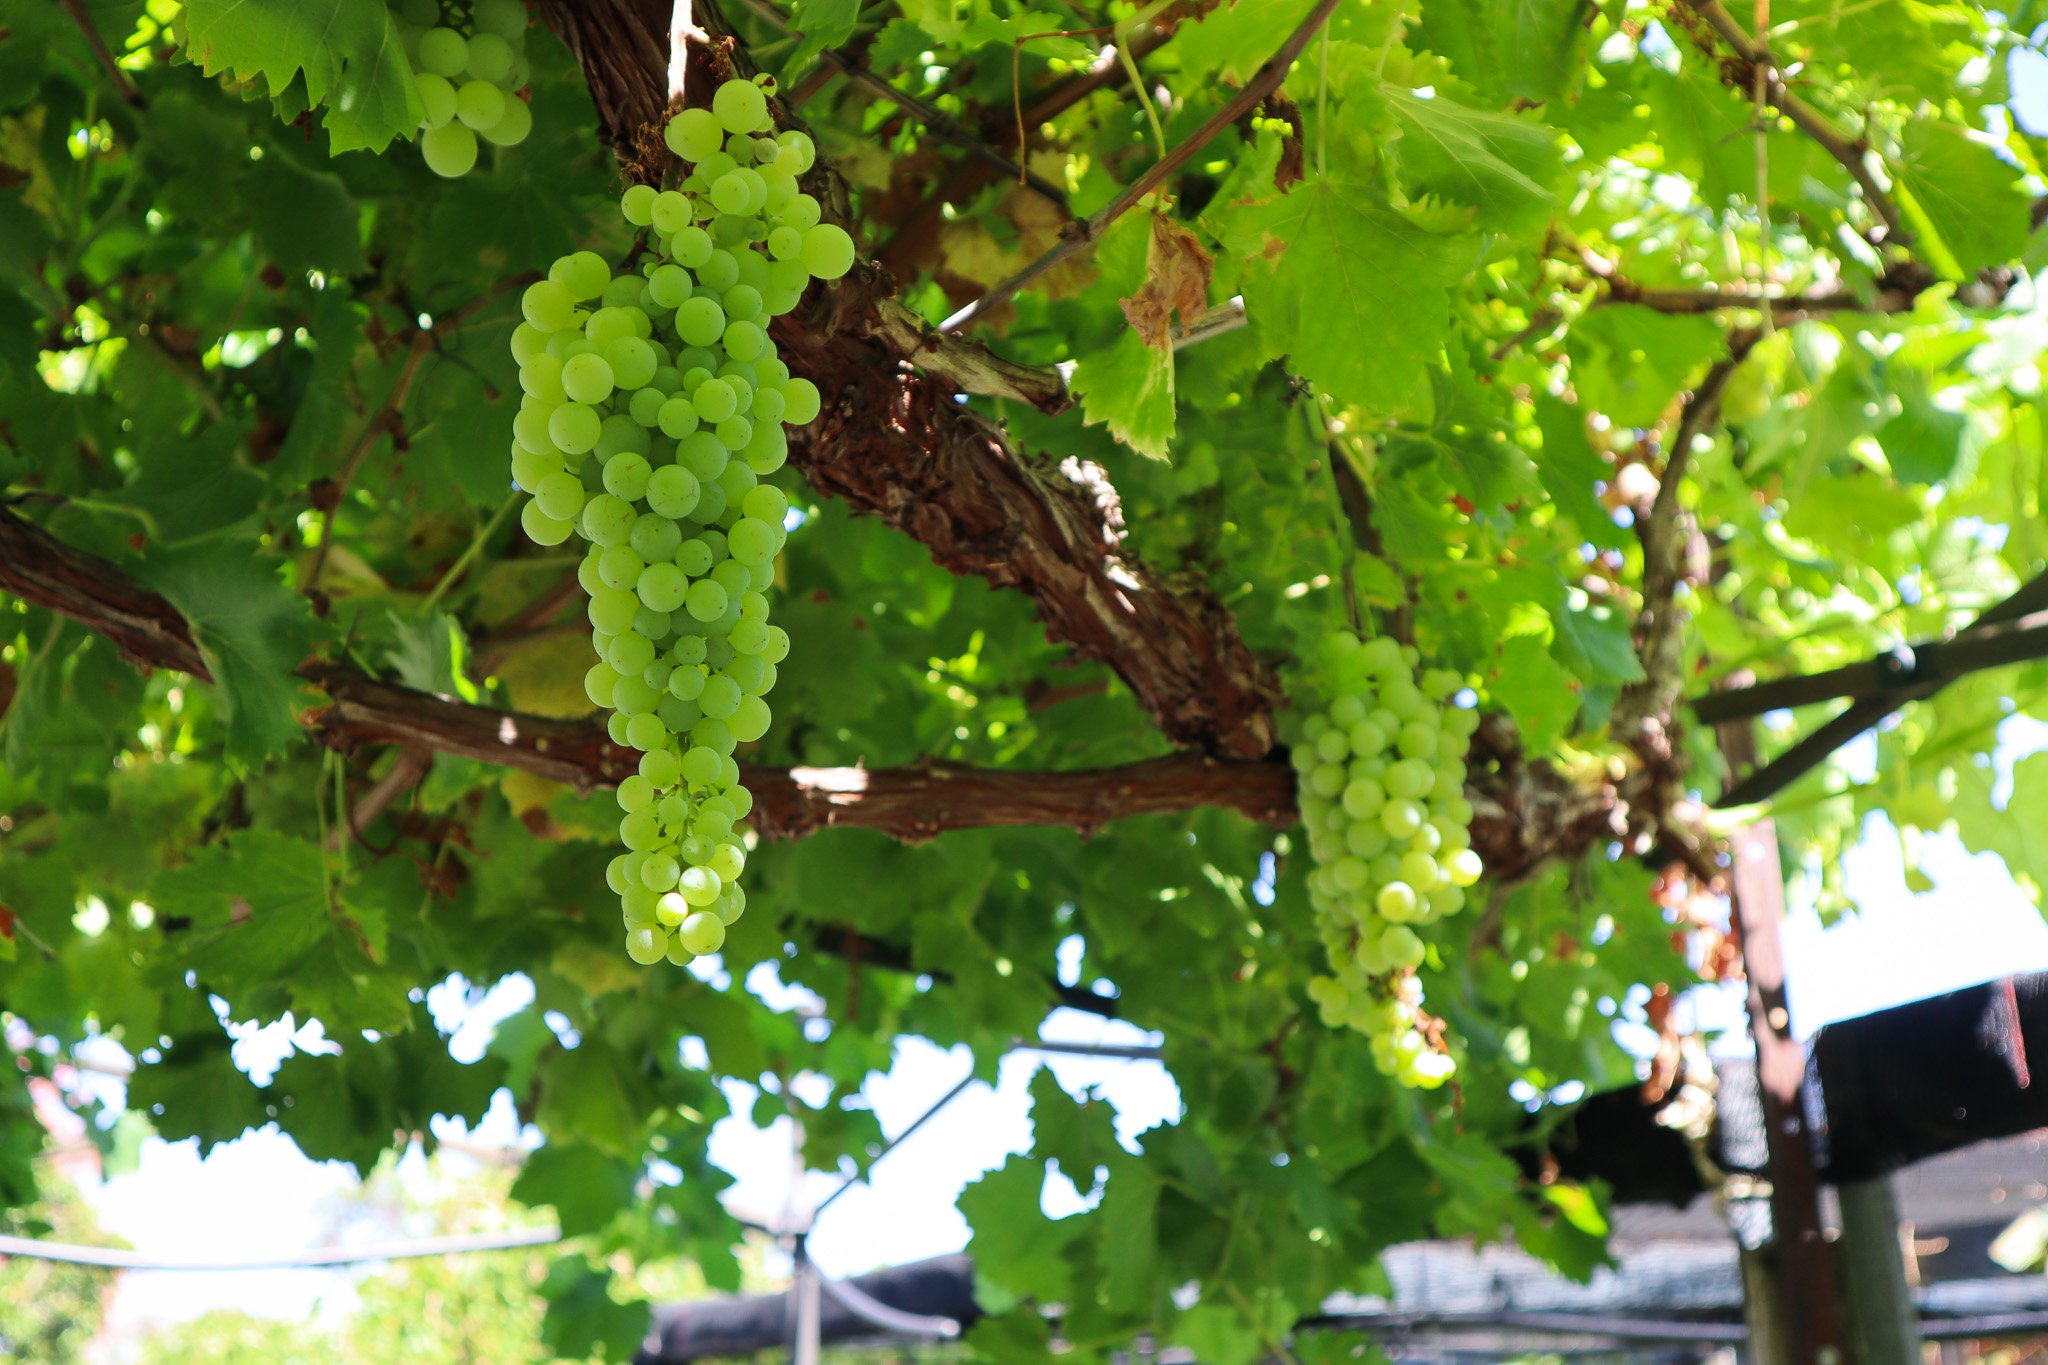
Living Shade: Building a Grape Arbour in Hot Climates
We have also constructed a metal arbour to grow living shade with x4 types of grapes planted. But with such intensely hot and dry summers, the grapes have not done much growing, but I am determined to make my dreams grape arbour happen!
What I’m Growing in my Raised Gardens this Autumn 🌱
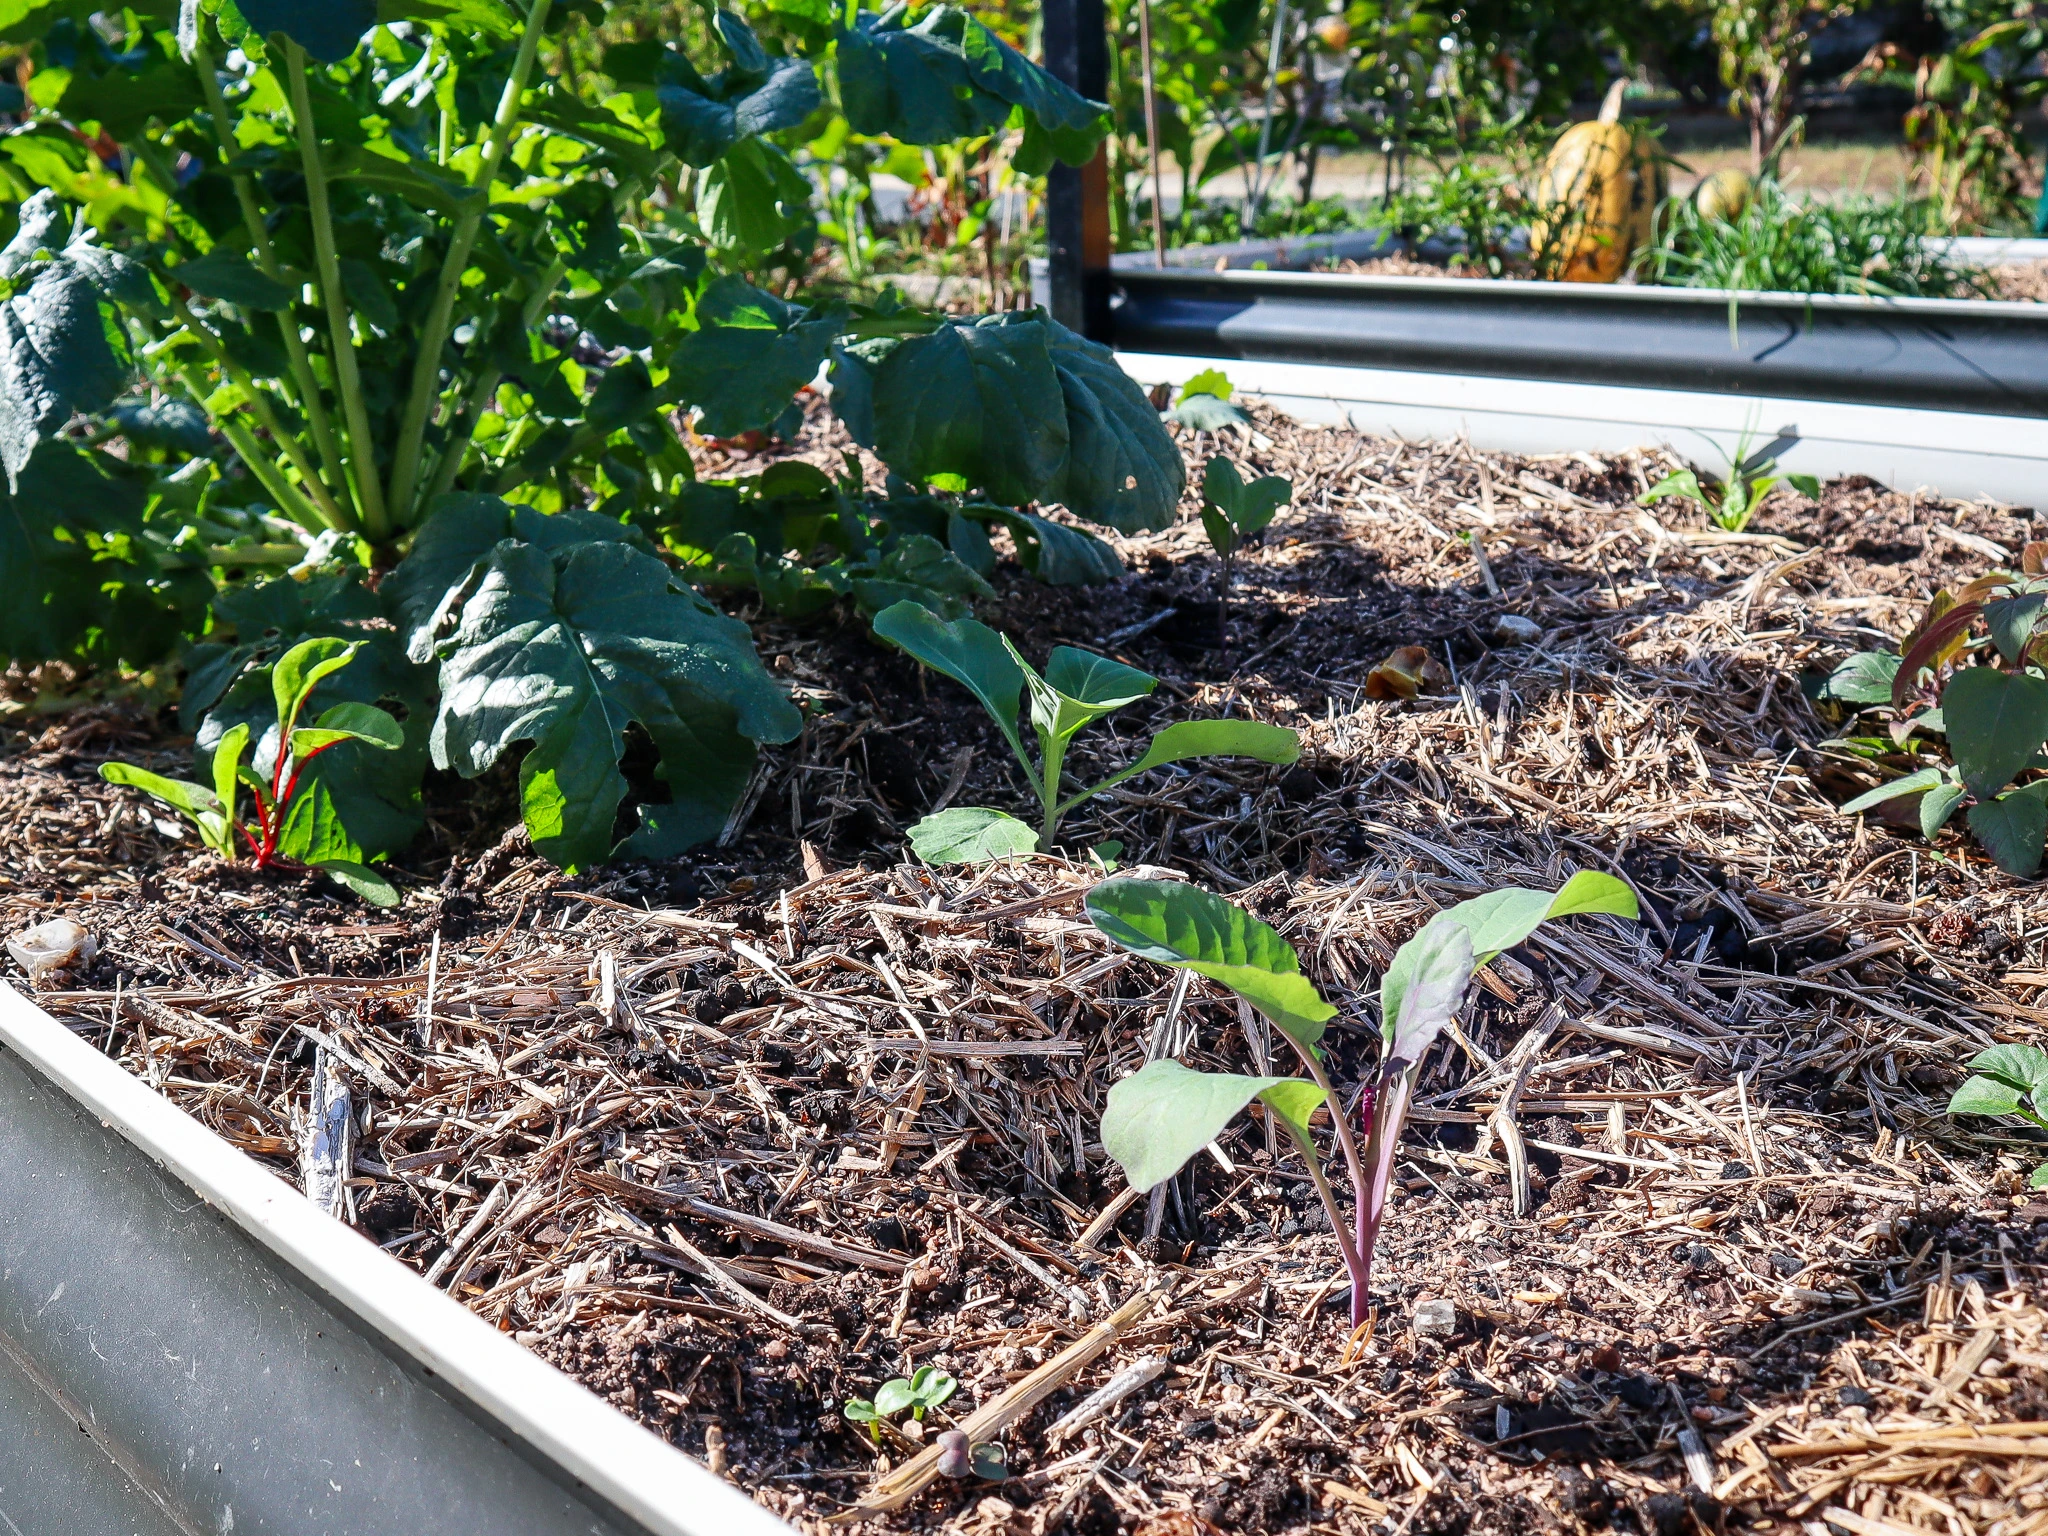
I have only just planted out my raised beds (at the end of Autumn) with seedlings and seeds because it’s just been so hot and dry, it didn’t seem worth it. But the cooler mornings and with rain forecast for this weekend, I think we might be ready to start the cool-season crops.
Just like my fruit tree planting, I also densely plant my raised beds. This helps stop any weeds from growing and gives me lush garden beds full of food. Currently, I have planted:
Edible Flowers ( Pansy/viola, Snapdragon, Dianthus and Calendula)
Edible Flowers for Beauty and Biodiversity
Edible flowers are a non-negotiable in my gardens. I love having the added colour as well as providing food for pollinators and beneficial insects. Plus, by choosing edible flowers, you can also use them to brighten up your meals. It’s a win-win.
Wildlife Pond: Attracting Frogs, Pollinators, and Beneficial Insects
The wildlife pond is getting a lot more shade now with the winter sun lower in the sky. The frogs have mostly disappeared as they go to find more sun or hibernate until warmer temperatures. There are still plenty of tadpoles, but I think these will stay like this until spring and summer because I believe they need more sun to transform. The wildlife pond has been one of my favourite projects out here in the front yard. There’s always so much wildlife to see, and it has become the main hub of my gardens to feed and nourish all my pollinators and beneficial insects.
The Driveway Patch: An Urban Food Forest Extension
Now for an update on my driveway patch! This was a new extension, and I have mainly planted deciduous fruit trees in here. This spot gets lots of hot sun during summer, but in winter, it gets a lot of shade. That’s why choosing deciduous fruit trees is a great idea. They go to sleep during winter, so they don’t mind at all.
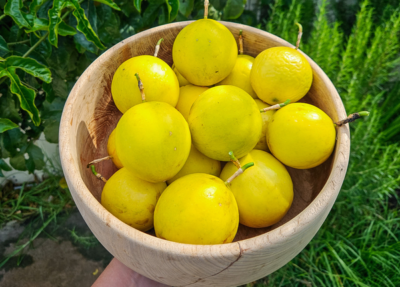
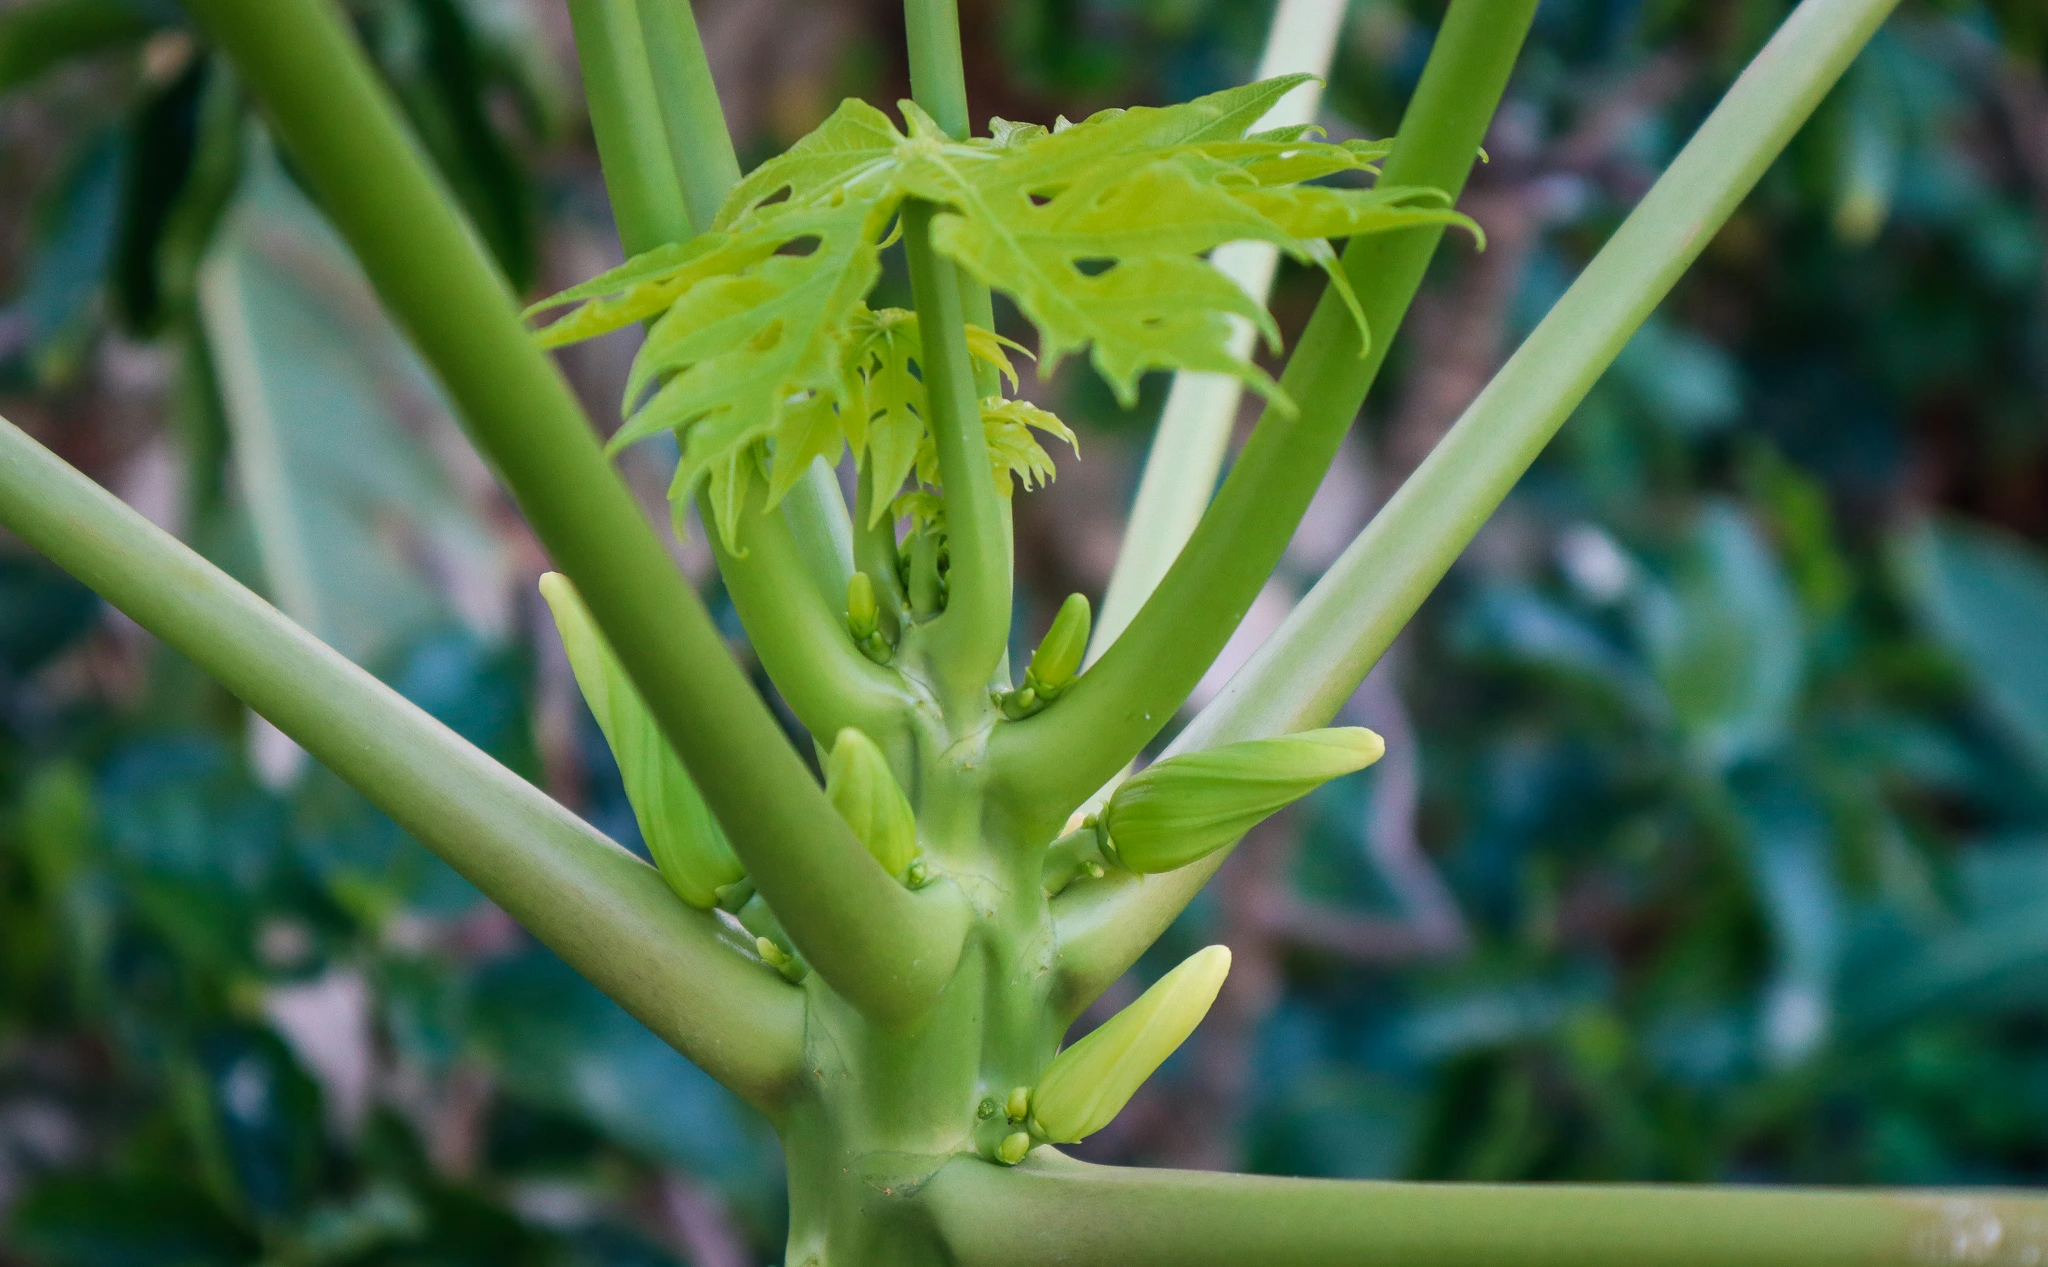
I have planted a seed, growing papaya, and it is thriving! It has started flowing along with another 5 I have planted throughout the rest of my gardens. Papayas grow well from seed and quickly! In warm climates, you can go from seed to harvesting fruit in just 1 year! In cooler climates, you may have to utilise greenhouses for winter. My plan is that this will get nice and tall to act as a bit of a natural umbrella for summer.
Summer in Perth is relentless, and with many days over 40 degrees, this garden will very much appreciate an umbrella. I have been adding more shade plants like this throughout the garden to try and help cool my summer gardens.
Creating Shade and Microclimates in an Urban Food Forest
Using plants strategically is something I have been doing a lot in my gardens.
Creating shade: I have a miringa planted in the middle of my tropical section to create beautiful dappled shade for my Soursop, Starfruit, Lychee and Avocado. I also have native plants such as Hakea that grow in poor soil and have quickly become the tallest plants in my new garden. They offer shade and wind protection, plus stunning flowers that the bees love.
Creating Mulch:Mulch plants are another thing I have throughout my gardens that I use for shade, wind protection and then I can chop them back to let light in and feed the soil and act as moisture retention. These are plants such as Pigeon Pea and Queensland Arrowroot.
Out the back, my original food forest garden has been getting lots of upgrades. I have just planted another mango, this one is the ‘lemon zest’, I also have the ‘Irwin’ and the ‘dwarf palmer’. My biggest seed-grown papaya is flowering, and I am hanging out to see it start to fruit! With more plants starting to flower, hopefully, I get some pollination happening!
In my last video, we took out the lemon tree that was just getting hammered with gall wasp and planted a giant avocado. It’s already pushing new growth, which is a good sign.
Pomegranates are ripe, and I should have harvested them, but I left it too late, and something else has beaten me to it! This Pomegranate has multiple different varieties grafted on it, but so far, just the main Azerbajani has fruited. These are amazing, like nature’s candy!
My bananas are looking good, and the plantain has shot up! My Pinkerton Avocado is looking nice and bushy, and next to that, another seed-grown papaya that has just started to flower. The rollinia is looking rather sad but has started to push all new growth off the side so fingers crossed! Behind that, we have my golden passionfruit growing vertically along the fence and a small sweet granadilla down below that I am cautiously optimistic about.
In my patio nursery, the shade cloth has come down for winter, and I am trying my best to find homes for as many things as I can in the garden. I want to downsize this a lot! I have lots of seed-grown plants here, like mango and custard apple, that I want to use for grafting practice, plus I have blueberries, finger limes and a lot of other things.
I hope you enjoyed this Autumn update of my urban food forest, and make sure you are subscribed to follow along with the progress!
Links included in this post might be affiliate links. If you purchase a product or service with the links that I provide I may receive a small commission. There is no additional charge to you! Thank you for supporting my blog so that I can continue to provide you with free content.
Do you want to grow more fruit and utilise vertical space? Then these 17 fruits that grow on vines will help you not only grow more delicious fruit to eat, but by growing vertically, you can save space and create more shade to protect your garden and more delicate plants during the hot months. I’m sharing my favourite fruits that grow on vines – perfect for urban food forests, backyard trellises, and small-space gardens. Whether you’re new to gardening or looking to expand your edible garden vertically, there’s something here for every garden.
If you’re looking to make the most of your vertical space, growing fruit on vines is one of the easiest and most rewarding ways to do it. From delicious grapes to exotic, rare passionfruit, there are so many climbing fruits that not only taste amazing but also help create lush, edible walls in your garden.
Why Grow Fruits on Vines?
Vine fruits are great space-savers. They climb up rather than spread out, meaning you can grow more food in less ground space. They’re ideal for small gardens, balconies, or food forests where every layer of the garden is put to work. Plus, many vine fruits are perennial or self-seeding, making them low-maintenance once established. I also love them for fence screening or adding more green to the backyard, with walls of green vines covered in fruit, they are not just productive, they’re beautiful too!
1. Passionfruit
One of my absolute favourite perennial fruiting vines!Passionfruit vines are fast-growing, evergreen in warmer climates, and produce deliciously tangy fruit. They’ll need strong support, plenty of sun, and a bit of pruning to keep them in check. Passionfruit can also be easily grown from seed to fruit in just 1-2 years.
Growing Tips: Plant in well-drained soil with plenty of compost, and water regularly during the growing season. Allow a lot of water during the summer season to allow them to produce abundant crops.
2. Grapes
Whether you’re growing table grapes or wine grapes, these deciduous vines are classic for a reason. Grapes love full sun and rich, well-drained soil. In winter, prune heavily to encourage fruiting in spring and summer. Grapes are great for areas that get full sun in summer but maybe get more shade in winter(because they are asleep). They can also be used to help offer shade to your veggie patch in summer and let light in during winter when they lose their leaves. I have mine planted over my main veggie patch on a strong arbour.
Growing Tips: Prune annually to control growth and increase yield. Provide sturdy support and full sun.
3. Choko (Chayote)
A vigorous vine that’s great for covering fences or pergolas, but must be kept in check with regular pruning. Chokos produce crisp, mild-flavoured fruit that’s incredibly versatile in the kitchen. Great for making preserves or used to bulk up pies as a substitute for apple or potato! They love warmth, regular watering, and space to sprawl. Chokos are a great option for providing summer shade to your garden in areas like Perth that have scorching hot summer days.
Growing Tips: Plant a whole chayote fruit in rich, moist soil and give it something to climb. It loves heat and humidity.
4. Kiwi Fruit
A beautiful deciduous vine with fuzzy fruit packed with vitamin C. Kiwi fruits need a male and female plant to produce fruit, and prefer a cold winter and warm summer. Provide sturdy support, these vines are strong!
Growing Tips: Train along a strong trellis and prune yearly. Kiwi prefers rich, well-drained soil and full sun (although protect during their first year in hot climates like Perth)
5. Cucamelon
These tiny watermelon lookalikes are actually closer to cucumbers. They’re crunchy, a little tangy, and perfect for pickling or snacking. Cucamelons are easy to grow from seed and do best in full sun with something to climb.
Growing Tips: Easy to grow in warm climates with full sun. Trellis them like cucumbers and harvest regularly.
6. Blackberry
While technically a bramble, many blackberry varieties can be trained like vines. Choose thornless varieties for ease of harvest, and plant them along fences or trellises. Great for attracting pollinators too.
Growing Tips: Plant in full sun with rich, well-drained soil. Train along a fence or wire support.
7. Raspberry
Like blackberries, raspberries can be trained vertically. They’ll reward you with handfuls of juicy berries and are surprisingly low-maintenance. Summer or autumn fruiting varieties are available depending on your climate.
8. Kiwi Berry
Kiwi berries are like miniature kiwifruits without the fuzz — bite-sized, smooth-skinned, and bursting with sweet, tropical flavor. These hardy vines are a great option for gardeners in cooler climates, and once established, they’re prolific producers. Unlike regular kiwis, you can pop these straight into your mouth without peeling! The vines are vigorous climbers and benefit from strong support and annual pruning.
Growing Tips: Some Kiwi berries need both a male and female plant for pollination. Plant them in well-drained soil with plenty of sun and compost, and keep them well-watered in dry periods. Patience pays off — they usually start fruiting in their third year, but reward you with loads of delicious fruit for years to come.
9. Giant Granadilla (Passiflora quadrangularis)
Giant Granadilla is the largest of the passionfruit family, producing fruit that can grow over a foot long! Its flavour is mild and slightly sweet, with edible pulp that can be eaten fresh, juiced, or added to desserts. One unique feature is that the white inner rind (or pith) is also edible when cooked, often used in stews, curries, or candied as a sweet treat. The plant also produces large, show-stopping flowers, making it both productive and ornamental. It’s ideal for gardeners who want something bold, tropical, and a little bit out of the ordinary. This one is tricky to grow and needs a warm tropical climate or a greenhouse to thrive.
Growing Tips: Plant in full sun and well-draining, compost-rich soil. This vigorous vine needs a very strong support structure and plenty of room to spread. Keep it well-watered during hot weather and feed regularly to support its large fruit. It prefers warm, frost-free climates but can be grown in large containers and moved to shelter if needed. Prune after fruiting to encourage new growth and airflow.
10. Dragonfruit (Pitaya)
A striking cactus vine that needs support and warmth. Great for hot and dry areas of your garden. Dragon fruit plants produce stunning flowers followed by bright pink or yellow fruit with speckled flesh. Perfect for tropical or subtropical gardens. Prune regularly to shape the plant and encourage flowering. With a bit of patience and care, you’ll be rewarded with stunning blooms and unique, nutrient-packed fruit.
Growing Tips: Choose a sunny, sheltered spot with well-draining soil. Water deeply but allow the soil to dry out slightly between waterings — too much water can lead to rot.
11. Loofah (Luffa)
While often grown for its spongy interior, young loofah fruits are edible when cooked. This vine loves the heat and needs a long growing season. Let a few mature fully for bath sponges and save the rest for dinner!
Growing Tips: Start from seed in spring. Let fruits mature fully on the vine if you want to harvest them as sponges.
12. Pumpkin
Though typically considered a ground crop, pumpkins will happily climb a strong trellis if you support the fruit. This is a great way to save space and get a better shape on the pumpkins too. Growing vertically can help reduce pest pressure and increase airflow. Choose smaller varieties to help reduce the risk of the stems breaking off the vine. Add small hammock supports to the fruit if you think they are too heavy.
Growing Tips: Plant in mounds with compost-rich soil. Allow plenty of space or use a strong vertical support for smaller varieties.
13. Melons (Rockmelon, Cantaloupe, etc.)
Melons can also be trellised to save space and reduce rot. Use slings or mesh bags to support the fruit as it grows. They love full sun, compost-rich soil, and warm temperatures. Melons are a great choice for annual fruits that grow on a vine.
Growing Tips: Choose smaller varieties. Consistent watering during the hot months will help get the best-tasting melons.
14. Muscadine Grapes
Native to the southeastern United States, muscadine grapes are hardy, disease-resistant vines that produce sweet, thick-skinned grapes perfect for fresh eating, jams, and winemaking. These grapes love warm, humid climates and are a great low-maintenance option for edible gardens. I haven’t been able to find any yet in Perth, but when I do, I will definitely be testing them out!
Growing Tips: Plant in full sun with well-drained soil. Muscadines prefer slightly acidic soil and benefit from a yearly layer of compost. Provide a strong trellis or arbor to support their vigorous growth. Prune in winter to encourage productive fruiting wood and good airflow. They’re self-fertile, but planting more than one variety can increase yields.
15. Climbing Tomato (Indeterminate Varieties)
While technically a fruiting shrub, indeterminate tomatoes behave like vines and can be grown vertically with supports. Perfect for patios and small garden beds where space is tight. Plant at the back of your container or garden to and train up whilst still utilising the front for short plants like lettuce and carrots.
Growing Tips: Use stakes, cages, or trellises. Pinch off suckers and prune to improve airflow and production.
16. Kiwano (Horned Melon)
This spiky, alien-looking fruit is sure to turn heads in the garden. Native to Africa, Kiwano grows on a vigorous climbing vine and produces bright orange, horned fruit filled with lime-green, jelly-like flesh. It has a mild, refreshing flavor, somewhere between cucumber, kiwi, and banana — perfect for smoothies or eating chilled with a spoon.
Growing Tips: Plant Kiwano in warm, frost-free conditions with full sun and well-drained soil. Like cucumbers, it appreciates regular watering and trellising. Start seeds indoors or direct sow after the last frost. It thrives in hot climates and is drought-tolerant once established.
17. Cucumber
A garden classic, cucumbers are refreshing, fast-growing vine fruits that are perfect for salads, pickling, and even chilled soups. With so many varieties — from crisp slicing cucumbers to cute pickling types — there’s one for every garden. Cucumbers also make a super nutritious and refreshing juice in summer.
Growing Tips: Plant cucumbers in full sun after the danger of frost has passed. They love warmth, regular watering, and rich, well-draining soil. Train them vertically with a trellis to save space and improve air circulation, which helps prevent powdery mildew. Harvest often to keep plants productive.
Tips for Growing Vine Fruits
Support Structures: Use trellises, arches, pergolas, or fences.
Mulch and Compost: Feed the soil with organic matter to keep your plants thriving.
Water Consistently: especially in dry or windy weather.
Prune as Needed: Keep vines manageable and productive.
Growing Fruit Vertically to Save Space
Growing fruits on vines is such a rewarding way to get more out of your space and your harvest. Whether you’re trailing cucamelons up a balcony rail or letting passionfruit take over a fence, vertical gardening adds beauty, abundance, and a lot more greenery to any garden. So pick one (or a few!) of these climbing fruits and get growing – your future self will thank you for the baskets of delicious fruit!
Maximize Garden Space with Espaliered Fruit Trees
While vine fruits are amazing for vertical gardening, espalier fruit trees are another clever way to grow food in tight spaces. Trained flat against a wall or fence, espaliered trees not only save space but also turn your garden into a living work of art. Apples, pears, figs, and even citrus can be grown this way with a little patience and pruning. They make excellent use of sunlight, are easier to harvest, and can add structure and charm to garden borders or sunny walls. If you’re short on space but big on fruit dreams, espalier might just be your next favorite technique!
Links included in this post might be affiliate links. If you purchase a product or service with the links that I provide I may receive a small commission. There is no additional charge to you! Thank you for supporting my blog so that I can continue to provide you with free content.
Edible ground covers are a crucial element in any permaculture or food forest garden. They serve as living mulch, protect and feed the soil, suppress weeds, and give you more food in less space. Whether you’re growing sweet potatoes for stir-fries or nasturtiums for a colorful salad, there are so many ways to make your ground layer both beautiful and functional.
Tired of weeding and bare soil? These low-growing edible plants cover the ground, feed your soil, and you!
By layering your garden with diversity in plant heights, root systems, and edible yields, you’ll create a more balanced, resilient system that supports you and the ecosystem around you. Let your mulch work to feed your soil and your family at the same time!
Welcome back to my garden! Today, we’re diving into edible ground covers that I use in my urban permaculture garden as living mulch. Creating layers in a food forest system helps you grow more diversity (and food) in a small space. Edible ground covers help suppress weeds to create a low-maintenance, sustainable garden that feeds us year-round and doesn’t demand daily upkeep.
We love to go camping, and that means I often leave my garden for days at a time. While I still love growing annuals like tomatoes and cucumbers, they require more hands-on care and come with a higher risk if I’m away. I’ll still grow them, but I want to shift the balance toward a more resilient garden using perennial plants and edible ground covers that do more of the heavy lifting while I’m off exploring.
Watch or read more below
Top 10 Edible Ground Covers for Living Mulch
So, what exactly are edible ground covers? These are low-growing plants that serve multiple functions: they protect the soil, retain moisture, reduce weeds, prevent erosion, and provide food for both humans and beneficial wildlife. In a food forest-style garden, ground covers are just one layer in a multi-tiered system that also includes tall trees, shrubs, flowers, and root crops.
Below are 10 of my favorite edible ground covers that are beautiful, functional, and delicious!
1. Sweet Potato
Sweet potato is hands-down my favorite edible ground cover. Its thick, lush vines protect the soil from the harsh sun and help retain moisture. The leaves are edible and can be used like spinach—sautéed with garlic, tossed in soups and curries, or even made into green wraps. And of course, the roots themselves are a delicious, substantial food source for both sweet and savory dishes. Sweet potatoes are also a haven for beneficial insects and frogs (yes, frogs!). I often find them nesting among the vines, even without a pond nearby. They’re super easy to propagate, making them perfect for sharing, selling, or expanding your patch.
2. Nasturtium
Nasturtiums are another edible ground cover that, once you plant them, you will have forever! Their bright flowers and peppery leaves are both edible and beautiful. I use the leaves in salads and as mini wraps, and the flowers as edible garnishes or pesto ingredients. They self-seed prolifically, meaning once you plant them, they often come back on their own every year. This means they can easily take over parts of your garden, so it’s important to keep them pruned if you want them to remain in one area.
Nasturtiums attract beneficial pollinators and act as a trap crop, luring pests like slugs and snails away from other plants. You can prune back areas to feed to your chickens as a natural pest management system. Even their seed pods are edible—you can pickle them to make homemade capers!
Naturtiums die off during the hot summer months, and so I pair these with sweet potato, which has an opposite growth pattern. Sweet potatoes thrive in summer and die back in the cooler months. These two work well to keep the soil covered all year round.
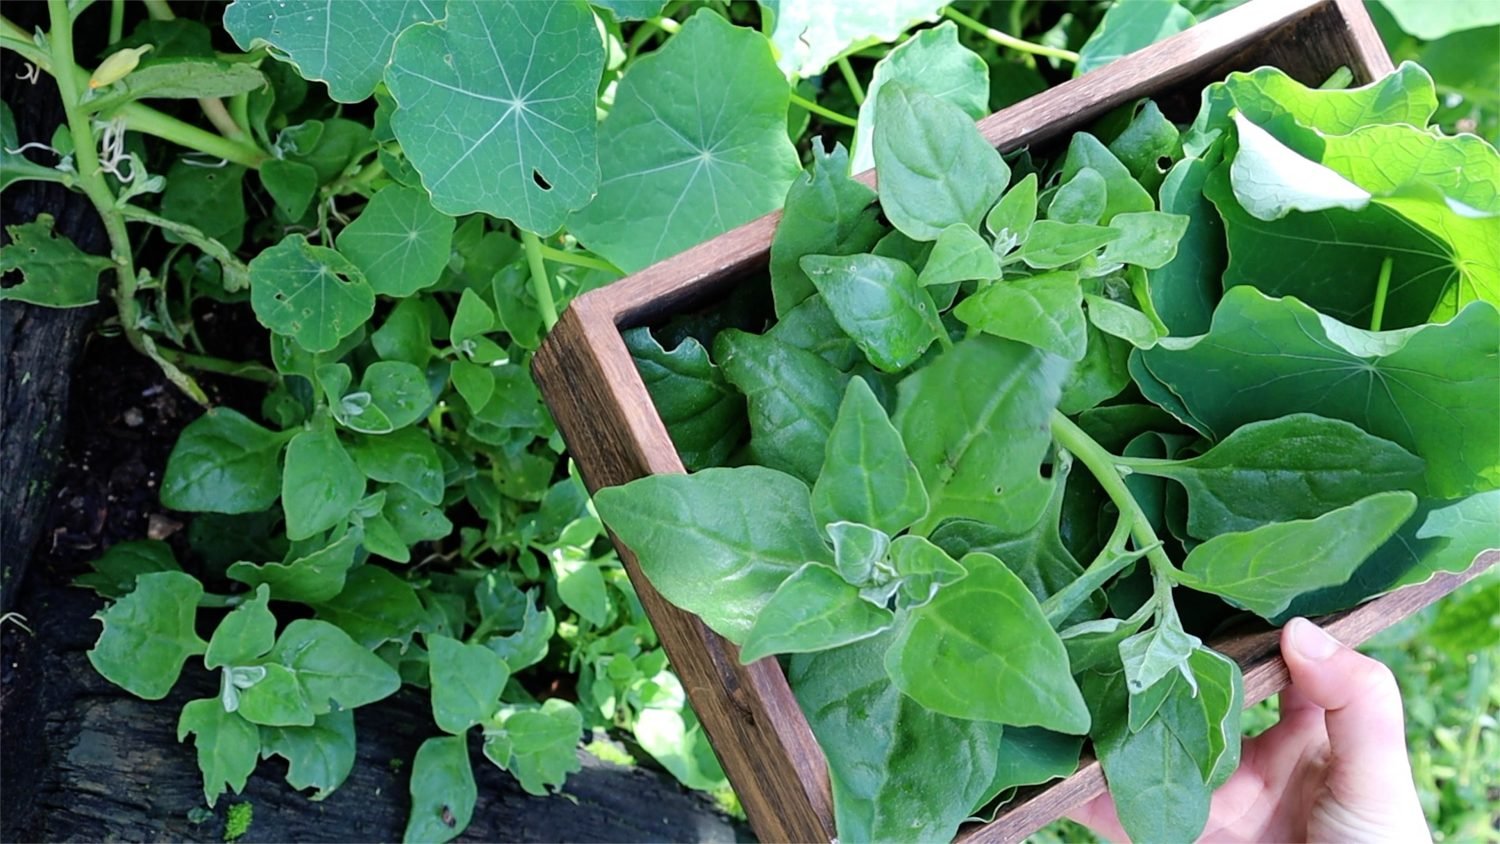
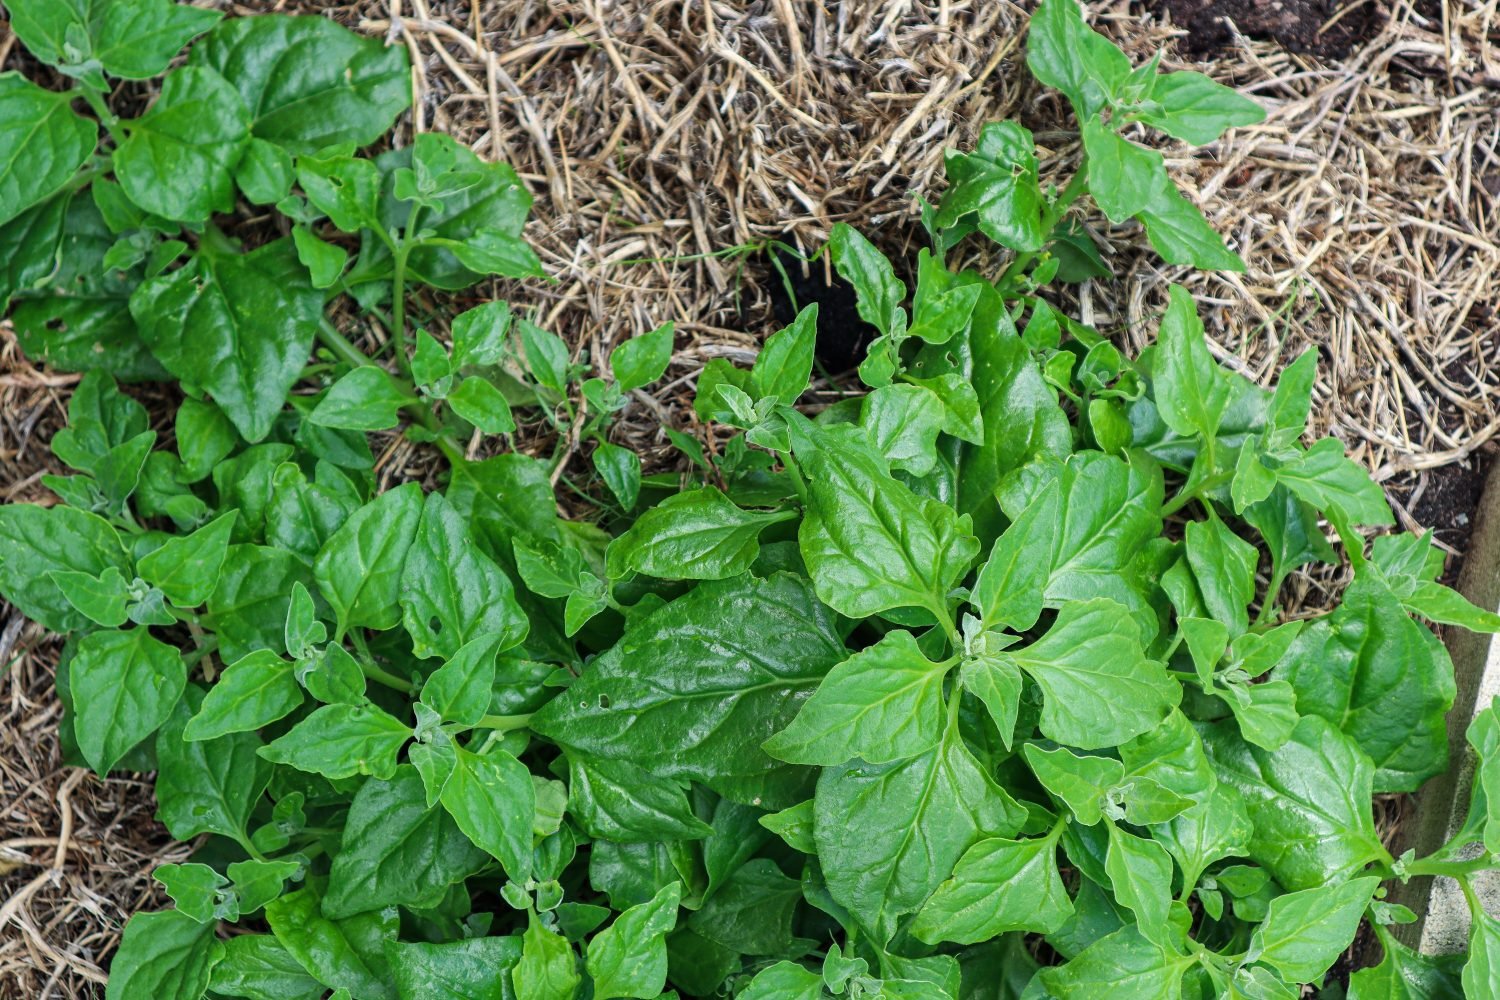
3. New Zealand Spinach (Tetragonia tetragonioides)
New Zealand Spinach is one of my go-to ground covers, especially in warmer weather when traditional leafy greens struggle. It spreads beautifully and creates dense, weed-suppressing coverage. The leaves are succulent and can be eaten cooked, much like regular spinach. It’s drought-tolerant, hardy, and perfect for low-maintenance edible landscaping. Due to its ability to self-seed easily, it can be a good idea to keep it contained.
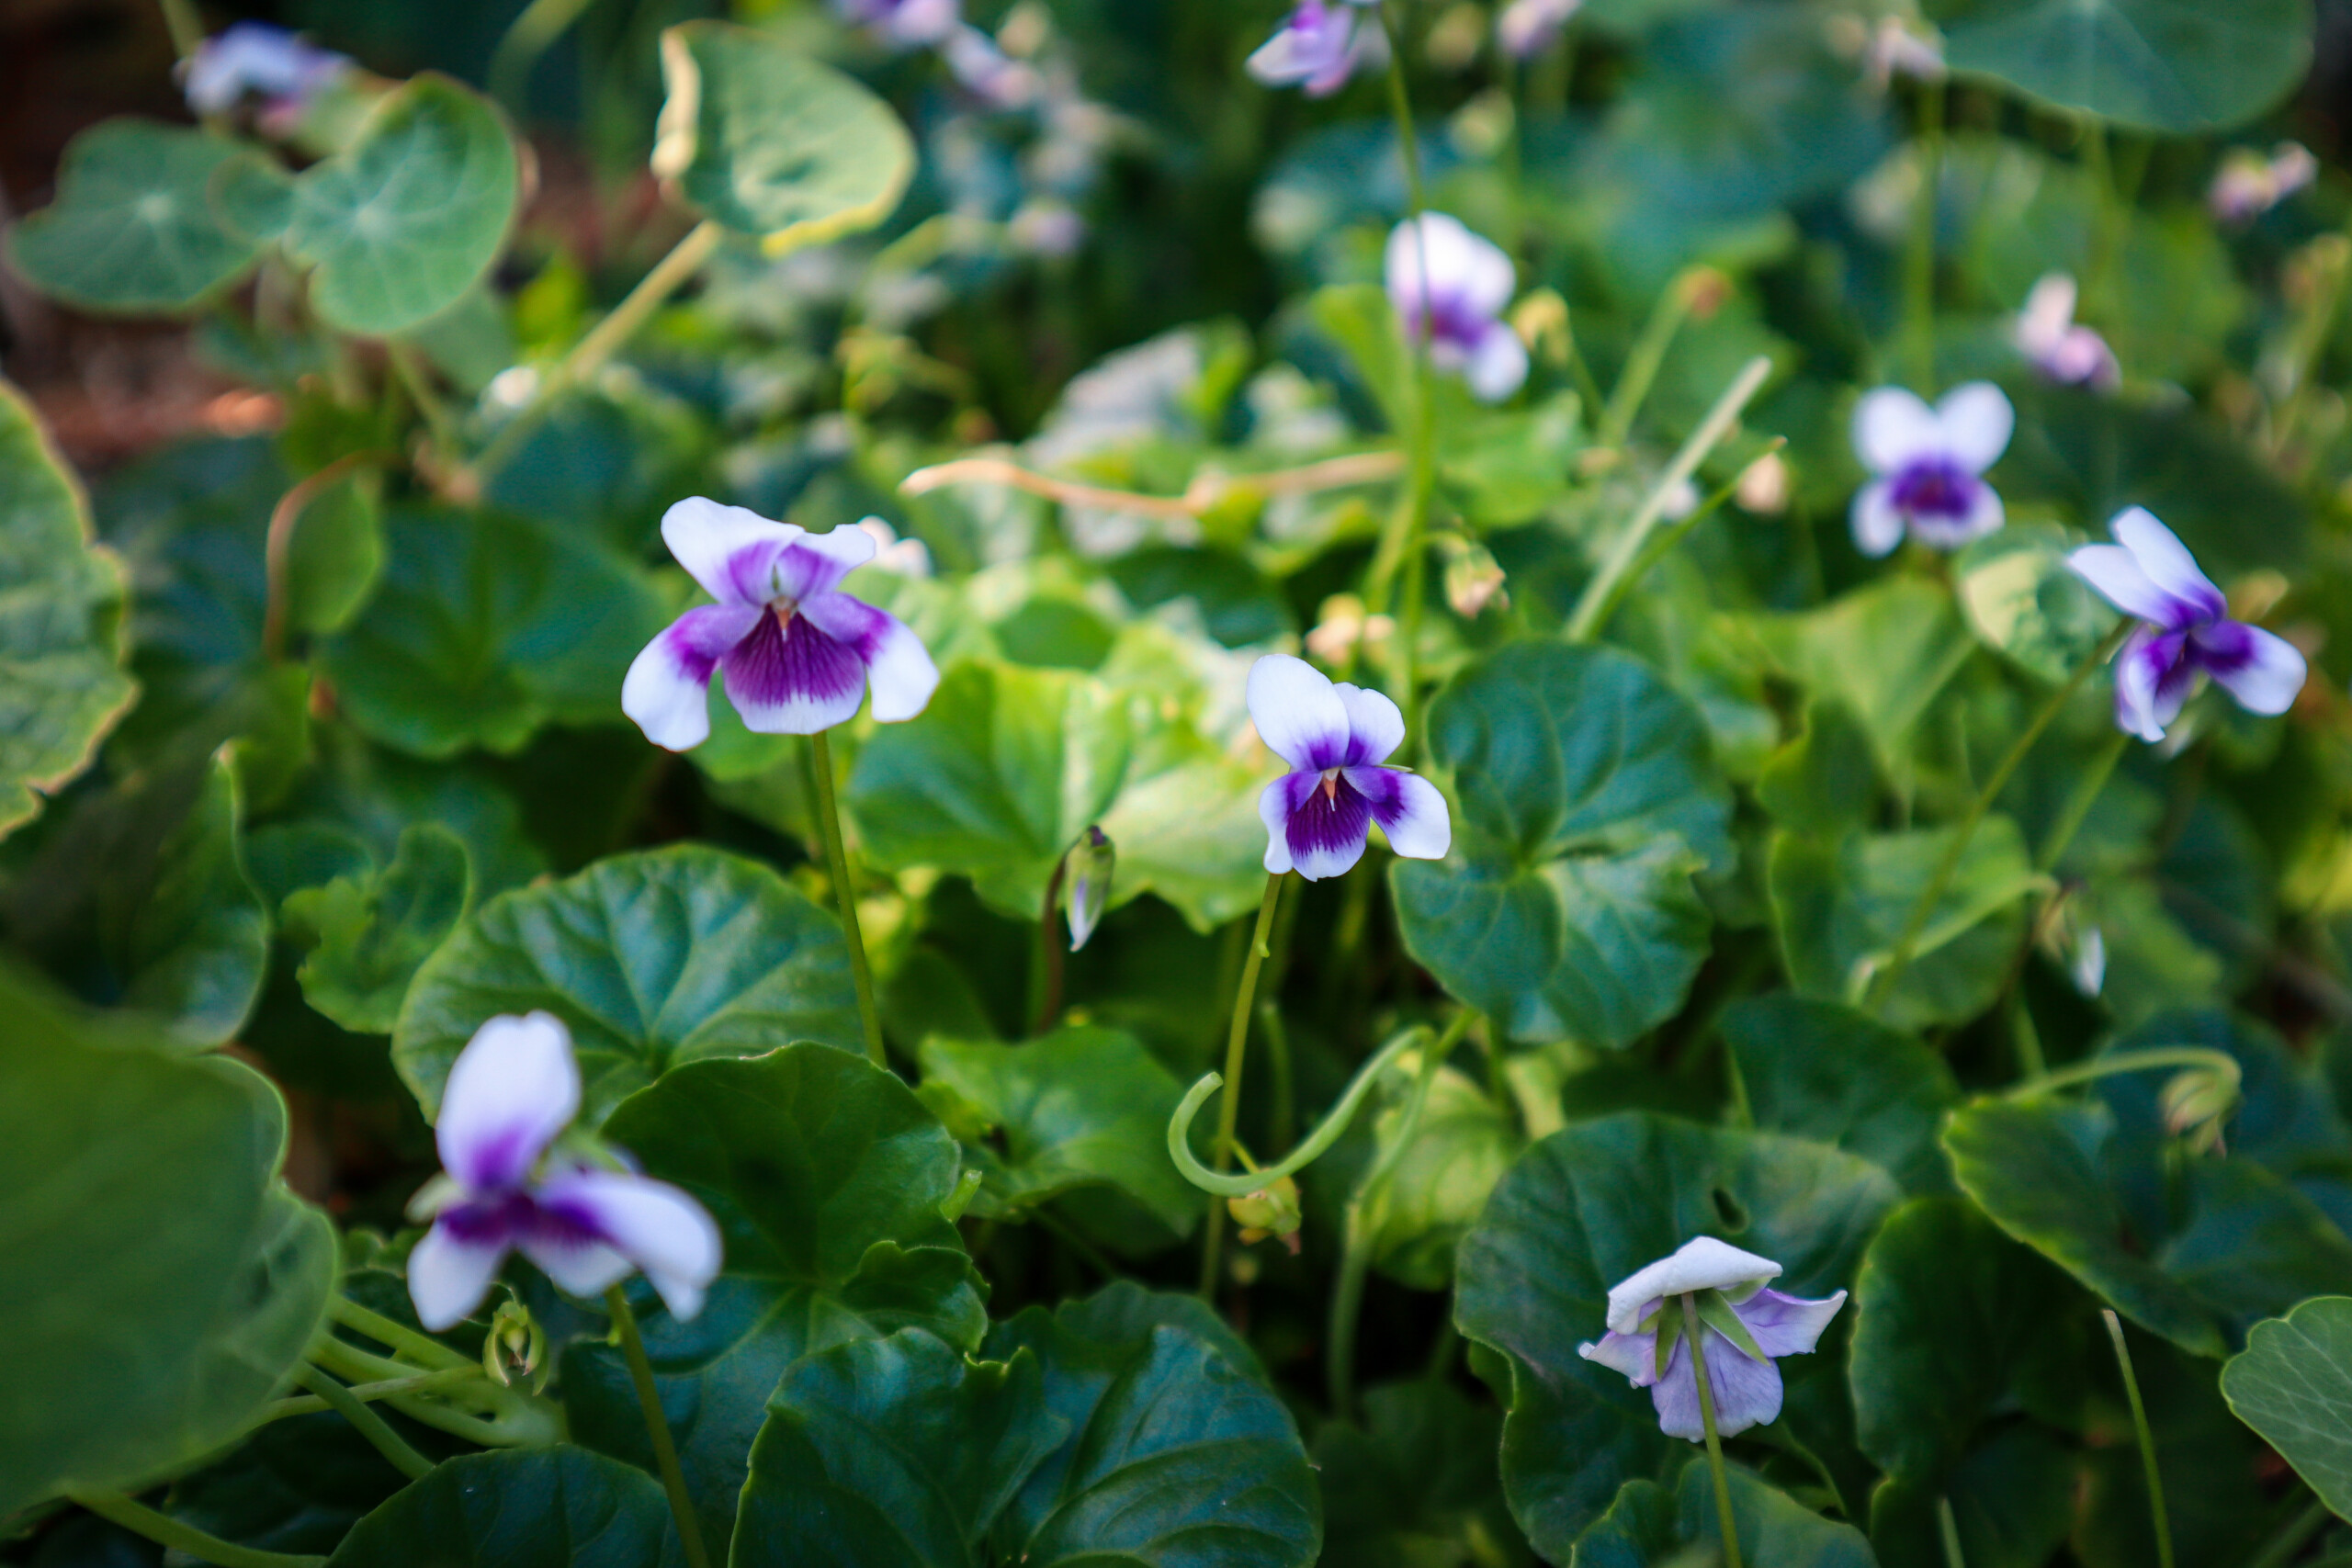
4. Sweet Violet
Sweet violets (Viola odorata) make a lovely ground cover for shady areas, which become more common as fruit trees mature and cast more shade. They have heart-shaped edible leaves and delicate purple flowers that make beautiful decorations for cakes and salads. While I usually use the flowers more than the leaves, the entire plant helps retain soil moisture and suppress weeds, making it an excellent living mulch.
5. Strawberries
Strawberries are a classic edible ground cover that needs little introduction. They spread easily, especially alpine varieties, and can handle partial shade. While their leaves and flowers are edible, the fruit is the real star. Just note they do better in sunnier patches of your garden.
6. Prostrate Rosemary
This low-trailing form of rosemary hugs the ground and is well-suited to hot, dry, sandy, or rocky soils. It’s evergreen, hardy, and incredibly useful in the kitchen. I love having rosemary nearby to flavor dishes, and the edible flowers are great for attracting bees. It also has a host of medicinal benefits—anti-inflammatory, digestive support, and calming properties.
7. Thyme & Oregano
Thyme and oregano are aromatic culinary herbs that make wonderful low-growing ground covers in sunny areas. Their spreading habit helps protect the soil, and both are drought-tolerant and resilient. These herbs can be used fresh or dried for flavoring food, making teas, and for natural remedies. Their tiny flowers also attract pollinators to your garden.
8. Yarrow
Yarrow is a powerhouse plant often overlooked as an edible. While the leaves can be used in teas or medicinally (always research before consuming), their greatest strengths in the garden are as a soil protector with dense fern-like leaves and a pollinator magnet. It has deep roots that help break up compacted soil and draw nutrients up to the surface, improving fertility over time. It sends runners underground, so it’s a good idea to treat this plant like you would mint and keep it contained to one area.
9. Chamomile
Chamomile creates a fragrant, low-growing cover that’s sometimes used as a lawn substitute. It’s most well-known for its daisy-like flowers, which are harvested for calming teas that support sleep and digestion. It thrives in sunny areas and adds a beautiful, soft texture to garden beds.
10. Red Clover
Red clover is one of those quiet achievers in the garden, it’s beautiful, useful, and so easy to grow. I love using it as a living mulch in my food forest because it grows low to the ground, helps suppress weeds, and is constantly feeding the soil with nitrogen through its roots. The bees absolutely adore the flowers, and if you’re into herbal teas, the blossoms are edible and can be harvested and dried too! It’s the kind of plant that gives so much without asking for much in return—perfect for filling in those bare spots while still being productive and pretty.
Many common weeds are edible and make great opportunistic ground covers. Purslane, for example, has succulent leaves rich in omega-3 fatty acids and grows rapidly to fill bare spots. Chickweed and dandelion also have edible and medicinal parts. While these can spread quickly, learning to identify and harvest them helps you turn a problem into a resource.
Living Mulch: Edible Ground Covers That Feed You and Your Garden
Start small by adding one or two edible ground covers to your garden beds or under fruit trees, and watch how quickly they transform the space. These hardworking plants not only fill gaps and reduce maintenance, but they also invite more life into your garden, as a wildlife habitat. Whether you’re building a full food forest or just looking to get more out of your patch, edible ground covers are one of the simplest ways to grow smarter, not harder.
Are you growing any edible plants as living mulch? Let us know below 👇
Links included in this post might be affiliate links. If you purchase a product or service with the links that I provide I may receive a small commission. There is no additional charge to you! Thank you for supporting my blog so that I can continue to provide you with free content.
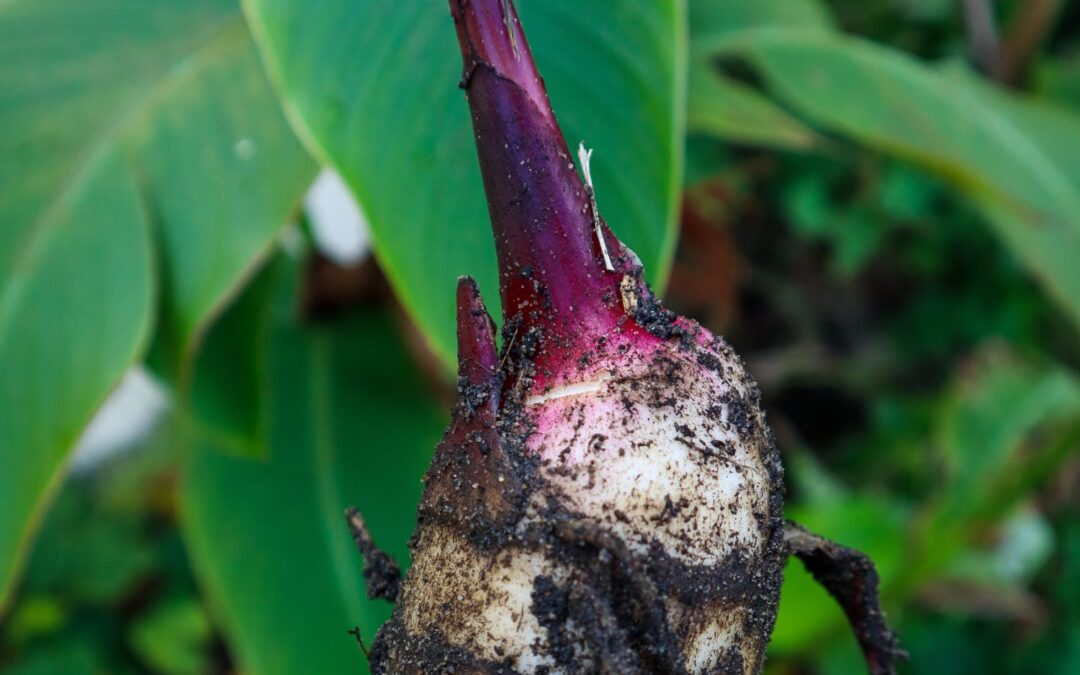
Edible canna or Queensland Arrowroot (Canna edulis) is a highly resilient, fast-growing plant that thrives in a variety of conditions, making it a valuable addition to any permaculture or sustainable garden. With its striking tropical foliage, edible rhizomes, tropical lush green leaves, and excellent mulching properties, edible canna is one of my favourite edible mulch plants to grow. Find out more about how to grow and use this incredible permaculture plant plus, where and how to find it!
Benefits of Growing Edible Canna in a Sustainable Garden
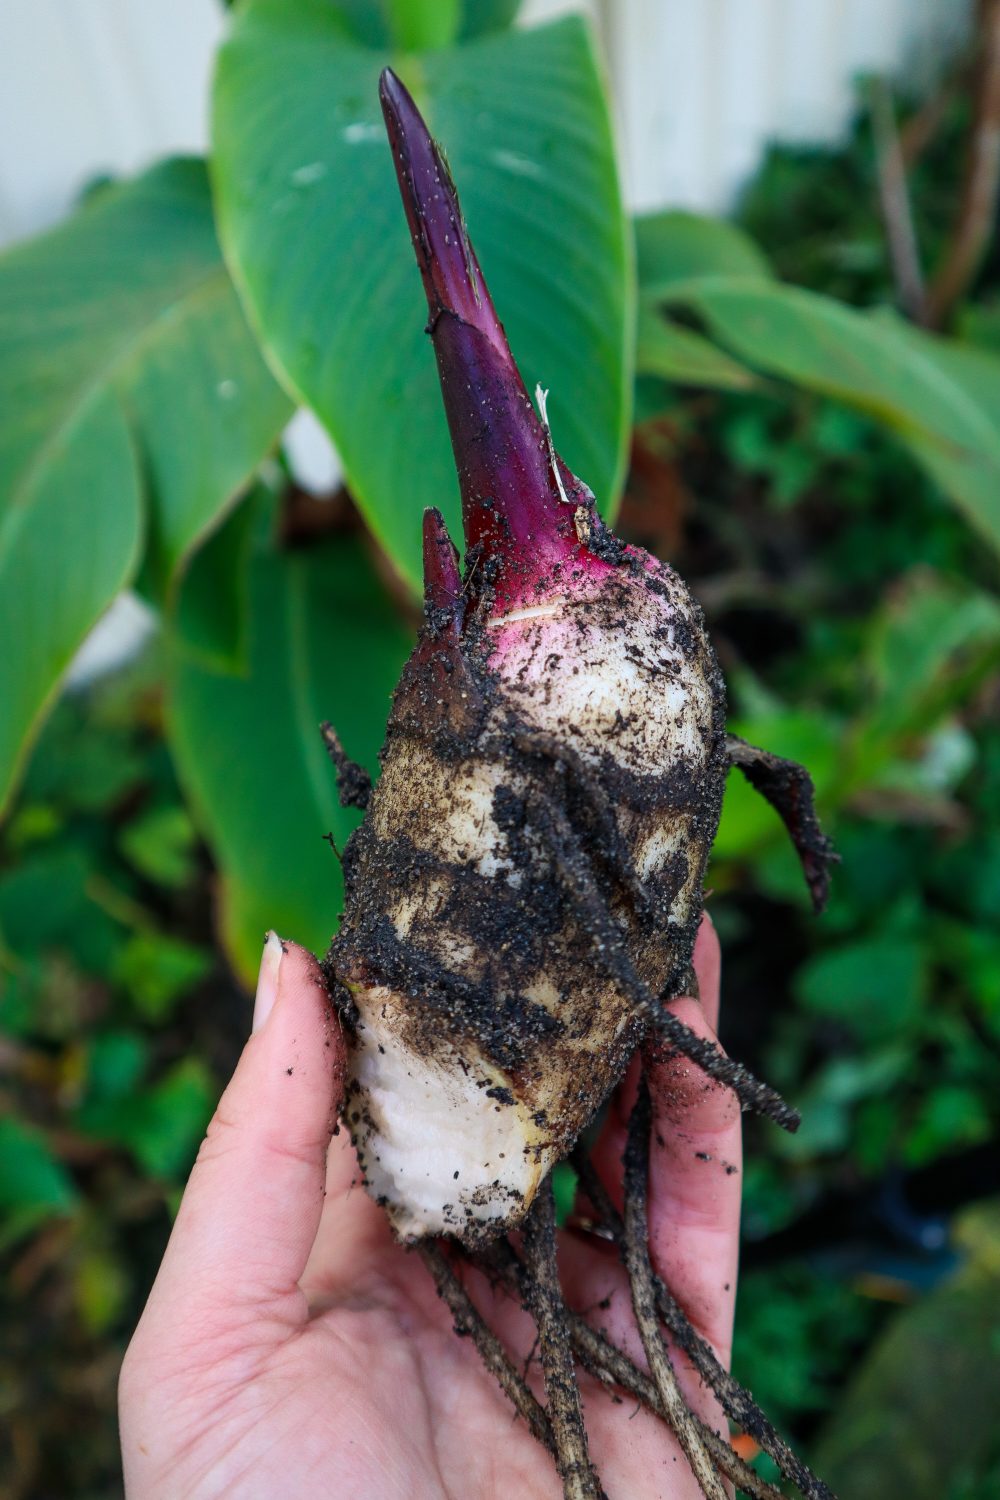
Edible and Nutritious Rhizomes
Edible canna produces large, round, red rhizomes that are highly versatile in the kitchen. These rhizomes:
Can be eaten raw or cooked like potatoes
Can be dried and ground into flour for baking and thickening sauces
The young shoots of edible canna are also edible, containing around 10% protein. They can be used as a nutritious green vegetable, adding diversity to your homegrown food supply during thin months.
Extremely Fast-Growing and Easy to Cultivate
Edible canna is incredibly easy to plant, grow, and harvest. It quickly repopulates, ensuring a continuous supply of rhizomes and biomass without much effort. The rhizomes send off side shoots that can be harvested to eat or to move and regrow in other areas of the garden.
Adaptable to Various Climates and Soils
Thrives in warm climates even the toasty hot Perth summers
Grows well in very poor soil, making it ideal for degraded or sandy areas
Highly drought-tolerant, but will produces better eating rhizomes in well-watered conditions
Grows well in wet conditions and even along pond edges, helping to stabilize soil and prevent erosion
Provides Biomass for Mulching & Soil Improvement
The large leaves and water-filled stems, similar to banana plants, make excellent chop-and-drop mulch. This is a game changer for establishing new gardens with poor soil. Regular pruning encourages new growth while giving you green material to add organic matter to the soil. Enriching your gardens fertility and helping protect the soil from the harsh sun to helps retain moisture, suppress weeds, and build soil health.
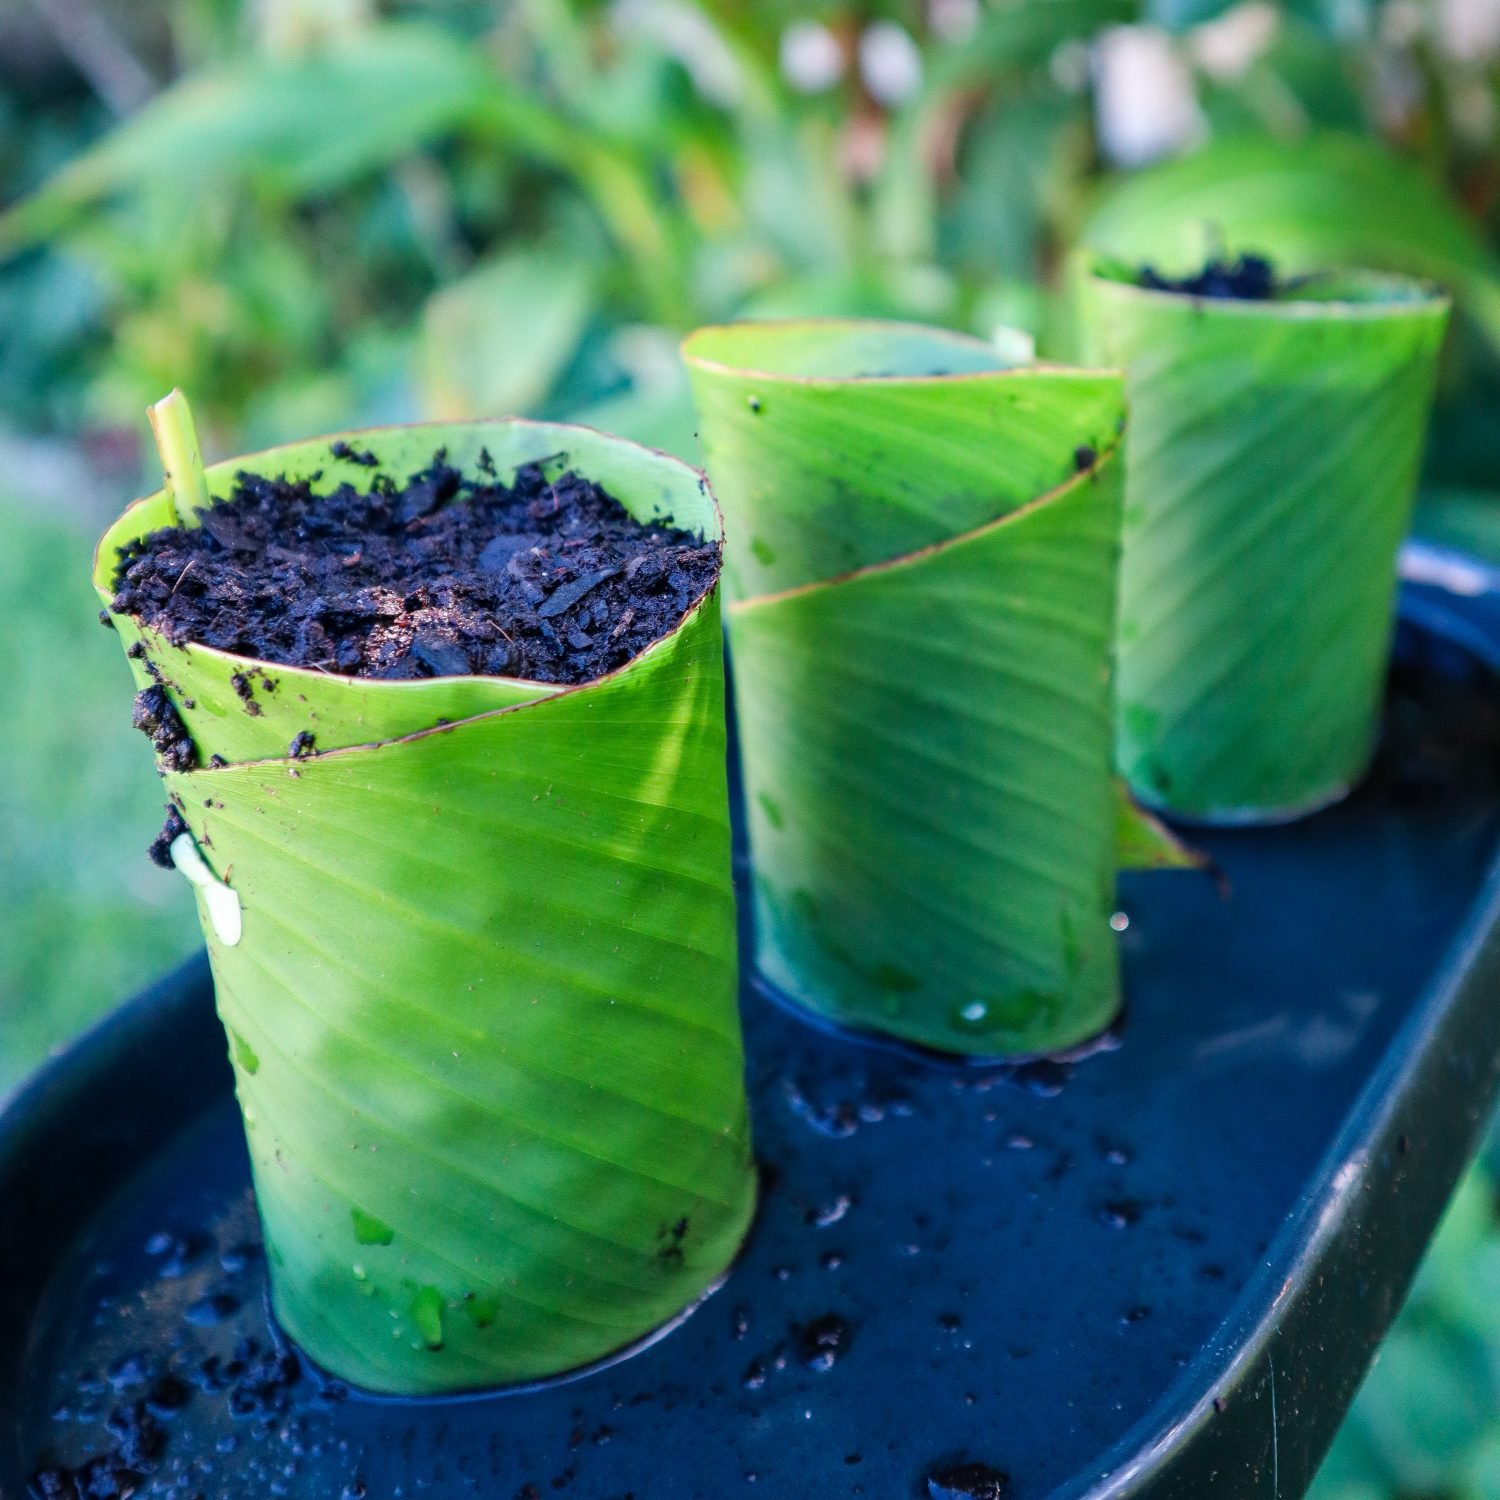
The leaves can also be used like Banana leaves to decorate tables or even make DIY eco pots.
Windbreak & Habitat for Wildlife
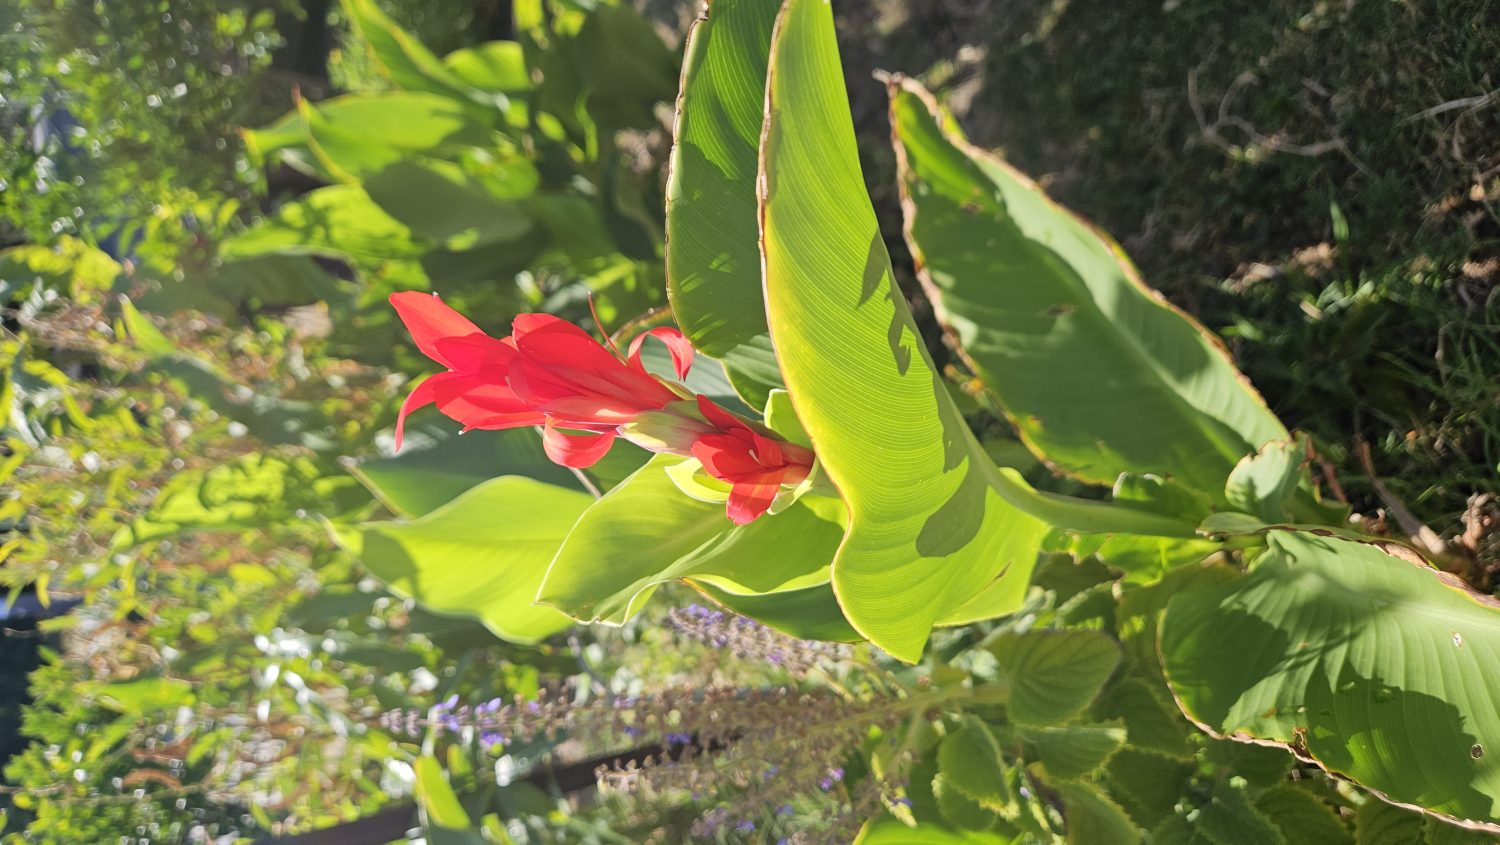
Dense clumping growth makes edible canna an effective windbreak, protecting more delicate plants. I often plant these first next to new plants to help protect them while they get established and then later on cut them back to use as mulch. The vibrant red flowers attract pollinators and small birds, enhancing biodiversity. They also provides shelter for beneficial insects and small wildlife which are key to creating a thriving sustainable garden.
How to Grow Edible Canna / Queensland Arrowroot
Planting & Soil Requirements
Prefers full sun but can tolerate partial shade
Grows well in poor, sandy, or wet soil conditions
Can be planted from rhizome divisions, making propagation easy
Maintenance & Care
Requires minimal maintenance once established
Regular pruning helps maintain vigorous growth and maximizes mulch production
Can be interplanted with fruit trees and vegetables to enhance soil health
Harvesting & Usage
Harvest rhizomes when they reach full size, usually after a year of growth
Young shoots can be harvested as needed for fresh greens
Leaves and stems can be pruned periodically for mulch
Where to Find Edible Canna or Queensland Arrowroot?
I get a lot of questions on where to find Canna Edulis so here are some place to check out if you are in Perth: Tass1 trees, Primal Fruits, Bloomings Nursery. Otherwise check out your local nurseries that are not “chain” stores. They can often be found in the pond sections alongside the edible plants. Be sure to check the variety for ‘Canna Edulis’ as there are many types of ornamental Canna.
Powerhouse plant for sustainable gardens
Edible canna is a powerhouse plant for sustainable gardens, offering food, mulch, and ecosystem benefits with minimal effort. Its ability to grow in tough conditions, provide edible rhizomes, and support soil health makes it a must-have for any permaculture system.
Incorporate edible canna into your garden today to enjoy its lush tropical look and numerous practical benefits!
Links included in this description might be affiliate links. If you purchase a product or service with the links that I provide, I may receive a small commission. There is no additional charge to you! Thank you for supporting my blog so that I can continue to provide you with free content.