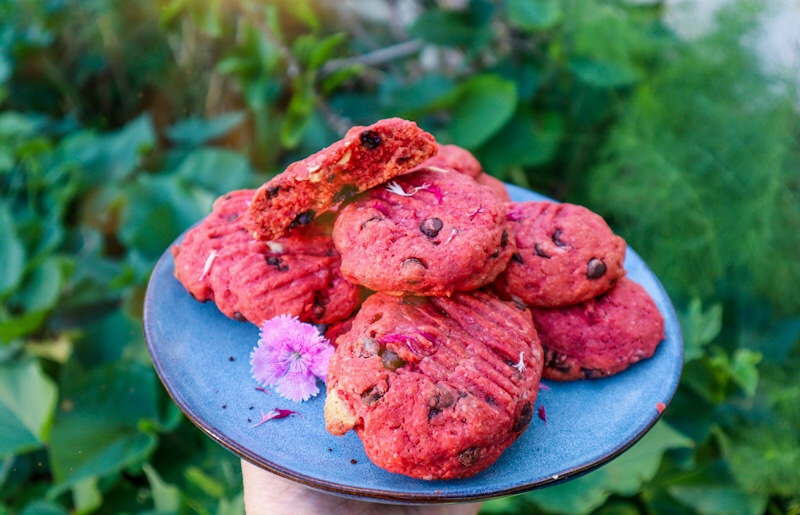
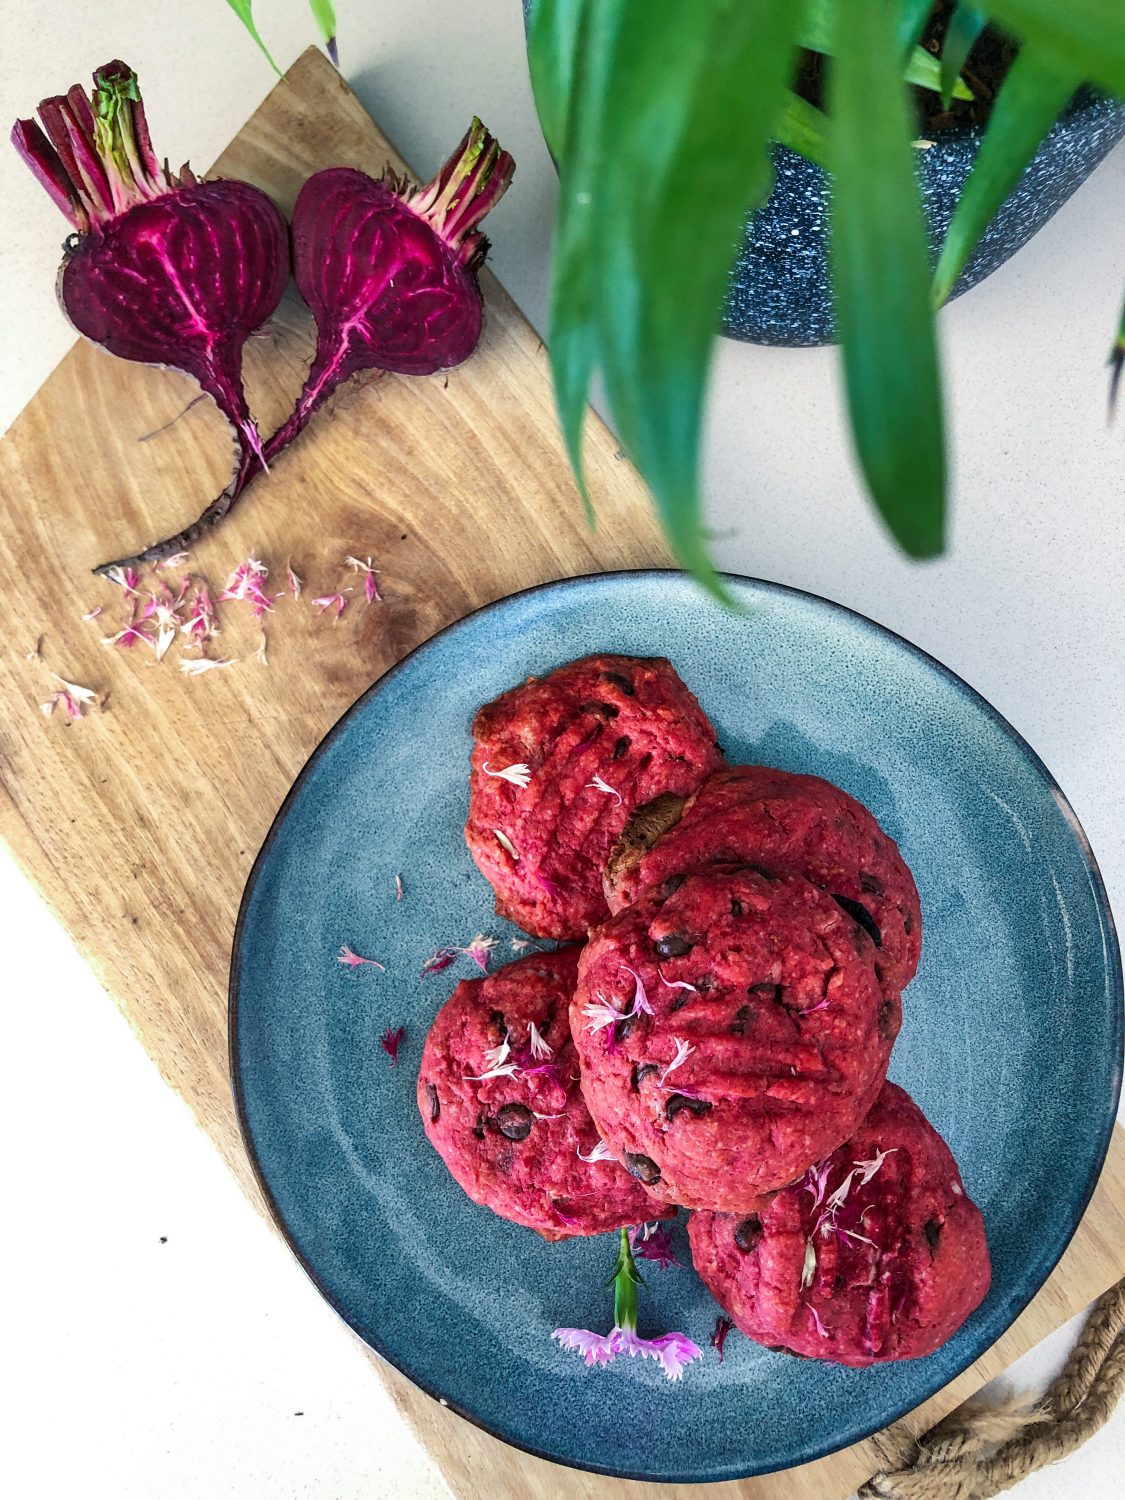
Beetroot is one of my favourite veggies to cook with. It is so versatile and can be used for both sweet and savoury dishes. Beetroot has also a vibrant natural pigment that I just can’t get enough of! Plus Beetroot is also a great source of fibre,folate (vitamin B9), manganese, potassium, iron, and vitamin C. Dark chocolate and beetroot go so well together and these choc chip cookies are so delicious. Plus with all the choc chippies the beetroot taste is very mild. The beetroot puree helps bind and keep the cookies moist plus the colour is just something else!
Vegan Beetroot Choc Chip Cookies
Yield: 15 cookies
Prep Time: 30 minutes
Cook Time: 15 minutes
Additional Time: 10 minutes
Total Time: 55 minutes
Ingredients
2 cups Plain Organic Flour
1 tsp Baking Powder
1/2 tsp salt
1/2 cup sugar
1/2 cup brown sugar (or coconut sugar)
1/2 cup coconut oil
1 medium beetroot
1/2 cup dark vegan choc chip
1/2 cup white vegan choc chip
Instructions
Cut the Beetroot into 4- 6 pieces, place in a saucepan and add enough water to just cover the pieces. Lightly simmer until you can pierce with a folk. Keep the water in and set it aside to cool.
In a mixing bowl add the sugar, salt and oil and mix to combine. Add 1 TBS of the water from the beetroot pot.
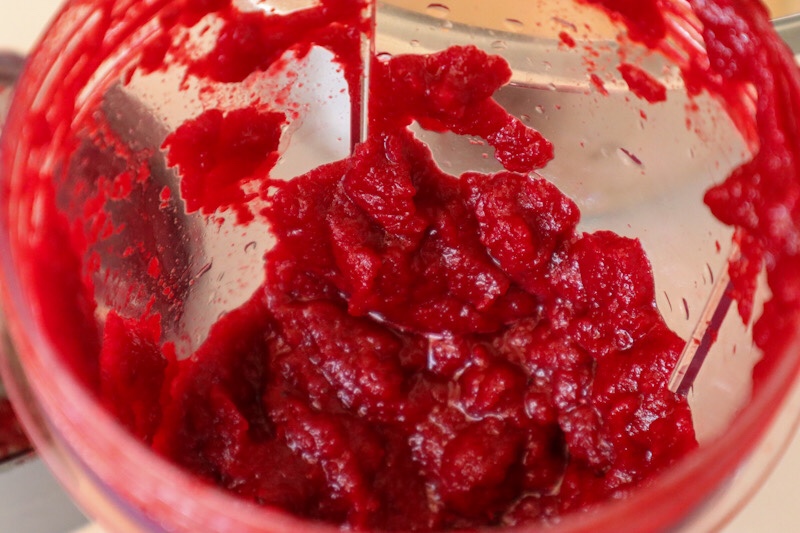
Add the beetroot to a blender or Nutribullet. Add a few teaspoons of the water from the saucepan. Enough to help it combine into a puree. Blend and add extra liquid if needed.
Add the beetroot Puree into the sugar and oil and mix to combine. sift and add flour and baking powder. Gently mix with a wooden spoon or spatular to combine. Don't over mix.
Add your choc chips and gently stir through.
Place the mix in the fridge to cool for 10-20mins.
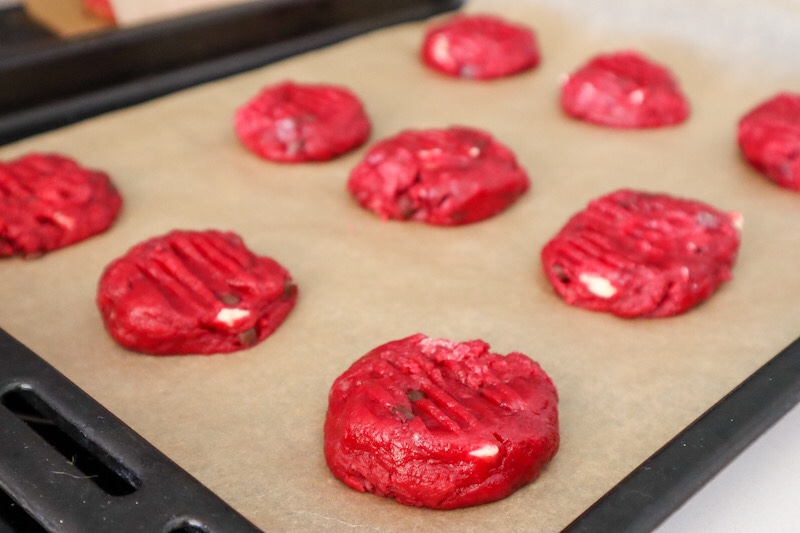
Preheat the oven to 180 degrees Celcius and place baking paper on a tray or grease the tray.
Make tablespoon-sized balls and place them on the tray leaving at least 5cm in between each one. Press down gently with a fork and bake for 12-15mins until slightly golden.
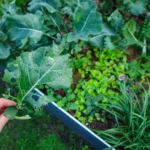
Beetroot falafel is a quick and easy way to make a delicious meal with only a few ingredients. I have included ways to use the whole vegetable from root to shoot. These beetroot falafels can be made into 12 small balls which are great for salads or wraps or moulded into larger burger patties.
Beetroot Falafel
Yield: 12 Falafel Balls or 6 Burger Patties
Prep Time: 15 minutes
Cook Time: 45 minutes
Total Time: 1 hour
Ingredients
2 small- medium Beetroot
250g Cooked Chickpeas (or one 420g can)
2 small Garlic Cloves
2 tsp Cumin Powder
1 tsp Salt
3 TBS Flour
2 TBS Bread Crumbs
2 TBS Water
2 TBS Chopped fresh parsley
Instructions
1. Pre-heat oven to 180 degrees Celcius.
Cut the leaves and stems of the beetroot and set them aside for later use. Cut the beetroot into 2-3cm cubes and place in a roasting dish. Drizzle with oil and bake in the oven.
Cook for 30-40mins or until beetroots are soft.
Remove and let the beetroot cool slightly. Blitz the beetroot, cumin and garlic. Then add chickpeas, salt and chopped parsley and blitz to combine and the chickpeas are broken into small pieces.
Add the bowl and mix flour and bread crumbs through. Taste and season with extra salt if needed.
Roll into tablespoon-sized balls or mould 1/2 cup into burger patties
Add oil to a pan and panfry until crispy.
Serve in a salad, burger, wrap or pita bread.
Serve these beetroot falafels with a salad using the beetroot leaves and the pickled beetroot stems make a great accompaniment and salad dressing. This salad can also be made and used for the burgers as well.
Beetroot Falafel Salad
Prep Time: 20 minutes
Additional Time: 1 hour
Total Time: 1 hour20 minutes
Ingredients
SALAD
1 Cup of lettuce greens (lettuce, nasturtium leaves, baby spinach)
Beetroot leaves and stems set aside from Beetroots used in Falafels
1 TBS feta
1/2 Avocado
1 TBS Sunflower seeds
1 TBS Pumpkin seeds
Edible flowers to serve (nasturtium)
BEETROOT STEM DRESSING
Beetroot stems set aside form Falafels
1 TBS Olive oil
1 TBS Apple Cider Vinegar
1 TBSP Water
1 TBS Sugar
1.2 tsp Salt
AVOCADO SALAD DRESSING
1/2 Avocado
1 TBS Feta
1 TBS Lemon Juice
2 TBS Water
Salt to season
Instructions
Beetroot stem dressing
1. In a serving dish, jar or jug, add the apple cider vinegar, sugar, salt, water and oil. Stir until combined.
2. Finely slice beetroot stems and add. Cover and set aside in the fridge for 1 -2 hours (can be made and left overnight).
Salad
1. Wash and roughly chop salad greens and beetroot leaves and place them in a serving bowl.
2. Crumble feta on top, slice and add avocado and sprinkle over seeds. Place edible flowers to finish.
Avocado Dressing
1. Add avocado to a bowl and mash and stir until mixed and slightly creamy.
2. Add feta, oil, salt, lemon and water into the avocado and mix well until smooth. Add extra water if needed.
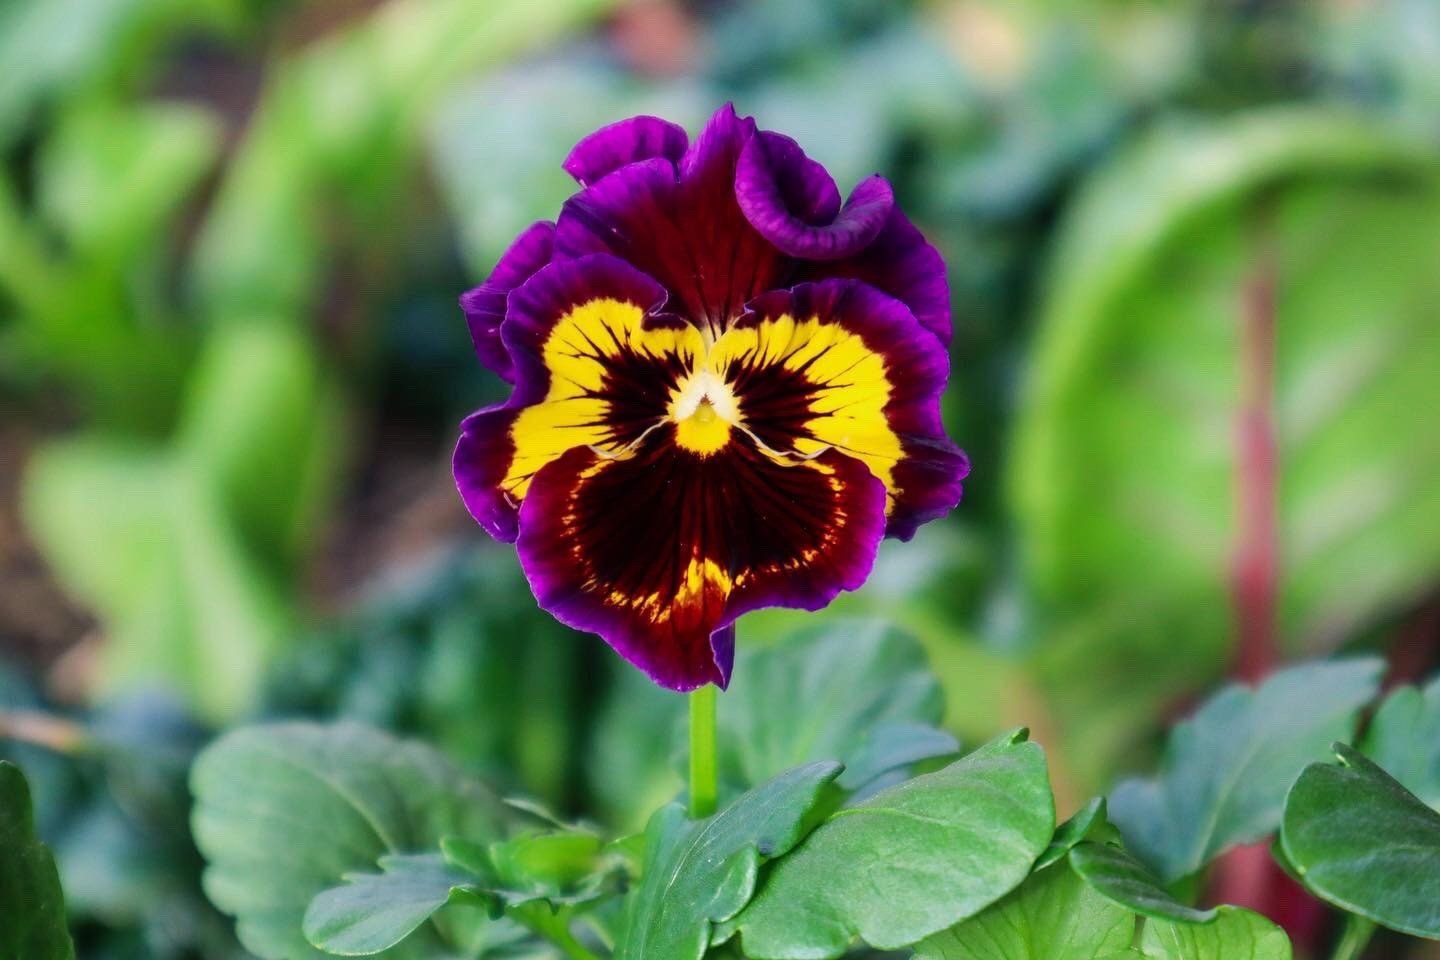
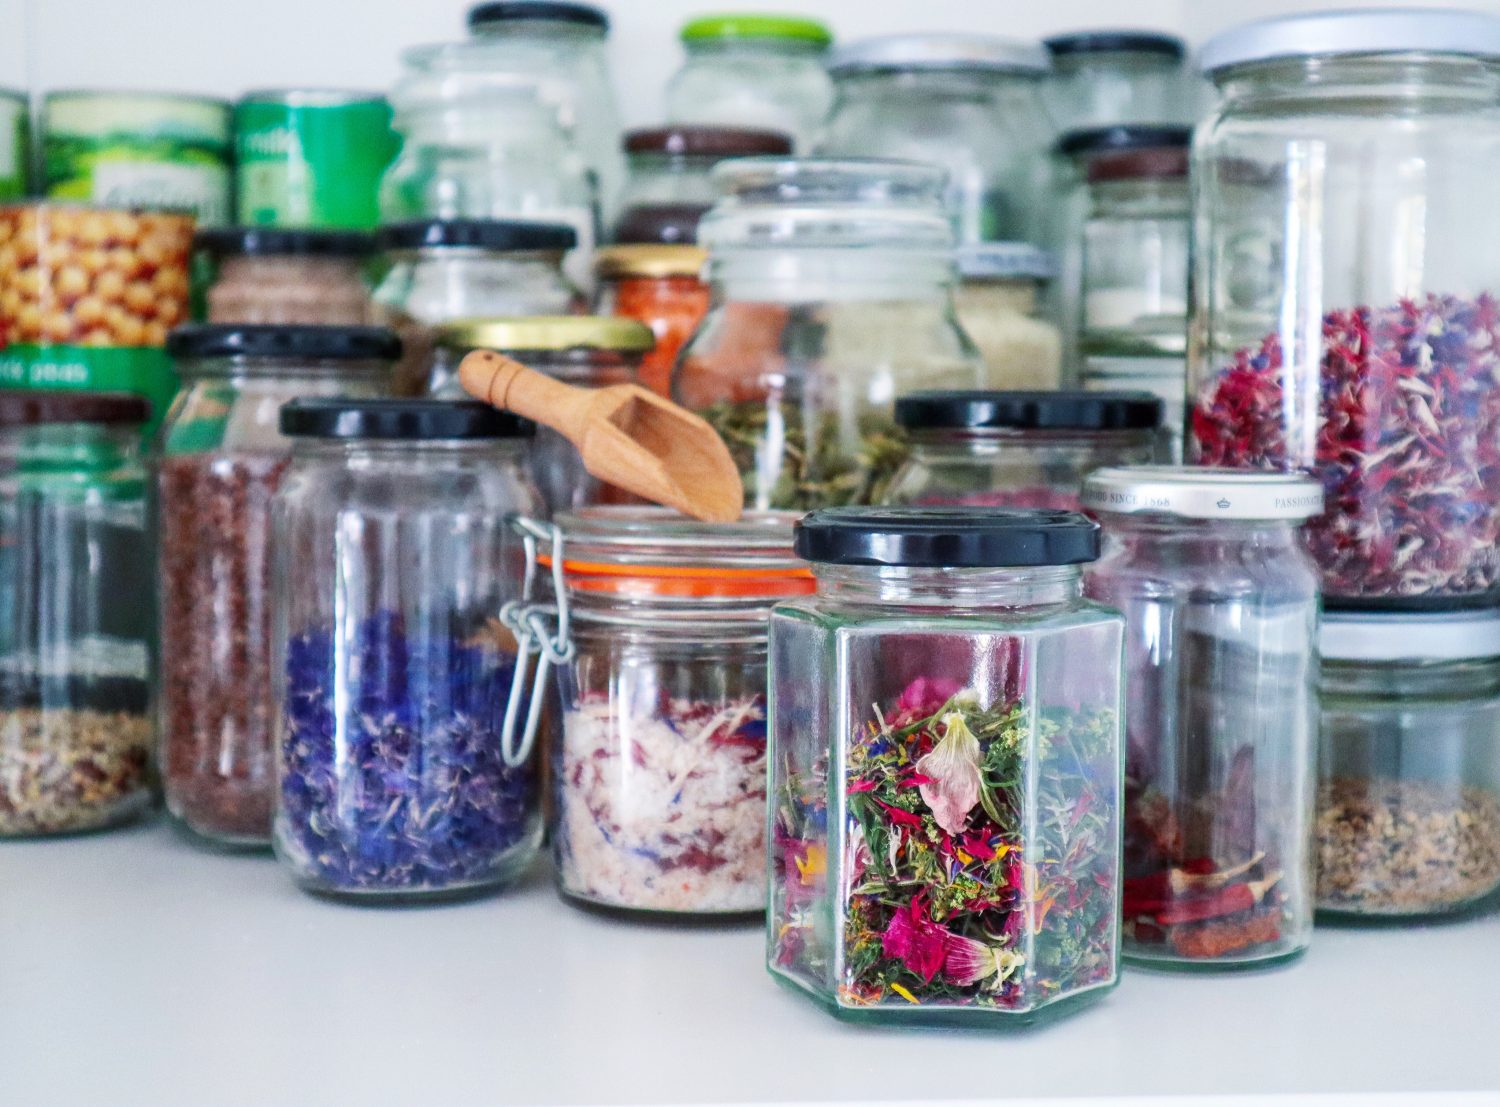
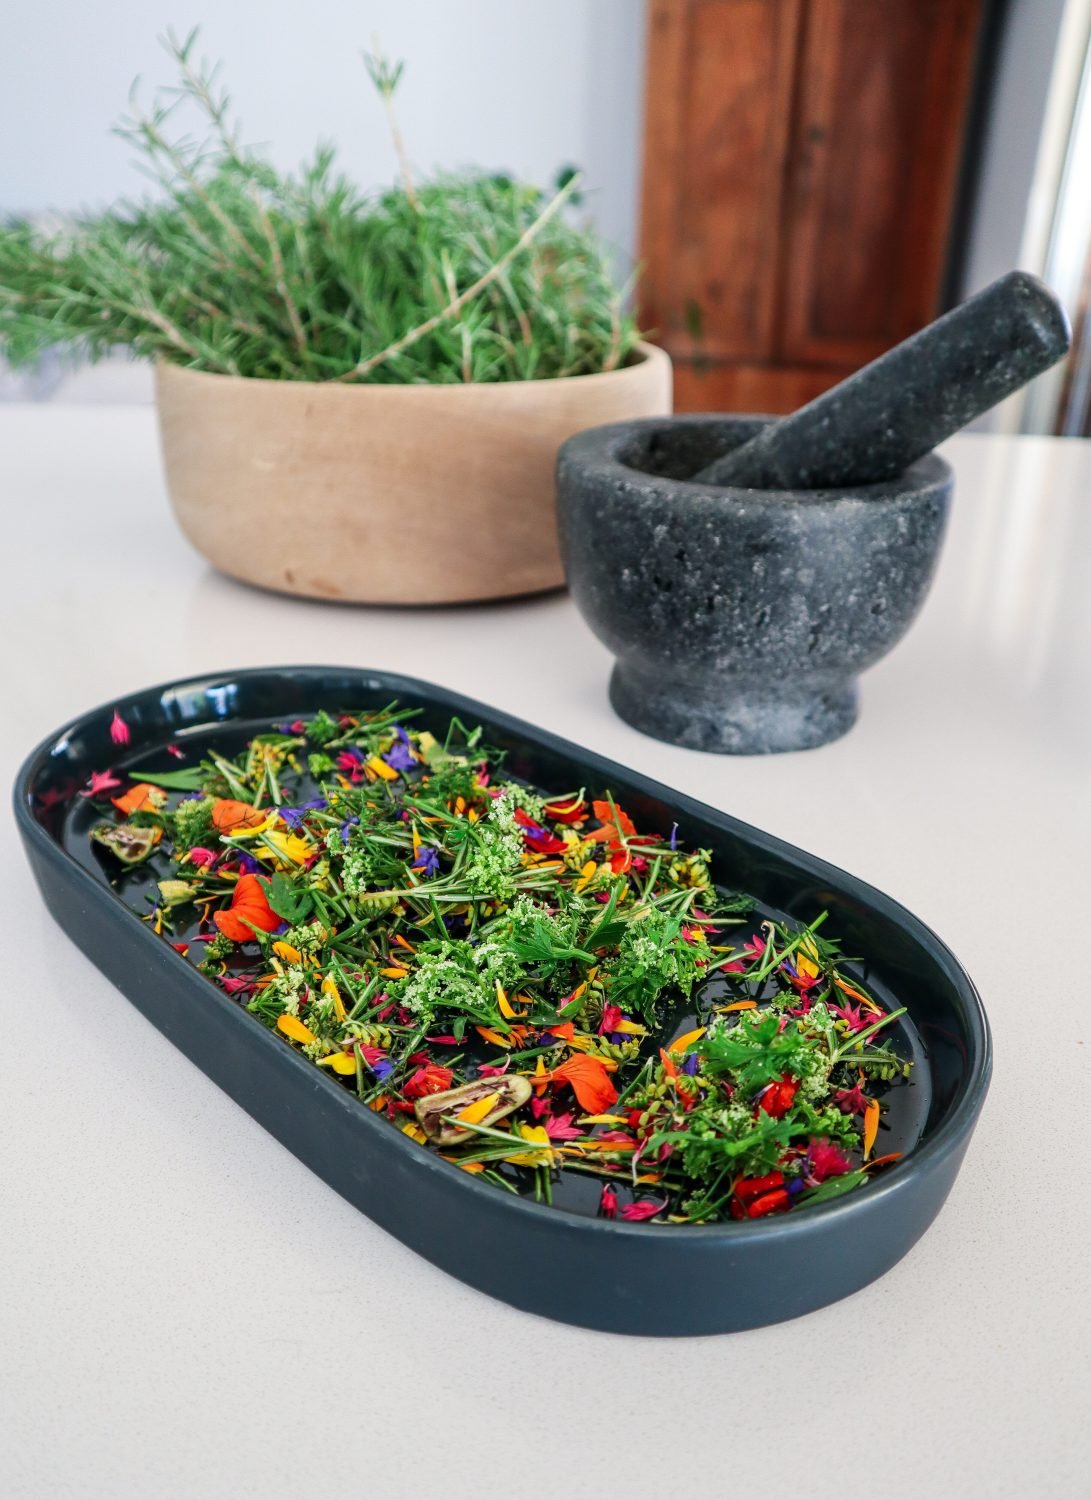
I grow a lot of edible flowers in my urban permaculture garden. That way, I not only have plenty of flowers for the bees, but also lots of beautiful edibles to brighten up any meal. Edible flowers have so many health benefits and valuable nutritional qualities. Flowers don’t often last long on the plant and a great way to preserve and harness their energy is to press or dry them. This way you can make infused oils, herbal teas and still have beautiful bright flowers to use throughout the year.
What Time of Day is Best to Pick Edible Flowers?
Pick your edible flowers in the morning but after the sun has come up. First thing in the morning the flowers will still be closed so wait until they fully open up. They will be at their best in the morning, full of life and well hydrated. Throughout the day they can lose moisture and become damaged by insects or wind. Make sure you select flowers that you know don’t have any chemicals or sprays on them. I only use flowers I have grown in my backyard as I can have more control over their surroundings.
Should you Dry the Whole Flower or just the Petals?
You can do both! If the flower has a thick base or bud I tend to remove the petals. Flowers such as Sunflower and Hibiscus, I usually remove the petals. The base will take a very long time to dry and most of the time will not be palatable/hard and bitter. Calendula has many healing properties in the base, leave this on if you are going to use it for infused oils and balms.
Air Drying Flowers Naturally
The main way that I preserve my edible flowers is to air dry them naturally. I keep a bowl or plate in my pantry and add petals and flowers to it regularly. Each time I go out to the garden to pick veggies, I will pick edible flowers as well. If I don’t use them fresh in my meals I will just pop them aside to dry. It is very hot and dry here in Perth, Australia during the summer, so they will dry within a couple of days. If you live in a humid or cool climate or it is winter, it would be best to oven-dry or use a dehydrator. You want to get the flowers as dry as possible with no moisture left. This is to prevent them from going mouldy or growing bacteria.
Oven drying flowers
Turn your oven on to 40-50degrees Celcius and spread your flowers out on a tray. If your flowers have thick buds or bases it will be best to separate them out and just dry the petals. This may take a while depending on the size and moisture levels of your flowers. It may take around 4-6 hours and gently turn and mix your flowers around during that time to help them dry evenly.
Drying flowers in the dehydrator
Lay your flowers out flat on a tray and turn your dehydrator on to 40-50 degrees Celcius. It will depend on the moisture levels and size of your flowers but it will take between 4-6 hours to dry. Make sure they are completely dry and they may sound crunchy to touch.
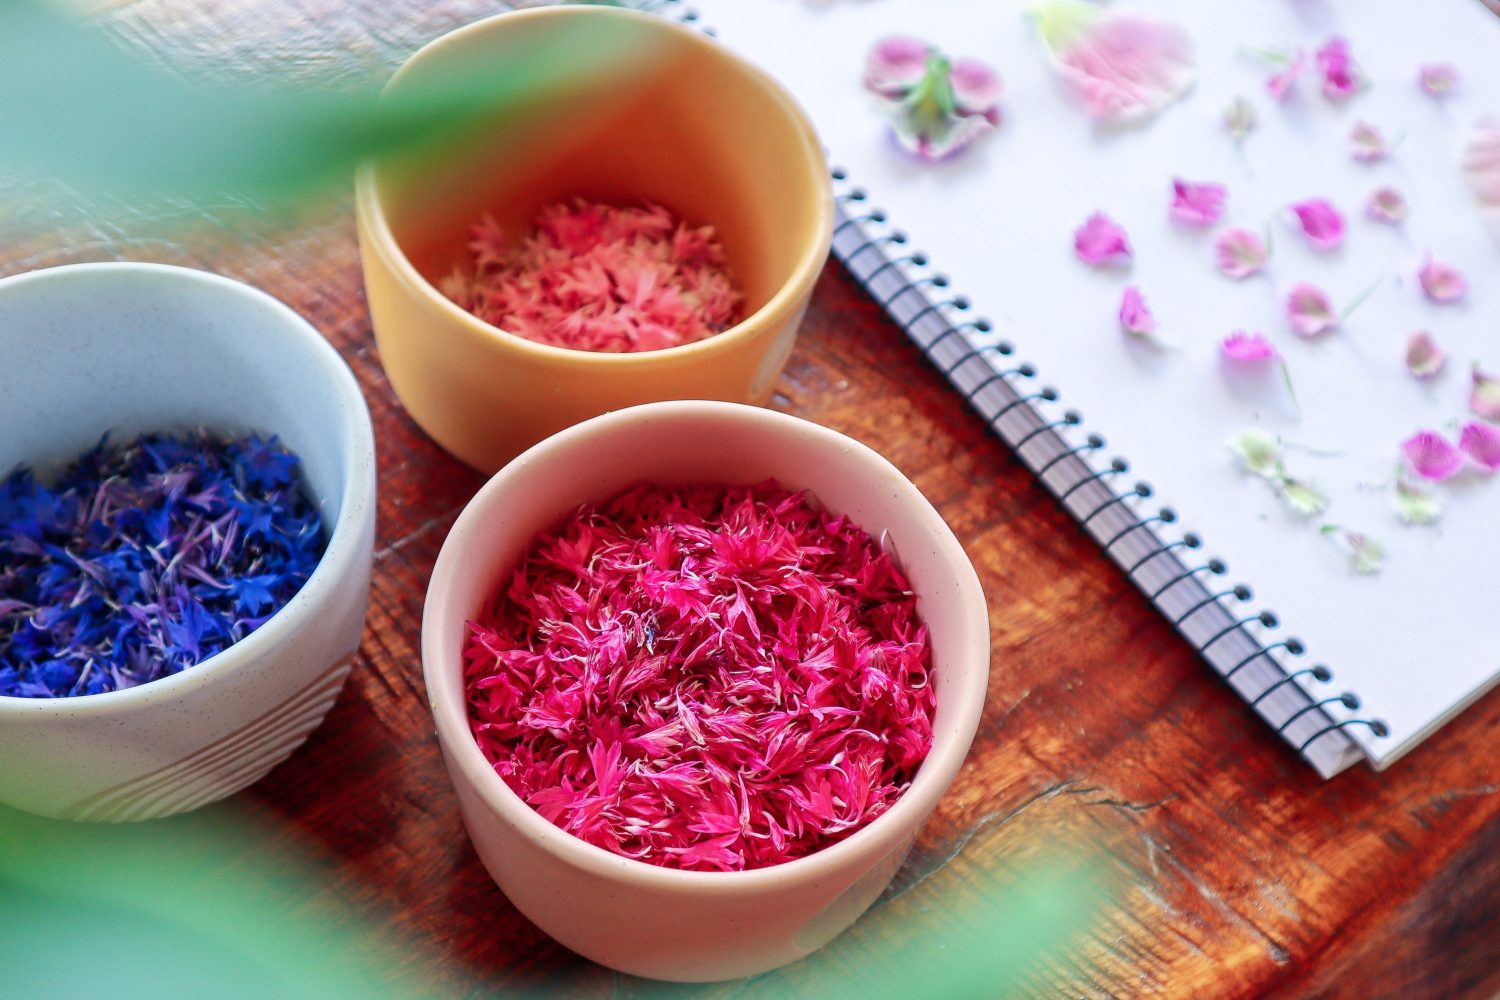
Pressing Edible Flowers
Another way I like to preserve my edible flowers is to press them. You can do this with any flower press or to press flowers without a flower press, simply place your flowers between sheets of paper or a notepad and stack some heavy books on top. Press whole flowers or petals but if the bud or base of the flower is quite thick, I would remove it and just press the petals. Pressing flowers will take a while to ensure that they are completely dry. Depending on your temperatures and climate it can take between 2-4 weeks to dry your edible flowers.
How to Store Edible Flowers
Once your flowers are completely dry you can store them in an airtight container out of sunlight. I keep all my air-dried flowers in jars in my pantry. My pressed flowers that I want to keep intact, I store in a glass container with a bit of paper towel. In dry conditions, these will last quite a while. I have some from a year ago that are still great.
How to use Dried Edible Flowers?
There are so many ways to use your dried flowers. Here are some of my favourite ways to use them.
MY GARDENING ESSENTIALS // Fertiliser spray gun: https://bit.ly/366nL1t Retractable Hose: https://bit.ly/2TSC0Bo More gardening tools: https://bit.ly/32IQmbD
DISCLAIMER: Links included in this description might be affiliate links. If you purchase a product or service with the links that I provide I may receive a small commission. There is no additional charge to you! Thank you for supporting my page so I can continue to provide you with free content!
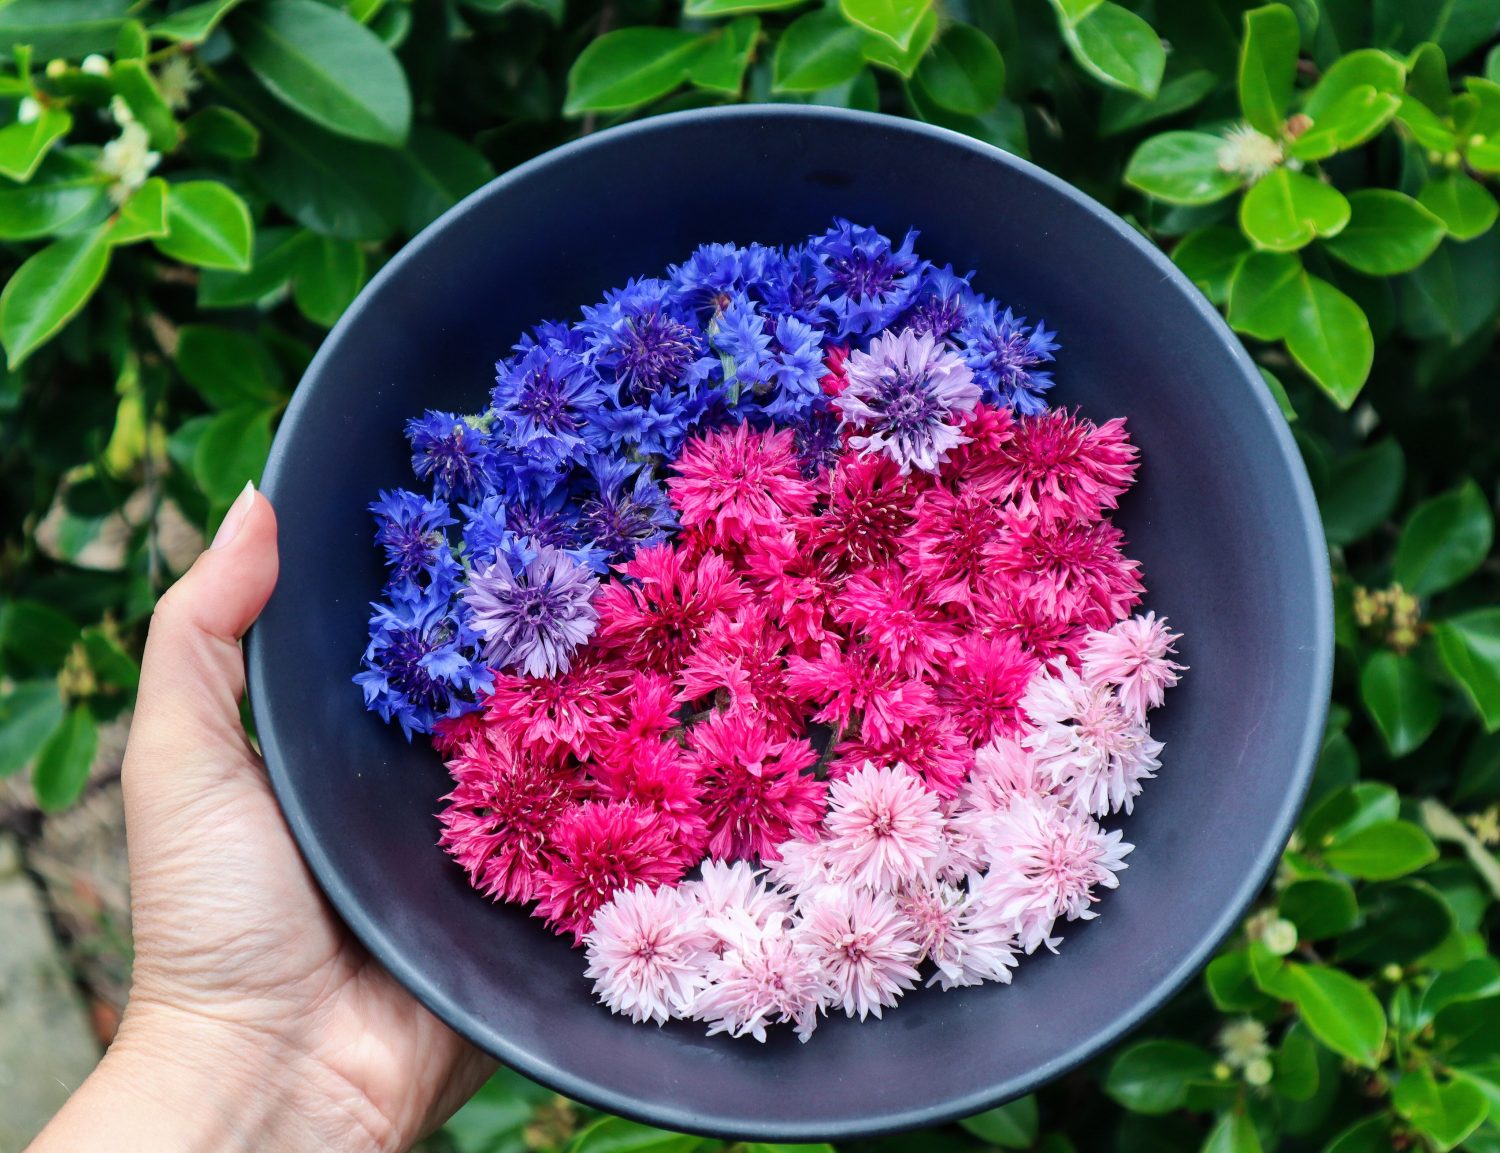
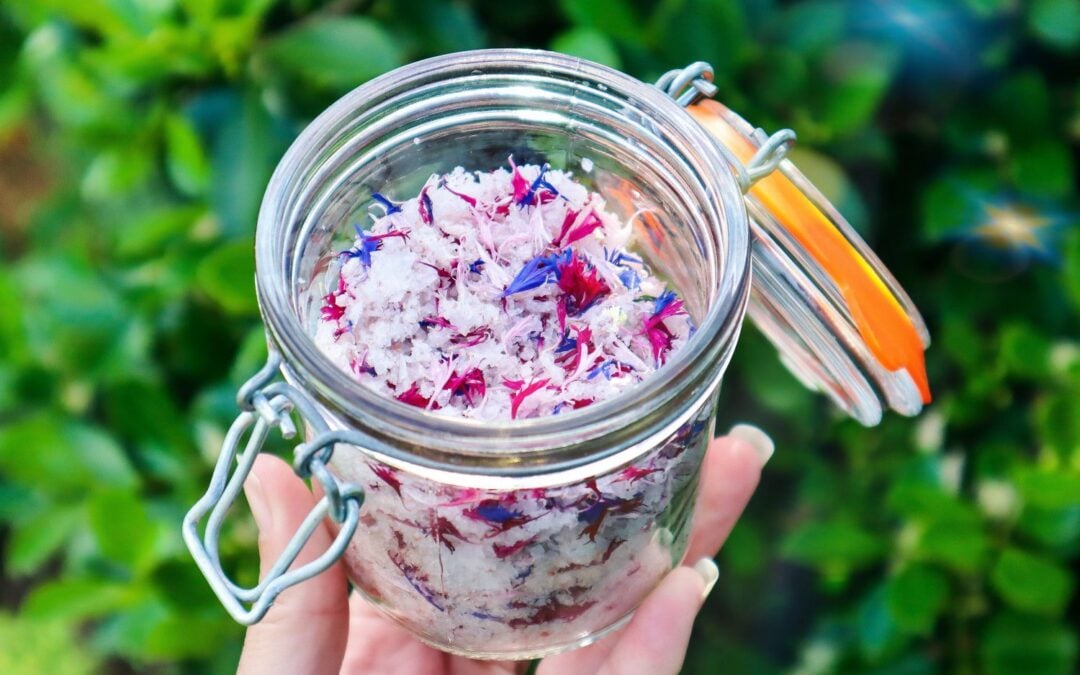
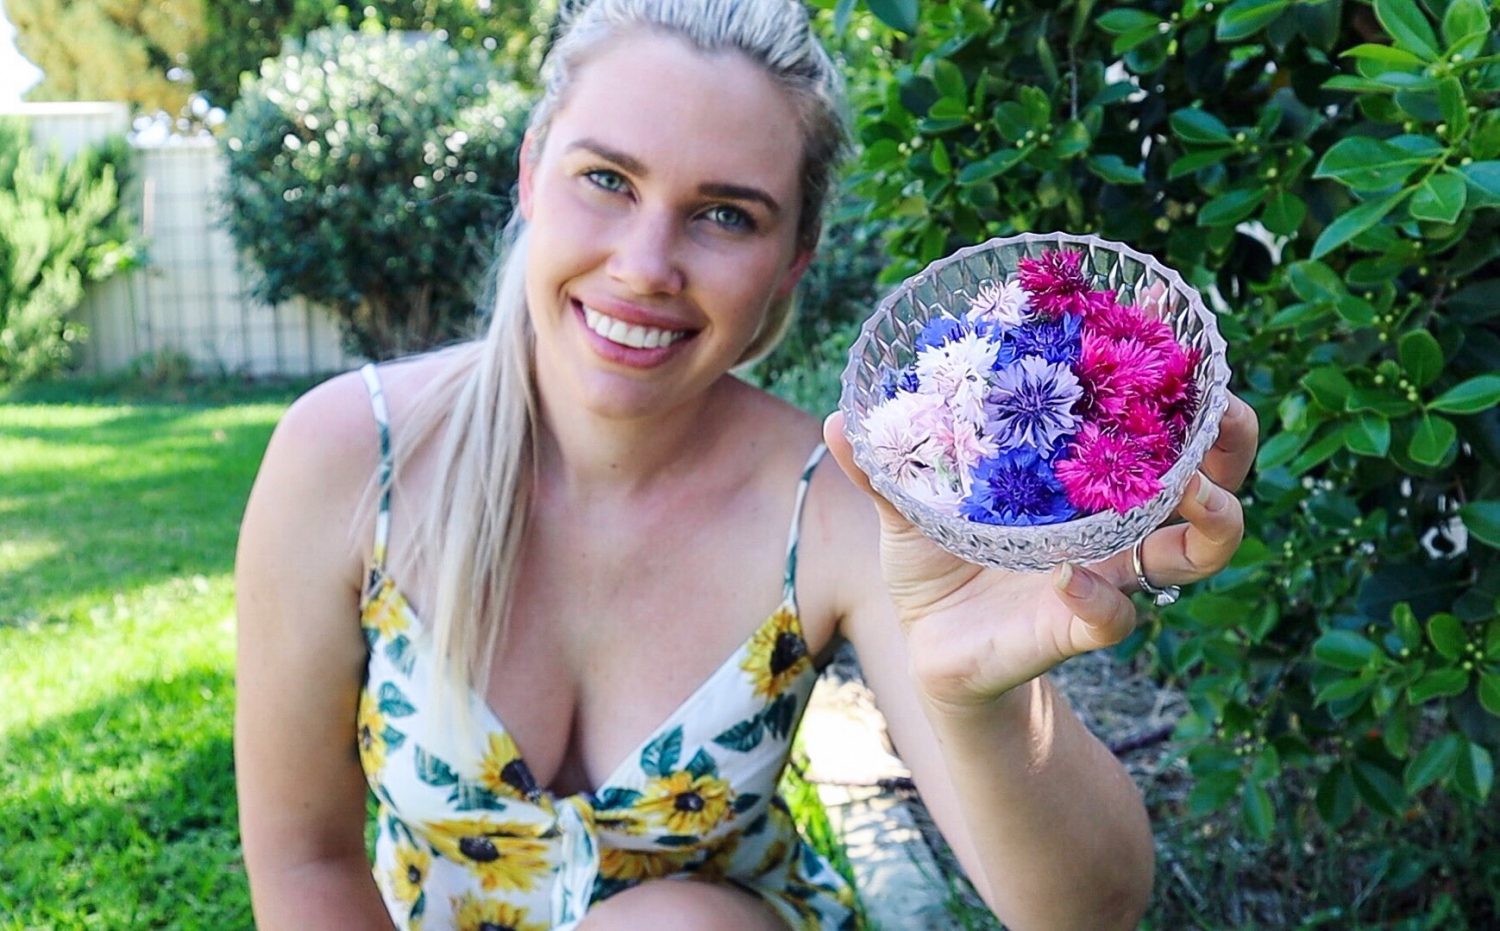
I jump at any chance to use edible flowers in my dishes and this edible flower fairy salt is one of my favourites! Edible flowers are a great, easy way to add wow factor to any dish. Cornflowers (Centaurea cyanus) are so vibrant and have been abundance in my garden this summer. This recipe helps preserve their stunning colours and I can use them on my dishes throughout the year.
Fairy salt would be a great way to get kids involved with garden to plate cooking. Foraging for edible flowers, drying them and making fairy salt.
Edible Flower Salt is so EASY with only two ingredients!
You could use any edible flowers for this but cornflowers are the perfect size and colour. They lose their colour when they are left to dry on the plant so I feel better about picking them.
Edible Flower Fairy Salt
Yield: 1/2 cup
Prep Time: 5 days
Additional Time: 2 minutes
Total Time: 5 days2 minutes
Ingredients
1/2 cup Salt Flakes
2 TBSP dried Cornflowers
Instructions
Pick cornflowers (Centaurea cyanus) and gently pull the petals from the bud. Lay them out flat on a plate. Leave them to dry completely for 5 days turning them regularly to release moisture. To speed up this process you could put them in the oven on low (40-50degrees Celcius) to dry.
Place salt flakes into an airtight jar. Mix through the dried cornflowers.
Serve on meals as a finishing salt.
Serving Suggestions
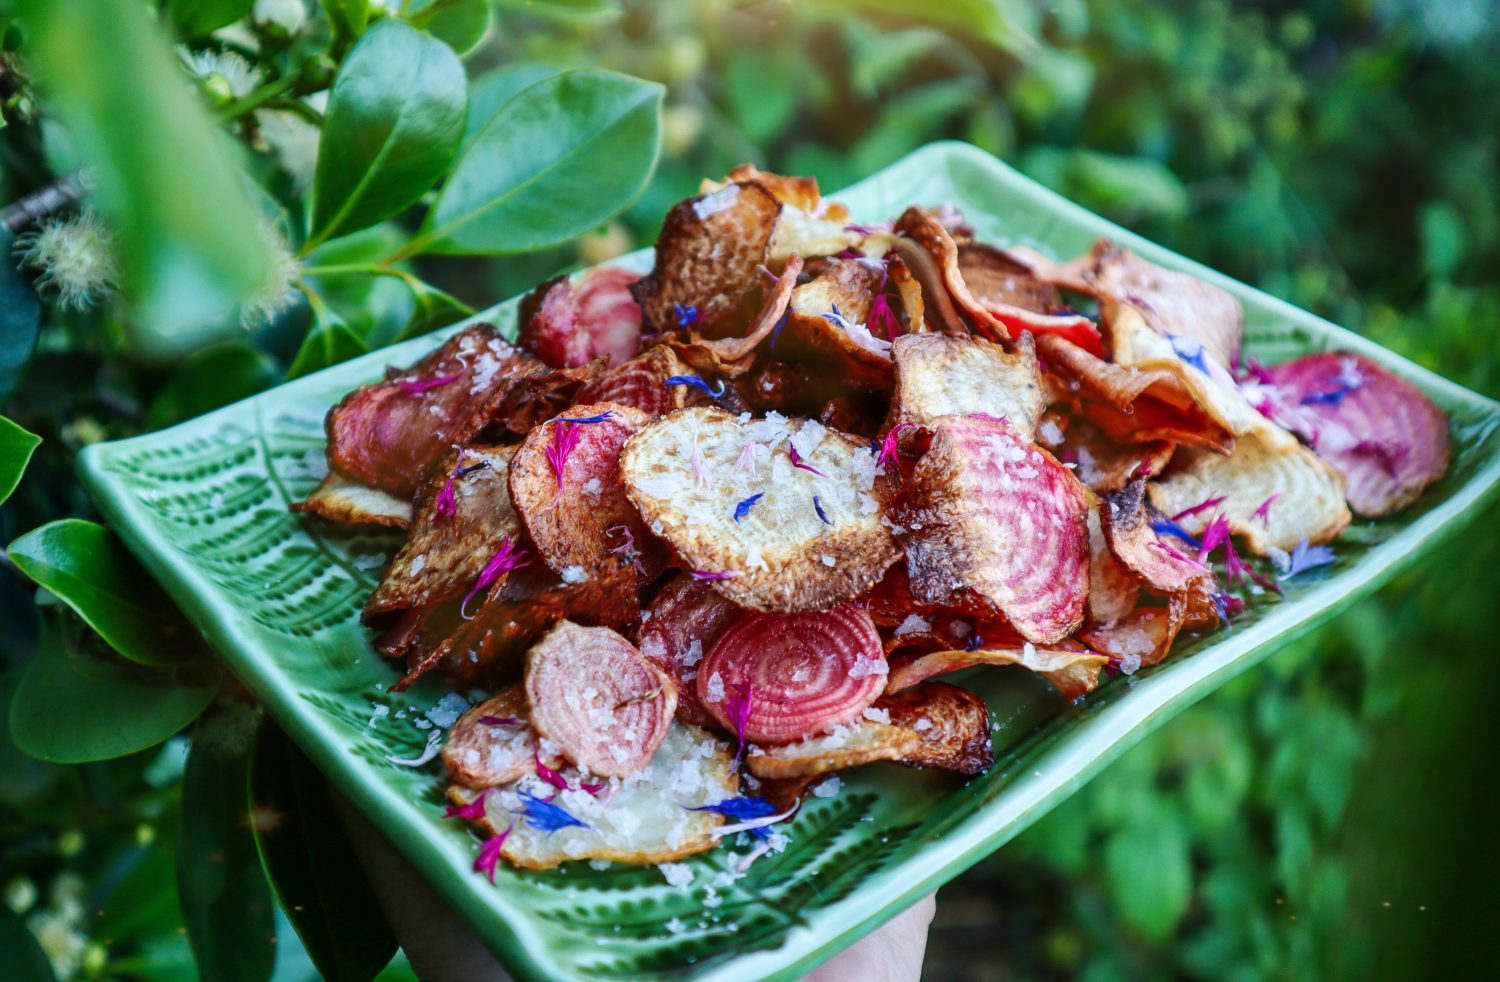
I have been using this edible flower salt to brighten up so many of my meals. Simple eggs on toast become a little more magical with a dusting of this flower salt. I also made some delicious salt and vinegar beetroot chips and this salt was the perfect addition.
Salt and Vinegar Beetroot Chips with Edible Flower Salt
DIY Gift Idea
I have also made up small jars as gifts to friends. A small simple gesture can go such a long way. I want to get in the habit of taking a small gift whenever I visit friends and family. Whether that is some preserved produce, cuttings, seedling or some saved seeds. You never know how much a spark of inspiration can cause a ripple effect in someone’s life.
Holly 🌱
WATCH Edible Flower Salt and Beet Chips Below
MY GARDENING ESSENTIALS // Fertiliser spray gun: https://bit.ly/366nL1t Retractable Hose: https://bit.ly/2TSC0Bo More gardening tools: https://bit.ly/32IQmbD
DISCLAIMER: Links included in this description might be affiliate links. If you purchase a product or service with the links that I provide I may receive a small commission. There is no additional charge to you! Thank you for supporting my page so I can continue to provide you with free content!
Nasturtium Bread Rolls are bright, vibrant and all-natural colouring. Create WOW factor food with this garden-inspired bread recipe. Nasturtiums are the plant that keeps on giving! Nasturtiums make a beautiful lush living ground cover and are so easy to grow! Once you have them in your garden they will pop up every year without any effort on your behalf. They have so many uses and integrated relationships within your garden which makes them one of my favourite permaculture plants. You can read more about growing Nasturtium and uses here.
I love trying to get the most out of the things I have growing in my Urban Permaculture garden and that means lots of kitchen experiments! These Nasturtium bread rolls do have a nasturtium flavour once cooked but once I added ingredients for a burger it was not very noticeable. Just beautiful lush green tasty burgers!
This recipe would be great for a garden party, high tea, or just for something fun and interesting! I am a big believer in making everyday special. Make your own magic!
Nasturtium Bread Roll Recipe
Yield: 8 Burger Buns or 10-12 Rolls
Prep Time: 2 hours
Cook Time: 20 minutes
Total Time: 2 hours20 minutes
These Nasturtium bread rolls were a fun kitchen experiment to make vibrant green bread naturally. These Nasturtium bread rolls were a fun kitchen experiment to make vibrant green bread naturally. They have a mild nasturtium flavour when eaten on their own but served with chutney or as a burger, the flavour is very subtle.
Ingredients
4 cups flour
2 cups lukewarm water
3 tsp dry yeast
1 tsp salt
1 tsp sugar
1 Tbs oil
2 cups greens (i used Nasturtium leaves and fennel fronds)
Instructions
1. Blend greens in 1/2 cup of lukewarm water using a Nutribullet or blender. Then add the remaining water and mix.
2. Pour greens and water into a bowl and add sugar and yeast. Whisk to combine. Set aside for 5 - 10 mins to activate.
3. In a large bowl mix flour, oil and salt. Add in your green mixture half at a time and mix. It may need more water to form a dough so add water to your green bowl to mix and use up any of the residual greens. Add to the mixture as needed to form a dough. Knead for 1-2 mins.
4. Rub some oil in a bowl and add the dough ball. Cover and set aside somewhere warm to rise for 1-2 hours.
5. Cut and lightly roll dough into round buns. 8 large or 10-12 regular size. Cover and allow to rise again for 30mins - 1hr.
6. Whisk an egg and brush a light coat on top of the bread rolls. This is just to make them shiny and is optional. Place them on a lightly greased or non-stick tray. Bake at 180 degrees Celcius for 20mins or until slightly golden.
Notes
Best served fresh with butter. I rolled butter into a ball and coated with edible flowers (calendula and cornflower petals) for added WOW! Delicious on their own or as I have in this video make your favourite burgers using lots of salad and veggies from the garden!
There are so many ways to use Nasturtiums and I have plenty more ideas to try out. The most common way to use Nasturtium is in a salad. The leaves, flowers and seed pods are all edible. The flowers have a mild peppery taste and the leaves are a lot stronger in flavour. It is so important to learn how to use your edible plants so that you can get the most out of them! Especially in small space gardening. Below is a list of Nasturtium Recipes I have made so far:
If you haven’t already make sure you subscribe to my Youtube Channel to get all my lastest Gardening tips, garden tours and Kitchen experiments. Your support helps me create more free content so you can get the most out of your garden and sustainability journey!
If you have any questions please leave me a comment below.
Happy Gardening!
Holly
MY GARDENING ESSENTIALS // Fertiliser spray gun: https://bit.ly/366nL1t Retractable Hose: https://bit.ly/2TSC0Bo More gardening tools: https://bit.ly/32IQmbD
DISCLAIMER: Links included in this description might be affiliate links. If you purchase a product or service with the links that I provide I may receive a small commission. There is no additional charge to you! Thank you for supporting my page so I can continue to provide you with free content!
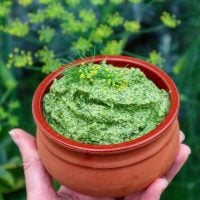
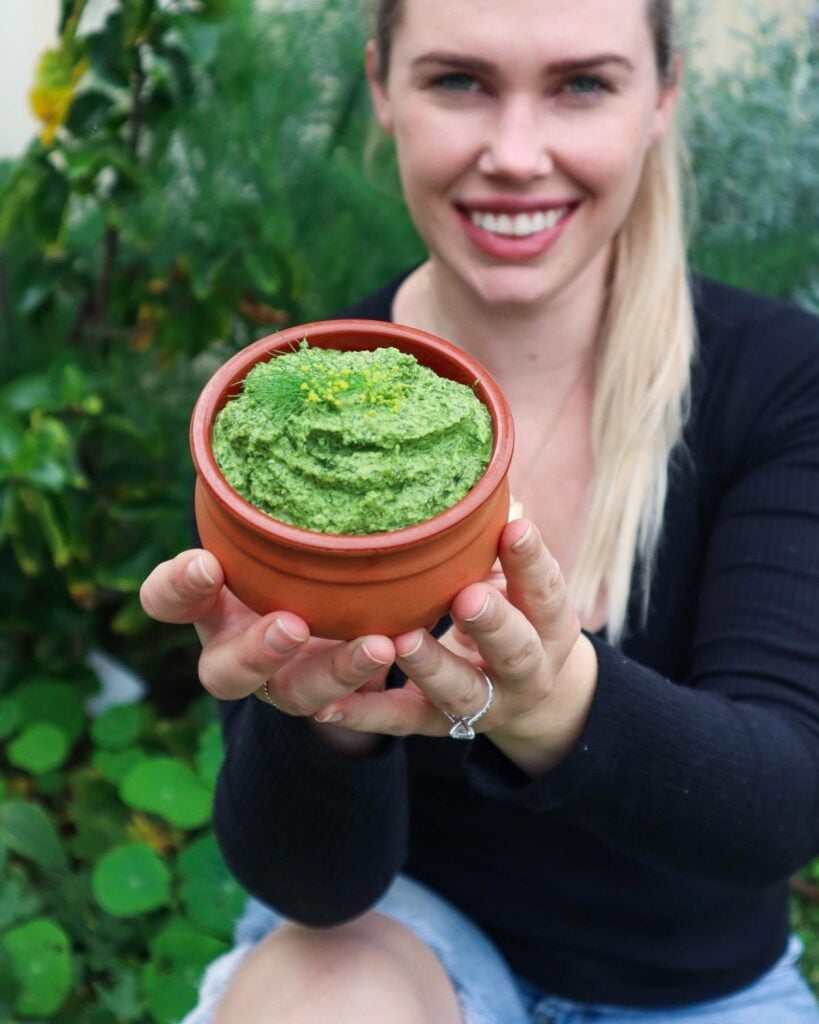
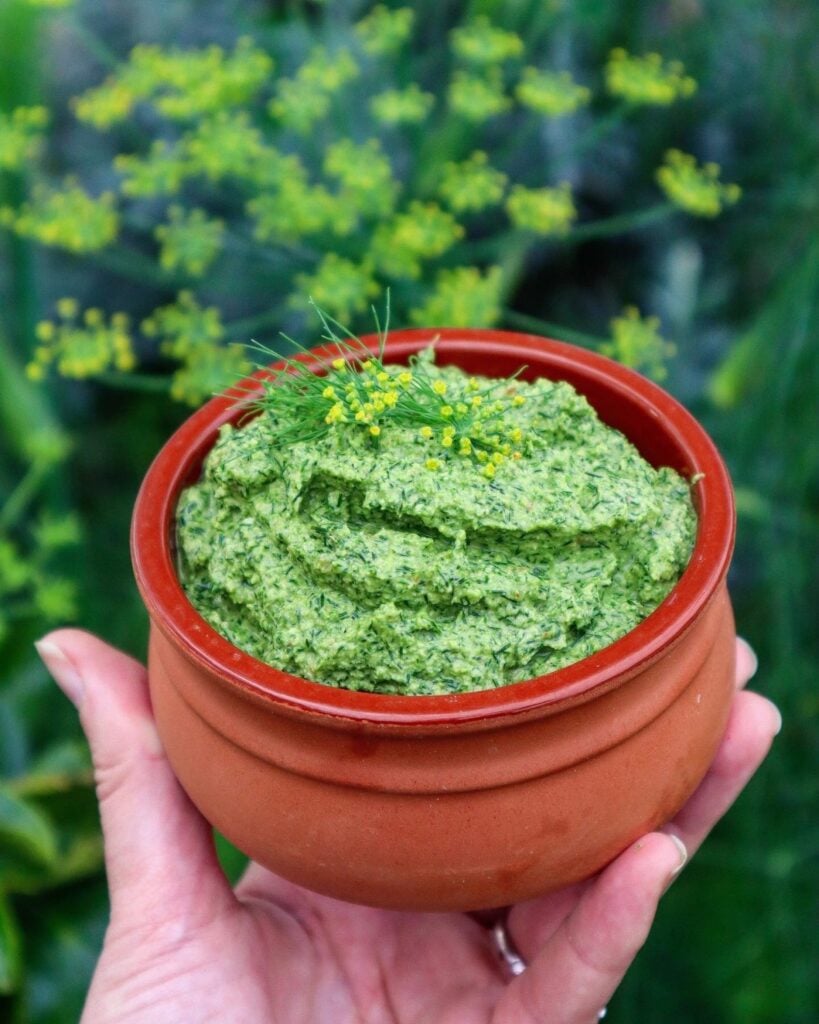
I made this delicious Fennel Front Pesto to use up the all the beautiful fresh fennel fronds I had. Super quick and easy to make! Are you growing fennel and not sure what to make with all those beautiful fennel fronds? I grew fennel for the first time this year so I had to start figuring out what to make with the abundance of greenery after harvesting the fennel.
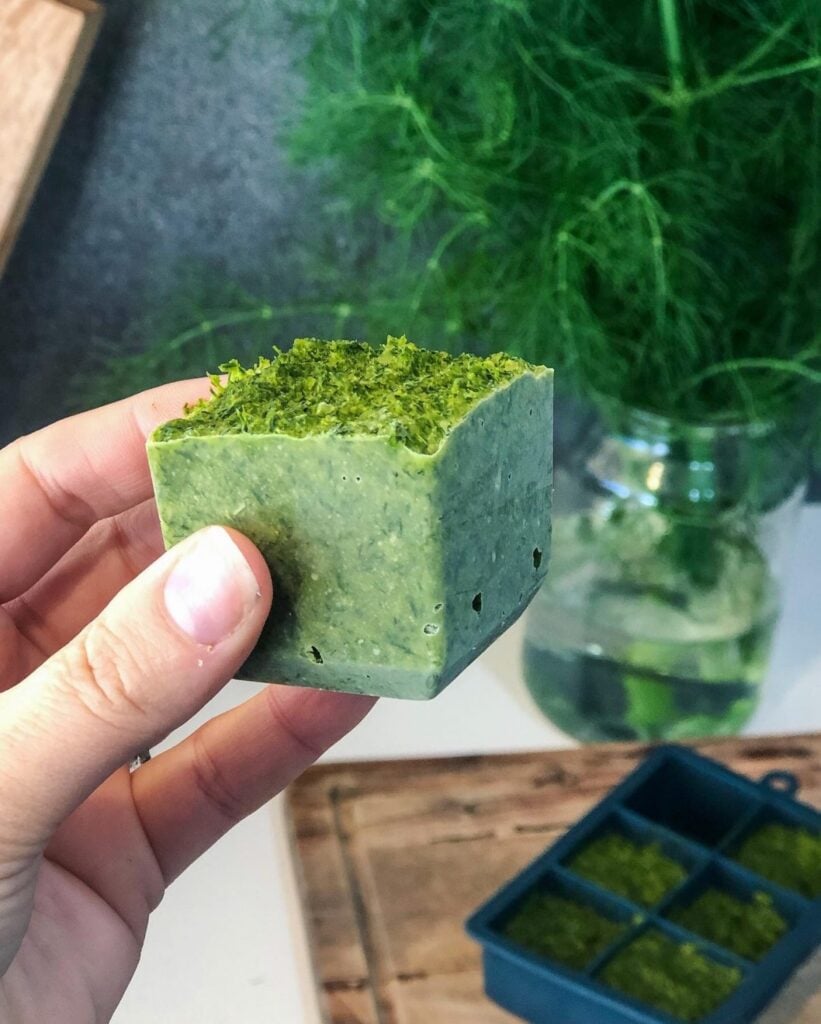
I often will portion out my extra pesto into ice cubes and freeze them in a container to preserve for future meals. Pesto is great to have on hand in the freezer to add to sauces, soups, quick and easy pasta sauce and even just defrosted as a dip for a cheese platter. Fennel Frond Pesto adds a fresh herbaceous flavour and saves buying dip in plastic containers!
Fennel Frond Pesto
Yield: 2 cups
Prep Time: 10 minutes
Total Time: 10 minutes
Ingredients
1/2 cup Walnuts
1/4 cup Olive Oil
1/4 cup Distilled Water
2-3 cups Fennel Fronds
2 Garlic Cloves
2 tsp Fresh Lemon Juice
Sprinkle of Salt to Season
Instructions
Wash Fennel Fronds and remove hard woody centre stem.
Place all ingredients EXCEPT Walnuts in a Nutribullet or food processor. Blitz until combined and fronds have broken up into small pieces.
Add the Walnuts and blitz to combine. If the mixture looks a little thick or dry add in an extra dash of water or olive oil.
Taste and add extra salt if needed and ready to serve!
Notes
If you want to preserve divide the extra mixture into ice trays and freeze. I use large Ice trays. Then once it has frozen place in an airtight, freezer-proof container until you are ready to use.
I use a Nutribullet or stick blender as that is all I have. They work well but that is why I split the walnuts and greens up as it takes longer to blitz the greens.
Nutrition Information:
Yield: 4Serving Size: 1/4 cup Amount Per Serving:Calories: 64Total Fat: 5.4gCholesterol: 0mgSodium: 72.5mgCarbohydrates: 3.5gSugar: 0gProtein: 1.7g
More about Fennel
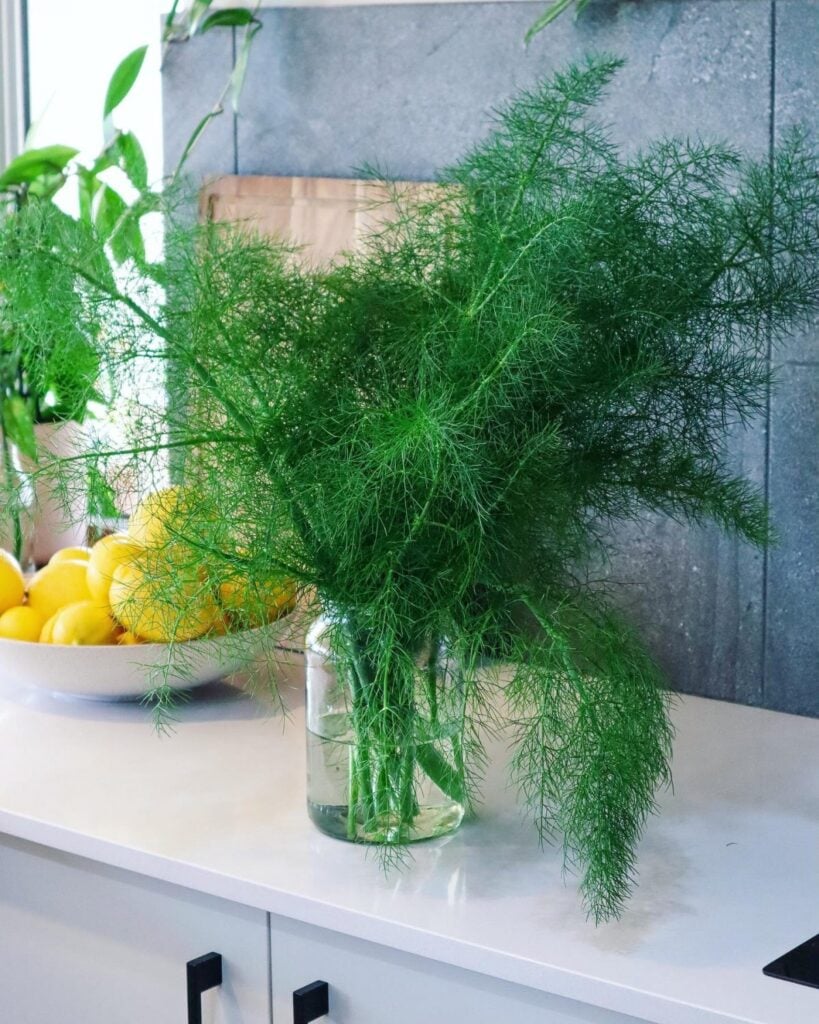
Fennel is such a great addition to your permaculture garden. The bulbs provide plenty of food which can be eaten fresh in a salad, roasted or pickled. The leaves are a great addition to salads, soups and teas. It also has beautiful yellow flowers that have a mild liquorice/ aniseed flavour and are an amazing edible flower as well as to attract pollinators to your garden. Their big bushy fronds make a great haven for beneficial insects and they look beautiful in vases as cut greenery and flowers. They self-seed very well so you will have fennel growing for many years to come with very little effort!
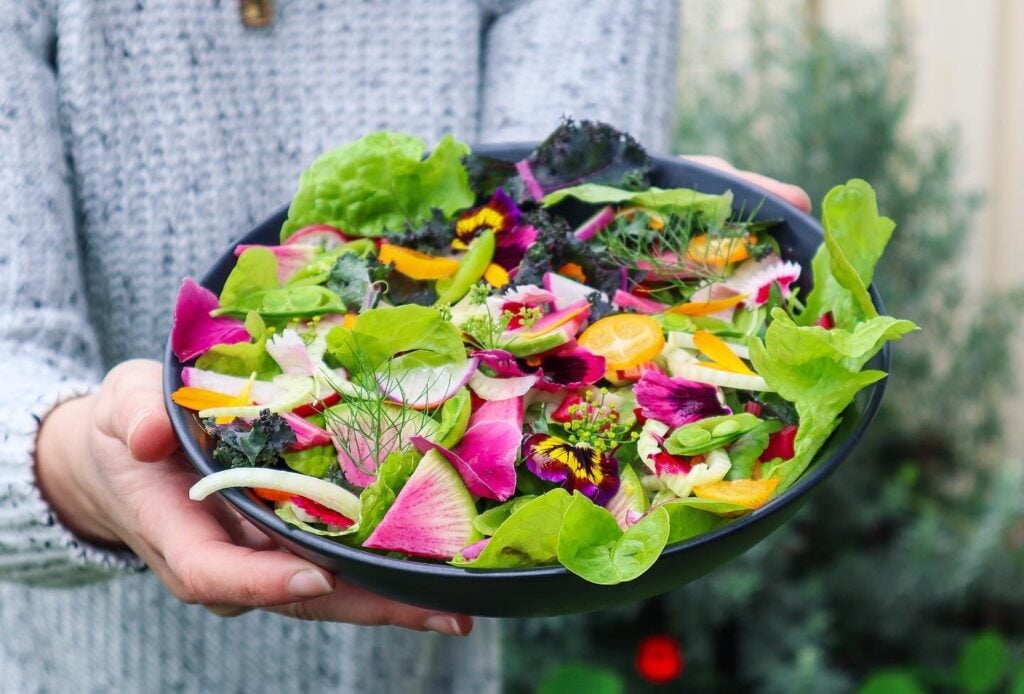
Fennel Salad with Kumquat, Watermelon Radish and edible flowers.
I am always learning new ways to use, cook and preserve everything I grow. I want to maximise my harvests and I am doing that by continuously expanding my knowledge and recipe base. Fennel Frond Pesto is now added to my list and I will continue to explore new ways to use all the parts of the fennel plant. Join me over on YouTube for weekly videos as I continue on my journey to live a more Sustainable Lifestyle.
I made this delicious Fennel Front Pesto by swapping out the greens from my garden pesto recipe. It is a super versatile recipe to use up any extra herbs and greens from your garden.
Watch my video below to find out more about my favourite edible flowers.
What do you use Fennel Fronds for? Leave a comment below 🌿
Holly 🌱
MY GARDENING ESSENTIALS // Fertiliser spray gun: https://bit.ly/366nL1t Retractable Hose: https://bit.ly/2TSC0Bo More gardening tools: https://bit.ly/32IQmbD
DISCLAIMER: Links included in this description might be affiliate links. If you purchase a product or service with the links that I provide I may receive a small commission. There is no additional charge to you! Thank you for supporting my page so I can continue to provide you with free content!