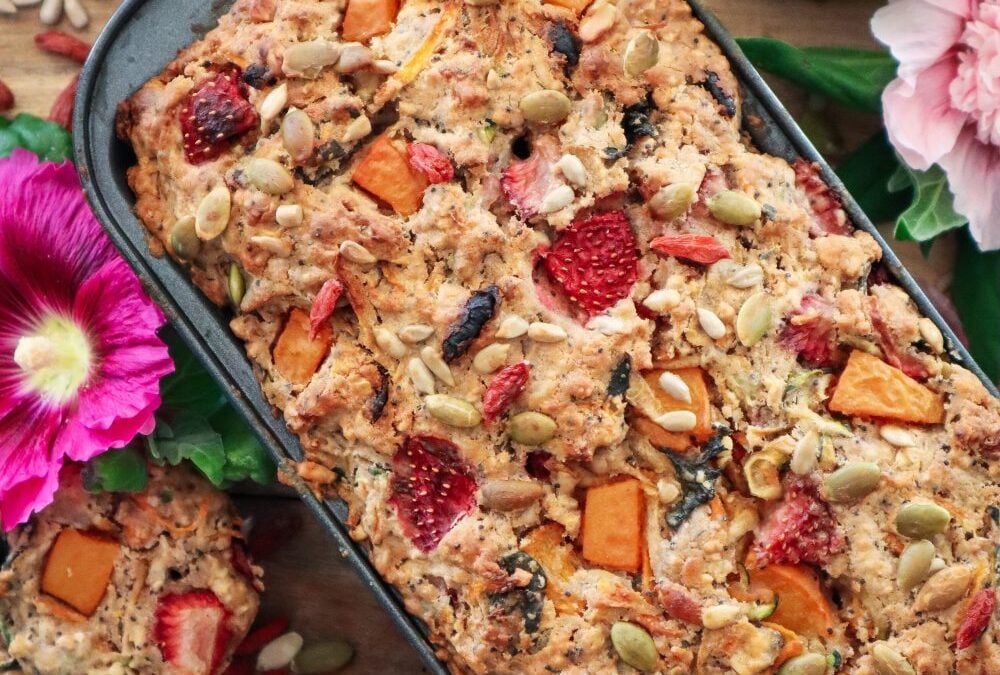
Have odd fruit and veggies to use up? This leftover breakfast loaf is a great way to reduce waste and make a delicious and healthy breakfast (or anytime) alternative. This recipe is flexible to allow a range of fruits, nuts, and seeds you have available.
Leftover Breakfast Loaf
Prep Time: 15 minutes
Cook Time: 45 minutes
Additional Time: 20 minutes
Total Time: 1 hour20 minutes
Have random odd fruit and veggies that need to be used up? This leftover breakfast loaf is a delicious way to make sure they don't go to waste.
Ingredients
Dry ingredients
2 cups flour
1 cup oats
1 tsp cinnamon
1 tsp mixed spice
1 TBSP Baking Powder
1/2 cup seeds (i used 50:50 pumpkin and sunflower)
1/2 cup walnuts (choose your favourite nuts)
1 TBSP Poppy Seeds
1/2 cup chopped mixed dried fruit (Goji berries, apricot, raisons)
Wet ingredients
1/2 cup coconut oil (liquid)
1/2 cup quality maple syrup
3/4 cup oat milk (or preferred milk)
Fruit & Veggies
1 cup grated zucchini
1 cup grated carrot
1 cup chopped greens/ spinach
1 cup grated pear (or apple)
1 cup diced Apricot & strawberry (swap for berries or cherries)
Instructions
Preheat oven to 180 degrees.
Mix dry ingredients in a bowl.
Grate and add chopped fruit and veggies to a bowl along with all the wet ingredients. Stir to combine.
Fold in the dry to the wet mix and combine with minimal mixing (don't over-mix).
Grease a loaf or bread tin and add in the mix. Bake for 45 minutes or until the skewer comes out clean.
If there is a little too much for the tin ( in my case) add to muffin trays (but these will only take 20 minutes).
Allow the tin to cool for 10 minutes then remove the loaf and cool for a further 10-15mins on a wire rack (do not slice straight out of the oven or it will fall apart and turn dry).
Notes
To freeze the extra loaf cut it into slices first and pop it in the compostable ziplock bags.
Mix and match fruit, veggies, nuts, and seeds to make your own delicious blends.
Frozen berries can be used add them in frozen don't thaw them out first.
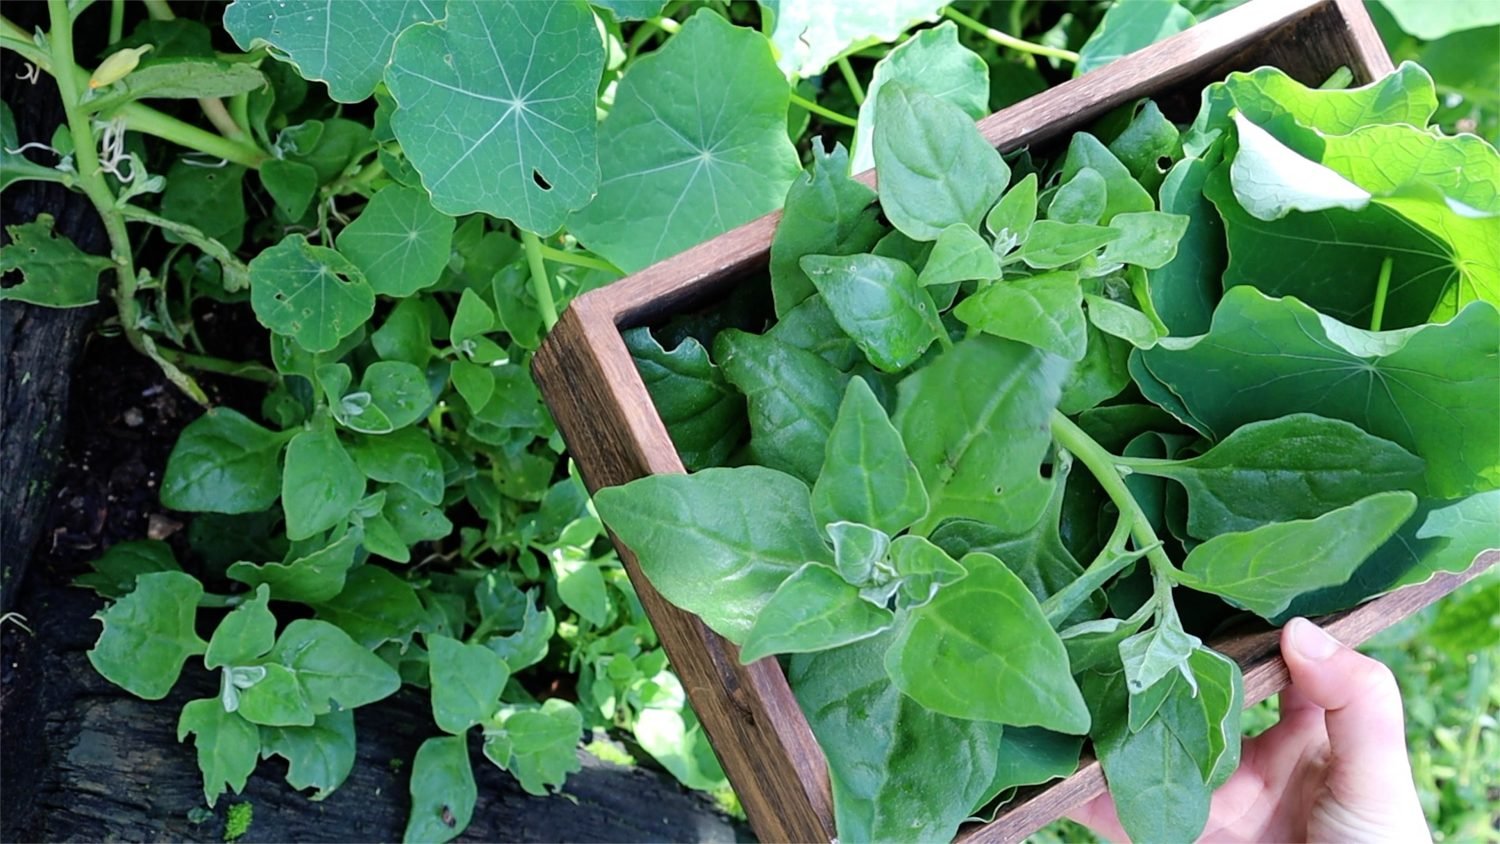
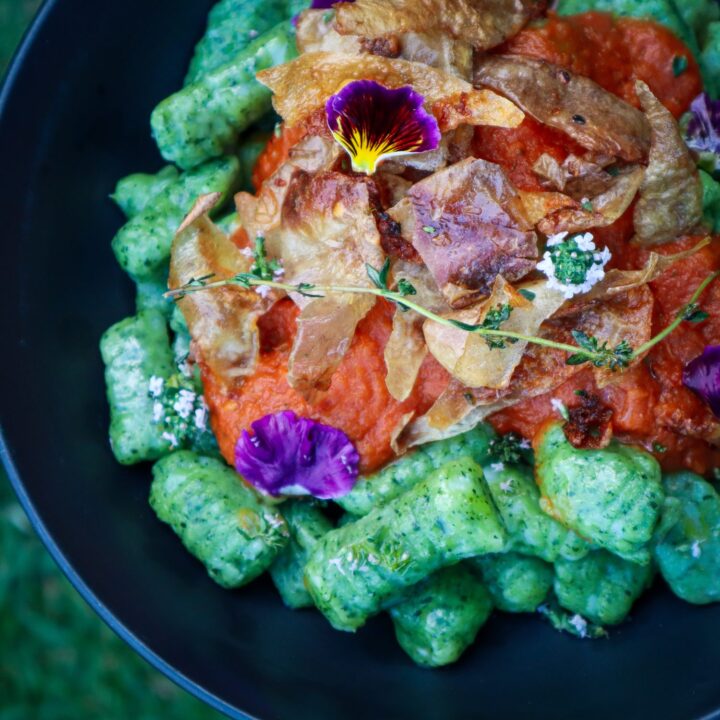
Soft pillowy spinach gnocchi with crispy potato skins. Serve with herbed butter or the simple roasted tomato sauce recipe. Delicious! Unlike most spinach varieties the NZ Spinach / Warrigal greens produce in abundance over the summer! This edible ground cover is a powerhouse in the garden and pairs well with so many dishes. Spinach gnocchi is so vibrant and delicious! Making gnocchi can seem scary but this recipe has just 4 ingredients and is so worth it! I have used NZ spinach but you could swap it out for regular spinach, chard, or any other leafy greens you have growing in the garden.
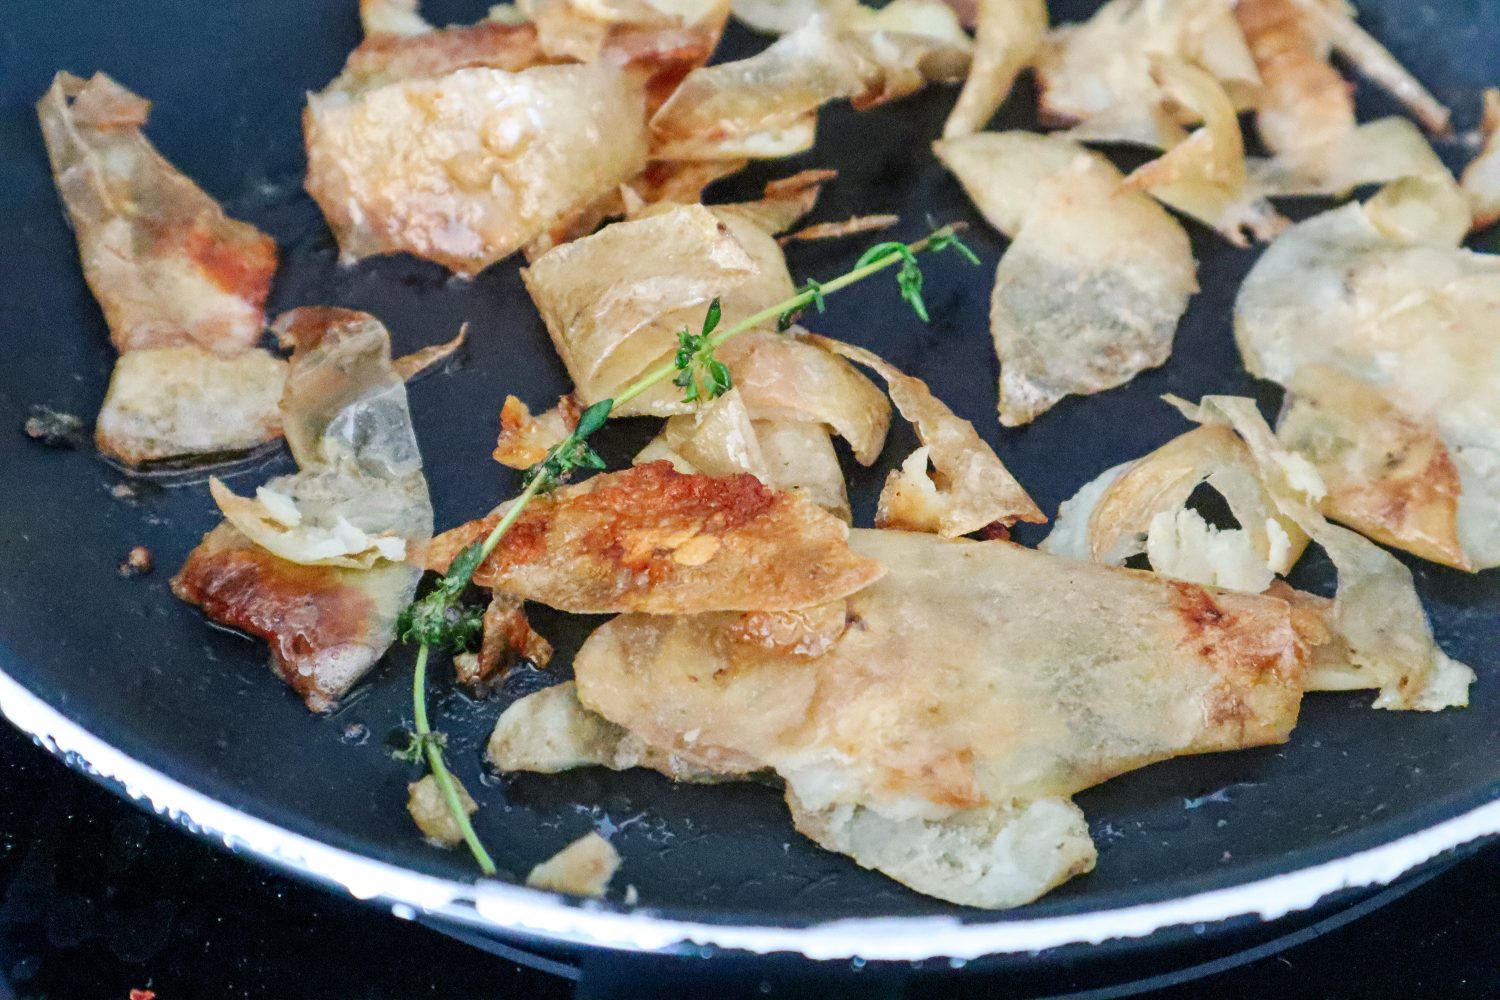
Most recipes call for the skins to be removed so after the potatoes are baked we fry them up and add them on top for a low-waste delicious meal!
Which Potatoes work best?
Floury potatoes work best (not waxy) such as Desiree, Yukon Gold, and Creme Royle. AVOID – Red Royle, Kipler. Normal “white potatoes” at the supermarkets tend to be quite waxy. This means your gnocchi will have more little lumps in but still possible.
Can I use different greens?
Yes! I love my recipes to be flexible with what is in season and growing in my garden. Try swapping NZ spinach for: Chard (remove stalks and fry them up to add to the dish), other spinach varieties, Kale, Beetroot leaves, Sweet potato leaves, or a mixed combination!
NZ Spinach Gnocchi with Crispy Potato skins
Yield: serves 4
Prep Time: 45 minutes
Cook Time: 1 hour30 minutes
Total Time: 2 hours15 minutes
Soft pillowy spinach gnocchi with crispy potato skins. Serve with herbed butter or the simple roasted tomato sauce recipe. Delicious!
Ingredients
Spinach Gnocchi
4 medium-large potatoes (see notes)
2 cups NZ Spinach (or other leafy greens such as chard or spinach)
1 1/4 cups flour (see notes)
1 tsp salt
Crispy Potato Skins
1-2 sprigs of fresh Thyme
1 TBSP Butter
Instructions
Preheat oven to 180 degrees. Wash your potatoes and stab holes all over with a fork. Sprinkle with 1/2 tsp of salt and bake for 45-1hour or until a fork easily goes right through. If some are larger than others keep them in a little longer. You don't want any hard potato bits for this.
While the potatoes cook blanch your greens. Remove hard stems and cook them in simmering water until vibrant green (40 seconds - 1 minute) then plunge into a bowl of iced water. Strain and blitz using a blender or mixer until a puree. Add a splash of water if needed to get blended.
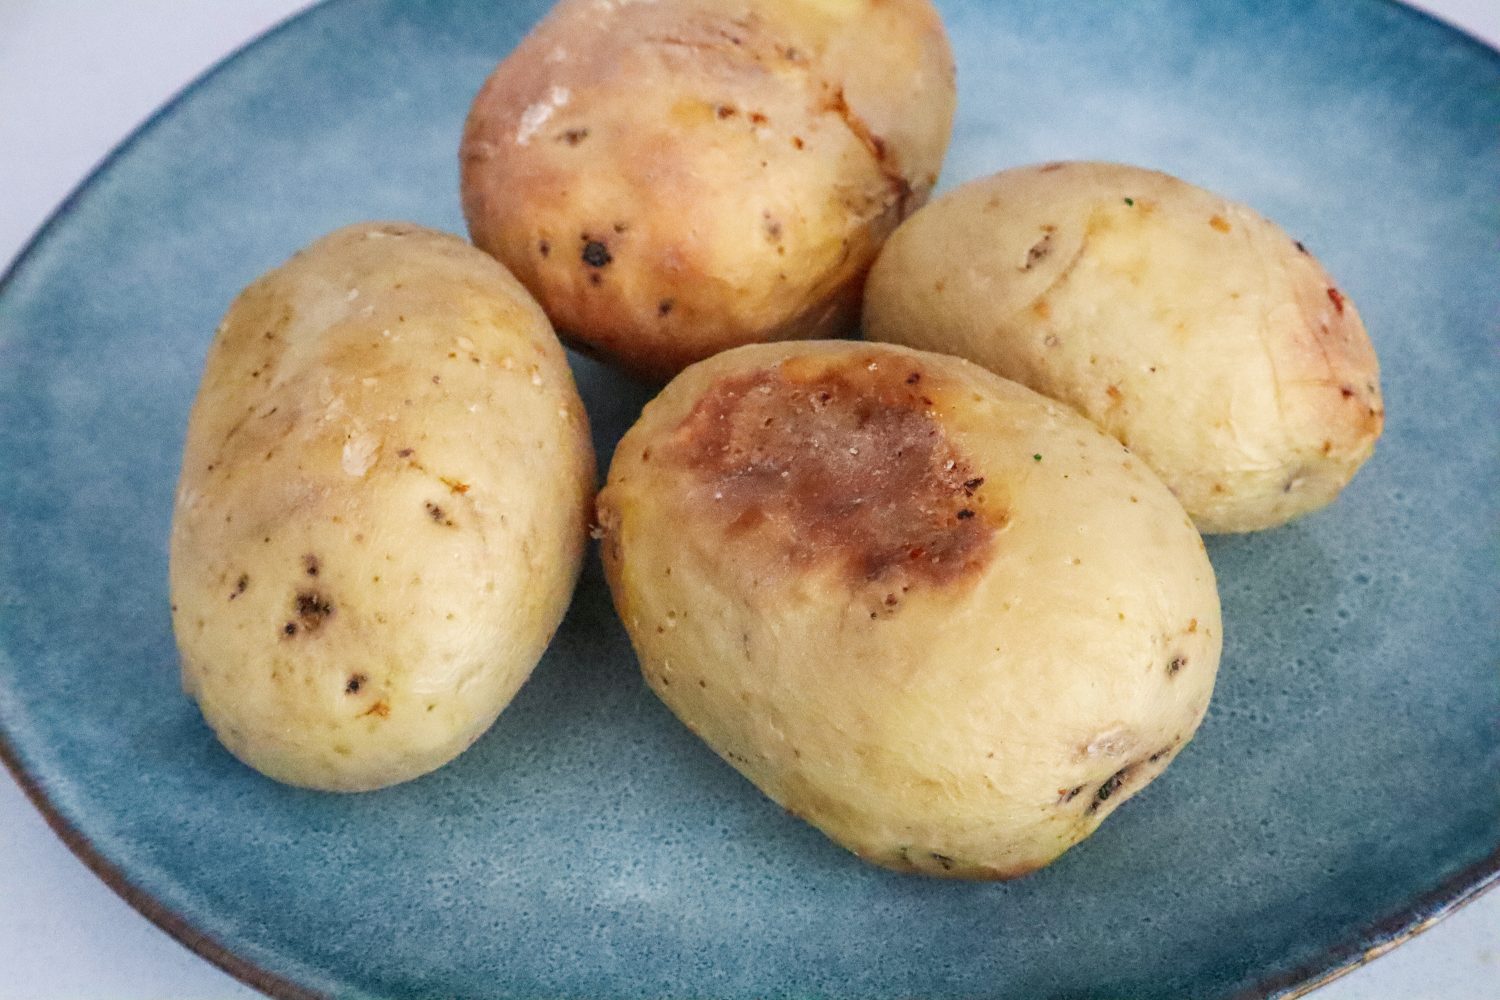
Remove potatoes from the oven and allow them to cool (until you can easily peel them).
Peel the skins off using a knife or just peel them back with your fingers. They are quite easy to peel once the skin is cooked and slightly golden. Don't waste these delicious skins! Put them on a plate and set them aside.
Mash the potatoes into a fine mash. Use a potato ricer or a potato masher and fork to get all the little lumps out.
Add mashed potato to a bowl and mix in 1/2 cup of greens puree and 1 tsp salt. Mix until fully combined.
Add in flour in parts and mix to form a dough. You may need a little less or a little more flour depending on how much moisture was in the potatoes and greens. You want it to still be slightly sticky but easy enough to roll. Similar to cookie dough. The more flour you add the tougher they get so try to keep less is more approach but it needs to be workable.
Divide the dough into 1/4s and roll long sausage lengths onto a floured surface. Cut into 1-inch lengths.
Have a floured tray or plate ready to put your finished gnocchi on.
Using your thumb push down and roll each gnocchi piece over the back of a fork or a gnocchi board ($4 at most kitchen stores) to create the lines. This is optional. The lines make them look the part and also allow more space for flavour to cling to.
In a pan add butter and thyme and fry potato skins until crispy. Set aside.
There are two ways to cook gnocchi - boiled or pan-fried, both are delicious. For this recipe, I used the boiling method because I was serving it with crispy potato skins. To boil add your gnocchi to a pot of boiling water seasoned with salt. Cook until they float to the surface (roughly 1 minute). Do this in batches so you don't overcrowd the pot and all the gnocchi have room to float to the surface. Strain and add to a serving bowl. To pan fry - add butter or oil to a pan (chuck in some more thyme and cook the gnocchi until slightly golden on each side)
Pour over hot tomato sauce or herb-infused brown butter and top with crispy potato skins.
Notes
Make the tomato sauce at the same time while you wait for your potatoes to cook. Tomatoes can be roasted in the oven along with the potatoes.
Choosing potatoes - Floury potatoes work best (not waxy) such as Desiree, Yukon Gold, and Creme Royle. AVOID - Red Royle, Kipler. Normal "white potatoes" at the supermarkets tend to be quite waxy. This means your gnocchi will have more little lumps in but still possible.
Flour - low protein flour is best for Gnocchi but all-purpose flour also works.
Made extra? Freeze your uncooked gnocchi pieces on a floured tray and once frozen add them to a freezer bag or container. Next time you want a meal simply pull out and boil from frozen or defrost and panfry.
Simple Roast Tomato Sauce
Yield: 2 cups / 400-500g
Prep Time: 10 minutes
Cook Time: 45 minutes
Additional Time: 5 minutes
Total Time: 1 hour
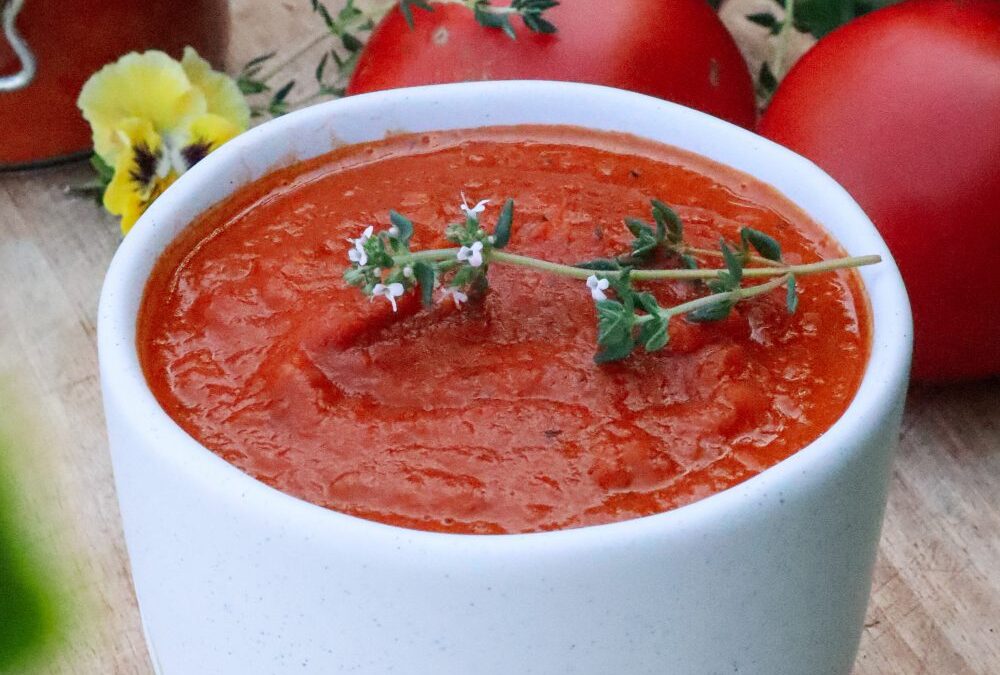
Simple and delicious tomato sauce. Staple condiment and the backbone of so many garden-to-plate dishes!
Ingredients
6-8 medium tomatoes (or 2-3 cups of cherry tomatoes)
2-3 Garlic cloves
1 tsp salt
4 TSBP Olive oil
1 medium brown onion
1 TBSP Balsamic vinegar
5-6 sprigs of fresh thyme (2inch long)
1/2 cup fresh basil
1/2 tsp chilli flakes
Instructions
Preheat oven to 180 degrees Celcius. Drizzle roughly 1 TSBP oil in a roast dish.
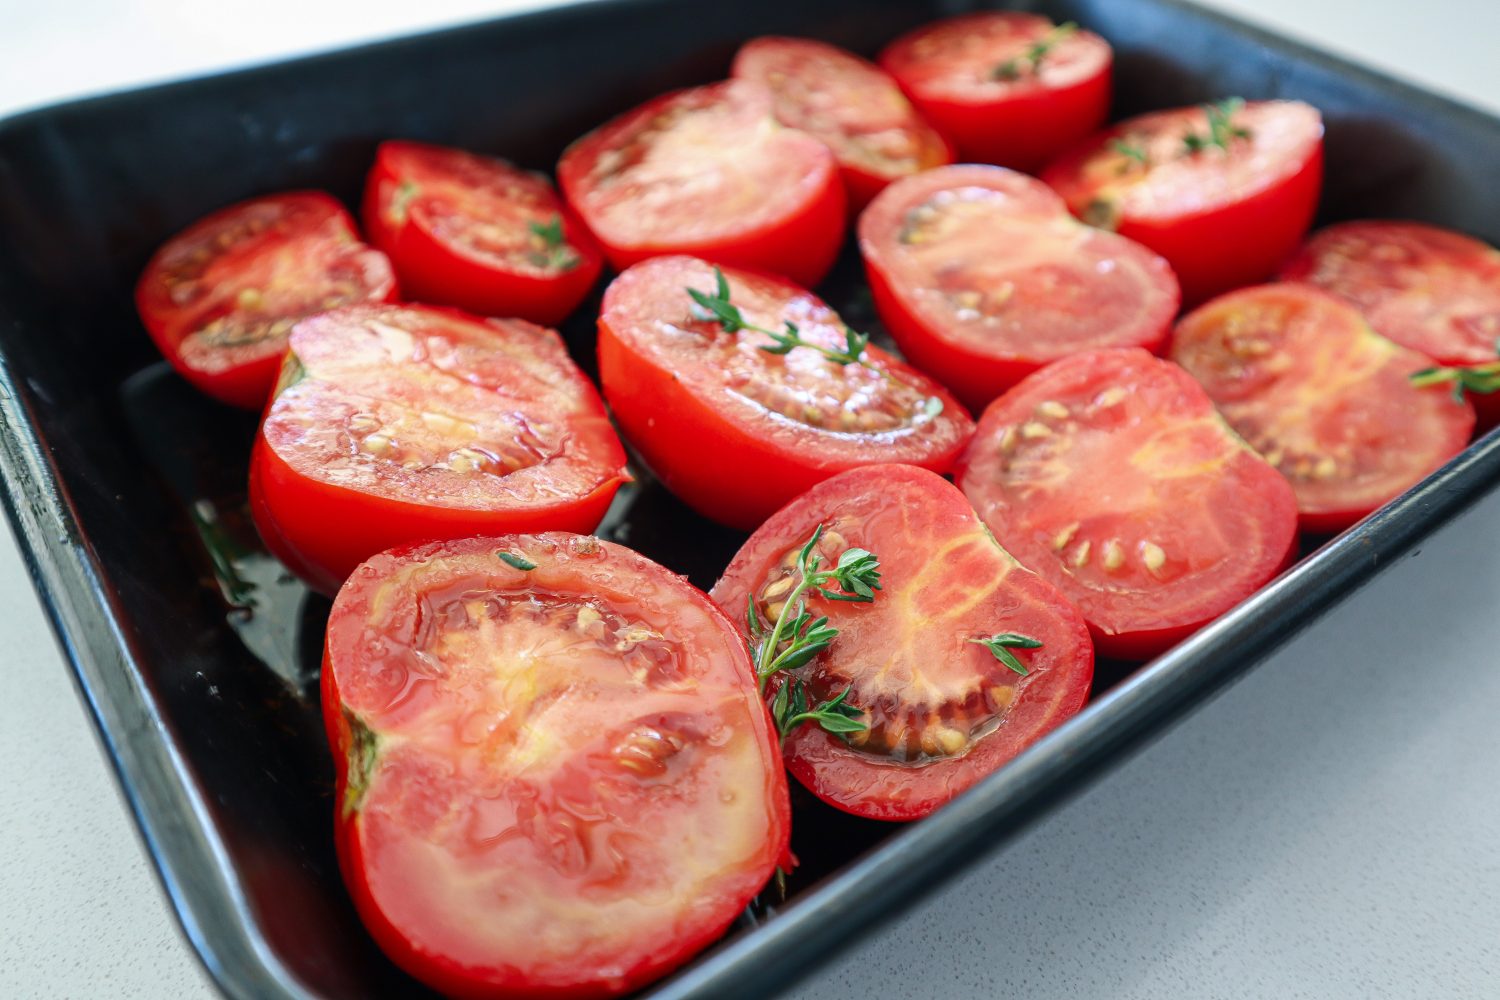
Cut tomatoes in half and add to the roasting dish skin side down. Add Garlic cloves (skin on) and thyme throughout the tomatoes.
Drizzle another TBSP of olive oil on top and season with salt.
Roast for 40-45 minutes until cooked and slightly golden. Time will be significantly less for cherry tomatoes (20 minutes).
While the tomatoes are roasting, dice the onion and add to a pan with 1 TBSP olive oil. Cook until soft and slightly brown. Pour in the balsamic and deglaze the pan (get all the delicious flavour off the bottom). Remove from the heat.
Remove the garlic from the skins and add the roasted ingredients to a blender (or jug and use a stick mixer). Allow the tomatoes to cool slightly before blitzing so the mixture isn't piping hot. Add in the chopped fresh basil, chilli flakes, and cooked onions. Blitz to combine. Smooth or chunky however you prefer.
Taste and season with extra salt or chilli to your liking.
Notes
Tomatoes will have varying amounts of liquid. If you get a lot of liquid in the bottom of the roasting dish, pour some to the side and blitz then add if you want a runnier sauce.
Add excess to a jar and keep in the fridge for 2-3 days or freeze for longer storage.
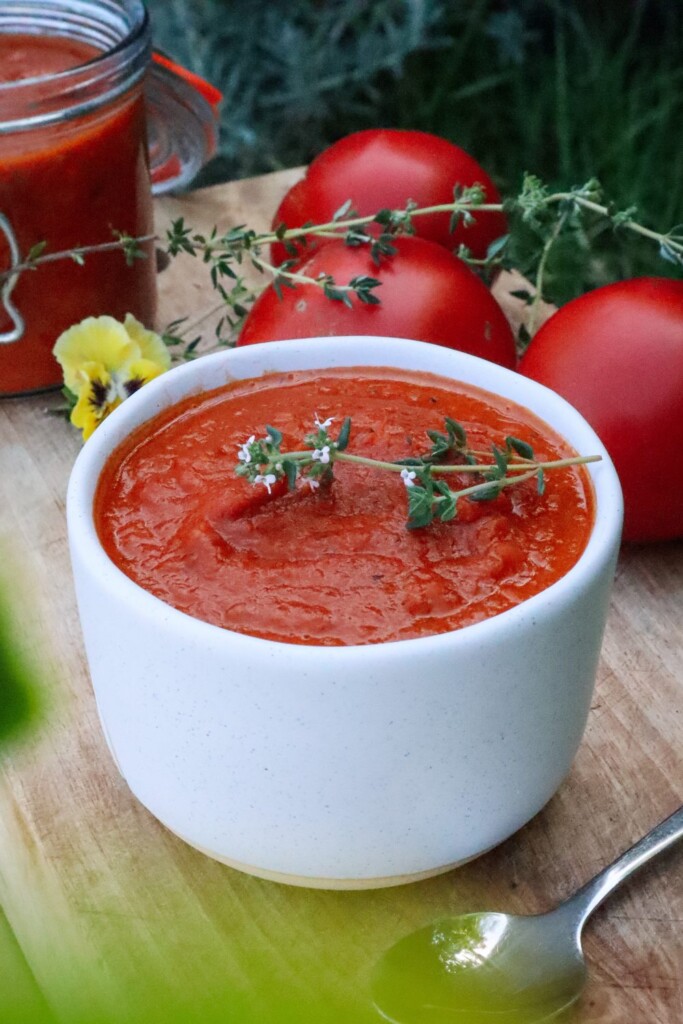
There is nothing quite like the taste of homemade tomato sauce! This recipe is so easy – basically, just cook and blitz and you have the most incredible tomato sauce to pour over pasta, pizza base, or dip crunchy potato wedges into. Add fresh herbs from your garden and it’s a winning combo. Try this sauce poured over spinach gnocchi for a mouth-watering garden-to-plate dinner.
Simple Roast Tomato Sauce
Yield: 2 cups / 400-500g
Prep Time: 10 minutes
Cook Time: 45 minutes
Additional Time: 5 minutes
Total Time: 1 hour
Simple and delicious tomato sauce. Staple condiment and the backbone of so many garden-to-plate dishes!
Ingredients
6-8 medium tomatoes (or 2-3 cups of cherry tomatoes)
2-3 Garlic cloves
1 tsp salt
4 TSBP Olive oil
1 medium brown onion
1 TBSP Balsamic vinegar
5-6 sprigs of fresh thyme (2inch long)
1/2 cup fresh basil
1/2 tsp chilli flakes
Instructions
Preheat oven to 180 degrees Celcius. Drizzle roughly 1 TSBP oil in a roast dish.
Cut tomatoes in half and add to the roasting dish skin side down. Add Garlic cloves (skin on) and thyme throughout the tomatoes.
Drizzle another TBSP of olive oil on top and season with salt.
Roast for 40-45 minutes until cooked and slightly golden. Time will be significantly less for cherry tomatoes (20 minutes).
While the tomatoes are roasting, dice the onion and add to a pan with 1 TBSP olive oil. Cook until soft and slightly brown. Pour in the balsamic and deglaze the pan (get all the delicious flavour off the bottom). Remove from the heat.
Remove the garlic from the skins and add the roasted ingredients to a blender (or jug and use a stick mixer). Allow the tomatoes to cool slightly before blitzing so the mixture isn't piping hot. Add in the chopped fresh basil, chilli flakes, and cooked onions. Blitz to combine. Smooth or chunky however you prefer.
Taste and season with extra salt or chilli to your liking.
Notes
Tomatoes will have varying amounts of liquid. If you get a lot of liquid in the bottom of the roasting dish, pour some to the side and blitz then add if you want a runnier sauce.
Add excess to a jar and keep in the fridge for 2-3 days or freeze for longer storage.
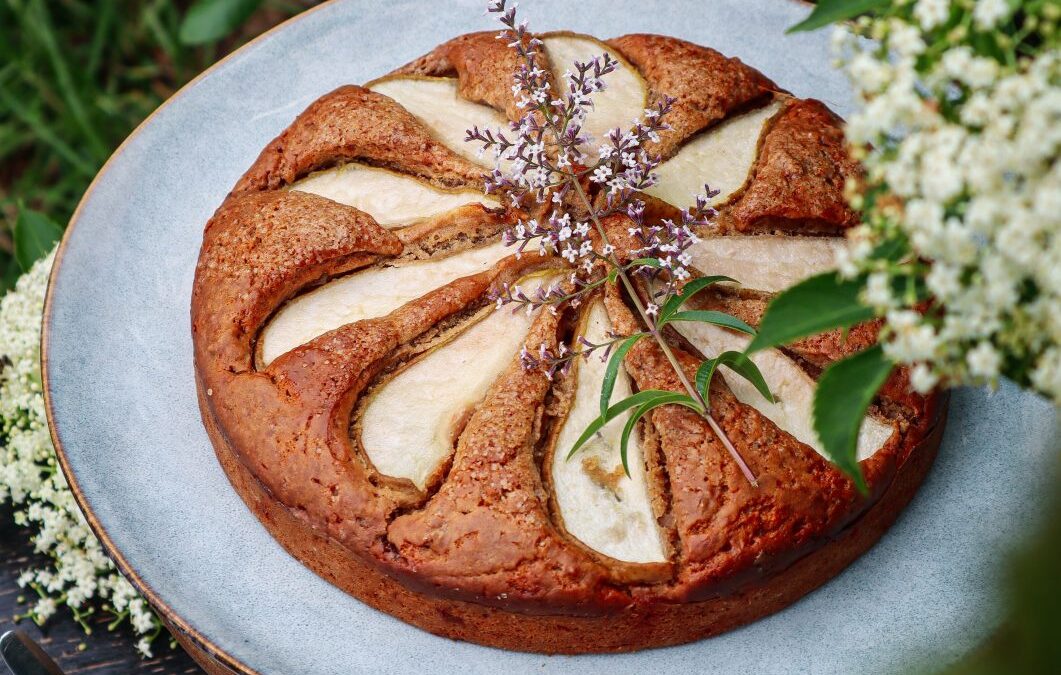
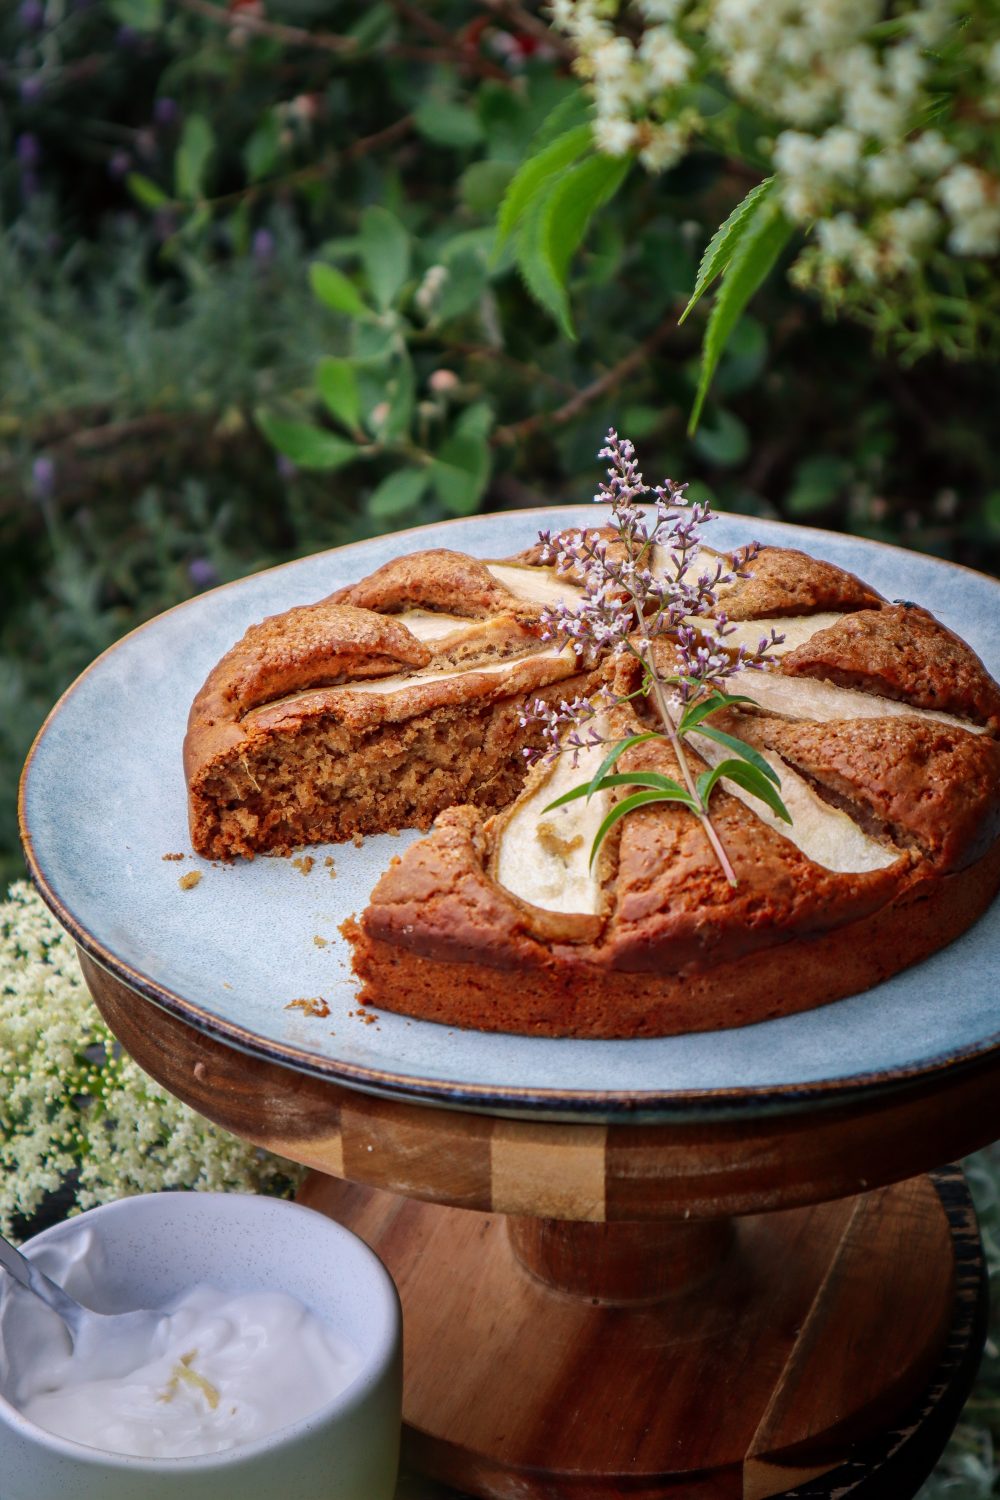
Ginger and Pear is a match made in heaven. This spiced ginger and pear tea cake is the perfect way to refuel after knocking out some tasks in the garden. Enjoy whilst sitting out in the garden with a cup of tea or coffee. If you love the warm, comforting flavors of ginger and pear, this Spiced Ginger and Pear Tea Cake is the perfect bake for you. This moist and fragrant cake combines fresh, juicy pears with the bold spice of ginger, making it a delightful treat for afternoon tea, cozy gatherings, or as a simple homemade dessert. Whether you’re an experienced baker or just starting out, this easy-to-follow recipe will quickly become a favorite in your kitchen.
Delicious Garden to Plate
Bursting with Flavor – The combination of fresh pears, fresh ginger, cinnamon, and honey creates a perfectly spiced cake that’s both aromatic and delicious.
Moist and Tender Texture – Thanks to the natural juiciness of the pears and creamy yoghurt, this cake stays wonderfully soft and moist.
Simple Ingredients – You probably already have most of these pantry staples at home, making it an easy go-to bake.
Perfect for Any Occasion – Enjoy a slice with a cup of tea, serve it as a weekend brunch treat, or bring it to your next gathering.
Tips for the Best Spiced Ginger and Pear Tea Cake
Use ripe but firm pears for the best texture and flavor.
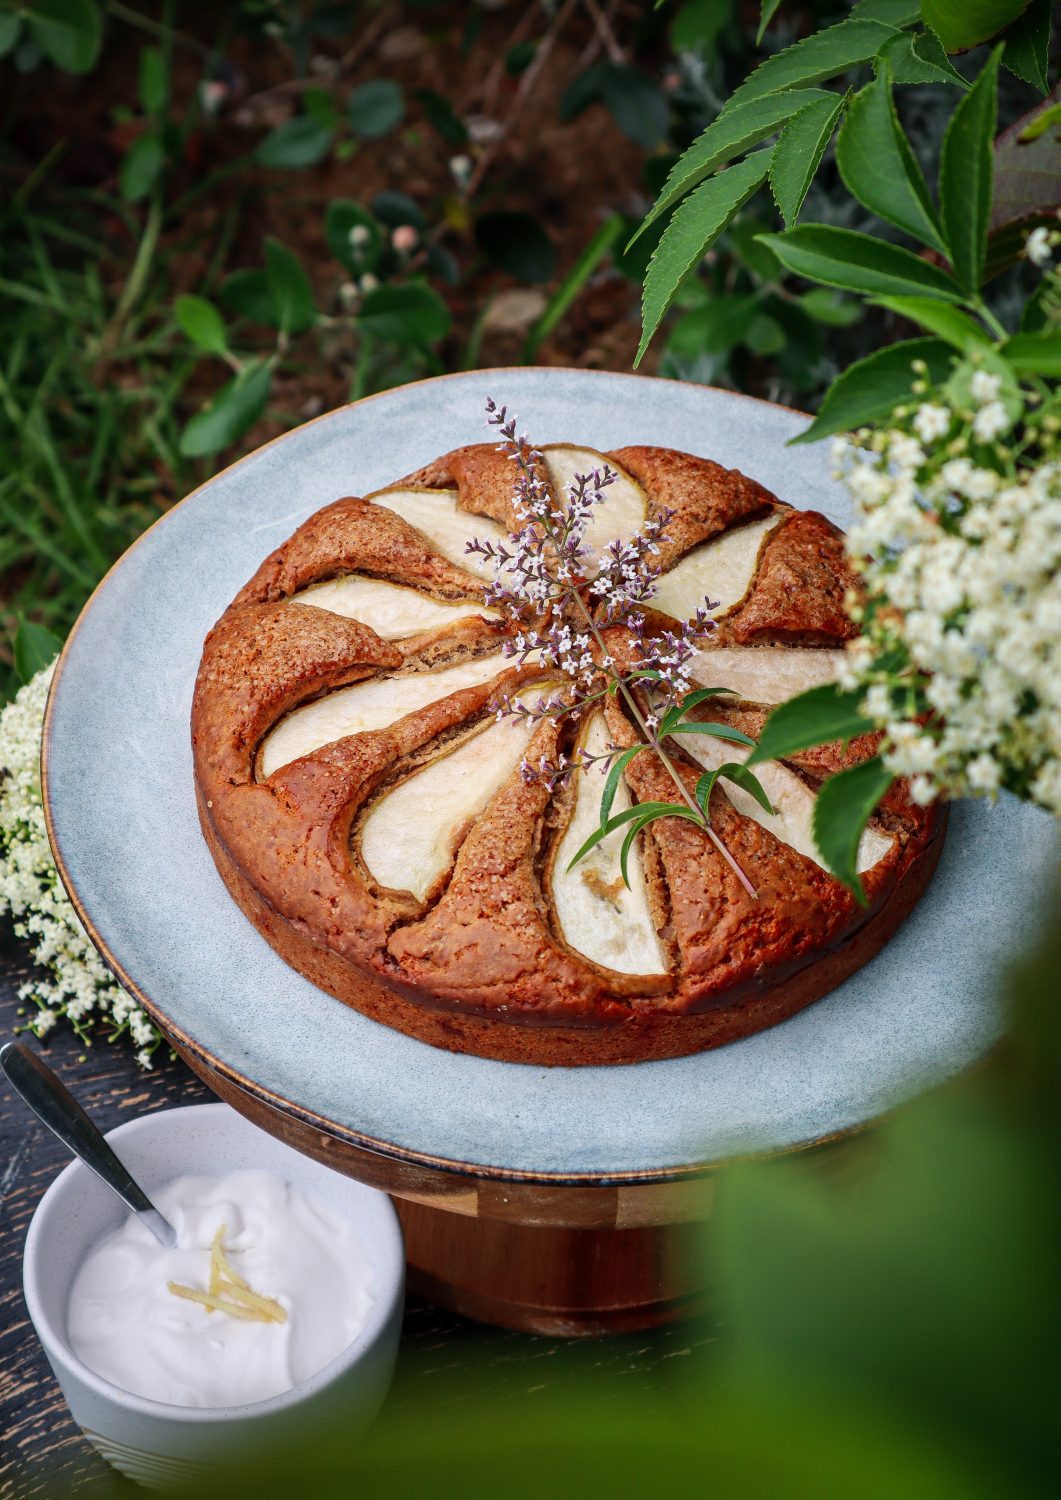
Grate 1/4 tsp fresh ginger into yogurt or cream to serve for an extra kick
This cake is naturally sweet, lightly spiced, and absolutely delicious. If you’re looking for a cozy, homemade treat that highlights seasonal produce, give this Spiced Ginger and Pear Tea Cake a try!
Spiced Ginger and Pear Tea Cake
Sugar and spice this tea cake is so nice! The perfect morning or afternoon tea treat to be enjoyed with a tea or coffee in the garden.
Ingredients
1 1/4 cups plain flour
1/2 cup coconut yoghurt*
1/3 cup olive oil
1 tsp baking powder
½ tsp baking soda
2 tsp freshly grated ginger
3/4 cup brown sugar
2 TBSP honey
1/2 tsp mixed spice*
1/2 tsp cinnamon
1 tsp ground ginger
1/3 cup milk
1 tsp apple cider vinegar or lemon juice
1 medium pear
1 TBSP raw sugar to sprinkle over the top
Instructions
Preheat oven to 180 degrees Celcius.
Mix all dry ingredients in a large mixing bowl.
Mix wet ingredients including grated ginger in a separate bowl.
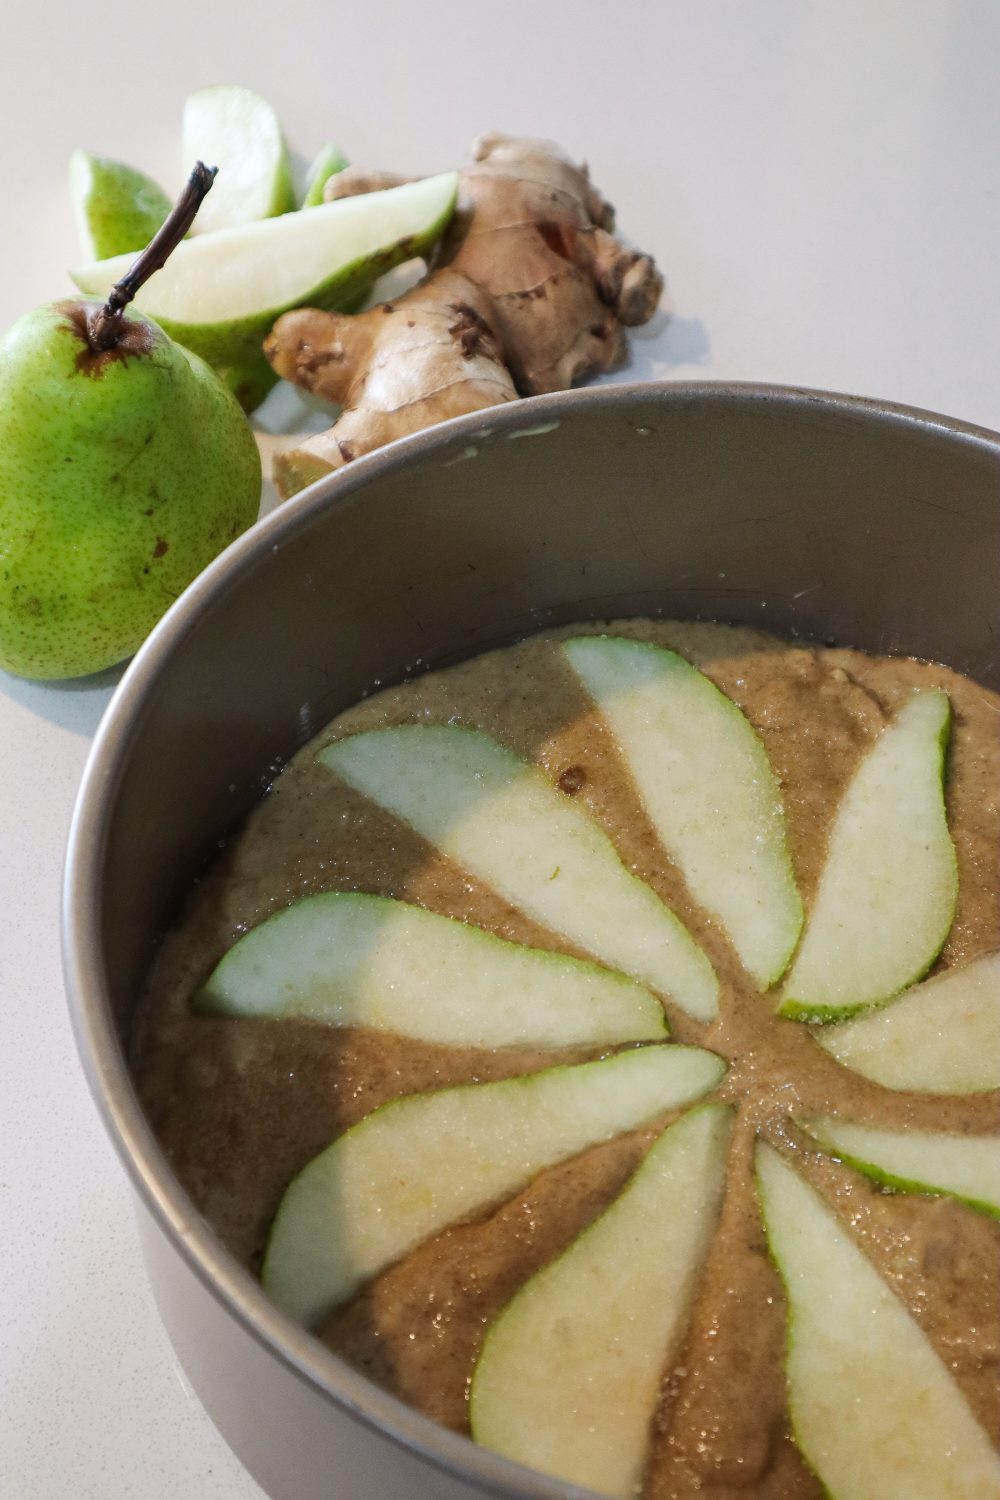
Wash and slice pears into slices lengthways. About 0.5cm - 1cm thick. (Thinner if you want them soft, thicker if you like them to still have some bite). Peel if you like but I don't bother.
Grease a 15-20cm cake tin.
Make a well in the center of the dry ingredients and gently mix the wet ingredients in until just combined. Don't over-mix.
Pour cake batter into the cake tin and level out to form a flat top. Place the pear slices in and gently push into the mixture. Sprinkle the TBSP of sugar on top.
Bake for 30- 45mins or until the cake skewer comes out clean.
Allow to cool and serve with extra yogurt or cream.
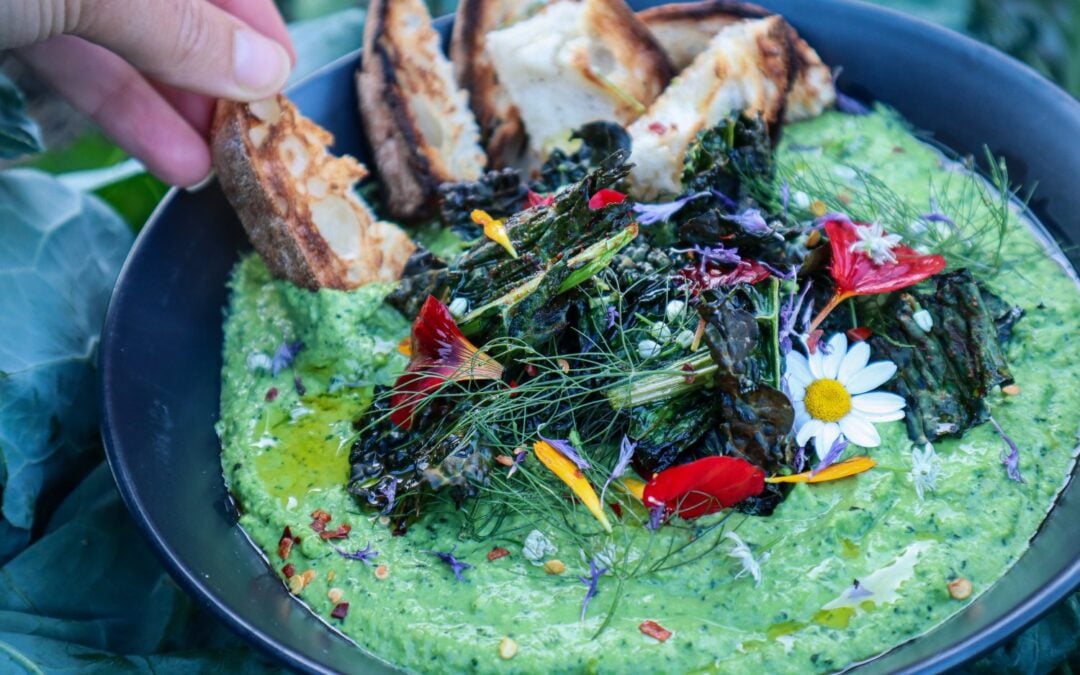
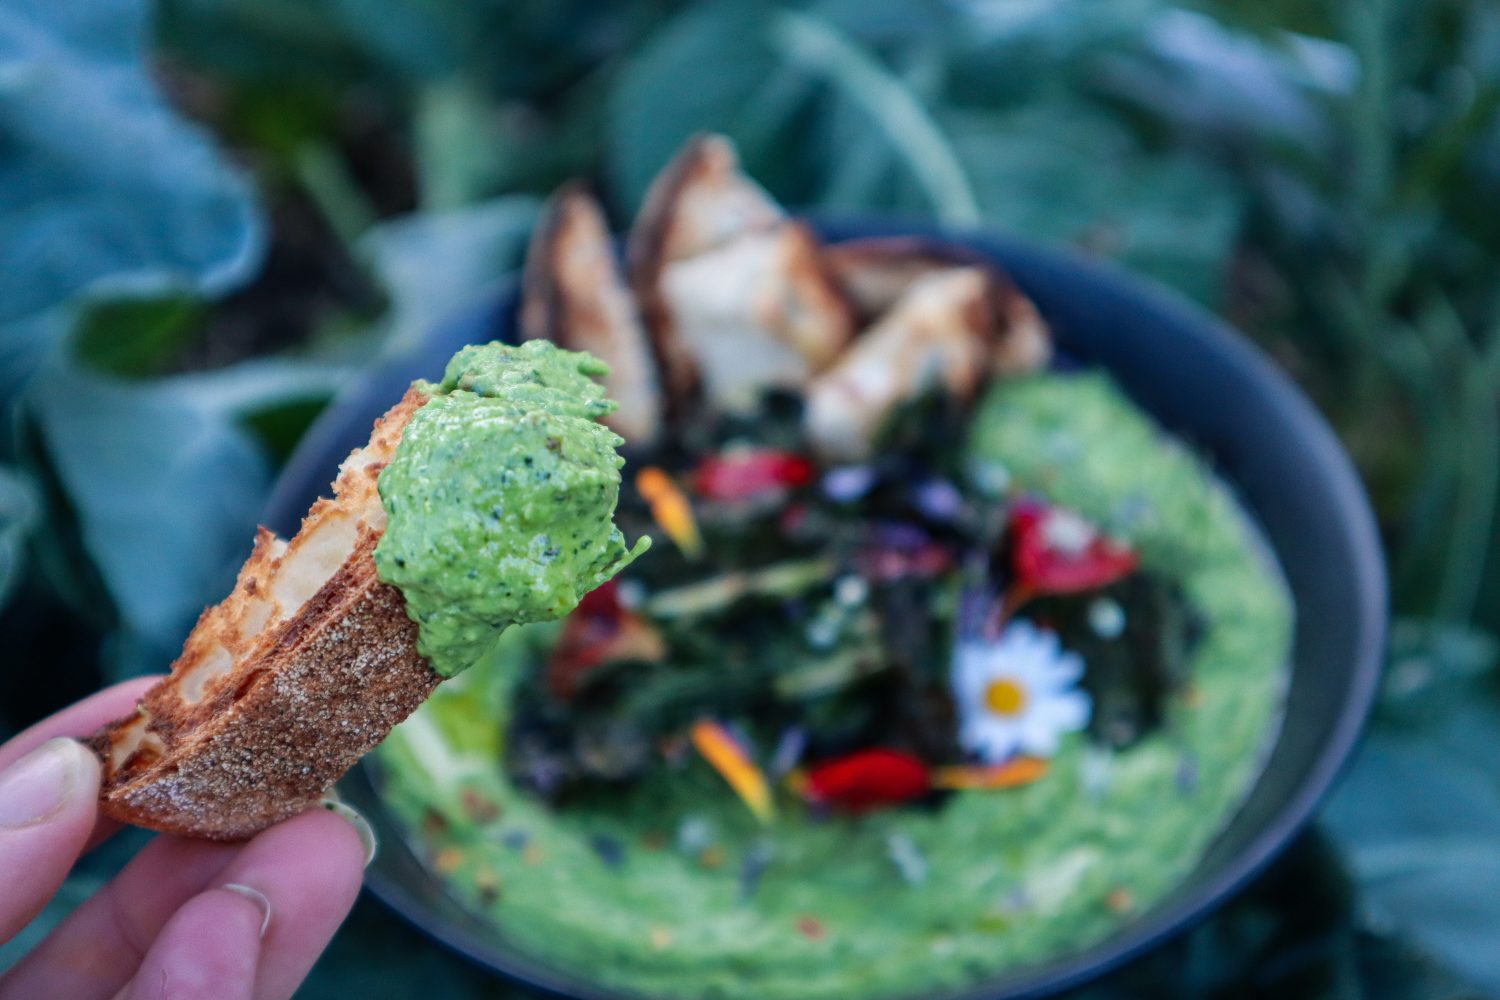
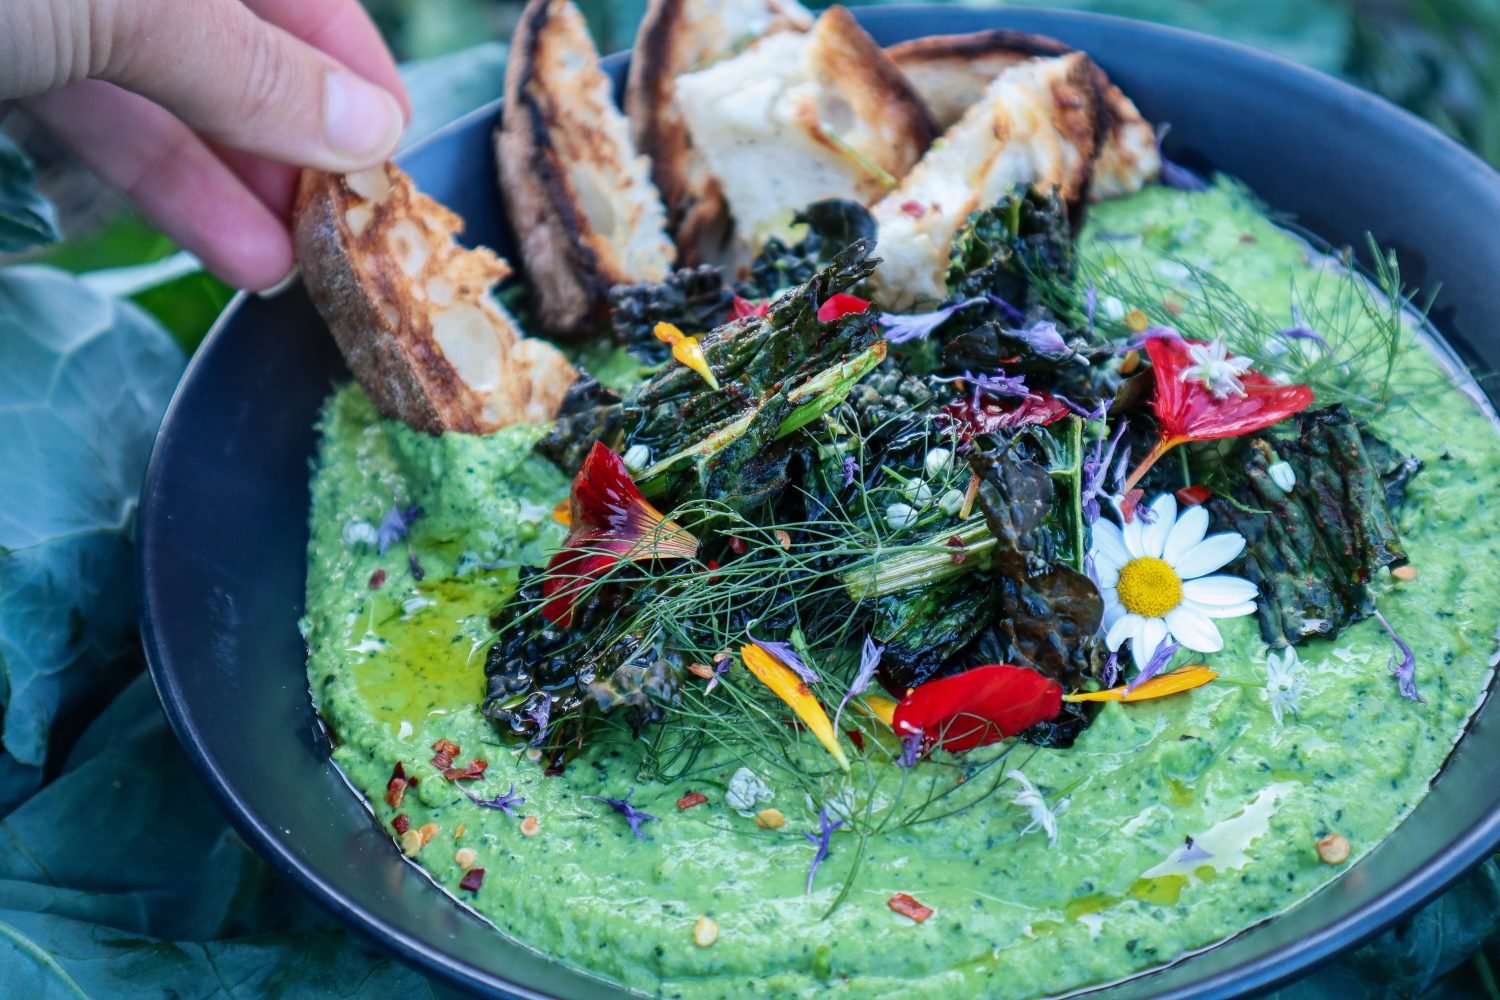
Creamy hummus loaded with crispy kale chips and edible flowers, this is a great way to use up your excess Kale harvest. Perfect for entertaining, served with toasted bread, pitas, or spooned onto a salad wrap. If you’ve got kale growing like crazy in your winter garden, this one’s for you! This Loaded Kale Hummus is a fresh, vibrant twist on classic hummus and one of my favourite ways to use up a big harvest of leafy greens. It’s packed with flavour, rich in nutrients, and makes the perfect colourful addition to snack platters, wraps, grain bowls or a simple piece of sourdough.
Ingredients from the Garden
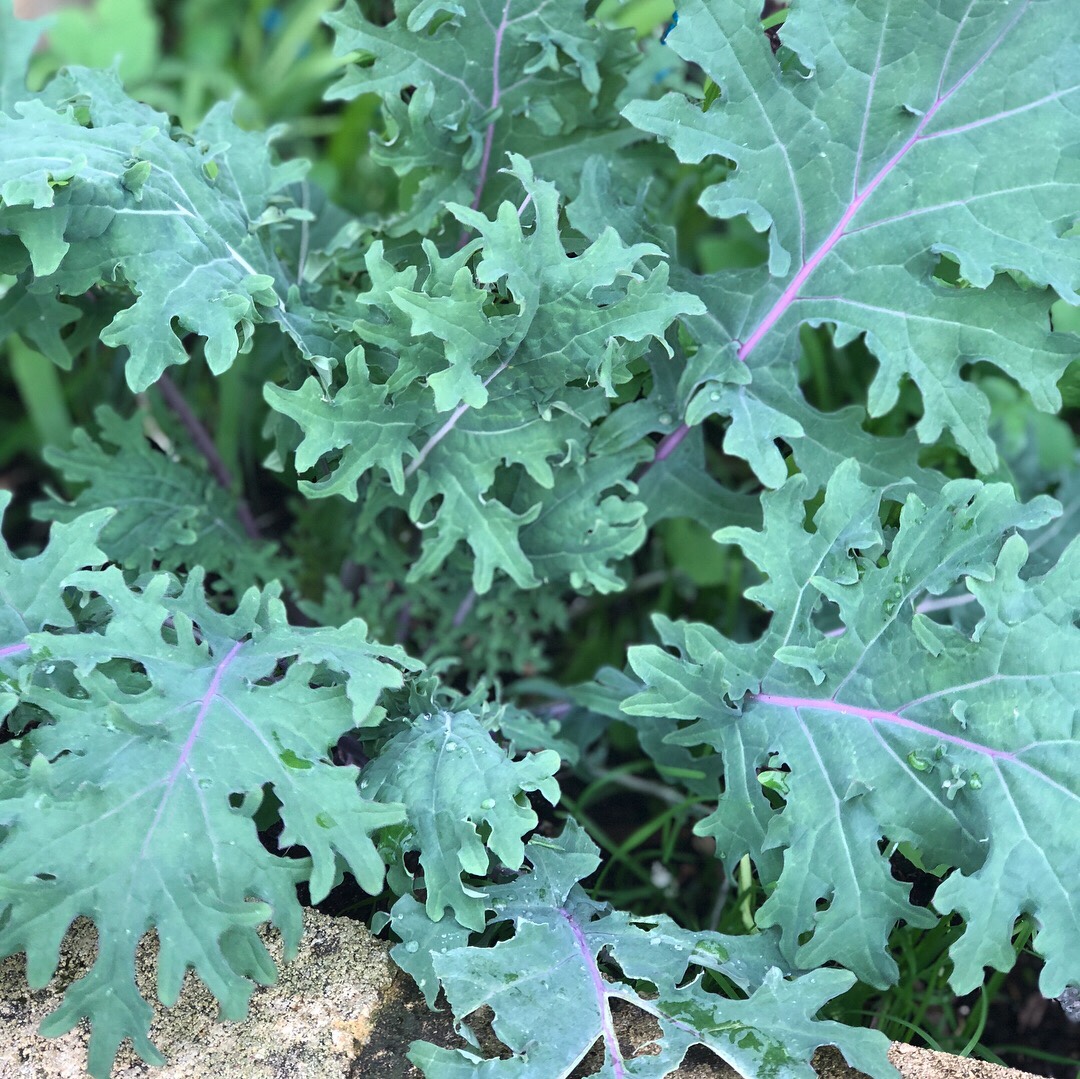
Kale: Use any variety you have! I often mix curly and Tuscan kale for colour and texture.
Fennel fronds: Optional but adds a soft, aniseed freshness.
Edible flowers: Calendula, viola, nasturtium, or blue cornflower all work beautifully for a colourful finish.
Easy Swaps
Swap chickpeas for white beans or lentils if you’re using what you’ve got on hand.
Add a little cumin, za’atar, or preserved lemon for extra flavour.
If you like heat, add fresh chilli on top!
Loaded Kale Hummus
Ingredients
Hummus
2 cups chopped Kale
1½ cups cooked chickpeas, drained and rinsed (or 1 can)
⅓ cup smooth tahini
2 tablespoons olive oil
½ teaspoon sea salt
2 1/2 tablespoons fresh lemon juice, more to taste
2-3 Roasted garlic cloves
6 tablespoons water, or as needed to blend
Crispy Kale Topping
2 cups chopped Kale
1 TBSP Olive Oil
1/4 tsp Salt
1/2 tsp paprika or smokey seasoning
Edible flowers to serve*
Fennel fronds to serve
1/4 tsp chilli flakes
Instructions
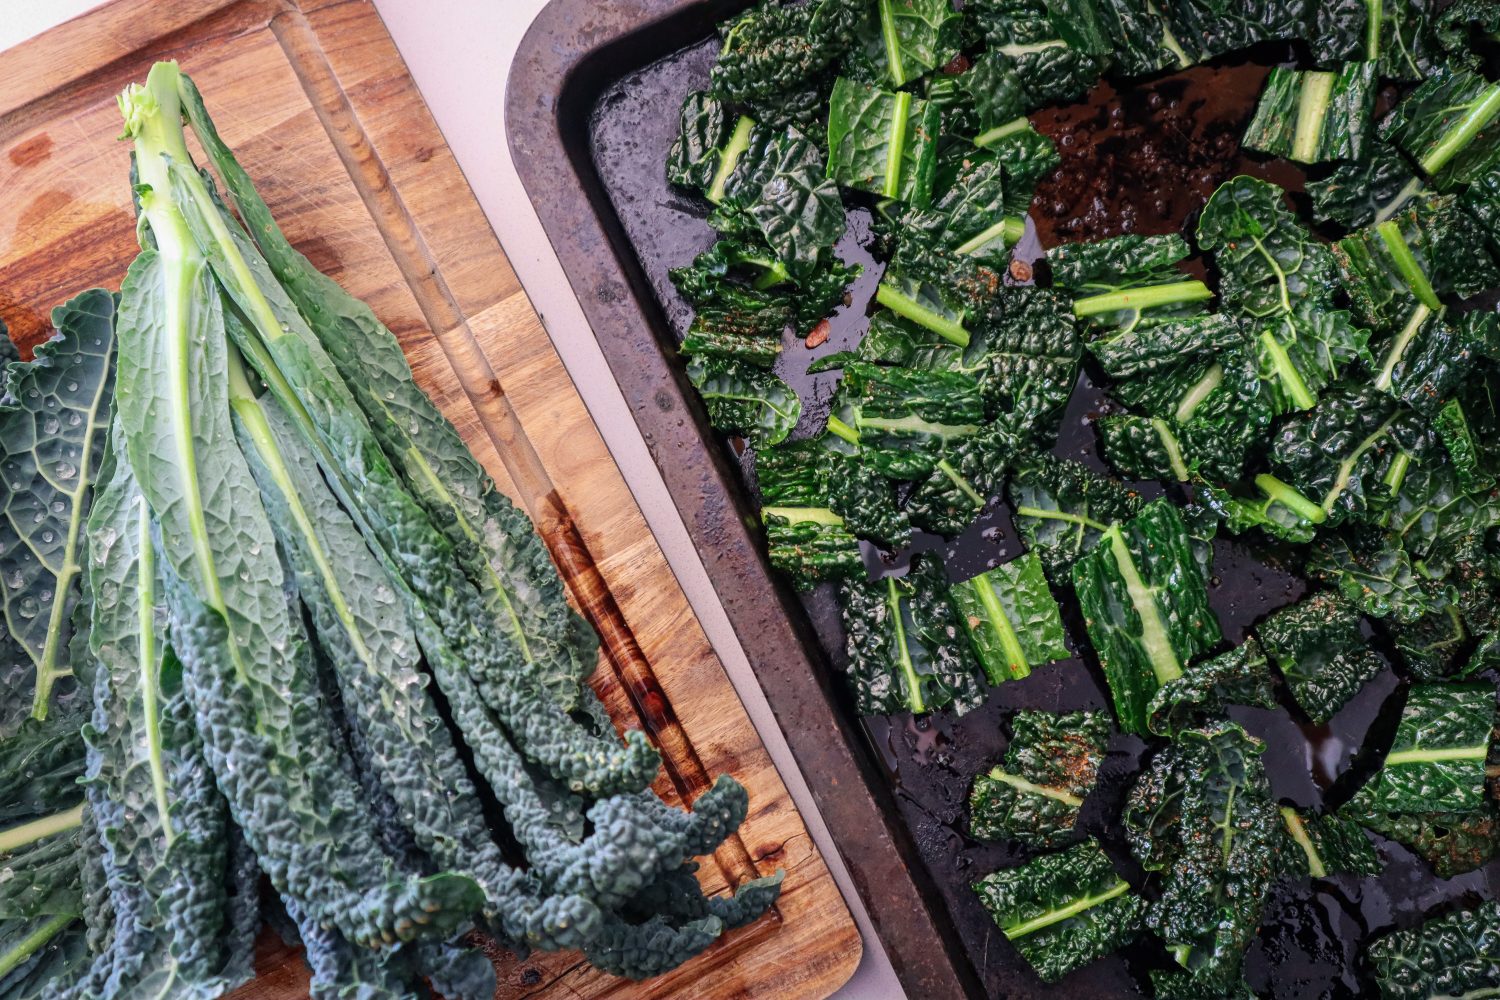
Preheat oven to 180 degrees. Wash and dry off Kale.
Add two cups of chopped Kale (approx 2cm square chunks) to a mixing bowl.
Add 1 TBSP oil and massage into the Kale. Sprinkle on the 1/4 tsp salt and the paprika and stir to combine. Add to a baking tray along with the whole cloves of garlic (unpeeled lightly coat in oil).
Bake until Kale is crispy (10minutes). Check if the garlic is soft and if not remove the kale and cook the garlic for a further few minutes.
Set the crispy kale aside in a bowl.
Add all the hummus ingredients into a mixer or blender including the roasted garlic (remove the peels first). Blitz to combine. Taste and add extra salt or lemon juice if needed.
Pour the hummus into a bowl and load up the crispy Kale chips on top. Sprinkle over edible flowers and optional chilli flakes and serve with warm toasted bread.
Notes
Edible flowers I used are: Onion flowers, pansies, calendula, cornflower, chrysanthemum, and nasturtium.
Toasted nuts and seeds would also be delicious additions.
Drizzle a little extra olive oil to serve.
Storing Kale Hummus
This hummus keeps in the fridge for up to 5 days in an airtight container. The crispy kale topping is best enjoyed fresh, but you can make a fresh batch quickly if needed. You can also freeze the base hummus (without toppings) for up to 3 months, perfect for quick snacks or lunch prep.
Garden to Plate
If your kale is getting ahead of you this season, blanch and freeze chopped kale in small handfuls so you’re ready to make this hummus (or green smoothies, soups, etc.) anytime. You can also substitute other leafy greens like silverbeet, beet greens, or parsley if you’re harvesting those instead.
Simple and so delicious this really is the best Kale salad! Garden-to-plate in a couple of minutes. Kale can be a struggle for many people to like but the curly edges and small dimples are amazing for holding on to flavours. This dressing is so easy and full of flavour it can be used on any of your garden salads.
The Best Kale Salad
Prep Time: 5 minutes
Total Time: 5 minutes
Simple and so delicious! This Kale salad is a staple garden-to-plate recipe.
Ingredients
4 cups chopped Kale (I used the Tuscan Variety)
2 TSBP Nuts or Seeds (Pumpkin and Sunflower)
3 Fresh Calendula Flowers
3 Fresh Nasturtium Flowers
1/4 tsp Salt
1 pinch dried chilli flakes
Salad Dressing
2 TBSP Lemon Juice
1 tsp Olive Oil
1 1/2 tsp Maple Syrup (or Honey)
Instructions
Wash and chop the Kale into 1cm strips. Add to a mixing bowl.
Toast the nuts or seeds in a dry frying pan - medium heat - for 2-3 minutes until slightly golden.
Mix together the dressing and massage into the kale with your hands until fully coated.
Sprinkle the salt, chilli, and calendula petals over the Kale and mix.
Add the salad to a serving dish and sprinkle over the seeds and Nasturtium Petals.
Enjoy!
Notes
Serve with a protein of your choice or pan-fried Haloumi or enjoy it on its own!
Ssubstitute edible flowers for what is available in your garden.