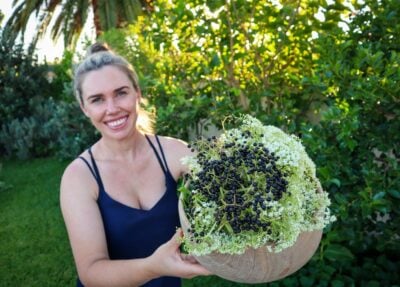
Learn how to grow Kumquat trees at home and what to make with your harvests with this ultimate guide! Kumquats (Citrus japonica and hybrids) or Cumquats are very ornamental citrus that produce masses of small fruit. Kumquats can be eaten straight from the tree, with the skin being edible too. They make beautiful, abundant additions to the garden, especially if you like jams and marmalades.
Kumquats are evergreen and provide dense bushy foliage, which makes them great for wind protection or screening.
Can be grown by seed but may differ from the parent plant.
Why Grow Kumquats at home?
Here are some of the many reasons to grow Kumquat
Hardy, low-maintenance fruit tree
Perennial
Ornamental and edible
Prolific producer
Dense busy shrub
Grows well in pots and containers
The whole fruit is edible
Great for making jams and preserves
Popular Kumquat Varieties
Nagami – Japanese variety with small oval-shaped fruit. Bright orange when ready. Sweet skin and tart flesh. 1-2 seeds in each fruit.
Meiwa – Larger round orange fruits. Sweet skin and flesh. A hybrid of Nagami and Marumi varieties.
Marumi – Round fruits that are quite sour or tart. Mainly used for preserving.
Variegated Kumquat – Stand out ornamental variegated leaves and fruit. Variegation disappears on fruit usually once ripe. Also known as Calamondin or Calamansi.
TOP TIPS TO GROW KUMQUAT
Choose a sunny location
Mulcharound the base (avoid touching the trunk)
Free-draining, slightly acidic soil
When to PlantKumquat
Ideally, plant your trees in Spring or Autumn. If you are growing in containers, protect new plants from extreme heat or cold.
How to GrowKumquat
Choose a sunny location with 6-8 hours of sunlight.
Dig a hole twice as big as the pot and loosen the roots if they are tightly bound.
Free-draining soil with compost.
Mulch to regulate temperatures and reduce weeds.
Give it a deep water.
Care/ Maintenance
Feeding
Feed with compost or liquid fertilisers in late winter after fruiting.
Watering
Deep water especially in summer.
Pruning
Prune after fruiting for shape. This can make it denser and bushier. Always check and remove growth below the graft.
The great thing about growing Kumquats is that they can last a long time ripe on the tree. This makes them really beautiful and ornamental and gives you time to preserve the fruit in batches. The fruit is ready when it is rich in colour. It can be a good idea to harvest using scissors or snips as the branches are thin and can rip or break if you pull the fruit off.
Reproducing
Kumquats often have 1-2 seeds inside. These can be grown, but results can vary but why not give it a try! Most citrus are grafted onto rootstock for disease resistance.
Cooking and Using
Kumquats fruit prolifically, so it’s a good idea to have a few recipes on hand. The great thing is that you don’t need to peel them as the skin is edible too!
Kumquats can be made into jams, chutney, marmalade, and relish. They can also be preserved whole in salt or liquor. Dehydrating slices is another easy way to preserve the harvest.
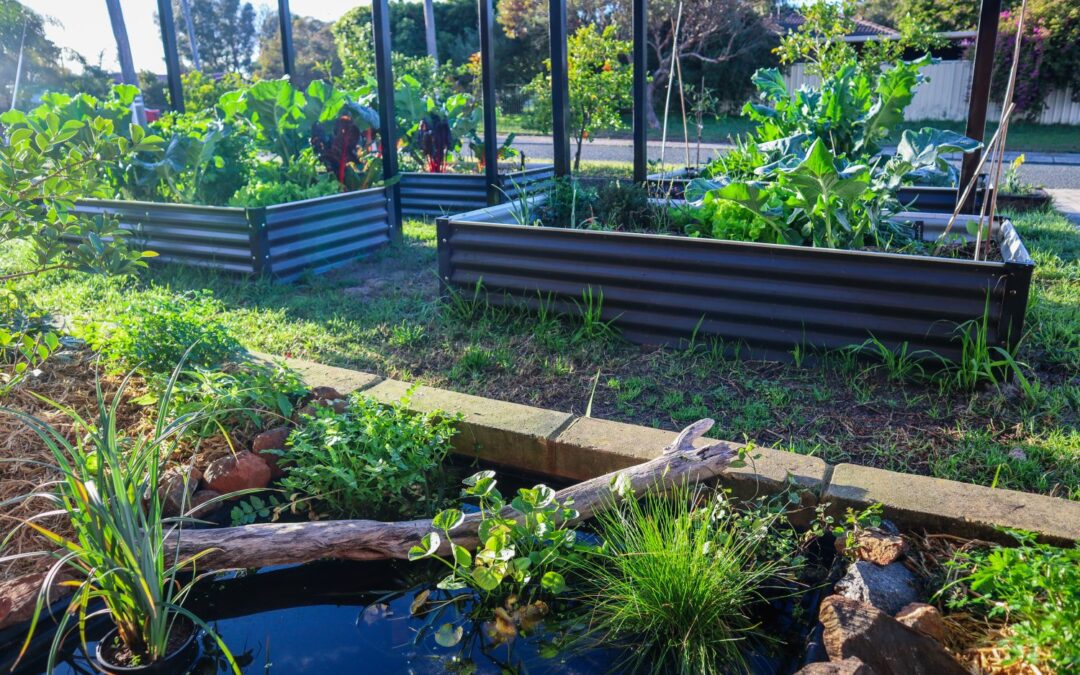
Wildlife and beneficial insects are key to creating a sustainable self-sufficient garden. They help form part of a balanced ecosystem and creating a small wildlife pond in the garden is an incredible way to attract them. Wildlife ponds can be a transformative addition to any garden or outdoor space, offering many amazing benefits including beauty, tranquility, and increased pollination. Whether you have a sprawling backyard or a compact urban garden, a small DIY wildlife pond has the potential to create a thriving ecosystem, attract beneficial insects, and help your gardens grow an abundance of food.
Today I’m going to share the process of creating my own DIY wildlife pond including choosing a location, pond plants, and why I have chosen native Australian fish for the pond.
One of the key advantages of having a wildlife pond is the ability to attract beneficial insects. Many of these insects, such as ladybugs, lacewings, and hoverflies, are natural predators of garden pests. By providing them with a water source and a suitable habitat, you can encourage their presence and create a natural pest control system within your garden. No need for harmful chemical pesticides making your garden healthy, thriving, and sustainable.
Click to WATCH the transformation or continue reading below
Planning Your Wildlife Pond
1. Choose a location for your wildlife pond
The first step in creating your small wildlife pond is to find suitable location options. Look for an area that is relatively level and away from large trees or shrubs whose roots may interfere with excavation or cause water quality issues. Consider the overall layout of your garden and how the pond will fit into the existing landscape. Keep in mind that a wildlife pond can range in size from a small, shallow pond to a larger, more expansive water feature, so choose a location that suits the space you have available.
Important things to consider when choosing the location for your wildlife pond:
Sunlight – most pond plants will need 6-7 hours of sunlight per day. This is more important in spring and summer than in winter as many pond plants will slow or die down over winter anyway.
Shade – Shade is also important, especially during the hottest part of the day. Shade will help keep the pond cool, especially in summer and reduce the algae. Adding plants will help shade out the pond.
Water source – Having a water source or hose available nearby is important especially in summer if the pond water gets low or too hot.
Safety and access – Pets or young children – depending on the size of your pond you will want to consider access if you have young children or pets (my water-loving dog would jump in immediately!). It would be worth checking out your local council’s requirements for ponds.
Close proximity to gardens – If you are wanting to attract wildlife to your gardens to help with pollination and pest management then it would be a good idea to have it close to your veggie patch or gardens. Existing gardens will also create wildlife corridors for safe access to and from the pond.
My pond location:
Front garden away from my water-loving dog
In an existing garden bed for a wildlife corridor
Outside my office window to enjoy the aesthetics and tranquility
The size and design of your wildlife pond could be determined by the space available or the structure you choose to use. Whether that is a prefabricated pond, pot or barrel pond, or full DIY pond with a pond liner.
I sourced a preformed poly pond that was roughly 1m x1m and 30cm deep. There is a huge range of preformed ponds available to fit a range of spaces. Baths, tubs, and tanks also make great DIY pond structures.
3. Filling and Balancing the Pond
Having a water source nearby is important to be able to top up or cool the pool down during the warmer months. Rainwater would be ideal to fill your pond but if like me, you only have access to mains or system water you will need to do a few extra steps to balance and remove the chlorine.
To condition the water you can either leave it to sit and gas off for 2-3 weeks or you can speed up the process by running an aeration pond pump in the water. The other way to condition the water is to purchase some water conditioning treatment. This is what I did and I also waited two weeks before adding in fish just to be sure and to allow natural bacteria to build up. I also added “splosht” which are small dissolving sachets of good bacteria to help keep the pond clean. The ones I used are made here in Western Australia so it is native bacteria. Speak to your local pond shop to see what will work best for your pond.
4. Introducing Plants to the Pond
Selecting plants for your pond is an exciting time! Firstly, it is important to determine what types of wildlife you would most like to attract to your pond. This will help you select plants to suit and reduce some of the overwhelm.
Frogs like lily pad like leaves and grasses or reeds to hide in.
Small birds like nectar-producing flowers and dense shrubs to hide in.
Ladybugs and beneficial insects like pollen-rich flowers such as herb flowers
Lizards like low-lying dense ground covers to easily hide in
Native wildlife often are attracted to native plants and flowers
Another thing to consider is whether you would like them to all be edible or a mix of both. I chose to plant edibles, natives, and herbs. A wide range of leaf types and plant heights/structures will help encourage a wider array of wildlife to your pond.
There are 4 main types of plants you may like to select for your pond:
Full Aquatic Plants: These grow completely submerged underwater such as Water lilies, and Vallis grass. They are great for deeper parts of the pond and can help oxygenate the water.
Filtration plants: These help keep the water clean and act as natural filtration. These are plants such as: Lebanese Cress, Water Mints, Gotu Kola, Pennywort, Watercress, Kang Kong. Most of these plants like to be partially submerged. I have mine propped up on bricks with 1 inch out of the water.
Marginal Plants: These are plants that can be planted around the edge of the pond or in shallow water. These are plants like: Fairy Lights, Blue Grass, Reeds, Bull Rush, Taro, Water Chestnuts, Mint, Queensland Arrowroot, Iris, Lebanese Cress, Watercress, Thalia, Papyrus, Society Garlic, Sweet Violet, and Moneywort.
Floating cover plants: These plants multiply quickly and cover the surface of the water. This can help regulate the pond temperature and shade out the pond. This can reduce algae and also offer food to many fish. Plants such as: Duckweed, Azolla, Frogbit and Hornwort.
Check out the video for a full tour of the plants I selected for this project.
5. Adding Natural Elements
Natural elements such as logs, rocks, and sticks offer surfaces for wildlife to rest on, cross over or hide under. It is important to make easy access in and out of the water. This will allow frogs, lizards, and bees the ability to get in and out. Shallow areas, ledges, ramps, and varying heights around the edge of the pond will help with this. It will also help your pond blend in and look more natural and integrated within the garden.
6. Adding Fish to the Pond
Adding fish to your pond can help with filtration and keep mosquito larvae in check. Understanding what type of wildlife you would ideally like to attract to your wildlife pond can help determine the type of fish for your pond. I am hoping to get frogs in my pond and many introduced fish such as goldfish or Koi may eat frogs’ eggs. This can be ok in a large pond with more space for frogs to hide and lay eggs. As I have a small pond and would like to encourage frogs, I have decided to go with West Australian Perch and White Cloud minnows that eat mosquito larvae but not the frogs eggs. They are also low maintenance and can handle ponds without pumps.
After purchasing the fish from the pond store, I let the bags sit in the pond water for 5 minutes to let the water in the bag adjust to the pond temperature. I then gently opened the bag and let the fish out. The Minnows dart about on the surface often but the Perch love to hide and I never see them! So that is something to consider.
7. Maintaining Your Wildlife Pond
It is important to regularly check on the pond, especially during the first year as things grow and temperatures change. Observing will allow you to see what types of wildlife are using the pond and what changes or additions you could make. Adding a small pump or water fountain will also help keep the pond cool and reduce algae. I do plan to add a solar pump and fountain eventually.
Scoop out dead leaves or excess algae
Top up water in summer if needed
Regular top-ups of “Splosht” good bacteria or similar
I decided to add solar lights to the pond as it is outside my office window and is nice to view during the evenings when I’m working late. I selected floating solar lights and also spotlights to point at feature plants. The fun thing about these lights is that I can change the colours and turn them on and off via a remote. The floating lights also offer more protection for the fish whilst the plants are established.
Just like the rest of your gardens your pond will change and develop over the seasons and the years. It will require some tweaking and editing as you go to find a good balance. There are so many amazing reasons to create a wildlife pond for your gardens.
By creating a wildlife pond, you are not only providing a habitat for a variety of natural life but also fostering diversity in your surroundings. These ponds act as sanctuaries for a wide array of wildlife, including frogs, lizards, birds, dragonflies, and beneficial insects such as bees and butterflies. These creatures play essential roles in pollination, pest control, and maintaining a balanced ecosystem.
Links included in this description might be affiliate links. If you purchase a product or service with the links that I provide I may receive a small commission. There is no additional charge to you! Thank you for supporting my blog so that I can continue to provide you with free content.
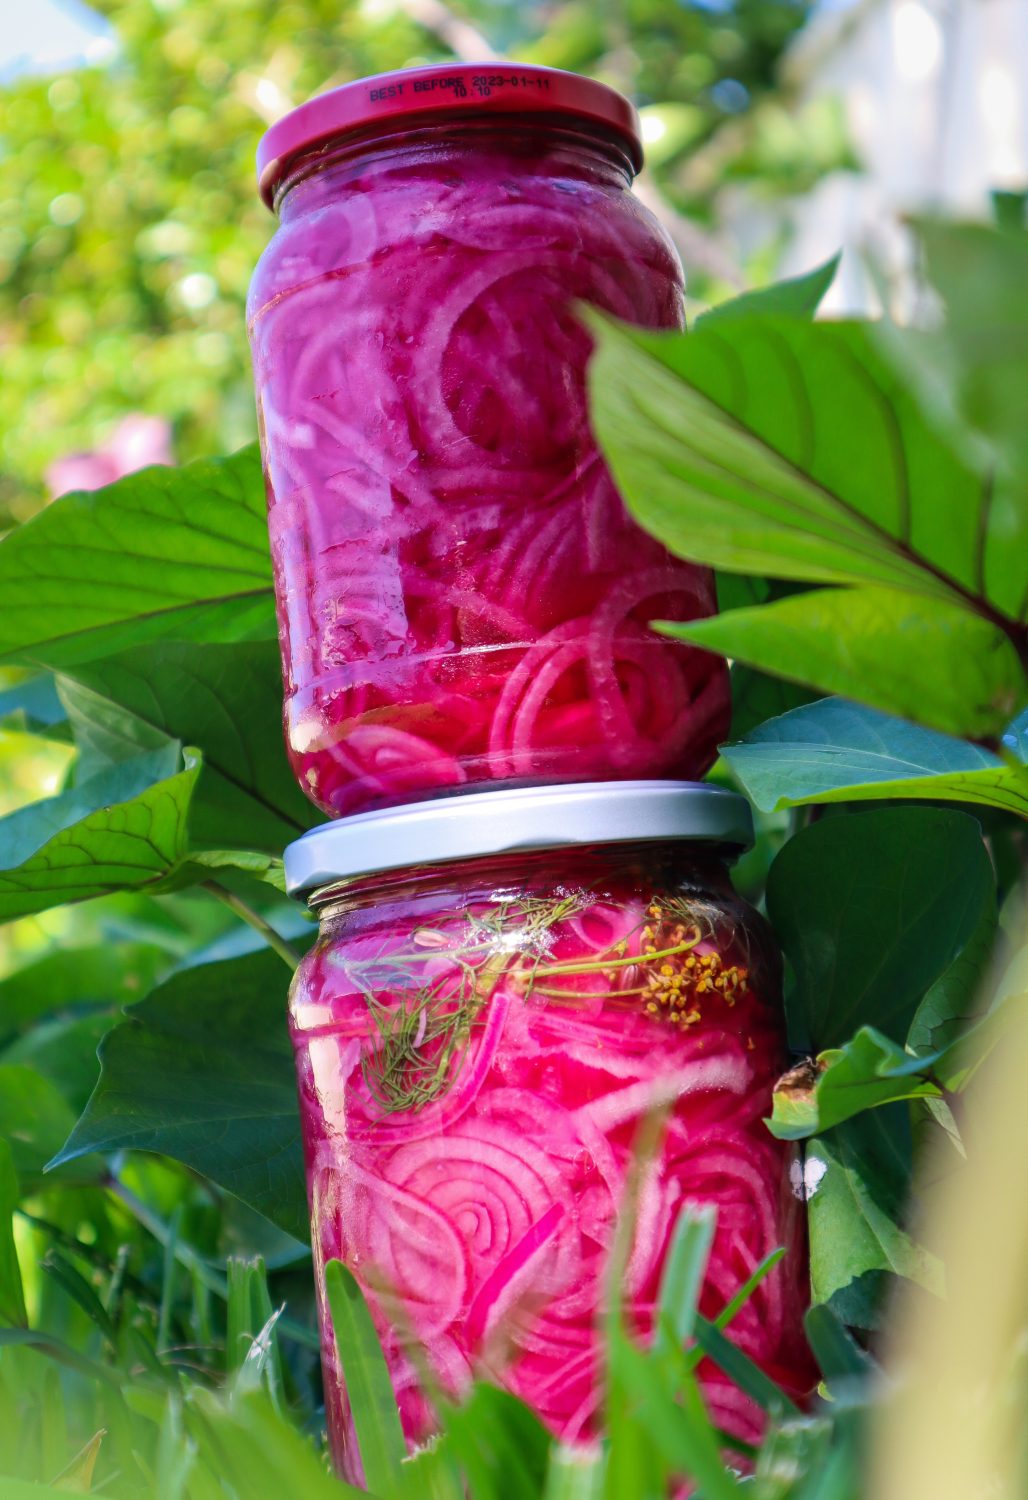
Sautéed Rainbow Chard is a quick and easy way to prepare a nutritious side of greens. This recipe is fresh, vibrant and so so delicious! Infused with garlic, lemon zest and topped with Crispy Sage and pickled onions this is the Ultimate garden-to-plate breakfast (lunch or dinner!). The pickled onions are best to make at least the day before so they have time to infuse and pickle.
Sautéed Rainbow Chard on Toast with Feta and Crispy Sage
Yield: serves 2
Prep Time: 20 minutes
Cook Time: 10 minutes
Total Time: 30 minutes
Fresh, nutritious and full of flavour, this garden-to-plate breakfast is easy and delicious! Make the most of the Rainbow Chard season.
Peel and finely slice garlic. Add to a pan on medium heat with butter. Cook for 2 mins.
Roughly slice Rainbow chard stalks (1cm chunks) and add them to the pan. Cook for a further 2 minutes.
Chop leaves and keep to the side.
In another pan fry the eggs to your liking.
Add chard leaves to the garlic and stalks and cook for 1-2 mins until wilted. Stir through Lemon zest and season with salt.
Turn the oven grill on to 180 degrees. Drizzle Sage with olive oil or butter and place on an oven tray along with Pepitas. Toast under the grill until slightly golden watching carefully as this will take less than 1 minute. Alternatively, this can be done in the pan along side eggs.
Toast sourdough and butter.
Place two pieces of toast on each plate and evenly distribute rainbow chard mix, crumble on feta, top with eggs, sprinkle on toasted pepitas, and top with Red Pickled Onions.
Add edible flowers for colour - I used Cornflowers and pea shoots.
Notes
The pickled onions are best to make at least the day before so they have time to infuse and pickle.
Simple Pickled Red Onions
Prep Time: 10 minutes
Cook Time: 2 minutes
Total Time: 12 minutes
Quick and easy pickled red onions add flavour to any meal. Add your seasonal garden herbs such as Fennel, Dill or Chilli to boost the flavours.
Ingredients
3 Red Onions
1/4 cup Apple Cider Vinegar
1/4 cup White Vinegar
1 1/2 TBSP Raw Sugar*
1 1/2 tsp Salt
1 cup Water
1/2 tsp Chilli flakes (optional)
Instructions
Finely slice the red onions - using a mandoline is the easiest option.
Cram as many red Onions into a clean sterilised jar.
In a saucepan add the vinegar, sugar, and salt and stir until the sugar has dissolved and the mix starts to simmer.
Add any extra flavours to the jar such as chilli, fennel flowers, fennel fronds, fennel seeds, mustard seeds, or peppercorns ( 1tsp per jar).
Pour over the liquid and secure the lid.
Allow cooling for one hour and place in the fridge.
Notes
To sterlise the jars place in a hot dishwasher run or wash and heat in the oven for 10-15 minutes at 110 degrees Celsius.
You can swap and use just one type of vinegar if you prefer.
Learn how to grow Sage with this Garden-to-Plate Guide and preserve this staple herb. Sage (Salvia officinalis) is a hardy perennial herb found in many home gardens. Sage is known for its soft fleshy leaves and has a long history in plant medicine. Sage is a great addition to your kitchen garden due to its culinary flavour-enhancing qualities along with a long list of medicinal values.
Sage also produces beautiful flowers and is a great pollinator-friendly plant.
Full sun – part shade. Doesn’t like wet soggy ground.
CARE
Prune if it gets too woody to promote new growth.
FERTILISE
Feed with compost and keep well mulched.
PESTS
Aphids, snails, spider mites.
HARVEST
Harvest as needed, early morning or evening.
REGROW
Seed, cuttings and splitting the clump.
Why Grow Sage?
Here are some of the many reasons to grow Sage
Hardy, low-maintenance herb
Perennial
Ornamental and edible
Flavour-enhancing culinary herb
Low-lying food forest layer
Pollinator-friendly
Can have Antimicrobial qualities
Can have Antiseptic qualities
Can have Anti-inflammatory qualities
Popular Sage Varieties
Sage is part of a huge Salvia family, but for this grow guide, we are just focusing on the common Sage – Salvia officinalis
Common – Silvery grey, slim leaves. Bright purple flowers.
Variegated – Striking gold and green variegated leaves. Adds a beautiful contrast to the garden.
Purple – Dark green and purple leaves, this variety can get a bit lost in the shadows. Beautiful colour and has great flavour.
Tri-coloured – Stand-out colour and patterns with green, silver, white, and purple/pink tones.
White-edged – Stunning white and silver variegated leaves.
Berggarten –Broad, silvery green leaf popular for culinary uses. Does not flower often. Compact shrub.
QUICK TIPS ON HOW TO GROW SAGE
Choose a sunny location
Mulch
Prune in spring to encourage new growth
Avoid wet or boggy situations
Take cuttings to repopulate easily
When to Plant
Ideally, plant your Sage in Spring, although you should be able to plant seedlings throughout the year. Protect young plants in the heat of summer and allow plenty of sun over winter.
Top Tips on How to Grow Sage
Plant sage seedlings in a warm sunny position. If you live in a wet or humid climate, it can be a good idea to grow sage in pots and containers. This allows you to move it about to reduce the time it stays wet.
Dig a hole twice as big as the pot and loosen the roots if they are tightly bound.
Mulch to regulate temperatures and reduce weeds. Give it a water.
Sage grows quite slowly from seed. Plant in spring.
How to Care and Maintain Sage
Feeding
Sage is quite low maintenance but can benefit from compost tea or worm tea in Spring and Autumn.
Watering
Sage doesn’t like wet feet. If you live in a wet climate, it can be a good idea to plant on mounds so excess water can run off.
Pruning
Once Sage has finished flowering, it can be a good time to prune back the flower stems and older growth.
Pests / Disease
Caterpillars, snails, aphids and slaters can eat your Sage plants, especially when they are young or in Spring with new growth. Check out Natural pest management for more tips.
How and When to Harvest Sage
The great thing about growing Sage is that you can harvest small amounts throughout the year. Pick individual leaves or shoots as needed. Sage can also be harvested and dried to use throughout the year.
ReproducingSage
Sage does send off sideshoots that can be split off the main plant. This is the quickest and easiest way to reproduce sage from an established plant. Cuttings are the next best way. Choose stems with semi-hard wood and place them in a jar of water or moist soil to send off roots. Remove larger leaves and keep 2-3 at the top to reduce energy and moisture loss.
Ways to Cook and Use Sage
Sage is commonly used to add flavour to roast veggies but there are so many delicious ways to use Sage.
Sage can easily be dried to use throughout the year. Lay flat on a rack or hang upside down in a dry, dust-free area. Alternatively, dehydrate sage on low at 40 degrees Celsius.
IMPORTANT
Sage is best used in moderation. Avoid if pregnant and breastfeeding, as Sage has been known to reduce milk production. Seek guidance from medical professionals.
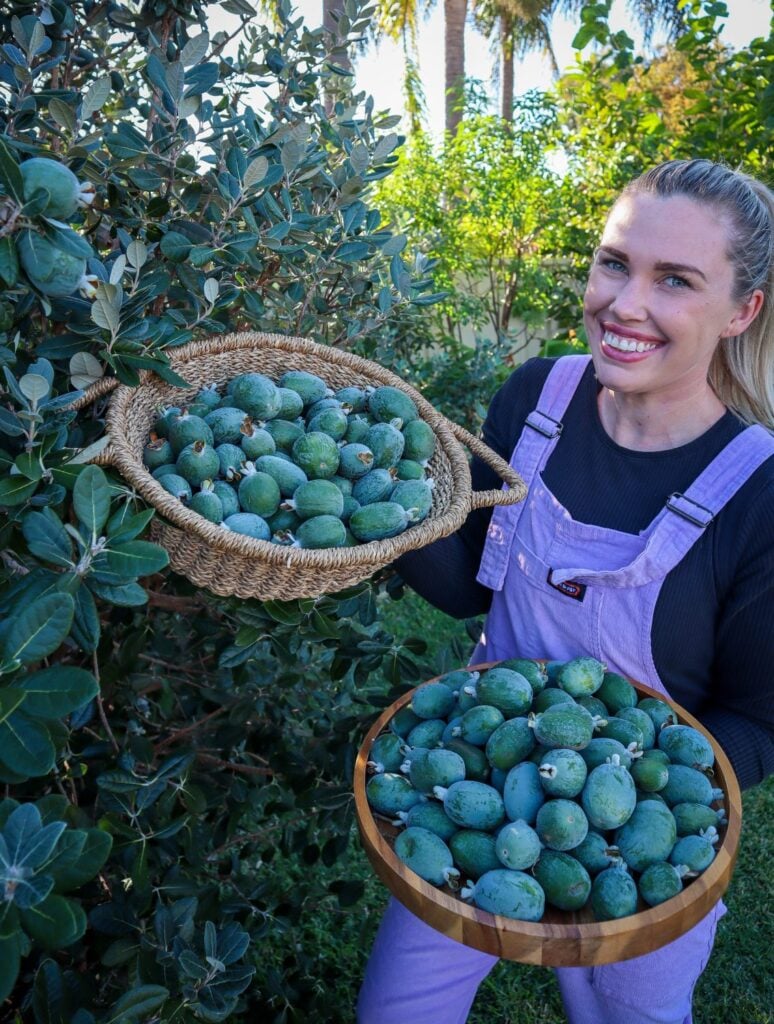
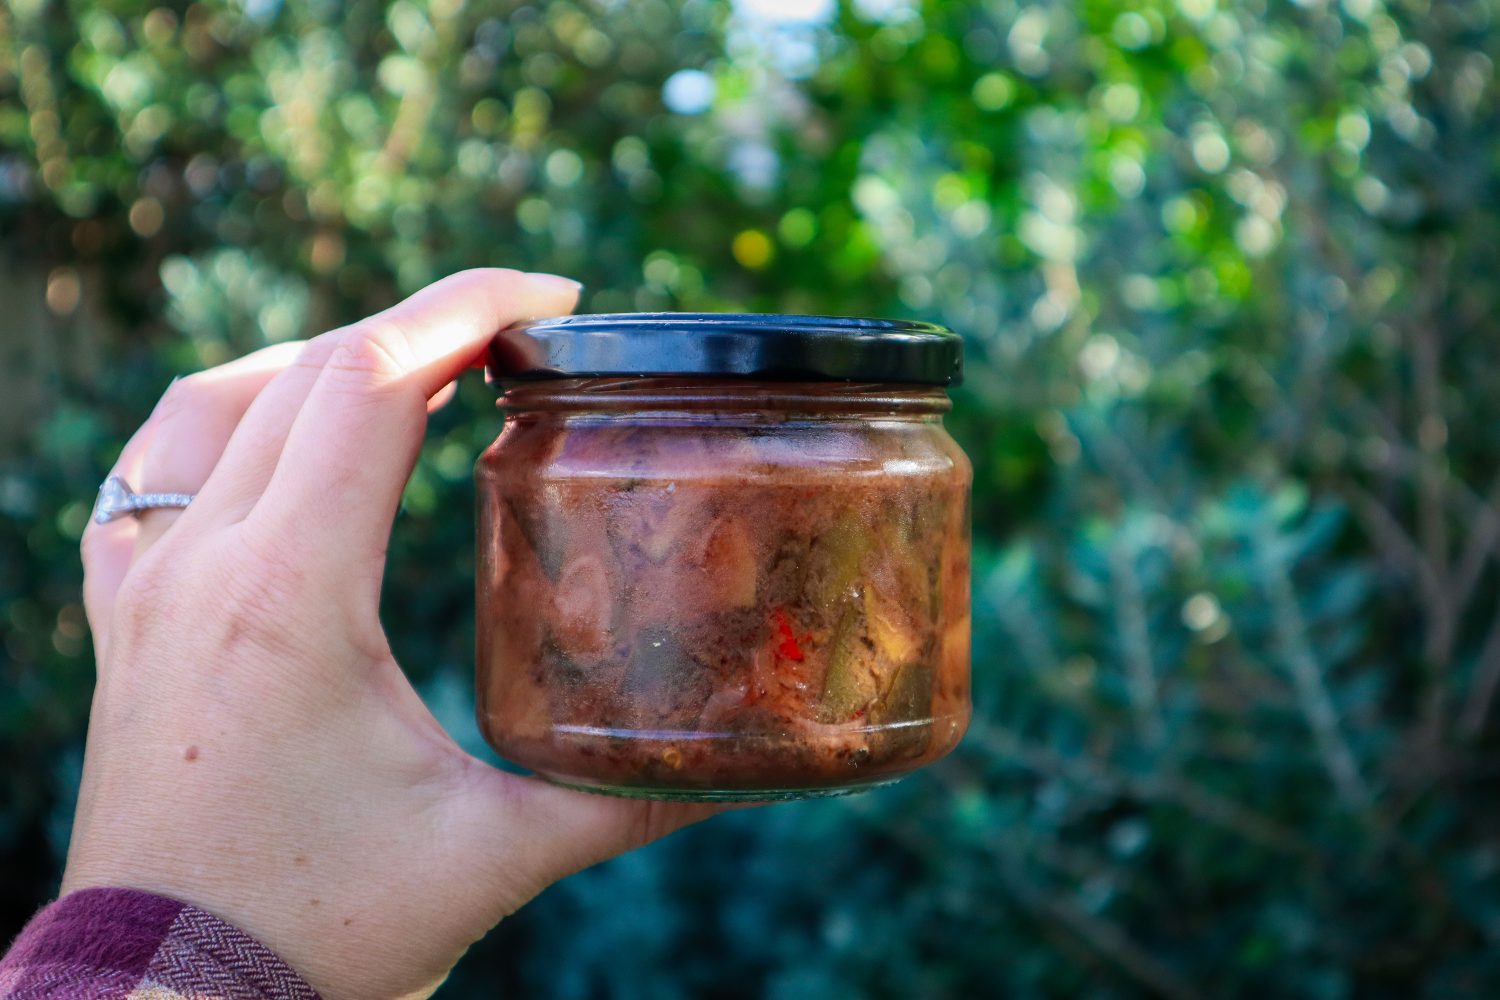
This a delicious zero-waste recipe to use up your excess Feijoa skins and get the most out of your harvest. Feijoas ripen quickly, within a few weeks, and it can be hard to keep up! This Feijoa skin chutney is a delicious way to enjoy your harvests and makes a great gift! Enjoy on a cheese platter or add flavour to a sandwich.
The Best Way to Use Feijoa Skins
Feijoa season is short but abundant, leaving many gardeners and Feijoa/ Pineapple Guava lovers wondering what to do with the excess fruit. Instead of letting the skins go to waste, why not turn them into a delicious Feijoa Skin Chutney? This simple recipe transforms feijoa peels into a flavorful condiment that pairs beautifully with cheese, meats, and sandwiches.
Using Feijoa skins reduces food waste and ensures you get the most out of your harvest. This chutney is packed with bold flavors, balancing the natural tartness of feijoa skins with warm spices and sweetness. Plus, it makes a wonderful homemade gift for friends and family!
Why Use Feijoa Skins?
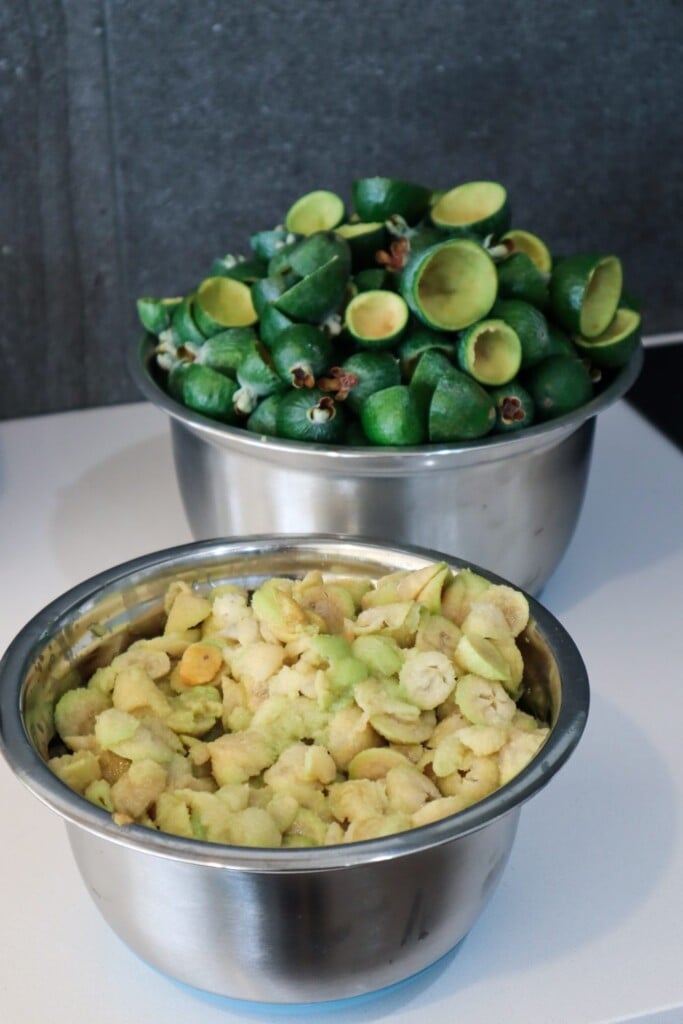
Most people scoop out the feijoa flesh and discard the skins, but the skins are packed with flavor and nutrients. I love eating them whole, which gives a balance of sweet and sour flavour! But… with huge harvests, it’s time to get creative!
The skins have a slightly bitter and aromatic taste, which blends beautifully with the spices and vinegar in this chutney.
By using the skins, you can: – Reduce food waste and maximize your harvest – Enjoy a unique flavor that’s different from regular feijoa chutney – Create a versatile condiment for both sweet and savory dishes
What You’ll Need to Make Feijoa Skin Chutney
This recipe uses simple pantry staples to bring out the best flavors in feijoa skins. Here’s what you’ll need:
Feijoa skins – Washed and chopped
Onions – For a rich, savory base
Apple cider & red wine vinegar – Adds tang and preserves the chutney
Raw sugar – Balances the tartness
Cumin Seeds – Warm spices for depth of flavor
Chili (optional) – For a little kick
Feijoa Skin Chutney
Prep Time: 15 minutes
Cook Time: 2 hours
Total Time: 2 hours15 minutes
Sweet chutney is perfect for cheese platters or to add flavour to sandwiches. Great zero-waste recipe to use up left over Feijoa skins.
Ingredients
3 cups feijoa skins chopped
1/2 cup red wine vinegar
1/2 cup apple cider vinegar
2 onions
2 green or red cayenne chilli (mild-medium spice)
1 cup raw sugar
1 1/2 tsp salt
1 tsp cumin seeds
Instructions
Remove the hard flower ends of the feijoas skins and slice the skins into strips (roughly 1cm wide).
Remove chilli seeds (or leave them in if you like it spicey!). Slice into pieces.
Peel (discard skins) and dice onion.
Place all ingredients in a pot or saucepan and lightly simmer for 1-2 hours until thickened and brown.
Sterilise jars by washing and adding them to the oven upside down at 120 degrees celsius for 15mins. Place lids in a bowl and add boiled water.
Spoon hot chutney into hot jars, clean rims and secure lids.
Notes
Once opened use within 1 week and keep refrigerated.
You can add Feijoa flesh as well as skins but this would increase the sweetness so use less sugar.
Ways to Enjoy Feijoa Skin Chutney
This chutney is incredibly versatile! Try these serving ideas:
On a cheese platter – A perfect match for sharp cheddar or creamy brie
In sandwiches or wraps – Adds a sweet and spicy kick
With grilled meats – Delicious as a glaze or dipping sauce
As a homemade gift – A thoughtful and unique present
Storage Tips & Shelf Life
Store chutney in sterilized jars for up to 6 months in a cool, dark place.
Once opened, keep in the fridge and use within 2–3 weeks.
The flavors will develop over time, so let it sit for a few weeks before enjoying for the best taste!
A Delicious Way to Reduce Food Waste
Making Feijoa Skin Chutney is one of the best ways to make the most of your feijoa harvest. It’s a simple, delicious, and sustainable recipe that transforms leftovers into a gourmet treat. Give it a try this feijoa season, and enjoy a homemade condiment that’s bursting with flavor!
What do you make with your excess feijoas? Let me know in the comments! 🌿
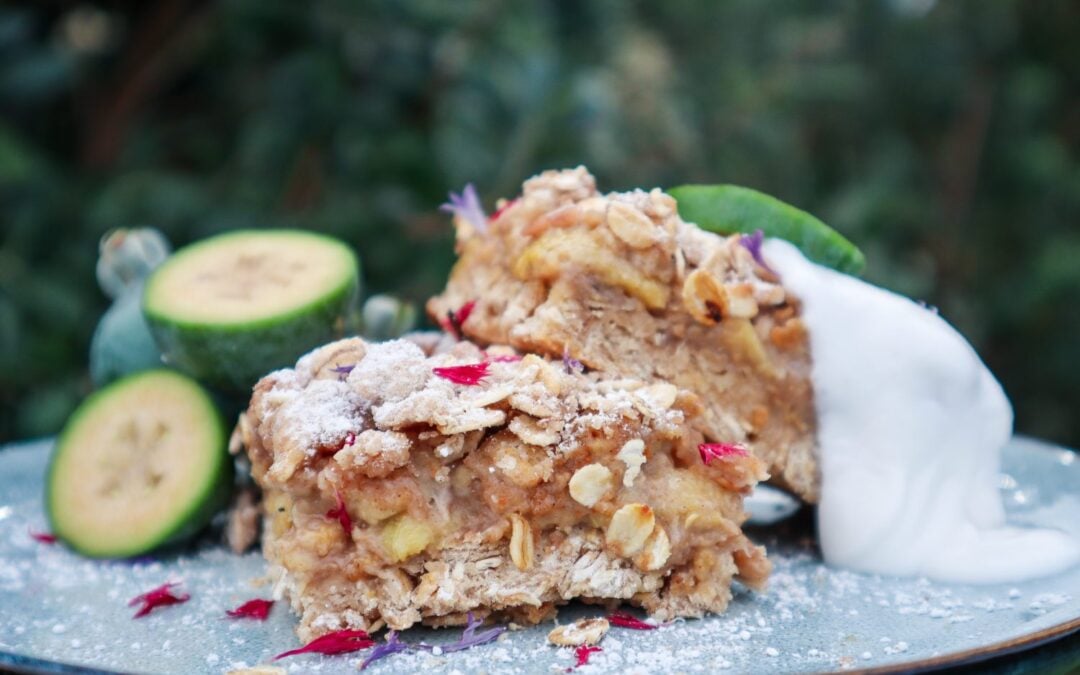
Feijoas or pineapple guavas come in thick in fast over the Autumn month. Their sweet, perfumey flavour is delicious and eaten fresh but once the trees are established you will have a hard time keeping up with them! This Feijoa crumble is delicious and not too sweet. Serve with ice cream yogurt or custard. Feijoas can be frozen to make this throughout the year or switch out the feijoas with other fruit such as apples, apricot, or plum.
Feijoa Crumble Slice
Prep Time: 20 minutes
Cook Time: 35 minutes
Total Time: 55 minutes
Feijoa crumble slice is delicious served warm with icecream, yoghurt, or a sweet treat for packed lunches.
Ingredients
Crumble
2 cups flour
1 1/2 cup rolled oats
1/2 cup shredded or desiccated coconut
1/2 teaspoon baking powder
1 /2 teaspoon cinnamon
1/8 teaspoon salt
1/4 cup yoghurt
1/3 cup maple syrup
1 teaspoon vanilla extract
80g Butter
Filling
3 cups Feijoa flesh (scooped out of the skin)
1 TBSP Raw sugar (or honey)
1 TBSP Flour
1 tsp Lemon Juice
1/2 tsp Cinnamon
Instructions
Preheat oven to 180 degrees Celsius.
Scoop out the flesh of the Feijoa (or thaw out previously frozen ones).
Add Crumble ingredients to a bowl and lightly mix into a crumble.
Grease or line a 20cm baking dish and press 2/3rds of the mixture in to form a base.
Bake for 15 minutes or until edges turn golden.
Mix filling ingredients together and pour over the base.
Evenly spread the remaining crumble on top and bake for a further 20-30 minutes until golden.
Enjoy!
Notes
Feijoas can be mixed with finely sliced apple if you do not have enough.
Swap out the Feijoas for whatever fruit you have in season such as Strawberry, Plum, Apricot
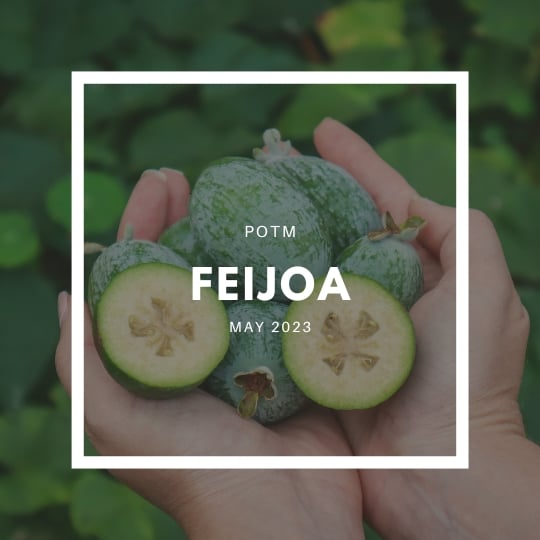
Learn how to grow Feijoa and what to make with their abundant crops! Feijoas or Pineapple Guava (Feijoa Sellowiana) are an abundant-producing fruit tree with green, sweet-tasting fruit. The trees are evergreen with dark green and silver foliage. Feijoas are easy to grow and, due to their thick foliage, they make a great screening tree or edible hedge!
This fruit tree is a prolific producer and can grow in a range of climates from temperate to subtropical, but grows best from zones 8-11.
Prune for size in autumn. Keep well watered in summer when fruiting.
FERTILISE
Feed with compost and keep well mulched.
PESTS
Rats, fruit flies, birds, guava moth, possums, scale.
HARVEST
Ripe when they fall from the tree. Collect daily.
REPRODUCE
Can grow from seed but best results are from grafted plants.
Why Grow Feijoa?
Here are some of the many reasons to grow Feijoa
It produces in abundance!
It is self-fertile
Evergreen – ornamental all year round
Delicious juicy fruit that are sweet with a perfumey flavor
Green fruit, which is harder to see from pests
Hardy tree – easy to grow
The whole fruit is edible!
Flowers are edible
Foliage is said to have fire-retardant qualities
Drought tolerant
Dense foliage can be pruned into a hedge for screening areas
Popular Feijoa Varieties
Feijoas are commonly sold as seedling plants under the name Pineapple Guava or Feijoa Sellowiana these will perform with mixed results and can take 6+ years to start fruiting. Choosing a grafted or named variety will offer a quicker-producing tree that will be true to type. Varieties will vary from country to country.
Duffy – Medium – large-sized fruit. Popular all-around variety.
White Goose – Large fruit with juicy white flesh. Early season fruiting that can last quite a long time.
Mammoth – Large round fruit with thick wrinkled skin. Can benefit from a pollinator tree. Tall upright tree.
Apollo – Medium – large oval fruit. Smooth light green skin. Tall upright tree. Semi-self-fertile – benefits from another pollinator tree.
Unique – Medium-sized fruit. Smooth, juicy, and sweet. Starts fruiting from a young age.
Triumph –Medium-sized fruit. Slightly gritty but good flavour. Late season bearing.
Nazemetz – Large oval/pear-shaped fruit. Smooth skin with sweet flesh. Self-fertile but will bear heavily with cross-pollination.
QUICK TIPSON HOW TO GROW FEIJOA
Choose a named variety (x2 different ones for bonus pollination)
Choose a sunny location
Add plenty of compost
Mulch
Ensure plenty of water during fruiting (summer)
Fruit is ready in Autumn
When to PlantFeijoa Trees
Plant your Feijoa plants in Spring or Autumn to avoid added stress from summer and winter temperatures.
How to GrowFeijoa
To plant your Feijoa, pick a sunny spot, they like full sun for 6-8 hours at least. And quite a bit of space, as these trees will grow quite large (2-5m). You can prune them back heavily though, so it’s not a major issue. They will also grow well in a large pot.
Dig a hole twice as big as the pot and mix a little compost in with the soil. If your plant has tightly bound roots, free them up before planting them out. Firmly pack the soil back around and cover it with mulch. Just pull back the mulch from the trunk so you don’t rot the trunk. Feijoas have shallow feeder roots so keep weeds and plants at a minimum under the tree line.
Give it big water! Now you basically don’t have to do anything for the first couple of years except keep it watered, especially during the dry season. You may get flowers in the first year or it makes take a couple of years until it is established enough to put out flowers. It flowers in spring and the fruits are usually ready and ripe in Autumn.
How to Care and Maintain Feijoa Trees
Feeding
Once your tree is established and starting to flower and fruit you can look at more fertilizing and watering. You can feed your plants near the end of winter, spring, and summer with compost or worm teas, or liquid seaweed. I don’t do a lot of feeding but I do chop and drop the prunings and add layers of mulch each year.
Watering
Another key tipis to ensure your plants get plenty of water during summer and late summer as the fruits are developing. This is something we struggle with here in Perth because we basically get no rain in summer. This last summer was so dry in Perth, and my trees were loaded with fruit. I obviously didn’t water them enough for the amount of fruit they had and the results are a strange hollow center. The fruit still tastes delicious, just not quite as juicy as it should be.
So I will have more mulch and more water next season. From memory, I was only hand watering max twice a week, and it was extremely hot here, so I’m not surprised really.
Pruning
Once your feijoas have finished fruiting, and you have picked up all the dropped fruit. It can be a good time to prune your trees if you want. I like to prune mine each year so that the fruit is always within reach. Otherwise, it ends up over the neighbor’s fence or is bruised from falling so far to the ground. Feijoas love a prune and it can actually improve fruiting. I cut back about 20-30% each year and I find that it grows back about that much so my trees stay relatively the same height by doing this.
Plus, by cutting back 20% of the tree, I get a whole lot of green material to chop and drop. In my food forest-style garden, I don’t remove anything so all prunings go directly back into the garden. I prune using hedge shears or loppers for larger branches and then run them through my small mulcher. You can also chop them into small pieces, then lay them around the trees. This will break down and act as a natural fertilizer.
Pollination
You may notice lots of small birds in your trees when they are flowering. Don’t worry as they are helping pollinate the flowers. They harvest the nectar and also eat the petals but generally allow the main flower to stay put and fruit. Bees and small birds are the main types of pollinators.
One tree will still perform amazingly as they are self-fertile but having multiple just increases your harvests. It can also extend your season. Meaning different varieties take longer or shorter to flower or ripen and you can get extended harvests.
One thing to note is that feijoas ripen quickly and in bulk. So they come in hard and fast.
Pests / Disease
Rats and possums will love your fruit, and also parrots and birds. You may want to net or bag fruits if you are worried. I definitely have rats and parrots but so far I haven’t needed to bag fruit as they are doing minimal damage to my large harvests. Fruit flies and guava moths are also a problem in other areas. Again, this would mean you need to bag the fruit or net the tree when the fruit is young before they get stung.
How/ When to HarvestFeijoa
Now comes the fun part – harvesting. How do we tell when the fruit is ripe if it remains green? Well, it falls off the tree. So each morning, you can go out and pick up all the fruit from the ground. It is important to pick all the fruit up because otherwise, you will attract pests like rats and possums, or fruit flies. Feijoas do continue to ripen off the tree so you want to eat them quite quickly or use and preserve them. I like the tartness of fresh feijoas, and they get sweeter and more perfumy as they ripen, which is why I never like feijoas from the stores, as I find them too overripe.
Most people will cut the fruit in half and scoop out the inside to eat but you can eat the whole fruit. Especially when they are quite ripe the skin is sour and the inside is sweet it has a nice balance.
Reproducing
Ripe feijoas may have small brown seeds inside. These can be planted in moist soil. Feijoas do not grow true to type from seed so they may produce fruit different from the one you saved the seeds from.
Ways to cook and use Feijoa
Feijoas are delicious when eaten fresh off the tree. You can eat the whole fruit or cut it in half and scoop out the insides. Once they fall from the tree, they may still be a little tart. Allow them to ripen for a few days, and they will become softer, sweeter, and juicier. However, they will continue to ripen and become over-ripe. Fruit flies may also find them on the bench, so I like to keep them in the fridge.
Feijoa flowers are beautiful, and the petals are edible. I saved a bunch to add to teas. Just carefully remove the soft white and pink petals without removing the whole flower.
Feijoa pairs well with: Ginger,Coconut, Apple, Cinnamon, Chilli, Citrus, Pear, Nuts, Dark chocolate, Yogurt
Feijoa ideas:
Juices
Smoothies
Cakes
Jam
Crumble
Muffins
Icecream
Preserving your Feijoa Harvest
Feijoa trees, once mature, will produce bucketloads of fruit! They can be frozen to use in smoothies and juices or baking, or preserved in jams, chutney, alcohol infusions, and bottled.
Our gardens will inevitably get shadier as mature trees start to grow. We will also get more shade in our gardens throughout the year during different seasons. In this episode of the Homegrown Podcast, we will discuss how to grow food if you have areas of shade in the garden. What to plant, how to maximise production and minimise disease.
Quick and easy creamy garlic sauce that is perfect for burgers, salads, wraps, fritters, or grilled veggies. You do need to be prepared a little ahead of time to soak the nuts. This recipe can be adapted to make different flavours each time using fresh in-season herbs and veggies. The beautiful lilac colour is made naturally from the cabbage leaves and stands out against a green salad. Alternatively, swap out the cabbage for herbs and make a creamy green sauce!
Creamy Garlic Sauce
Yield: 2 cups
Prep Time: 12 hours
Additional Time: 5 minutes
Total Time: 12 hours5 minutes
Creamy and delicious dipping sauce or salad dressing with a unique all-natural lilac colour.
Ingredients
1 cup raw cashews
2 garlic cloves
1/2 red chilli ( add the whole chilli if you like spice or leave out)
2 tsp lemon fresh juice
1-2 pinch of sea salt
2 purple cabbage leaves
1 cup water
Instructions
Soak cashews in water overnight in the refrigerator (alternative if you want it quicker soak in lukewarm water for 2+ hours the longer the creamier).
Chop up red cabbage and blend all ingredients until smooth and creamy. Add more water for a runner dressing. Season with extra salt if needed.
Serve with chilli flakes and edible flowers (I used dried cornflower)
Notes
Swap red cabbage for a handful of your favourite herbs such as Parsley, Coriander or Chives.
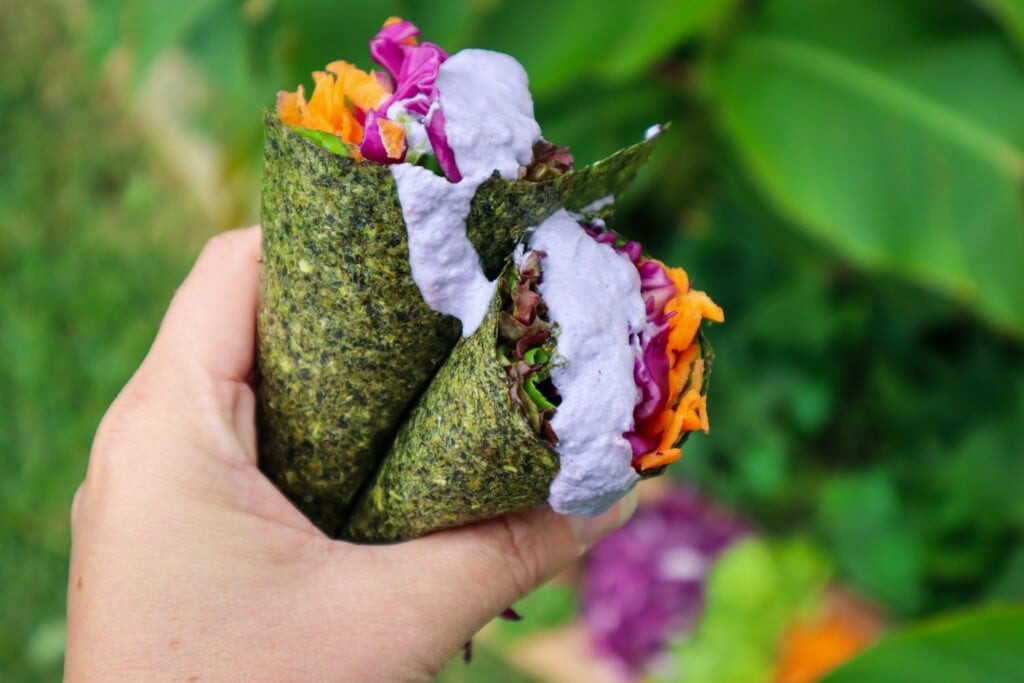
Looking for a healthy, homemade wrap alternative? These DIY spinach sushi wraps are a delicious and nutritious way to use up garden greens and create quick, wholesome meals. Whether you follow a gluten-free, low-carb, or plant-based lifestyle, these wraps are a game-changer. Made from fresh spinach, herbs, and garden vegetables, they’re packed with nutrients and completely free from preservatives and additives.
These wraps have the texture of nori but are 100% vegetable-based. Use them for sushi, wraps, or as a healthy tortilla alternative. This is the perfect recipe for zero-waste gardeners who want to make the most of their seasonal harvests. I am so impressed with how amazing these are!
These dehydrated spinach sushi wraps taste and feel just like the real deal but I know exactly what is in them. Use excess garden greens along with bottle gourd or zucchini to make a batch of sushi wraps for a quick and easy lunch. Like most of my recipes, you can mix and match different greens and herbs depending on what’s in season or in abundance in your garden.
Garden Vegetable Variations
Don’t have spinach? No problem. Try other leafy greens such as:
NZ spinach (Tetragonia)
Swiss chard
Rocket/arugula
Sweet potato leaves
Amaranth greens
You can even mix in edible weeds like chickweed or purslane for extra nutrition.
Recipe Notes
Psyllium Husk helps bind the mixture and gives flexibility.
Herbs are optional but add great flavor.
Dehydration Time varies depending on water content and thickness.
Spinach "sushi" wraps
Yield: 8
Prep Time: 10 minutes
Cook Time: 6 hours
Total Time: 6 hours10 minutes
Easy way to preserve excess produce and have wraps on hand for a quick garden-to-plate lunch when you need it.
Ingredients
4 cups spinach or greens*
1/2 cup fresh herbs*
1 TBSP psyllium husk
1 - 2 TBSP water
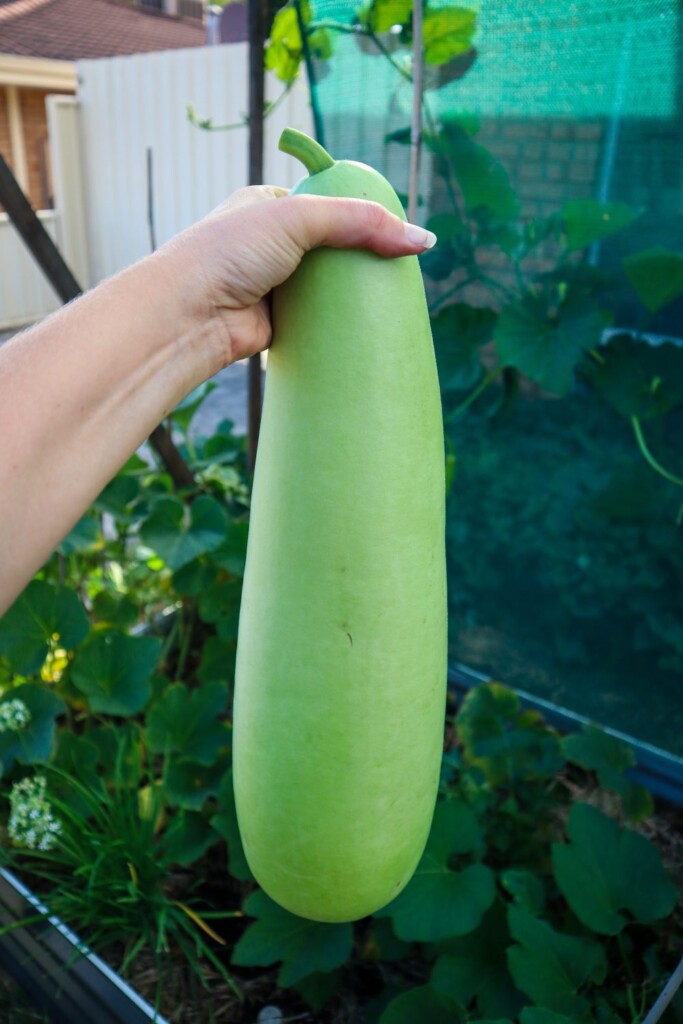
2 cups chopped bottle of gourd or zucchini
Instructions
Rinse the greens and quickly blanch for 30 seconds in hot water then transfer to iced water to cool.
Strain and add to a mixer or blender. (use the blanching water on the garden once it has cooled down)
Peel Bottle gourd using a vegetable peeler, remove the center seeds and pith then chop into 2-3cm cubes. If using zucchini there is no need to peel.
Add all the ingredients to a blender or mixer and blitz until combined. You may need to move things about with a spoon to get it mixed or add a dash more water. You want a thick paste-like consistency not too watery.
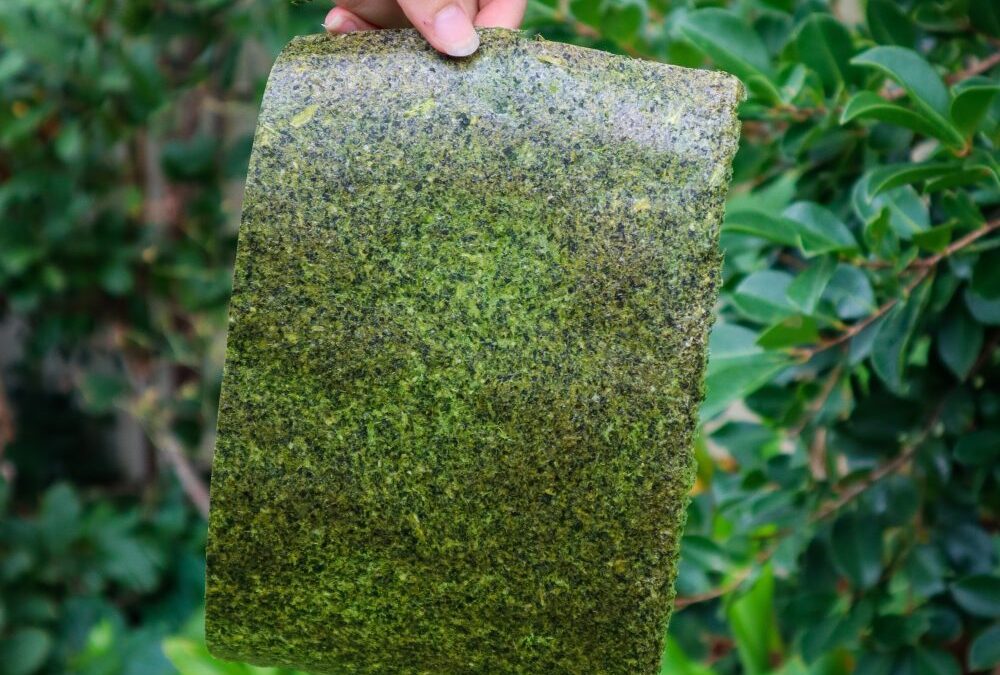
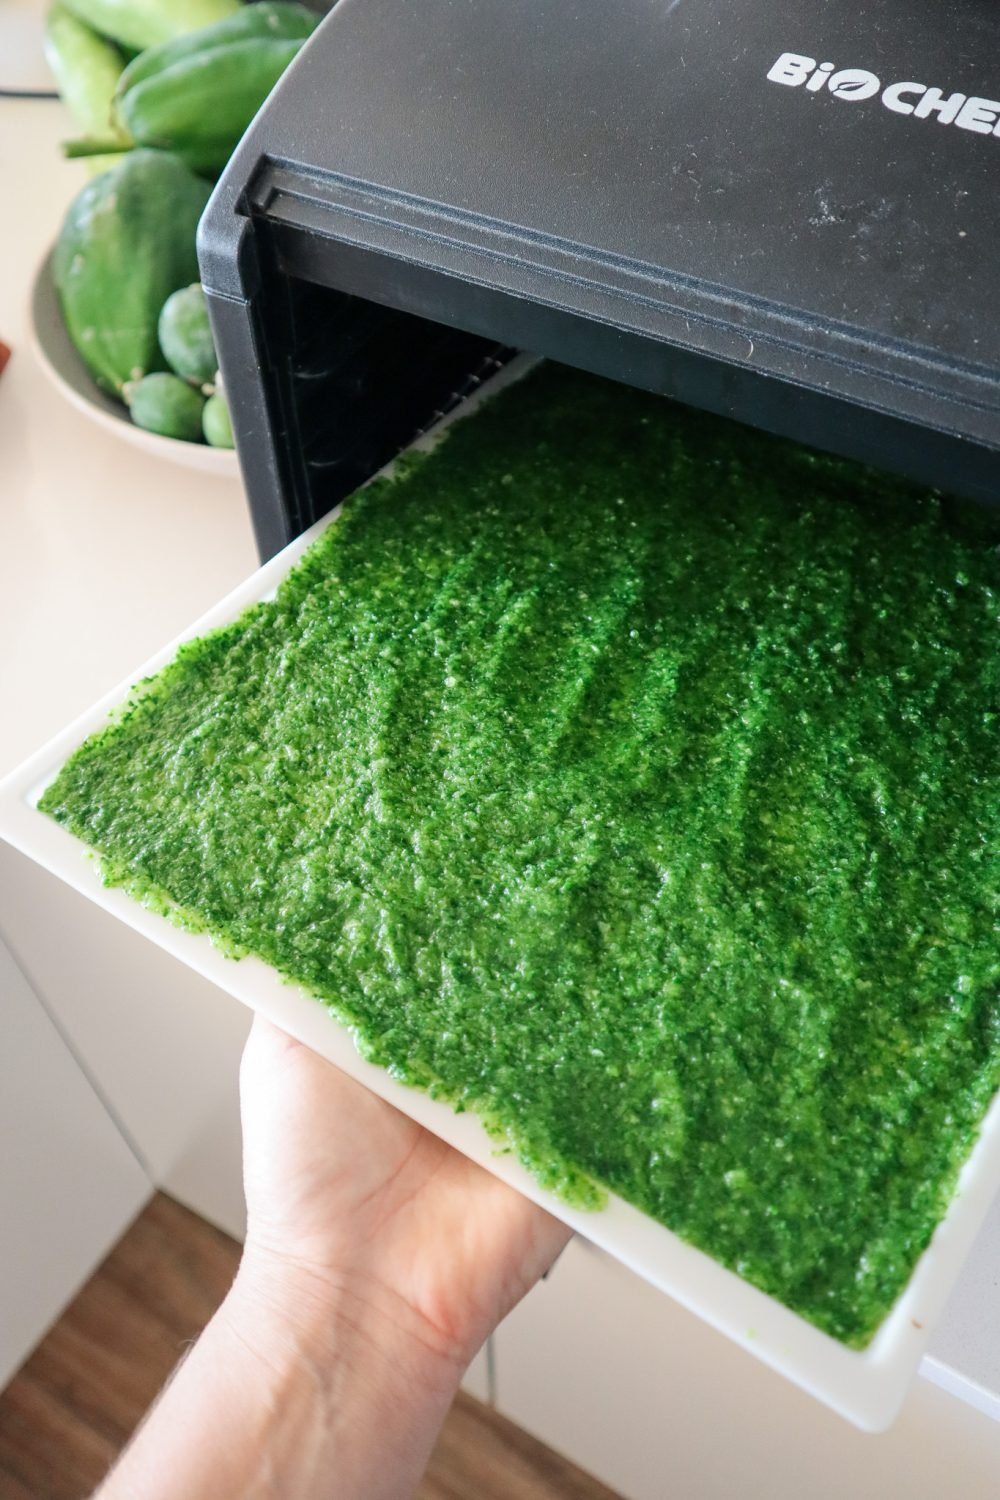
Spread the mixture onto 3-4 silicon dehydrator trays. You may need to do this in batches or use baking paper and a tray if you do not have enough of the silicon trays. The mixture should be thick enough to not see through to the tray or paper but also as thin and even as you can (before seeing through to the tray)
Dehydrate at 50 degrees celsius until dry. Check after 2-3 hours as the time will vary depending on the water content of the greens you used.
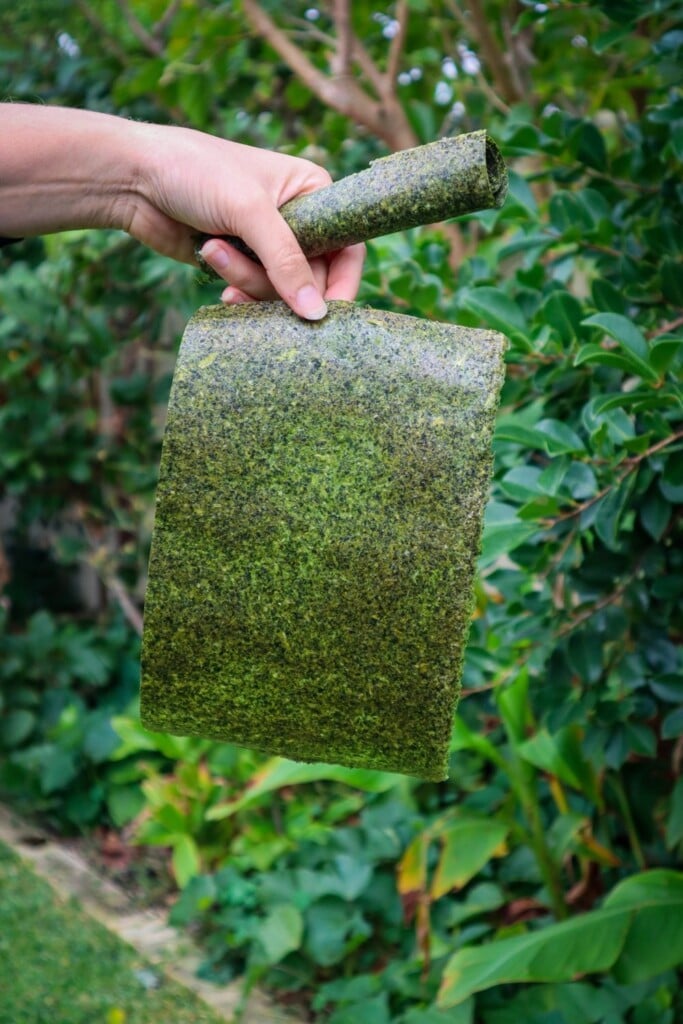
Remove and carefully run a knife around the edges to loosen it. Carefully peel off the sheet it is best to do this one bit at a time holding the sheet as close to the tray as possible as to not tear it.
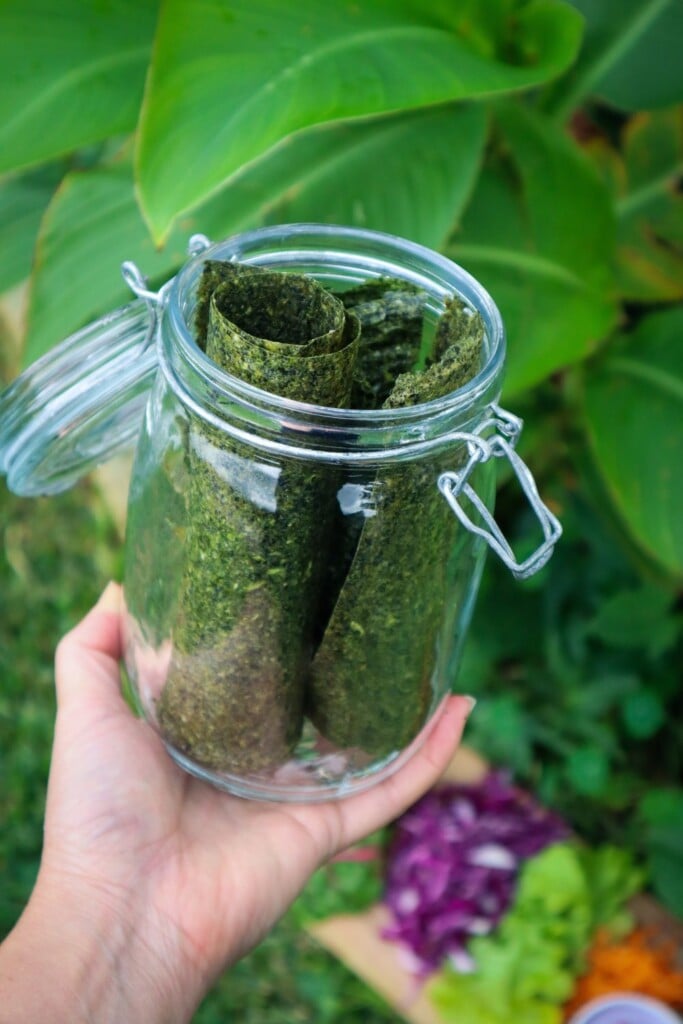
Once removed from the tray cut the sheets into the desired size (I cut in half for wraps but I keep them whole for sushi rolls) then roll them up and place them in an airtight storage jar. Or use them straight away. would
Use the wraps with your favorite salad ingredients and grilled chicken, haloumi or similar.
Notes
Greens - I used NZ spinach including the young stems but you could use any spinach or greens such as chard, rocket, sweet potato leaves etc just remove any thick stems.
Herbs - add herbs or leave them out (replace with more greens) completely up to you. Try adding 1/2 cup of herb such as parsley, chives or coriander for added flavour.
If you do not have a dehydrator you can use an oven on low to 50 degrees but be aware it may take up 6 hours so ensure you are home and not leaving the oven unattended.
These homemade spinach sushi wraps are a sustainable way to reduce kitchen waste and boost your nutrition. Whether you’re preserving an abundant garden harvest or just trying to eat healthier, they’re a delicious, eco-friendly addition to your kitchen staples.