Welcome to my urban food forest garden in Perth, Australia. It’s currently the end of autumn, the mornings are finally starting to feel cooler, but we still haven’t had much rain….not since last year before the summer, so the garden is just hanging in there. Today, I want to share an update on my urban food forest progress and the wide range of fruit I’m growing in a small space!
🎥 Watch the full Urban Food Forest Garden Tour
Starting a Productive Urban Food Forest on Less Than 1/5 Acre
My garden is high-density, featuring over 200 types of fruit trees, as well as herbs and annual vegetables, all within a property of less than 1/5 of an acre in total. My goal is to have small amounts of many different types of fruit and be able to harvest fruit 365 days a year. This means I’ve said goodbye to spacing rules, utilised dwarf fruit trees, vertical gardening, learnt to multi-graft, and I keep my trees pruned to not only let light in but also create more green material to chop and drop and feed my soil.
I first became inspired by this style of gardening after creating an edible fence screen using food forest style planting in my backyard, which we will take a look at soon, but more recently, I have taken over the front! If you have been a regular YouTube subscriber, you would have seen the process of how we have transformed my front yard from a bare lawn to a mini high-density food forest with lots of tropical fruit trees, raised garden beds to grow annual veggies and a mini wildlife pond home to small fish and frogs. Below is a current update on where we are now!
Tropical Fruits Growing in my Front Yard
I started off this front garden by planting evergreen hardy fruit trees to create an edible screen that could withstand the temperatures out here. I have a lime, feijoa, blood orange, guava, mandarin, more feijoa and a lemonade. I have since gone in and added 3 mangos, an avocado, dwarf grimichama, mulch plants, nitrogen fixing plant and edible ground covers.
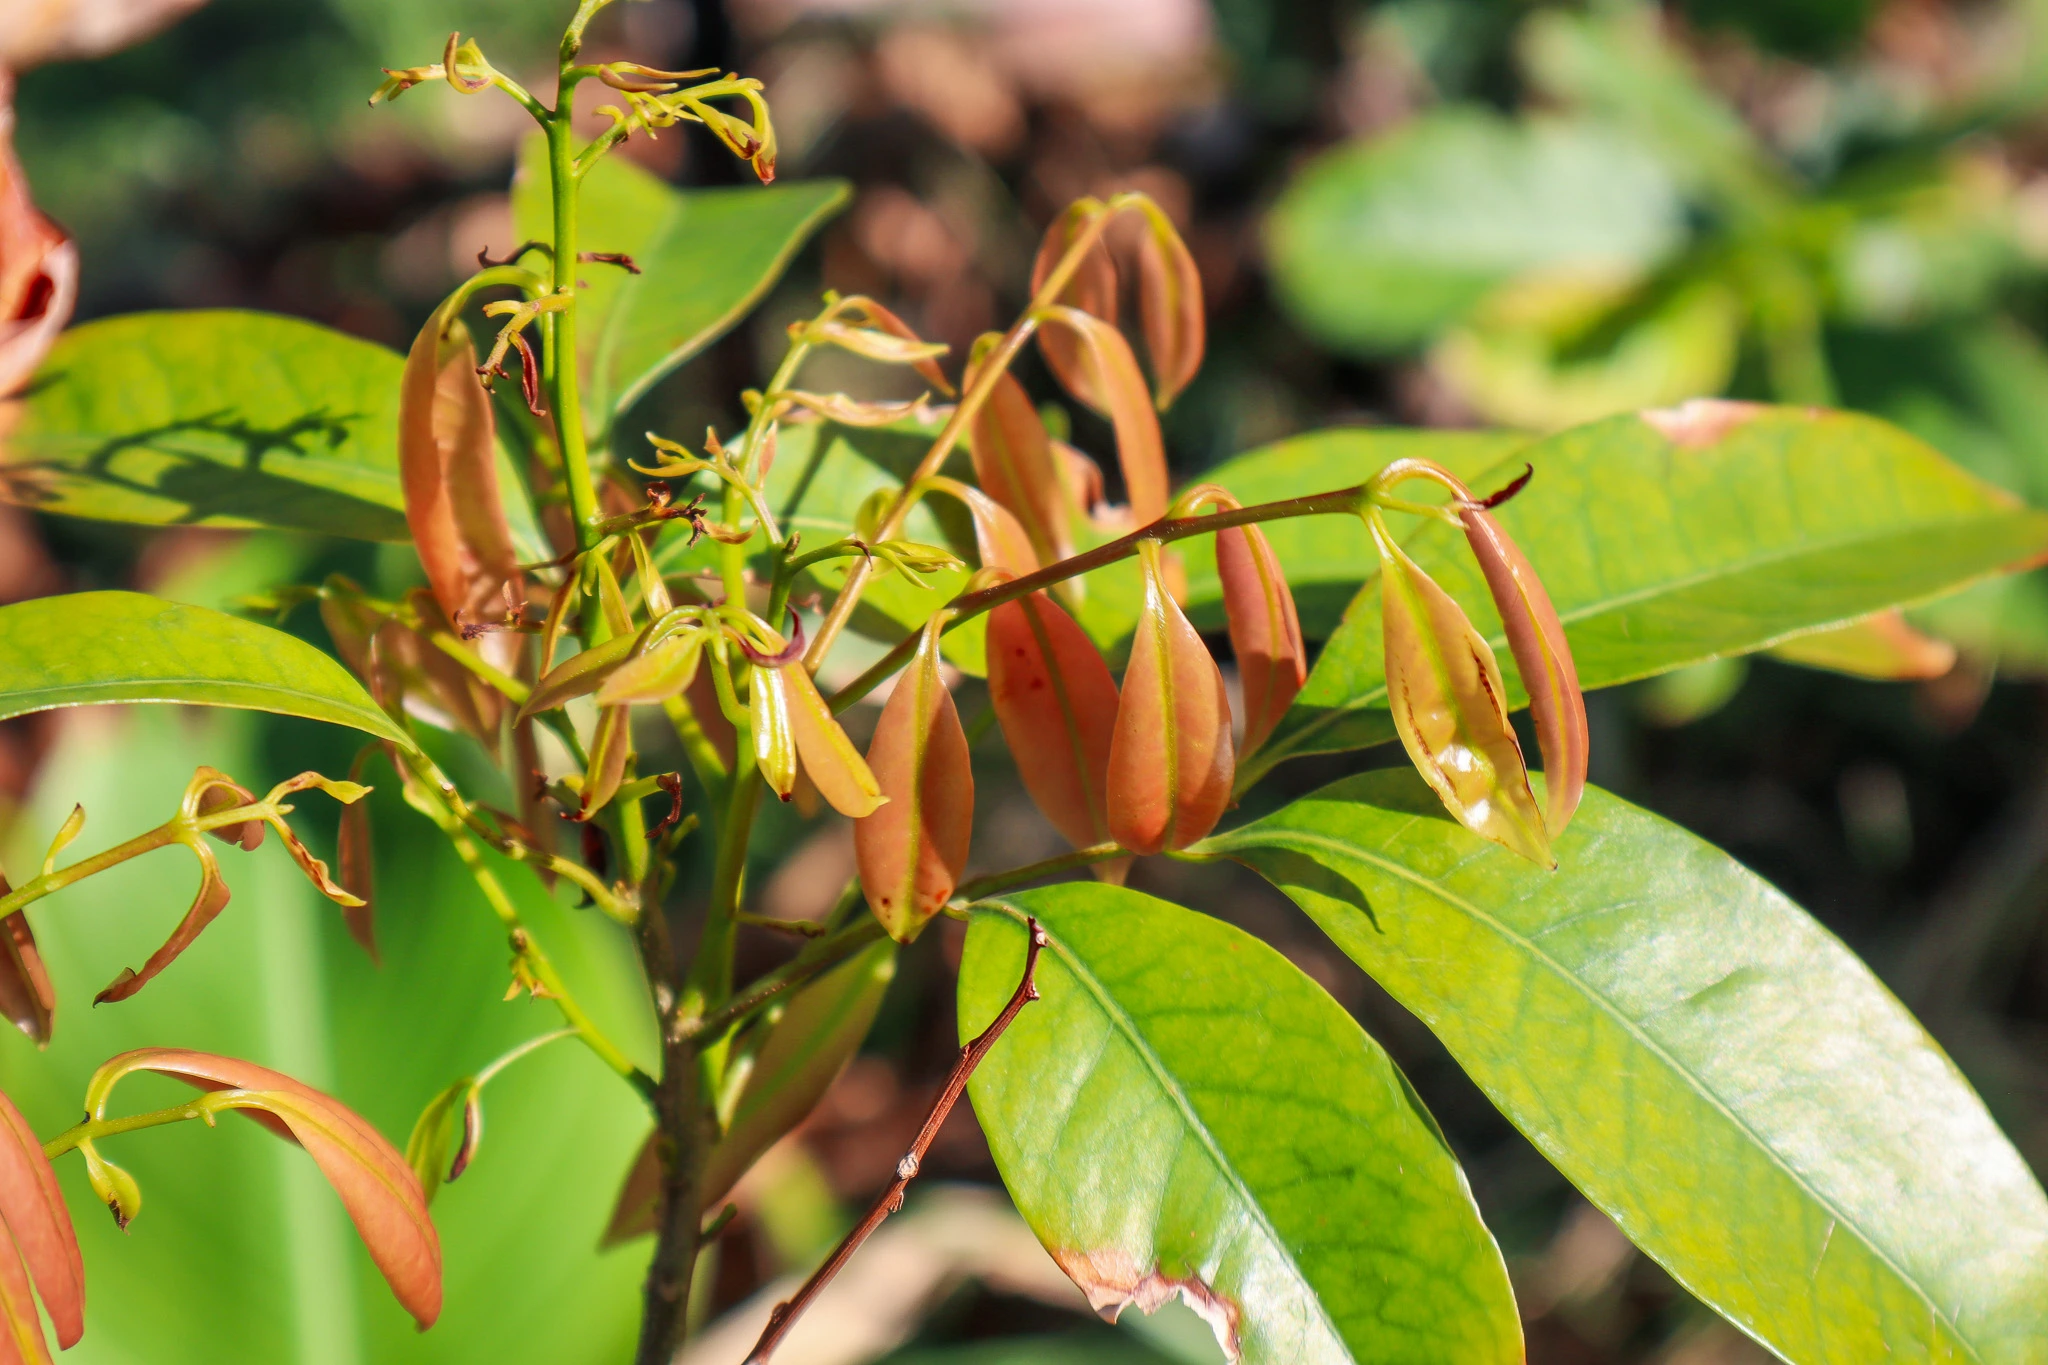
I have 4 different custard apples now planted, and I definitely have a passion for collecting new varieties of these. It’s a fruit that was rare back home in NZ, but we could grow the Cherimoya, and I was lucky enough to be introduced to that by a rare fruit grower when I was a kid. Now being in Perth, I am lucky enough to have the heat to grow more varieties, and I have (so far) Africa Pride, Paxton Prolific, Hilary White and a Bullock’s Heart, along with a bunch of seed-grown ones. These tend to lose their leaves a bit in winter, so they let light into my raised bed patch in winter, but in summer, they help keep it cool.
I have two different nashi pears, which are another favourite of mine and fruit well in warmer climates, unlike many other pears.
Some of the other fruit trees I have in the front yard include: Louisa Plum, unknown yellow Plum, multigrafted 4-way Plum (Satsuma, Mariposa, Santa Rosa, unknown), Indian Blood Peach, Lemon Mango, Orange Sherbet Mango, Sweet Tart Mango, Thai Mango, Linda Avocado, Choquette Avocado, Soursop, Starfruit, Lychee and more!
Living Shade: Building a Grape Arbour in Hot Climates
We have also constructed a metal arbour to grow living shade with x4 types of grapes planted. But with such intensely hot and dry summers, the grapes have not done much growing, but I am determined to make my dreams grape arbour happen!
What I’m Growing in my Raised Gardens this Autumn 🌱
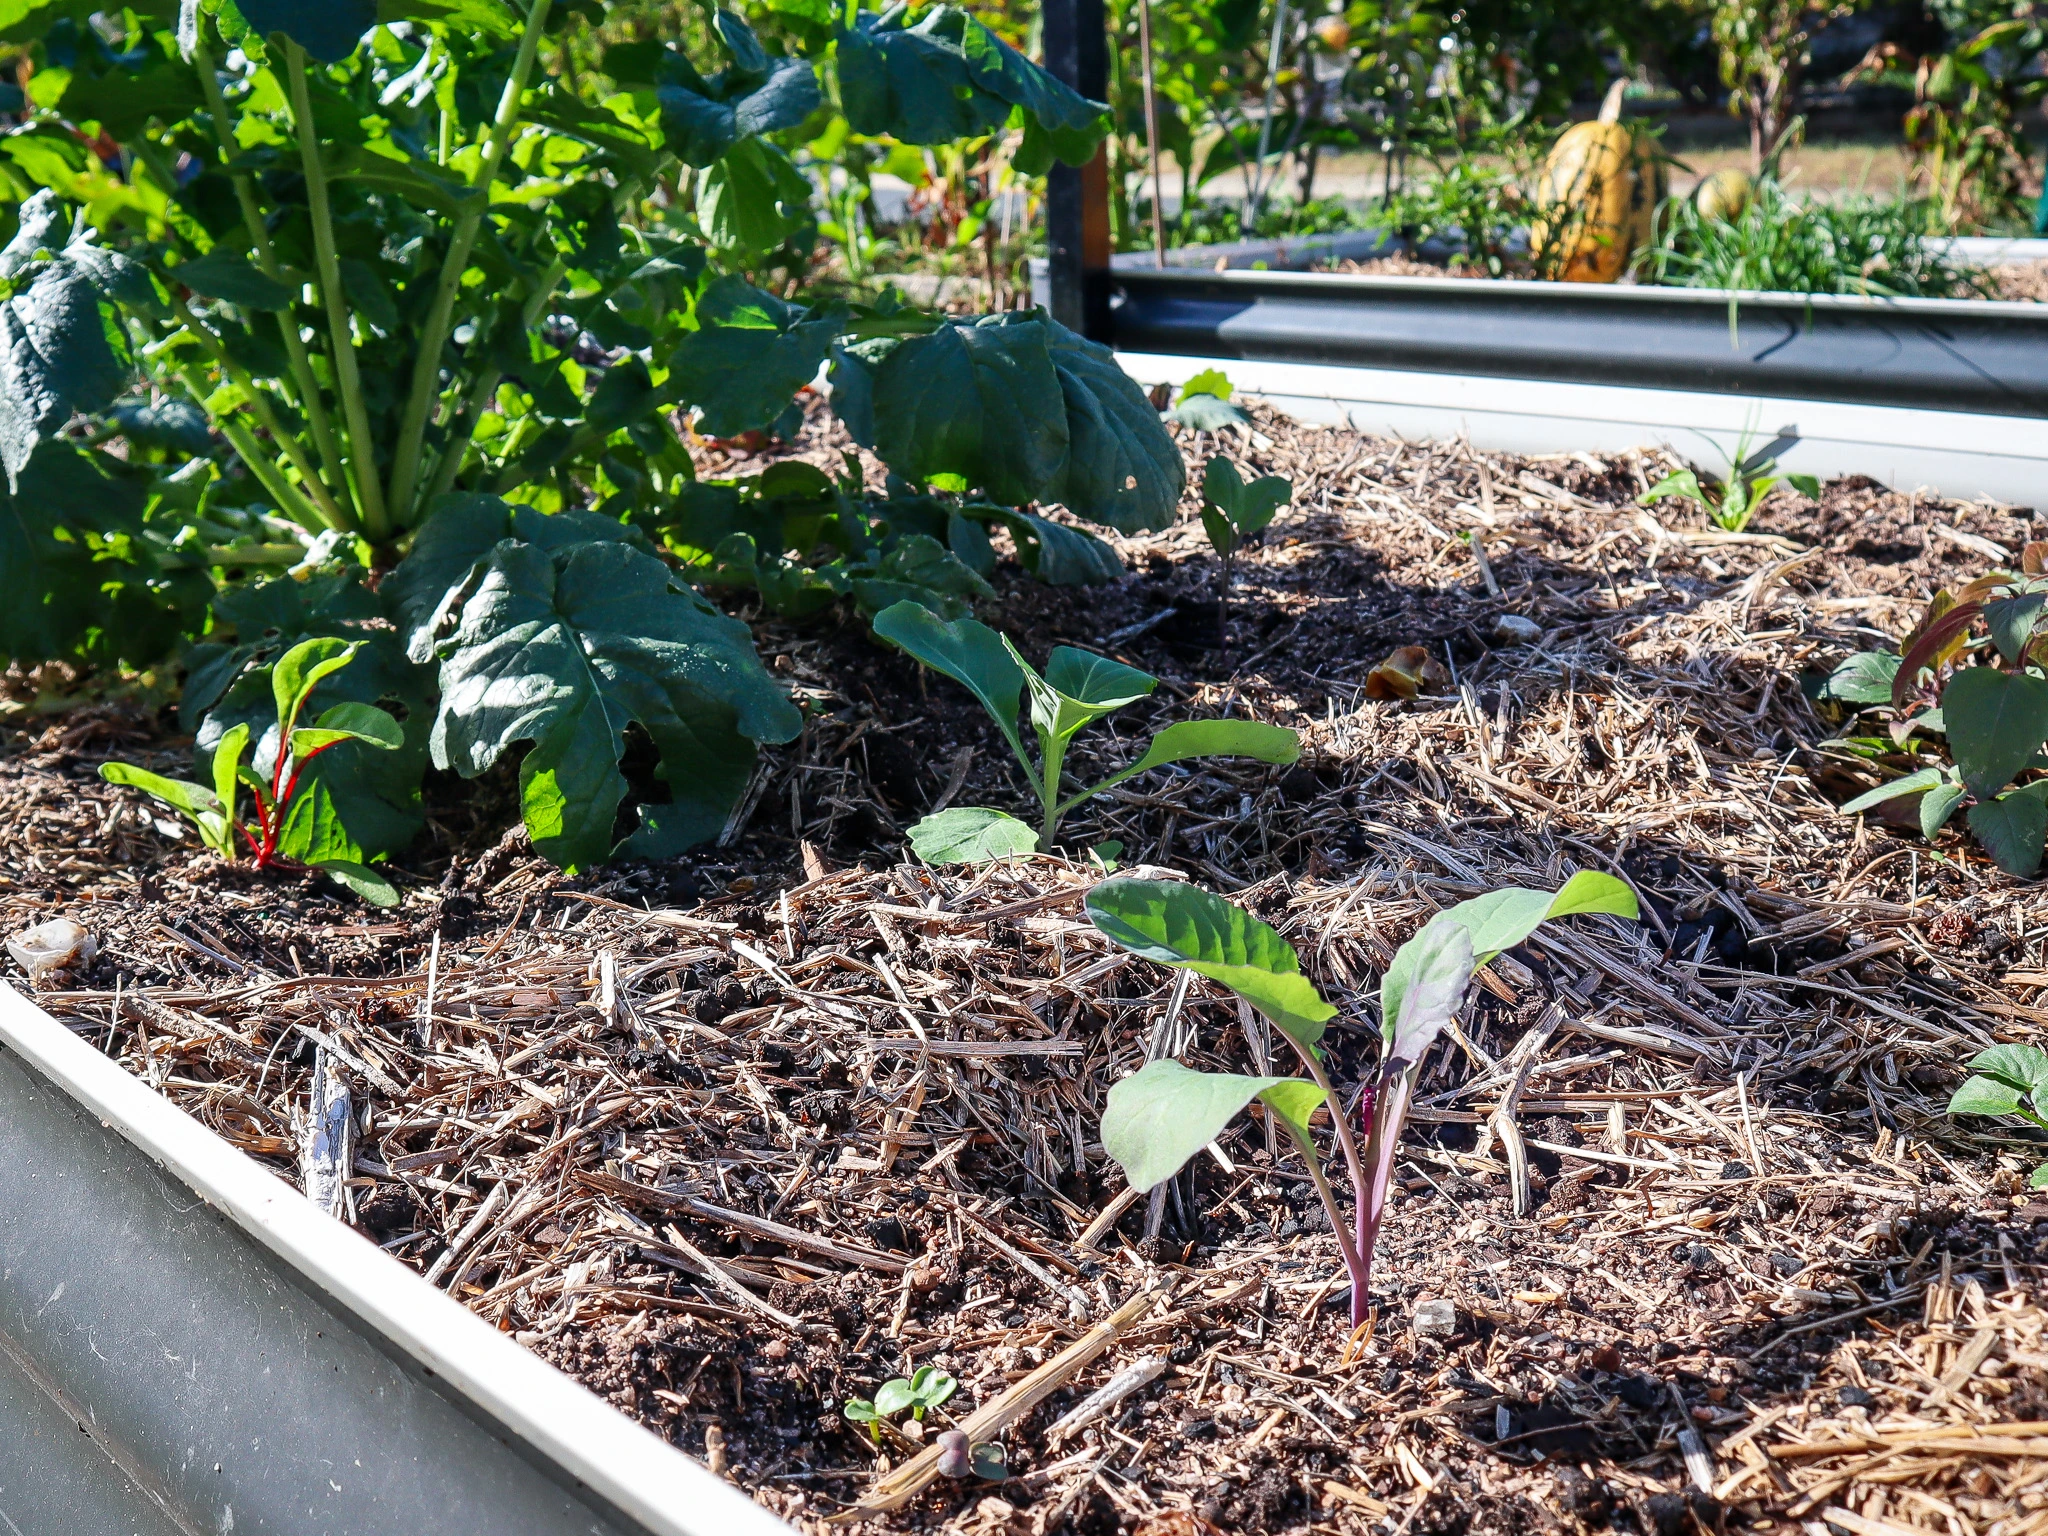
I have only just planted out my raised beds (at the end of Autumn) with seedlings and seeds because it’s just been so hot and dry, it didn’t seem worth it. But the cooler mornings and with rain forecast for this weekend, I think we might be ready to start the cool-season crops.
Just like my fruit tree planting, I also densely plant my raised beds. This helps stop any weeds from growing and gives me lush garden beds full of food. Currently, I have planted:
Edible Flowers ( Pansy/viola, Snapdragon, Dianthus and Calendula)
Edible Flowers for Beauty and Biodiversity
Edible flowers are a non-negotiable in my gardens. I love having the added colour as well as providing food for pollinators and beneficial insects. Plus, by choosing edible flowers, you can also use them to brighten up your meals. It’s a win-win.
Wildlife Pond: Attracting Frogs, Pollinators, and Beneficial Insects
The wildlife pond is getting a lot more shade now with the winter sun lower in the sky. The frogs have mostly disappeared as they go to find more sun or hibernate until warmer temperatures. There are still plenty of tadpoles, but I think these will stay like this until spring and summer because I believe they need more sun to transform. The wildlife pond has been one of my favourite projects out here in the front yard. There’s always so much wildlife to see, and it has become the main hub of my gardens to feed and nourish all my pollinators and beneficial insects.
The Driveway Patch: An Urban Food Forest Extension
Now for an update on my driveway patch! This was a new extension, and I have mainly planted deciduous fruit trees in here. This spot gets lots of hot sun during summer, but in winter, it gets a lot of shade. That’s why choosing deciduous fruit trees is a great idea. They go to sleep during winter, so they don’t mind at all.
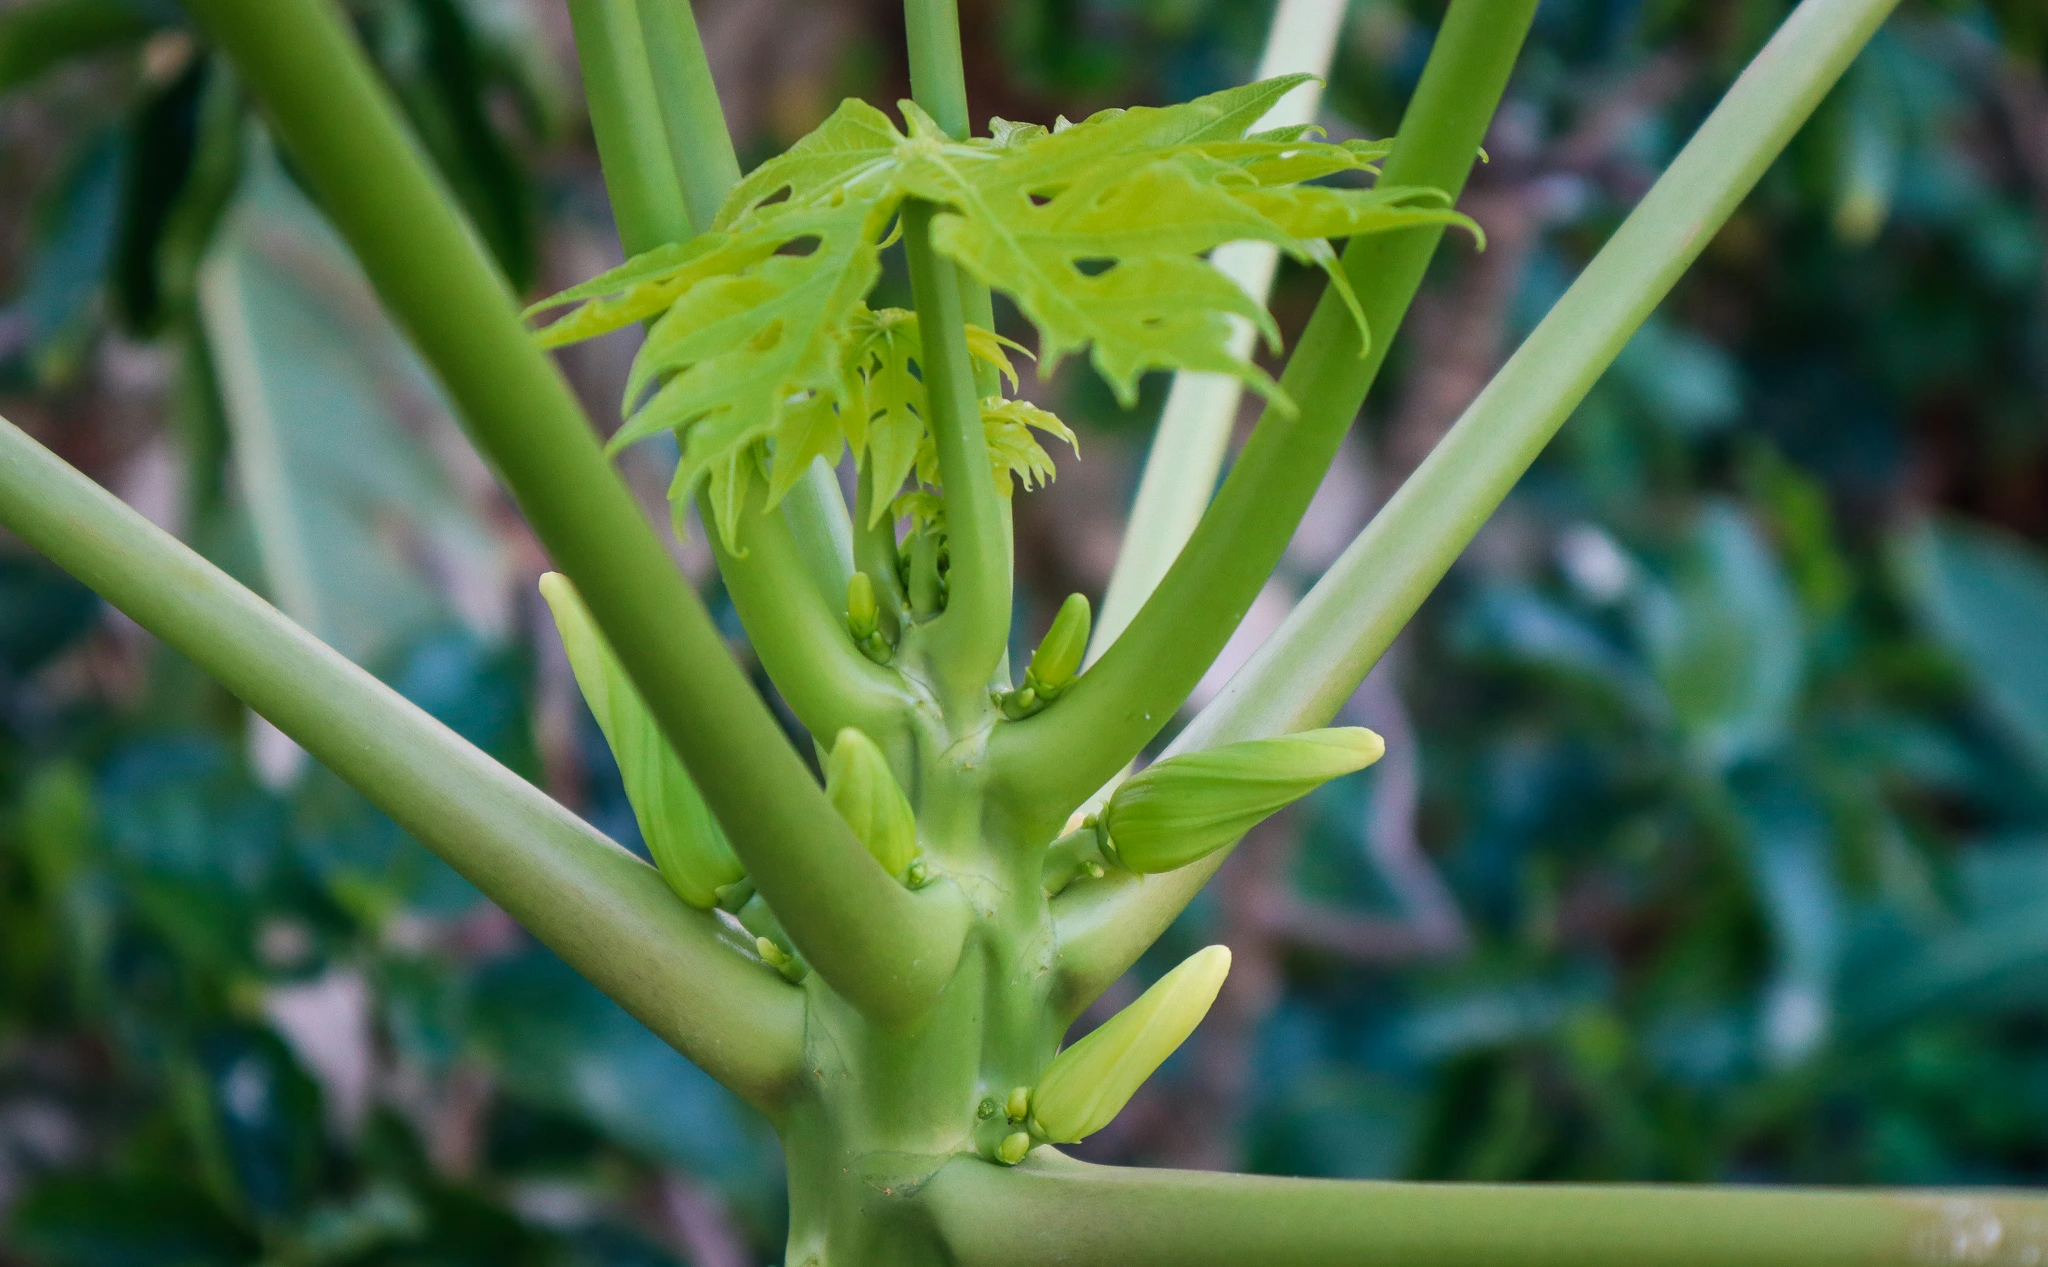
I have planted a seed, growing papaya, and it is thriving! It has started flowing along with another 5 I have planted throughout the rest of my gardens. Papayas grow well from seed and quickly! In warm climates, you can go from seed to harvesting fruit in just 1 year! In cooler climates, you may have to utilise greenhouses for winter. My plan is that this will get nice and tall to act as a bit of a natural umbrella for summer.
Summer in Perth is relentless, and with many days over 40 degrees, this garden will very much appreciate an umbrella. I have been adding more shade plants like this throughout the garden to try and help cool my summer gardens.
Creating Shade and Microclimates in an Urban Food Forest
Using plants strategically is something I have been doing a lot in my gardens.
Creating shade: I have a miringa planted in the middle of my tropical section to create beautiful dappled shade for my Soursop, Starfruit, Lychee and Avocado. I also have native plants such as Hakea that grow in poor soil and have quickly become the tallest plants in my new garden. They offer shade and wind protection, plus stunning flowers that the bees love.
Creating Mulch:Mulch plants are another thing I have throughout my gardens that I use for shade, wind protection and then I can chop them back to let light in and feed the soil and act as moisture retention. These are plants such as Pigeon Pea and Queensland Arrowroot.
Out the back, my original food forest garden has been getting lots of upgrades. I have just planted another mango, this one is the ‘lemon zest’, I also have the ‘Irwin’ and the ‘dwarf palmer’. My biggest seed-grown papaya is flowering, and I am hanging out to see it start to fruit! With more plants starting to flower, hopefully, I get some pollination happening!
In my last video, we took out the lemon tree that was just getting hammered with gall wasp and planted a giant avocado. It’s already pushing new growth, which is a good sign.
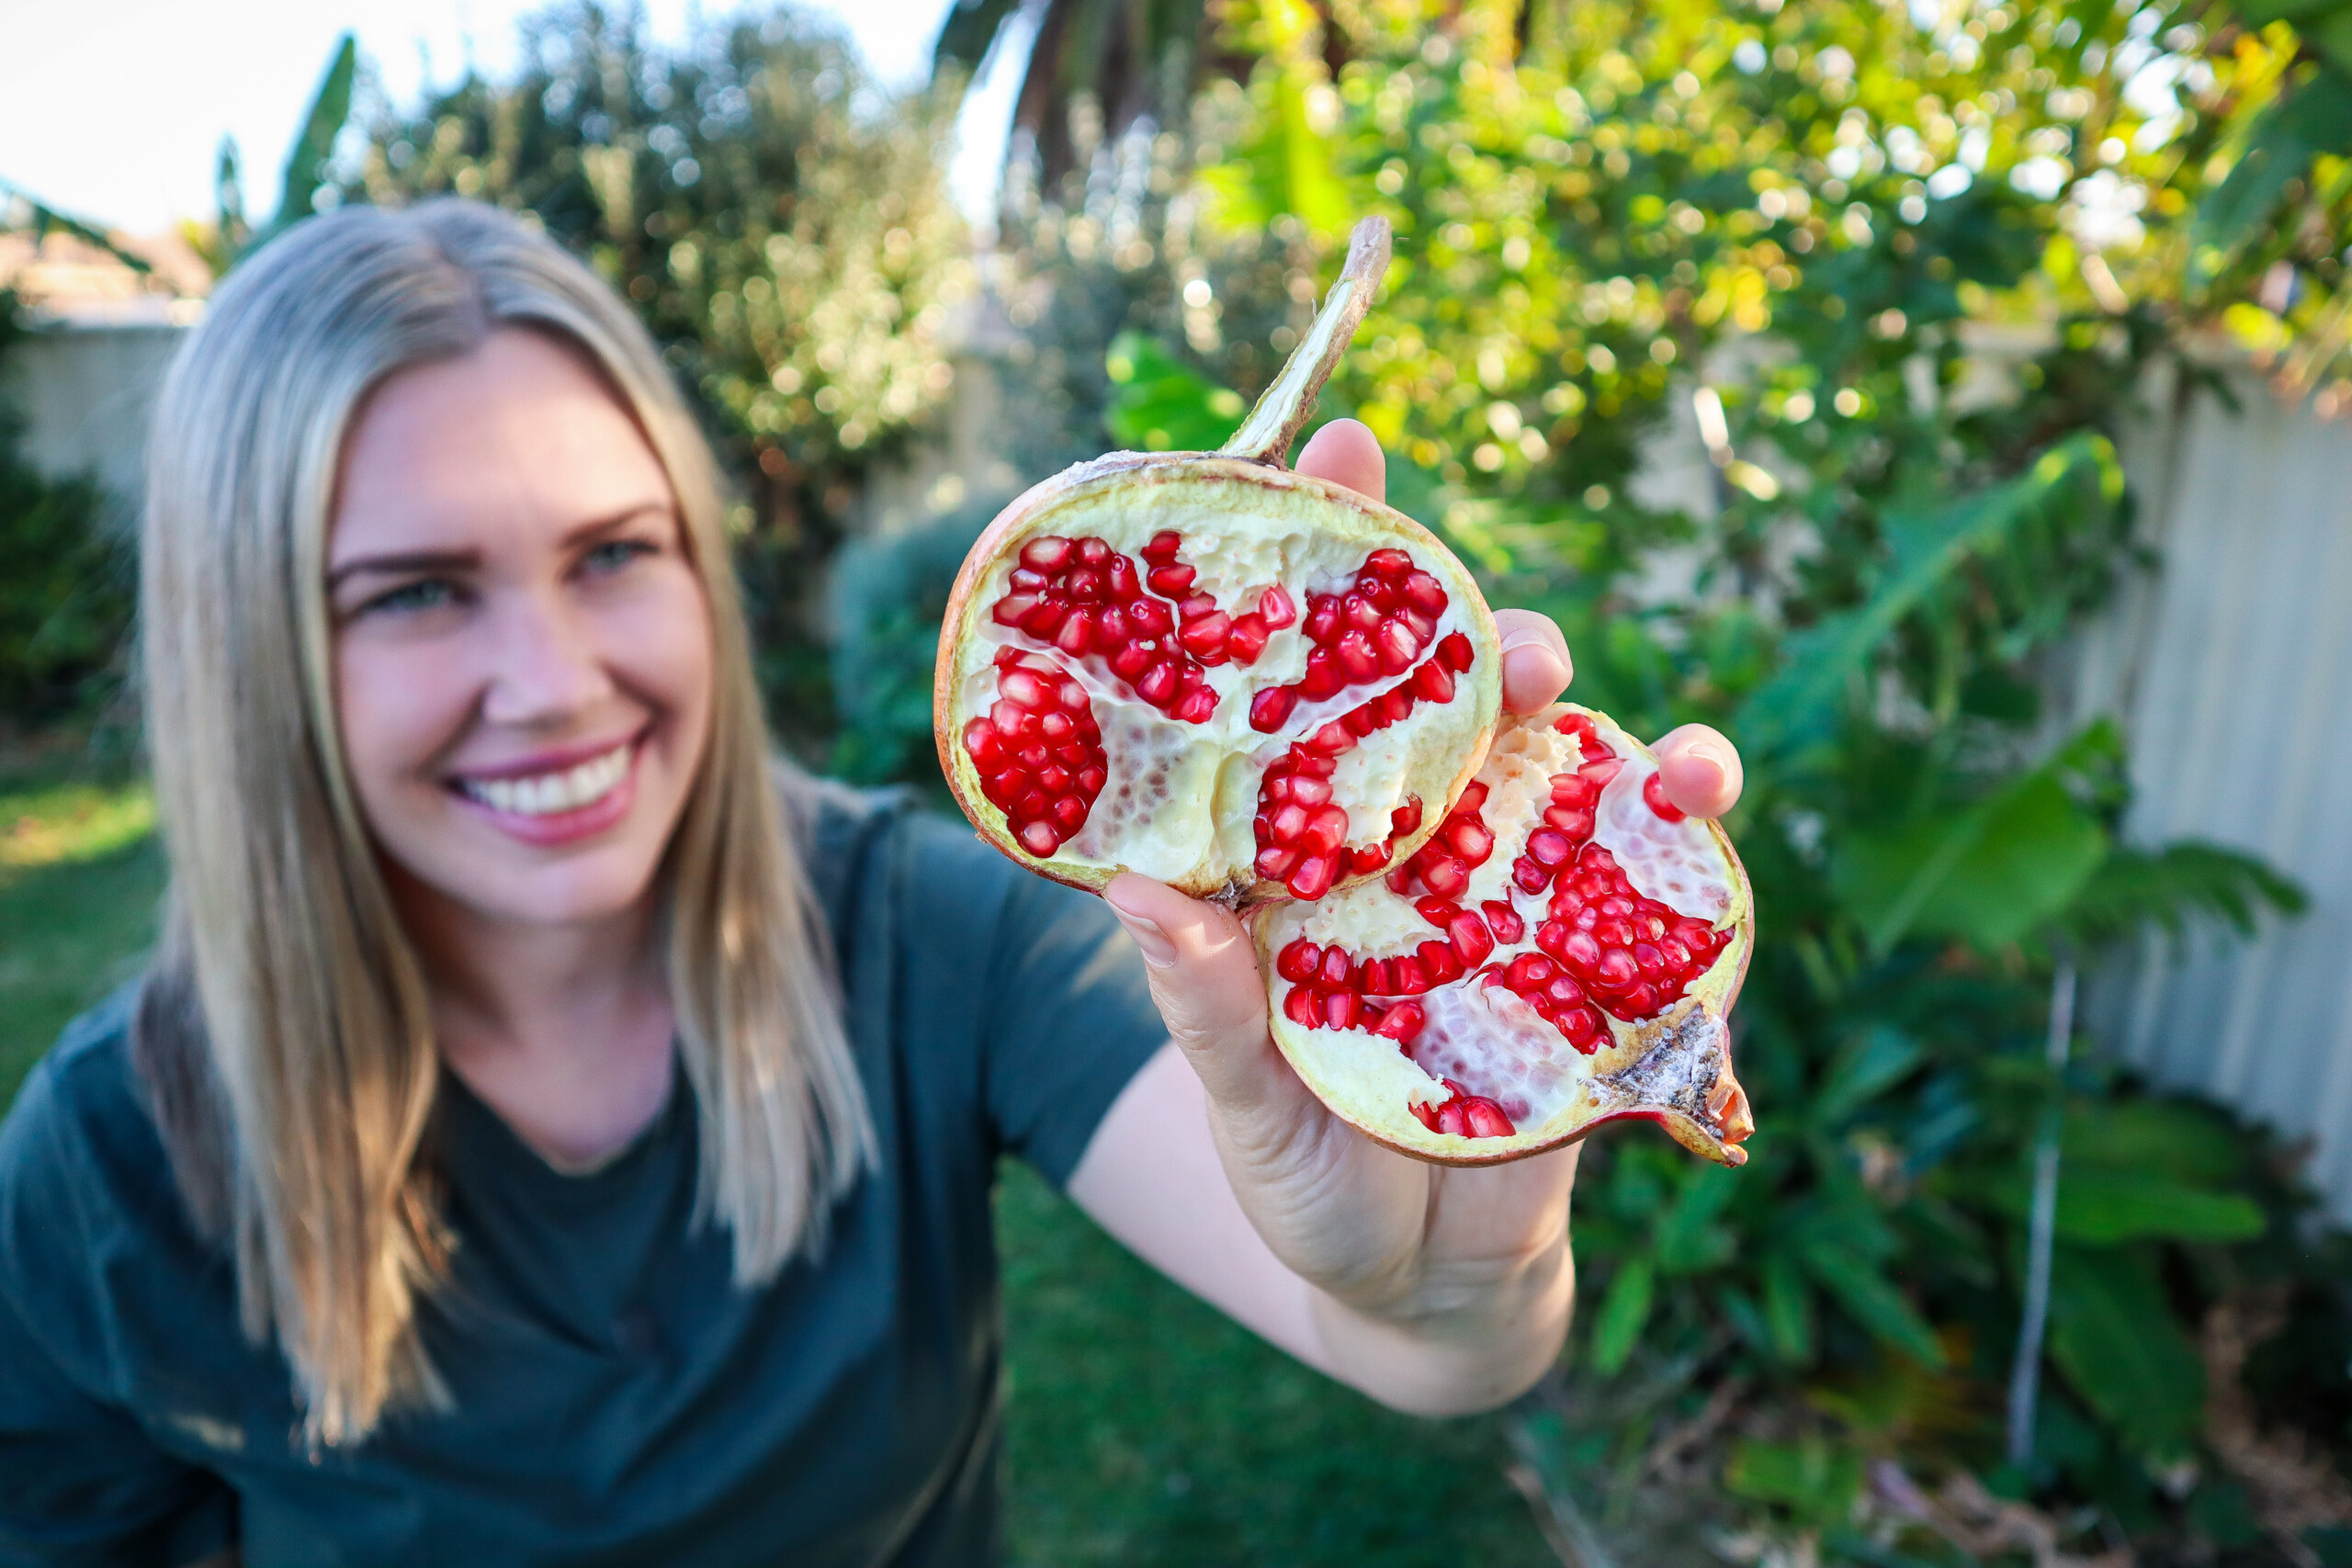
Pomegranates are ripe, and I should have harvested them, but I left it too late, and something else has beaten me to it! This Pomegranate has multiple different varieties grafted on it, but so far, just the main Azerbajani has fruited. These are amazing, like nature’s candy!
My bananas are looking good, and the plantain has shot up! My Pinkerton Avocado is looking nice and bushy, and next to that, another seed-grown papaya that has just started to flower. The rollinia is looking rather sad but has started to push all new growth off the side so fingers crossed! Behind that, we have my golden passionfruit growing vertically along the fence and a small sweet granadilla down below that I am cautiously optimistic about.
In my patio nursery, the shade cloth has come down for winter, and I am trying my best to find homes for as many things as I can in the garden. I want to downsize this a lot! I have lots of seed-grown plants here, like mango and custard apple, that I want to use for grafting practice, plus I have blueberries, finger limes and a lot of other things.
I hope you enjoyed this Autumn update of my urban food forest, and make sure you are subscribed to follow along with the progress!
Links included in this post might be affiliate links. If you purchase a product or service with the links that I provide I may receive a small commission. There is no additional charge to you! Thank you for supporting my blog so that I can continue to provide you with free content.
Do you want to grow more fruit and utilise vertical space? Then these 17 fruits that grow on vines will help you not only grow more delicious fruit to eat, but by growing vertically, you can save space and create more shade to protect your garden and more delicate plants during the hot months. I’m sharing my favourite fruits that grow on vines – perfect for urban food forests, backyard trellises, and small-space gardens. Whether you’re new to gardening or looking to expand your edible garden vertically, there’s something here for every garden.
If you’re looking to make the most of your vertical space, growing fruit on vines is one of the easiest and most rewarding ways to do it. From delicious grapes to exotic, rare passionfruit, there are so many climbing fruits that not only taste amazing but also help create lush, edible walls in your garden.
Why Grow Fruits on Vines?
Vine fruits are great space-savers. They climb up rather than spread out, meaning you can grow more food in less ground space. They’re ideal for small gardens, balconies, or food forests where every layer of the garden is put to work. Plus, many vine fruits are perennial or self-seeding, making them low-maintenance once established. I also love them for fence screening or adding more green to the backyard, with walls of green vines covered in fruit, they are not just productive, they’re beautiful too!
1. Passionfruit
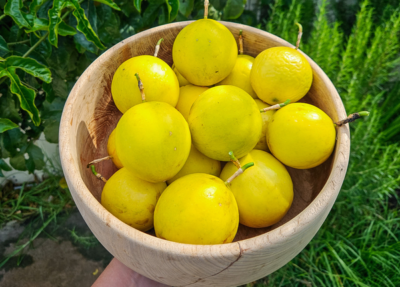
One of my absolute favourite perennial fruiting vines!Passionfruit vines are fast-growing, evergreen in warmer climates, and produce deliciously tangy fruit. They’ll need strong support, plenty of sun, and a bit of pruning to keep them in check. Passionfruit can also be easily grown from seed to fruit in just 1-2 years.
Growing Tips: Plant in well-drained soil with plenty of compost, and water regularly during the growing season. Allow a lot of water during the summer season to allow them to produce abundant crops.
2. Grapes
Whether you’re growing table grapes or wine grapes, these deciduous vines are classic for a reason. Grapes love full sun and rich, well-drained soil. In winter, prune heavily to encourage fruiting in spring and summer. Grapes are great for areas that get full sun in summer but maybe get more shade in winter(because they are asleep). They can also be used to help offer shade to your veggie patch in summer and let light in during winter when they lose their leaves. I have mine planted over my main veggie patch on a strong arbour.
Growing Tips: Prune annually to control growth and increase yield. Provide sturdy support and full sun.
3. Choko (Chayote)
A vigorous vine that’s great for covering fences or pergolas, but must be kept in check with regular pruning. Chokos produce crisp, mild-flavoured fruit that’s incredibly versatile in the kitchen. Great for making preserves or used to bulk up pies as a substitute for apple or potato! They love warmth, regular watering, and space to sprawl. Chokos are a great option for providing summer shade to your garden in areas like Perth that have scorching hot summer days.
Growing Tips: Plant a whole chayote fruit in rich, moist soil and give it something to climb. It loves heat and humidity.
4. Kiwi Fruit
A beautiful deciduous vine with fuzzy fruit packed with vitamin C. Kiwi fruits need a male and female plant to produce fruit, and prefer a cold winter and warm summer. Provide sturdy support, these vines are strong!
Growing Tips: Train along a strong trellis and prune yearly. Kiwi prefers rich, well-drained soil and full sun (although protect during their first year in hot climates like Perth)
5. Cucamelon
These tiny watermelon lookalikes are actually closer to cucumbers. They’re crunchy, a little tangy, and perfect for pickling or snacking. Cucamelons are easy to grow from seed and do best in full sun with something to climb.
Growing Tips: Easy to grow in warm climates with full sun. Trellis them like cucumbers and harvest regularly.
6. Blackberry
While technically a bramble, many blackberry varieties can be trained like vines. Choose thornless varieties for ease of harvest, and plant them along fences or trellises. Great for attracting pollinators too.
Growing Tips: Plant in full sun with rich, well-drained soil. Train along a fence or wire support.
7. Raspberry
Like blackberries, raspberries can be trained vertically. They’ll reward you with handfuls of juicy berries and are surprisingly low-maintenance. Summer or autumn fruiting varieties are available depending on your climate.
8. Kiwi Berry
Kiwi berries are like miniature kiwifruits without the fuzz — bite-sized, smooth-skinned, and bursting with sweet, tropical flavor. These hardy vines are a great option for gardeners in cooler climates, and once established, they’re prolific producers. Unlike regular kiwis, you can pop these straight into your mouth without peeling! The vines are vigorous climbers and benefit from strong support and annual pruning.
Growing Tips: Some Kiwi berries need both a male and female plant for pollination. Plant them in well-drained soil with plenty of sun and compost, and keep them well-watered in dry periods. Patience pays off — they usually start fruiting in their third year, but reward you with loads of delicious fruit for years to come.
9. Giant Granadilla (Passiflora quadrangularis)
Giant Granadilla is the largest of the passionfruit family, producing fruit that can grow over a foot long! Its flavour is mild and slightly sweet, with edible pulp that can be eaten fresh, juiced, or added to desserts. One unique feature is that the white inner rind (or pith) is also edible when cooked, often used in stews, curries, or candied as a sweet treat. The plant also produces large, show-stopping flowers, making it both productive and ornamental. It’s ideal for gardeners who want something bold, tropical, and a little bit out of the ordinary. This one is tricky to grow and needs a warm tropical climate or a greenhouse to thrive.
Growing Tips: Plant in full sun and well-draining, compost-rich soil. This vigorous vine needs a very strong support structure and plenty of room to spread. Keep it well-watered during hot weather and feed regularly to support its large fruit. It prefers warm, frost-free climates but can be grown in large containers and moved to shelter if needed. Prune after fruiting to encourage new growth and airflow.
10. Dragonfruit (Pitaya)
A striking cactus vine that needs support and warmth. Great for hot and dry areas of your garden. Dragon fruit plants produce stunning flowers followed by bright pink or yellow fruit with speckled flesh. Perfect for tropical or subtropical gardens. Prune regularly to shape the plant and encourage flowering. With a bit of patience and care, you’ll be rewarded with stunning blooms and unique, nutrient-packed fruit.
Growing Tips: Choose a sunny, sheltered spot with well-draining soil. Water deeply but allow the soil to dry out slightly between waterings — too much water can lead to rot.
11. Loofah (Luffa)
While often grown for its spongy interior, young loofah fruits are edible when cooked. This vine loves the heat and needs a long growing season. Let a few mature fully for bath sponges and save the rest for dinner!
Growing Tips: Start from seed in spring. Let fruits mature fully on the vine if you want to harvest them as sponges.
12. Pumpkin
Though typically considered a ground crop, pumpkins will happily climb a strong trellis if you support the fruit. This is a great way to save space and get a better shape on the pumpkins too. Growing vertically can help reduce pest pressure and increase airflow. Choose smaller varieties to help reduce the risk of the stems breaking off the vine. Add small hammock supports to the fruit if you think they are too heavy.
Growing Tips: Plant in mounds with compost-rich soil. Allow plenty of space or use a strong vertical support for smaller varieties.
13. Melons (Rockmelon, Cantaloupe, etc.)
Melons can also be trellised to save space and reduce rot. Use slings or mesh bags to support the fruit as it grows. They love full sun, compost-rich soil, and warm temperatures. Melons are a great choice for annual fruits that grow on a vine.
Growing Tips: Choose smaller varieties. Consistent watering during the hot months will help get the best-tasting melons.
14. Muscadine Grapes
Native to the southeastern United States, muscadine grapes are hardy, disease-resistant vines that produce sweet, thick-skinned grapes perfect for fresh eating, jams, and winemaking. These grapes love warm, humid climates and are a great low-maintenance option for edible gardens. I haven’t been able to find any yet in Perth, but when I do, I will definitely be testing them out!
Growing Tips: Plant in full sun with well-drained soil. Muscadines prefer slightly acidic soil and benefit from a yearly layer of compost. Provide a strong trellis or arbor to support their vigorous growth. Prune in winter to encourage productive fruiting wood and good airflow. They’re self-fertile, but planting more than one variety can increase yields.
15. Climbing Tomato (Indeterminate Varieties)
While technically a fruiting shrub, indeterminate tomatoes behave like vines and can be grown vertically with supports. Perfect for patios and small garden beds where space is tight. Plant at the back of your container or garden to and train up whilst still utilising the front for short plants like lettuce and carrots.
Growing Tips: Use stakes, cages, or trellises. Pinch off suckers and prune to improve airflow and production.
16. Kiwano (Horned Melon)
This spiky, alien-looking fruit is sure to turn heads in the garden. Native to Africa, Kiwano grows on a vigorous climbing vine and produces bright orange, horned fruit filled with lime-green, jelly-like flesh. It has a mild, refreshing flavor, somewhere between cucumber, kiwi, and banana — perfect for smoothies or eating chilled with a spoon.
Growing Tips: Plant Kiwano in warm, frost-free conditions with full sun and well-drained soil. Like cucumbers, it appreciates regular watering and trellising. Start seeds indoors or direct sow after the last frost. It thrives in hot climates and is drought-tolerant once established.
17. Cucumber
A garden classic, cucumbers are refreshing, fast-growing vine fruits that are perfect for salads, pickling, and even chilled soups. With so many varieties — from crisp slicing cucumbers to cute pickling types — there’s one for every garden. Cucumbers also make a super nutritious and refreshing juice in summer.
Growing Tips: Plant cucumbers in full sun after the danger of frost has passed. They love warmth, regular watering, and rich, well-draining soil. Train them vertically with a trellis to save space and improve air circulation, which helps prevent powdery mildew. Harvest often to keep plants productive.
Tips for Growing Vine Fruits
Support Structures: Use trellises, arches, pergolas, or fences.
Mulch and Compost: Feed the soil with organic matter to keep your plants thriving.
Water Consistently: especially in dry or windy weather.
Prune as Needed: Keep vines manageable and productive.
Growing Fruit Vertically to Save Space
Growing fruits on vines is such a rewarding way to get more out of your space and your harvest. Whether you’re trailing cucamelons up a balcony rail or letting passionfruit take over a fence, vertical gardening adds beauty, abundance, and a lot more greenery to any garden. So pick one (or a few!) of these climbing fruits and get growing – your future self will thank you for the baskets of delicious fruit!
Maximize Garden Space with Espaliered Fruit Trees
While vine fruits are amazing for vertical gardening, espalier fruit trees are another clever way to grow food in tight spaces. Trained flat against a wall or fence, espaliered trees not only save space but also turn your garden into a living work of art. Apples, pears, figs, and even citrus can be grown this way with a little patience and pruning. They make excellent use of sunlight, are easier to harvest, and can add structure and charm to garden borders or sunny walls. If you’re short on space but big on fruit dreams, espalier might just be your next favorite technique!
Links included in this post might be affiliate links. If you purchase a product or service with the links that I provide I may receive a small commission. There is no additional charge to you! Thank you for supporting my blog so that I can continue to provide you with free content.
From invasive root systems to aggressive self-seeding, I will share why urban gardeners should Avoid Planting these in the Ground. These 15 Fruit Trees & Edible Plants can take over your garden, damage nearby structures, or require constant maintenance. Planting fruit trees and edible plants in the ground might seem like the best way to grow them, but some plants can quickly become a headache in urban gardens!
If you have limited space or an urban garden, this will be important info to know BEFORE you plant these in the ground! In this post, I’ll explain why these plants are better suited for containers, raised beds, or controlled areas, helping you avoid common gardening mistakes.
Fig Trees
Figs are delicious and easy to grow, but their strong root systems can cause major problems. They have the potential to damage pavers, concrete, and even underground drains as they search for water. If planted in raised beds, they can take over the space, outcompeting other plants.
A better option? Grow figs in a pot. This allows them to focus on fruit production rather than excessive growth. You may find they fruit quicker and more prolifically in a pot when they focus more on fruit production than on establishing their size. If you have plenty of space, you can plant them in the ground—just keep them away from structures, driveways, and pipes.
Kumquat Trees
Kumquats are a fun citrus tree, but for many gardeners, they end up being more ornamental than practical. While they produce masses of fruit, the small, tart fruits are best suited for jams, chutneys, or cocktails—not for everyday snacking.
A small potted tree will be much easier to manage and will give you great harvests to experiment with. Rather than a full-sized tree overloaded with fruit that becomes a chore to harvest.
Blackberry
Blackberries are known for their invasive growth habits. They send suckers underground, making them hard to contain, and if their stems bend over and touch the ground, they root and spread even further.
To keep them under control, grow blackberries in containers or install a deep garden edge to prevent runners from escaping. Otherwise, they can quickly take over your garden or spread into neighboring gardens or properties.
Blueberry
Blueberries thrive in acidic soil, which can be challenging to maintain in the ground. Without consistent soil pH, they may struggle to produce fruit.
Growing blueberries in pots allows you to control soil acidity, ensuring healthier plants and bigger harvests. Plus, container-grown blueberries take up less space and can be moved easily.
Grafted Passionfruit
Grafted passionfruit vines are notorious for causing problems in the garden, especially for beginner gardeners. The rootstock can take over, killing off the main plant and leaving behind a non-fruiting, invasive vine. The suckers can spread over 50 meters, making them extremely difficult to remove once established.
For a hassle-free option, grow non-grafted passionfruit vines to avoid rootstock takeover.
Mint
Mint is one of the worst plants for spreading aggressively. It sends out underground runners that allow it to jump containment and take over nearby garden beds. Even in pots, it can escape through drainage holes and establish itself in the soil.
Since a single plant can produce more than enough for home use, keep mint contained in a pot or raised bed to prevent it from becoming invasive.
Elderberry
Elderberry bushes are great for their medicinal berries and flowers, but they send out suckers that make them difficult to control. Even if you try to remove them, they can keep coming back for years.
If you’re growing elderberries in a small space, consider pots or designated garden areas to manage their spread.
Goji Berry
Goji berries grow fast and aggressively, spreading through self-seeding and suckering. While they are packed with nutrients, they can quickly take over garden beds if not regularly pruned.
For better control, grow goji berries in a pot to keep them manageable.
Jerusalem Artichoke (Sunchoke)
Jerusalem artichokes send out underground tubers that spread rapidly and uncontrollably. Once established, they are nearly impossible to remove.
To prevent them from taking over, grow sunchokes in large containers or contained garden beds where they can be harvested easily.
Yarrow
Yarrow is a fantastic medicinal herb. It also attracts a lot of beneficial insects and pollinators to the garden. However, it has an aggressive spreading growth habit in the garden. It spreads throughrunners under theground that can invade neighboring properties and garden beds. Yarrow can be hard to get rid of once a patch is established.
If you want to grow Yarrow in an urban garden, try containers or root barriers to keep it in check.
Malabar Spinach
This fast-growing vine can take over trellises and nearby plants. It also self-seeds aggressively, meaning it will pop up all over your garden. It is also more ornamental than edible so you don’t need to have it regrowing everywhere.
For better management, grow it in containers or a dedicated trellis space.
Lemon Balm
Lemon balm is one of my FAVOURITE herbs. It is part of the mint family and spreads rapidly through self-seeding. Once established, it can take over veggie patches.
Keep it pruned to stop flowering and contained by growing it in pots rather than directly in the ground.
Choko (Chayote Vine)
Chayote vines are a great perennial vine but do grow extremely fast, climbing over fences, trees, and garden beds. They also regrow from tuberous roots, making them hard to remove once established.
To prevent it from taking over, grow choko in containers or on a dedicated trellis.
Loquat
Loquats are delicious, but birds spread their seeds, causing them to self-sow aggressively. These trees also grow large, shading out other plants and taking up valuable space.
If you plant a loquat tree, be prepared for regular pruning and fruit netting.
Nasturtium
While nasturtiums are great companion plants, they self-seed aggressively and can quickly take over garden beds. In warm climates, they may become invasive.
To keep them in check, grow nasturtiums in pots or confined spaces.
Where & How to Plant Instead:
1. Large Pots & Containers 🪴
Great for invasive trees like figs, bamboo, or mulberries.
Controls root spread and makes maintenance easier.
Use at least a 50L (13-gallon) pot with good drainage.
2. Raised Garden Beds 🌱
Ideal for shallow-rooted plants that need better soil structure.
Prevents aggressive roots from spreading into pathways or damaging pipes.
Use deep beds (40cm/16” or more) for trees like bananas or certain berry bushes.
3. Root Barrier Systems 🚧
Works well for trees with aggressive or spreading roots (e.g., willows, mulberries).
Install a thick plastic or metal barrier at least 60cm (24”) deep around the root zone.
4. Espalier Against a Fence or Trellis 🌿
Perfect for space-saving and controlling growth (e.g., citrus, apples, pears).
Improves air circulation and prevents disease.
Train branches horizontally along wires or a fence.
5. Food Forest or Dedicated Zone 🌳
Some trees, like guavas or loquats, spread but work well in food forests.
Plant in designated areas where spreading isn’t an issue.
Use companion planting to balance growth and improve soil health.
6. Grow Bags or Air-Pruning Pots 🛍️
Good for trees like figs or pomegranates that do well in restricted root spaces.
Promotes healthy root structure and prevents circling roots.
Use 40L+ fabric pots for long-term growth.
Planting in the ground
While these plants can all be great additions to your garden, planting them directly in the ground can lead to maintenance headaches and invasive growth. By growing them in containers or designated areas, you can still enjoy their benefits without the stress of keeping them under control.
Have you had trouble with any of these plants? Leave a comment below and share your experience! Don’t forget to subscribe to my YouTube channelfor more gardening tips. 🌱
Links included in this description might be affiliate links. If you purchase a product or service with the links that I provide I may receive a small commission. There is no additional charge to you! Thank you for supporting my blog so that I can continue to provide you with free content.
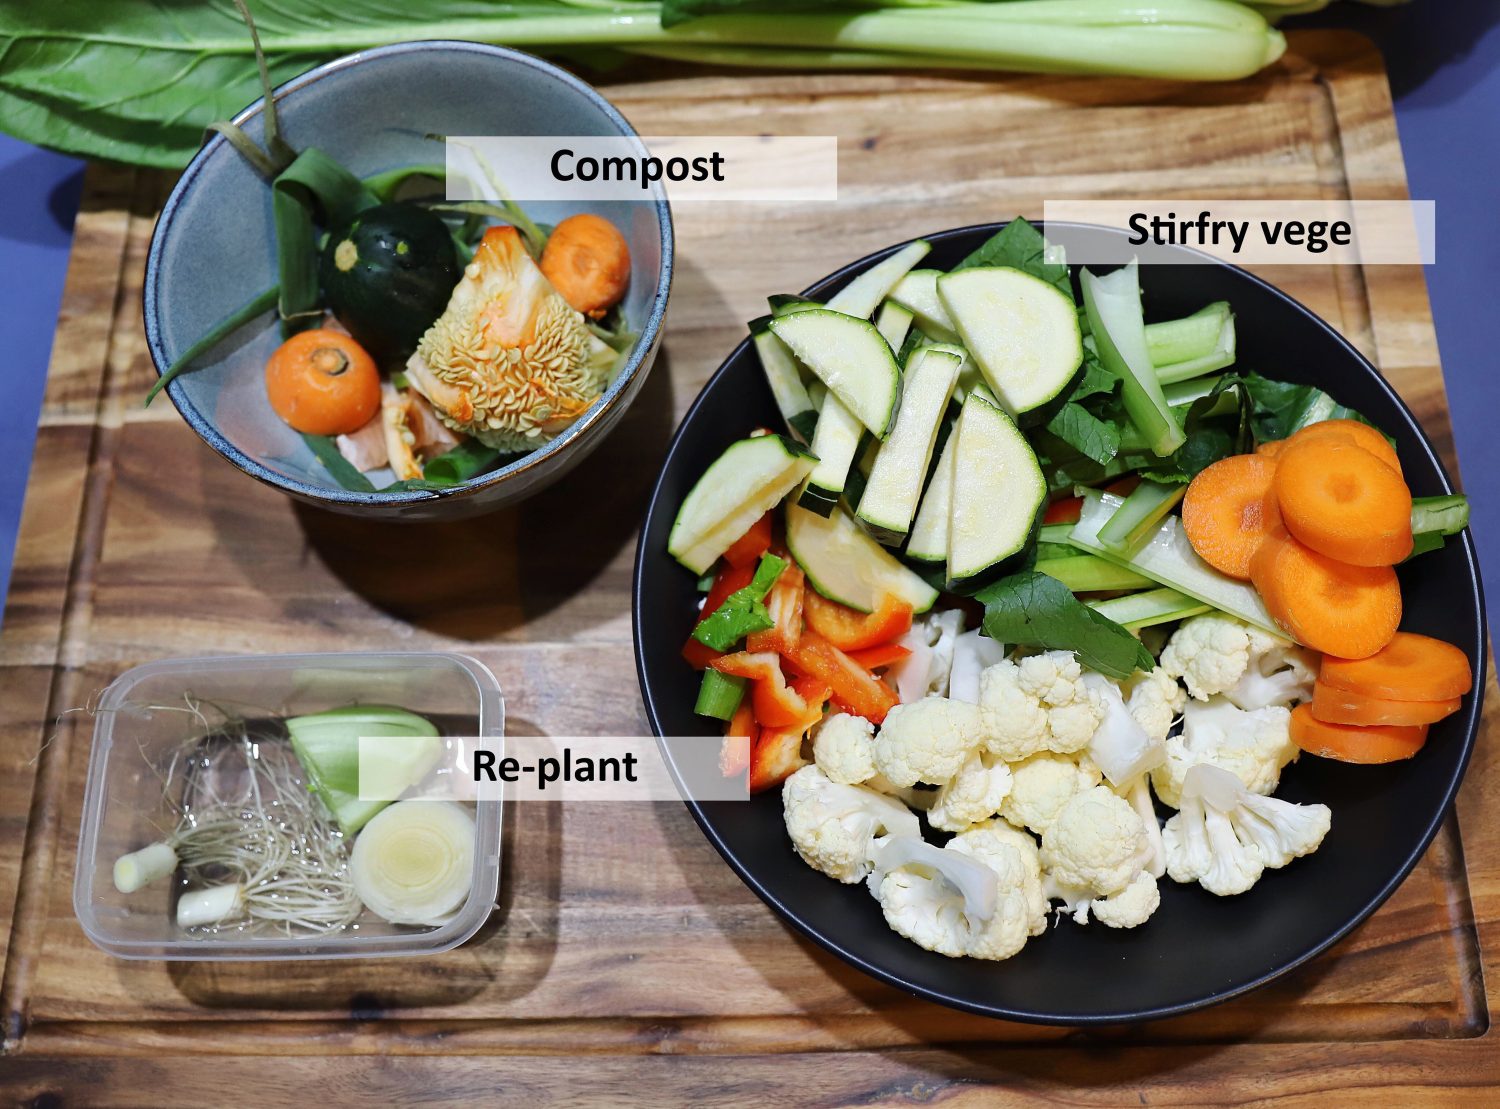
Composting is a great way to reduce waste, build soil and grow healthy thriving plants. Part of a naturally occurring cycle that feeds an ecosystem. Urban composting may mean smaller systems need to be used but they can still be very effective. I have a tumbler compost bin and now I have made a DIY worm tower to go in my Container Gardens. This tower is made from recycled PVC pipe we had left over and a recycled plant pot was used for the lid. The worms love it and so do my plants!
Urban Composting
You don’t need to have a large garden to start composting your veggie scraps at home. There are some great urban composting solutions including Tumbler Composts, Bokashi and Worm Farms. There is even an app called Share Waste that connects people to others that have composts in your local area. Whichever solution you choose it is a fantastic way to reduce your waste and stop it from going to landfill. Food scraps that end up in landfill do not break down in the correct environment so they produce methane emissions that contribute to our climate change crisis. The more scraps you can use up or put back into the earth the better!
How to Make a DIY Composting Worm Tower?
Using things you already have at home is a great way to recycle and get the most out of everything you use. Left over PVC pipes are great for turning into worm towers. The worms can go between the garden and the worm tower to feed and help break down the veggie scraps. This will in turn provide natural fertiliser for the plants to thrive. Creating a balanced and diverse ecosystem is so import for healthy gardens.
To make these I used a 6 inch PVC pipe and cut it down so that it was the height of my pallet plants.
We then drilled holes around the bottom half of the pipe approximately 10mm in diameter. Big enough for worms to fit through.
I then dug a hole in the centre of my pallet planter and buried the pipe with the holes at the bottom and covered the sides back up with soil. Try to bury as much of the pipe as you can as to reduce it’s exposure to the sun.
A lid is important to stop any flies, rats, mice or household pets from getting in and eating the scraps. It will also keep any smells away so your gardens don’t give off a bad odour. The lid we made from the bottom of a plastic garden pot we had spare. I tested out a few for size and chose on that fit tightly over the pipe. It needs to be secure so that the wind won’t blow it off or animals cant easily overturn it. If your pot has drainage holes in the bottom cover them up too.
Once the pipe and lid are secured in place you can start adding your veggie scraps. Use only scraps that will break down relatively quickly and do not place any meat or dairy scraps. You can also add a sprinkle of soil on top of the layers to reduce odours if it is a concern.
IMPORTANT
Make sure your recycled materials are food safe and haven’t been used previously with any chemicals.
Healthy soil grows healthy vegetables!
Holly 🌱
MY GARDENING ESSENTIALS // Fertiliser spray gun: https://bit.ly/366nL1t Retractable Hose: https://bit.ly/2TSC0Bo More gardening tools: https://bit.ly/32IQmbD
DISCLAIMER: Links included in this description might be affiliate links. If you purchase a product or service with the links that I provide I may receive a small commission. There is no additional charge to you! Thank you for supporting my page so I can continue to provide you with free content!
My nasturtiums are abundant again for the Autumn/ Winter season and are popping up everywhere! They make a beautiful lush ground cover and are so easy to grow! Once you have them in your garden they will pop up every year without any effort on your behalf. They have so many uses and integrated relationships within your garden which makes them one of my favourite permaculture plants. Their lily pad-like leaves also give all the magical fairy vibes.
Growing Nasturtiums
Nasturtiums seem to thrive well in most soil types and you will often see them spilling out onto the street from gardens or popping up in the wild. They have quite a weed-like growth because they are so easy to grow and self-seed. They come in a few different varieties and range in colours from yellow, red, orange, peach, white, and a beautiful scarlet red that I have my eye on.
They can also make a companion plant as they keep the soil protected and create a great space for beneficial insects to live. They are a great addition to any garden and one of my top permaculture plants due to the number of beneficial uses and positive relationships with other plants and animals.
Medicinal
Nasturtiums have many medicinal and healing qualities. They are rich in vitamin C, boost your immune system, as well as a natural aid to antibacterial and fungal infections. Plus most of the plant is edible which I love! Please note it is best to try things in moderation and I am by no means a medical professional. I did read that you should possibly avoid Nasturtium if you are pregnant, breastfeeding or have kidney disease.
Chickens
Growing Nasturtiums can also attract snails, aphids, and other bugs which keeps them away from your sensitive crops and then you can just harvest patches of affected plants and feed them to your chickens. The chickens will love the snails/bugs and the Nasturtium itself is a great natural medicine for the chickens. Nasturtium can improve reproductive health and immunity and help as a natural antibiotic.
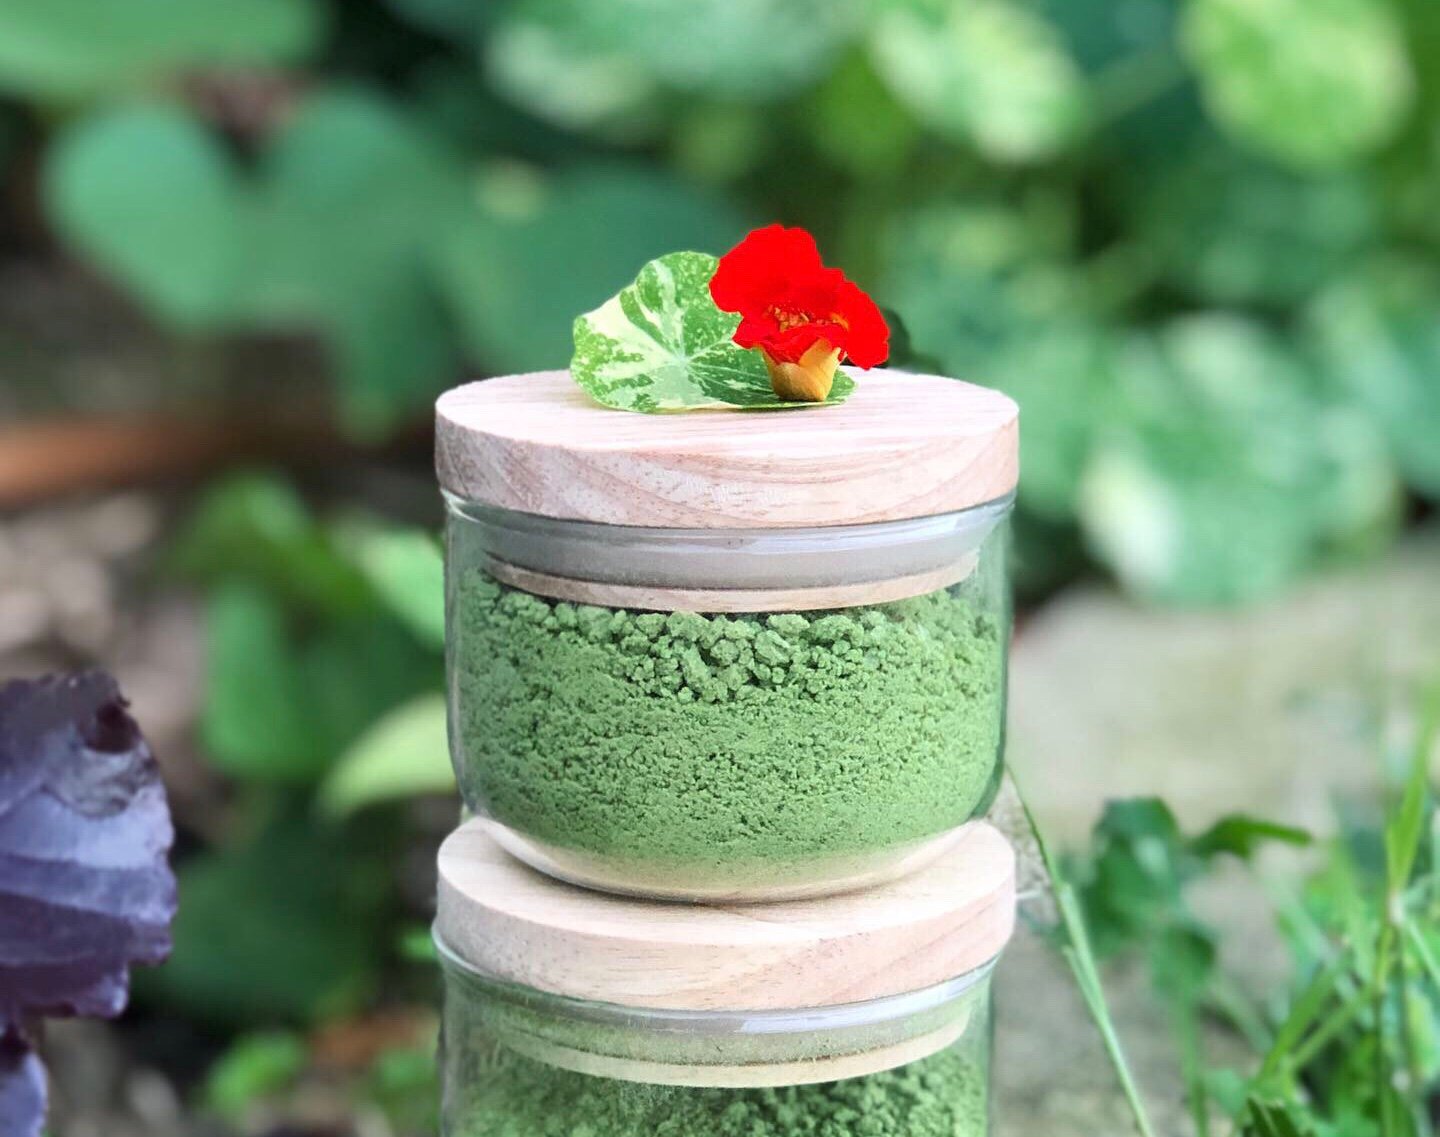
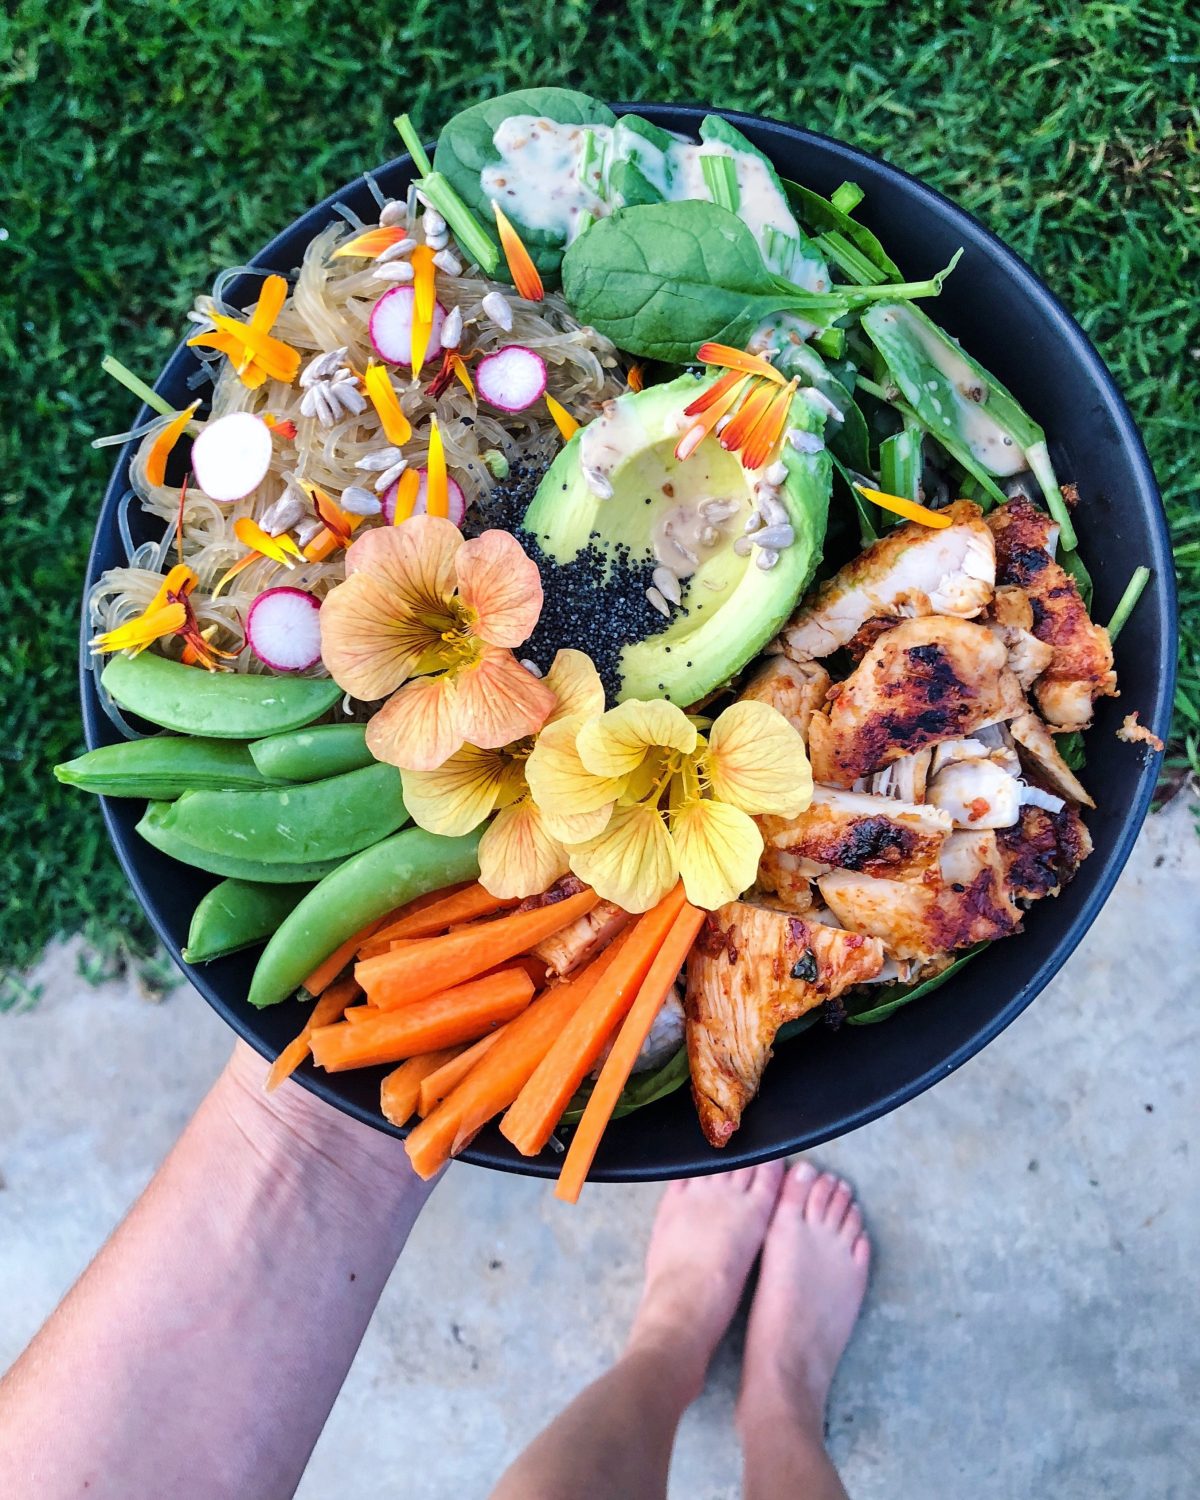
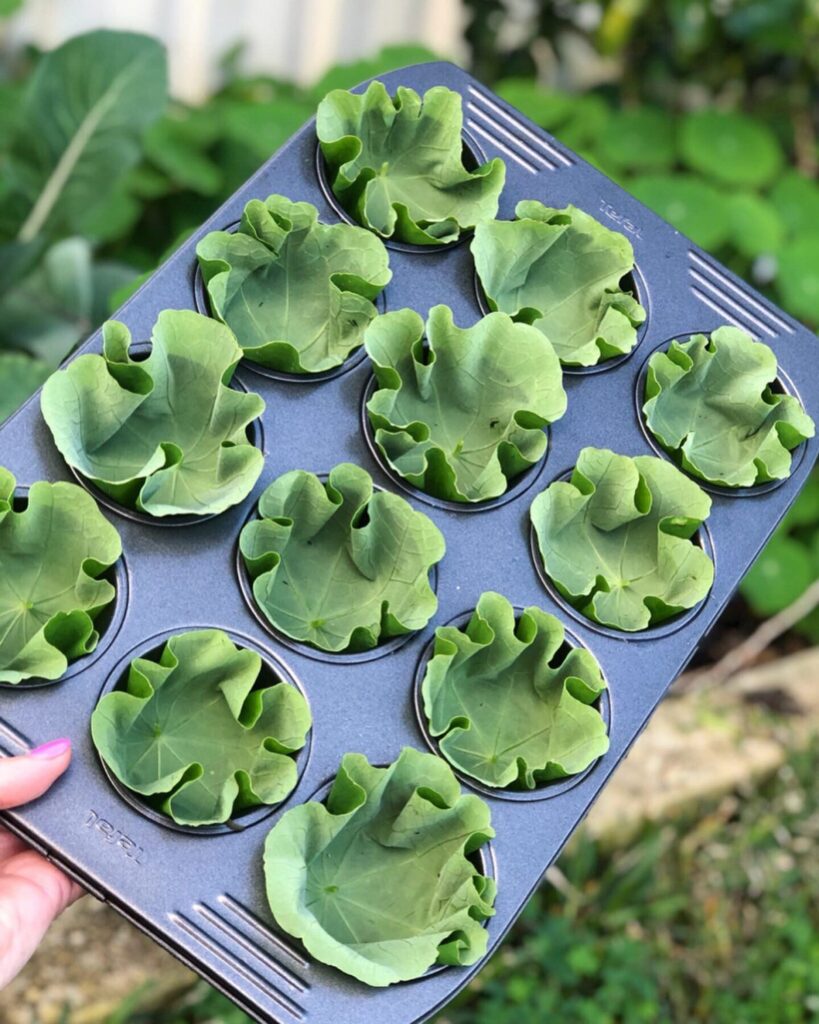
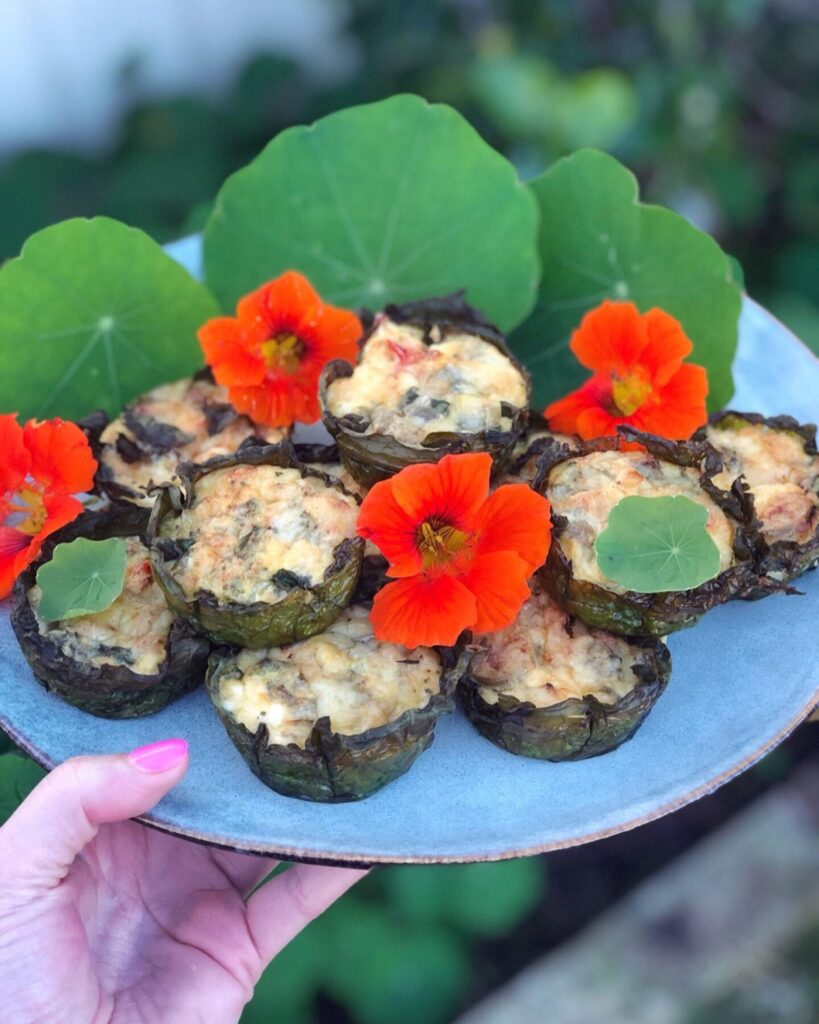
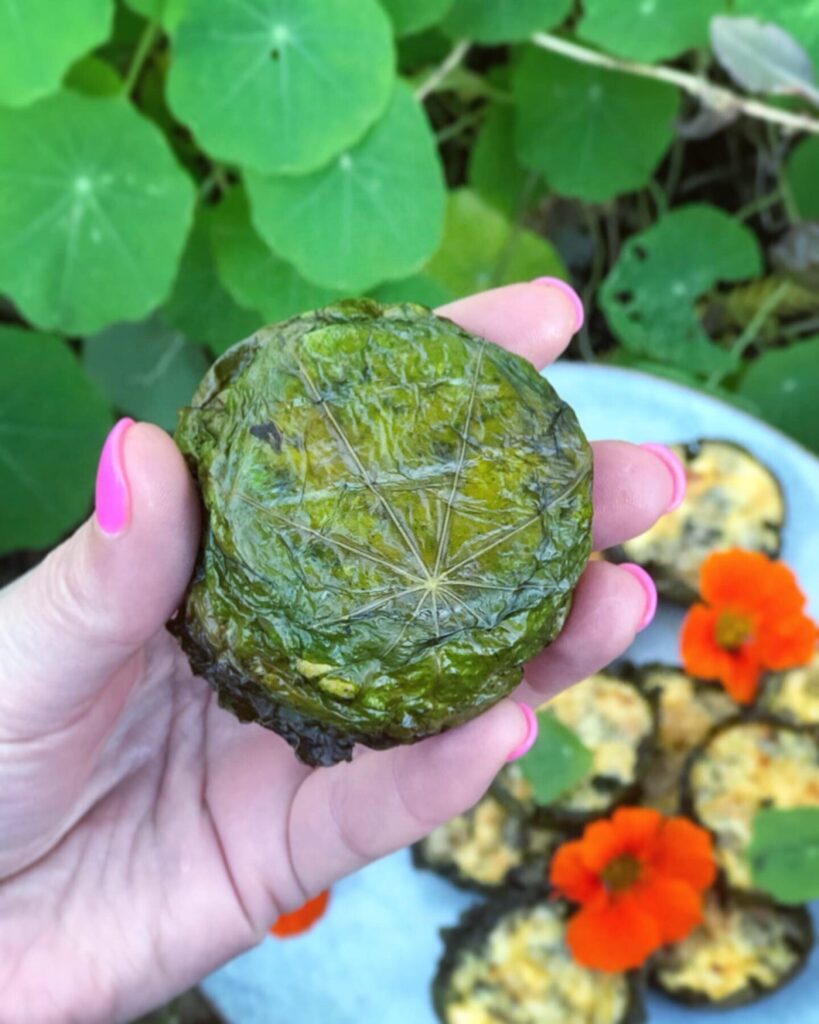
Ways to Eat Nasturtiums
There are so many ways to use this plant and I have only tried a few so far. It is so important to learn how to use your edible plants so that you can get the most out of them! Here is a list of ways along with links to any recipes I have on my blog.
Are you growing Nasturtiums? Do you use Nasturtium in any other ways? I would love to know, please leave a comment below.
Holly🌱
Want to learn more about edible gardening?
Make sure you hit Subscribe to get notifications when new posts are live.
MY GARDENING ESSENTIALS // Fertiliser spray gun: https://bit.ly/366nL1t Retractable Hose: https://bit.ly/2TSC0Bo More gardening tools: https://bit.ly/32IQmbD
DISCLAIMER: Links included in this description might be affiliate links. If you purchase a product or service with the links that I provide I may receive a small commission. There is no additional charge to you! Thank you for supporting my page so I can continue to provide you with free content!