Beautiful and delicious floral shortbread with subtle flavours of orange and thyme. This basic shortbread recipe can easily be adjusted to add seasonal edible flowers and herbs from the garden. I created this recipe when I was home (New Zealand) in my mum’s garden. Although she has very limited baking equipment….she made up for it with her inspiring gardens and the perfect eclectic set of vintage floral tea cups and saucers. I hope you also find some inspiration. The perfect treat to spoil your friends and celebrate spring with a tea or coffee in the garden.
Orange and Thyme Botanical Shortbread
Prep Time: 20 minutes
Cook Time: 20 minutes
Additional Time: 1 hour
Total Time: 1 hour40 minutes
Fresh, subtle flavours infused in soft melting biscuits. These botanical shortbread biscuits can be made using seasonal edible flowers and herbs.
Ingredients
250gram butter
1 cup icing sugar
3 cups flour
2 tbsp orange juice
2 tbsp ( 1 orange) zest
1 tsp chopped fresh thyme
1 /2 cup edible flowers
Instructions
Beat sugar and butter until very pale yellow/white and creamy.
Grate the zest of one large orange and add to the mix along with 2 TBSP of juice.
Mix through the flour to make a soft dough.
Wrap or cover the bowl and refrigerate for at least 1 hour.
Preheat the oven to 140 degrees. Lightly dust a baking tray with flour.
Remove the dough and lightly knead to bring it together.
Roll out the dough on a lightly floured surface to approximately 1 cm thick (easier to manage using 1/2 the dough at a time)
Sprinkle over edible flower petals and fresh thyme leaves (removed from the stalk).
Gently roll over the flowers. Some may not stick, so just lightly press them into place. Cut out shapes using a cookie cutter and place them onto the baking tray.
Merge the leftover edges and re-roll out, and continue to cut shapes. The second roll will incorporate the flowers into the dough, so you may want to add extras on top.
Bake for 15-20mins or until very slightly starting to go golden. You want to keep them pale so they don't become too dry and crumbly. Remove and allow to cool on a wire rack.
Notes
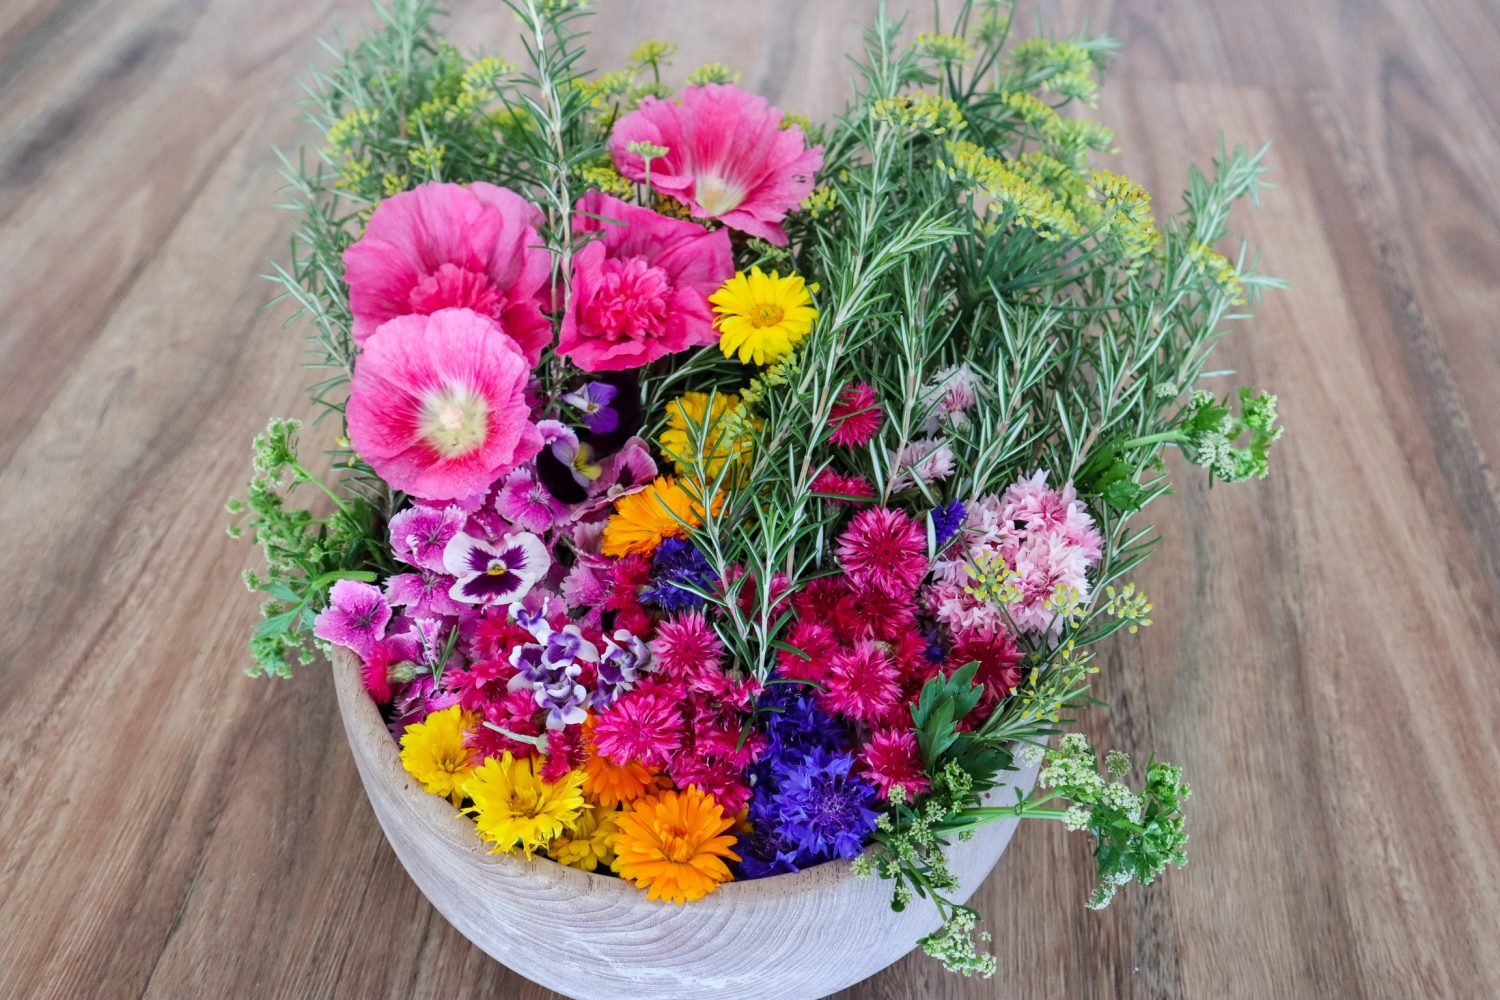
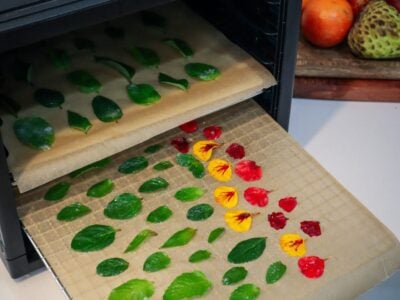
Edible flowers I used: Pineapple Sage (red flowers), Calendula, Rose, Sweet Violet, and Nasturtium.
Use seasonal edible flowers and herbs: other options to try are Lemon and Lavender, Lemon and Rosemary, or Mint.
Let’s dive into this incredible companion plant and explore how to grow Calendula and what to make with it! Calendula (Calendula officinalis) is a hardy edible flower that has many beneficial uses both in the garden and in the home. Calendula is easy to grow and if left to go to seed, will pop up each year in your garden with bright pops of colour.
Calendula has anti-inflammatory, anti-viral, and antibacterial properties great for making healing teas, balms and lotions.
Autumn – Spring.Mild summers can grow all year round.
SOIL
Grows well in most soil types.
LOCATION
Full sun – part shade position
CARE
Consistent watering.
FERTILISE
Doesn’t require feeding.
PESTS
Slaters, slugs, aphids, snails, green caterpillars.
HARVEST
Harvest young leaves fresh and flowers once fully open.
REPRODUCE
Seeds can be saved once the petals have fallen and the flower has dried off.
Why Grow Calendula?
Calendula is an edible that provides flowers for the bees they look beautiful and ornamental in the garden.
Here are some of the many reasons to grow Calendula:
Easy to grow
Flowers for the bees
Natural pest management
Low maintenance
Edible flowers
Can be used raw or cooked
Edible leaves
Healing and medicinal qualities
Protects soil
Anti-inflammatory, anti-viral, anti-fungal
Natural food colouring or dye
High in vitamin A&C
Cut flowers
Chicken coop health
Popular Calendula Varieties
‘Pink Surprise’ – Large double-layer petals with a peachy colour.
‘Double Red’ – Large double-layered petals with a deep orange colour.
‘Golden Emperor‘ – Large single-petal flowers. Daisy-like flower with bright yellow colour.
‘Balls improved orange‘ – Large double orange flowers.
‘Pacific Apricot’ – Large double-petal light yellow-peach flowers.
When to Plant Calendula
Calendula can be sown at the end of summer or autumn. It can grow all year round in some locations that have mild summers.
How to Grow Calendula
Choose a sunny location.
Plant seeds directly in the soil or in seed trays.
Plant seeds or seedlings 1 hand width apart
Protect young seedlings from slugs and snails but adding a ring of crushed eggshells
Add mulch to retain moisture
Care/ Maintenance
Calendula is a hardy, easy-to-grow plant. Harvest flowers regularly once petals are open to encourage more blooms.
Pests / Disease
Slugs and snails may eat young seedlings. Use natural pest management. Caterpillars can eat the leaves and flowers. Calendula can become a “trap” for pests and this will keep them away from your other plants.
How/ When to HarvestCalendula
The best time to harvest flowers and most vegetables is early in the morning, while the plants are hydrated. Wait until the flowers have opened usually once the sun is out. For medicinal uses, dry the flower with the green central structure attached, as that is where a lot of the healing properties are.
Reproducing
Wait until the flowers start to die off, their petals will fall and the seeds will start to form at the centre of the flower. Once they start to go brown and dry you can pick the flower and allow it to dry inside. Calendula self-seeds easily. If you would like to have flowers pop up in your garden next year, allow the seeds to dry on the plant and fall onto the soil. Once you know what calendula leaves look like you will be able to identify volunteer plants next year and dig up seedlings to spread around your garden.
Cooking and Using Calendula
Calendula flowers and leaves can be eaten raw or used in baking and home products.
NOTE: Calendula is not suitable for those who are pregnant or trying to conceive, as it may affect menstruation. Or those who are sensitive to the Asteraceae/Compositae family.
Preserving the Harvest
Calendula can be easily preserved to use throughout the year.
Calendula petals can be sprinkled in chicken bedding to help reduce ticks and bacteria. They can also be incorporated into their food which can make the egg yolks a deeper yellow colour.
Okonomiyaki is a delicious cabbage dish similar to a fritter or hash brown (although referred to as a pancake). They make a great base to build any toppings you like! Add a fresh salad, pickles, or anything really! As the dish translates to “how you like it”.
Cabbage Pancake - Okonomiyaki
Prep Time: 10 minutes
Cook Time: 10 minutes
Total Time: 20 minutes
Delicious and easy cabbage meal for breakfast, lunch, or dinner!
Ingredients
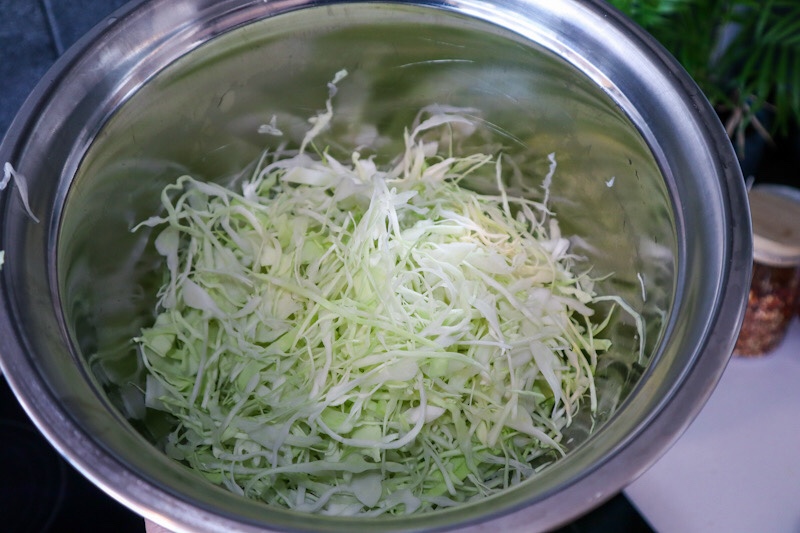
3 cups of tightly packed finely sliced cabbage
2 eggs
1/2 cup flour
1/4 cup water
1/2 tsp salt
pinch chilli flakes
To serve
Japanese Mayo
Tonkatsu Sauce
Fresh chilli
Sesame seeds
Salad
Instructions
Finely slice the cabbage. A mandoline is a great way to do this quickly. The finer the cabbage the easier it will stick together. Add to a large mixing bowl.
In a small bowl whisk eggs and add the remaining ingredients. Whisk to form a batter.
Add the batter to the cabbage and stir until the cabbage is fully coated in the batter.
Heat a frypan to medium heat. Drizzle with a little oil (or butter for a browner crust).
Add the cabbage and press to form one large fritter or make two smaller ones.
Cook for 5mins and flip onto a plate. Carefully transfer the uncooked side back to the pan (push off the plate.
Cook for a further 4-5mins.
Top with sauces and sesame seeds. Add a fresh garden salad.
Notes
For a vegan alternative replace the eggs with 2 TBSP Sushi seasoning and allow the full cabbage mix to sit for 5 minutes before cooking. This will make the pancakes a pack more vinegary flavour so balance with a creamy salad.
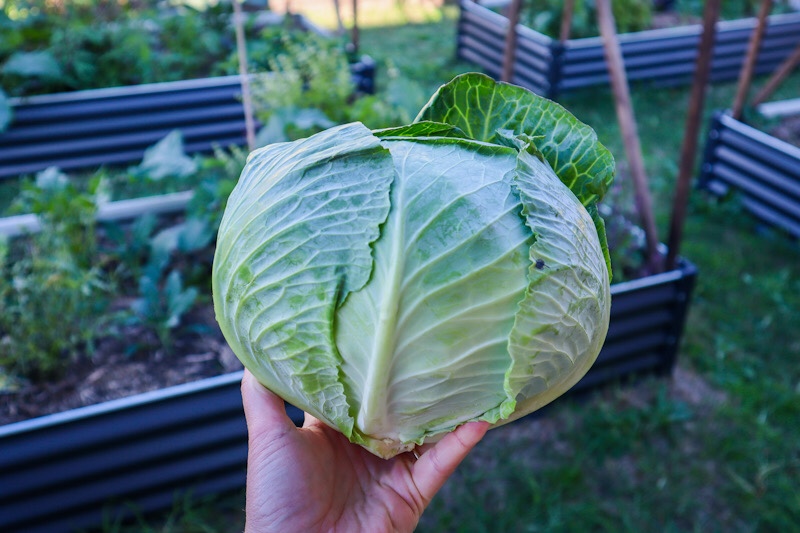
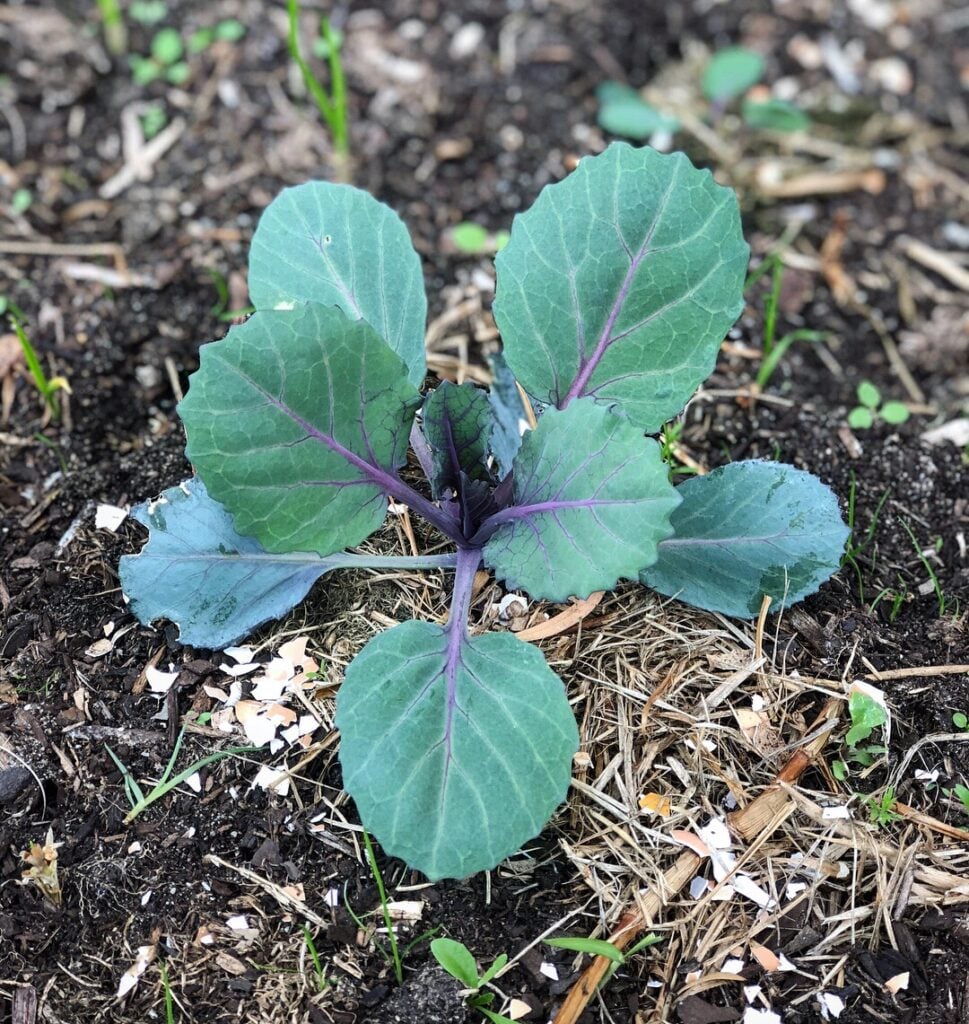
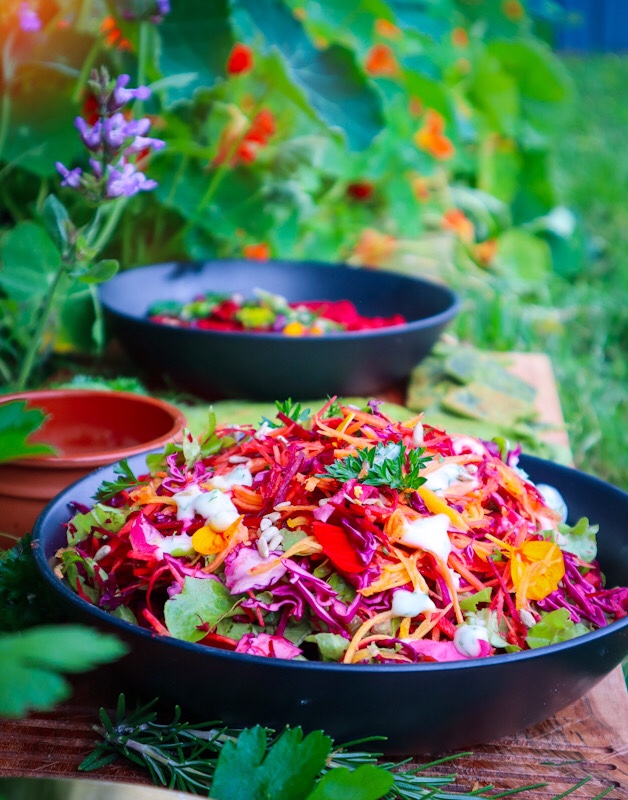
Cabbage (Brassica oleracea) is a classic staple winter veggie that provides your homestead with a hearty base crop to build many dishes.
Cabbage is a great supporting veggie BUT it can also be the star of the show! Learning to grow, cook and preserve cabbage will go a long way to supporting your ability to become more self-sufficient. Cabbage is low-calorie but packed with vitamins, antioxidants, and nutrients.
Feed with compost and with liquid seaweed fertiliser.
PESTS
Slaters, slugs, snails, green caterpillars.
HARVEST
When heads are firm. Cut with a sharp knife.
REPRODUCE
Seeds can be saved in the second year of growth. See below.
Why Grow Cabbage?
Cabbage is a great crop to grow to feed the family and they look beautiful and ornamental in the garden.
Here are some of the many reasons to grow Cabbage:
Easy to grow
Low maintenance
Produce a lot of food
Can be used raw or cooked.
Rich in vitamin C, K, B12
High in anti-oxidants
High in fibre
Nutrient-dense
Can be used as a food colouring
Promote cardiovascular health
Popular Cabbage Varieties
‘Mini’ – Small green cabbage great for urban gardens. Slow blot. 18 weeks to harvest. 1.3kg size.
‘Early Jersey Wakefield’ – Tight cone-shaped green cabbage. Space-saving for urban gardens. Harvest small or allow to 2-3kg size.
‘Brunswick‘ – German heirloom green cabbage. Late season crop. Large 3kg Cabbage.
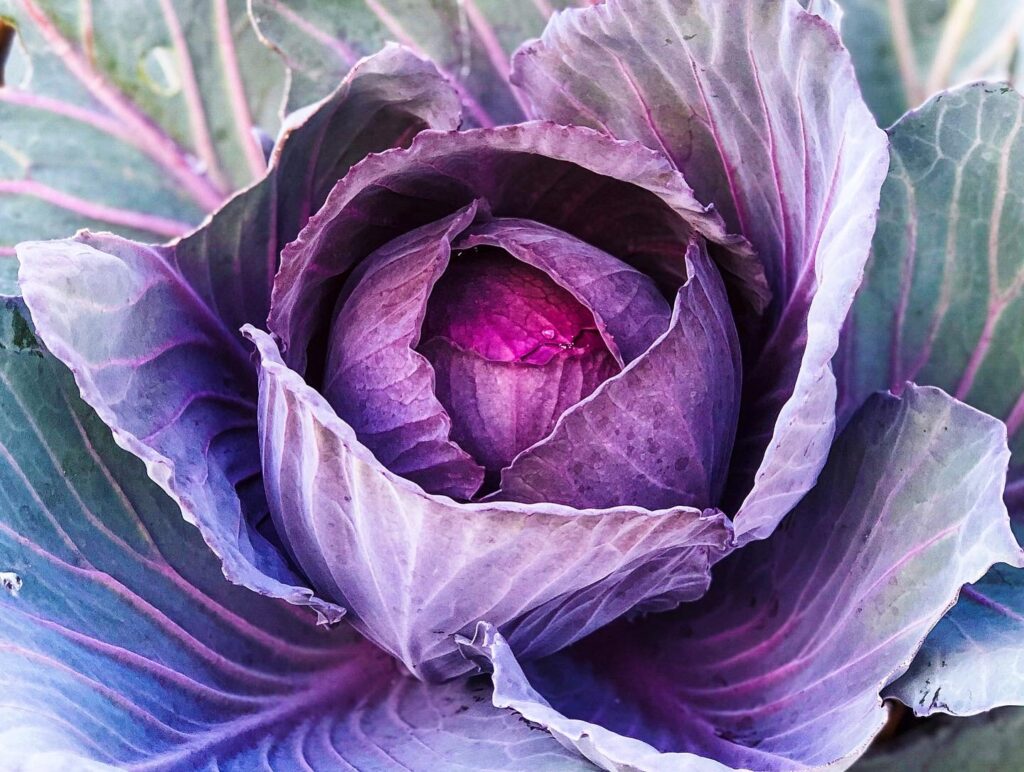
‘Red Drumhead‘ -Heirloom red cabbage with beautiful purple leaves. Large 3kg+ size. Caterpillar resistant so good for warmer months.
‘Red Express’ – Compact small red cabbage. Quick to grow and will produce an early harvest.
‘Savoy‘ –Green cabbage with distinctive curly texture. Mild flavour. Rich in vitamins.
When to Plant Cabbage
Cabbage is mainly grown in the colder seasons of Autumn and winter but some varieties can be grown in the warmer months to allow for a full year of cabbage harvests. Plant seeds at the start of Autumn.
How to Grow Cabbage
Choose a sunny location.
Prepare compost-rich soil ( pH 7.5 preferred)
Direct sow or plant your seeds in seed trays.
Plant seeds or seedlings 40cm apart
Protect young seedlings from slugs and snails but adding a ring of crushed eggshells
Add mulch to keep retain moisture
Care/ Maintenance
Cabbage are heavy feeders and can benefit from a liquid fertilizer every 2-3 weeks
Regular watering
Pests / Disease
Slugs and snails may eat young seedlings. Use natural pest management. Green caterpillars from the white butterflies are usually the main culprits. Especially during warmer months of the year. In some cases, exclusion nets over your cabbage plants or entire patch may be the best option.
How/ When to Harvest
When the cabbages form a tight ball and look about the right size to harvest (check the variety to how big you can expect them to grow) Use a sharp knife to slice the cabbage stem at the base. Remove some of the old outer leaves and rinse well checking for bugs and poop.
Reproducing
Cabbage plants are biannual meaning they will produce seeds in their second season. This means saving seeds from cabbage can be quite time consuming and will take up space in your patch. Cabbages grown in warm months will also attract a lot of white butterflies to your veggie patch. Most of the time it is easier and more effective to purchase cabbage seeds. If you would like to try to save your own – leave a few cabbages without harvesting them for a year to produce flowers and then seeds. Once the seed pods start to dry on the plant, pick and dry further inside. Separate out the seeds from the seed pods and store them.
Cooking and Using Cabbage
Cabbage is a versatile veggie that can be used raw, cooked, roasted and pickled.
10 Sustainable Gardening hacks to ensure your garden is quickand easy to maintain for sustainable long-term growth. Do you want to grow an edible garden and harvest delicious organic food straight from your own backyard but… you don’t have enough time in the day? Whether you are a busy parent or your spare time is already devoted to hobbies, sports, growing your business, or other priorities and you want to ensure your garden is easy to maintain for sustainable long-term growth, then these Sustainable Gardening Hacks are perfect for you!
Lazy gardening is actually an amazing thing! It means you are working smarter, not harder, and have systems in place to work with nature to get abundant harvests.
So let’s not waste any time and get straight into it…
1. Plant Perennials
Perennial plants are ones that you plant once and they will continue to give you harvests for many years to come. They are the ultimate hack for sustainable gardening! So this is probably my number one tip for lazy or time-poor gardeners.
Perennials are plants such as Fruit Trees, Berries, Bananas, Sweet Potatoes, Rhubarb, Artichoke, and Asparagus. Aromatics such as Ginger and Tumeric, and Herbs such as Rosemary, Lemon Verbena, and Mint. These you plant once and each year they will produce more and more food. There are also many perennial versions of our much-loved annuals such as Perennial Basil, and Perpetual Spinach. This year I have added Egyptian Walking Onions, more Berries, Fruit Trees, Asparagus and Artichoke.
I am converting more and more of my gardens to perennials because not only does that mean I have more time to spend developing new gardens or pouring hours into creating more gardening content but, Perennial Plants also allow a seamless transition and continuous supply of food. Perennials will either produce all year round or they will have certain times of the year when they are fruiting or producing. If you want to really level it up you can plan out when your perennials are ready and ripe and plan to fill in the gaps with other perennials that will be productive during these gaps in the season. For example, my citrus are ready in winter, then over summer I have berries, and in autumn I have Feijoas. My plan is to have a continuous supply of fruit all year round so I will continue to select plants that are ready during the gaps.
2. Chop and Drop
This is a technique of mulching and composting that I use in my urban food forest. Any time I trim my plants or remove any annuals I simply chop up the leaves and branches and drop them around the garden allowing the plant matter to break down and feed my plants. This is very easy to do and I don’t have to move plant material anywhere. It protects the soil from the sun, suppresses weeds and it feeds my soil to help grow more and more food! It’s a win-win situation and saves a lot of time. Fruit trees also love the fungal properties that rotting sticks and branches provide.
This technique works best with a food forest situation rather than a veggie patch, as it would be much harder to spread the plant matter and not cover small seedlings. This may also attract slaters or woodlice which will help break down the plant matter but these little critters are not something you want in your veggie patch.
3. Direct Sow Seeds
This is my favourite way to plant seeds. No, it’s not the most effective, but it saves a lot of time. I find direct sowing seeds straight into the garden can take a bit longer for them to germinate because it might not be the right soil temperatures but once they pop up they will usually be stronger plants. Sowing in seed trays means you can control the conditions and bring them inside which will encourage them to pop up sooner but you need to baby them and care for them. Harden them off by taking them outside so they can get used to outside temperatures before you plant them in the garden. They are just more fiddly and do require more attention. So where I can I go with the survival of the fittest approach and plant a few extra seeds.
4. Grow Soil
If you are time-poor and only have small amounts of time to allocate to your gardens, I would definitely put a big chunk of that into improving your soil and creating soil-improving systems. This will go a long way in creating sustainable gardens. Healthy nutrient-rich soil means your plants will grow faster, they will be stronger and more resilient and they will not succumb to pests and diseases as easily. If your soil is poor and lacks nutrients you will end up spending more time trying to keep your plants alive, more time watering and more time babying your plants.
Following on from growing soil – keeping your gardens well mulched is a great system to help build soil for sustainable gardens. Mulch will start to break down over time and feed your soil. Mulching also helps keep moisture in so your gardens won’t need as much watering and they help suppress weeds. Weeds are not friends with time-poor or lazy gardeners. So having a thick layer of mulch will help reduce the time needed for weeding and also the weeds that do grow will be so much easier to pull out.
6. Make it Close and Convenient
Choosing a location for your garden can be a make or break for the time-poor or lazy gardener. If you decide to grow your veggie patch or garden down the back of your property or behind the shed, it may start off okay whilst you are full of enthusiasm and feeling inspired, but eventually it will be out of sight and out of mind…. this happens to me all the time and my property is just a suburban block. I plant all my low-maintenance plants such as perennials and fruit trees all in the outer parts of my property and the annuals or plants that require more attention or regular harvesting, within view of my kitchen. In permaculture, we call these zones and it makes so much sense. When it’s raining, dark or you have had a long day, traipsing out to the veggie patch might not be high on the list. But, if you have your gardens close to your house and within view, you might notice something that needs harvesting or attention, and your garden will naturally receive more love and attention because of that. Therefore it will be more productive.
Even If this means you start off with small container gardens and once you master that move on to larger more permanent spaces.
7. Grow Wild
Creating diversity and growing lots of plants all together will not only do amazing things for the number of beneficial insects in your garden, but it can also be a lot more low maintenance. Conventional gardens with neat edges, straight rows, and symmetrical layouts will take a lot more time to maintain. By creating a garden that is a little wilder it will look lush and have less room for weeds to take up home. Even if you do get some weeds they blend in and don’t look too messy and hey, some of them may even be edible or provide flowers for the bees. Edible ground covers are great for this.
8. Let Plants go to Seed
If you let some of your plants go to flower and seed you will have plants popping up all on their own next season. This is another way you can create sustainable garden systems. The great thing about self-sown seeds is that they stay dormant in the soil until they get the right conditions to grow and then they shoot up. With absolutely no effort on your behalf. I have lettuce, tomatoes, basil, and edible flowers pop up nearly every year. Free FOOD! This technique can be amazing but it can also be a little wild at times. It’s important to try to contain the seeds on your property. I let a celery plant go to seed once and I had celery popping up in everywhere!
9. Easy Watering
Watering can take up a lot of time, especially during the warmer months. And if you run out of time or can’t be bothered then you could lose your plants after just one day in the peak of summer (especially if you live here in Perth!). Thinking about watering and creating sustainable watering systems will go such a long way to savingtime in the garden.
Some great tips are to install automatic timers and drip lines. Another is to ensure you have a hose nearby to your gardens and make it a retractable hose! Nothing puts you off watering than thinking about unraveling and putting away a hose. A retractable hose can be out and back in seconds and it has honestly been a game-changer for me in my garden!
Mulching will also help with water retention.
10. Get the Plant Selection Right
Selecting the right plants will go a long way toward creating a low-maintenance sustainable garden. We talked about choosing perennials earlier but there are also other plant selection criteria than can really help you grow an abundant garden with less effort.
Choose local or native plants. Plants that thrive in your local area will be much more adapted to the conditions and will be easier to grow. Native edible plants are often interesting and unique additions to your garden. They will also attract your local pollinators and wildlife which is a bonus!
Choose low-maintenance plants. Some plants require more care and upkeep than others. And some will have a lot more pests and diseases than others. This will vary from place to place.
Tomatoes – require staking and tying and are susceptible to pests and diseases. I often grow cherry tomatoes as I find them a lot easier to grow.
Stone fruit – Trees such as Nectarines, Peaches, and Plums have soft skin and can be vulnerable to many pests and diseases. Birds, fruit flies, rats, bats, etc. They may require netting or individually bagging fruit to ensure you get a harvest. I have chosen citrus as they have thicker skins and I find them a little more hardy and low maintenance. I have a lot of citrus for that reason such as Lemon, Lime, Blood Orange, Finger Limes, Blood Limes, Kumquat, and Lemonade.
Herbs and fragrant plants such as Lemon Verbena, Rosemary, and Ginger are often left alone by pests and are easy to grow.
This is where it is a great idea to visit small local nurseries where you can get helpful advice on what grows well in your local climate.
WATCH Sustainable Gardening HACKS for Time-Poor Gardeners
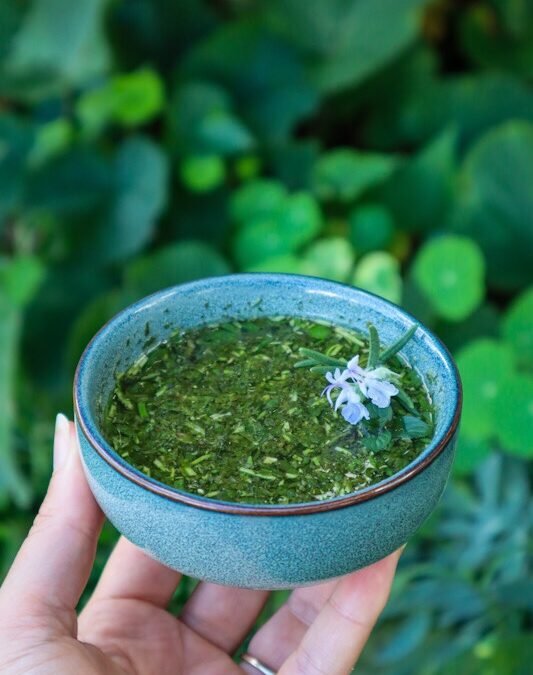
Homemade Mint and Rosemary Sauce is so fresh and delicious. With just a few ingredients and fresh herbs from the garden, you can whip this flavour-packed sauce to serve with any Sunday Roast.
Mint and Rosemary Sauce
Prep Time: 5 minutes
Cook Time: 2 minutes
Total Time: 12 minutes
Fresh and zingy Mint and Rosemary Sauce.
Ingredients
1 Cup chopped Mint Leaves (3-4 Sprigs)
1 TBSP Roughly Chopped Rosemary Leaves (1 Sprig)
1/4 cup White Wine Vinegar (or white vinegar)
2 TBSP Water
1 Pinch Sea Salt Flakes
2 tsp Raw Sugar
Instructions
Rinse off the Mint and Rosemary and remove the leaves from the stems. Roughly Chop.
In a saucepan add the vinegar and sugar. Heat until sugar is dissolved. Add the herbs and remaining ingredients and stir to combine.
Lightly blitz using a stick mixer or blender.
Serve hot or cold.
Notes
Store leftovers in the refrigerator in an airtight jar for 1 week.