Hi everyone, I thought I would do a bit of an intro and fill you in on my journey to sustainable living so far and where I am heading. This will be a great way to capture where I am and look back on it someday! I hope this inspires you to dream big and continue working towards your goals.
So grab yourself a tea or coffee as I have a lot of things to talk about, so let’s start from the beginning!
Dreams, Goals, Visions
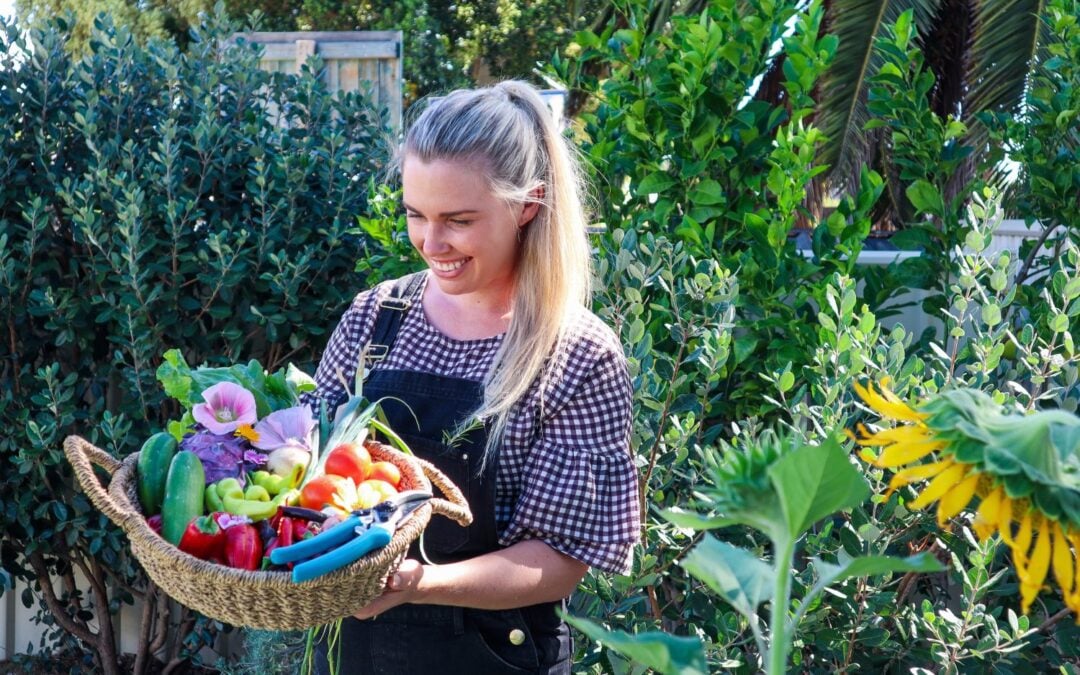
My name is Holly and I was born and raised on a farm in New Zealand. I have been growing my own food in some capacity my entire life. I have also been working towards the same vision and goal for as long as I can remember. That is to own a chunk of land and build a sustainable eco-home that is more garden than it is house. This vision has become more elaborate over time with small eco-cabins, waterfalls, dams and food forests. But in essence, it has always been the same, a piece of land that I can rewild and transform into an edible self-sufficient haven. The land will help provide both food and income and I can feed my ducks, eat straight from the organic gardens, create art and talk to the bees all day.
Slow intentional living
Now…. that is not exactly where I am right now. But I want to touch on where I’m heading and how I intend to get there. Small achievable steps to create a life by design and not default.
Start where you are and use what you have
5 years ago my partner and I along with our dog Tama bought and moved into a suburban house in Perth, Australia. Since that day I have been converting the gardens into edible wonderlands using permaculture principles. I try to use as much recycled or second-hand things as I can with very little waste.
BEFORENOW
After living in our house for a year I realised that the best light and space for growing was down the side of the house which was actually a paved driveway. Not great for growing veggies….but this house is a stepping stone and not the end goal. It will potentially be an investment property or we will sell it to launch towards the next step. So ripping up concrete and pavers to plant veggies was not really on the cards. But, I wasn’t going to let that stop me, so I came up with an idea to grow a whole lot of food with space and resources I had available.
Start small but start now
The pallet planters on wheels were born! These worked out so much better than I could have imagined because they not only gave me control over the soil I was growing in but also allowed me to control the growing conditions by wheeling them in and out of the sun/rain. Perth climate can be so harsh it goes from one extreme to the other with summer and winter so these have been so good!
Investing in knowledge is investing in your future
I dove deep into experimenting with recipes and trying to build and expand my knowledge in growing, cooking and preserving my harvests. Buying vegetables I intended to grow in the future. Learning new ways to use and preserve them means I will be ready to hit the ground running when I do grow an oversupply.
Sustainable Income
The next part of my journey is sustainable income. Because how can I spend my days talking to the bees when I am bound to a corporate office job. This has been my career since leaving uni and it has never sat well with me. I have always been one to question and dislike the rat race.
Last year I was made redundant from my job and I took that as a sign and ran with it.
Since then I have built my website, Instagram, taken on ambassadorships, written paid blog posts and sponsored content. I have also written ebooks and gardening worksheets (CLICK HERE)if you want to learn how to grow your own thriving edible gardens. I have also been busy working away on my membership site and I will be launching that very soon! So make sure you hit sign up to my website to get notified when it opens. I will be opening it at a discount rate for founding members. The membership site will be all about how to grow, cook, preserve and start living more sustainably no matter whether you have a garden or not!
My goal is to build a community of like-minded people to share knowledge, learning to grow real food, save seeds, propagate & swap and trade those for other plants. I hope you join me on this adventure. I’m so excited for what is to come!
Sustainable Living Goals
So to finish off this post my goals for 2021 are to continue forging my own path and inspiring others along the way.
Learning to cook outside over the fire or harnessing the sun’s energy.
Preserving more jams and chutneys.
Experiment and learn from other cultures and cuisines to expand my knowledge of flavours and techniques.
Dive deeper into growing from cuttings, grafting as this will be a valuable skill for building my future food forest.
Make more time to do art and stay creatively inspired
Learn more handcrafting techniques such as weaving or woodwork.
Slow intentional living. We have become so used to instant gratification, being in a rush and always needing more. To start with it can be overwhelming but each time you learn a new skill or recipe it will become easier. Adapting to doing things and seeing things differently. Find the joy in growing and preparing wholesome food, learn how to make milk from nuts, buy second hand, fix and reuse broken items and stop spending all your money on things you don’t really need.
Holly 🌱
MY GARDENING ESSENTIALS // Fertiliser spray gun: https://bit.ly/366nL1t Retractable Hose: https://bit.ly/2TSC0Bo More gardening tools: https://bit.ly/32IQmbD
DISCLAIMER: Links included in this description might be affiliate links. If you purchase a product or service with the links that I provide I may receive a small commission. There is no additional charge to you! Thank you for supporting my page so I can continue to provide you with free content!
Grow food from cuttings and boost your garden’s sustainability. Do you want to grow more food without all the cost of buying seeds and plants to make it happen? This guide will show you some easy and quick ways to grow a tonne of food. Multiplying plants from ones you already have or making cuttings from friends gardens can help you set up and grow a sustainable garden without all the costs involved.
$18
30-page Digital Ebook featuring 10 detailed plants to grow from cuttings. Plus tips & tricks to propagate and grow a sustainable garden.
Homegrown food not only tastes so much better but it also provides you with much more nutrients than many store-bought fruits and veggies. You also can control what goes on your food and skip all the pesticides, chemical fertilisers and other nasty sprays that get used on commercially grown food. Many of the plants in this guide may already be in your garden, neighbours or friends and family’s. Learning to identify these plants and how to propagate and regrow them from cuttings will take your gardening and sustainability to the next level.
By the end of this guide, you will have a list of edible plants you can go out and reproduce to grow wholesome food for you and your family.
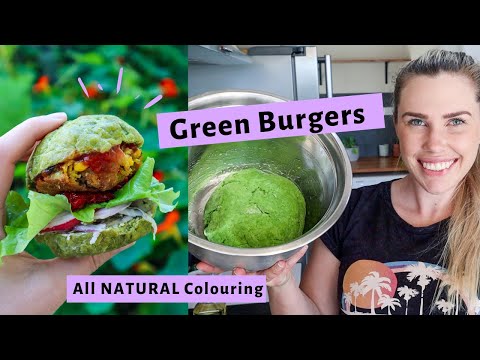
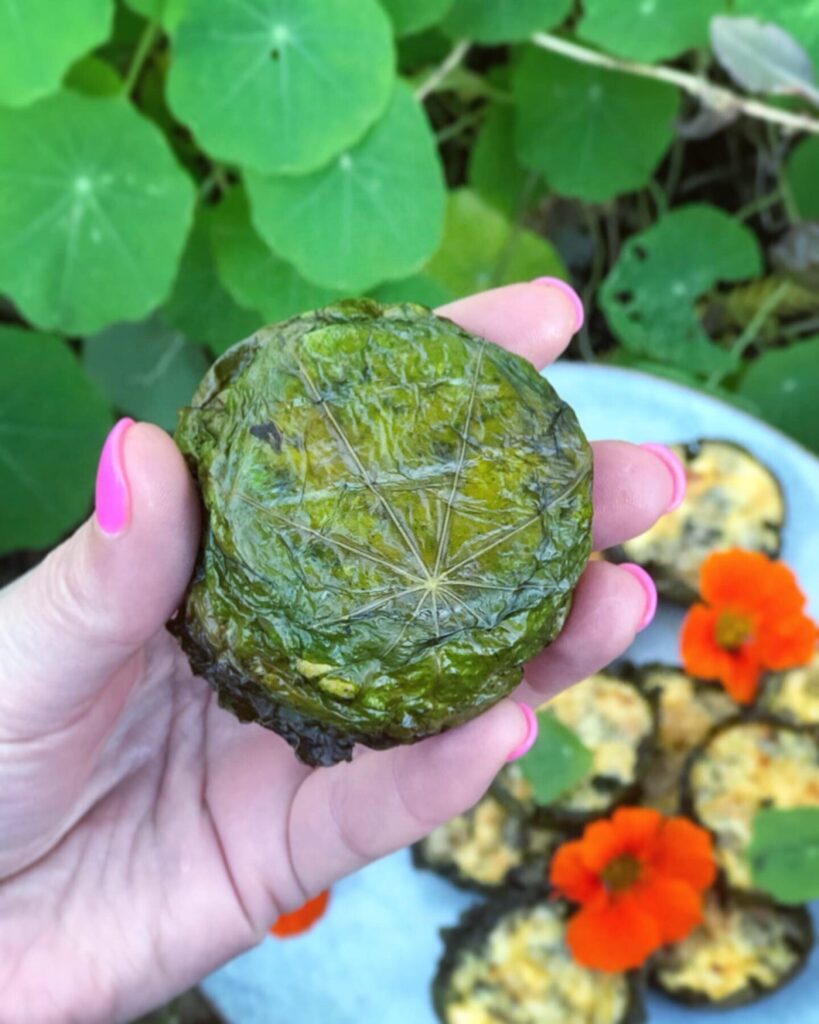
Nasturtium Bread Rolls are bright, vibrant and all-natural colouring. Create WOW factor food with this garden-inspired bread recipe. Nasturtiums are the plant that keeps on giving! Nasturtiums make a beautiful lush living ground cover and are so easy to grow! Once you have them in your garden they will pop up every year without any effort on your behalf. They have so many uses and integrated relationships within your garden which makes them one of my favourite permaculture plants. You can read more about growing Nasturtium and uses here.
I love trying to get the most out of the things I have growing in my Urban Permaculture garden and that means lots of kitchen experiments! These Nasturtium bread rolls do have a nasturtium flavour once cooked but once I added ingredients for a burger it was not very noticeable. Just beautiful lush green tasty burgers!
This recipe would be great for a garden party, high tea, or just for something fun and interesting! I am a big believer in making everyday special. Make your own magic!
Nasturtium Bread Roll Recipe
Yield: 8 Burger Buns or 10-12 Rolls
Prep Time: 2 hours
Cook Time: 20 minutes
Total Time: 2 hours20 minutes
These Nasturtium bread rolls were a fun kitchen experiment to make vibrant green bread naturally. These Nasturtium bread rolls were a fun kitchen experiment to make vibrant green bread naturally. They have a mild nasturtium flavour when eaten on their own but served with chutney or as a burger, the flavour is very subtle.
Ingredients
4 cups flour
2 cups lukewarm water
3 tsp dry yeast
1 tsp salt
1 tsp sugar
1 Tbs oil
2 cups greens (i used Nasturtium leaves and fennel fronds)
Instructions
1. Blend greens in 1/2 cup of lukewarm water using a Nutribullet or blender. Then add the remaining water and mix.
2. Pour greens and water into a bowl and add sugar and yeast. Whisk to combine. Set aside for 5 - 10 mins to activate.
3. In a large bowl mix flour, oil and salt. Add in your green mixture half at a time and mix. It may need more water to form a dough so add water to your green bowl to mix and use up any of the residual greens. Add to the mixture as needed to form a dough. Knead for 1-2 mins.
4. Rub some oil in a bowl and add the dough ball. Cover and set aside somewhere warm to rise for 1-2 hours.
5. Cut and lightly roll dough into round buns. 8 large or 10-12 regular size. Cover and allow to rise again for 30mins - 1hr.
6. Whisk an egg and brush a light coat on top of the bread rolls. This is just to make them shiny and is optional. Place them on a lightly greased or non-stick tray. Bake at 180 degrees Celcius for 20mins or until slightly golden.
Notes
Best served fresh with butter. I rolled butter into a ball and coated with edible flowers (calendula and cornflower petals) for added WOW! Delicious on their own or as I have in this video make your favourite burgers using lots of salad and veggies from the garden!
There are so many ways to use Nasturtiums and I have plenty more ideas to try out. The most common way to use Nasturtium is in a salad. The leaves, flowers and seed pods are all edible. The flowers have a mild peppery taste and the leaves are a lot stronger in flavour. It is so important to learn how to use your edible plants so that you can get the most out of them! Especially in small space gardening. Below is a list of Nasturtium Recipes I have made so far:
If you haven’t already make sure you subscribe to my Youtube Channel to get all my lastest Gardening tips, garden tours and Kitchen experiments. Your support helps me create more free content so you can get the most out of your garden and sustainability journey!
If you have any questions please leave me a comment below.
Happy Gardening!
Holly
MY GARDENING ESSENTIALS // Fertiliser spray gun: https://bit.ly/366nL1t Retractable Hose: https://bit.ly/2TSC0Bo More gardening tools: https://bit.ly/32IQmbD
DISCLAIMER: Links included in this description might be affiliate links. If you purchase a product or service with the links that I provide I may receive a small commission. There is no additional charge to you! Thank you for supporting my page so I can continue to provide you with free content!
Turn this common GARDEN PROBLEM into something AMAZING! So you can Grow Healthy Organic Plants. Making this all-natural, organic weed tea fertiliser also means you can feed your plants without worrying about any chemicals harming the insects in your garden. A happy and healthy garden will produce more food for you and all the beneficial insects and pollinators.
Weeds weeds weeds
If you have an organic garden, you probably have some weeds! Especially at this time of year with spring just around the corner in Australia, the weeds are thriving. Weeds can tell us a lot about our soil and learning to identify weeds in your garden can help you fix soil issues. Weeds are so good at pulling nutrients out of any soil and therefore can be holding on to a lot of great nutrients that can be harnessed to make an organic weed tea fertiliser.
Making weed tea fertiliser is a great way to close the loop and return nutrients back to your fruit trees and plants in a form they can easily absorb. This liquid fertiliser is also completely FREE and using up unwanted weeds from your garden. Its WIN-WIN. Making weed tea fertiliser is so easy and requires very little equipment. I put the weed tea fertiliser back into the same garden that I pulled the weeds from.
Identify your weeds
Learning to identify weeds in your garden can also mean you have more edible plants available! Yes! Some weeds are actually edible! Make sure you do your research and identify weeds that are local to you. Having good soil is key to a thriving organic garden! So learning to identify common weeds and what kind of soil they like to grow in is a great way to find out what’s going on with your soil. The weeds I identified were all ones that like to grow in compacted soil. So that is something I can check and see if my soil getting too compacted.
Catsear Flatweed – Hypochaeris radicata
How to make weed tea fertiliser
To start off you are going to need some weeds! Map out an area of your garden and start pulling weeds out and try to get the whole root out as well. I like to listen to a podcast and multitask during this time. Use some good quality gardening gloves to protect your hands from sharp spikes or insect bites.
Evaluate and identify the most common weeds in your garden. I used a book with common weeds local to my area. See if you can notice any patterns and what kind of soil they like to grow in. This might help you identify what is going on in that particular patch of garden.
Put all your weeds in a large bucket and fill with water. Rainwater is best but if you only have tap water from your local council then just pour it into a bucket and let it sit for a day or two until the chlorine has dissipated.
Roughly rip up your weeds and add to the water. Place a rock or something weighted on top so the weeds are all underwater.
Put a cover on top to stop insects like mosquitoes. I used a piece of rag cotton.
Let it BREW. stir with a stick once a week. You can brew your weed tea fertiliser for anywhere from a few weeks to a few months! The longer you leave it the more nutrients will be released but it will also start to really stink so it is up to you! Brew it longer if you have any seeds in there to try and destroy them before you put it back onto your garden.
Dilute up to 1:10 ratio and pour back on to your garden. If you want to ensure no seeds are there you can strain it through a sieve or piece of fabric. The leftover leaf material can go into your compost.
NOTE: Grass seeds can be hard to destroy so I would avoid using grasses or strain well before putting onto your garden. I use the hoselink spray mixer and strained it through a fine cloth before I used it so that the plant material doesn’t block up the nozzle.
Leave me a comment below if you have any questions.
Holly 🌱
MY GARDENING ESSENTIALS // Fertiliser spray gun: https://bit.ly/366nL1t Retractable Hose: https://bit.ly/2TSC0Bo More gardening tools: https://bit.ly/32IQmbD
DISCLAIMER: Links included in this description might be affiliate links. If you purchase a product or service with the links that I provide I may receive a small commission. There is no additional charge to you! Thank you for supporting my page so I can continue to provide you with free content!
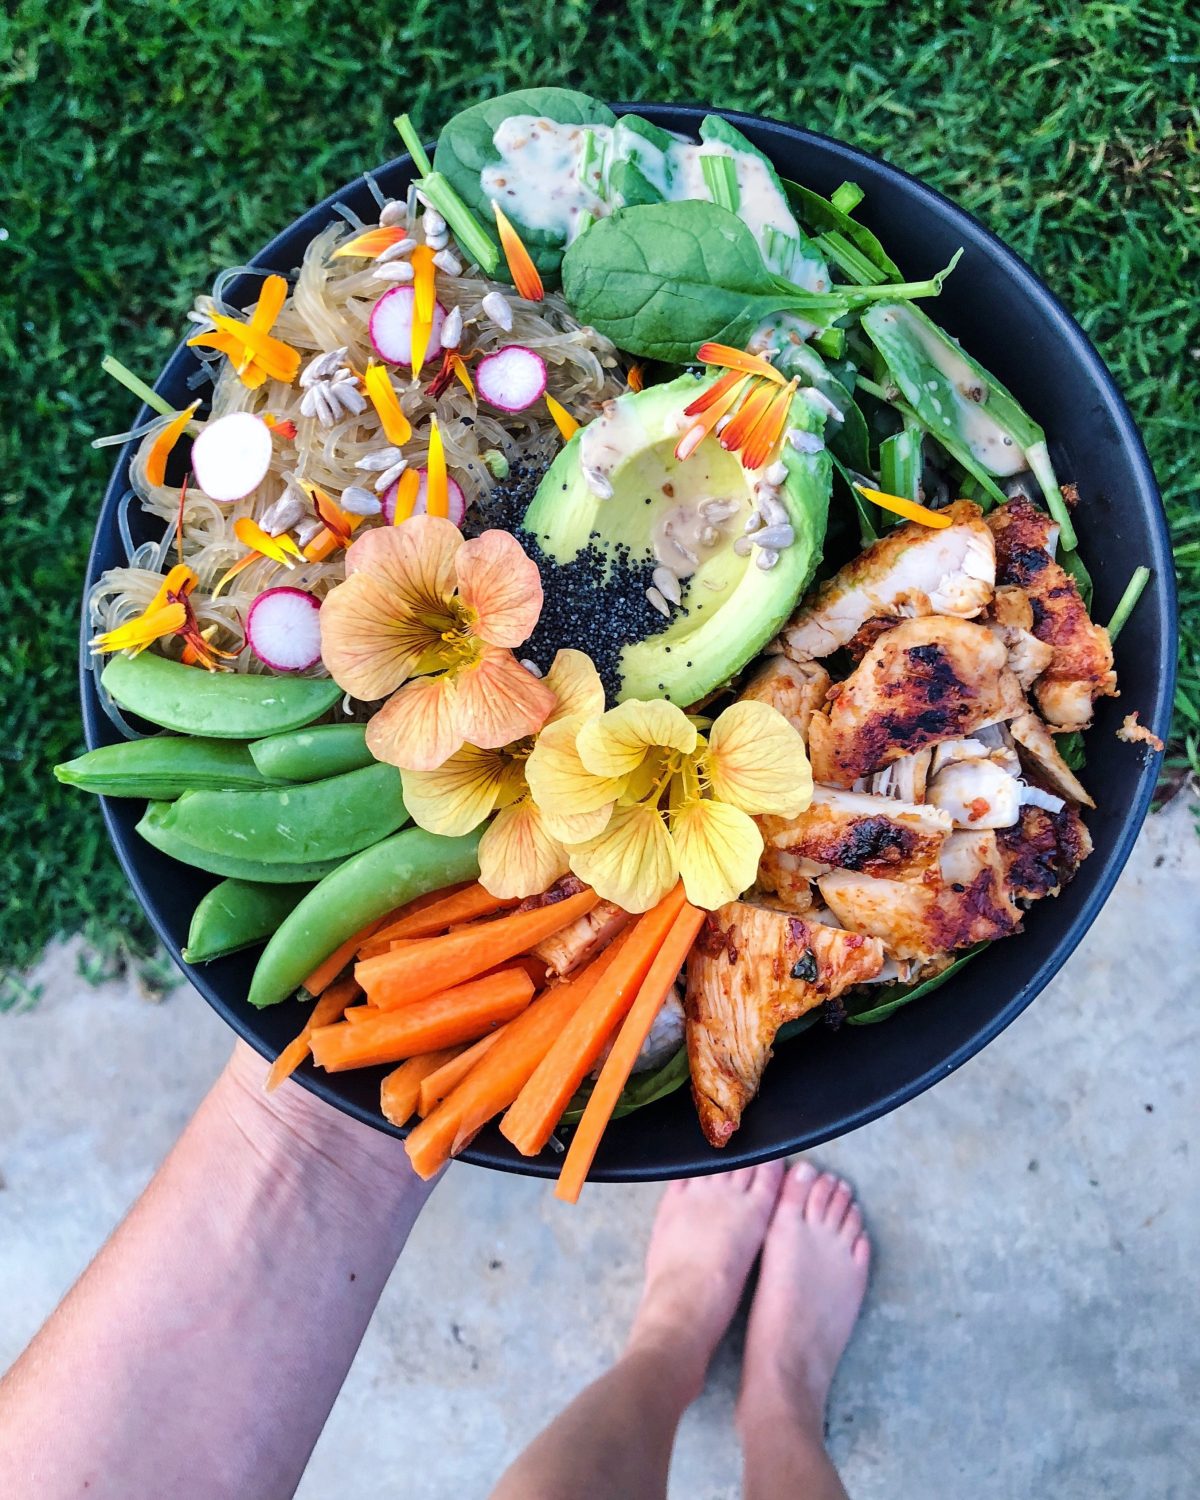
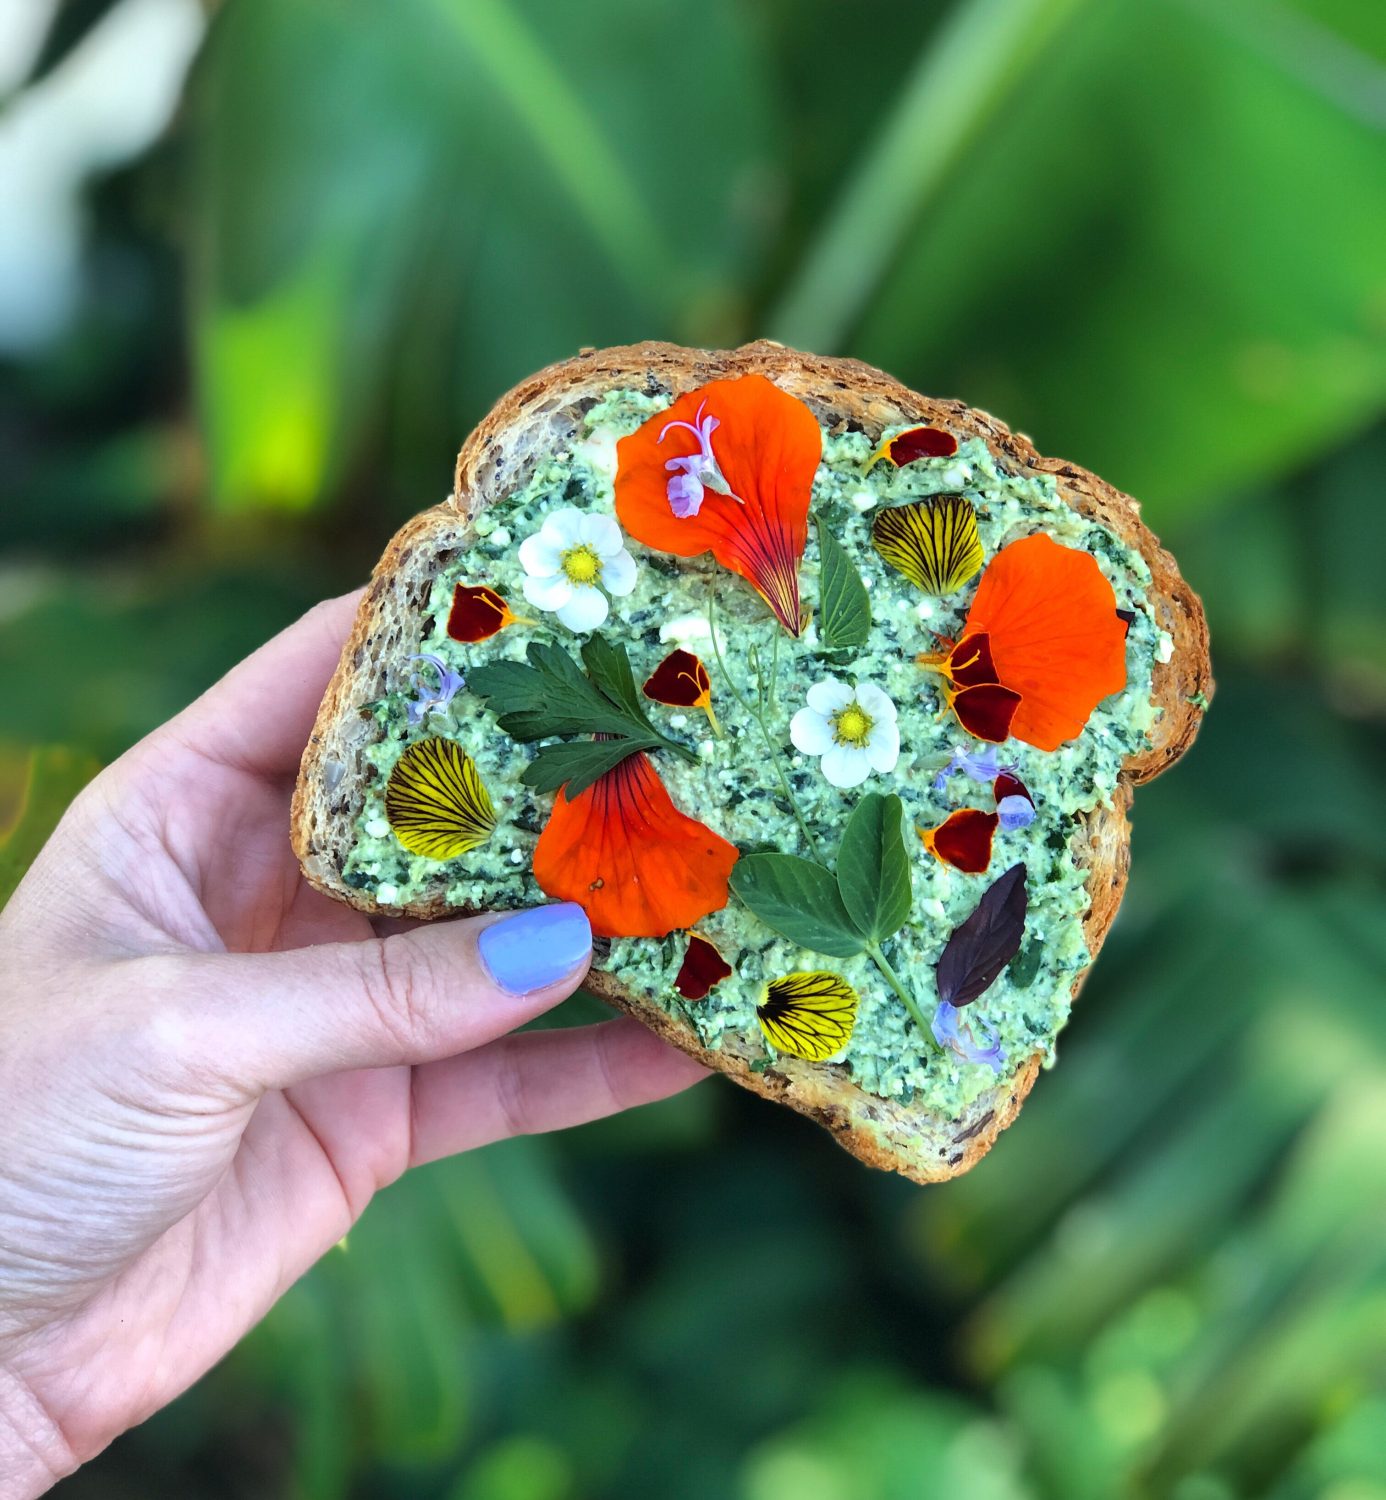
In this video are 10 of the best edible flowers I grow because they are not only my secret ingredient to make all food look magical but, are also great for attracting pollinators to your garden. If you want a thriving, abundant permaculture garden, it is so important to create diversity and attract beneficial insects and pollinators. Important: Make sure you clearly identify which flowers you can eat and are safe before eating.
Watch My Top 10 Best Edible Flowers to grow
Why Grow Edible Flowers?
Edible flowers offer so much to your permaculture garden. Here are a few of the MANY reasons I LOVE growing them:
Create beautiful aesthetic dishes
Attract beneficial insects to your garden for pest control
Aid in pollination by attracting insects
Create diversity in the garden
Add colour to your garden
Have subtle, delicate flavours
Add nutrients to your meals
Flowers for the Bees
The best edible flowers are ones that have multiple benefits and interconnected relationships within your garden. Creating diversity in flowers will help bring in a diversity of beneficial insects and become part of a natural integrated pest management system in your urban permaculture garden. A diverse ecosystem is a healthy one.
How to use Edible Flowers?
Edible flowers are amazing natural ingredients that add nutritional value and will elevate any dish to create magical food. Create a “wow factor” by just letting nature shine. They are great for natural cake decorating, salads, cocktails, baking, pasta and just anything really! Add detail, pattern, vibrant colour, and celebrate your homegrown food. I believe that creating visually appealing food can make everyday meals so much more enjoyable. Every day should be special and celebrated and this is just one way I like to spark joy in everyday living. Add some to your peanut butter on toast and BOOM you have a masterpiece!
Important: Make sure you clearly identify which flowers you can eat and are safe before eating.
Which are your favourite? It was so hard to even narrow it down to 10!
Holly 🌱
MY GARDENING ESSENTIALS // Fertiliser spray gun: https://bit.ly/366nL1t Retractable Hose: https://bit.ly/2TSC0Bo More gardening tools: https://bit.ly/32IQmbD
DISCLAIMER: Links included in this description might be affiliate links. If you purchase a product or service with the links that I provide I may receive a small commission. There is no additional charge to you! Thank you for supporting my page so I can continue to provide you with free content!
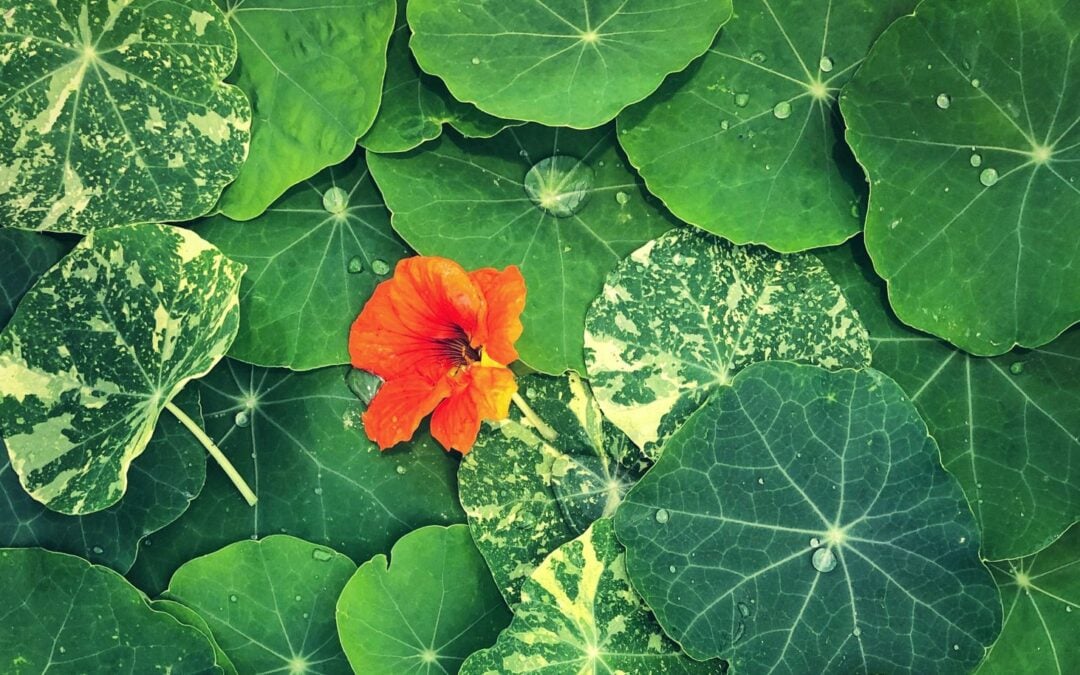
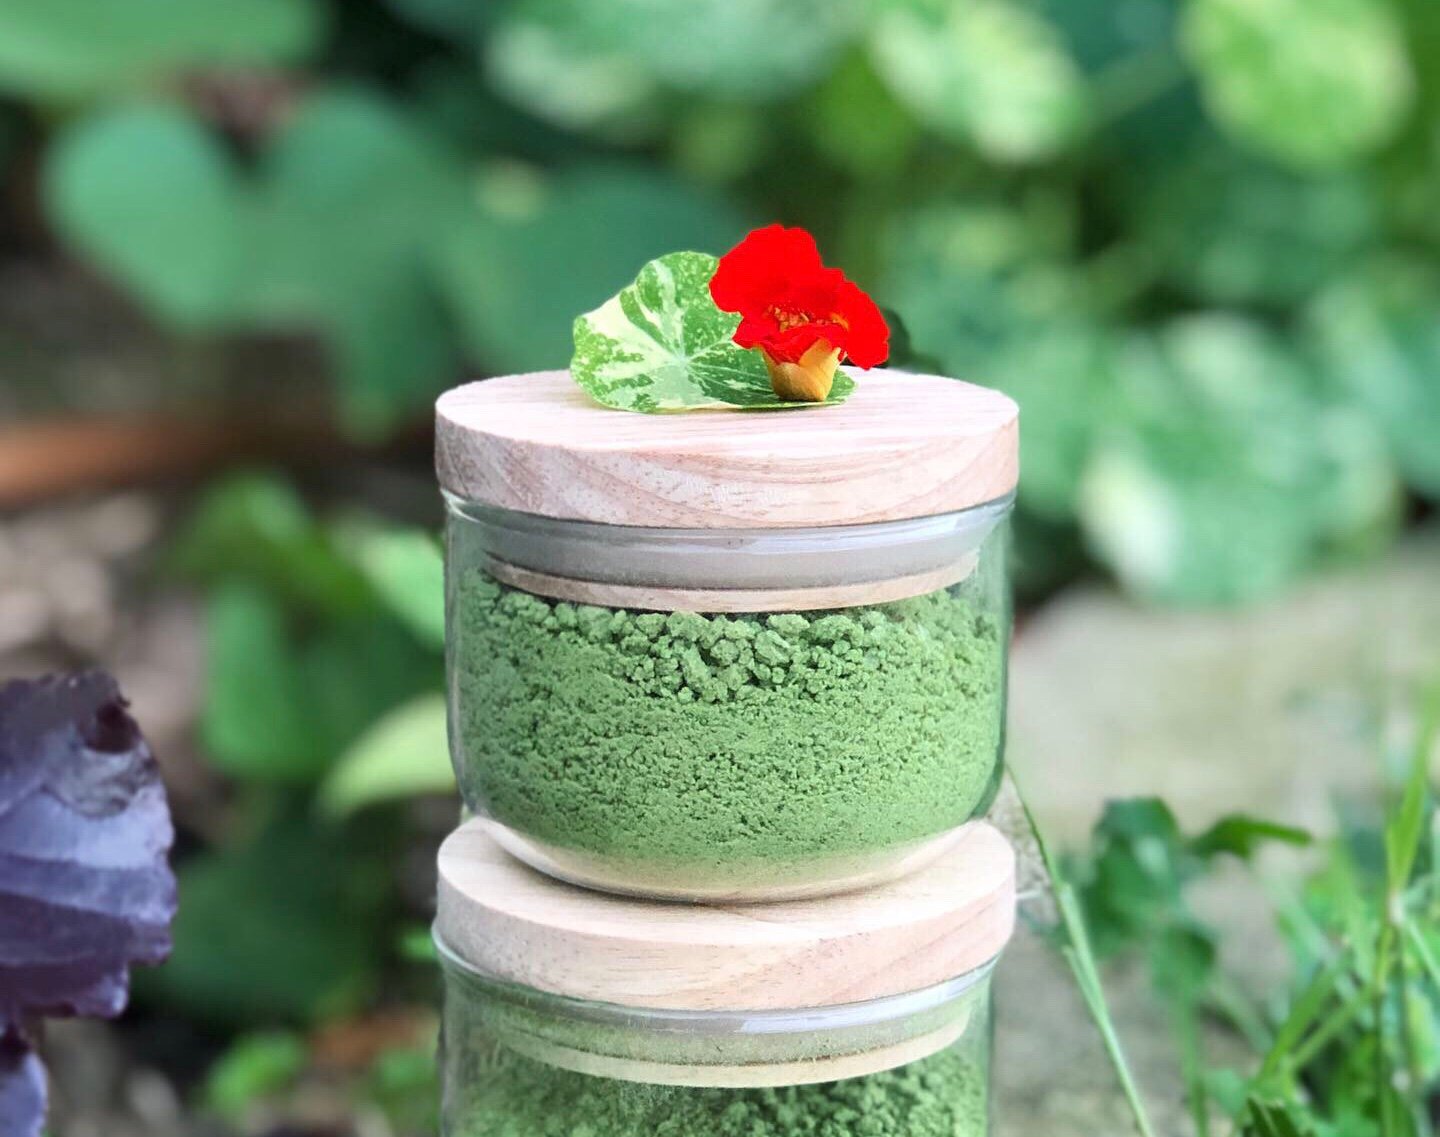
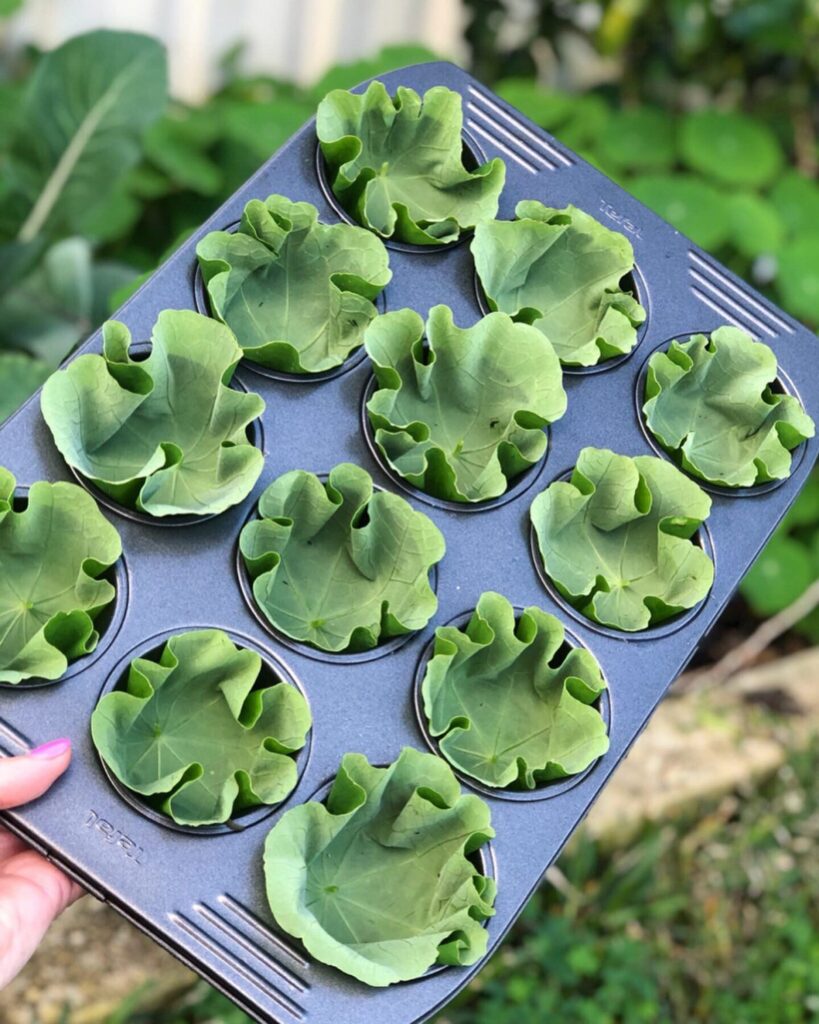
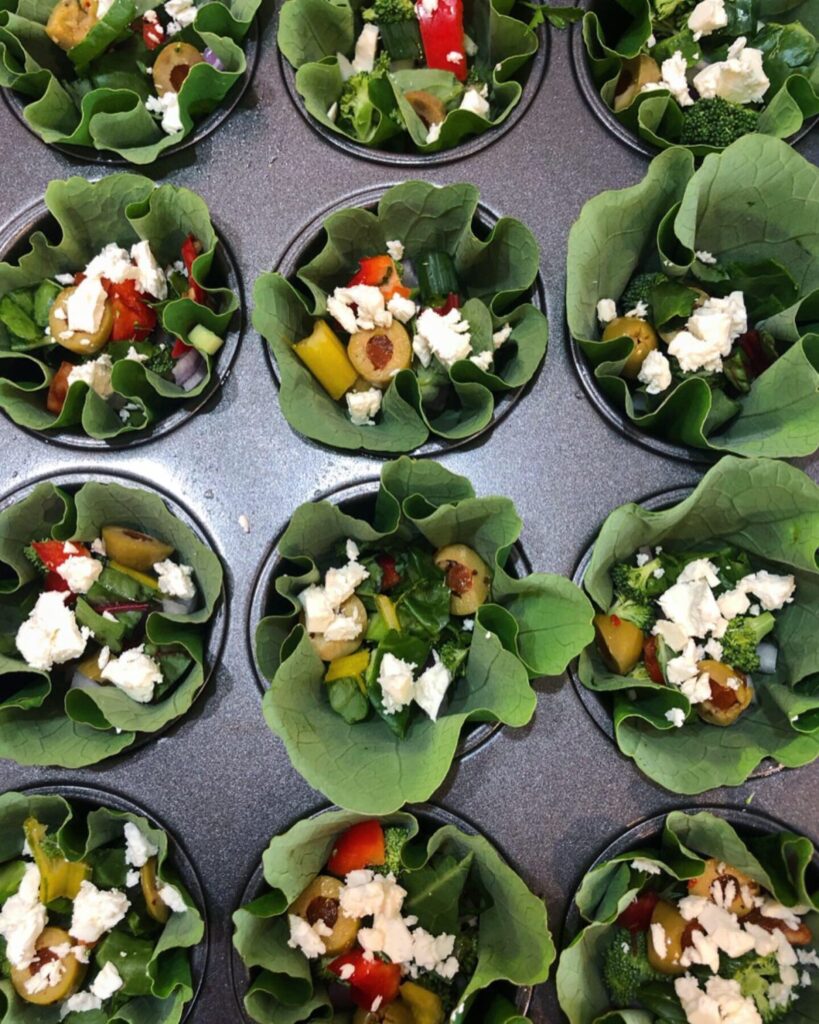
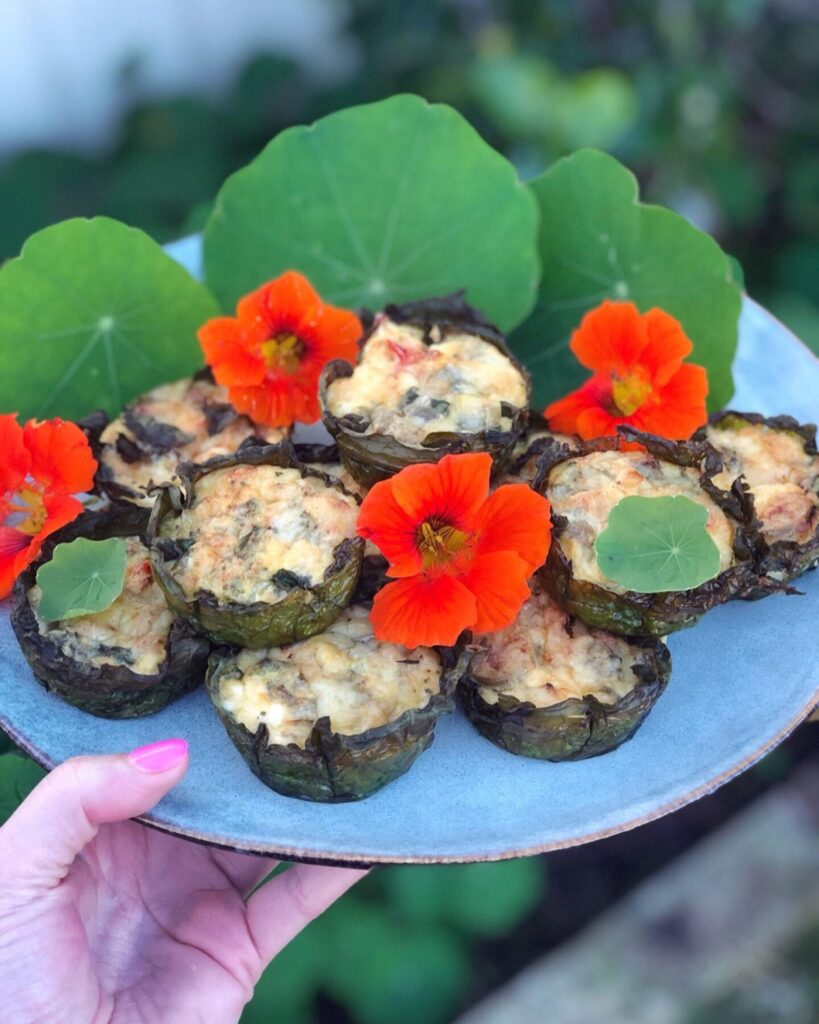
My nasturtiums are abundant again for the Autumn/ Winter season and are popping up everywhere! They make a beautiful lush ground cover and are so easy to grow! Once you have them in your garden they will pop up every year without any effort on your behalf. They have so many uses and integrated relationships within your garden which makes them one of my favourite permaculture plants. Their lily pad-like leaves also give all the magical fairy vibes.
Growing Nasturtiums
Nasturtiums seem to thrive well in most soil types and you will often see them spilling out onto the street from gardens or popping up in the wild. They have quite a weed-like growth because they are so easy to grow and self-seed. They come in a few different varieties and range in colours from yellow, red, orange, peach, white, and a beautiful scarlet red that I have my eye on.
They can also make a companion plant as they keep the soil protected and create a great space for beneficial insects to live. They are a great addition to any garden and one of my top permaculture plants due to the number of beneficial uses and positive relationships with other plants and animals.
Medicinal
Nasturtiums have many medicinal and healing qualities. They are rich in vitamin C, boost your immune system, as well as a natural aid to antibacterial and fungal infections. Plus most of the plant is edible which I love! Please note it is best to try things in moderation and I am by no means a medical professional. I did read that you should possibly avoid Nasturtium if you are pregnant, breastfeeding or have kidney disease.
Chickens
Growing Nasturtiums can also attract snails, aphids, and other bugs which keeps them away from your sensitive crops and then you can just harvest patches of affected plants and feed them to your chickens. The chickens will love the snails/bugs and the Nasturtium itself is a great natural medicine for the chickens. Nasturtium can improve reproductive health and immunity and help as a natural antibiotic.
Ways to Eat Nasturtiums
There are so many ways to use this plant and I have only tried a few so far. It is so important to learn how to use your edible plants so that you can get the most out of them! Here is a list of ways along with links to any recipes I have on my blog.
Are you growing Nasturtiums? Do you use Nasturtium in any other ways? I would love to know, please leave a comment below.
Holly🌱
Want to learn more about edible gardening?
Make sure you hit Subscribe to get notifications when new posts are live.
MY GARDENING ESSENTIALS // Fertiliser spray gun: https://bit.ly/366nL1t Retractable Hose: https://bit.ly/2TSC0Bo More gardening tools: https://bit.ly/32IQmbD
DISCLAIMER: Links included in this description might be affiliate links. If you purchase a product or service with the links that I provide I may receive a small commission. There is no additional charge to you! Thank you for supporting my page so I can continue to provide you with free content!