Mint (Mentha) is a classic staple herb to grow that provides your kitchen garden with an abundance of fragrance and flavour. Mint can be used for both sweet and savoury dishes as well as medicinal, cleaning products, teas, and more.
Mint can be very invasive so it is important to choose the right location to grow mint so that it doesn’t take over your garden. Below will be more tips on where and how to grow mint along with creative ways to use your abundant harvests!
Sunny Position 6rs. Contain the roots in a pot or container.
CARE
Water regularly.Protect from the harsh summer sun.
FERTILISE
Feed with compost and with liquid seaweed fertiliser.
PESTS
Slaters, slugs, snails, green caterpillar, aphids. Rust.
HARVEST
Trim regularly. Harvest in the mornings.
REPRODUCE
Mint grows quickly from cuttings or dividing the plant up.
Why Grow Mint?
Mint is refreshing and packed full of flavour. Below are just a few of the amazing reasons to grow mint at home.
Here are some of the many reasons to grow Mint:
Easy to grow
Low maintenance / hard to kill
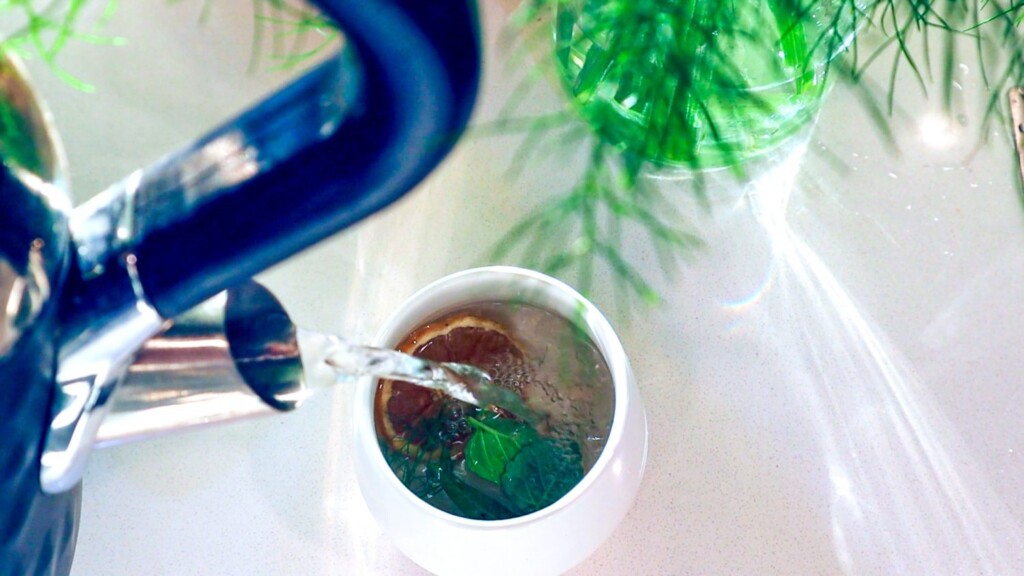
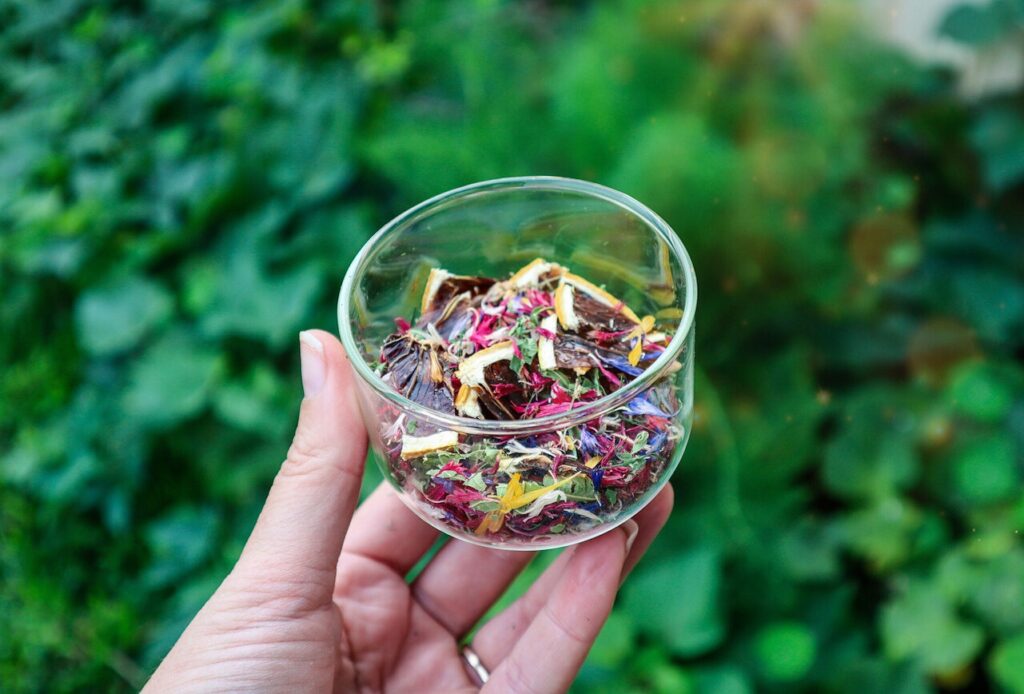
Flavour Teas or drinks
Natural insect spray
Aids in digestion
Calming qualities
Rich in vitamin A
High in anti-oxidants
Aid in upset stomachs
Nutrient-dense
Easy to propagate
Flowers for the bees
Condiments, dressings and dips
Popular Mint Varieties
‘Peppermint’ – Classic mint variety. Sharp flavour. Often larger leaves. Great for sweets, cocktails, teas and scented products.
‘Spearmint’ – Popular mint variety. Rounded leaves. Great for Roasts, sauces, teas, baking and fresh in salads.
‘Chocolate Mint‘ – Fun flavoured mint to grow with a mild chocolate flavour. Dark reddish tinted leaves and stems.
‘Morrocan Mint‘ – Fragrant mint with subtle spiced flavour. Great for roasts, salads and teas.
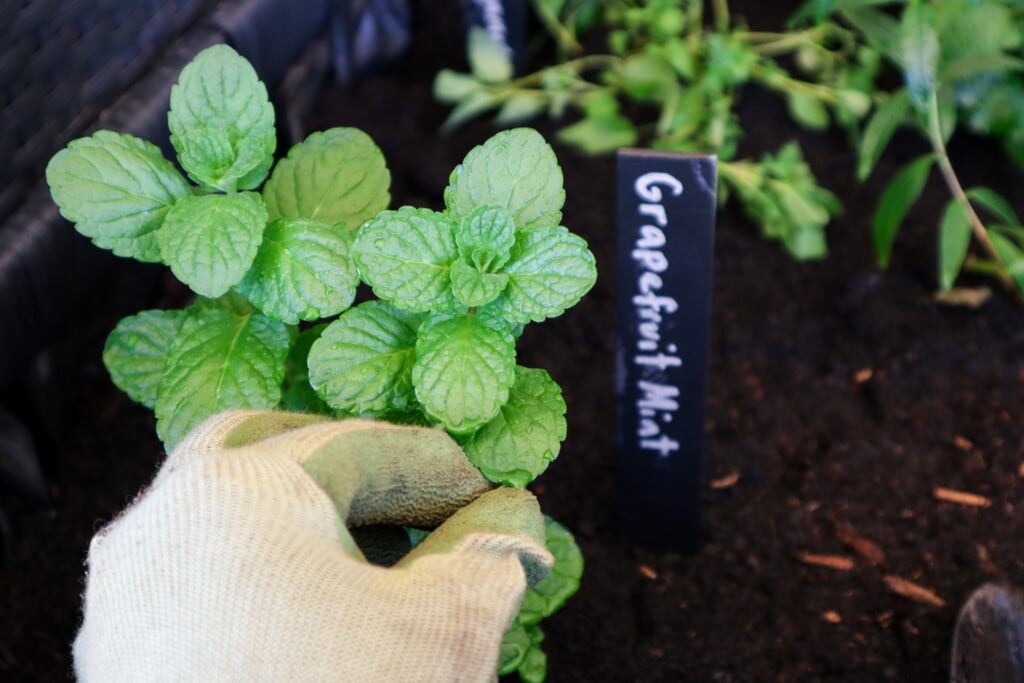
‘Grapefruit Mint’ – Fresh with Grapefruit notes. Summer drinks, salads, teas, cocktails and dressings.
‘Varigated Applemint‘ –Small green and white variegated leaves. Slight fluffy leaves. Sweet apple flavour. Gret for drinks and salads.
‘Ginger Mint’ – Fresh and vibrant flavour. Great for teas, salads and dressings.
‘Berries and Cream’ – Sweet berry notes. Great for desserts, teas and cocktails.
When to Plant Mint
To start off growing Mint it can be best to plant in Spring after the last frost. Mint will do well all year round in most moderate climates.
How to Grow Mint
Choose a sunny location.
BE AWARE – Mint sends out runners under the soil and can become invasive quickly. It is always advised to grow mint in a pot or container. A repurposed garden such as a wheelbarrow also works well!
Mint will grow in nearly any soil but it’s always good to add fresh compost. Ensure the soil is free-draining so that the roots do not get waterlogged.
Protect mint from the harsh summer sun and keep well watered in hot weather.
Trimming the mint regularly will help it stay low and bushy.
Care/ Maintenance
Mint can become root bound in containers quickly so if it starts to look sad it may need to be split up and divided to allow more room for the roots.
Feed with liquid seaweed or homemade fertilizers to help add nutrients into the contained space.
Pests / Disease
Slugs and snails may eat young seedlings. Use natural pest management. Aphids can also be an issue on young shoots. Dip them in soapy water. Green caterpillars can be a problem in summer and are hard to see against the green leaves.
How/ When to Harvest
Use sharp snippers or scissors and cut the tops off regularly. This will stop the plants from getting too leggy and stay low and bushy. Harvest Mint and herbs first thing in the morning when they are hydrated and full of life. You can keep them in a jar of water until you are ready to use.
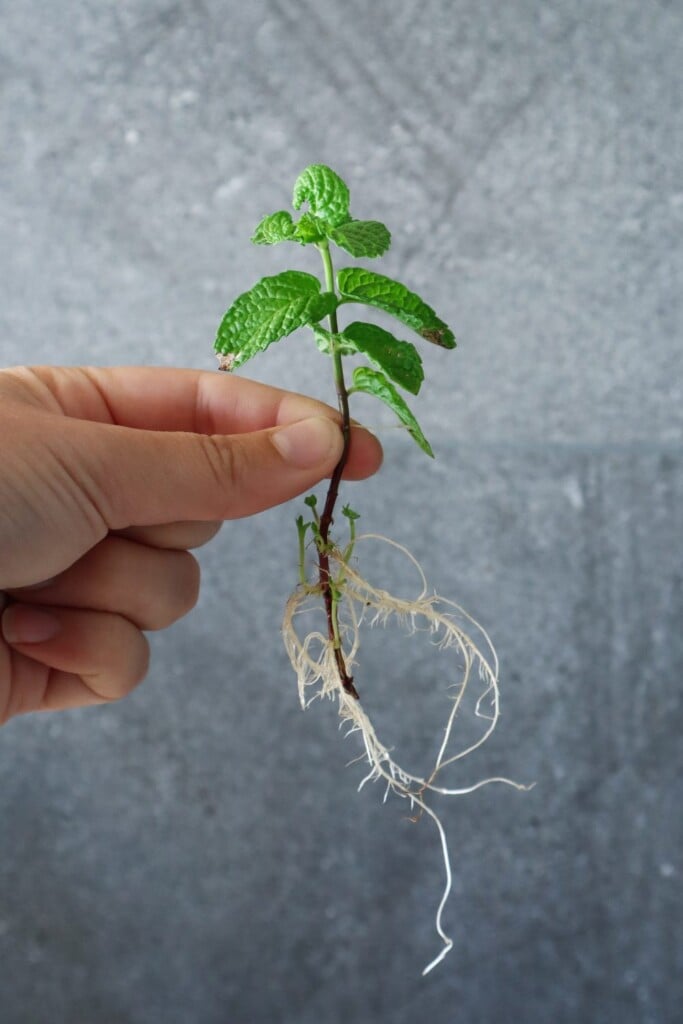
Reproducing
The best way to reproduce Mint is to take cuttings or pull up a section with roots already attached. This will start growing immediately.
Cooking and Using Mint
Mint is a great flavour enhancing herb for many different dishes.
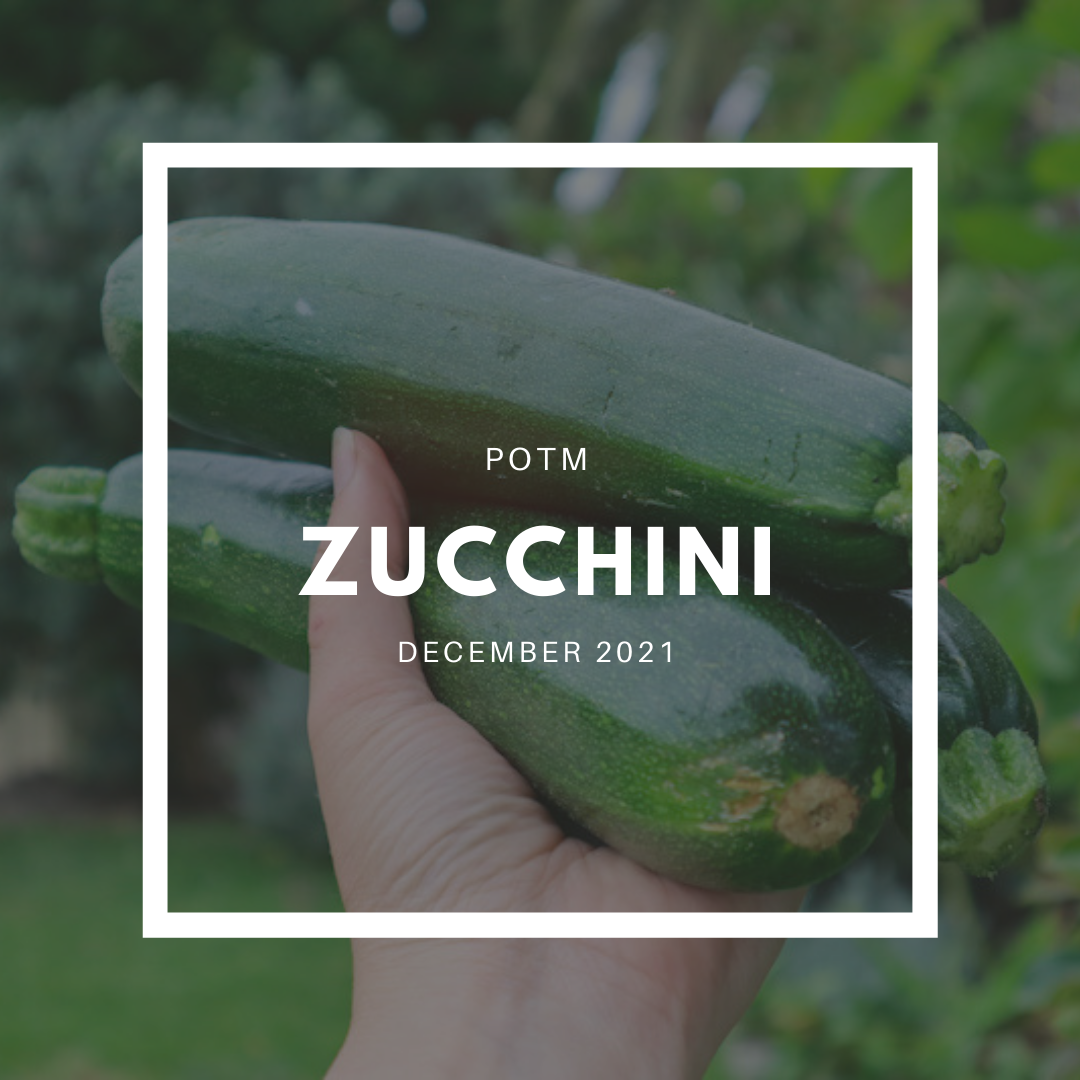
Zucchini (Cucurbita pepo) is a popular edible for home gardeners, as they are easy to grow and produce an abundance of food on a single plant. Zucchini can also be grown in pots or grow bags, so they make a fantastic high-yield option for urban gardens.
Zucchini is so versatile and can be used for sweet or savoury dishes and both raw or cooked. The great thing about growing Zucchini is that you will have more than enough to preserve, gift, swap, or trade.
Creating an abundant garden that you can share with your friends, family, and neighbours, is a rewarding and fulfilling way to garden.
Rich compost and composted manure soil. Create soil mounds.
LOCATION
Full sun 6 hours per day.
CARE
Water at the base to prevent mildew on the leaves.
FERTILISE
Feed every 2-3 weeks with liquid seaweed fertiliser.
PESTS
Mildew in humid climates.Rodents may attack the fruit.
HARVEST
Spring and Summer. Usually around 2 months after planting.
REPRODUCE
Save seeds from your best Zucchini at maturity.
Why Grow Zucchini?
Zucchini are quick-growing and can be used to make a wide variety of meals. Zucchini is a great base crop to grow, allowing you to create more meals straight from your garden. Below are just a few reasons to grow your own Zucchini at home.
Here are some of the many reasons to grow Zucchini:
Easy to grow
Prolific production on each plant
High in Vitamin A & C
Rich in Antioxidants
Can promote healthy digestion
Edible flowers
Can be eaten raw or cooked
Can be used for sweet or savoury dishes
Absorb flavour easily
Generous crops for gifting, swapping, or trading
Popular Zucchini Varieties
‘Black Beauty‘– Most popular heirloom variety with dark green skin. Prolific, quick-growing, ready to harvest in 7-9 weeks.
‘Long Florence‘ – Italian heirloom with green ribbed skin. Grows larger flowers perfect for stuffing. Ready to harvest in 6-8 weeks.
‘Fordhook‘ – Classic variety with smooth green skin with light speckles. High yield. Ready to harvest in 6-8 weeks.
‘Costata Romenesco‘ – Italian heirloom variety with pale green ribs and speckles. Looks like a star when sliced. Quick growing, ready to harvest in 6 weeks.
‘Lebanese‘ – Pale green or ‘grey’ variety. Sweet flavour. Best picked small. 8 weeks to harvest.
‘Golden‘ – Bright yellow/golden variety. Great for summer BBQs or baking. Ready to harvest in 9 weeks.
‘Ronde de Nice‘ – French heirloom variety. Small round fruits with green skin. Great for stuffing. Bruise easily so you don’t see these available at the shops often. Ready to harvest in 8 weeks.
How to Grow Zucchini
Zucchini grow in a large low structure and do take up quite a lot of space in the garden due to their large leaves. Choose a full sun location with at least 6 hours of sunlight a day. Zucchini can also be grown in pots and containers.
Zucchini are warm-loving plants and can be damaged by frosts. It may be best to plant your seeds in small pots or seed trays until your last frost has passed. Otherwise, Zucchini grow best sown directly into the soil. Plant your seeds as per the packet instruction as each variety and climate will have different growing suggestions. Once your seedlings have 4-5 leaves and your likelihood of frosts has passed, plant your seedlings in free-draining soil with plenty of compost. If you are growing Zucchini in garden beds, create small mounds of soil to plant your Zucchini seedlings on top of. Plant each seedling at least 1m apart.
When to Plant Zucchini
Plant Zucchini seeds directly in the soil during spring and summer. For early crops you can plant seeds inside in seed trays and plant outside once your last frost has finished.
Care/ Maintenance
Zucchini are heavy feeders, so it can be helpful to feed your plants with liquid seaweed or garden fertilizer every 2-3 weeks.
Mulch around your plants to protect the soil and retain moisture. Water your Zucchini at the base to avoid getting the leaves wet, as Zucchini can be prone to powdery mildew. Watering in the morning can also help to prevent this, as the leaves will have time to dry out and not sit wet for too long. If you do see white powdery mildew, remove the affected leaves and make up an organic spray with a mix of 9 parts water to 1 part milk. Spray this over the Zucchini leaves.
It can be beneficial to remove the older leaves at the base of the plant to increase airflow and prevent moisture from sitting around too long. Use sharp and clean secateurs to reduce the spread of any diseases.
Some plants may need staking or support as they grow.
Pollination/ Fruiting
Zucchini produce both male and female flowers on each plant for pollination. Our bees do a fantastic job at pollinating, so planting flowers nearby will help to encourage plenty of pollinators to your garden.
If your Zucchini are not reaching maturity and seem to shrivel and die prematurely, this may be due to a lack of pollination. You can manually pollinate your flowers by using a small paintbrush to dust the pollen of the male flower’s stamen (single flower with no baby Zucchini forming) to the female flower Stigma (flower with a baby Zucchini at the base). This can help boost your success rate and grow more Zucchini. This can also be achieved by picking a male flower, removing the petals, and using the pollen-covered stamen to transfer pollen to the female flowers. If you do notice pollination issues be sure to plant lots more flowers in between your plants to attract more bees.
Another reason your fruit may be dying off could be due to blossom end rot. This will cause the end of the Zucchini to go brown and start to rot before reaching maturity. This is due to a number of factors such as lack of calcium in the soil, feeder roots being cut or damaged, and most commonly, inconstant watering. During hot, dry periods, it is important to keep a regular watering schedule. Anautomatic timer will come in very useful. Mulching will also help retain moisture.
Pests / Disease
Zucchini is relatively pest-resistant. Protect young seedlings from slugs and snails. They can get some fungal diseases in humid weather. It is important not to wet the leaves to prevent powdery mildew from forming. If you do start to see some powdery mildew, remove the leaves (if it is only a few) or create a spray of 1 part milk to 9parts water and spray over the affected area. Once the fruits start to mature be aware of rodents or other animals finding your harvests.
How/ When to Harvest
Harvest your Zucchini when they are small (15-20cm long) and often. This will encourage your plant to produce more and more fruit. Use sharp secateurs to avoid accidentally ripping the entire plant out or snapping off part of your Zucchini.
Zucchini grow very quickly once the plant is established, so you may need to check every day or every other day for new produce.
If you want to harvest Zucchini flowers for eating, choose the male flowers. Otherwise, you will be reducing the number of Zucchini you get from each plant. Be sure to leave some male flowers for pollination, or harvest your flowers after manually pollinating the female flowers.
Reproducing
Zucchini seeds are the easiest way to reproduce. Let 1-2 of your best-looking Zucchini grow to maturity (until the skin is hard and cannot be broken with your fingernail). This will be when the seeds are mature and ready to harvest. Wash the flesh off the seeds and allow them to dry before storing it in a cool, dry, dark space.
Cooking and Using Zucchini
There are so many ways to use Zucchini and with just one plant, you will have plenty of opportunities to try many of them out! Below are just a few of the many ways to cook and preserve your abundant Zucchini harvests.
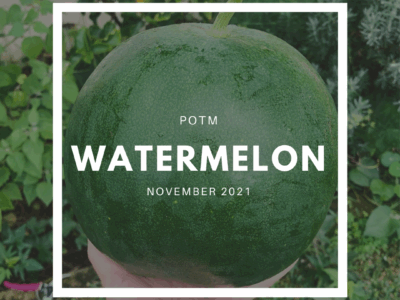
Watermelon (Citrullus lanatus) is easy to grow in home gardens and provides large amounts of delicious fruit. Sweet and bursting with juice, watermelons provide us with a delicious and hydrating summer treat. Watermelons grow on a vine and can trail along the ground or can also be grown vertically with extra support for their heavy fruit. This makes them a great addition to any home garden.
Rich compost and composted manure soil. Create soil mounds.
LOCATION
Full sun 6-8+ hours per day.
CARE
Young plants need regular watering.Water at the base to prevent mildew on the leaves.
FERTILISE
Feed every 2-3 weeks with liquid seaweed fertiliser.
PESTS
Mildew in humid climates.Rodents may attack mature fruit.
HARVEST
Late Summer. Usually around 3 months after planting.
REPRODUCE
Save seeds from your best watermelons.
Why Grow Watermelon?
Watermelon is bursting full of sweet, delicious, and hydrating food. Nature’s way of providing us with refreshing and nutritious energy for the long, hot summer days. Although they do need plenty of water to grow abundant crops, watermelon can do well in hot, dry climates.
Here are some of the many reasons to grow Watermelon:
Low maintenance
Drought tolerant
Pest resistant
Creates diversity in the garden
Abundant, sweet, juicy fruit
Can be grown along the ground or vertically
Can be used for sweet or savoury dishes
Make your own garden treats
Hydration
Vitamin C & A
Antioxidants
Animal Feed
Popular Watermelon Varieties
‘Sugar Baby’– Abundant red flesh Heirloom variety. Compact fruit with matte green hard outer skin to prevent splitting. 10-week harvest. 4 Fruit per plant. 3kg per fruit.
‘Moon & Stars’ – Heirloom pinky-red flesh variety with yellow “stars” over the fruit and leaves and one large “moon” speck. Thich skin to prevent splitting. 14- week harvest. 3-4 fruit per plant. 25kg per fruit.
‘Crimson Sweet (War Paint)’ – Very popular with deep red flesh and white paint-like stripes on the skin. 12-week harvest. 10kg per fruit.
‘Candy Red (Charleston Grey) – Heirloom. Large oval fruits with deep red flesh. Light green skin. 15+ week harvest. 15kg fruit.
‘Bush Jubilee’ – Old variety with red flesh and green striped skin. High sugar content. Compact bushy vine, great for small space gardening. 14-week harvest. 5kg fruit.
‘Blacktail Mountain’ – Large round fruit with red flesh. Dark green skin. Extra Sweet. Great for colder climates. 15-week harvest. 4 fruit per plant. 5kg per fruit.
‘Sweet Siberian’ – Heirloom with a green outer skin and sweet orange flesh. Great for colder climates. 10-weeks harvest. 5 fruit per plant. 4kg per fruit.
‘Golden Midget’ – Skin turns yellow when ripe. Sweet red flesh. Prefers warmer climates. 14-week harvest. 7 fruit per plant. 2.5kg per fruit.
How to Grow Watermelon
Watermelon likes a full sun location, with approximately 6-8 hours of sunlight. Plant seeds when daily temperatures start to average 20-25 degrees Celsius per day (less for colder varieties). Watermelon does not like their roots being disturbed. So if possible planting them directly in the ground can be beneficial. Create 30cm high mounds of soil using rich compost and composted manure. Plant your seeds 1 inch deep on the top or plant your seedlings if you have germinated inside.
When to Plant Watermelon
Plant your watermelon seeds from Spring to early Summer. Watermelon can take a while to produce so it is a good idea to get them in the ground early. As soon as temperatures average 20-25 degrees Celcius.
Care/ Maintenance
Young watermelon plants will need regular watering. Especially in the height of summer. The leaves will curl up and notify you that they are too dry. Avoid watering the leaves as this can allow powdery mildew to form. It can be a great idea to put a stick or marker where you plant the seeds. Once the plant is established, it can be hard to see where the main stem and roots are to water correctly. Placing a marker will help you water the correct part of the plant for maximum efficiency. Cover your soil with mulch – pea straw or lucerne can be a great option as it will start to break down and feed your plants.
Feed your plants regularly (every 2 weeks or so) with a liquid seaweed fertiliser for an extra boost of nutrients.
Heavy rain or excess watering when the fruit is nearing maturity, may cause the melon to crack open. Keep an eye on your ripening melons.
Watermelon can also be grown vertically! Especially the smaller fruiting varieties. Plant them near a trellis or frame and move the vines as they grow to latch onto the frame. They have strong tendrils that will hold them in place. Once the fruit starts to form you may need to support the weight so that they do not snap and fall. A mini hammock under the melon using a stretchy, breathable fabric such as a stocking can be useful.
Pollination/ Fruiting
Watermelons require pollination from a male to a female flower to form fruit. If you have plenty of bees in your garden, they should be able to do this for you. If you notice small watermelons forming and then dying off, this may mean you have a pollination problem. This can be aided by using a small paintbrush to dust the pollen of the male flower (single flower with no baby melon forming) to a female flower (flower with a baby melon at the base). This can help boost your success rate and grow more watermelon. Be sure to plant lots more flowers in between your plants to attract the bees if you ever have pollination problems.
Pests / Disease
Watermelon is relatively pest-resistant. They can get some fungal diseases in humid weather. It is important not to wet the leaves to prevent powdery mildew from forming. If you do start to see some powdery mildew, remove the leaves (if it is only a few) or create a spray of 1 part milk to 9 parts water and spray over the affected area. Once the fruits start to mature be aware of rodents or other animals finding your fruit.
How/ When to Harvest
Harvesting watermelon can be tricky! And devastating when you get it wrong (be prepared it may happen from time to time..). Under-ripe watermelon will be bland and lack flavour, whereas, over-ripe watermelon will be floury and granular.
Some ways to determine if your watermelon is ready:
Look for the curly tendrils closest to the watermelon stem. They should turn brown and dry when the watermelon is ready.
A light knock on the watermelon, it should sound slightly hollow when ready.
Carefully roll the melon over and the part that was touching the ground should be turning yellow.
Reproducing
Watermelon seeds are the easiest way to reproduce watermelon. Choose seeds from your best mature melons. Wash off the flesh and allow it to dry before storing it in a cool, dry, dark space. Watermelon can also be grown from cuttings. Do this early in the season otherwise, the vine will not have enough time to produce before the weather gets cold. Cut a 10cm piece of a side shoots off. You want to let the main leader vine grow so do not cut this. Cut just below a leaf as this is where the roots will form. Place in a jar of water until you see some roots form. Then plant it back out into the garden. This is more for a bit of fun as you will get the best crops from direct-sown seeds.
Cooking and Using Watermelon
Watermelon is so delicious eaten fresh but there are many other ways to prepare watermelon to use in both sweet or savoury dishes.
Watermelon Pairs well with: Mint, Lime, Basil, Citrus, Red Onion, Feta Cheese, Coconut, Yoghurt, Almonds, Jalapeno, Haloumi, Ginger
Watermelon ideas:
Fruit salad
Juice
Iceblocks
Salads
“Chips” or “Wedges” with dipping sauce
Fruit kebabs
Watermelon jerky
Grilled watermelon
Cocktails
Serving Bowls using the skin/shell
Cocktails and Mocktails
Carvings
Sorbet
Watermelon Cake
Flavoured Water
Salsa
Fruit leather
Syrup
Preserving the Harvest
Watermelon is best eaten cold and fresh but sometimes we can’t keep up with their generous yields. Dehydrated watermelon is a great way to use up a lot of extra watermelons. Watermelon jerky is extremely sweet and could make a good substitute for natural lollies. Other ways you could preserve your watermelon are Freezing cubes, juicing and freezing cubes or making syrup or chutney.
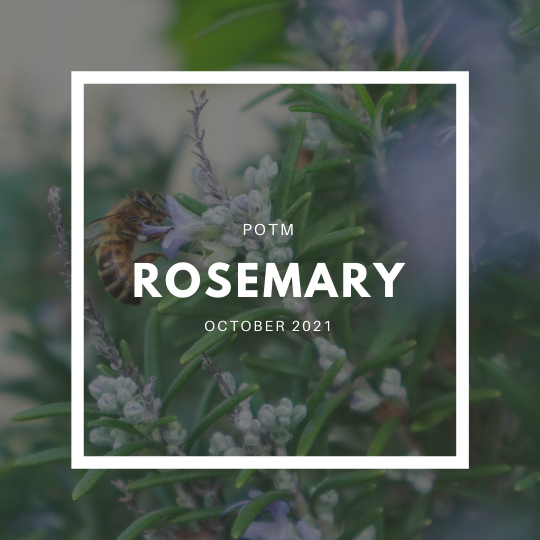
Rosemary (Rosmarinus officinalis) is a fragrant perennial herb. Rosemary is a hardy, drought tolerant shrub and can also be used as an ornamental due to its evergreen foliage and purple or white edible flowers. Rosemary is a great herb to plant on your journey to sustainability, as it has a large list of beneficial uses for the garden, home, kitchen, plus many medicinal qualities. When Rosemary flowers it will attract an abundance of beneficial pollinators to increase your gardens production.
Full sun 6-8 hours per day. Cold climates -move it to a warmer spot in winter.
CARE
Water at base – dont over water. Keep well mulched. Prune early Spring to encourage new growth.
FERTILISE
Spring and Autumn with seaweed solution or an organic slow release fertilizer.
PESTS
Aphids, white fly, scale, mealybugs. Mildew in humid climates.
HARVEST
Anytime of the year.
REPRODUCE
Cuttings are the easiest and quickest way to reproduce.
Why Grow Rosemary?
Rosemary offers so many beneficial relationships within your garden. Rosemary is a hardy, drought tolerant, ever green perennial herb. A fantastic staple to have growing in any edible garden. Rosemary also has many healing properties, so it is a handy plant to have near the house or in a kitchen garden.
Here are some of the many reasons to grow Rosemary:
Low maintenance
Drought tolerant
Pest resistant
Attracts Pollinators
Creates diversity in the garden
Evergreen herbs
Edible flowers and leaves
Adds flavour to your meals
Great for skin care and healing
Anti-inflammatory properties
Boosts mental clarity and focus
Improves digestion
Aids in hair growth
Calming and therapeutic qualities
Popular Rosemary Varieties
‘Arp Rosemary’– Large sturdy shrub. Purple -blue flowers. Grows 1.5m high and 1m wide. Cold hardy. Popular for skewers.
‘Gorza’ – Tall upright shrub. Leaves are twice as big as other varieties. Large light purple flowers. Popular with Chefs. Can handle humid locations.
‘Salem’ – Medium sized upright shrub originating from Auckland, New Zealand. Deep Blue Flowers. Grows 1.5m tall and 1m wide. Popular for hedging.
‘Pink Remembrance – Small-Medium sized shrub. Light pink flowers. Grows 1m tall to 80cm wide. Can handle cold climates, wind, salt and dry soils. Popular for pots or cottage gardens.
‘Huntingdon Carpet’ – Low lying or cascading Rosemary. Bright blue flowers. Grow 30-60cm tall. Popular for rock walls or pots.
‘Tuscan Blue’ – Tall upright plant. Light blue-purple flowers. Grows 1.5m tall x 1.5m wide. Popular topiary or hedge. Can handle coastal environments.
‘Blue Lagoon’ – Compact trailing/ cascading plant. Deep blue- purple flowers speckled with white. Grows 1m tall to 1m wide. Popular for rock walls. Can handle coastal environments.
‘Golden Rain’ – The most densely compact variety. Leaves turn a golden colour during winter then back to green in summer. Light blue flowers. Grows 60-90cm high and wide.
‘White Flowering’ – Short dark green, needle shaped leaves. Curved branching form. White flowers give the appearance of snow fall.
How to Grow Rosemary
Rosemary likes a full sun location, with approximately 6-8 hours of sunlight. Rosemary is a hardy, drought tolerant plant that grows well in poor soils. Rosemary doesn’t like having wet feet, so free-draining soil is important. In humid areas, select a variety such as the ‘Gorza’. Before planting, add in a layer of compost and mulch around the base after planting.
When to Plant Rosemary
Plant Rosemary in Spring after the last frost has past.
Care/ Maintenance
Rosemary can get root rot if it gets too much water, so ensure the soil has had time to dry out between watering. Feed with liquid seaweed or plant fertiliser every few months for improved results. Pruning Rosemary regularly will help keep it compact and fresh. Older branches tend to go woody and sparse over time. Prune after it has finished flowering and remove no more than 1/3 of the plant at a time. You can then use your trimmings to make new plants!
Pests / Disease
Rosemary is a hardy plant but it can suffer from a few pests and diseases from time to time. In humid areas Rosemary can get powdery mildew and root rot. To prevent this, water only at the base and not the leaves. Let the soil dry out before watering and ensure the soil is free-draining. Prune to allow good airflow. Aphids, white fly, scale and mealy bugs may also effect your Rosemary. It is best to catch these pests early and you may be able to blast them off with the hose or try a natural spray such as chilli and garlic. A mix of natural dish detergent and water can also help remove them.
How/ When to Harvest
Harvest and use your Rosemary all year round. Use sharp secateurs to allow new growth to form easily.
Reproducing
Rosemary is very easy to reproduce from cuttings. Choose a semi-hard wood section (not the soft new growth and not the thick hard stems – somewhere in the middle. You can cut that portion down). Cut lengths of 10-15cm and strip the bottom half of the leaves off. Then either place in a jar of water to sprout roots or place directly in a pot of soil. Ensure the pot is kept well watered while they sprout roots.
Cooking and Using Rosemary
Rosemary is such a versatile herb and works well with both sweet and savoury dishes. Rosemary has a pungent, pine like aroma.
Rosemary can be preserved by drying see preserving herbs. The great thing about drying Rosemary, is that it reduces in size dramatically. So a massive basket of Rosemary can be condensed into a single jar. It can also be blitz with salt to make delicious Rosemary finishing salt. This is an easy way to add extra flavour to your dishes. Rosemary can also be added to oils and vinegars to infuse.
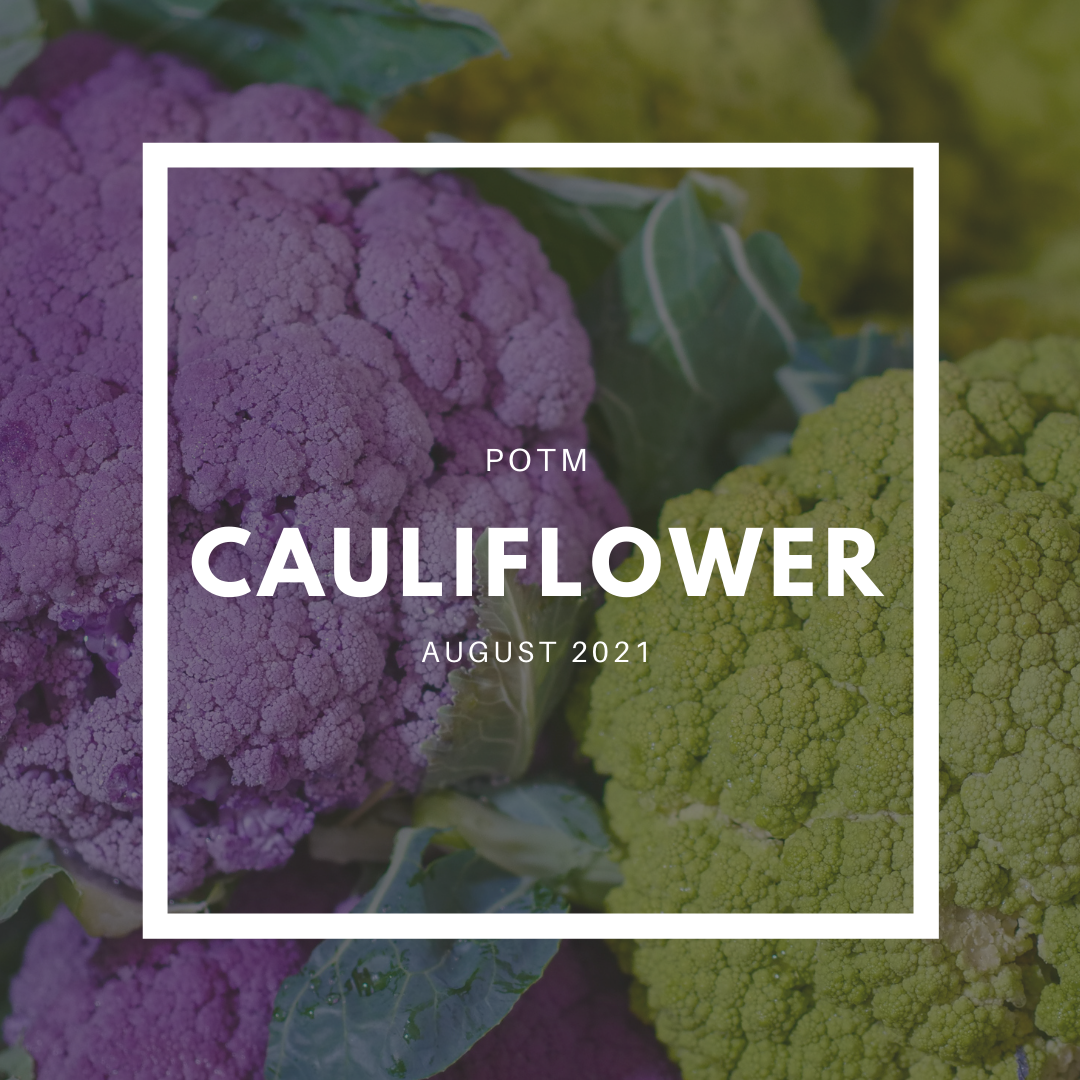
Cauliflower (Brassica oleraceabotrytis) is a hearty winter vegetable that provides large yields of nutritious food that can be used in so many ways! Cauliflower is great at holding flavours and can form the base of many meals. Growing your own Cauliflower at home means you will have nutrient-rich veggies but you will also get access to all the extra parts of the plant such as the leaves and the stem that are both edible and delicious. Cauliflower is easy to grow and can be grown in containers or garden beds. They are heavy feeders and can be susceptible to bugs such as caterpillars, slugs, and snails
‘First Early’ – Fast growing, small, compact heads. Harvest 90days.
‘ All-year round’ – Popular English heirloom. Dwarf size plant with medium/standard sized cauliflower heads. Harvest 110 days.
‘Purple Sicily’ – Large bright purple heads. Italian heirloom. Mild, sweet flavour. Harvest in 190 days.
‘Green Macerata’ – Bright lime green heads. Southern Italian heirloom. Good for cold climates. Large heads 1-1.5kg. Harvest in 190 days.
How to Grow Cauliflower
Cauliflower likes cool temperatures and a full sun location. Cauliflower is a heavy feeder so much sure your soil is topped up with compost and try to plant your Cauliflower in a different area of the garden each year to help the soil replenish the nutrients. Cauliflower can grow quite large with big leaves so plant your seedlings about 40- 50cm apart in compost-rich soil, water in your seedlings directly after planting. Add a layer of mulch to keep the soil protected from weeds and moisture in.
When to Plant Cauliflower
Cauliflower is a cool weather plant so you typically want to be harvesting your Cauliflower during winter and early spring. However, in some climates it can be grown all year round. There are many varieties available and some that can tolerate warm or cold weather. Sow your seeds in the last few months of Summer or during Autumn so that your Cauliflower plants are ready to harvest over winter.
Care/ Maintenance
Keep the plants well-watered on warm days. Water the plant at the base to avoid excess water pooling in the leaves and causing rot. For an extra boost you can feed your plants with a liquid seaweed solution every 2-3 weeks. Once the heads start forming it is best to protect the white Cauliflower from the sun. You can do this by folding the outer leaves over the head or tying them together above. The sun will “burn” or discolour your white cauliflower varieties.
Pests / Disease
Cauliflower is a prime target for white butterflies and caterpillars. Check your plants regularly by lifting the leaves and checking for caterpillars or larvae and remove. A barrier of crushed eggshells or a small container of beer can help keep the slugs and snails away especially while the plants are young and delicate. Plant a few extras throughout your garden and you will be sure to have more than enough Cauliflower to eat! Click here for more natural pest management to help keep the pests at bay.
How/ When to Harvest
Depending on the variety Cauliflower will be ready to harvest in 90-190 days. The Cauliflower head should be tightly packed and not have started going to flower. Once the little buds start separating and moving apart you will want to harvest ASAP as the flowers will be quite bitter in flavour. To harvest your Cauliflower cut the stem using a sharp knife. You can also harvest the younger leaves and use them in cooking as extra greens.
Reproducing / Saving Seeds
Cauliflower seeds can be saved after letting one of the Cauliflower florets go to flower and seed. Yellow flowers will appear and then after that, seed pods will form. Once the seed pods have dried off you can harvest all the seed pods. The Cauliflower seeds can be removed from the dried pods and stored to replant the following season. Save the seeds in a cool, dry, dark space.
Cooking and Using Cauliflower
Cauliflower is such a hearty vegetable and can provide nutritious and filling meals. Cauliflower can be used in so many ways such as raw in a salad, roasted, grilled, steamed, stirfried, and added to any curry or soup. Cauliflower is a great vehicle for flavour! As it absorbs and holds flavour so well. Cauliflower is a great source of fibre, vitamin C, B,A,K and Folate.
Cauliflower is super versatile and can be used to replace many grains and legumes. Try Cauliflower versions of mash, pizza base, rice, hummus, flat bread and more.
Preserving the Harvest
Cauliflower can be frozen to add to soups and stocks. To prepare the Cauliflower, rinse and remove the stalks. The stalks will take longer to cook so I like to freeze them separately. Blanch the Cauliflower in boiling water for 40seconds – 1minute then add to a bowl of iced water. Cut the stalks into slices or cubes and blanch for 2 minutes and then add to the ice water until completely cool. Shake off the excess water and add to freezer bags or ziplock bags. Try to remove as much of the air from the bags as possible to reduce freezer burn. Keep frozen and use within 6 months. The stems can also be pickled and stored in the refrigerator.