Learn how to grow Asparagus and what to make with your abundant harvests. Asparagus (Asparagus officinalis) is a perennial vegetable and is a great long-term investment in your food production. Asparagus grows back each year and can produce for up to 30 years ( or longer). The great thing about Asparagus is it produces edible spears at the start of spring, which is often an “in-between” time in the garden when winter crops have finished and summer crops are not yet ready.
Asparagus does require its own spot in the garden, but it can also be grown successfully in a container garden.
Plant seeds in spring or dormant crowns late winter.
SOIL
Free-draining compost-rich soil.Slightly acidic.
LOCATION
Full sun – part. 6-8 hours.
CARE
Keep weed-free and well mulched.
FERTILISE
Feed with compost and composted manure late winter after fronts die off.
PESTS
Aphids, snails, slaters.
HARVEST
Harvest spears in spring choose spears thicker than a pencil.
REPRODUCE
Can be grown by seed but produce quickerby dividing crowns (roots)
Why Grow Asparagus at Home?
Here are some of the many reasons to grow Asparagus.
Hardy, low-maintenance vegetable
Perennial
Ornamental and edible
Prolific producer
Early Spring Harvest
Produces up to 30 years
High in Potassium
Great raw or cooked
Popular Asparagus Varieties to Grow
Mary Washington – Popular open-pollinated variety. Long, tender green spears. White spears can be produced if blocked from light.
Sweet Purple – Dark purple spears with 20% more sugar than the green variety. It is also less fibrous.
TOP TIPS ON HOW TO GROW ASPARAGUS
Choose a sunny locationthat can be a permanent home
Prepare soil with plenty of compost and well-composted manure.
Free-draining, slightly acidic soil
Grow from crowns for faster production
Feed with high nitrogen or compost at the end of winter before spring growth
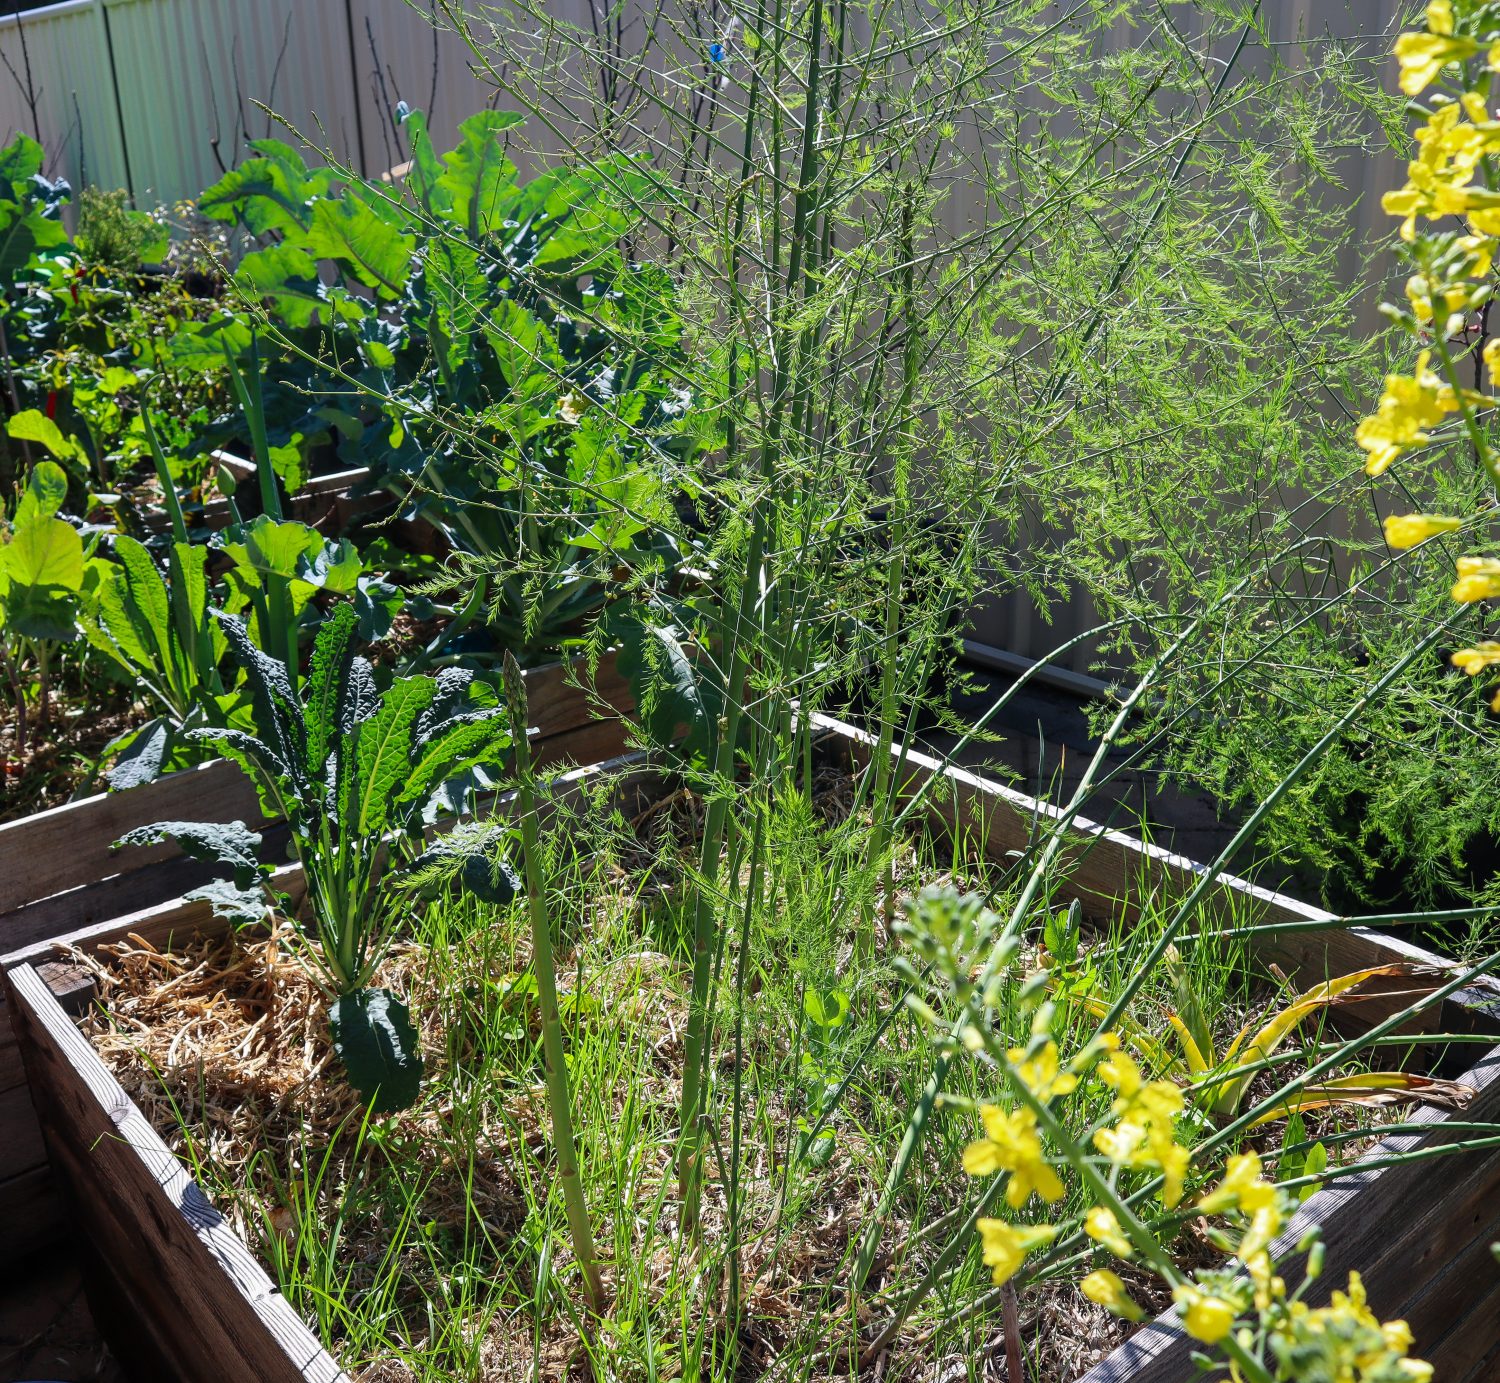
Allow spears to grow into ferns for the first 2 years
Harvest the fattest spears and leave thin ones to go to ferns
Keep weed-free and well-mulched
When to PlantAsparagus?
If you are planting Asparagus from seed, sow seeds in Spring. Soak seeds in water for 2+ hours before planting for quicker germination. Seedlings can also be planted in spring. Established crowns should be planted while still dormant in late winter.
How to GrowAsparagus?
Choose a sunny location with 6-8 hours of sunlight.
Choose a location that can be a permanent home for the next 20+ years.
Be aware of surrounding trees that may grow to overshadow the asparagus patch.
Asparagus-like loose soil that is easy to burst through. Create mounts if you have hard or clay soils.
Prepare beds with plenty of compost and composted manure.
Plant 40cm apart
Give them a deep water.
Care/ Maintenance
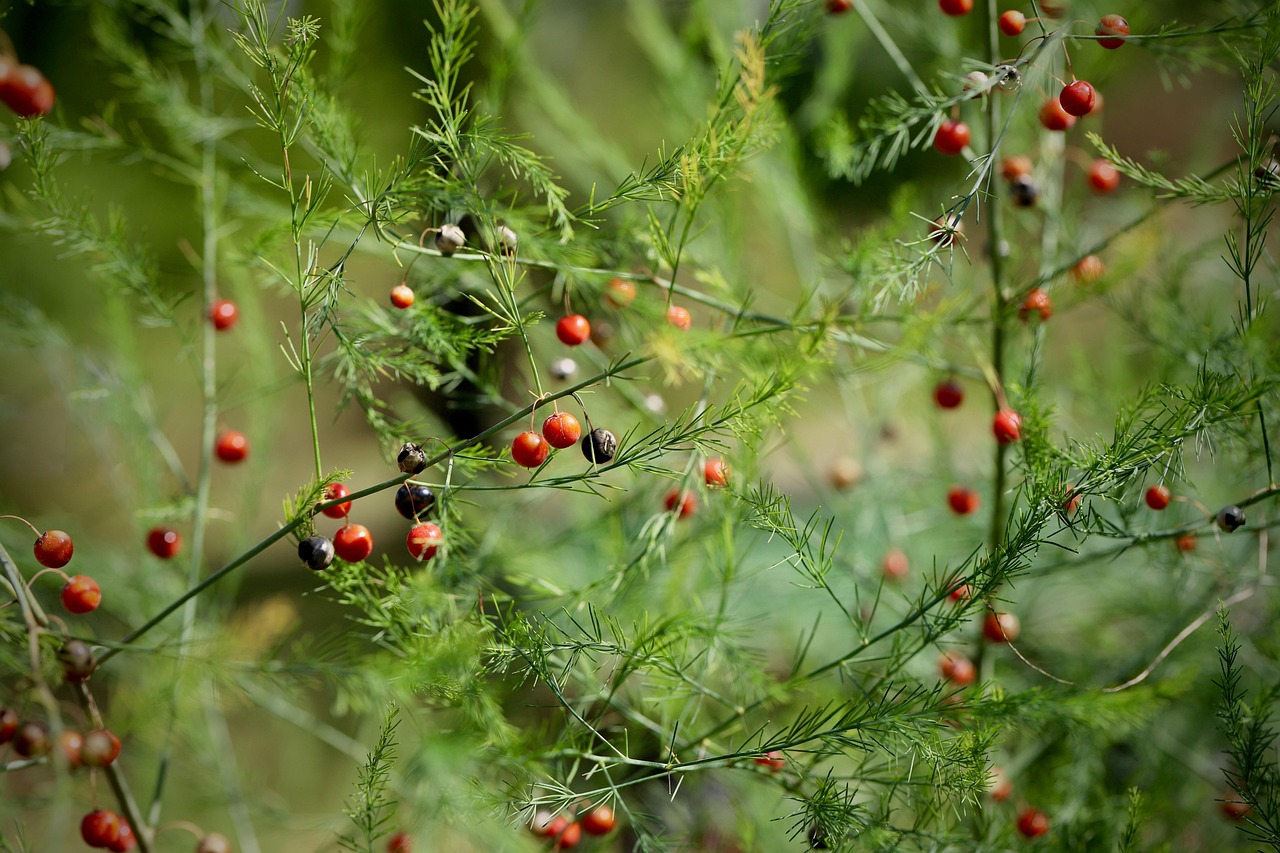
Asparagus comes in both male and female plants. They both produce spears, but the males are said to be of higher quality. The female plants can be identified as they produce berries at the end of the ferns. These berries can be saved and will have seeds inside that can be planted.
Feeding
Feed with compost or composted manure at the end of winter. Remulch with lupin, pea straw or sugarcane.
Watering
Deep water, especially in summer.
Harvesting
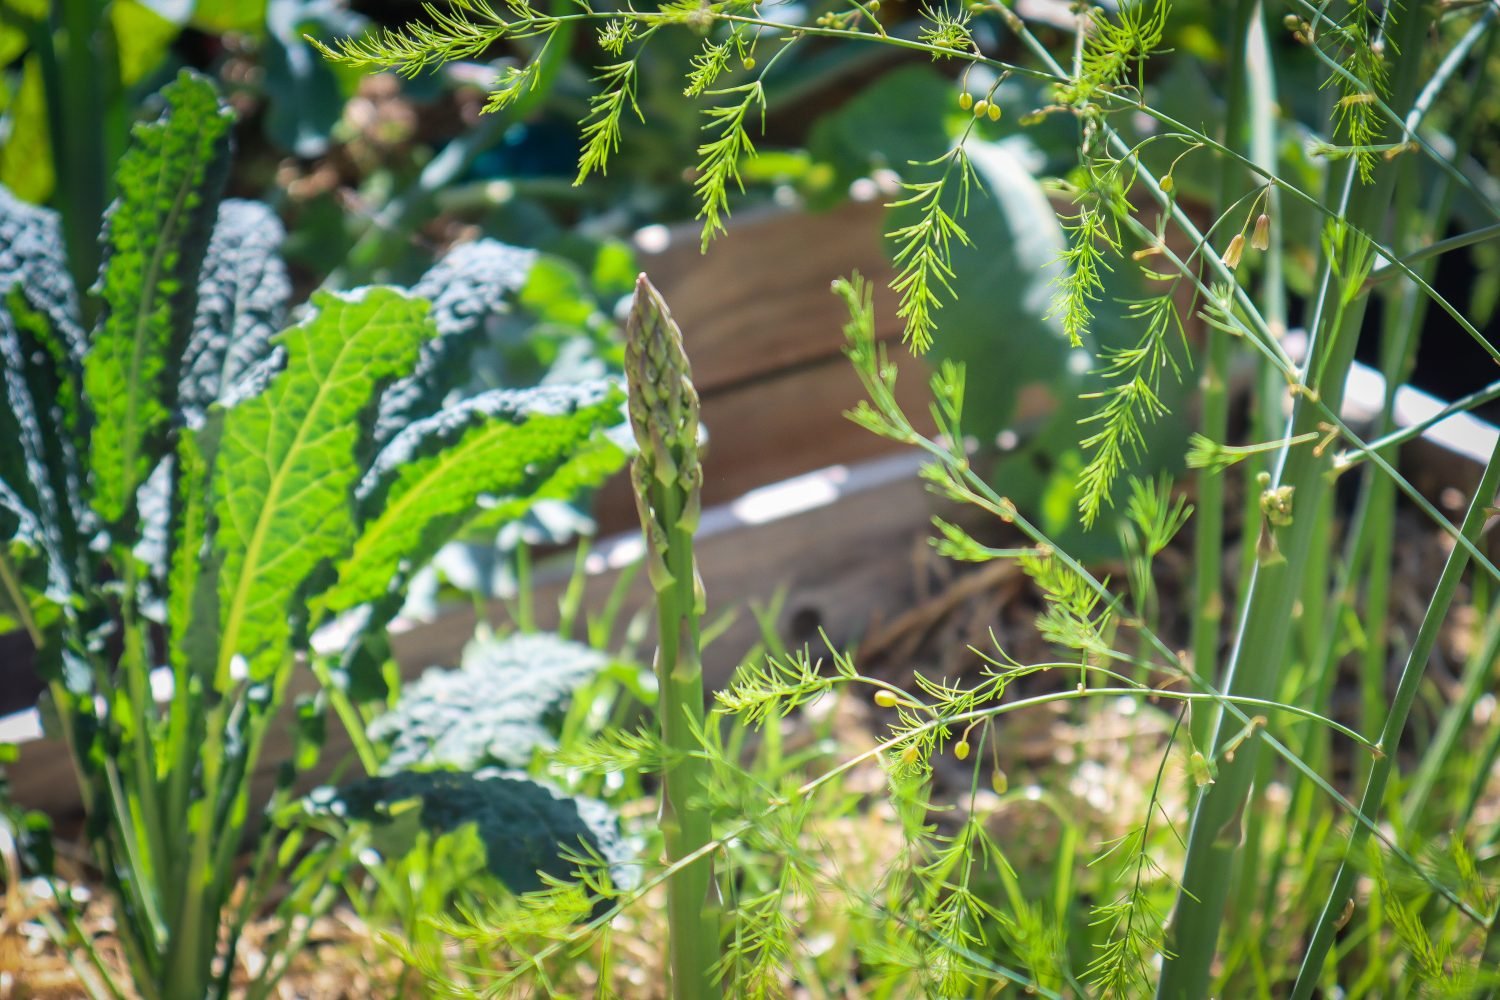
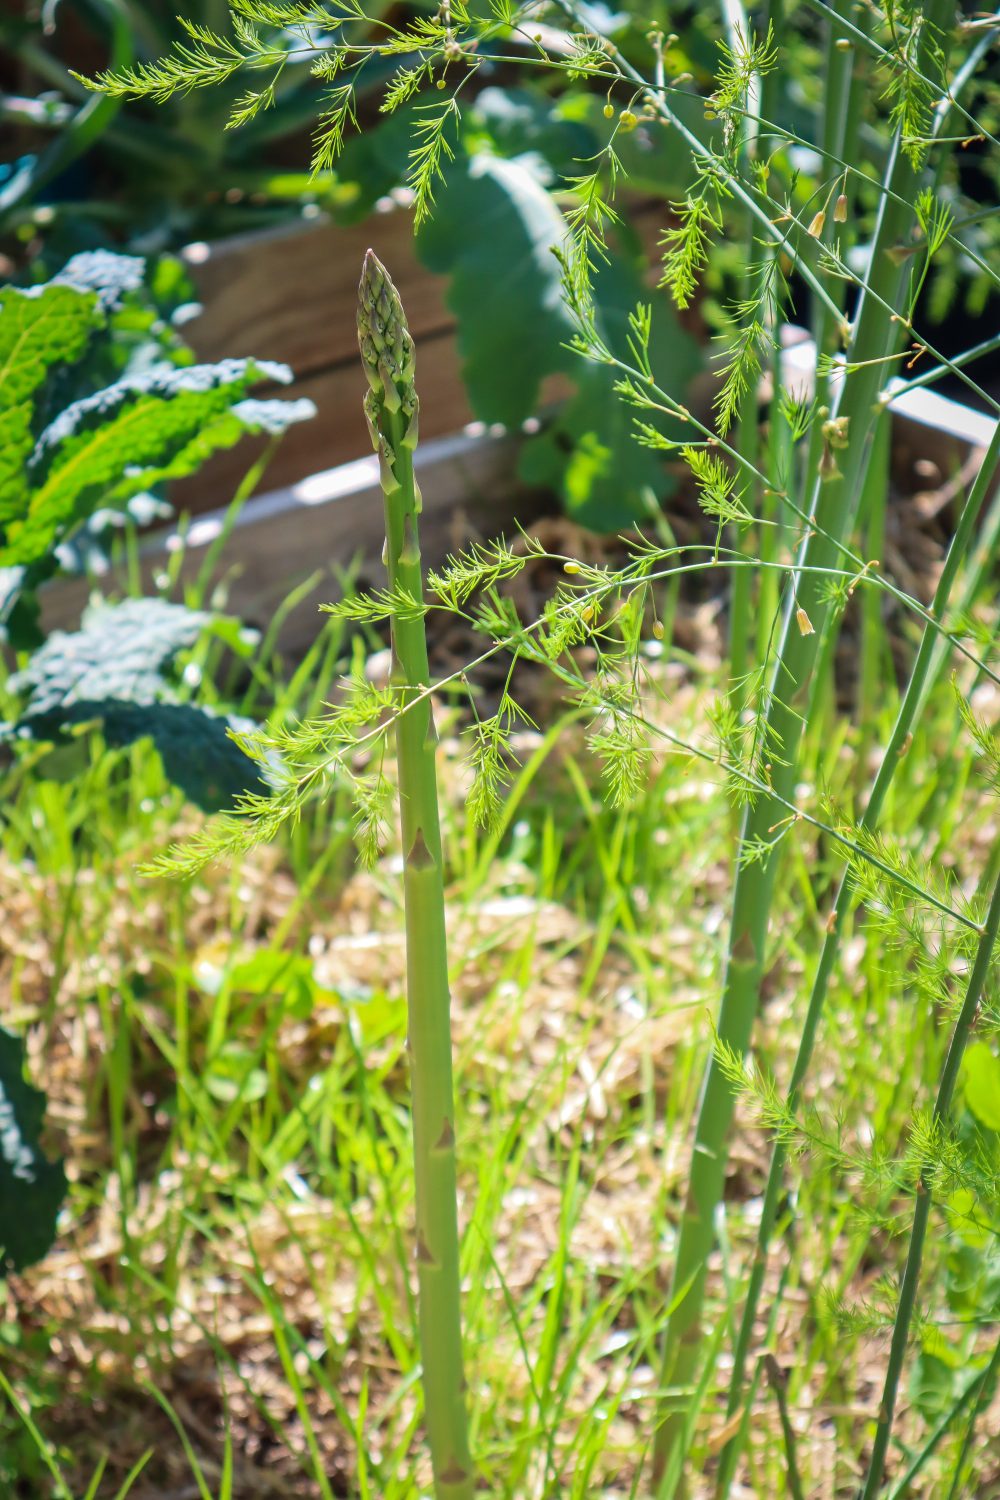
Asparagus holds its energy in the crowns, so it is important to allow the patch to establish before harvesting. From seed, Asparagus should be left for the first 2-3 years. If growing from crowns, Asparagus can be picked sparingly over the first 1-2 years. Choose the fattest spears at least pencil-width thick. Let the thin spears turn to ferns to conserve energy in the crowns for winter.
Pruning
If left, the spears will turn into tall ferns. This is how the plant conserves energy and repopulates. It’s important to allow this for the first few years. The green ferns will turn yellow and die off during mid-late winter. They can then be pruned and used as mulch or added to the compost. Once pruned, add a fresh layer of compost around the bed and re-mulch. This will keep them warm over winter and add nutrients back to the bed ahead of spring.
Pests / Disease
Aphids, slugs, snails, and slaters may like your young spears. Check plants in early spring. Natural pest management. Spears can also be affected with rust. Allow good airflow.
How/ When to Harvest
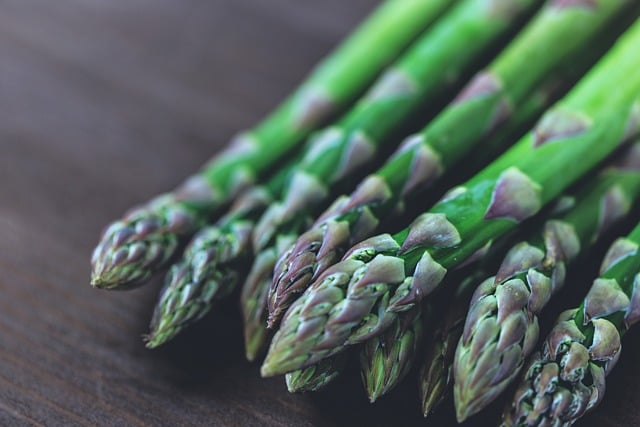
Asparagus is ready in early spring. Choose the fattest spears, bigger than pencil width and 20 – 25cm tall. Use a sharp knife and cut just below the soil line. Allow thinner spears to grow into ferns.
Reproducing
Female plants will produce berries at the end of their ferns, which contain seeds. These can be planted to expand your Asparagus patch. Crowns can be split when dormant in winter to create new patches.
Cooking and Using
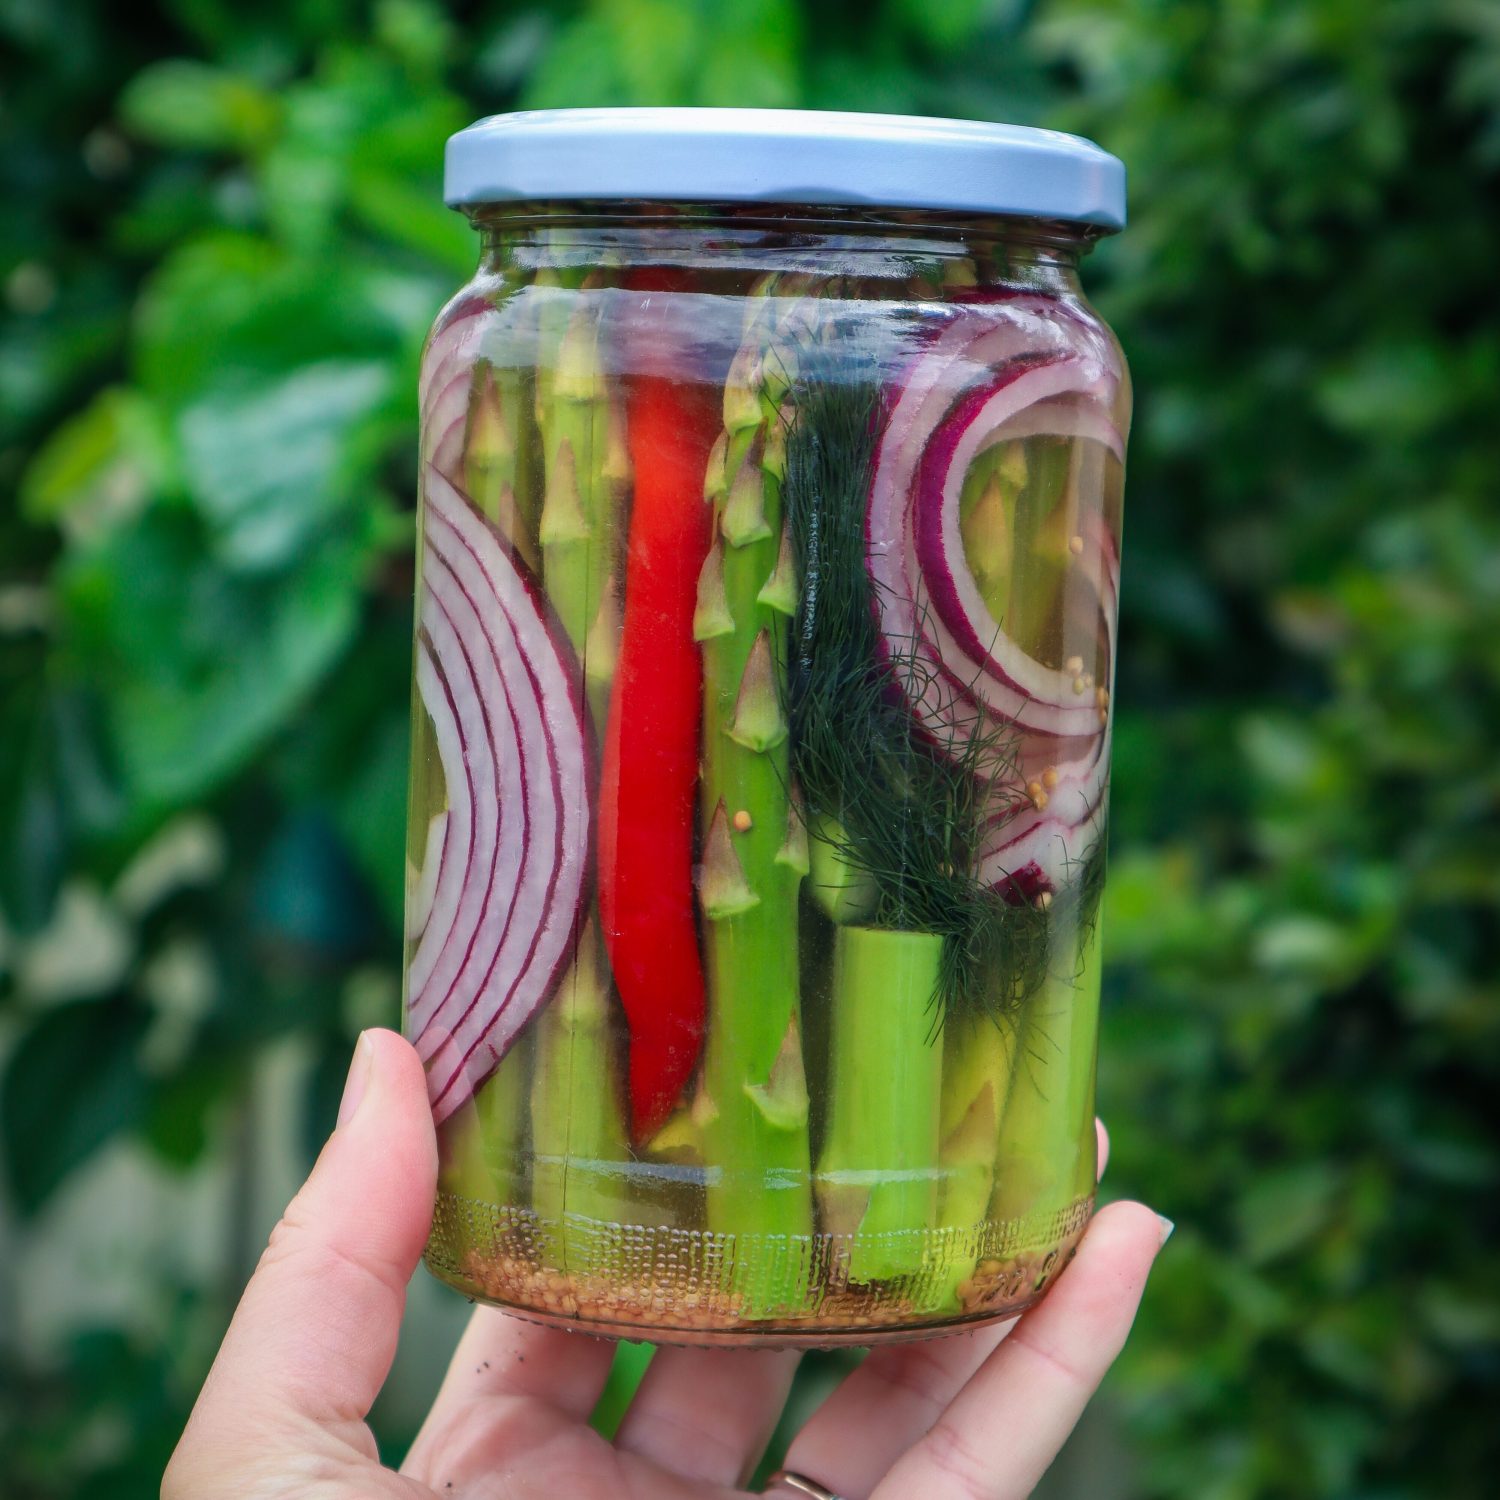
Asparagus can be eaten raw, cooked or preserved, pickled, and bottled.
Asparagus pairs well with:Mint, peas, rocket, dill, chives, cheese, eggs, cured meats, seafood, strawberry, raspberry, nuts, lemon, and potato
If you grow kumquats, you probably know how prolifically they fruit! These tiny, tangy citrus gems often produce more than you can eat fresh, making them perfect for preserving. Making kumquat jam is one of the best (and most delicious) ways to enjoy your homegrown harvest throughout the year. This easy kumquat jam recipe is a simple, low-waste method that uses natural pectin from the seeds and minimal ingredients—just fruit, water, sugar, and lemon.
Whether you’re new to preserving or a seasoned jam maker, this recipe is a great way to use up a bunch of kumquats and create something delicious to enjoy or gift to friends and family.
Why You Should Make Kumquat Jam
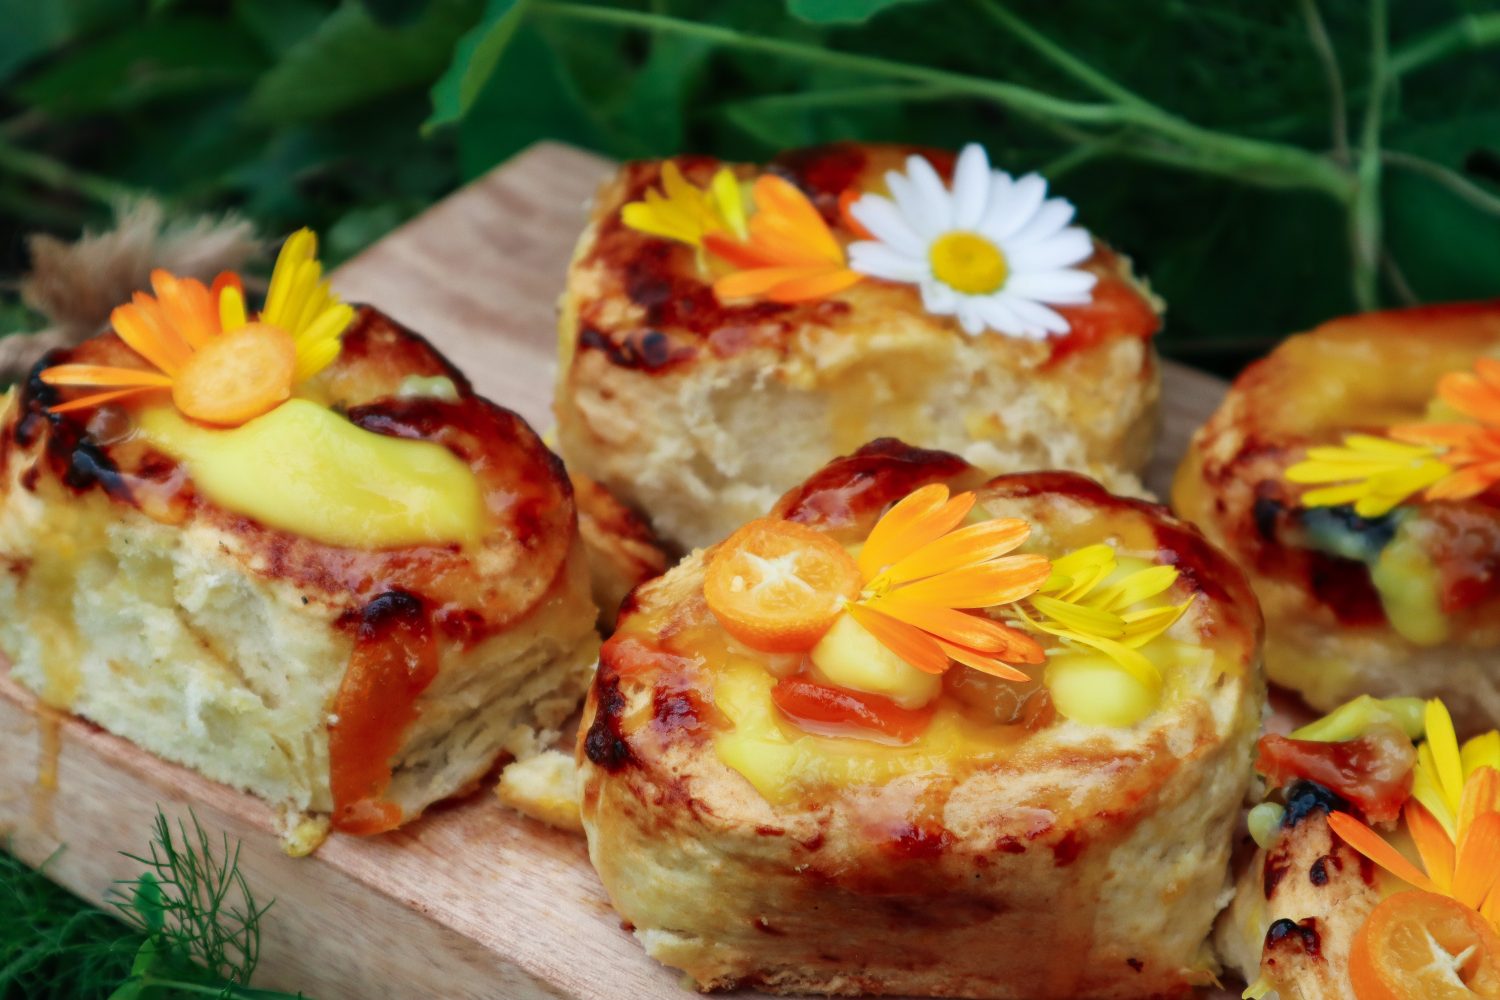
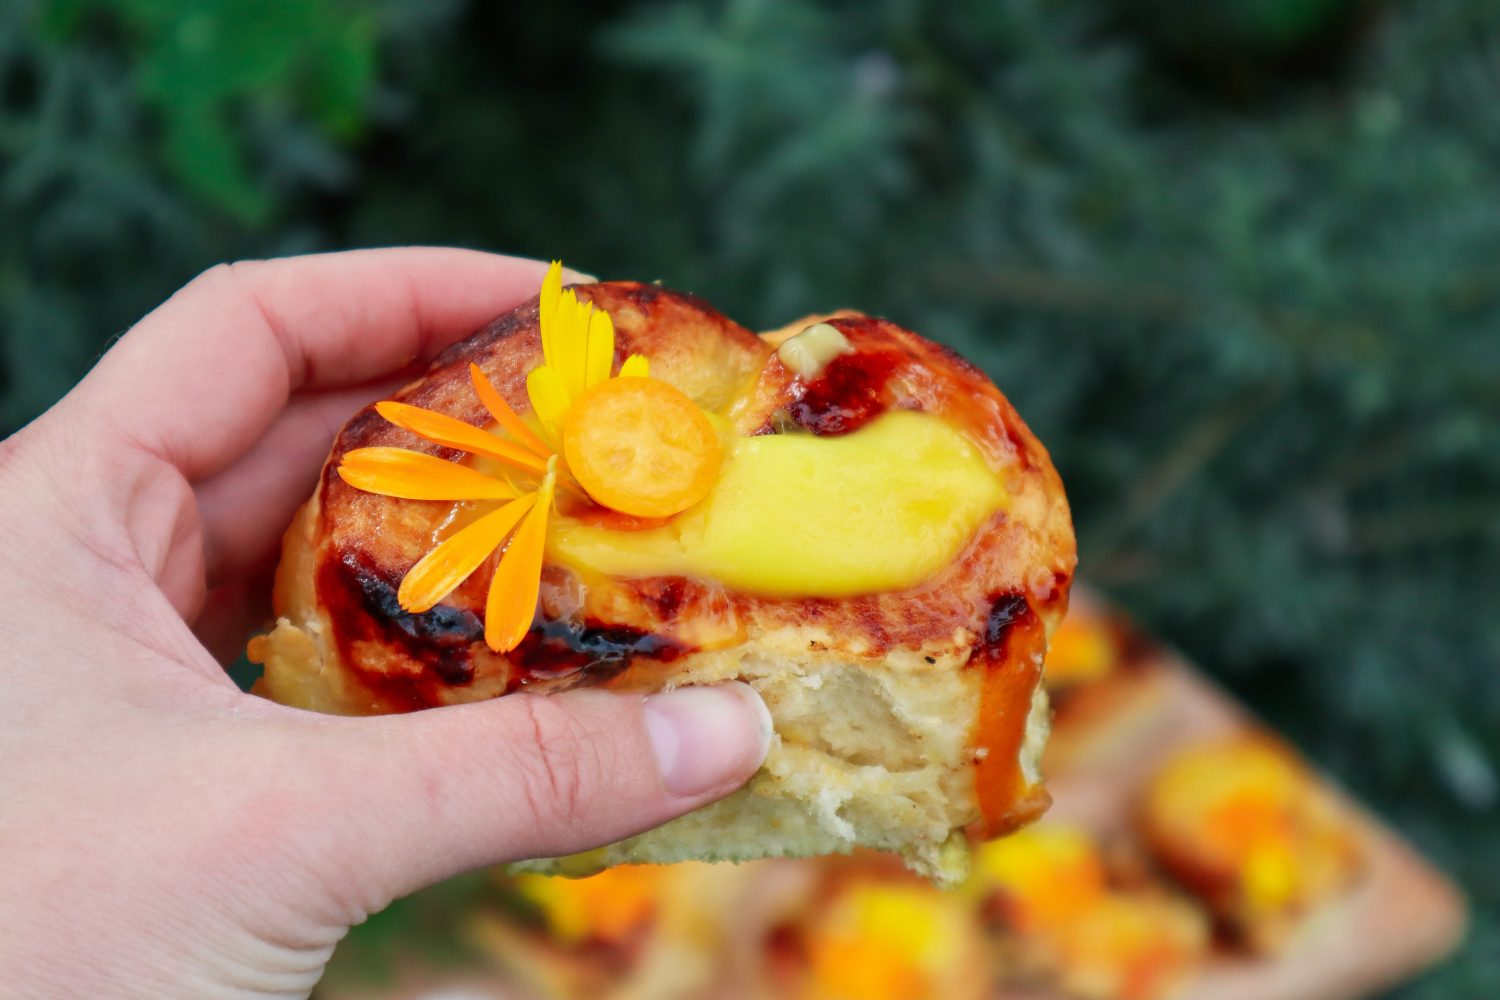
Kumquats are a unique grape-sized citrus fruit with edible skins and a sweet-tart flavor that works beautifully in jams and marmalades. Unlike many other citrus fruits, kumquats can be eaten whole, which means their zest, juice, and skin all contribute to flavour-packed, easy-to-make preserves. This homemade kumquat jam is vibrant, tangy, and great for using in other recipes like my delicious Kumquat Jam and custard scrolls! (a must try)
Another bonus? You don’t need to buy pectin. Kumquat seeds contain natural pectin, which helps the jam set, so this is a great way to make a more natural jam using what you already have.
Simple Ingredients for Homemade Kumquat Jam
4 cups chopped kumquats (seeds reserved)
5 cups water
1½ cups sugar
½ lemon (juice)
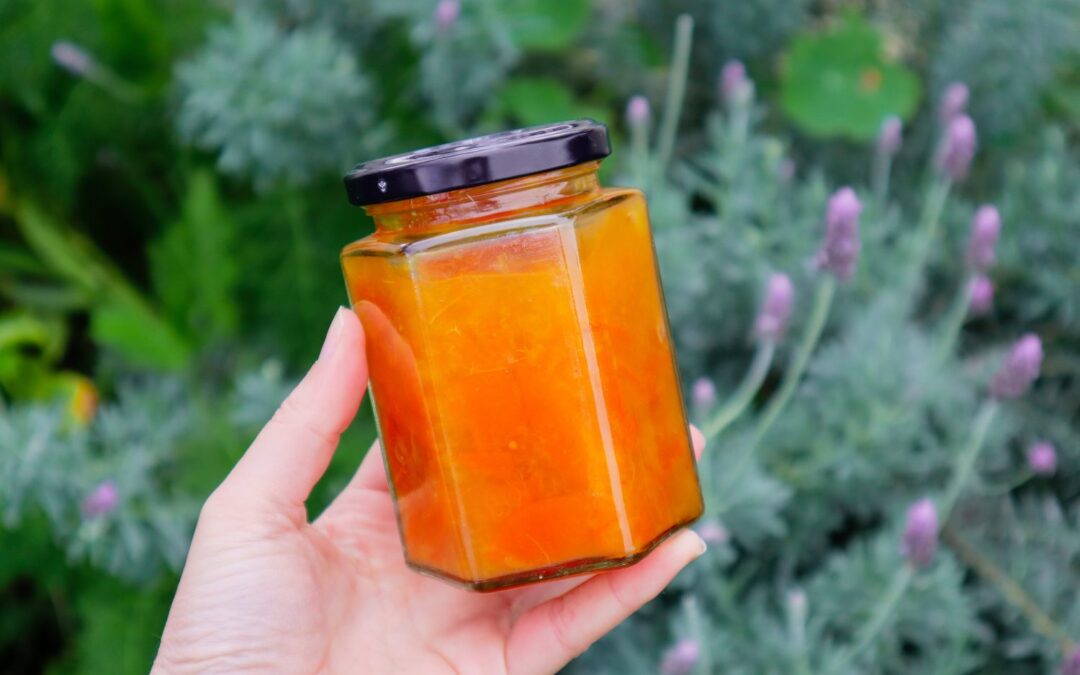
Kumquat Jam
Yield: 3 jars
Prep Time: 4 hours30 minutes
Cook Time: 10 minutes
Additional Time: 15 minutes
Total Time: 4 hours55 minutes
Kumquat jam is a great way to use and preserve your harvests. Add this jam to pikelets or baking for a delicious citrus flavour.
Ingredients
4 cups chopped Kumquats
5 cups of water
1 1/2 cups sugar
1/2 lemon
Instructions
Wash and chop your Kumquats and keep the seeds as you will need them to use as natural pectin.
Place the Kumquats and water in a pot.
Get all your seeds and make a little bag from cheesecloth or in a strainer. You want the seeds to be submerged in the water but not dispersed throughout as you will be discarding them later. Let the seeds and kumquats sit in the water for 4hrs to release the natural pectin. Remove the seeds and discard.
Place a saucer or plate in the freezer to test your jam out at the end.
Bring the pot to a simmer for 30mins. Add in the sugar and stir. Bring the pot to boil for 5min.
Test your jam by putting droplets onto your frozen plate. They should thicken as you run the end of a spoon through the droplet to check. If it doesn't look like it is set add some fresh lemon juice, reheat, and stir. Test again. I repeated this a couple of times and it started to look set.
Spoon hot mixture into hot jars (heat mine in the oven to sterilise 120 degrees for 15 mins and the lids in a bowl of boiling water).
Turn the jars upside down to cool and help the lids seal.
Refrigerate and enjoy.
How to Make Kumquat Jam (Step-by-Step)
1. Prep Your Kumquats
Wash your kumquats thoroughly. Chop them up and be sure to collect the seeds as you go. You’ll need the seeds later to extract the natural pectin that helps the jam thicken.
2. Create a Pectin Bag
Place the chopped kumquats and water into a large pot. Take your reserved seeds and place them into a small cheesecloth bag or a metal strainer. This step is important—you want the seeds to soak in the water but not disperse throughout the jam, as you’ll be removing them later.
Let the pot sit for around 4 hours at room temperature. This resting time allows the seeds to release their pectin into the water naturally.
3. Remove Seeds & Begin Cooking
After 4 hours, remove and discard the seeds. Place a small saucer or plate in your freezer (this will help you test if the jam is set later).
Bring your pot of kumquats and water to a simmer and cook for 30 minutes. Then stir in the sugar and bring the mixture to a rolling boil for 5 minutes.
4. Test for Set
Remove your plate from the freezer and spoon a few drops of the jam onto the cold surface. Wait a few seconds, then run the edge of a spoon through it. If the jam wrinkles or holds its shape, it’s ready. If not, add the juice of ½ a lemon, stir, and boil for another minute or two. Repeat the test until the jam is set.
5. Jar Your Jam
Sterilise your jars ahead of time by placing them in a 120°C (250°F) oven for 15 minutes. Soak the lids in boiling water. Once your jam is ready, spoon the hot mixture into the hot jars and seal them while hot. I like to turn my jars upside down as they cool to help them seal.
How to Store Your Kumquat Jam
Once cooled, store your jam in the fridge. Properly sterilised and sealed jars can last several months in the fridge or a cool pantry. Opened jars should be used within a few weeks.
Delicious Ways to Use Kumquat Jam
Spread on toast or scones
Swirled into yogurt or porridge
As a glaze on roast vegetables or meats
Paired with cheese on a grazing board
Layered in cakes or desserts
Making your own jams/ preserves is a rewarding way to reduce waste, use seasonal fruit, and add something homemade and flavourful to your pantry. If you’re growing kumquats, give this small-batch kumquat jam recipe a try. You’ll love the sweet, tangy flavor and the satisfaction of creating a garden-to-table treat with your garden’s harvest.
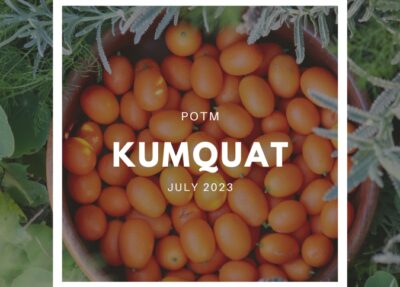
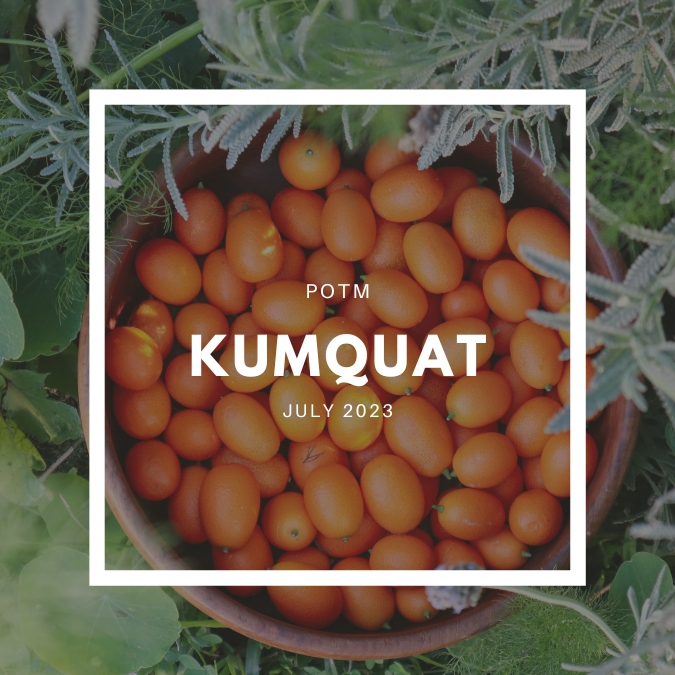
Learn how to grow Kumquat trees at home and what to make with your harvests with this ultimate guide! Kumquats (Citrus japonica and hybrids) or Cumquats are very ornamental citrus that produce masses of small fruit. Kumquats can be eaten straight from the tree, with the skin being edible too. They make beautiful, abundant additions to the garden, especially if you like jams and marmalades.
Kumquats are evergreen and provide dense bushy foliage, which makes them great for wind protection or screening.
Can be grown by seed but may differ from the parent plant.
Why Grow Kumquats at home?
Here are some of the many reasons to grow Kumquat
Hardy, low-maintenance fruit tree
Perennial
Ornamental and edible
Prolific producer
Dense busy shrub
Grows well in pots and containers
The whole fruit is edible
Great for making jams and preserves
Popular Kumquat Varieties
Nagami – Japanese variety with small oval-shaped fruit. Bright orange when ready. Sweet skin and tart flesh. 1-2 seeds in each fruit.
Meiwa – Larger round orange fruits. Sweet skin and flesh. A hybrid of Nagami and Marumi varieties.
Marumi – Round fruits that are quite sour or tart. Mainly used for preserving.
Variegated Kumquat – Stand out ornamental variegated leaves and fruit. Variegation disappears on fruit usually once ripe. Also known as Calamondin or Calamansi.
TOP TIPS TO GROW KUMQUAT
Choose a sunny location
Mulcharound the base (avoid touching the trunk)
Free-draining, slightly acidic soil
When to PlantKumquat
Ideally, plant your trees in Spring or Autumn. If you are growing in containers, protect new plants from extreme heat or cold.
How to GrowKumquat
Choose a sunny location with 6-8 hours of sunlight.
Dig a hole twice as big as the pot and loosen the roots if they are tightly bound.
Free-draining soil with compost.
Mulch to regulate temperatures and reduce weeds.
Give it a deep water.
Care/ Maintenance
Feeding
Feed with compost or liquid fertilisers in late winter after fruiting.
Watering
Deep water especially in summer.
Pruning
Prune after fruiting for shape. This can make it denser and bushier. Always check and remove growth below the graft.
The great thing about growing Kumquats is that they can last a long time ripe on the tree. This makes them really beautiful and ornamental and gives you time to preserve the fruit in batches. The fruit is ready when it is rich in colour. It can be a good idea to harvest using scissors or snips as the branches are thin and can rip or break if you pull the fruit off.
Reproducing
Kumquats often have 1-2 seeds inside. These can be grown, but results can vary but why not give it a try! Most citrus are grafted onto rootstock for disease resistance.
Cooking and Using
Kumquats fruit prolifically, so it’s a good idea to have a few recipes on hand. The great thing is that you don’t need to peel them as the skin is edible too!
Kumquats can be made into jams, chutney, marmalade, and relish. They can also be preserved whole in salt or liquor. Dehydrating slices is another easy way to preserve the harvest.
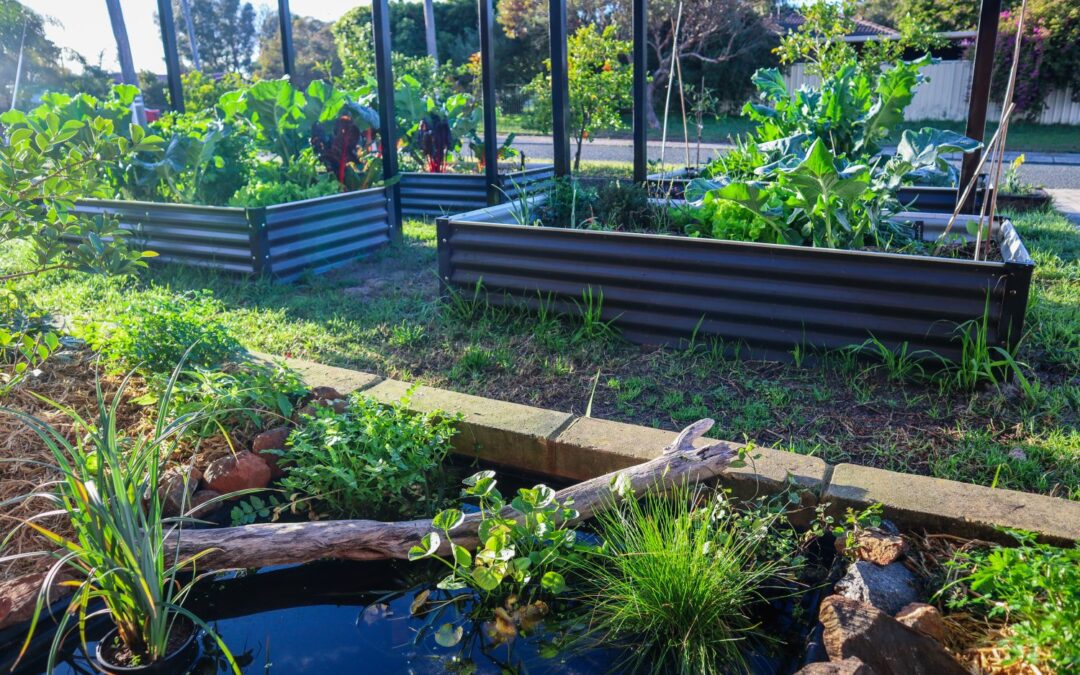
Wildlife and beneficial insects are key to creating a sustainable self-sufficient garden. They help form part of a balanced ecosystem and creating a small wildlife pond in the garden is an incredible way to attract them. Wildlife ponds can be a transformative addition to any garden or outdoor space, offering many amazing benefits including beauty, tranquility, and increased pollination. Whether you have a sprawling backyard or a compact urban garden, a small DIY wildlife pond has the potential to create a thriving ecosystem, attract beneficial insects, and help your gardens grow an abundance of food.
Today I’m going to share the process of creating my own DIY wildlife pond including choosing a location, pond plants, and why I have chosen native Australian fish for the pond.
One of the key advantages of having a wildlife pond is the ability to attract beneficial insects. Many of these insects, such as ladybugs, lacewings, and hoverflies, are natural predators of garden pests. By providing them with a water source and a suitable habitat, you can encourage their presence and create a natural pest control system within your garden. No need for harmful chemical pesticides making your garden healthy, thriving, and sustainable.
Click to WATCH the transformation or continue reading below
Planning Your Wildlife Pond
1. Choose a location for your wildlife pond
The first step in creating your small wildlife pond is to find suitable location options. Look for an area that is relatively level and away from large trees or shrubs whose roots may interfere with excavation or cause water quality issues. Consider the overall layout of your garden and how the pond will fit into the existing landscape. Keep in mind that a wildlife pond can range in size from a small, shallow pond to a larger, more expansive water feature, so choose a location that suits the space you have available.
Important things to consider when choosing the location for your wildlife pond:
Sunlight – most pond plants will need 6-7 hours of sunlight per day. This is more important in spring and summer than in winter as many pond plants will slow or die down over winter anyway.
Shade – Shade is also important, especially during the hottest part of the day. Shade will help keep the pond cool, especially in summer and reduce the algae. Adding plants will help shade out the pond.
Water source – Having a water source or hose available nearby is important especially in summer if the pond water gets low or too hot.
Safety and access – Pets or young children – depending on the size of your pond you will want to consider access if you have young children or pets (my water-loving dog would jump in immediately!). It would be worth checking out your local council’s requirements for ponds.
Close proximity to gardens – If you are wanting to attract wildlife to your gardens to help with pollination and pest management then it would be a good idea to have it close to your veggie patch or gardens. Existing gardens will also create wildlife corridors for safe access to and from the pond.
My pond location:
Front garden away from my water-loving dog
In an existing garden bed for a wildlife corridor
Outside my office window to enjoy the aesthetics and tranquility
The size and design of your wildlife pond could be determined by the space available or the structure you choose to use. Whether that is a prefabricated pond, pot or barrel pond, or full DIY pond with a pond liner.
I sourced a preformed poly pond that was roughly 1m x1m and 30cm deep. There is a huge range of preformed ponds available to fit a range of spaces. Baths, tubs, and tanks also make great DIY pond structures.
3. Filling and Balancing the Pond
Having a water source nearby is important to be able to top up or cool the pool down during the warmer months. Rainwater would be ideal to fill your pond but if like me, you only have access to mains or system water you will need to do a few extra steps to balance and remove the chlorine.
To condition the water you can either leave it to sit and gas off for 2-3 weeks or you can speed up the process by running an aeration pond pump in the water. The other way to condition the water is to purchase some water conditioning treatment. This is what I did and I also waited two weeks before adding in fish just to be sure and to allow natural bacteria to build up. I also added “splosht” which are small dissolving sachets of good bacteria to help keep the pond clean. The ones I used are made here in Western Australia so it is native bacteria. Speak to your local pond shop to see what will work best for your pond.
4. Introducing Plants to the Pond
Selecting plants for your pond is an exciting time! Firstly, it is important to determine what types of wildlife you would most like to attract to your pond. This will help you select plants to suit and reduce some of the overwhelm.
Frogs like lily pad like leaves and grasses or reeds to hide in.
Small birds like nectar-producing flowers and dense shrubs to hide in.
Ladybugs and beneficial insects like pollen-rich flowers such as herb flowers
Lizards like low-lying dense ground covers to easily hide in
Native wildlife often are attracted to native plants and flowers
Another thing to consider is whether you would like them to all be edible or a mix of both. I chose to plant edibles, natives, and herbs. A wide range of leaf types and plant heights/structures will help encourage a wider array of wildlife to your pond.
There are 4 main types of plants you may like to select for your pond:
Full Aquatic Plants: These grow completely submerged underwater such as Water lilies, and Vallis grass. They are great for deeper parts of the pond and can help oxygenate the water.
Filtration plants: These help keep the water clean and act as natural filtration. These are plants such as: Lebanese Cress, Water Mints, Gotu Kola, Pennywort, Watercress, Kang Kong. Most of these plants like to be partially submerged. I have mine propped up on bricks with 1 inch out of the water.
Marginal Plants: These are plants that can be planted around the edge of the pond or in shallow water. These are plants like: Fairy Lights, Blue Grass, Reeds, Bull Rush, Taro, Water Chestnuts, Mint, Queensland Arrowroot, Iris, Lebanese Cress, Watercress, Thalia, Papyrus, Society Garlic, Sweet Violet, and Moneywort.
Floating cover plants: These plants multiply quickly and cover the surface of the water. This can help regulate the pond temperature and shade out the pond. This can reduce algae and also offer food to many fish. Plants such as: Duckweed, Azolla, Frogbit and Hornwort.
Check out the video for a full tour of the plants I selected for this project.
5. Adding Natural Elements
Natural elements such as logs, rocks, and sticks offer surfaces for wildlife to rest on, cross over or hide under. It is important to make easy access in and out of the water. This will allow frogs, lizards, and bees the ability to get in and out. Shallow areas, ledges, ramps, and varying heights around the edge of the pond will help with this. It will also help your pond blend in and look more natural and integrated within the garden.
6. Adding Fish to the Pond
Adding fish to your pond can help with filtration and keep mosquito larvae in check. Understanding what type of wildlife you would ideally like to attract to your wildlife pond can help determine the type of fish for your pond. I am hoping to get frogs in my pond and many introduced fish such as goldfish or Koi may eat frogs’ eggs. This can be ok in a large pond with more space for frogs to hide and lay eggs. As I have a small pond and would like to encourage frogs, I have decided to go with West Australian Perch and White Cloud minnows that eat mosquito larvae but not the frogs eggs. They are also low maintenance and can handle ponds without pumps.
After purchasing the fish from the pond store, I let the bags sit in the pond water for 5 minutes to let the water in the bag adjust to the pond temperature. I then gently opened the bag and let the fish out. The Minnows dart about on the surface often but the Perch love to hide and I never see them! So that is something to consider.
7. Maintaining Your Wildlife Pond
It is important to regularly check on the pond, especially during the first year as things grow and temperatures change. Observing will allow you to see what types of wildlife are using the pond and what changes or additions you could make. Adding a small pump or water fountain will also help keep the pond cool and reduce algae. I do plan to add a solar pump and fountain eventually.
Scoop out dead leaves or excess algae
Top up water in summer if needed
Regular top-ups of “Splosht” good bacteria or similar
I decided to add solar lights to the pond as it is outside my office window and is nice to view during the evenings when I’m working late. I selected floating solar lights and also spotlights to point at feature plants. The fun thing about these lights is that I can change the colours and turn them on and off via a remote. The floating lights also offer more protection for the fish whilst the plants are established.
Just like the rest of your gardens your pond will change and develop over the seasons and the years. It will require some tweaking and editing as you go to find a good balance. There are so many amazing reasons to create a wildlife pond for your gardens.
By creating a wildlife pond, you are not only providing a habitat for a variety of natural life but also fostering diversity in your surroundings. These ponds act as sanctuaries for a wide array of wildlife, including frogs, lizards, birds, dragonflies, and beneficial insects such as bees and butterflies. These creatures play essential roles in pollination, pest control, and maintaining a balanced ecosystem.
Links included in this description might be affiliate links. If you purchase a product or service with the links that I provide I may receive a small commission. There is no additional charge to you! Thank you for supporting my blog so that I can continue to provide you with free content.
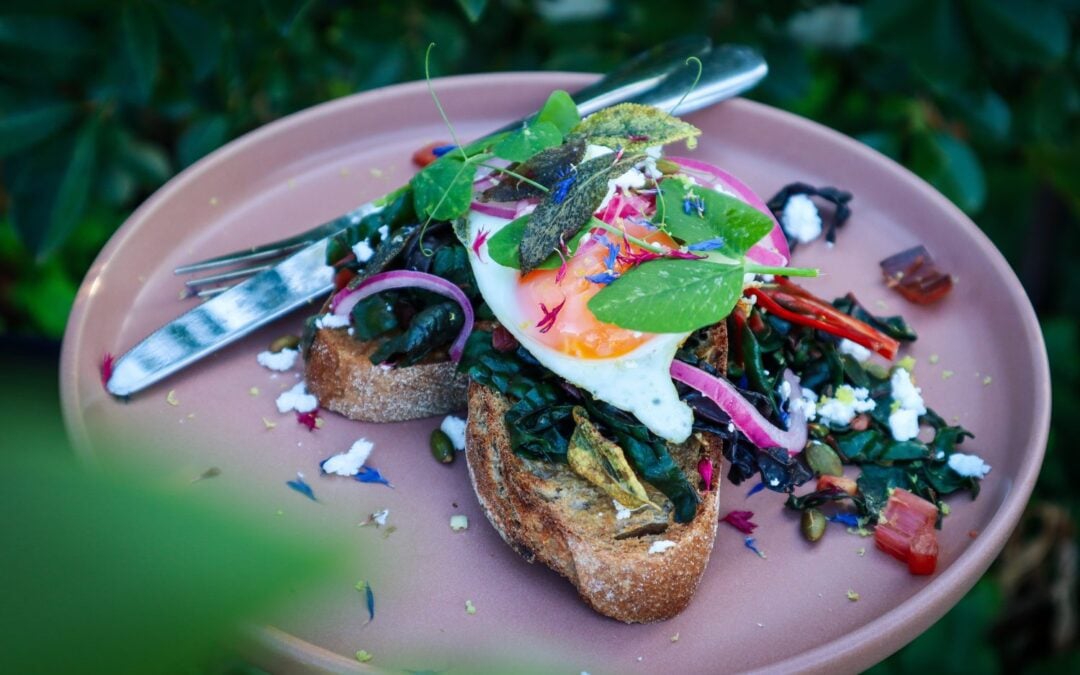
Sautéed Rainbow Chard is a quick and easy way to prepare a nutritious side of greens. This recipe is fresh, vibrant and so so delicious! Infused with garlic, lemon zest and topped with Crispy Sage and pickled onions this is the Ultimate garden-to-plate breakfast (lunch or dinner!). The pickled onions are best to make at least the day before so they have time to infuse and pickle.
Sautéed Rainbow Chard on Toast with Feta and Crispy Sage
Yield: serves 2
Prep Time: 20 minutes
Cook Time: 10 minutes
Total Time: 30 minutes
Fresh, nutritious and full of flavour, this garden-to-plate breakfast is easy and delicious! Make the most of the Rainbow Chard season.
Peel and finely slice garlic. Add to a pan on medium heat with butter. Cook for 2 mins.
Roughly slice Rainbow chard stalks (1cm chunks) and add them to the pan. Cook for a further 2 minutes.
Chop leaves and keep to the side.
In another pan fry the eggs to your liking.
Add chard leaves to the garlic and stalks and cook for 1-2 mins until wilted. Stir through Lemon zest and season with salt.
Turn the oven grill on to 180 degrees. Drizzle Sage with olive oil or butter and place on an oven tray along with Pepitas. Toast under the grill until slightly golden watching carefully as this will take less than 1 minute. Alternatively, this can be done in the pan along side eggs.
Toast sourdough and butter.
Place two pieces of toast on each plate and evenly distribute rainbow chard mix, crumble on feta, top with eggs, sprinkle on toasted pepitas, and top with Red Pickled Onions.
Add edible flowers for colour - I used Cornflowers and pea shoots.
Notes
The pickled onions are best to make at least the day before so they have time to infuse and pickle.
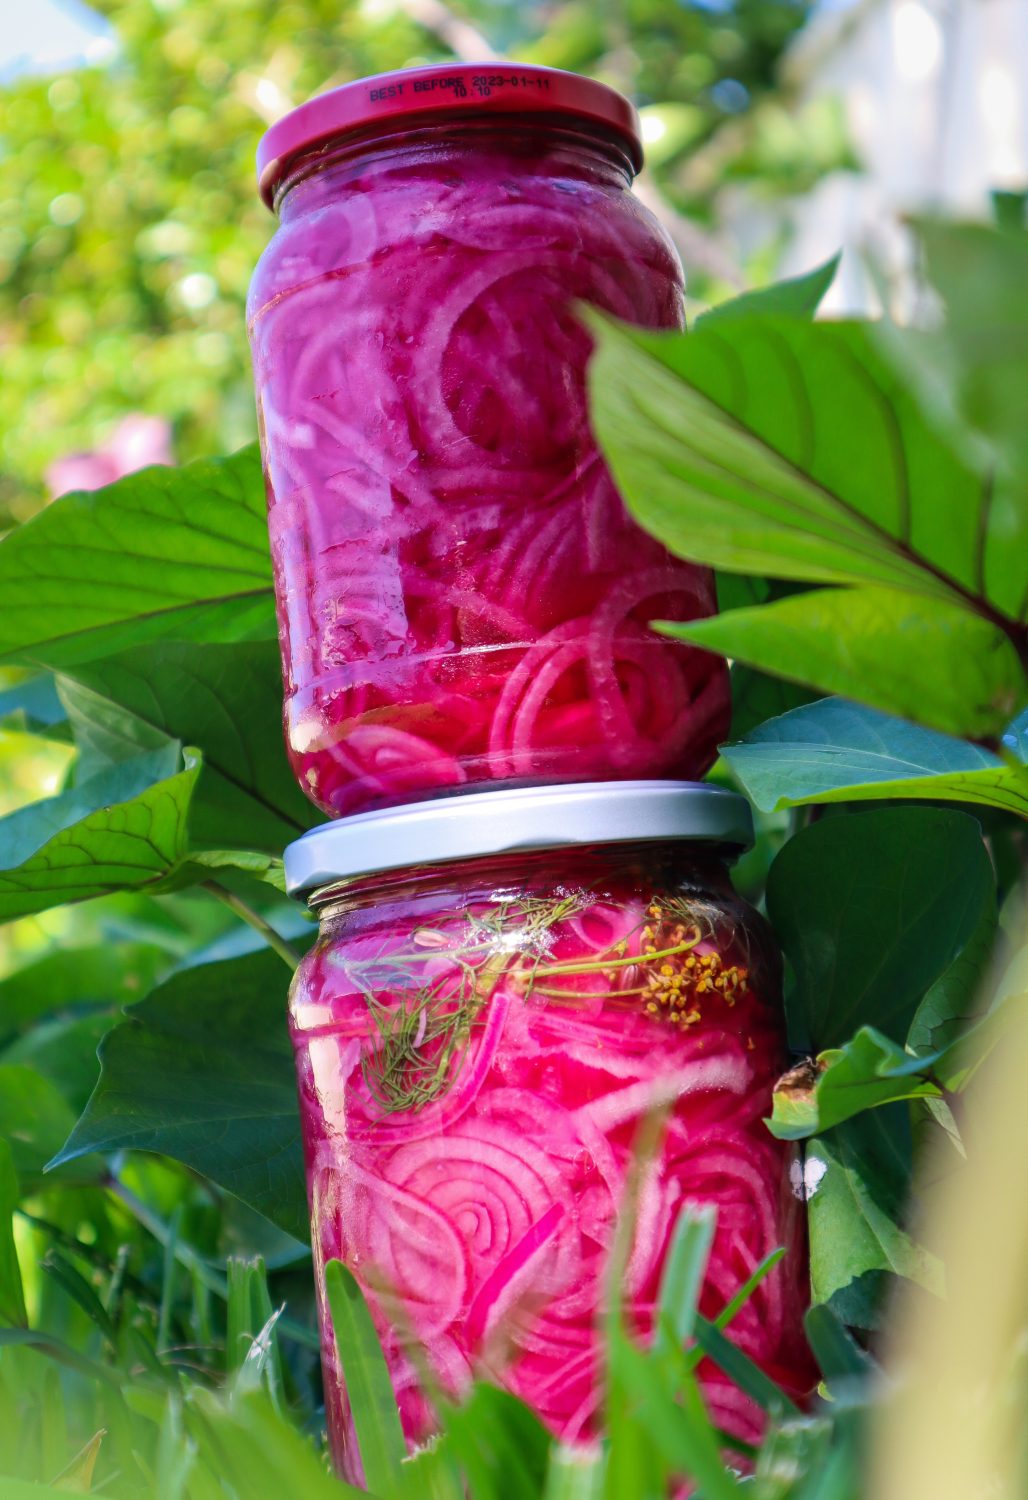
Simple Pickled Red Onions
Prep Time: 10 minutes
Cook Time: 2 minutes
Total Time: 12 minutes
Quick and easy pickled red onions add flavour to any meal. Add your seasonal garden herbs such as Fennel, Dill or Chilli to boost the flavours.
Ingredients
3 Red Onions
1/4 cup Apple Cider Vinegar
1/4 cup White Vinegar
1 1/2 TBSP Raw Sugar*
1 1/2 tsp Salt
1 cup Water
1/2 tsp Chilli flakes (optional)
Instructions
Finely slice the red onions - using a mandoline is the easiest option.
Cram as many red Onions into a clean sterilised jar.
In a saucepan add the vinegar, sugar, and salt and stir until the sugar has dissolved and the mix starts to simmer.
Add any extra flavours to the jar such as chilli, fennel flowers, fennel fronds, fennel seeds, mustard seeds, or peppercorns ( 1tsp per jar).
Pour over the liquid and secure the lid.
Allow cooling for one hour and place in the fridge.
Notes
To sterlise the jars place in a hot dishwasher run or wash and heat in the oven for 10-15 minutes at 110 degrees Celsius.
You can swap and use just one type of vinegar if you prefer.
Learn how to grow Sage with this Garden-to-Plate Guide and preserve this staple herb. Sage (Salvia officinalis) is a hardy perennial herb found in many home gardens. Sage is known for its soft fleshy leaves and has a long history in plant medicine. Sage is a great addition to your kitchen garden due to its culinary flavour-enhancing qualities along with a long list of medicinal values.
Sage also produces beautiful flowers and is a great pollinator-friendly plant.
Full sun – part shade. Doesn’t like wet soggy ground.
CARE
Prune if it gets too woody to promote new growth.
FERTILISE
Feed with compost and keep well mulched.
PESTS
Aphids, snails, spider mites.
HARVEST
Harvest as needed, early morning or evening.
REGROW
Seed, cuttings and splitting the clump.
Why Grow Sage?
Here are some of the many reasons to grow Sage
Hardy, low-maintenance herb
Perennial
Ornamental and edible
Flavour-enhancing culinary herb
Low-lying food forest layer
Pollinator-friendly
Can have Antimicrobial qualities
Can have Antiseptic qualities
Can have Anti-inflammatory qualities
Popular Sage Varieties
Sage is part of a huge Salvia family, but for this grow guide, we are just focusing on the common Sage – Salvia officinalis
Common – Silvery grey, slim leaves. Bright purple flowers.
Variegated – Striking gold and green variegated leaves. Adds a beautiful contrast to the garden.
Purple – Dark green and purple leaves, this variety can get a bit lost in the shadows. Beautiful colour and has great flavour.
Tri-coloured – Stand-out colour and patterns with green, silver, white, and purple/pink tones.
White-edged – Stunning white and silver variegated leaves.
Berggarten –Broad, silvery green leaf popular for culinary uses. Does not flower often. Compact shrub.
QUICK TIPS ON HOW TO GROW SAGE
Choose a sunny location
Mulch
Prune in spring to encourage new growth
Avoid wet or boggy situations
Take cuttings to repopulate easily
When to Plant
Ideally, plant your Sage in Spring, although you should be able to plant seedlings throughout the year. Protect young plants in the heat of summer and allow plenty of sun over winter.
Top Tips on How to Grow Sage
Plant sage seedlings in a warm sunny position. If you live in a wet or humid climate, it can be a good idea to grow sage in pots and containers. This allows you to move it about to reduce the time it stays wet.
Dig a hole twice as big as the pot and loosen the roots if they are tightly bound.
Mulch to regulate temperatures and reduce weeds. Give it a water.
Sage grows quite slowly from seed. Plant in spring.
How to Care and Maintain Sage
Feeding
Sage is quite low maintenance but can benefit from compost tea or worm tea in Spring and Autumn.
Watering
Sage doesn’t like wet feet. If you live in a wet climate, it can be a good idea to plant on mounds so excess water can run off.
Pruning
Once Sage has finished flowering, it can be a good time to prune back the flower stems and older growth.
Pests / Disease
Caterpillars, snails, aphids and slaters can eat your Sage plants, especially when they are young or in Spring with new growth. Check out Natural pest management for more tips.
How and When to Harvest Sage
The great thing about growing Sage is that you can harvest small amounts throughout the year. Pick individual leaves or shoots as needed. Sage can also be harvested and dried to use throughout the year.
ReproducingSage
Sage does send off sideshoots that can be split off the main plant. This is the quickest and easiest way to reproduce sage from an established plant. Cuttings are the next best way. Choose stems with semi-hard wood and place them in a jar of water or moist soil to send off roots. Remove larger leaves and keep 2-3 at the top to reduce energy and moisture loss.
Ways to Cook and Use Sage
Sage is commonly used to add flavour to roast veggies but there are so many delicious ways to use Sage.
Sage can easily be dried to use throughout the year. Lay flat on a rack or hang upside down in a dry, dust-free area. Alternatively, dehydrate sage on low at 40 degrees Celsius.
IMPORTANT
Sage is best used in moderation. Avoid if pregnant and breastfeeding, as Sage has been known to reduce milk production. Seek guidance from medical professionals.