Edible Climbing Vines help maximise growing space and double the amount of food in each garden bed or container. One thing that I think is so underrated is the ability to grow food up 👆 This list of edible climbers to grow in your garden will help you utilise vertical space and create shade and protection. These 10 edible climbing vines are perennials,which means they will produce more and more food each year without us having to replant them! There are so many incredible reasons you should be growing food vertically. Not only to maximise space but also to increase airflow to reduce rot or disease, strategic shade, or like me, to reduce some of the heat in my garden by covering my ugly fences!
Annuals vs Perennials 🌿
Annuals will allow you to still change up your garden beds each season and have the flexibility of space. Whereas perennials (which grow for longer than 2 years) will allow you to get a crop established and provide long-term protection, and produce more and more food each year.
Click to watch for bonus Planting Tips 👇
10 Perennial Edible Climbing Vines
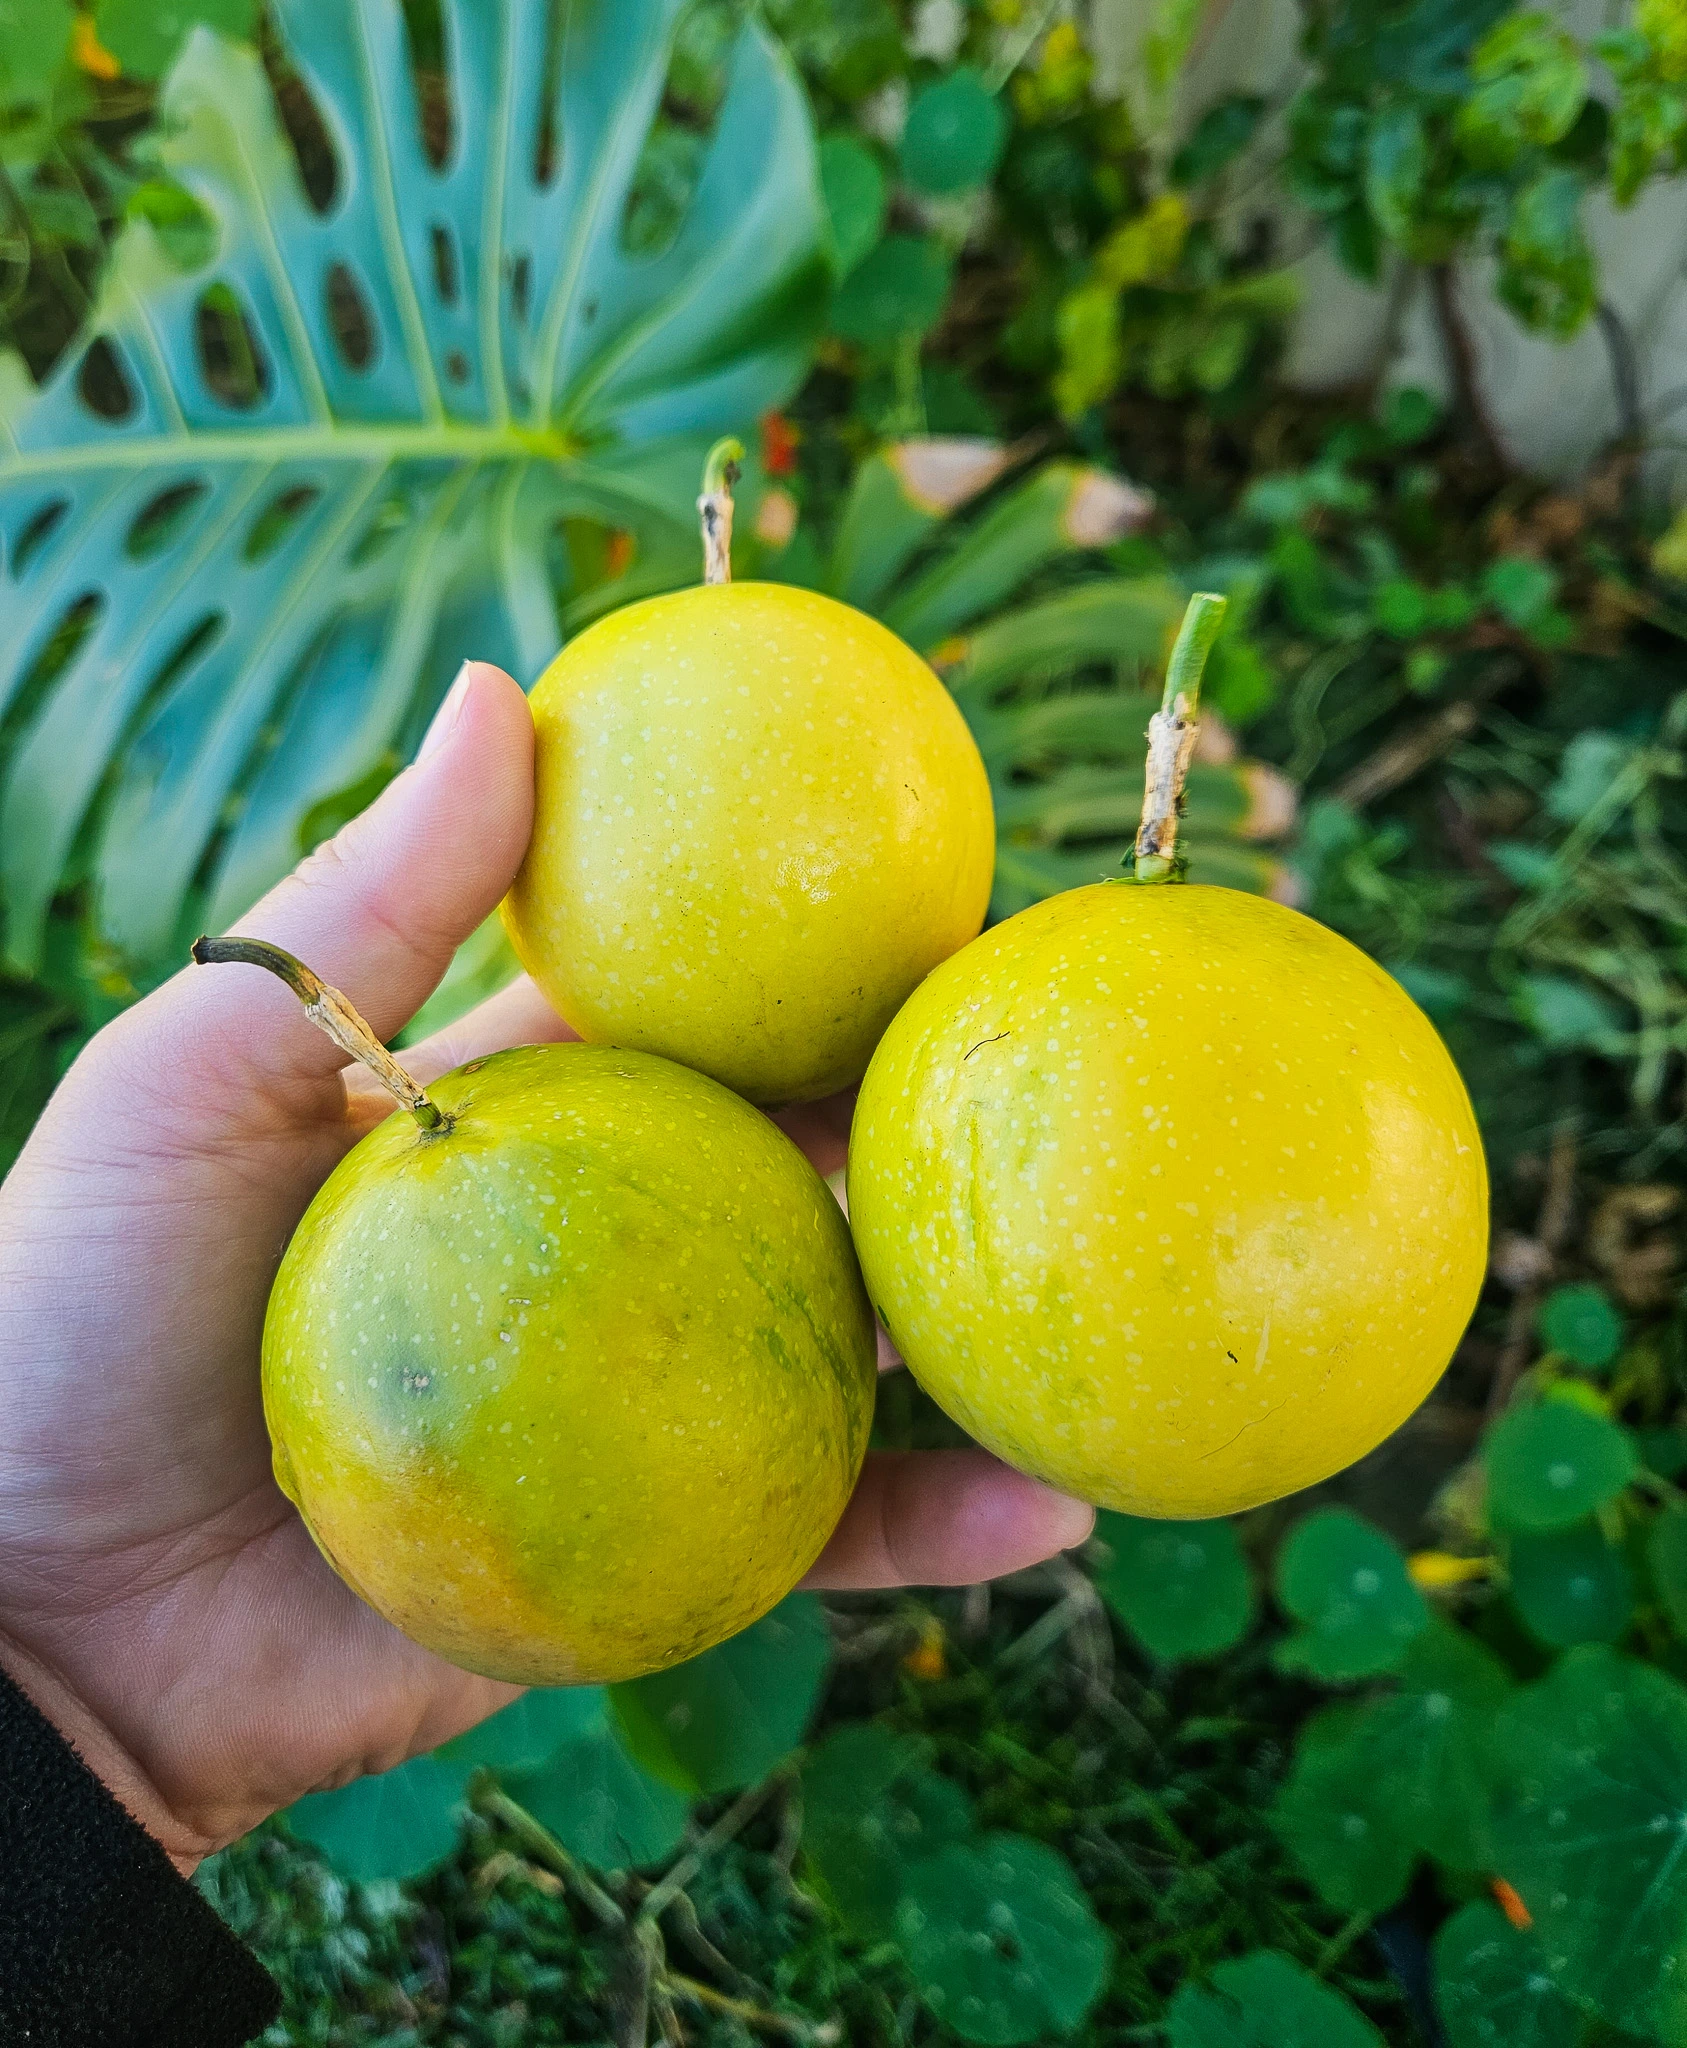
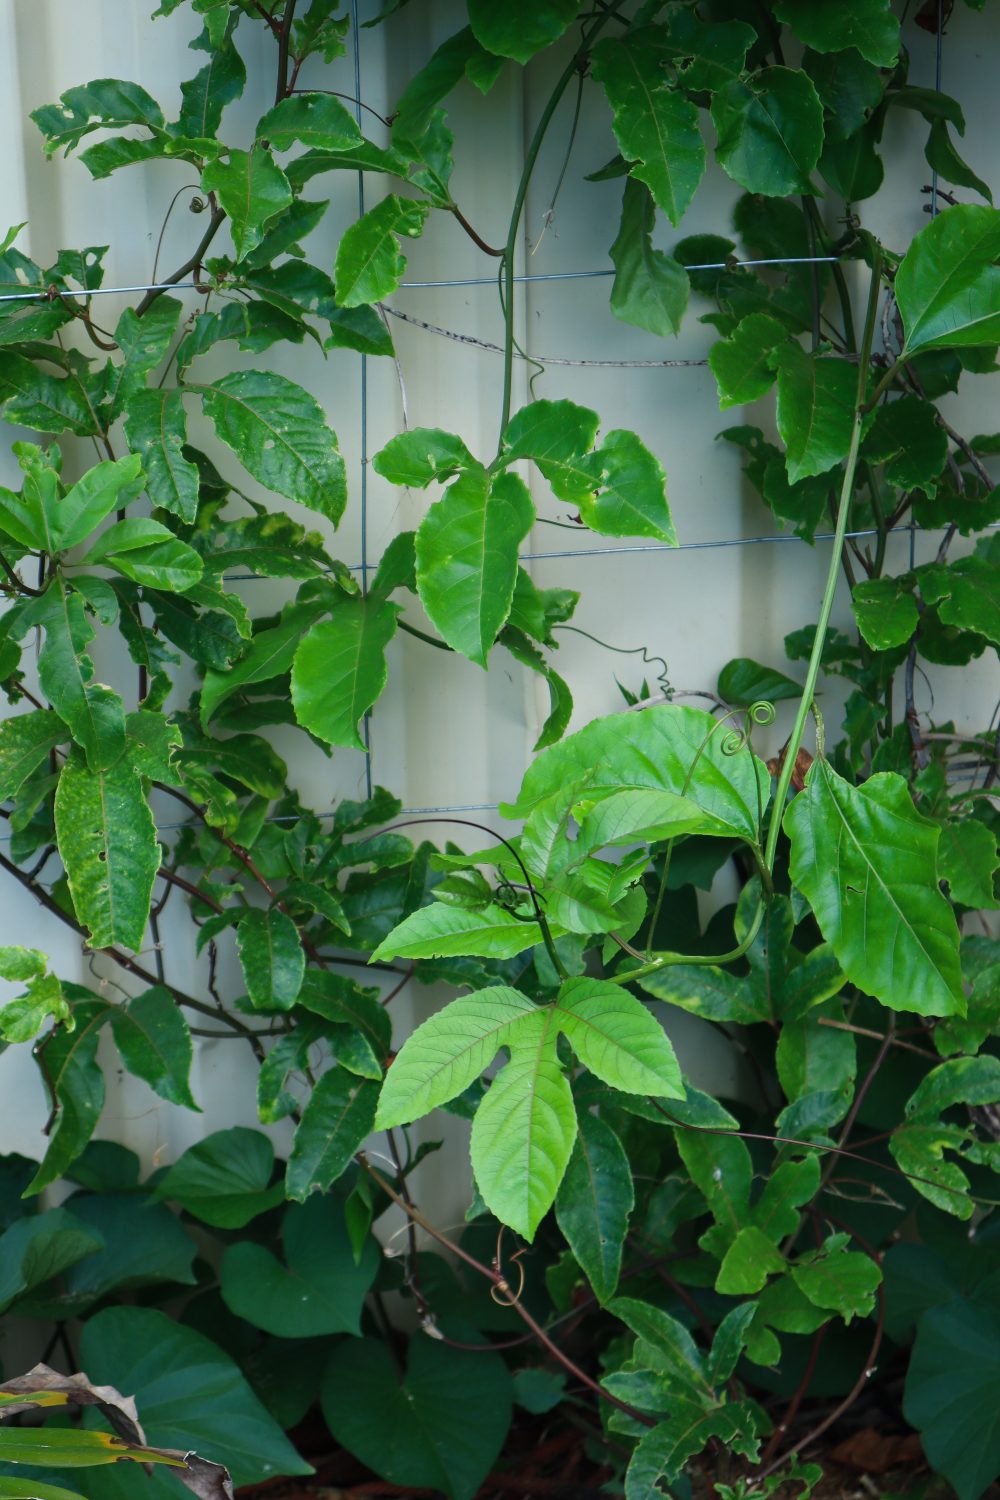
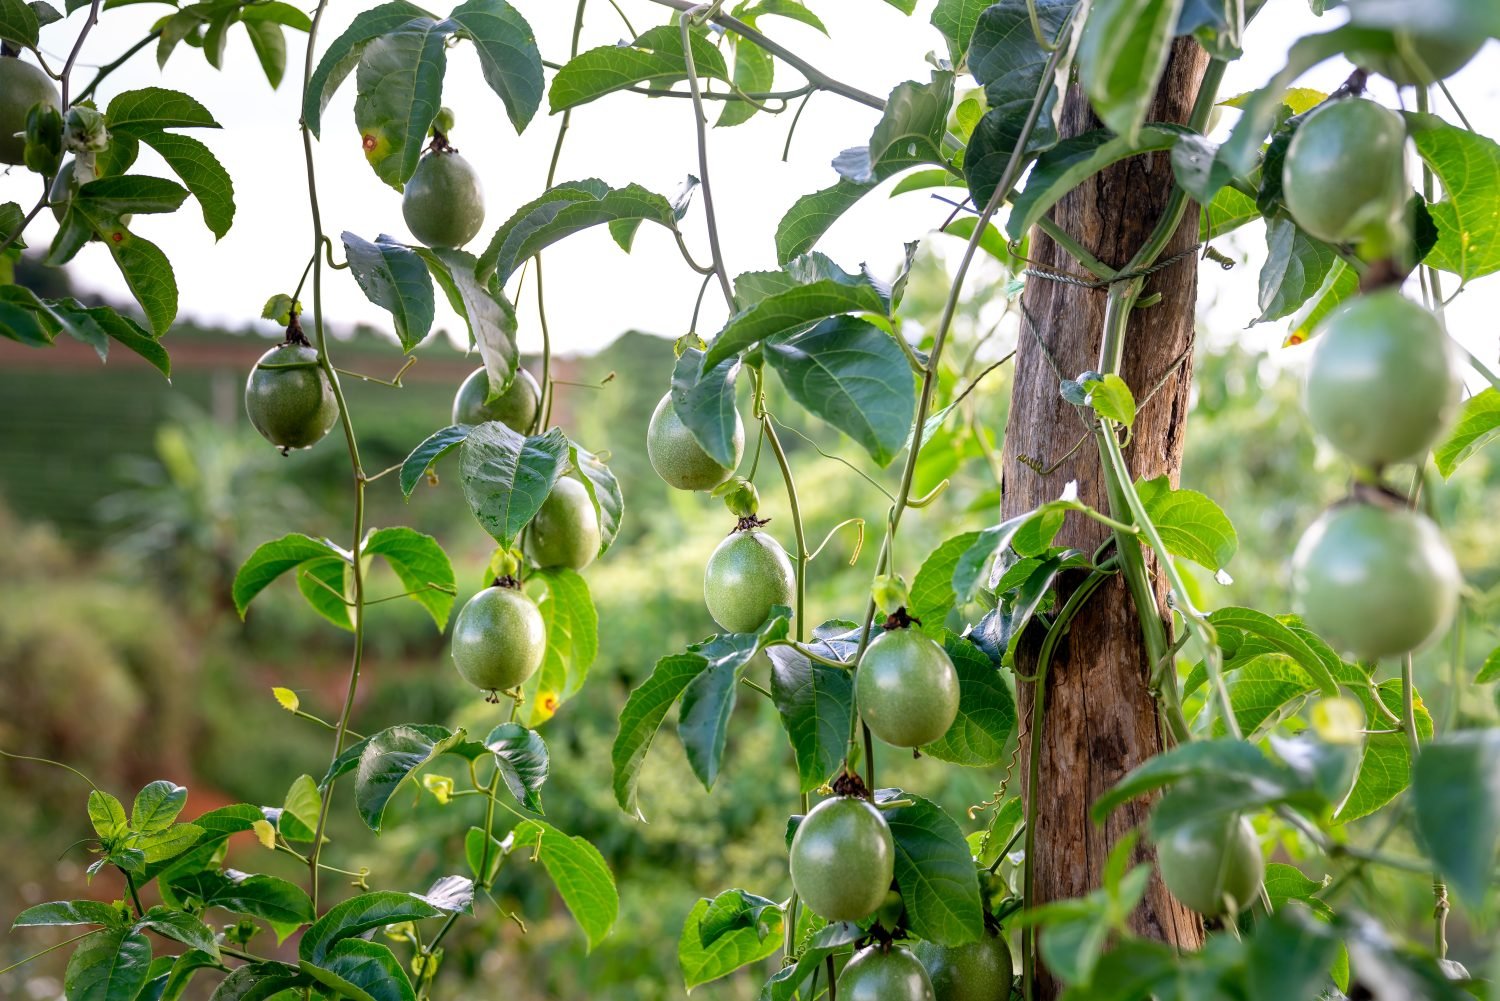
1. Passionfruit
Passionfruit is one of my favourite fruits to eat, and the main reason I am growing this edible climber in my garden. They are also evergreen, so it has leaves all year round to create shade and protection. Passionfruit have thick, lush leaves, so they work perfectly to cover fences or create screens to block out unsightly structures or areas. Watch the video above to see how to plant passionfruit from a store-bought fruit!
BONUS TIP: Purchase a passionfruit plant that is NOT grafted. Grafted passionfruit needs to be carefully maintained or the rootstock can quickly take over and become invasive with no fruit.
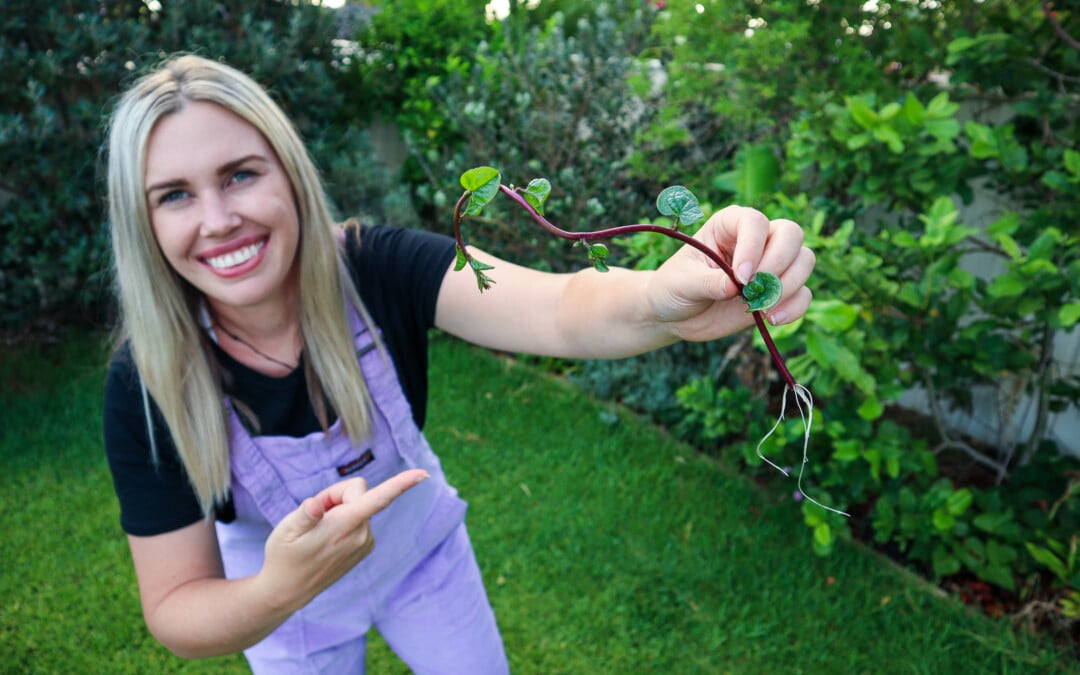
2. Choko /Chayote
Choko is a quick-growing, vining edible plant that can make great summer shade to protect your summer garden. They will often die back over winter but will pop up and regrow each spring. Any fruits left on the ground will also easily regrow. Choko are similar to a large zucchini or marrow and can be used as a substitute for potatoes or even apples to bulk up pie recipes.
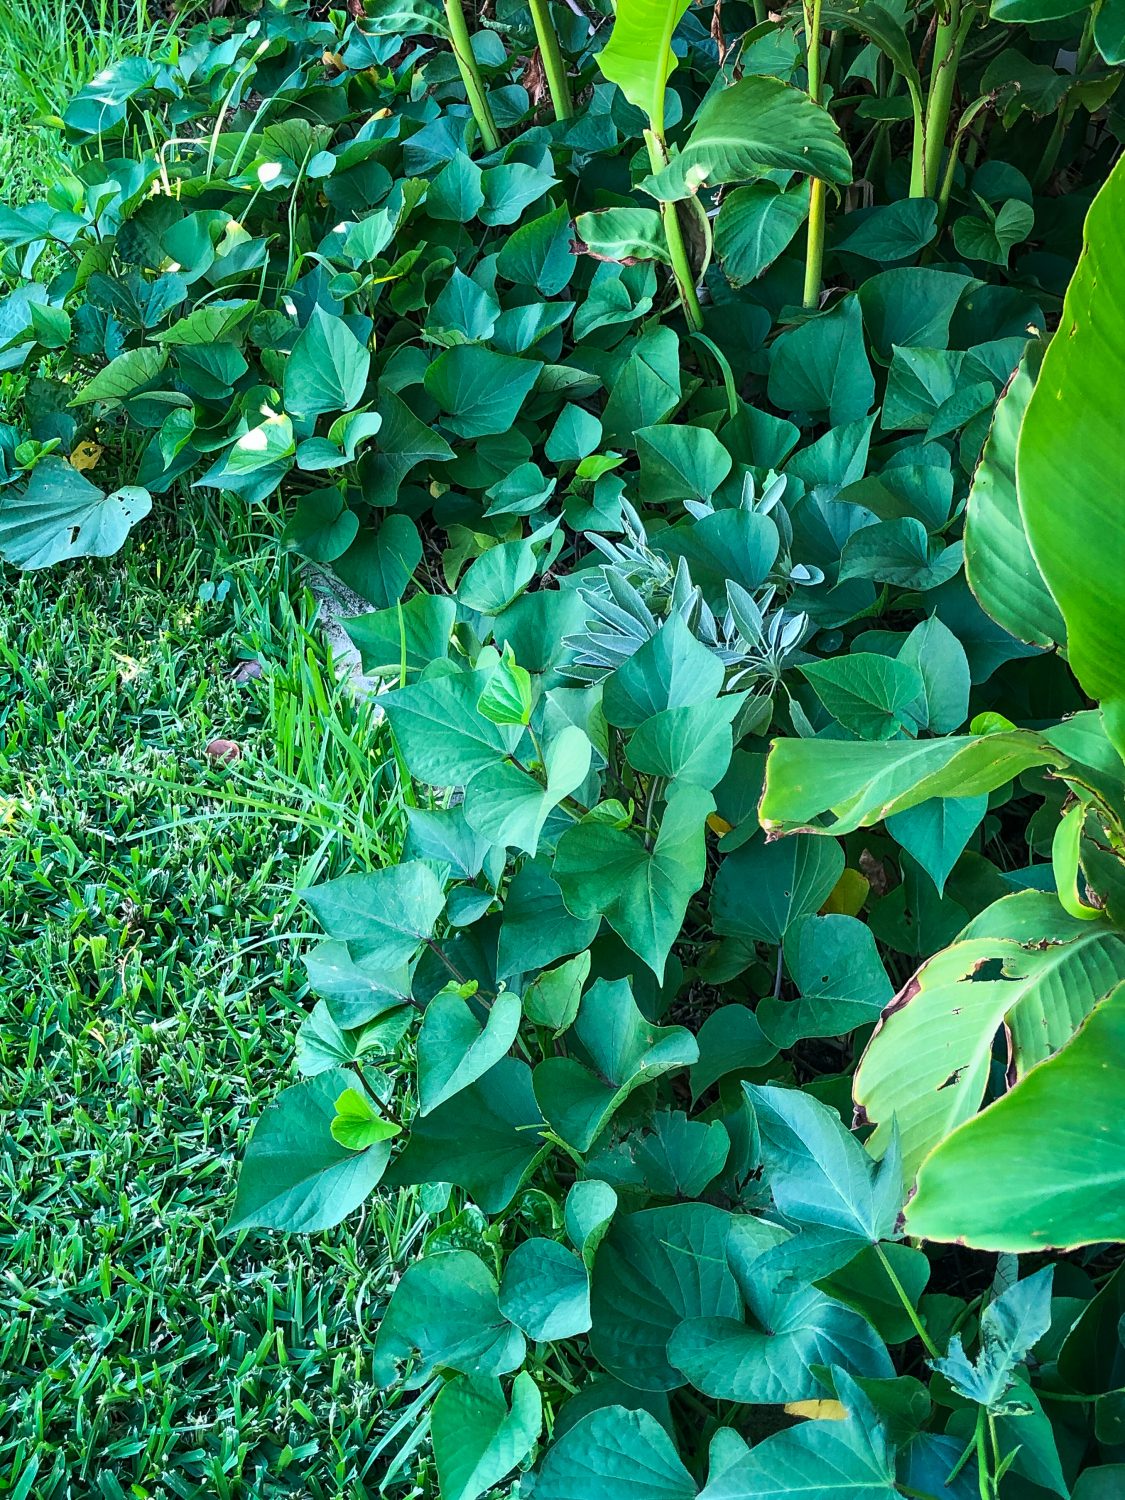
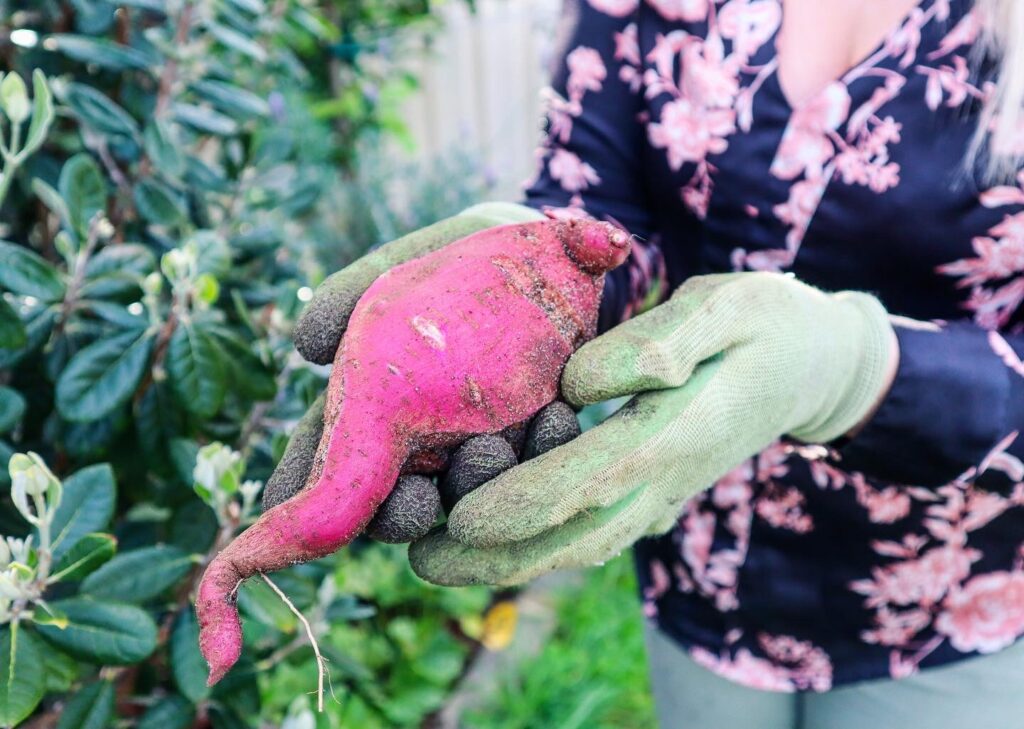
3. Sweet Potato
Growing Sweet Potatoes / Kūmara (Ipomoea batatas) in your home garden is a great step toward self-sufficiency. They are my favourite permaculture plants and are an easy crop to grow for beginner gardeners. It is important to grow plants that support and encourage other plants and beneficial insects in your garden. Creating a cohesive ecosystem that promotes the growth and success of your garden’s health and supports abundant harvests. Sweet potatoes send out runners and can easily be trained up a vertical trellis. Plus, many people do not know that the leaves of the sweet potato plant are also edible.
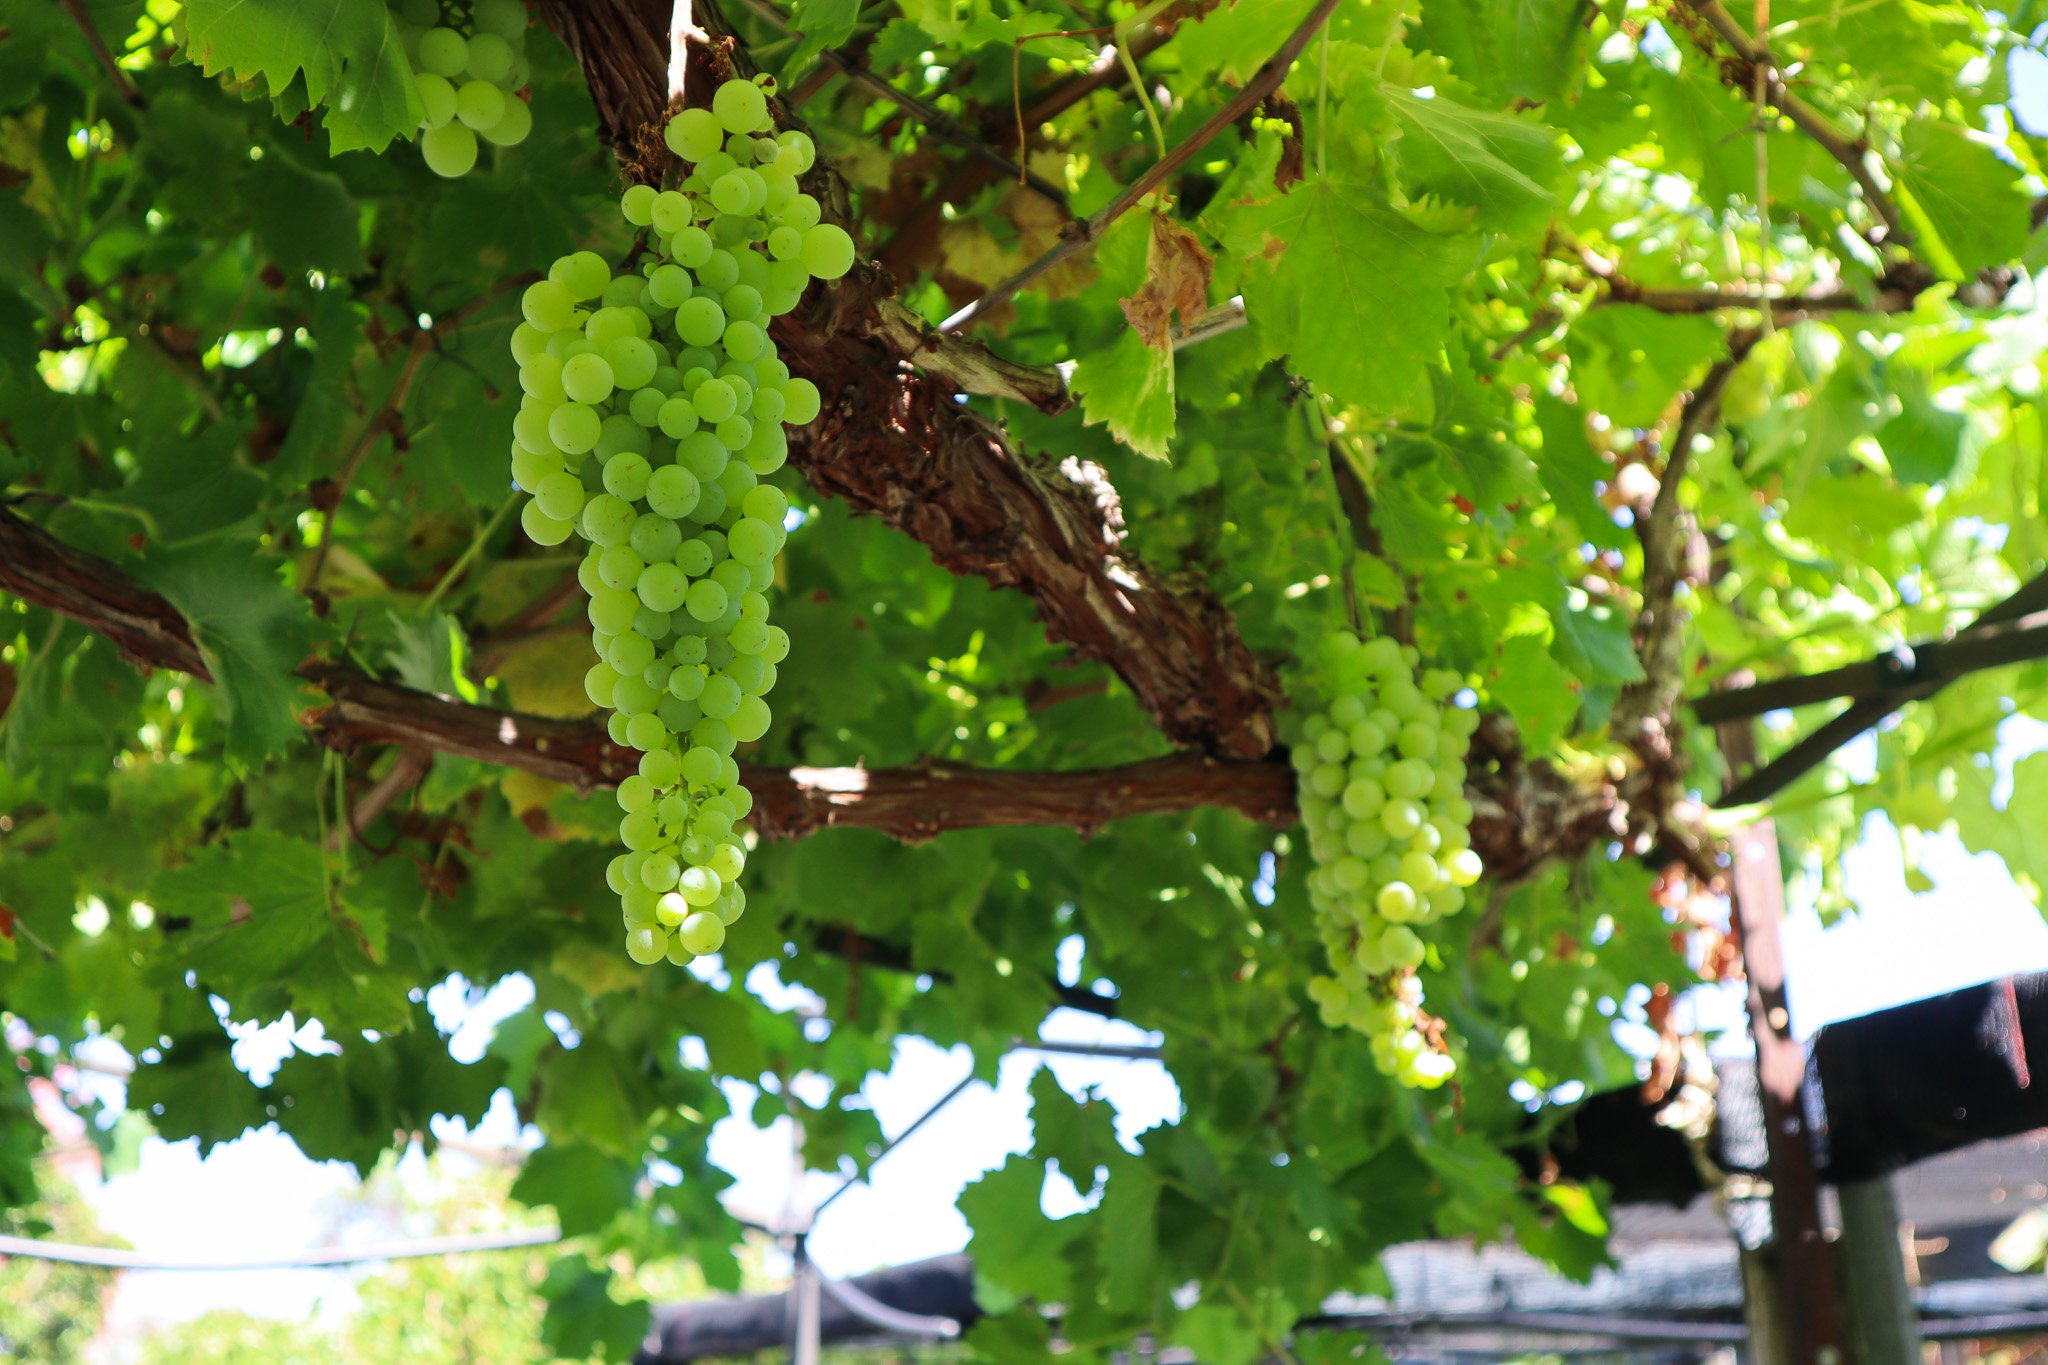
4. Grapes
The great thing about growing grapes as edible climbers is that they are deciduous. This means they lose their leaves in winter, so you can plant grapes strategically to provide shade in summer and let light through in winter!
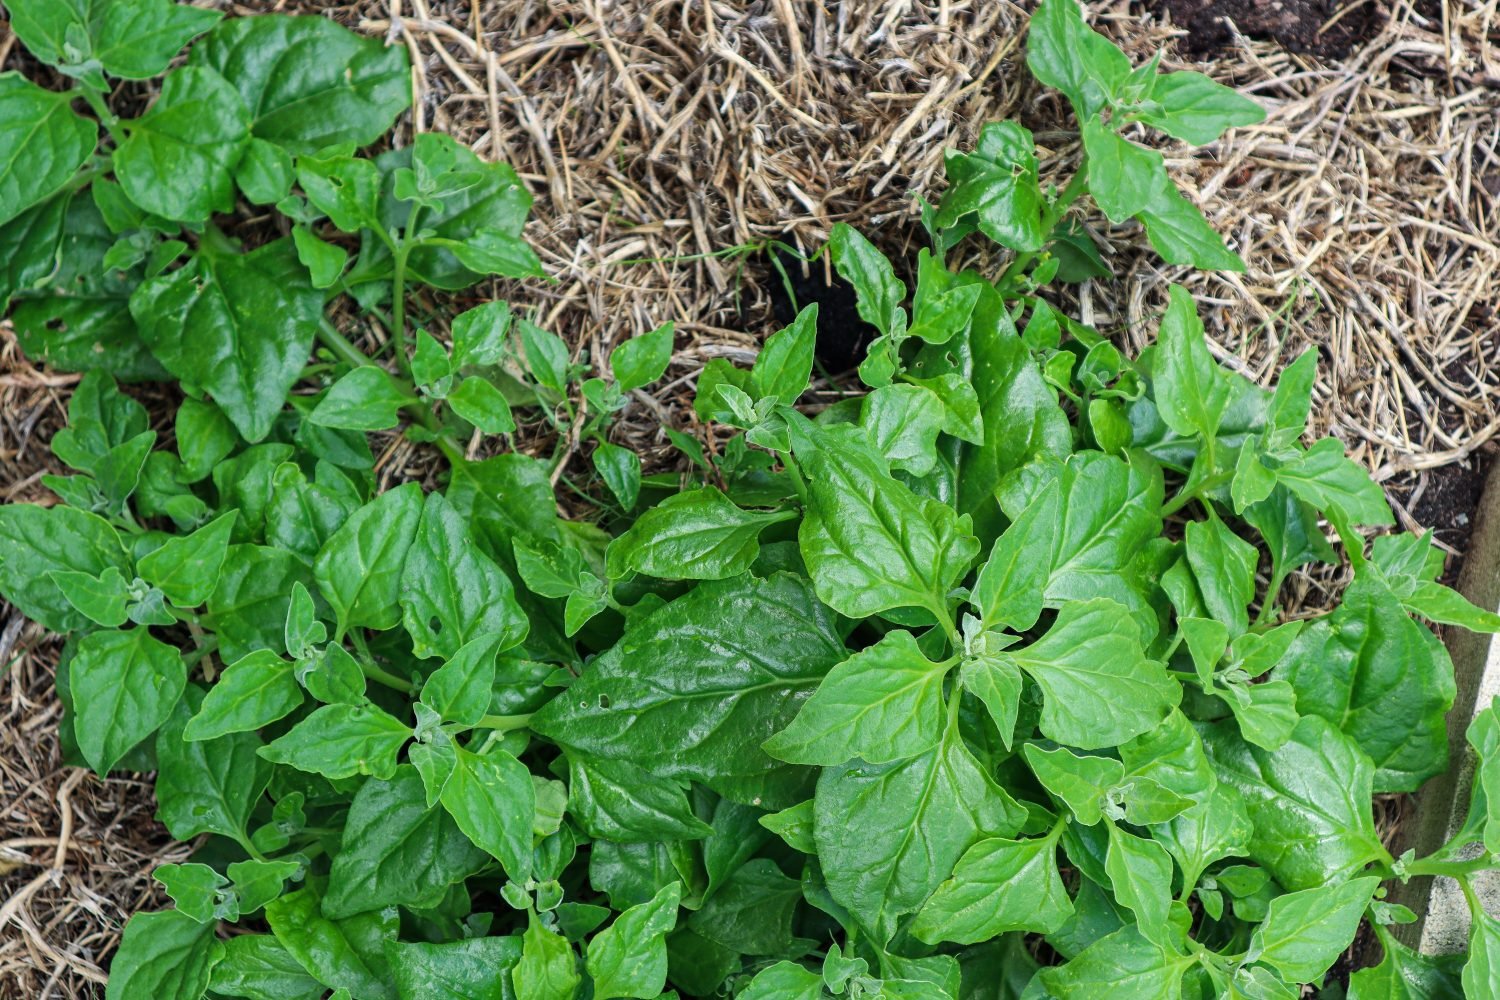
5. Malabar Spinach
Malabar spinach is a fantastic edible climber for warm or tropical climates. It thrives in summer during warm weather when most other spinach and leafy greens die off. This can help fill the gaps in your seasonal harvests. Malabar spinach can be grown in pots or containers. It has succulent-like leaves, so it can handle hot weather, but it can be frost sensitive.
6. Butterfly Pea
If you love colour, then this edible climber will be perfect for you! With bright blue-purple flowers, the butterfly pea is a striking addition to an edible garden. The flowers can be used as a natural food colouring or infused in teas or cocktails. Plus, if you add acidity such as lemon juic,e the colour will transform to hot pink! Such a fun plant to grow.
7. Kiwifruit
Kiwifruit can be grown over structures to create great canopy shade. They are prolific producers and the fruit can be eaten fresh, frozen for smoothies, made into jams and even dehydrated for naturally sweet treats. You will need to have both a male and a female plant for pollination.
8. Kiwiberry
Kiwi berries have a similar taste to the kiwifruit, but are much smaller, around the same size as a grape. Kiwi berry vines grow really well in containers or urban gardens.
9. Nasturtium
Nasturtium is often known for its wild rambling nature but it can be trained vertically as an edible climber. The whole plant is edible, including the leaves, flowers and seed pods. Nasturtium has a strong peppery taste and can be used in salads, flavoured salts, pickles and many other recipes. Here in Perth, my Nasturtium dies down in summer but will pop up and regrow by itself in Autumn/winter.
10. Scarlett Runner Bean
Scarlet runner beans are also known as the 7-year bean because they pop up and regrow each year (for about 6-7 years). Beans are a great addition to an edible garden and can easily be cooked or frozen to preserve.
Annual Climbing Vines 🌿
Annual climbers are also great because they don’t need dedicated space, so you can grow, harvest and remove them to grow something different each season! Having a mix of annuals and perennials will help you grow more food all year round. Annual climbers can be plants such as Cucumber, Squash, Tomatoes, Pumpkin, and Melons.
Fruits that Grow on Vines
Want to grow more fruit without taking up extra ground space? Climbing fruits are a great way to grow more varieties without taking up more garden space! Check out these 17 fruits that grow on vines to get more fruiting plants in your garden.
Do you have big dreams and sustainable homestead goals to grow food and create your dream self-sufficient lifestyle but it feels so far off? You may be renting or in an apartment. Today, I’m going to share 10 actionable steps to help you achieve your sustainable homestead goals no matter how far away they feel. This is the path I have been on and I think this may help or inspire you too.
Are you ready? because your dream life starts now!
Click to watch the video 👇
I was listening to a podcast the other day and they were talking about you are where you are for a reason and that is because you still have more to learn. If I got /my big break and had 100s or 1000s of people flocking to join my garden-to-plate membership would I cope? the answer is probably not! My systems have been built on a small scale and I still have lots more work to do before reaching that level (goals!). Hopefully one day I will be able to help 100s and 1000s of people grow food so I’m continuously working on improving my systems.
The same with getting your dream homestead, if you suddenly found yourself dropped in the middle of an off-grid property would you know exactly what to do? Would you know how to improve your soil, plant trees, care for animals, or afford a house, infrastructure, and the bills that come along with it? or would it be an overwhelming chaotic mess?
There are so many small steps you can start taking today and these are the 10 stages I have been working through to bring my dreams to life. so hopefully they help and inspire you too!
10 ACTIONABLE STEPS to start your Sustainable Homestead Goals now
1. What are your goals?
Write them down. Where do you want to live? What lifestyle do you want to achieve? How do you want your days to look?
The great thing about having clear goals is that decisions along the way become easier (great for people like me that struggle with decision-making!) Does this align with my goals or not? Start at the end and work backward. Will this change along the way? Probably but at least it will give you a direction to start working towards and not be stuck doing nothing.
2. Make a vision board
I like to do this every year and I use Canva and put together a collage type of document. I then have mine as my screen savers on my phone and computer for constant reminders but you could just print out some images and put them on the fridge or the wall. I am a real visual person so this works for me.
3. Pay off debts
Ditch after pay and all that. Don’t buy things you don’t need with money you don’t have. That has always been part of my mentality so I have never financed furniture or anything like that…Hence why my house looks a little bare 😅 I prioritize money in other ways.
One of the hardest things I did was prioritize paying off my student loan. It took me a few years and I set up automatic payments to come out after each pay. If I was still buying coffees and let’s be honest probably plants…then I would increase my repayments a bit because I obviously still had disposable income. ..and repeat. As a student, I knew how to live off the minimum. Lifestyle creep is inevitable but if your dreams are big and solid you can do it!
Hard now and easy later!
Something I found so useful was the debtfree charts. You can choose a relevant one and divide the amount into sections. Each time you pay one down you can highlight it. For a visual person like me, this worked a treat. I just wanted to pay one more line . These also work great for savings too.
4. Start savings
Once you have your debts out of the way start saving. You know what you are capable of paying after paying off your debts so switch to a savings mode. Don’t get into the continuous reward stage. Remind yourself of the goals you are working towards.
5. Start growing food
This can be started from day one. You don’t need all the gear or all the nice raised garden beds, that will come. Start with what you have. Keep an eye on marketplace there are so many free pots and random things that you will be able to turn into gardens. Both my compost bins were free and I even got a free fruit tree recently.
If you dream of creating these thriving edible gardens that produce a whole lot of food then the only way there is through it. There’s no quick fix. you have so much to learn and you will learn faster by doing.
So get seeds in the soil and start growing.
6. Learn learn learn
We are so lucky to have incredible resources at our fingertips. Watch YouTube, listen to podcasts, invest in the skills you want to have, and visit community gardens. Learn to love the process because continuous learning is so important!
7. Take action
Take what you have learned and put it into practice. Grow cuttings, and plant fruit trees in pots, if you plan to have a homestead in the same state then you can be growing your future plants and trees in containers to eventually take with you. Or even sell at a higher price to add to your savings.
8. Surround yourself with Like-minded People and Communities.
This is a great way to stay motivated and learn so much. Not just about how to grow food or raise chickens but just about their outlook on life and values. People are so generous with their time and resources. Offer to help someone in their garden, this is a great way to learn and you may even receive cuttings or seeds from special plants.
9. Start working on Financing the Dream.
We all need to make money its just part of the world we live in. Does your current job and career align with the sustainable homestead goals or lifestyle you are working towards? It may do, you may already love your job but it also more than likely does not. Start a side business or grow your hobby with the direct intention of it becoming your career. Keep coming back to that lifestyle you set out in stage 1. If you want to have time to go on adventures or spend days in the garden then make sure what your working towards actually allows for that.
Do you dream of starting a flower farm? What can you do now? Start social media and grow a following. It’s free and it’s a real actionable step toward that goal. If you need some ideas check out this video on 100 ways to make an income from your property. I guarantee if one of those things excites you, there is an actionable step you can take today to make progress.
10. Re-evaluate and check in with yourself.
This is really the stage I am at now. I have been working on the last 9 steps for the last 10 years and it’s important to make sure my sustainable homestead goals and visions are still aligned. Don’t be afraid to pivot. Maybe after growing food or doing cut flowers your are unsure if that really fits anymore. For me, annuals just aren’t really it ( I LOVE PERENNIALS) and I’m actually unsure about all the 100s of animals I initially wanted. Animals are a lot of work and commitment I kind of want the freedom to come and go more often.
My dream is still real and I would love to have land to rewild and have my dream homestead but lots of things have changed. I also want to be able to travel and explore more. So I’m creating new visions that I can’t wait to share with you along the way.
Sometimes it will be really tough. But find joy in the journey, IN THE INBETWEEN, the learning!. and absolutely celebrate the small wins! because they are aligned to stage 1 so they will all add up to be something incredible.
DISCLAIMER: Links included in this description might be affiliate links. If you purchase a product or service with the links that I provide I may receive a small commission. There is no additional charge to you! Thank you for supporting my website so I can continue to provide you with free content each week!
CREATING EXTRA INCOME FOR YOUR HOMESTEAD
Online surveys: https://bit.ly/3Bg0XNr
Ebook templates: https://bit.ly/2UfOXsr
Email lists: https://bit.ly/3VNXRbT
Photography editing: https://bit.ly/3cPfXW8
Create an online community: https://bit.ly/3W6s8mv
Do you want to learn how to GROW, COOK & PRESERVE your own food naturally and sustainably?
Join in monthly Workshops and Challenges, Plant of the Month features, and Garden to Plate Recipes, with a fun and supportive community to live a more sustainable lifestyle.
Do you have areas that get very hot, full sun, and nothing seems to survive? These 22 heat-tolerant edible plants to grow in HOT full-sun locations will help you grow productive edible gardens. I’ve been growing food here in Perth, Australia, for the last 10 years, and let me tell you, it was a big change and learning curve coming from the lush green of New Zealand.
Today, I’m sharing some plant ideas to plant in those super hot locations, but keep reading to the end because it’s not just about what you plant, but also when and how! Bonus tips on that, so you can turn your hot barren wasteland into productive edible gardens.
Click to WATCH 22 heat-tolerant edible plants
22 Heat-tolerant Edible Plants for Full Sun
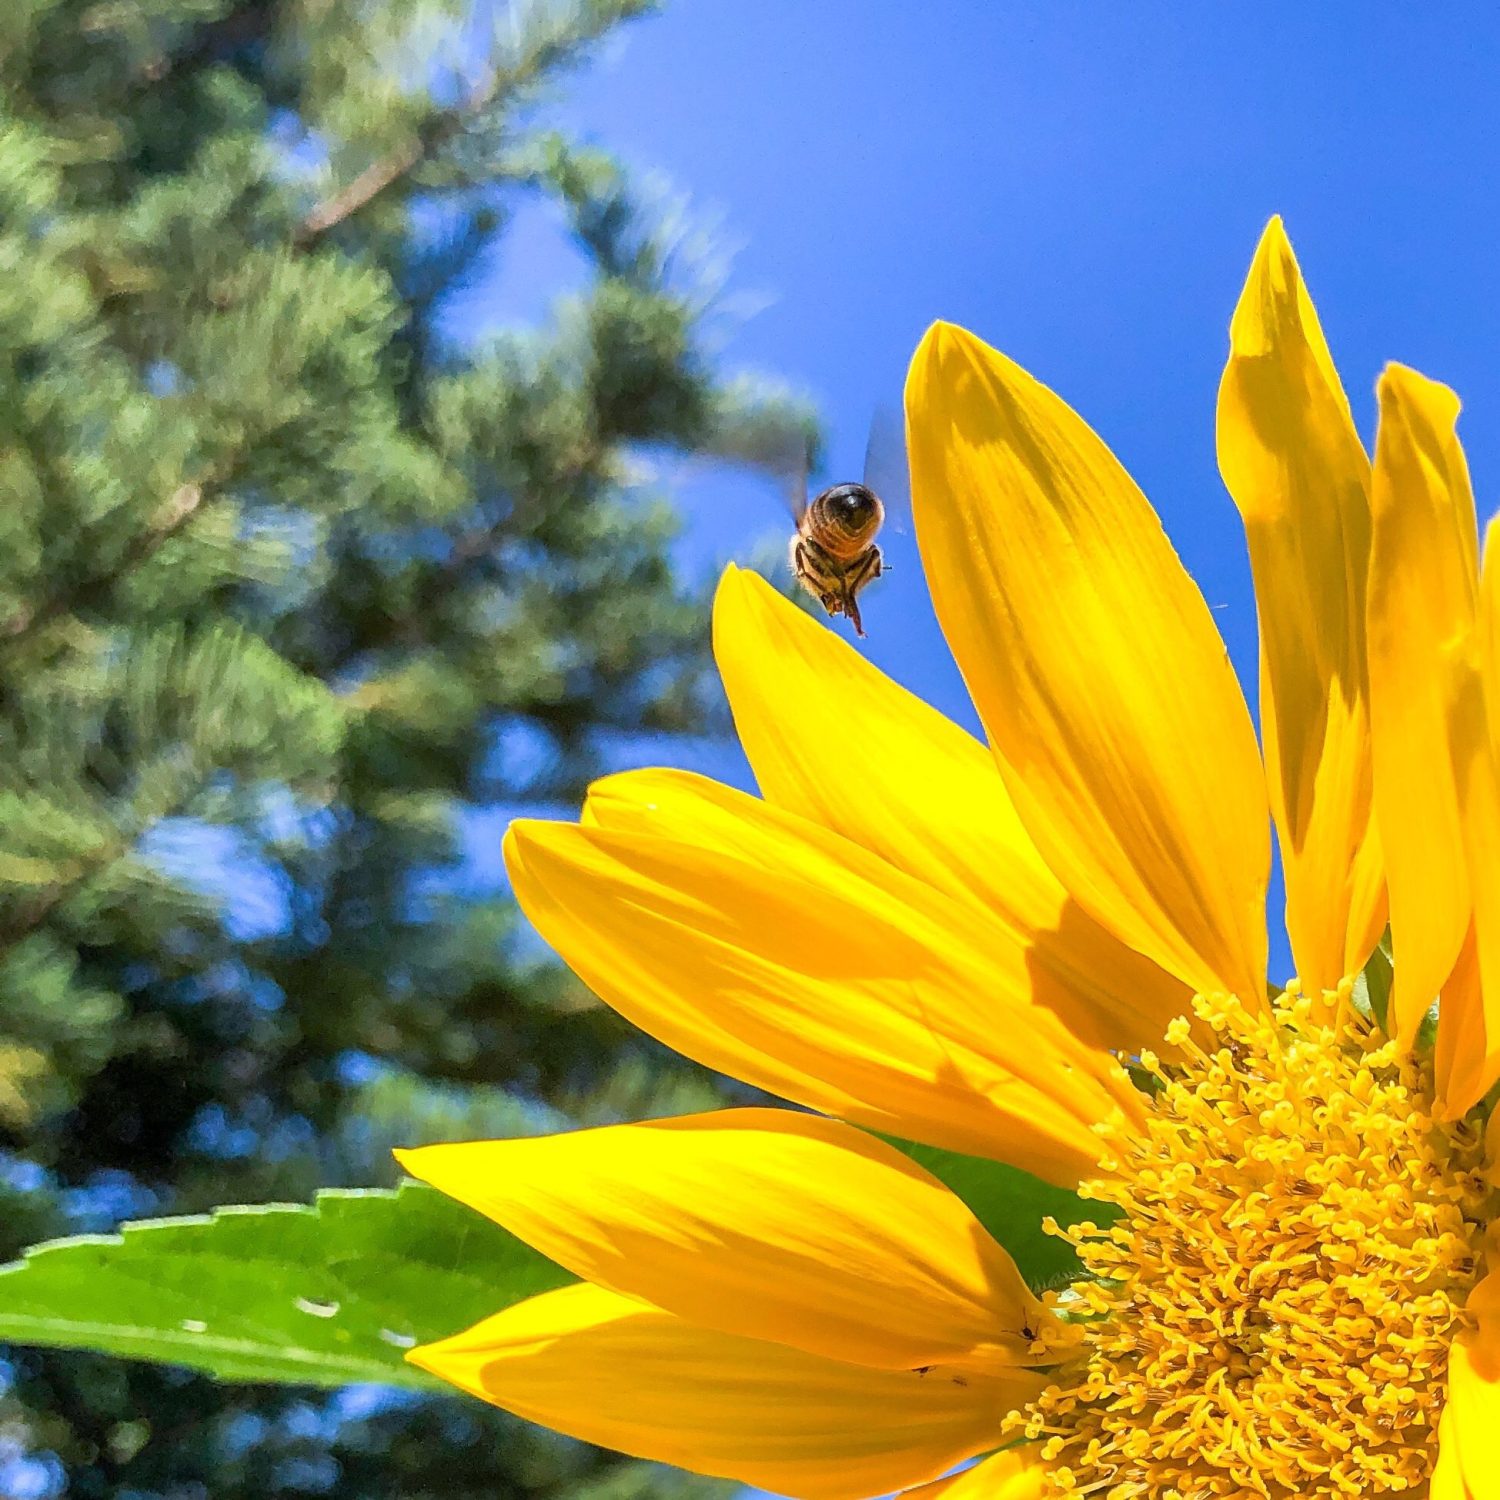
1. Rosemary
Attracts bees 🐝 and has healing properties, and is great for skin and hair care. Flavour-enhancing culinary herb🌿 When I first moved here, I wondered why so many houses had Rosemary hedges out the front – and it’s because it thrives on neglect and our poor sandy soils. Rosemary is a great heat-tolerant addition to your edible garden. Try making your own Rosemary Salt.
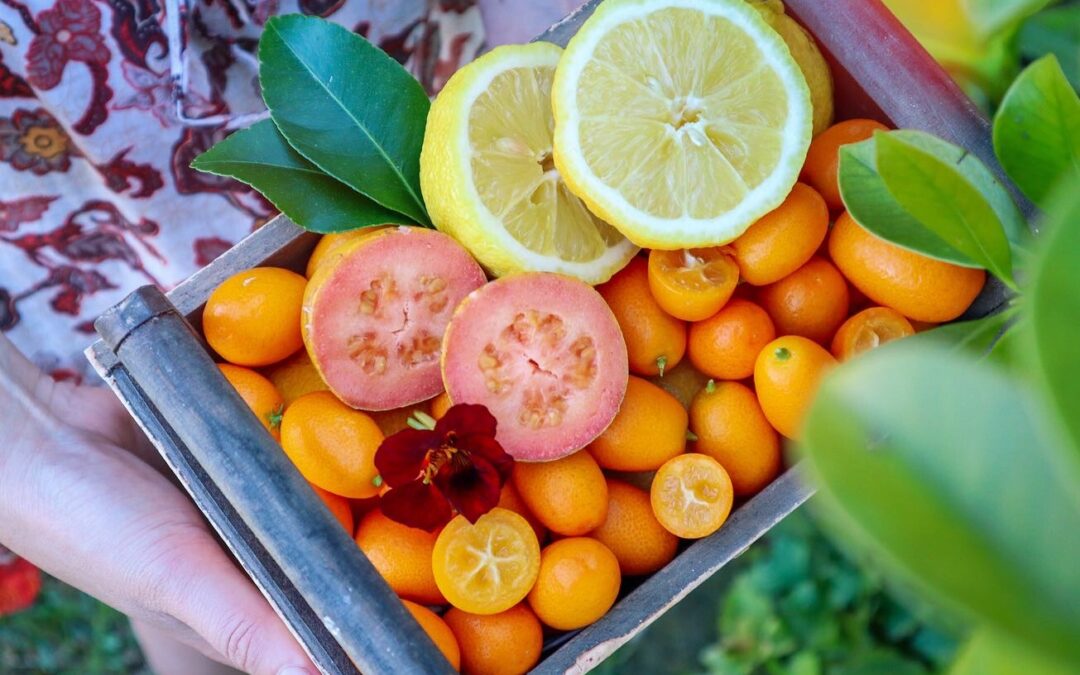
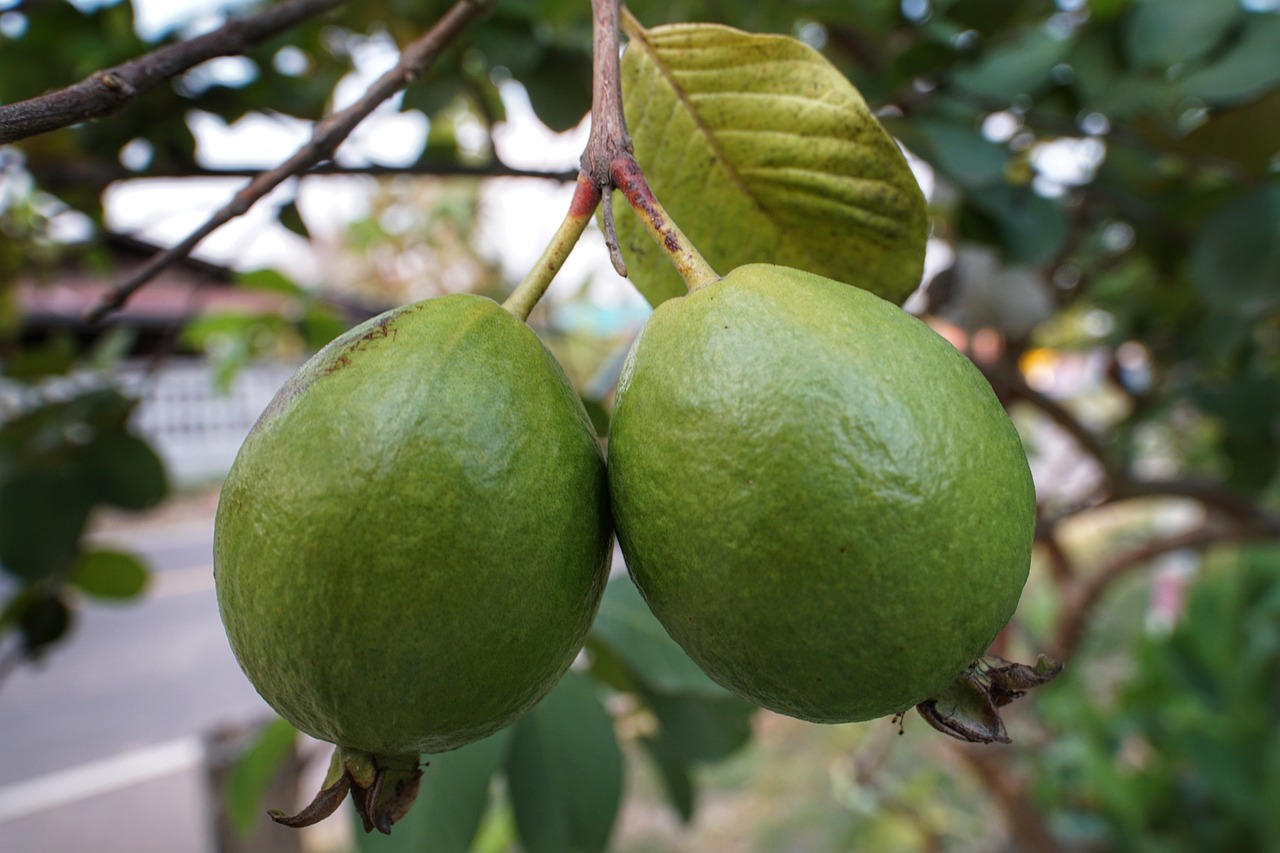
2. Guava – Strawberry & Tropical
Strawberry/cherry, lemon cherry, and tropical Hawaiian/Thai guavas are really hardy, low-maintenance fruit trees that produce bucketloads of fruit!
3. Mulberry
Another powerhouse perennial that survives on neglect – they grow super fast so you can use these as a nanny plant or a pioneer plant. If you have a barren hot area you could plant a Mulberry to get quick shade established and later on remove it or heavily prune if it gets too big. Mulberry also loses leaves in winter to let light in.
4. Lavender
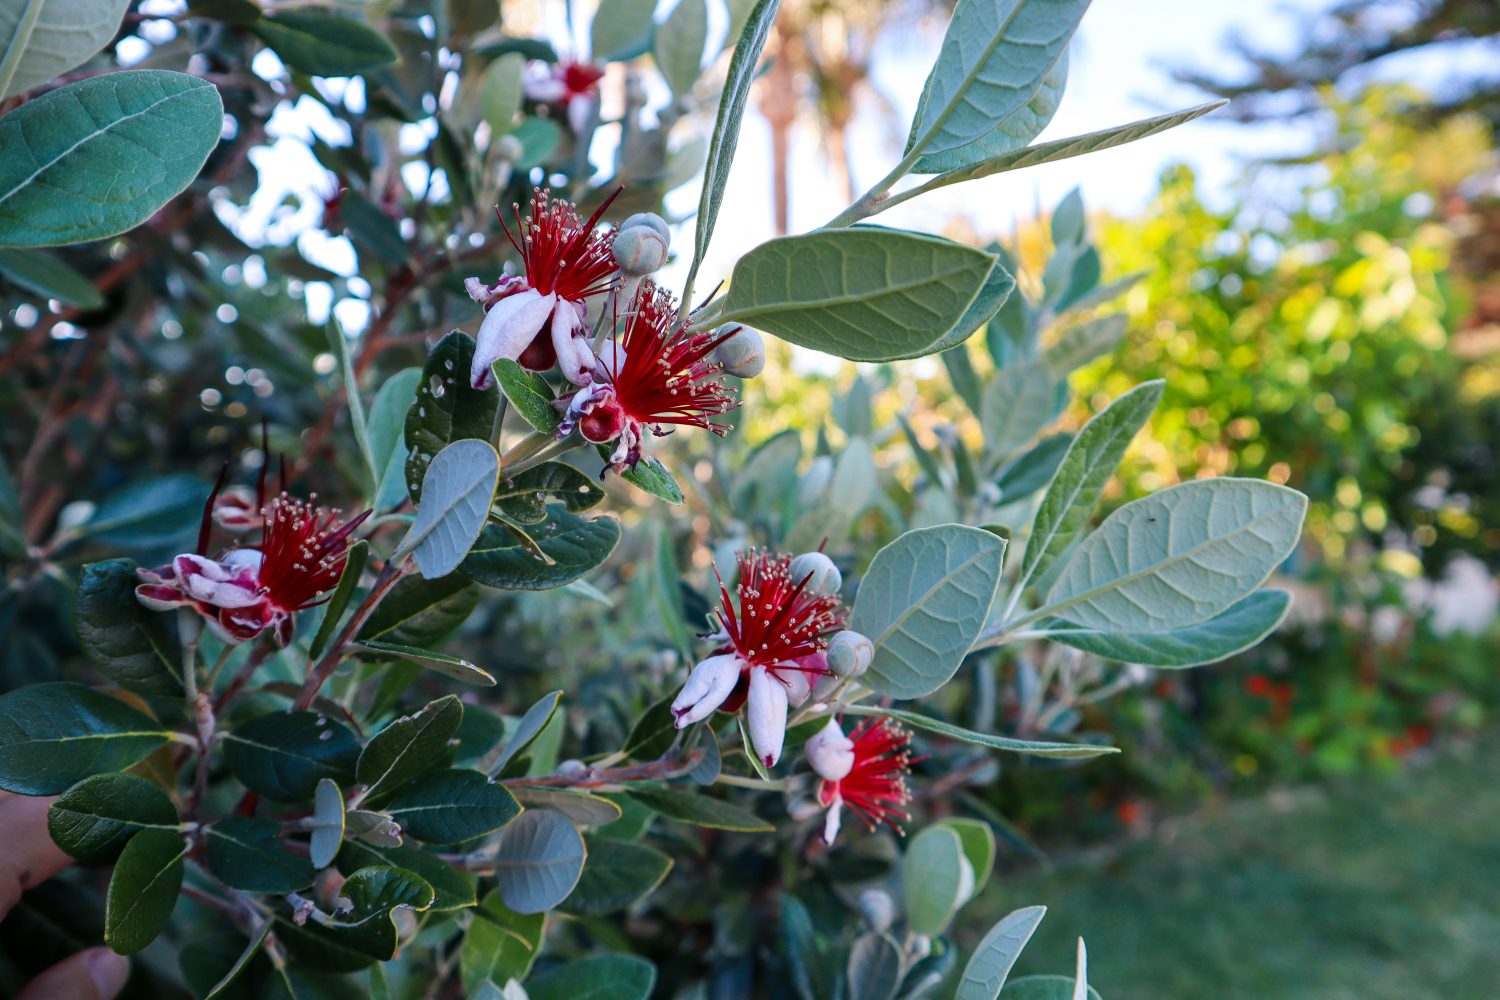
Lavender is drought-tolerant – a great pollinator plant with many medicinal (calming and sleep) and culinary uses. In my garden (which will be different with climates and varieties) Lavender flowers at the same time as my Feijoas so I have it planted in between them to attract pollinators and increase my Feijoa harvests.
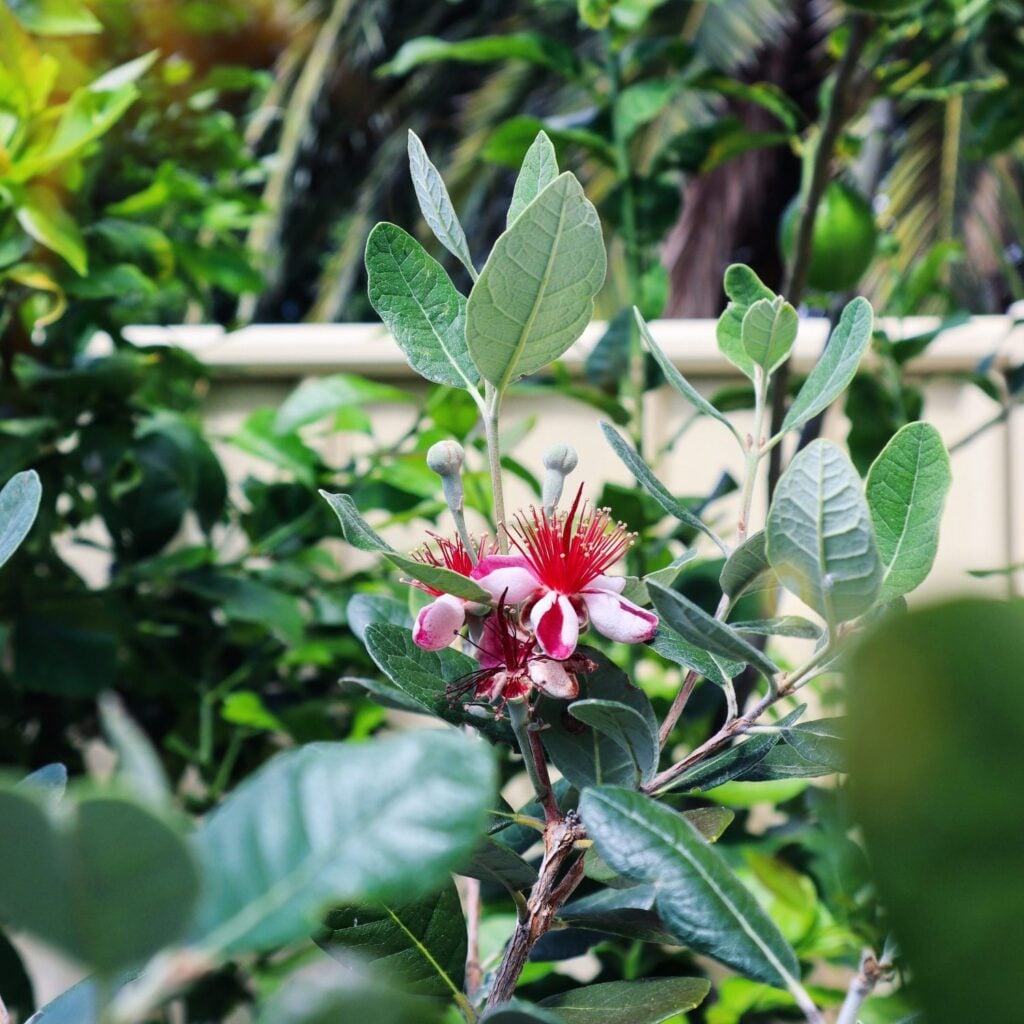
5. Feijoa / Pineapple Guava
If you have been following me on Instagram or subscribed to my YouTube, you will have guessed this plant would make the list 😂 Low maintenance, super hardy, and produces plenty of food! Feijoas do taste better when they get 50 chill hours a year so they aren’t optimally grown here in Perth, but they do grow well and are drought-tolerant. They are evergreen and super bushy, so they can be grown as an edible hedge. They are known to have fire-retardant qualities, which is very handy for hot, dry climates. If you are looking to purchase a Feijoa, choose a named variety (such as Duffy, White Goose, Mammoth, plus more) as these will perform better and produce fruit faster than generic seedling plants.
6. Passionfruit
Passionfruit is an edible vine that can be used to cover a fence, structure, or grown over an arbor to create shade. This can help cool your garden down and provide delicious fruit. Passionfruit flowers can also be used to make calming teas to aid in sleep and anxiety. NOTE: Avoid planting a grafted variety the grafts take over and become invasive, hard to get rid of, and don’t produce good fruit.
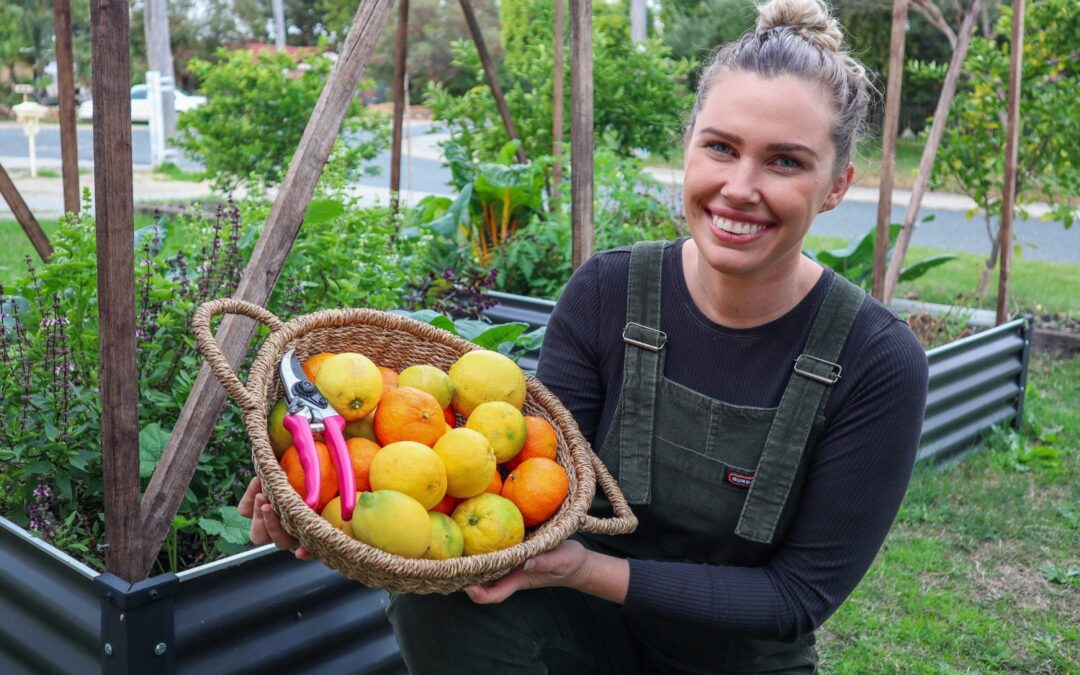
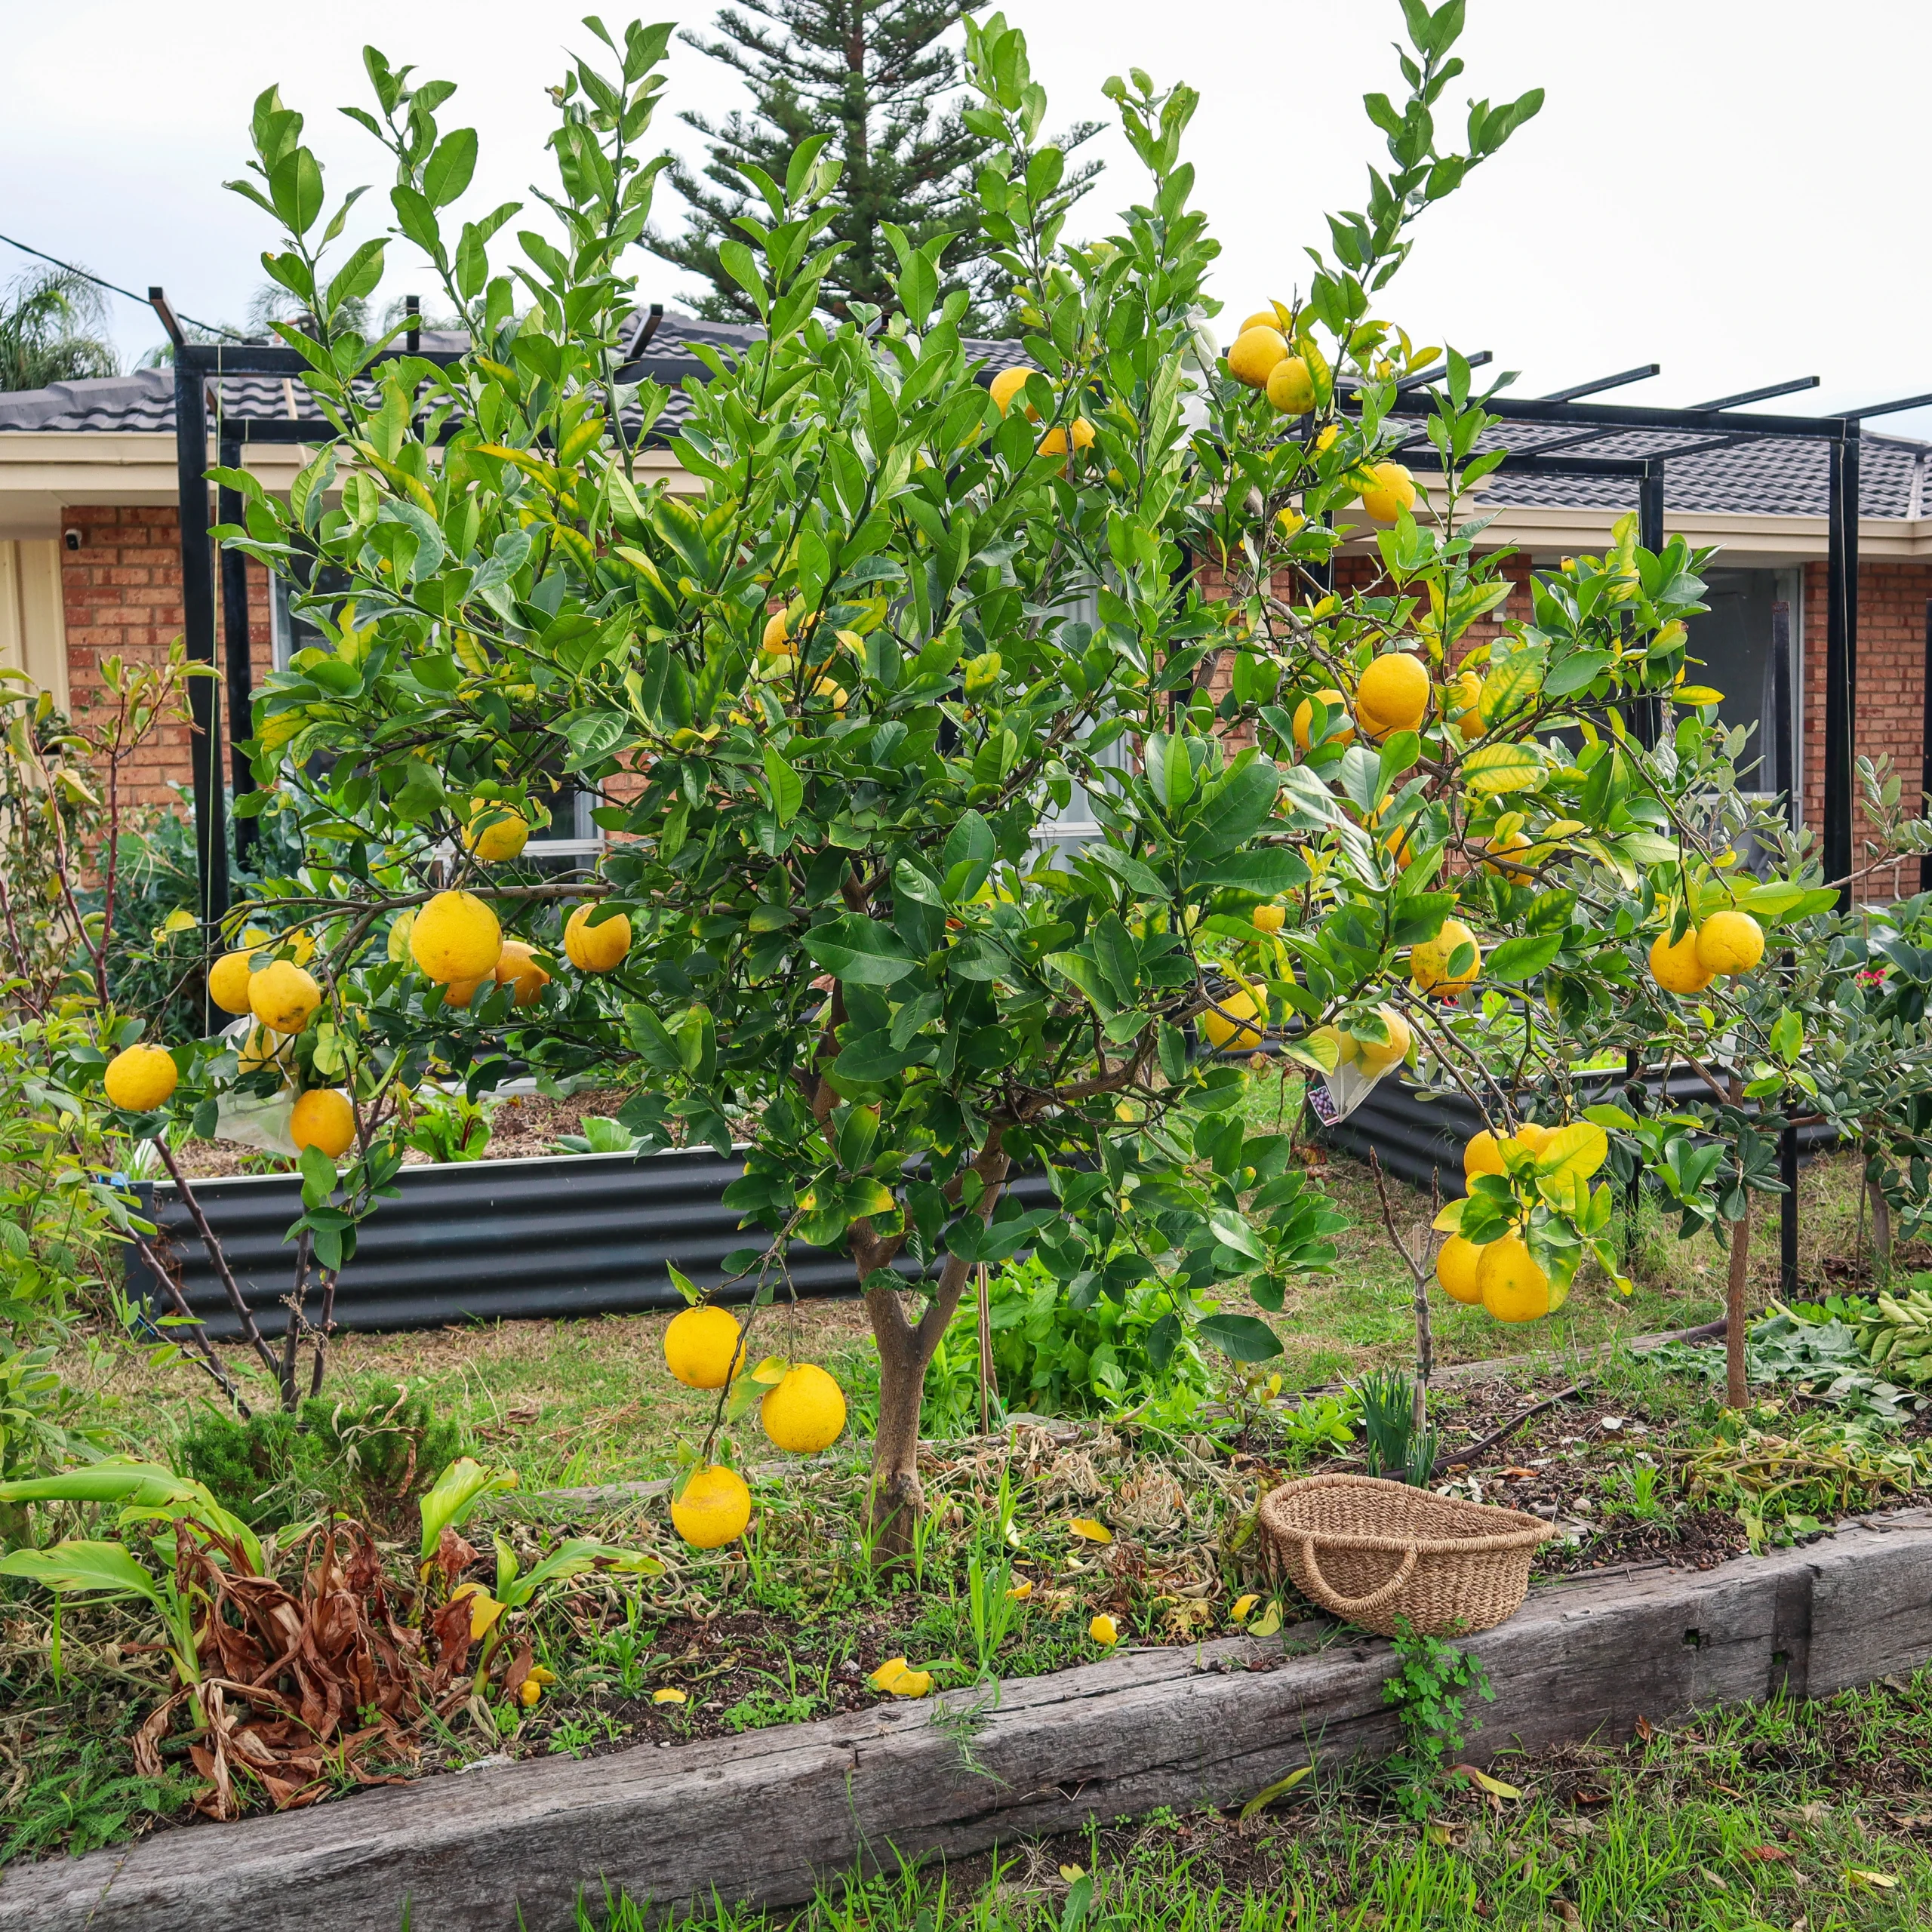
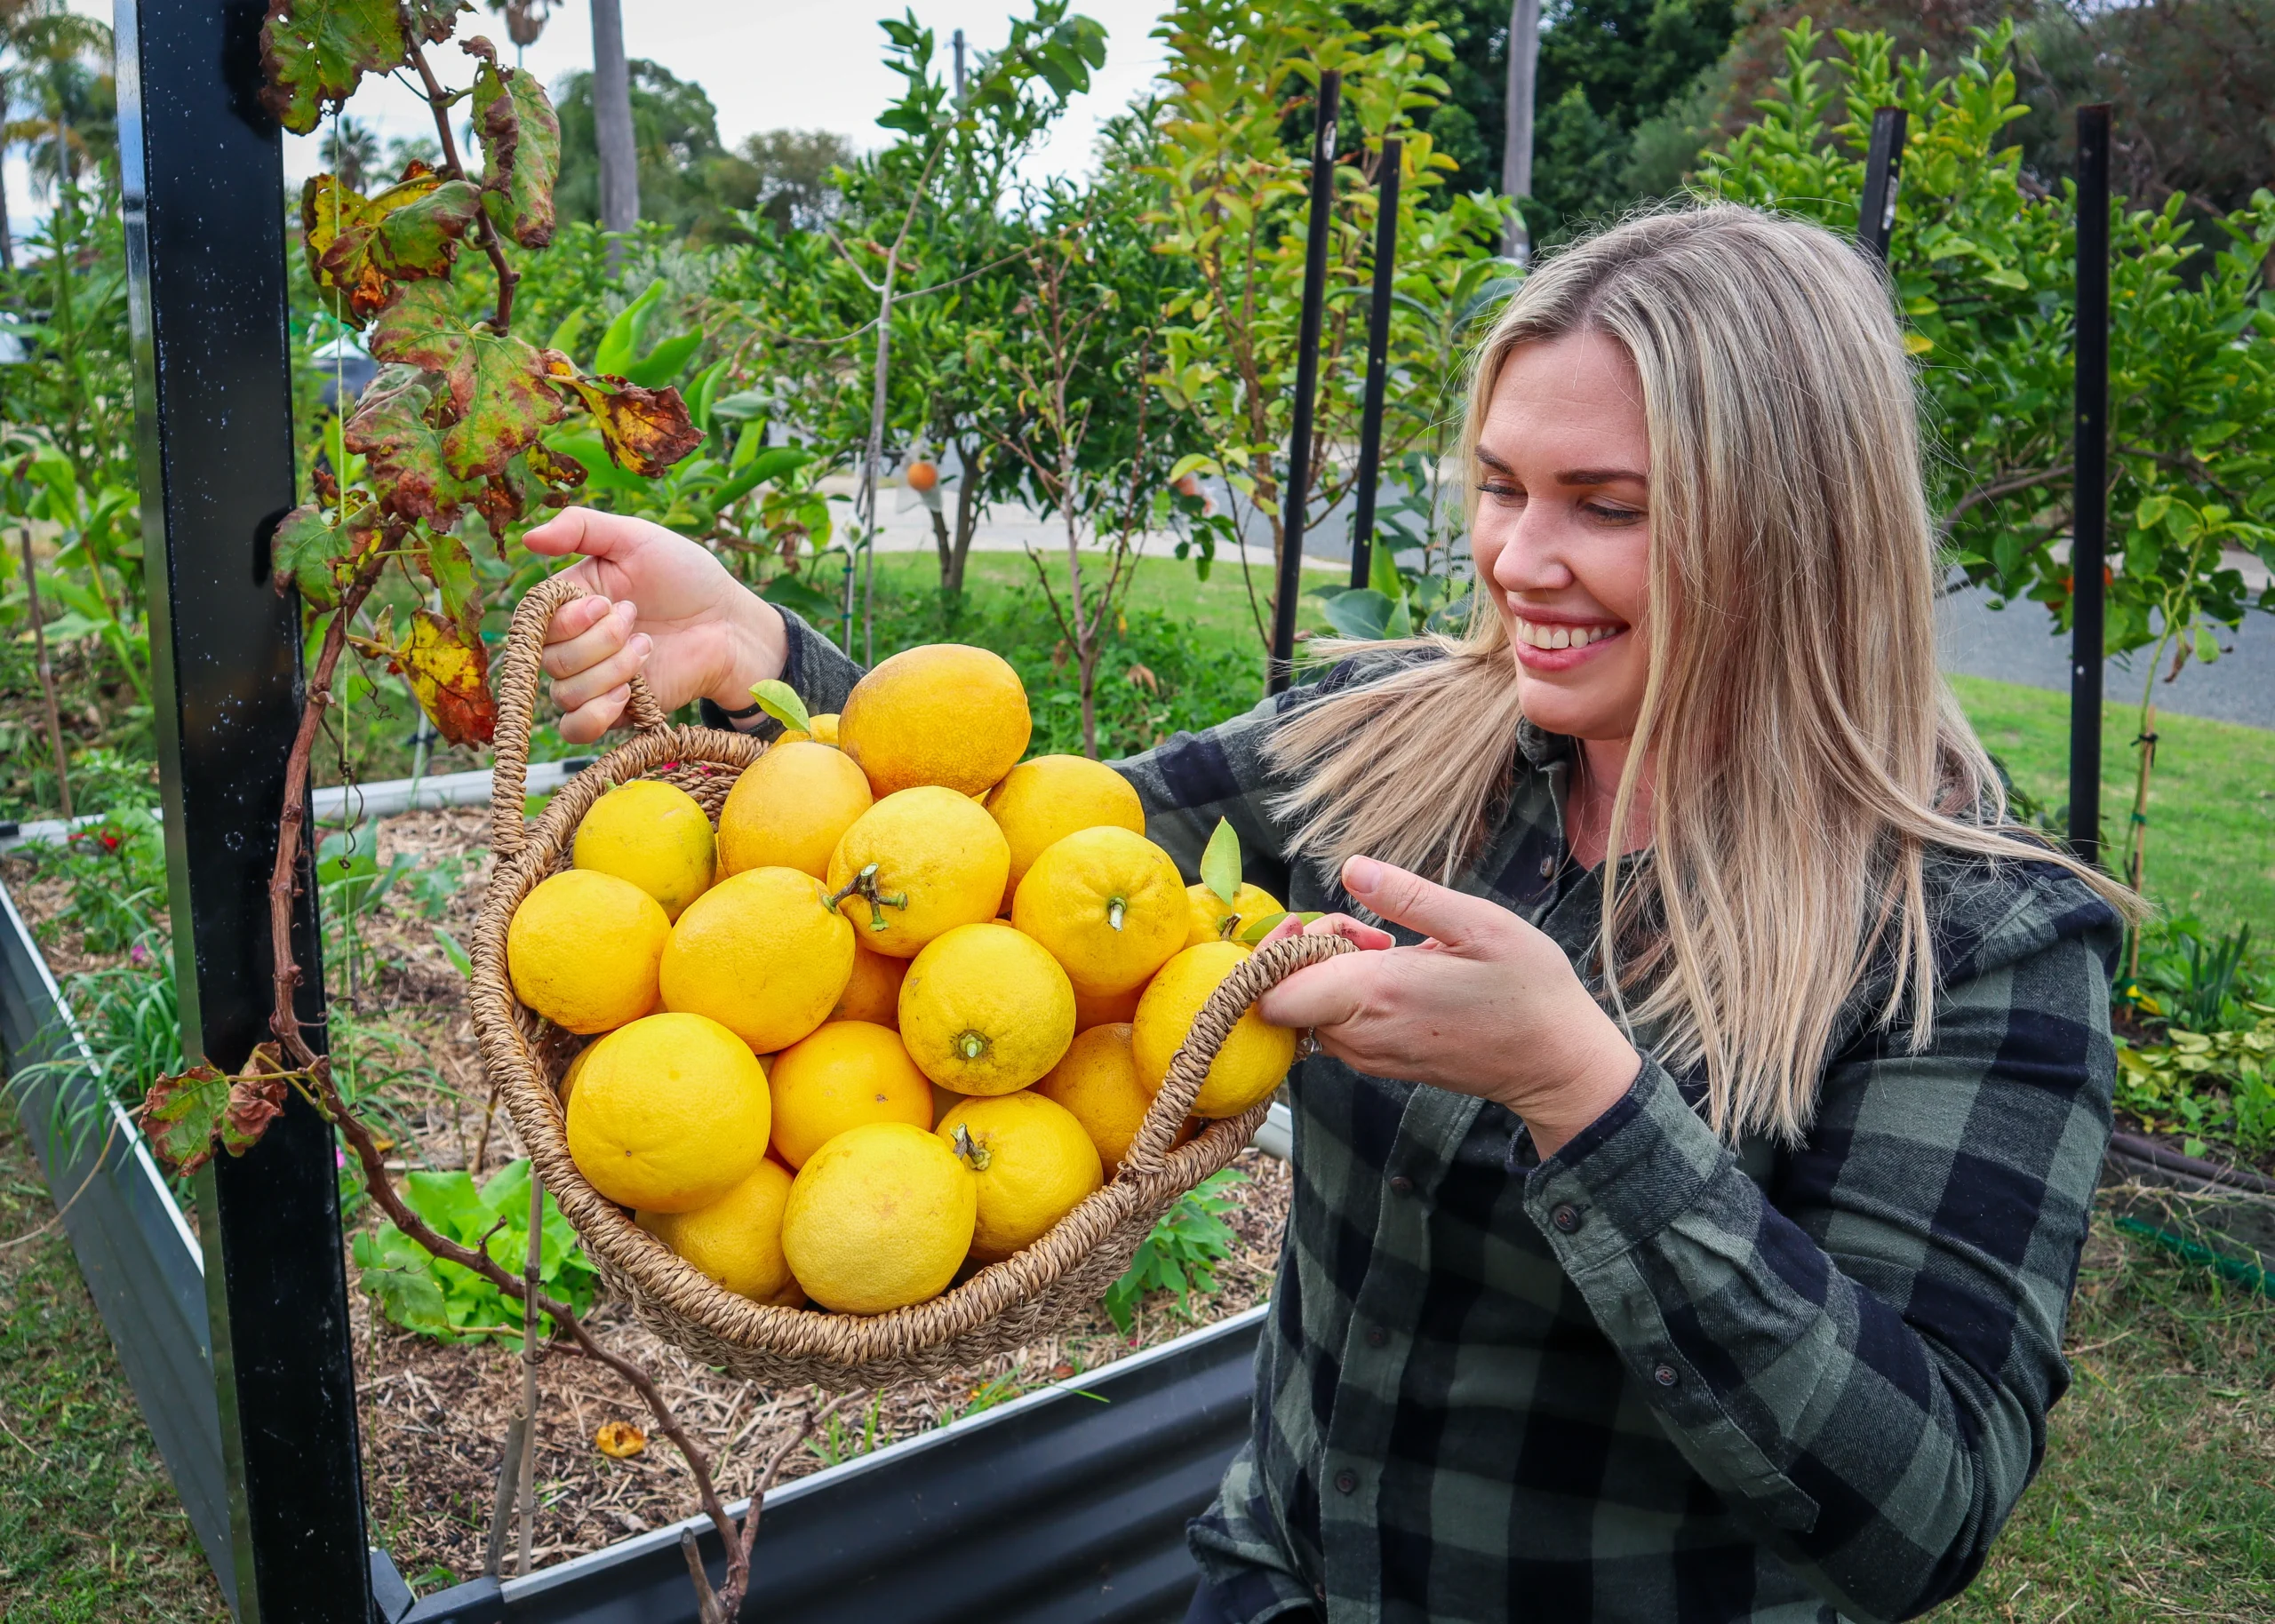
7. Citrus
Citrus like full sun and, once established, can thrive in hot environments. Avoid planting new trees before or during the hot summer so that they have time to get their roots established before the added stress of summer.
8. Lemon Verbena
A fragrant lemony scent that is similar to lemongrass. Lemon Verbena is great in teas, baking, and all the things! Lemon verbena is one of those plants that quietly becomes a favourite. Its leaves have a sweet, lemony fragrance—similar to lemongrass but softer—and the whole plant smells incredible when you brush past it. It’s perfect for teas, baking, syrups, and infused water,and it keeps its flavour really well when dried. I always keep a jar in the pantry for quick herbal tea blends. In the garden, lemon verbena is easy to grow in full sun and well-drained soil. It drops its leaves in winter (don’t worry, it’s normal!) and comes back quickly once the weather warms.
9. Pomegranate
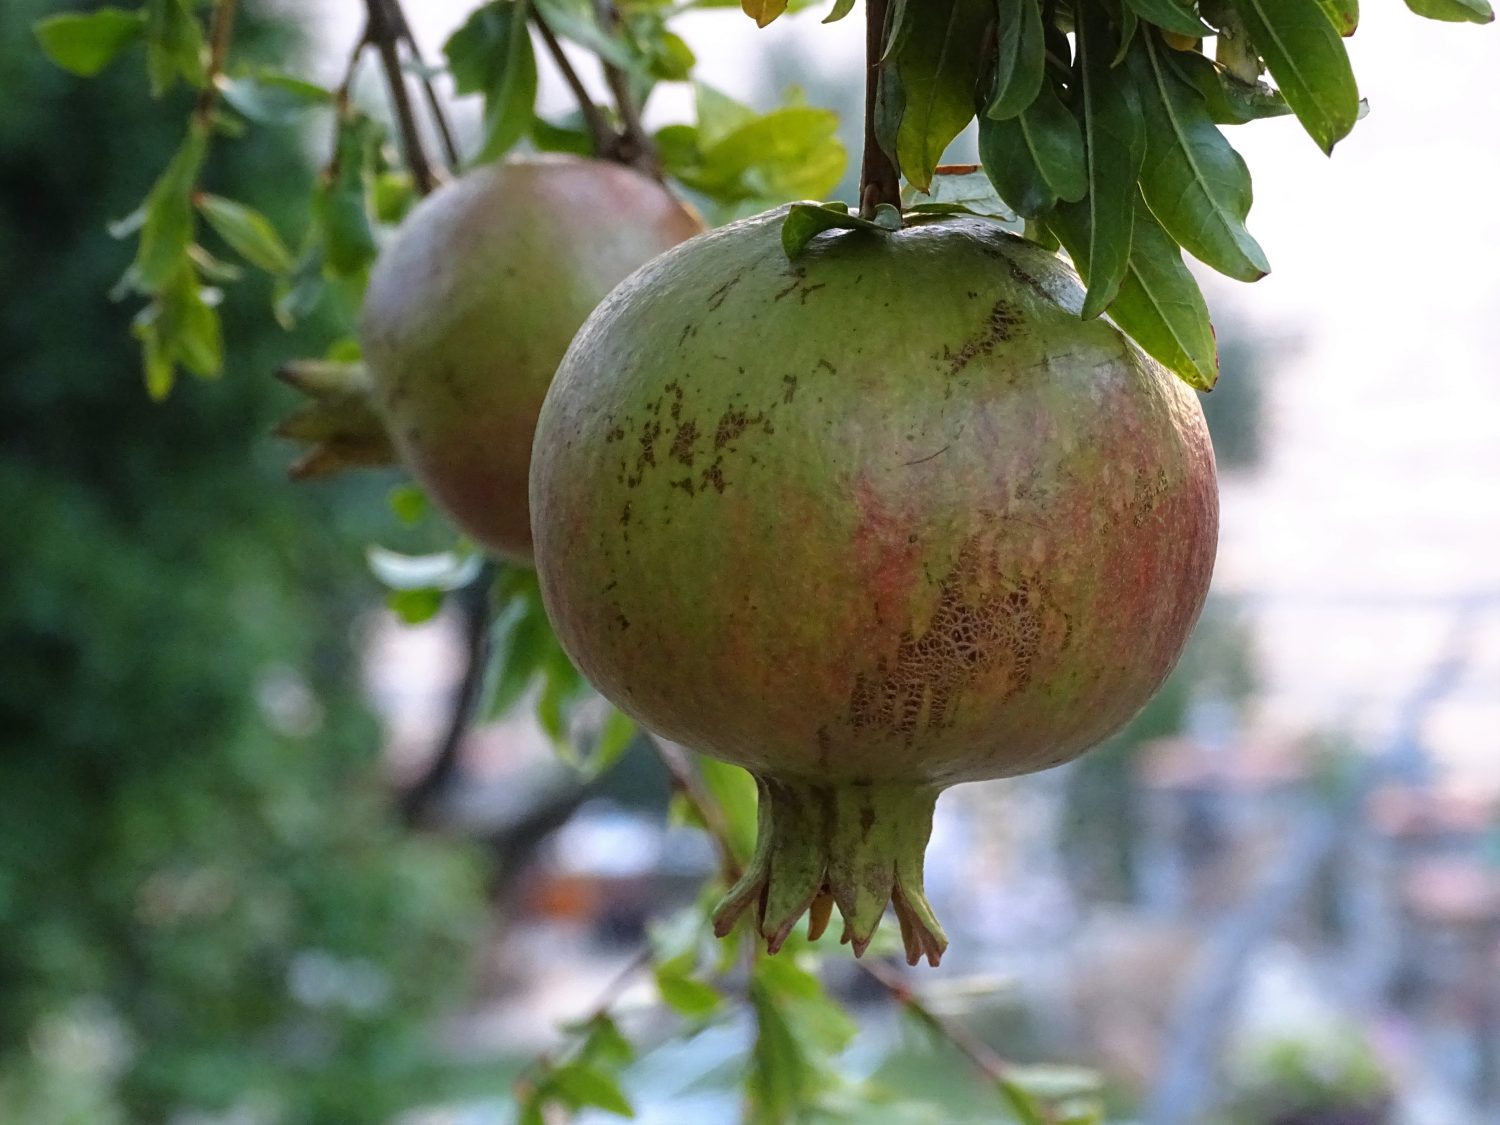
Pomegranates are one of the best heat-tolerant fruit trees you can grow in a hot climate. They thrive in full sun, handle dry conditions like champions, and still reward you with glossy red fruit and bright, beautiful flowers. They’re incredibly low-maintenance, needing far less water than most fruit trees once established. Their deep roots make them drought-resilient, and they’re also naturally pest-resistant — perfect for gardens with harsh summers. If you’re building a resilient, water-wise garden, pomegranates are a must-have: tough, productive, and beautiful all year round.
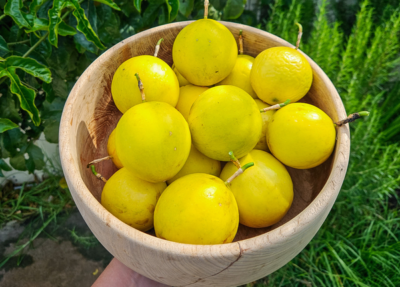
10. Loquat
Loquats are incredibly hardy, fast-growing fruit trees that thrive in hot, dry climates. They handle poor soils, need very little care once established, and fruit heavily in late winter–spring when not much else is producing. Their sweet, tangy fruit is amazing fresh or made into sauces, and the large, glossy leaves give your garden a lush, tropical look with almost no effort. Loquats can be a pest plant because they grow so easily, and birds spread the seeds, so check with your local area.
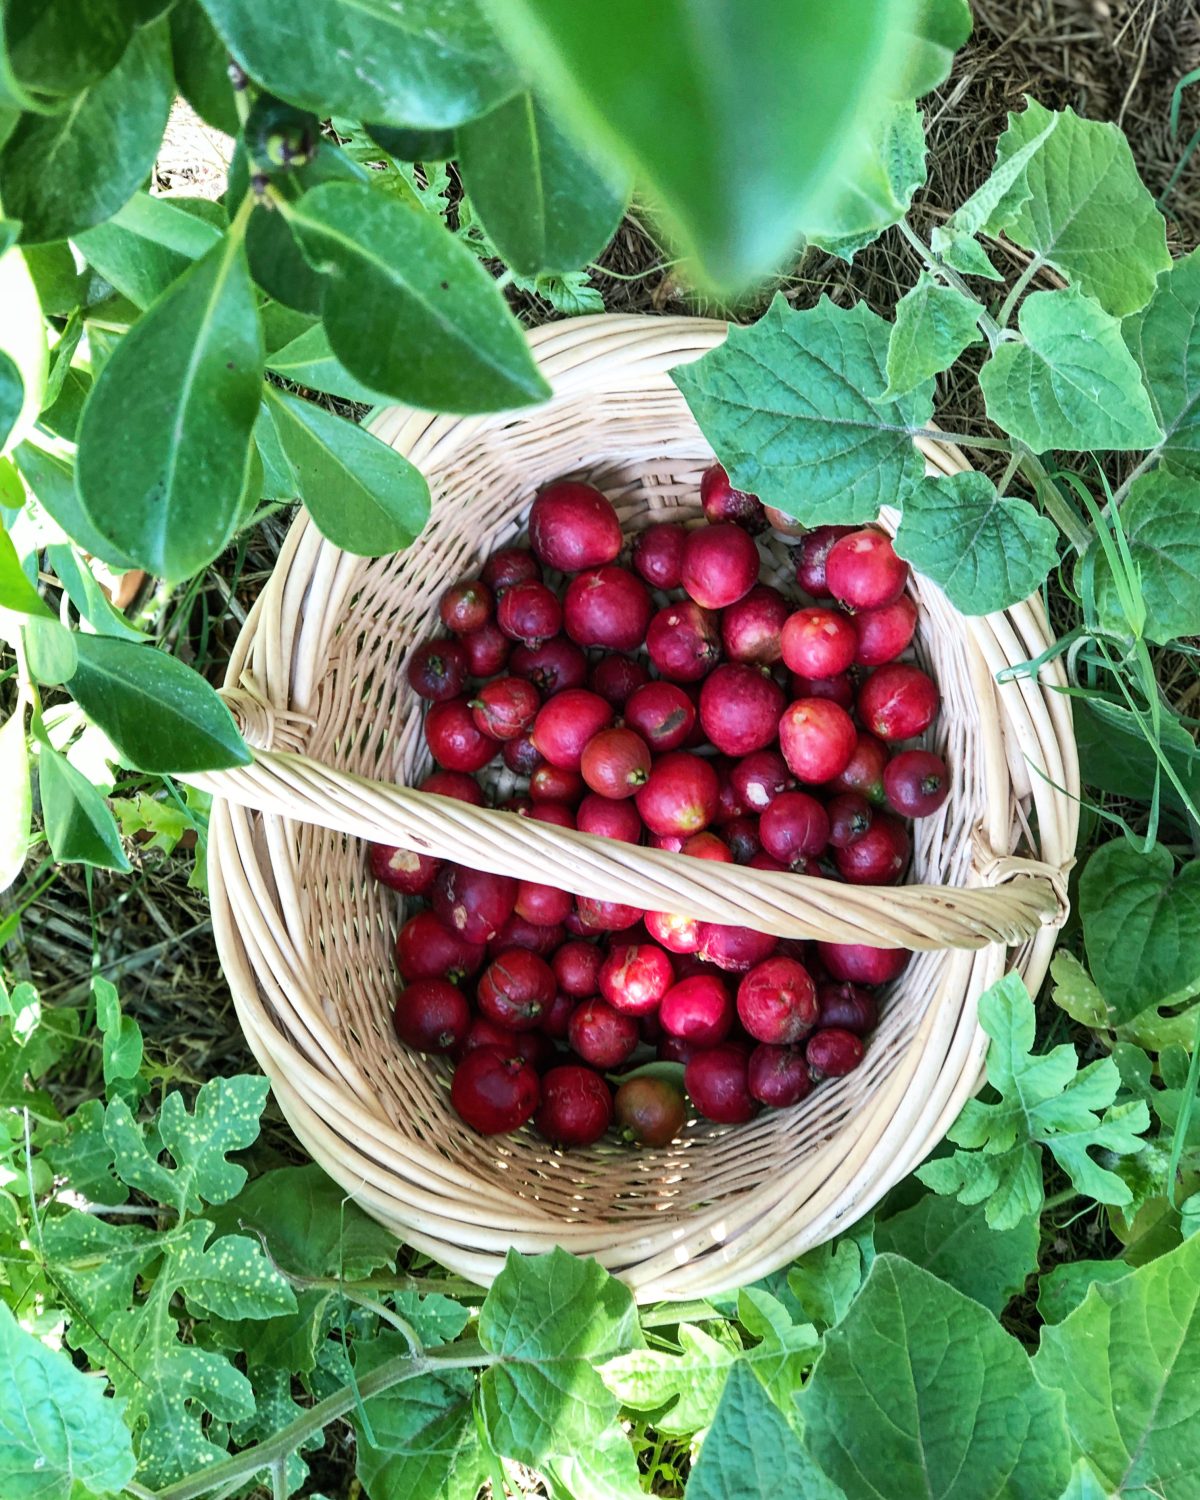
11. Lilly Pilly
Lilly pillies are tough, water-wise Australian natives perfect for hedges, screens, or structure in hot climates. They handle heat, humidity, pests, and pruning exceptionally well. Many varieties produce edible pink or purple berries that can be made into jams or syrups. They’re also fantastic habitat plants for beneficial insects and birds. Part of the Syzygium genus is a great dense evergreen hedging plant with bright pink fruits. The fruits are edible and can be made into jams, sauces, and even sparking wine!
12. NZ Spinach / Warrigal Greens
NZ Spinach is one of the best heat-tolerant leafy greens for summer. It thrives when regular spinach collapses, spreading as a groundcover that shades and protects the soil. Harvest the tender tips regularly for stir-fries, and sautés. It’s low-maintenance, productive, and perfect for filling gaps in hot, sunny beds. Due to oxalates it does need to be cooked first.
13. Malabar Spinach
Malabar spinach is a vigorous climbing vine that absolutely loves the heat. Its fleshy, succulent leaves stay tender and productive even in scorching weather, and it grows beautifully over trellises to create summer shade. It’s ideal for warm climates but doesn’t tolerate frost, so give it a protected spot if your winters are cold.
14. Quince
Quince is a hardy, drought-tolerant fruit tree that thrives in hot conditions and poor soils. It produces large, fragrant yellow fruit perfect for making jams, jellies, pastes, and preserves. The tree itself is stunning with pretty spring flowers.
15. Zinnia
Zinnia is an edible flower that thrives in hot dry conditions. Zinnia has vibrant flowers in a huge range of colours. The great thing about Zinnia is that it produces nectar so it attracts a diverse range of pollinators to the garden such as bees, hoverflies, butterflies, and small birds. Zinnia is susceptible to powdery mildew so great for dry summers.
16. Sunflower
I love growing Sunflowers because they attract a huge amount of pollinators to the garden, and you can pretty much eat the whole plant! I use the petals fresh in a salad or press them to use on baking as garnishes. The seeds can be used on top of salads, to make oil, or to make spreads, and the leaves are also edible. Sunflower stems can even be made into flour! Sunflowers also help remove toxins from the soil, so they are a fantastic addition to a hot, full-sun garden.
17. Figs
Figs are one of the most reliable hot-climate fruit trees. They adore full sun, tolerate drought once established, and produce incredibly sweet fruit with almost no fuss. They grow well even in poor or sandy soil, making them ideal for Perth-style gardens. Prune them in winter to keep them compact and productive.
18. Olive
Olives are true Mediterranean survivors, heat-tolerant, drought-resilient, and long-lived. They thrive on tough love and poor soil, and they’re surprisingly productive even with minimal watering. Whether you grow them for fruit or as hardy ornamental structure, olives add beautiful silvery foliage and year-round resilience to hot-climate gardens.
19. Grapes
Grapes are great for growing over structures to provide shade to your garden and help other plants grow. Grapes are deciduous so they lose their leaves in winter to let light in and have full leaf coverage in summer to protect from the harsh midday sun. Grape plants have so many uses from fresh delicious table grapes to jams, preserves, and wine! grape leaves also have many uses in the kitchen.
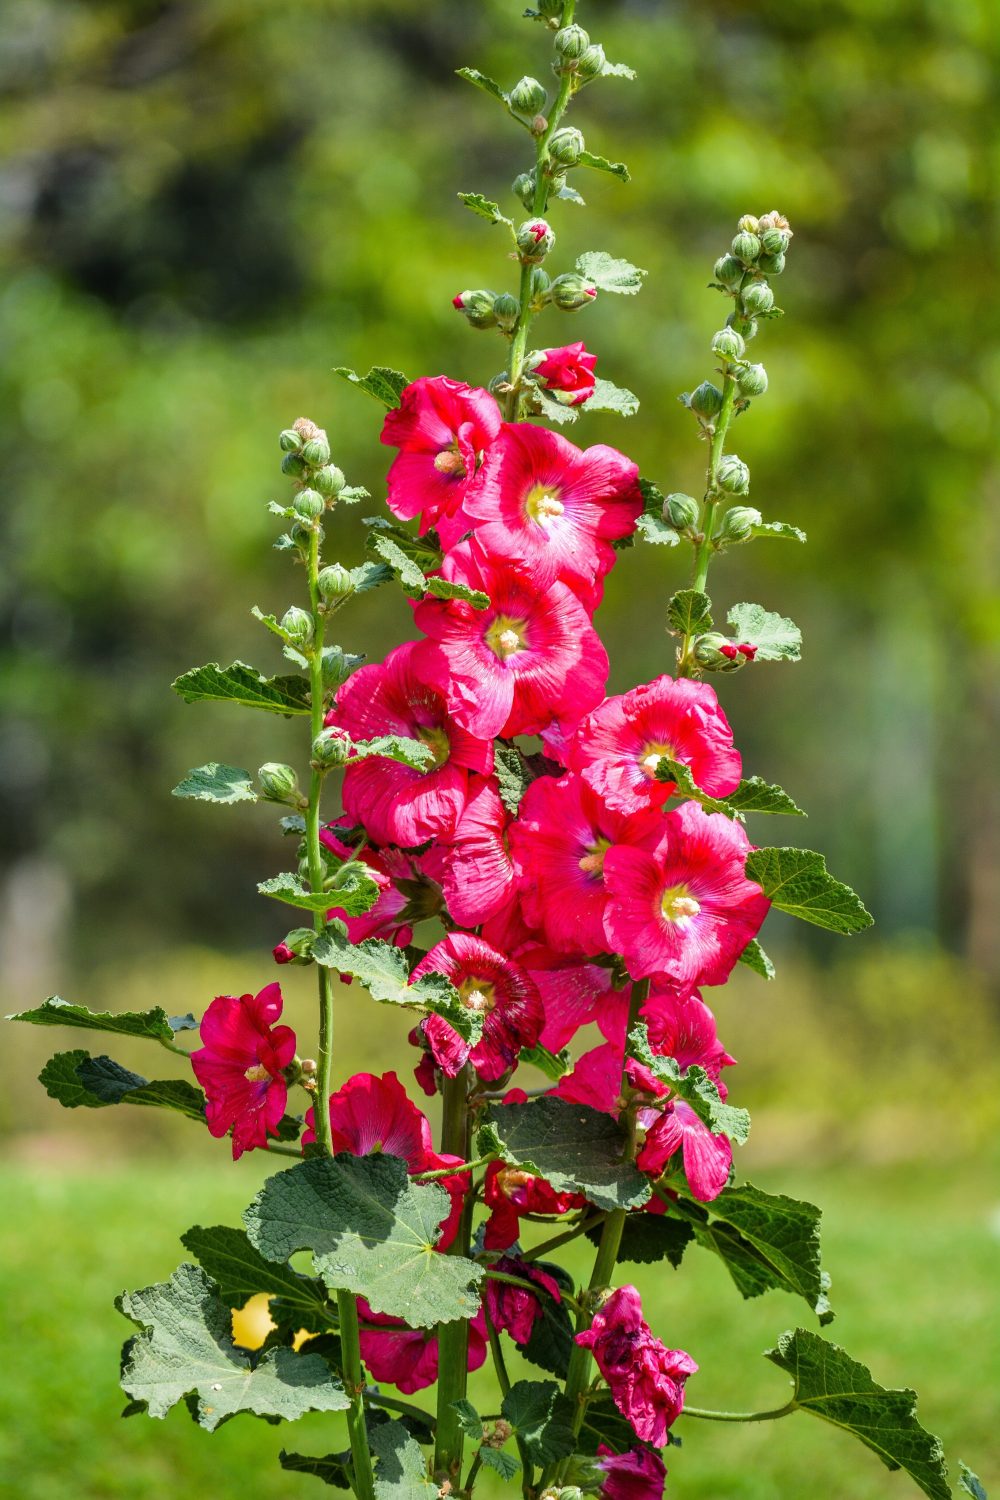
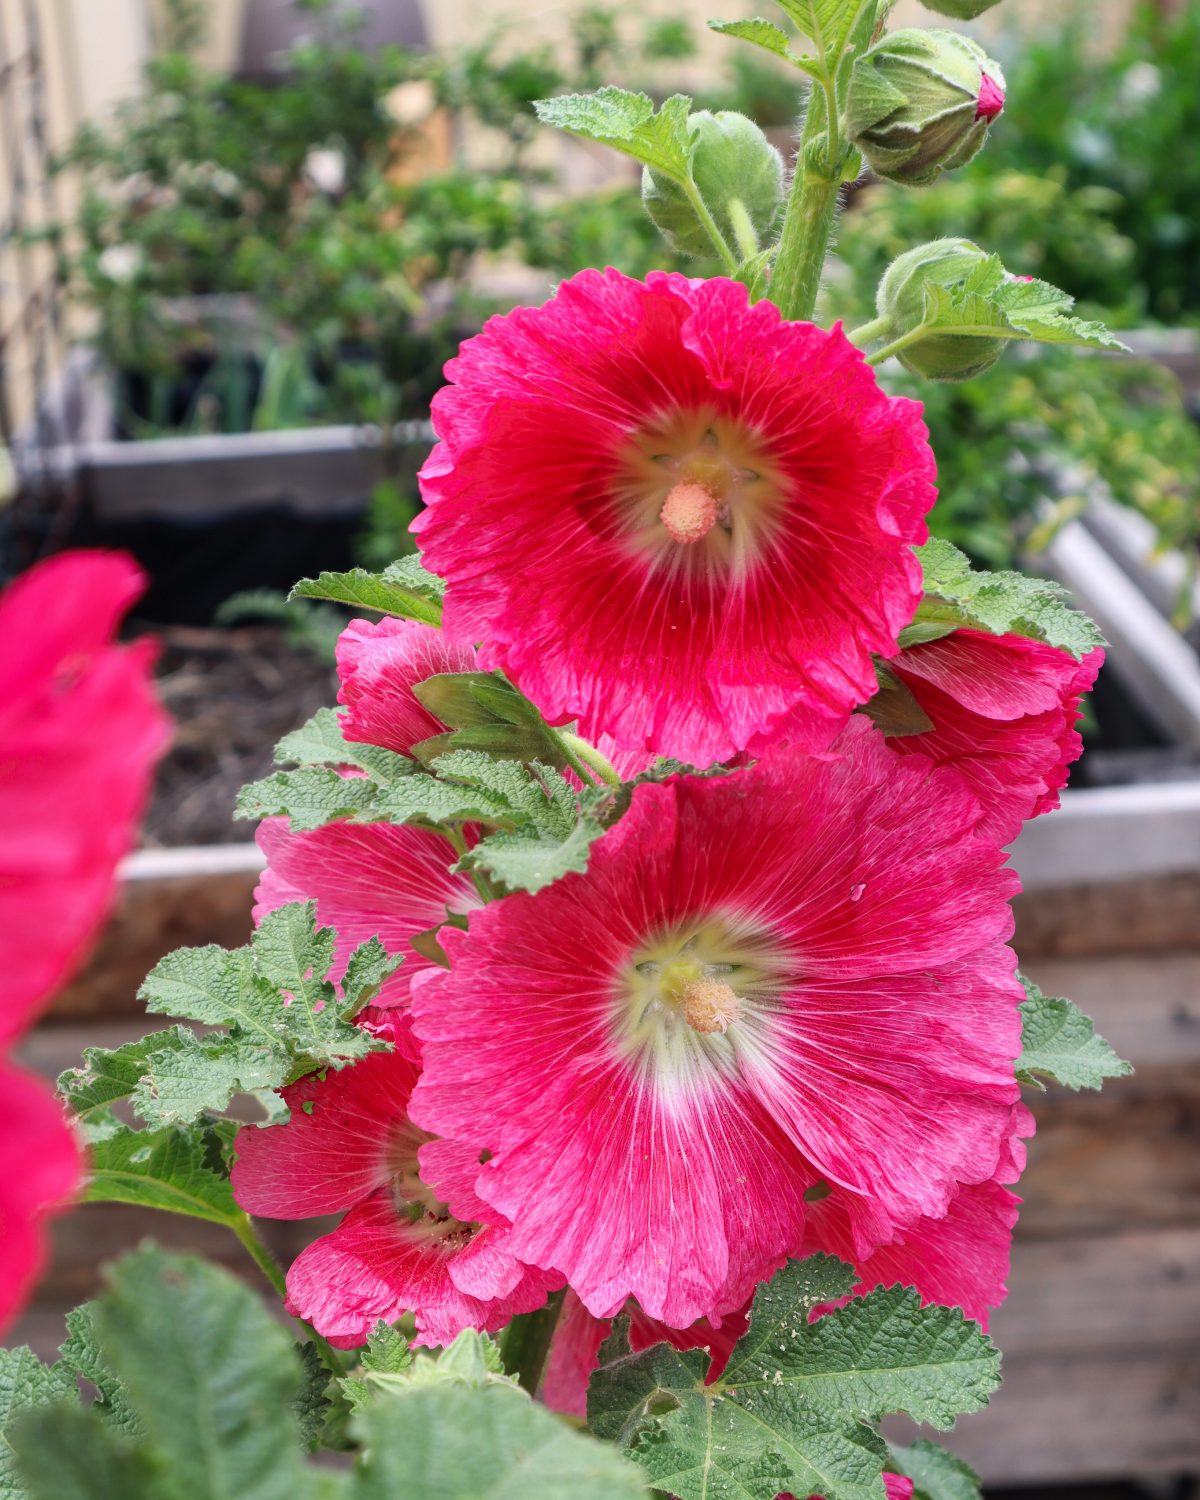
20. Hollyhock
Hollyhocks are edible flowers that can grow up to 10 feet tall! They attract 100 of pollinators to the garden, and their height acts as a flag inviting them in. The leaves are also edible and can be cooked to make wraps. Hollyhocks are an annual so they will need to be planted again each year but they are so worth it! They can be susceptible to powdery mildew.
21. Thyme
Thyme is a hardy herb that thrives in hot conditions. Thyme is very versatile in the kitchen and pairs well with tomato dishes, on pizza, and roast veggies. Thyme also produces masses of tiny white flowers that attract an array of beneficial insects and pollinators. Thyme creeps over the ground so it makes a great edible ground cover plant.
22. Macadamia Nut
Macadamia nut trees can take a long time to start producing (5-7 years) but are really hardy and nuts are great additions to a homestead to make flour and milk from.
8 Tips for Successfully Growing Heat-Tolerant Edible Plants
Many of these heat-tolerant plants listed are perennials, and the reason perennials are so good for hot environments is that they have established roots and have time to get used to their environment. Annuals such as lettuce and tomatoes are planted new and have shallow roots so are more vulnerable to overheating.
Below are some tips to help you get your plants established and thriving through hot periods.
Avoid planting in hot weather (always check the forecast)
Provide temporary protection,such as shade cloth or umbrellas, during hot periods.
Grow nanny plants or pioneer plants (quick-growing trees that provide dappled shade in summer eg: grapes, mulberry, and deciduous fruit trees)
Plant new trees in pots until after the summer heat has passed
Plant densely – allow other plants to protect and shade each other and the soil.
Grow Endless Fertiliser
Growing food in a hot climate doesn’t have to be a struggle. By choosing tough, heat-tolerant plants, layering your garden with support species, and working with your climate instead of against it, you can build a garden that stays productive all summer long.
If you want to take it even further, my new ebook Grow Your Own Natural Fertiliser shows you how to build healthier soil, boost resilience, and keep your garden thriving — even in extreme heat. It’s the perfect next step for creating a truly self-sustaining garden.
An edible food forest is a type of food-producing system that mimics nature and creates a low-maintenance edible garden. Food forest systems can be designed and adapted to suit small urban blocks, sloping sections, and large open spaces. The idea of creating a food forest is that you can let it go a little wild and allow nature to create balance. Food forests not only provide an abundance of food, but they also promote biodiversity, sequester carbon, attract wildlife, nurture the soil, and create a beautiful and tranquil place to be.
Watch the workshop
What is a Food Forest?
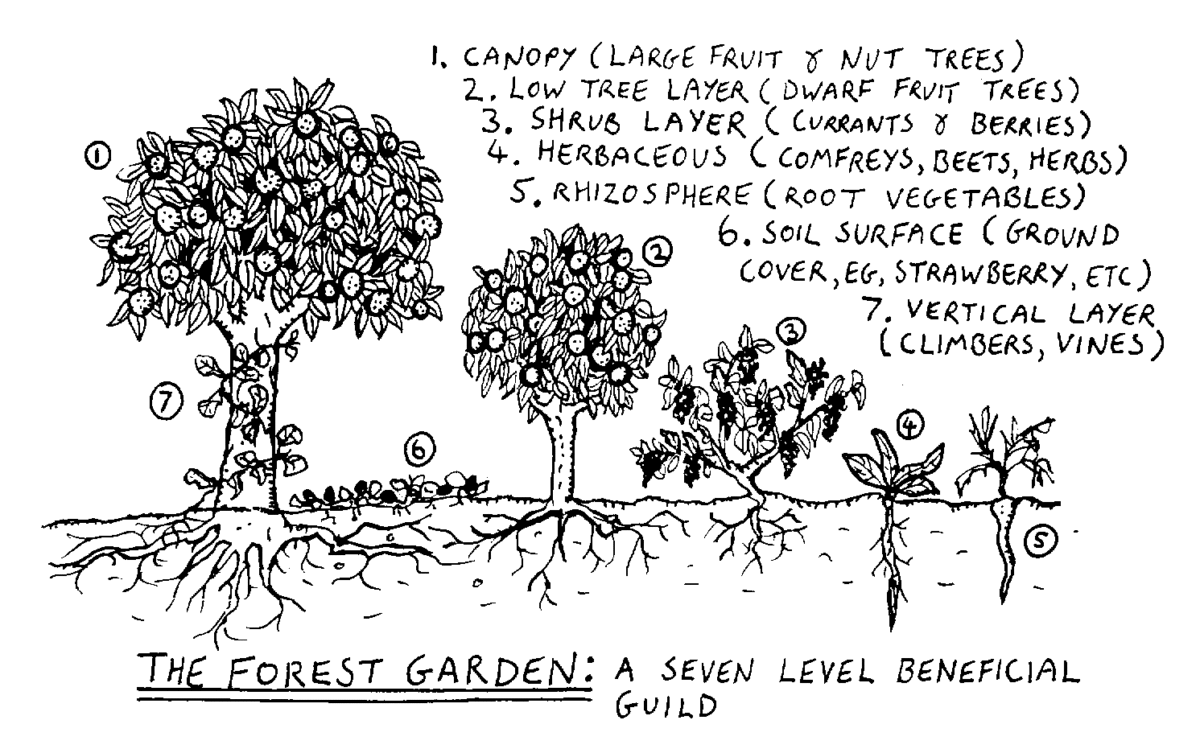
A food forest is a layered system of gardening that is designed to promote biodiversity and create an ecosystem that feeds off each other through mutually beneficial relationships. A food forest aims to mimic patterns and systems that occur in nature. Although, the food forest gardens we create are definitely not what occurs naturally eg: planting tomatoes with guavas, feijoa, and lettuce. It is more so about creating layers both above the surface with different heights and shapes, as well as below the surface with varying root structures. This way all the plants can get the space they need to thrive, provide nutrients, shade, and shelter to others, and work all together as one big family to grow abundant food supplies.
image credit: Graham Burnett
Why Create a Food Forest Garden?
If you are looking to create a low-maintenance garden that produces food all year round, is lush, tranquil, and attracts birds, bees, and other local wildlife, then a food forest may be the garden for you! Food forests are a great way to grow a huge variety of plants in a single area. The ground covers will smother weeds so there is one less job for you to do! The plants are mainly perennials so this means we don’t need to dig up the soil and replace plants each season. The less we dig up our soil the better as this promotes healthy microorganisms and soil life.
There are certain characteristics of a food forest that allow it to renew and support itself with little external input
Planting Density
It’s important to cover and protect the soil from the harsh sunlight
Planting densely creates a habitat for wildlife
More leaf matter to fall and nourish the soil
More roots to hold the soil together and reduce erosion
More flowers for the bees = more pollination and more food production
Dense planting will reduce the number of unwanted weeds
Having flowers and fruit trees planted close together can increase pollination as the bees and pollinators will be nearby
Growing a wide variety of plants
Planting a wide variety of plants will mean you have fruit, vegetables and flowers ready at all different times of the year
Diversity in plants not only provides you with a wide range of nutrients but also your garden and wildlife
Different root structures will provide the soil microbes with different secretions and reduce the severe depletion of nutrients in the soil. If you have all one crop planted in a single area they use up the same nutrients and the soil can become depleted. Having a wide variety can help keep it balanced.
Plants have different flowers which will attract different pollinators to your garden. Each pollinator will achieve different results for each plant. It’s important not only to have flowers available all year round but also a variety of different kinds.
Self Fertilising
With a variety of layers and heights in your food forest, the plants will drop their leaves and fruit which will act as a mulch and built-in fertiliser.
Some plants may get overgrown or die off (survival of the fittest!) which will also return nutrients to the soil.
From time to time you may need to trim your trees to reduce their height or width. This trimming can be put through a mulcher or cut up and returned back to the garden to feed the plants.
Self Seeding
By letting some plants go to flower and seed you will have new plants popping up each year. This can be an extremely easy way to grow more food for free.
At times fruit trees may grow beneath the canopy from the seeds of rotting fruit. It can be a good idea to move these as they won’t have adequate space to grow. Either, relocate them or pot them up to swap or trade.
How to Start a Food Forest Garden
Step 1: Choose a location and prep the soil
First up, we must decide on an area to start converting into a food forest system. This could be an old veggie patch, the front lawn, along the back fence line, or a large open field. The preparation needed will depend on the condition of the area selected. But in general, you will want to:
Clear any debris or unwanted structures
Remove or smother the grass. This can be done by laying down an old carpet for a few months to kill off all the grass. If the grass is still alive and present it can be hard to maintain. Another way is to use sheets of cardboard, as these will eventually breakdown once the grass has died.
If your location has never been used to grow before, the soil quality may be extremely poor or sandy. It could be a good idea to add a layer of compost or organic manure.
Cover your area in a thick layer of mulch. This will protect the soil and help keep any grasses or unwanted weeds away.
Give the area a good water and feed with a liquid seaweed solution.
Step 2: Selecting a plant list
We want to select plants that:
A: we want to eat and
B: provide benefits to other aspects of our garden (animal feed, mulch, birds, shade, etc).
Below are the 7 layers of the food forest. Write down a wish list of plants for each layer and then you can start mapping out which plants will go where depending on their size, what “layer” they are, and how much light they will need to grow.
7 Layers of a Food Forest
1 Canopy Layer – Large trees that require full sun – fruit and nut trees (Avocado, Chestnut, Mango)
2 Understorey Trees – Dwarf fruit or small trees ( Citrus, Papaya)
3 Perennial Shrubs – Small bushy plants (Berries, Ginger, Arrowroot)
Some plants may fall into multiple categories – Sweet potato is a root crop but also a fantastic ground cover. Ginger is also a root crop but can make a great Perennial shrub layer.
Step 3: Designing
Mapping out a design can be as detailed or as rough as you like. It is important to come up with some kind of plan so that you can decide where to plant your larger trees so that they get enough sunlight. You don’t want to be digging up and moving things around. This should be your master plan not what you are starting with. So go big, add in all things you want so that you can plan for the future and ensure you can room.
How to map out your food forest design
1 Draw the outline of your location or property to scale
2 Add in any permanent structure (sheds, veggie patch, established trees, fences)
3 Map where the sun and shade come from. Mark areas as full sun, part sun, or full shade.
4 Add in your large Canopy trees and allow space for them to grow.
5 Add in your pathways or future large structures (pond, shed, chicken coop)
5 Add in your sub-canopy trees
6 Add in your scrubs, herbaceous layer, root crops, ground cover, and vertical layers.
7 Add seating, a table, or a place for you to view and enjoy your food forest.
Step 4: Planting
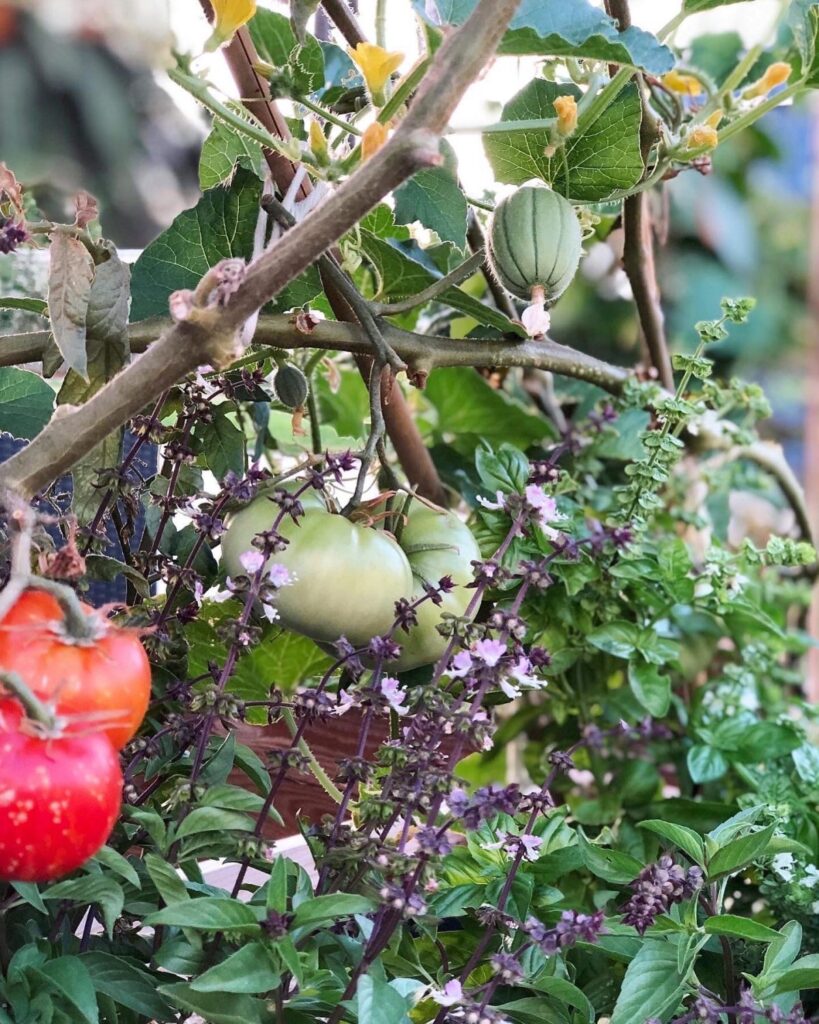
To start with you will want to select your large canopy trees and ensure there is enough space for them to grow. The height and width will be noted on the labels. Then you can start adding in your sub-canopy/dwarf trees. Large trees may take years to fully establish so your food forest may not look very ‘foresty’, to begin with. This is a great time to interplant with more annual crops (lettuce, tomatoes, broccoli, etc).
When I first started my back fence line in a food forest system, there were large gaps between the trees. This meant there was a lot more light and space available but I knew that eventually my canopy and sub-canopy trees would grow to fill the space. I used this time to grow seasonal veggies and edible flowers. As well as accumulating and establishing new shrub layers and ground covers.
How to Source Plants for your Food Forest?
Creating a food forest can involve a lot of new plants and the costs will quickly add up. This is where learning how to make cuttings can be extremely valuable. Not only can you reproduce your plants to grow in other areas of the garden but you can also swap, trade, and sell your plants to acquire new ones. Keep an eye out on local pages as you can pick up established trees for cheap or even free! I have managed to get established fruit trees that are already fruiting for less than $20. This can really speed up your food forest production.
Maintaining your Food Forest
The idea of creating your food forest is that it will require less care and attention. This can mean it will look a little wild from time to time (in a good way)
Pruning or trimming back excess trees can be a great way to propagate more or mulch to feed the garden. This can be done once the tree has finished fruiting.
Some trees will need to be staked and secured while they are young so that they don’t snap off.
Propagating plants to establish in other areas – it can take a while for some plants to establish so once they have you can start to reproduce them in other areas.
Harvesting fruit – this is important so that you can reduce the number of unwanted critters (such as rats). Rotting fruit on the ground can also promote fruit fly infestations which you do not want! So ensure all fruit is picked and preserved or composted.
Feeding – It can be beneficial especially in a young food forest to add in extra fertilisers. Try using natural products such as seaweed solution or creating your own from leftover plants and weeds.
Netting or bagging fruit – Depending on your location you may need to net or place net bags on your fruit. Fruit fly, bats, and birds can decimate crops in just a few hours.
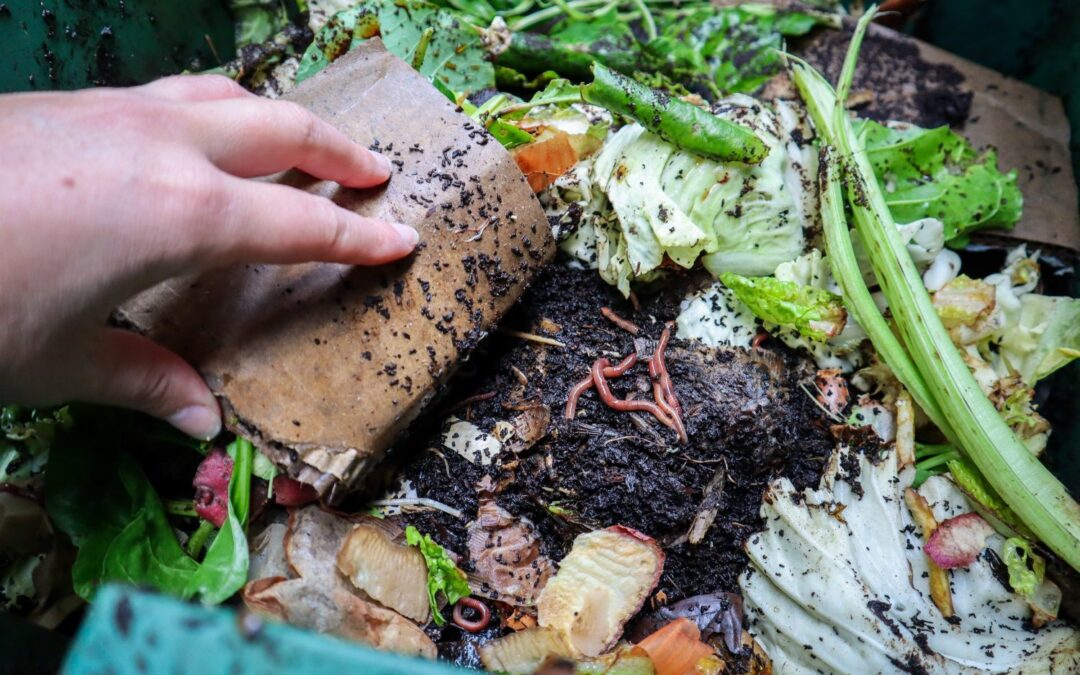
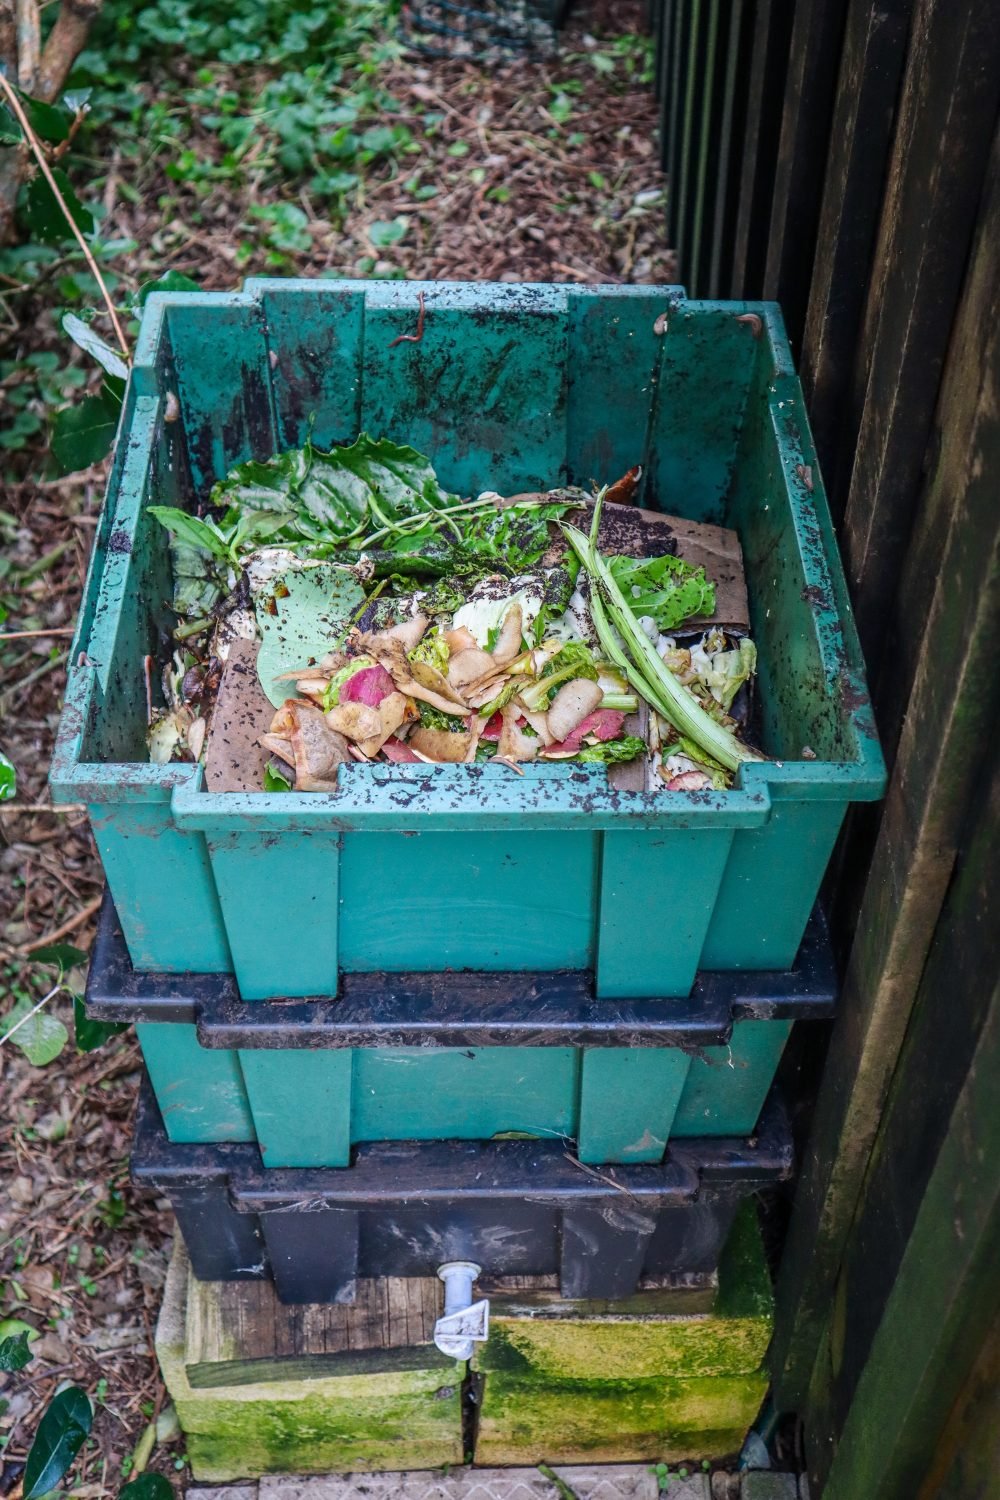
Worms are an amazing addition to a self-sufficient homestead as they turn scraps into nutrient-rich organic fertilizer to help you grow more food. Creating a sustainable lifestyle is all about taking small steps and changes to close the loop and nurture thriving ecosystems. You don’t have to do it all at once and I highly recommend starting small, mastering a manageable garden, and then start adding layers one by one. If you overwhelm yourself and don’t have habits and systems in place it won’t be sustainable long term and you can end up with unproductive chaos.
Click to watcha warm farm tour
Tips for setting up a backyard worm farm
1. Source a Worm Farm or Home for your Worms
There are many options for backyard worm systems from kit-set to DIY. You will also more than likely be able to pick up a second-hand worm farm so keep an eye out on your local listings and marketplace. Be mindful of your local climate and do a little research. In Perth, Australia, we have extremely hot summers that reach over 40 degrees. Cool shady locations are a must for worms. If you do live in a hot climate there are some great DIY options using old fridges and freezers to offer more protection. This is something I will be creating very soon!
2. Choose a Location
Choose a location for your worms that is out of direct sunlight and is well protected. On the flip side if you get snow or cold temperatures you would need to make sure you can bring your worm farm somewhere warmer.
The other important consideration to make is to keep it close and convenient. Worms like to be fed a little and often so you don’t want them down the back of your property where they may get forgotten about. Permaculture zone 1-2 would be great or have them located on a path that you frequent regularly. For example: on the way to the chicken coop or the washing line. Having things in convenient locations is the absolute key to being consistent and having systems in place that easily become habits means you don’t even have to think about it just becomes part of everyday life.
3. Source Composting Worms
There are many times of worms in your garden and they all play different roles so it’s important to get the right worms for your worm farm to make sure they are happy and thriving. Tiger worms are a popular type of worm for this system and can be purchased at many plant nurseries or hardware stores that sell worm farms. You may also be able to get set up with worms from friends that have their own form farms established.
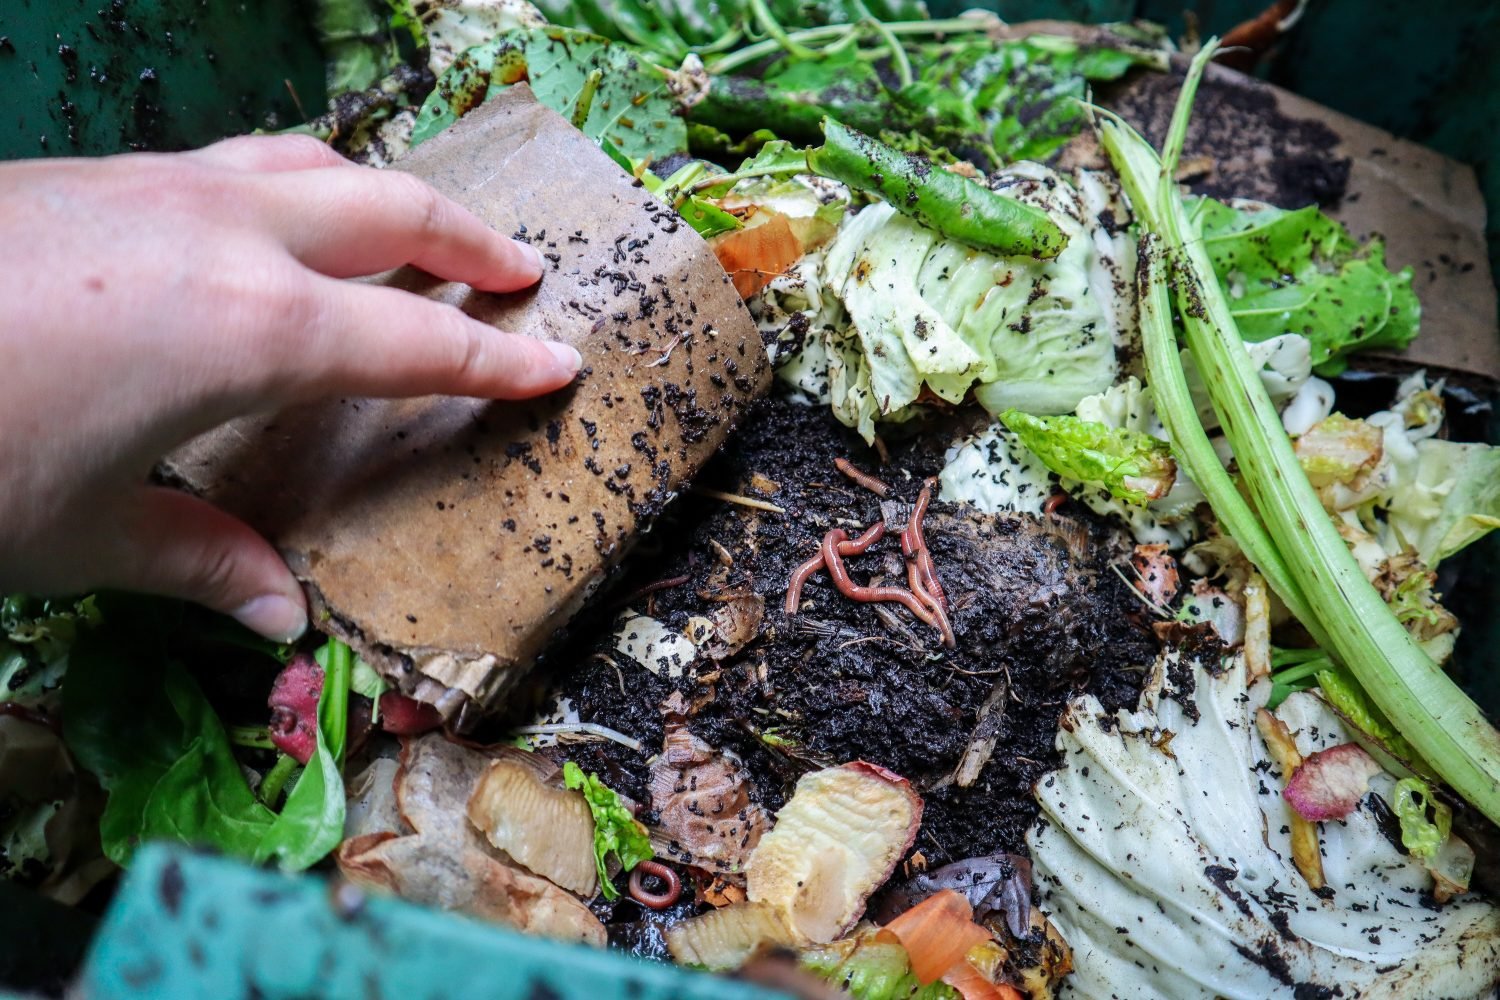
4. What to Feed your worms
Feed your worms little and often! Be consistent.
What to feed: Coffee grinds, tea leaves, vegetable scraps, egg shells, banana peels, shredded paper or cardboard, dried leaves, greens, vacuum dust, and hair. The more variety the better as this will help keep a balanced pH. Add a little sprinkle of soil when you feed as the grit can help the worms break down the scraps. Keep the food scraps in smaller pieces if possible.
What to avoid feeding your Worms?
Avoid citrus, garlic, or the onion family as this will create an acidic environment that will harm the worms. No meat – as this can create bad bacteria and attract rats and other unwanted pests.
5. Water your Worms
Worms like a moist environment of around 70% moisture, so it’s important to give your worms a regular drink. Keep a damp sheet of cardboard, hessian sack, or newspaper on top of the food scraps to retain moisture and regulate temperatures. This also acts as a slow-releasing food source.
6. How to care for Worms when you go on Holiday
If you are going away for a few weeks your worms should be fine if you get them prepared. Flush water from the top tray, add plenty of food and some slow-release food such as pea straw, hay, and place some layers of wet newspaper or cardboard on top. This will help keep the worms nice and moist. If you are worried or going away for longer ask someone to stop by and feed your worms.
How to harvest the Worm Tea and Worm Castings?
The by-products of worms are both castings and worm tea. Castings are the worm poo which is your food scraps converted into soil. Add scoops of worm castings to your garden beds to feed and enrich the soil. Warm castings are quite concentrated so it’s best to mix this through with other soil first.
Once the worm bin starts to fill up with worm castings and the worms start trying to get out it may be time to change the bins over. Depending on the size of your worm farm and the population of worms this can be done 2-4 times a year. The active worm bin should be in the top layer so it is time to move this down and place an empty bin on top. Lift out as much of the uneaten food as possible and add it to the empty tub. Put in some fresh food and bedding and pour water over the top to moisten it all down. The worms will start to come up to the top layer to access the food and leave the bin of castings behind.
This may take a while for the worms to move up depending on how much uneaten food is left behind and how dense the population of worms is.
If you don’t have multiple layers in your worm farm another way to harvest the castings is to tip it all out onto some cardboard. The worms don’t like sunlight so they will move to the bottom of the pile and you can harvest off the top layer before putting the worms back in.
Worm tea can be watered down 10:1, especially on young seedlings but we also use a much more concentrated version of 50:50 on fruit trees. Just be careful when using it around young plants as they will be more sensitive, that’s when I would water it down more. Like with everything in the garden, when you are unsure or just starting out do sections and test it out first.
Use the worm tea within a month or two as you want to ensure the living organisms stay alive as that is the key to healthy soil!
If you have extra worm concentrate, bottle it up for gifts or this could be a great little side hustle for kids to sell.
10 Sustainable Gardening hacks to ensure your garden is quickand easy to maintain for sustainable long-term growth. Do you want to grow an edible garden and harvest delicious organic food straight from your own backyard but… you don’t have enough time in the day? Whether you are a busy parent or your spare time is already devoted to hobbies, sports, growing your business, or other priorities and you want to ensure your garden is easy to maintain for sustainable long-term growth, then these Sustainable Gardening Hacks are perfect for you!
Lazy gardening is actually an amazing thing! It means you are working smarter, not harder, and have systems in place to work with nature to get abundant harvests.
So let’s not waste any time and get straight into it…
1. Plant Perennials
Perennial plants are ones that you plant once and they will continue to give you harvests for many years to come. They are the ultimate hack for sustainable gardening! So this is probably my number one tip for lazy or time-poor gardeners.
Perennials are plants such as Fruit Trees, Berries, Bananas, Sweet Potatoes, Rhubarb, Artichoke, and Asparagus. Aromatics such as Ginger and Tumeric, and Herbs such as Rosemary, Lemon Verbena, and Mint. These you plant once and each year they will produce more and more food. There are also many perennial versions of our much-loved annuals such as Perennial Basil, and Perpetual Spinach. This year I have added Egyptian Walking Onions, more Berries, Fruit Trees, Asparagus and Artichoke.
I am converting more and more of my gardens to perennials because not only does that mean I have more time to spend developing new gardens or pouring hours into creating more gardening content but, Perennial Plants also allow a seamless transition and continuous supply of food. Perennials will either produce all year round or they will have certain times of the year when they are fruiting or producing. If you want to really level it up you can plan out when your perennials are ready and ripe and plan to fill in the gaps with other perennials that will be productive during these gaps in the season. For example, my citrus are ready in winter, then over summer I have berries, and in autumn I have Feijoas. My plan is to have a continuous supply of fruit all year round so I will continue to select plants that are ready during the gaps.
2. Chop and Drop
This is a technique of mulching and composting that I use in my urban food forest. Any time I trim my plants or remove any annuals I simply chop up the leaves and branches and drop them around the garden allowing the plant matter to break down and feed my plants. This is very easy to do and I don’t have to move plant material anywhere. It protects the soil from the sun, suppresses weeds and it feeds my soil to help grow more and more food! It’s a win-win situation and saves a lot of time. Fruit trees also love the fungal properties that rotting sticks and branches provide.
This technique works best with a food forest situation rather than a veggie patch, as it would be much harder to spread the plant matter and not cover small seedlings. This may also attract slaters or woodlice which will help break down the plant matter but these little critters are not something you want in your veggie patch.
3. Direct Sow Seeds
This is my favourite way to plant seeds. No, it’s not the most effective, but it saves a lot of time. I find direct sowing seeds straight into the garden can take a bit longer for them to germinate because it might not be the right soil temperatures but once they pop up they will usually be stronger plants. Sowing in seed trays means you can control the conditions and bring them inside which will encourage them to pop up sooner but you need to baby them and care for them. Harden them off by taking them outside so they can get used to outside temperatures before you plant them in the garden. They are just more fiddly and do require more attention. So where I can I go with the survival of the fittest approach and plant a few extra seeds.
4. Grow Soil
If you are time-poor and only have small amounts of time to allocate to your gardens, I would definitely put a big chunk of that into improving your soil and creating soil-improving systems. This will go a long way in creating sustainable gardens. Healthy nutrient-rich soil means your plants will grow faster, they will be stronger and more resilient and they will not succumb to pests and diseases as easily. If your soil is poor and lacks nutrients you will end up spending more time trying to keep your plants alive, more time watering and more time babying your plants.
Following on from growing soil – keeping your gardens well mulched is a great system to help build soil for sustainable gardens. Mulch will start to break down over time and feed your soil. Mulching also helps keep moisture in so your gardens won’t need as much watering and they help suppress weeds. Weeds are not friends with time-poor or lazy gardeners. So having a thick layer of mulch will help reduce the time needed for weeding and also the weeds that do grow will be so much easier to pull out.
6. Make it Close and Convenient
Choosing a location for your garden can be a make or break for the time-poor or lazy gardener. If you decide to grow your veggie patch or garden down the back of your property or behind the shed, it may start off okay whilst you are full of enthusiasm and feeling inspired, but eventually it will be out of sight and out of mind…. this happens to me all the time and my property is just a suburban block. I plant all my low-maintenance plants such as perennials and fruit trees all in the outer parts of my property and the annuals or plants that require more attention or regular harvesting, within view of my kitchen. In permaculture, we call these zones and it makes so much sense. When it’s raining, dark or you have had a long day, traipsing out to the veggie patch might not be high on the list. But, if you have your gardens close to your house and within view, you might notice something that needs harvesting or attention, and your garden will naturally receive more love and attention because of that. Therefore it will be more productive.
Even If this means you start off with small container gardens and once you master that move on to larger more permanent spaces.
7. Grow Wild
Creating diversity and growing lots of plants all together will not only do amazing things for the number of beneficial insects in your garden, but it can also be a lot more low maintenance. Conventional gardens with neat edges, straight rows, and symmetrical layouts will take a lot more time to maintain. By creating a garden that is a little wilder it will look lush and have less room for weeds to take up home. Even if you do get some weeds they blend in and don’t look too messy and hey, some of them may even be edible or provide flowers for the bees. Edible ground covers are great for this.
8. Let Plants go to Seed
If you let some of your plants go to flower and seed you will have plants popping up all on their own next season. This is another way you can create sustainable garden systems. The great thing about self-sown seeds is that they stay dormant in the soil until they get the right conditions to grow and then they shoot up. With absolutely no effort on your behalf. I have lettuce, tomatoes, basil, and edible flowers pop up nearly every year. Free FOOD! This technique can be amazing but it can also be a little wild at times. It’s important to try to contain the seeds on your property. I let a celery plant go to seed once and I had celery popping up in everywhere!
9. Easy Watering
Watering can take up a lot of time, especially during the warmer months. And if you run out of time or can’t be bothered then you could lose your plants after just one day in the peak of summer (especially if you live here in Perth!). Thinking about watering and creating sustainable watering systems will go such a long way to savingtime in the garden.
Some great tips are to install automatic timers and drip lines. Another is to ensure you have a hose nearby to your gardens and make it a retractable hose! Nothing puts you off watering than thinking about unraveling and putting away a hose. A retractable hose can be out and back in seconds and it has honestly been a game-changer for me in my garden!
Mulching will also help with water retention.
10. Get the Plant Selection Right
Selecting the right plants will go a long way toward creating a low-maintenance sustainable garden. We talked about choosing perennials earlier but there are also other plant selection criteria than can really help you grow an abundant garden with less effort.
Choose local or native plants. Plants that thrive in your local area will be much more adapted to the conditions and will be easier to grow. Native edible plants are often interesting and unique additions to your garden. They will also attract your local pollinators and wildlife which is a bonus!
Choose low-maintenance plants. Some plants require more care and upkeep than others. And some will have a lot more pests and diseases than others. This will vary from place to place.
Tomatoes – require staking and tying and are susceptible to pests and diseases. I often grow cherry tomatoes as I find them a lot easier to grow.
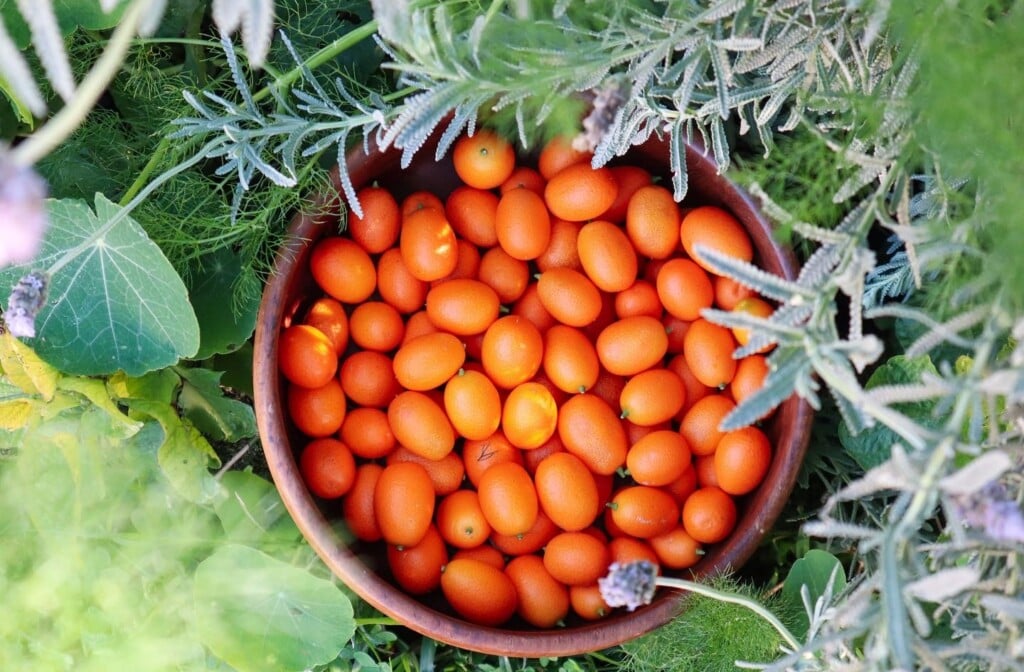
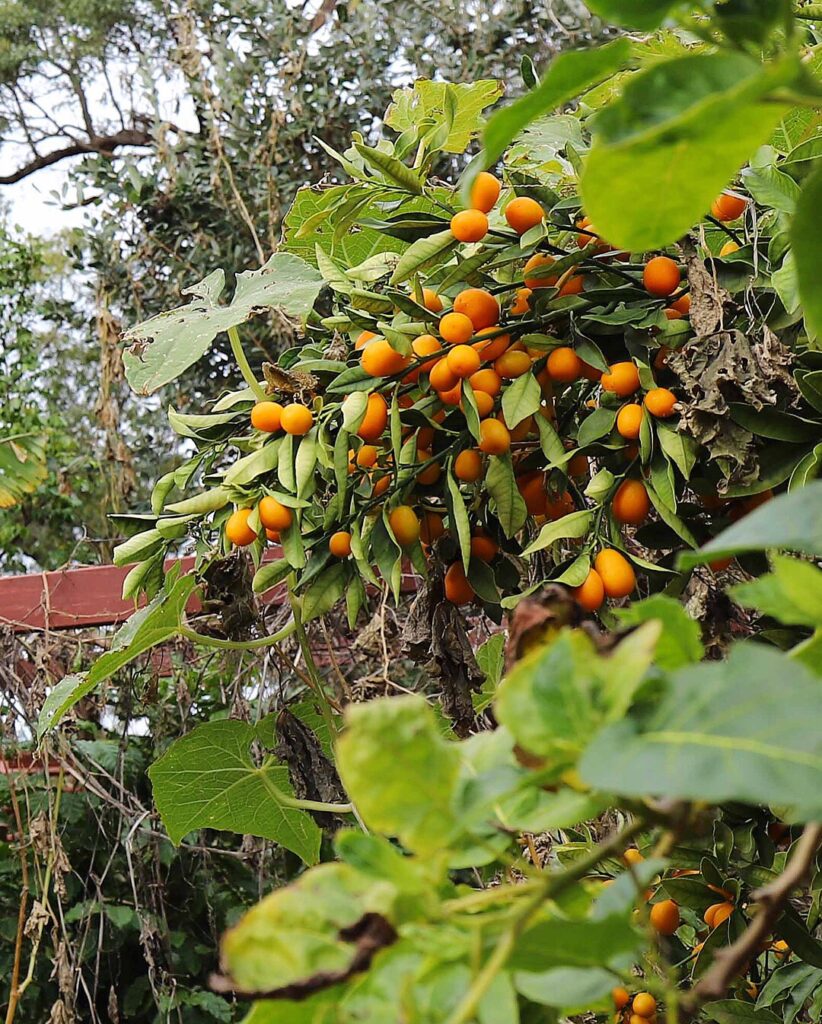
Stone fruit – Trees such as Nectarines, Peaches, and Plums have soft skin and can be vulnerable to many pests and diseases. Birds, fruit flies, rats, bats, etc. They may require netting or individually bagging fruit to ensure you get a harvest. I have chosen citrus as they have thicker skins and I find them a little more hardy and low maintenance. I have a lot of citrus for that reason such as Lemon, Lime, Blood Orange, Finger Limes, Blood Limes, Kumquat, and Lemonade.
Herbs and fragrant plants such as Lemon Verbena, Rosemary, and Ginger are often left alone by pests and are easy to grow.
This is where it is a great idea to visit small local nurseries where you can get helpful advice on what grows well in your local climate.
WATCH Sustainable Gardening HACKS for Time-Poor Gardeners