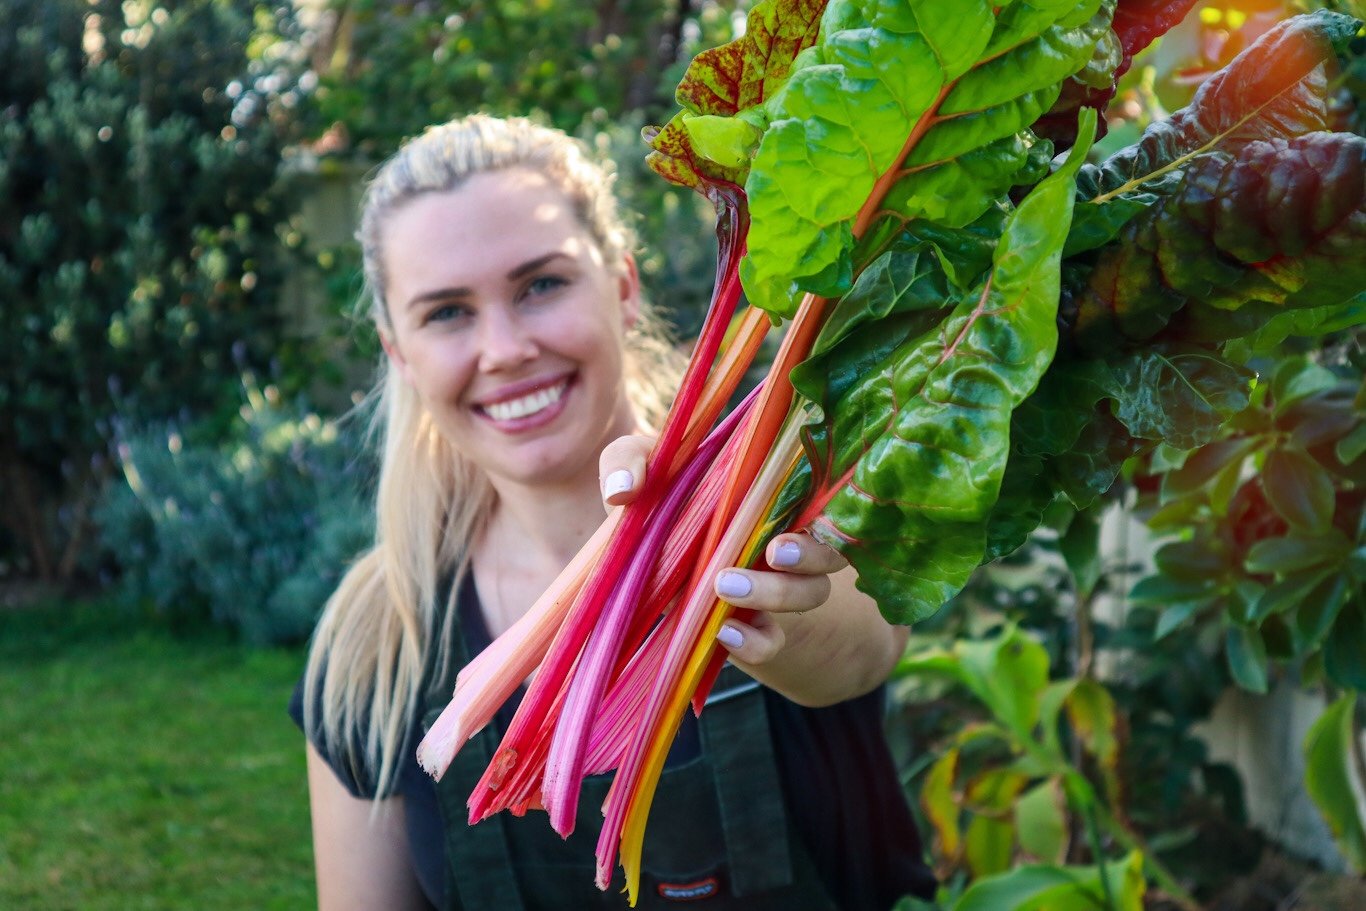
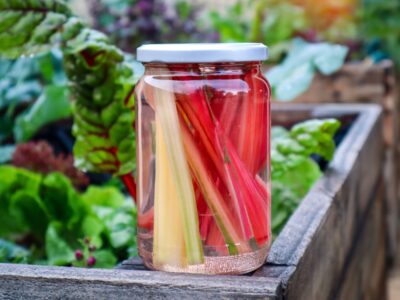
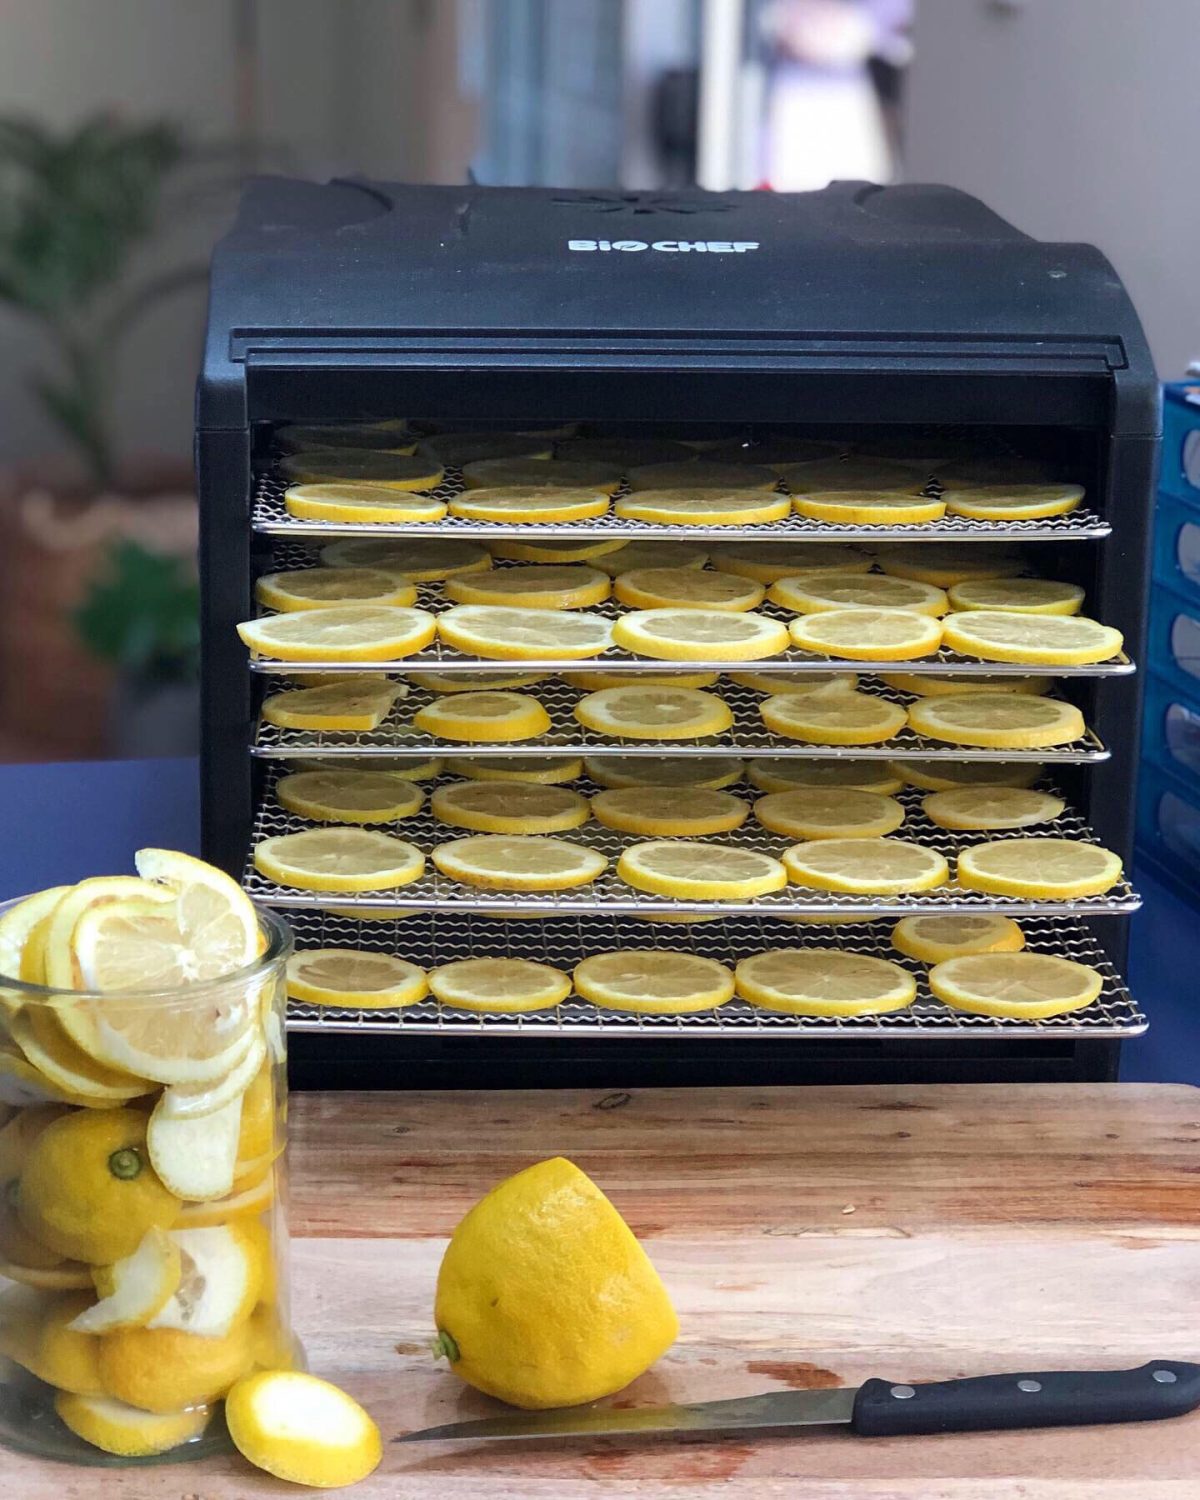
Pickled Rainbow Chard Stalks are a great way to preserve and utilise the whole vegetable. If you have made a recipe or cooked a meal using only the leafy greens, then this quick pickle is the way to go! Rainbow Chard is such an abundant and generous vegetable. In many areas Rainbow Chard can be grown all year round. Choose a shady cool location during the warmer month and keep it well watered. A great staple to grow in any home garden.
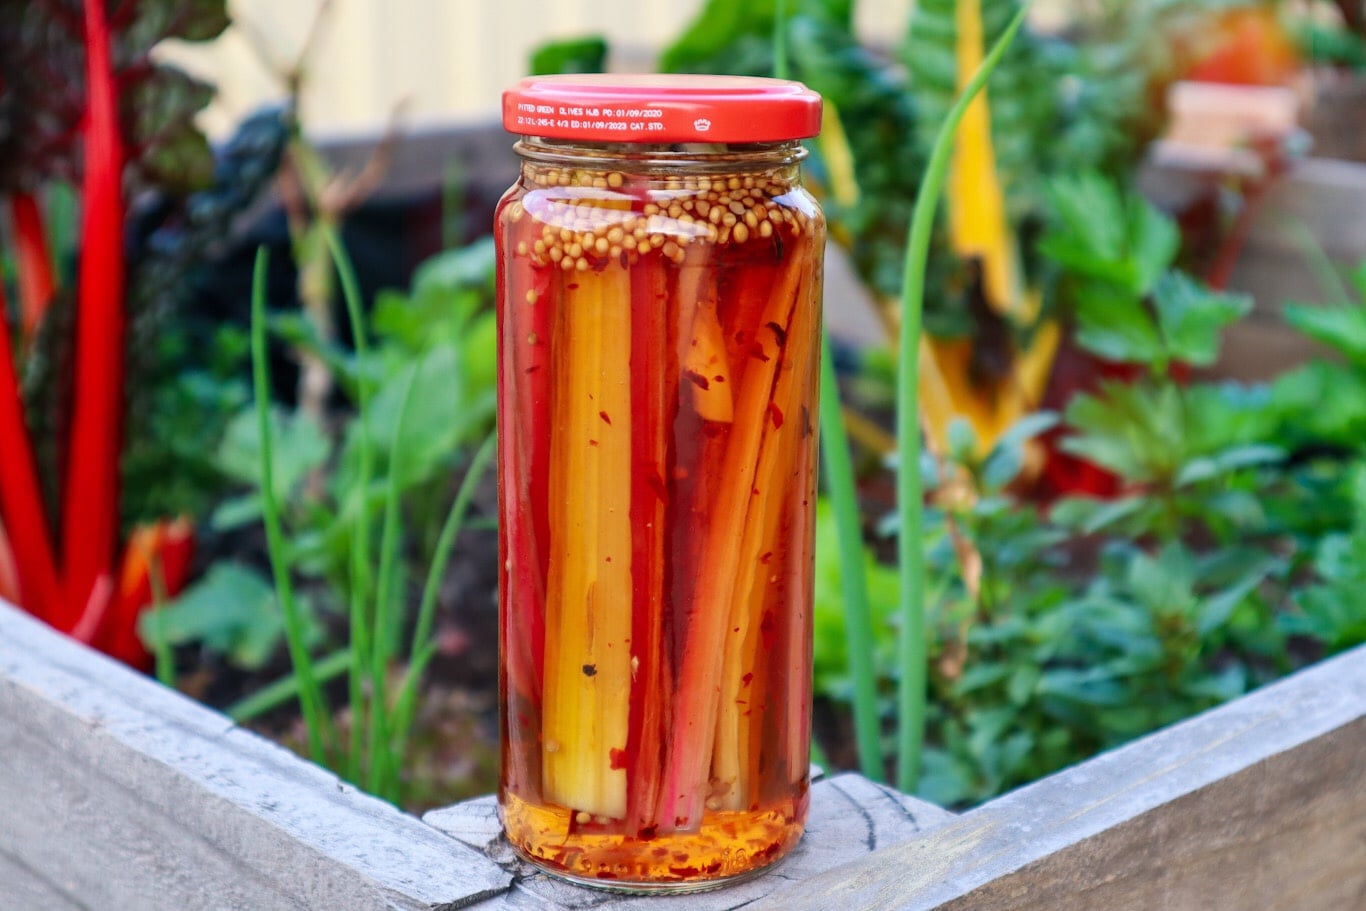
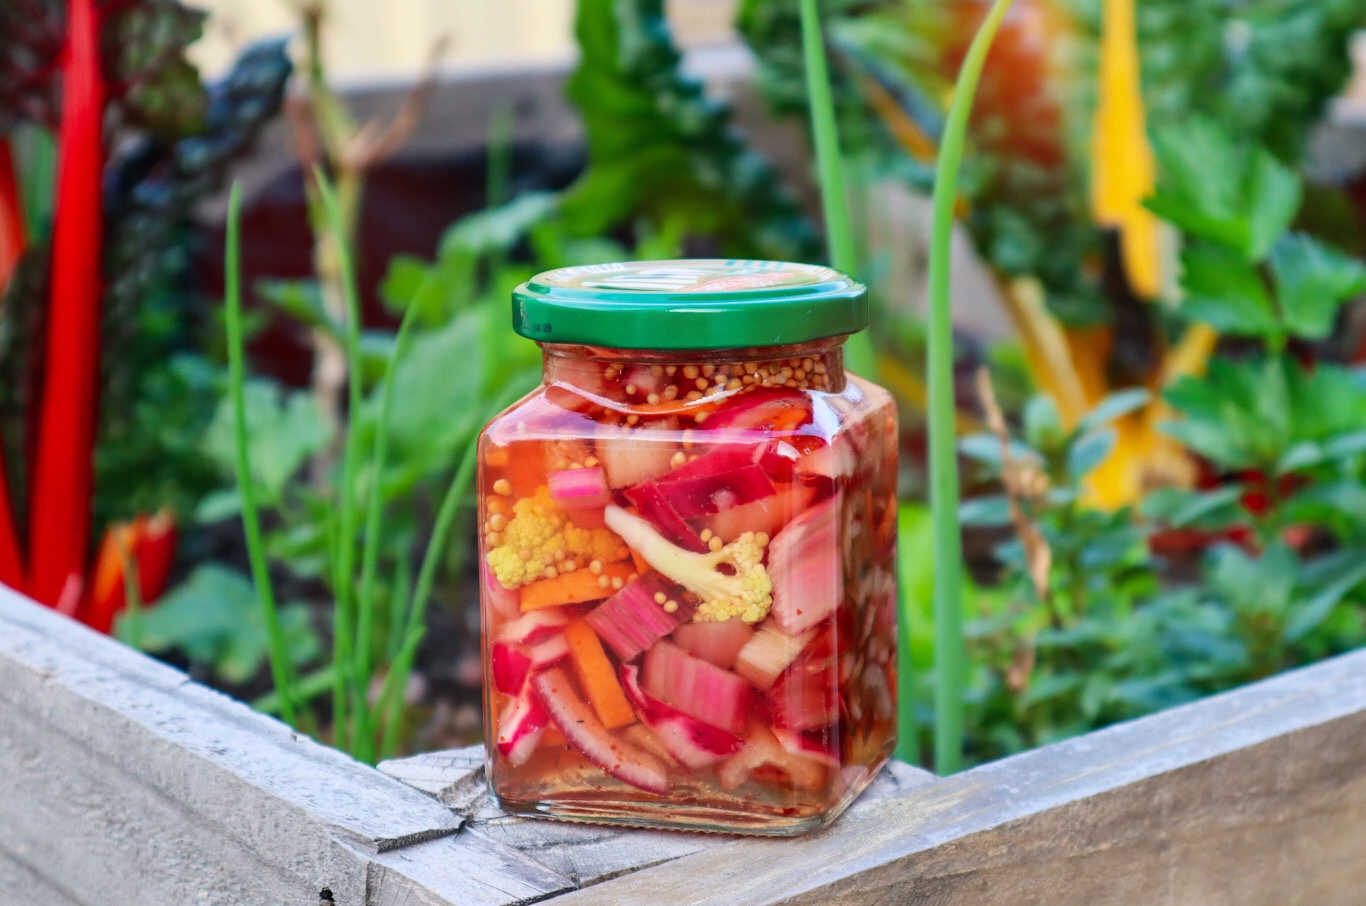
Pickled Rainbow Chard stalks absorb all the flavour from the pickling liquid but remain crunchy and fresh. Delicious!
Quick Pickled Rainbow Chard Stalks
Yield: 1-2 jars
Prep Time: 5 minutes
Cook Time: 5 minutes
Total Time: 10 minutes
Make the most of your Rainbow Chard and make these easy and delicious quick pickles. Pickled rainbow chard stalks stay super crunchy and absorb all the flavour of the pickling liquid.
Ingredients
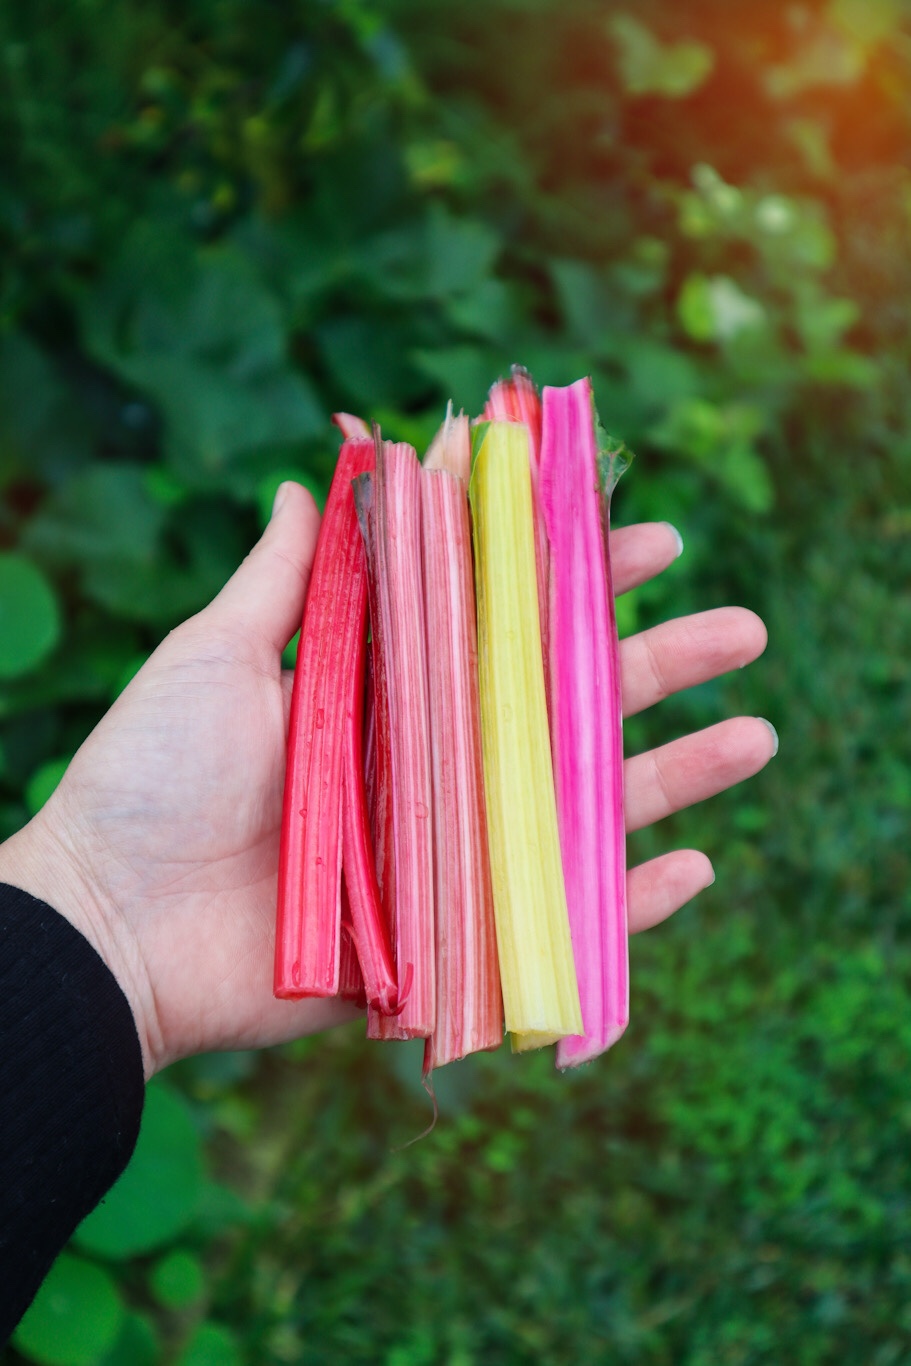
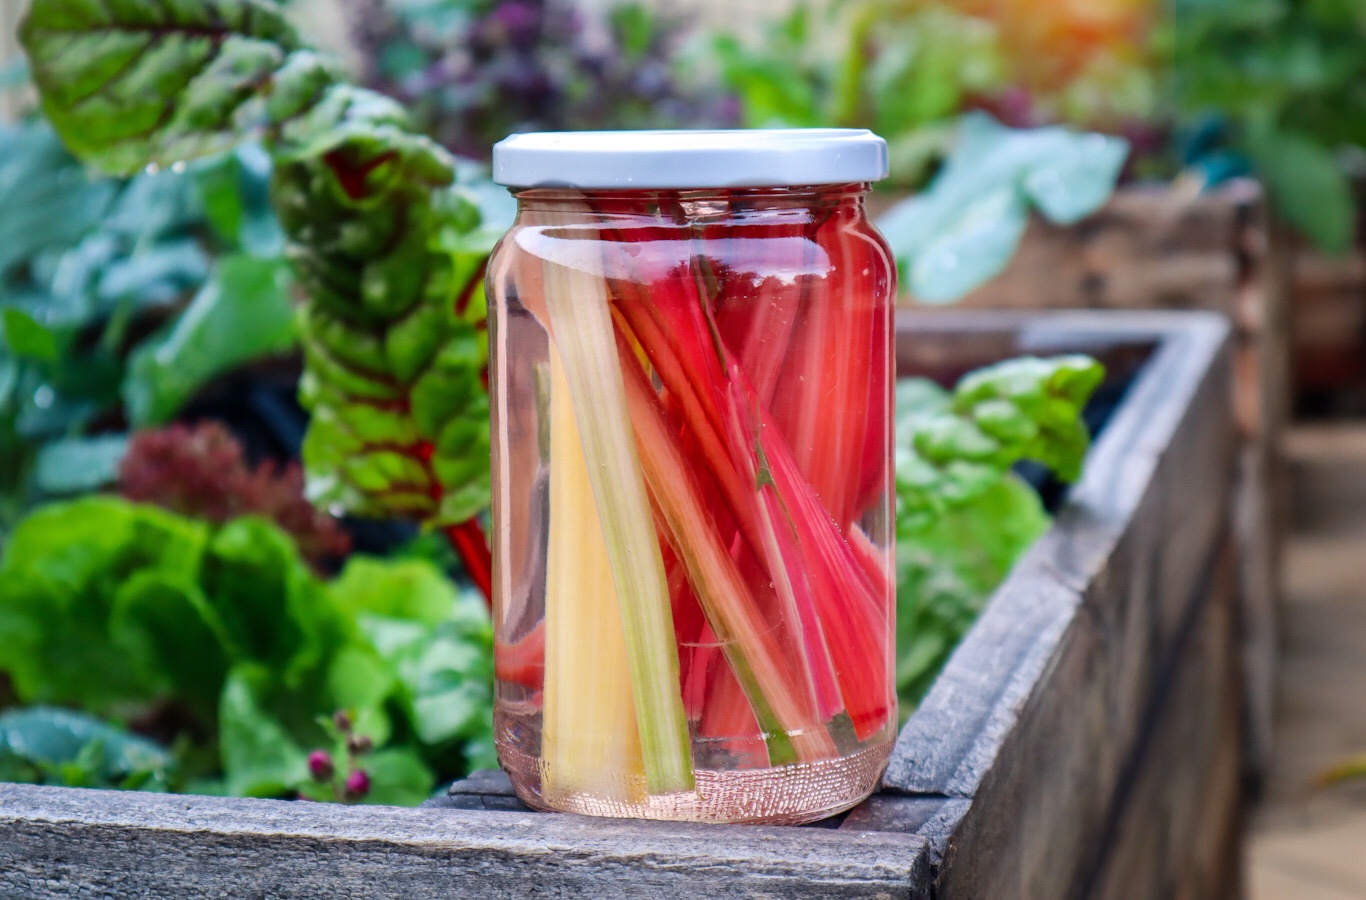
8-10 Rainbow Chard Stalks
1 3/4 cup White Wine Vinegar
3/4 cup Sugar
1/2 tsp Salt
1/2 tsp Chilli Flakes (optional)
2 tsp Brown Mustard Seeds
1 tsp Fennel Seeds
Instructions
Rinse the Rainbow Chard well. Remove the green leafy part (see below for other Rainbow Chard Recipes). There are two ways to cut the stalks. Either slice into 1cm pieces or leave as long stalks. If leaving them long, make sure they will fit in the jar you have selected to use. Cut the stalks length ways down the centre.
Add the vinegar, sugar, salt, chilli, mustard seeds and fennel seeds into a sauce pan and simmer until the sugar is dissolved.
Sterilise the jars by heating them in the oven face down at 120degrees Celsius or in the dishwasher on a high heat. Sterilise the lids in a bowl by pouring boiling water on them.
Add your Rainbow Chard to the hot sterilised jars and pour over hot pickling liquid to fill. Place the lid on top tightly and sit the jars upside down to seal. Leave to cool and then place in the refrigerator.
Wait a couple of days to allow the flavours to infuse. Pickles will last in the refrigerator unopened 2-3 months.
Notes
Add in any other leftover vegetables you have such as red onion, carrot, cauliflower or zucchini.
Sunflowers (Helianthus annuus) are beautiful, edible flowers that can grow well in any garden. Sunflowers just like their name suggest, brighten up the day with their large striking flowers and they also attract pollinators to your garden. Sunflowers have a lot of beneficial relationships and within the garden and are on my must grow list every year.
Sunflowers offer so many beneficial relationships within your garden. They are also known to remove toxins from the soil. This can be a great way to regenerate soil. If you have had spill of chemicals or other sprays have been used on your soil, plant sunflowers to help remove some of these toxins. But of course do not eat any that have been planted in the “bad soil”.
Here are some of the many reasons to grow sunflowers:
Low maintenance
Drought tolerant
Pest resistant
Attract Pollinators
Create diversity in the garden
Add colour to your garden
Edible flowers, seeds, stalks and leaves
Add nutrients to your meals
Aid in soil regeneration
Bird or animal feed (seeds)
Make oil
Natural plant dyes
Act as a trellis to grow vines up
Green manure
Popular Sunflower Varieties
‘Mammoth ‘Russian‘– Large single yellow flowers. Grows 2-4m tall. Abundance of edible seeds.
‘Prado Red‘ – Rich red colour. Multiple flowers up to 10 per stem. Grows to 1.5m tall. Remove old flowers to promote extra growth.
‘Van Goghs Landscape’ – Large single traditional yellow flower. Grows to 1.5m tall.
‘Double Dazzler’ – Semi-double single stem flower with tightly packed petals. Edible petals and seeds. Grows to 2m tall.
‘ Evening Sun’ – Striking multi head sunflower. Colours range from red, bronze and yellow.
‘Italian White’ – Pale yellow multi head flowers. Grows to 1.5m tall. Great cut flowers.
‘Moonwalker’ – Pale yellow multi head flowers. Grows to 2m tall. Bushy plant great for screening. Remove old flowers to promote extra growth.
‘Teddy bear’ – Fluffy deep gold double flowers. Multi-stems per plant. Dwarf variety grows up to 50cm tall. Great for pots.
‘Dwarf Sunsation’ – Compact plant with golden yellow flowers. Multi-stems per plant. Dwarf variety grows up to 45cm tall. Great for pots.
How to Grow Sunflowers
Sunflowers like a full sun location. They will turn their head to follow the sun during the day! Sunflowers grow well in most soil but do prefer fertile, free-draining soil. Plant the seeds directly in the soil during spring and summer after the last frost. Plant 30cm apart. Sow seeds in trays indoors first to speed up germination if you are planting late in the season.
When to Plant Sunflowers
Sunflowers are warm weather plants so plant the seeds during spring and summer. There are many varieties available with differing lengths of growth and harvest.
Care/ Maintenance
Keep the plants well-watered on warm days. Mulch the base to keep moisture in and weeds out. For an extra boost you can feed your plants with a liquid seaweed solution every 2-3 weeks. Be aware that your local birds may find your sunflowers once they start to form seeds so you may need to harvest them early and keep in a vase inside to fully open. Plants with multiple flowers on each stem can be “dead headed” (cut old flowers off) to promote more flowers to form. The large single flowering varieties such as the ‘Mammoth’ may need staking to help keep them upright especially with wind or rain.
Pests / Disease
Mice and rats love the sunflower seeds so be aware and if you have an issue with this it may be best to start the seeds off inside until they are seedlings. Slugs and snails may be an issue when the plants are young. Utilise natural pest management . As the sunflowers mature there will be less pests until they flower and attract birds. If you plant plenty there may be enough for you and the local birds to enjoy!
How/ When to Harvest
Harvesting will depend on the variety of Sunflower you have chosen. Read the packet or label to determine the type and length of harvest. Multi- stem flowers can be picked as they flower to promote more growth. Large single head flowers will be ready to pick as their petals open. Leave longer on the plant if you want to harvest the seeds (but before the birds do). Use a sharp pair of secateurs.
Reproducing / Saving Seeds
Sunflower seeds will form in the centre of the flower. These will form last as the petals start to fall off. Pick the flower and hang it upside down somewhere warm and dry (away from any birds, rats or mice). Once the head is completely dry, remove the seeds and place in a tray to dry further for a few days. Once the seeds are all dry place them in a brown paper back and label them with the variety and year of harvest. Keep the seeds in a cool, dry dark place ready to plant again the following year.
Cooking and Using Sunflowers
Sunflower petals and seeds can be eaten fresh. The seeds can also be pressed using specialty equipment to make vegetable oil. The petals can be used fresh in salads or baking as garnish. The petals can also be used to make natural dyes. The sunflower leaves can be used just like spinach or collard greens. The younger leaves are best. The young stems can also be used fresh or cooked.
Preserving the Harvest
Sunflower petals can be preserved by pressing or drying and keeping in an airtight container. These can then be used to add bright colourful edible flowers to any meal throughout the year. Sunflower seeds can be dried and kept in a jar to use in cooking by roasting the seeds.
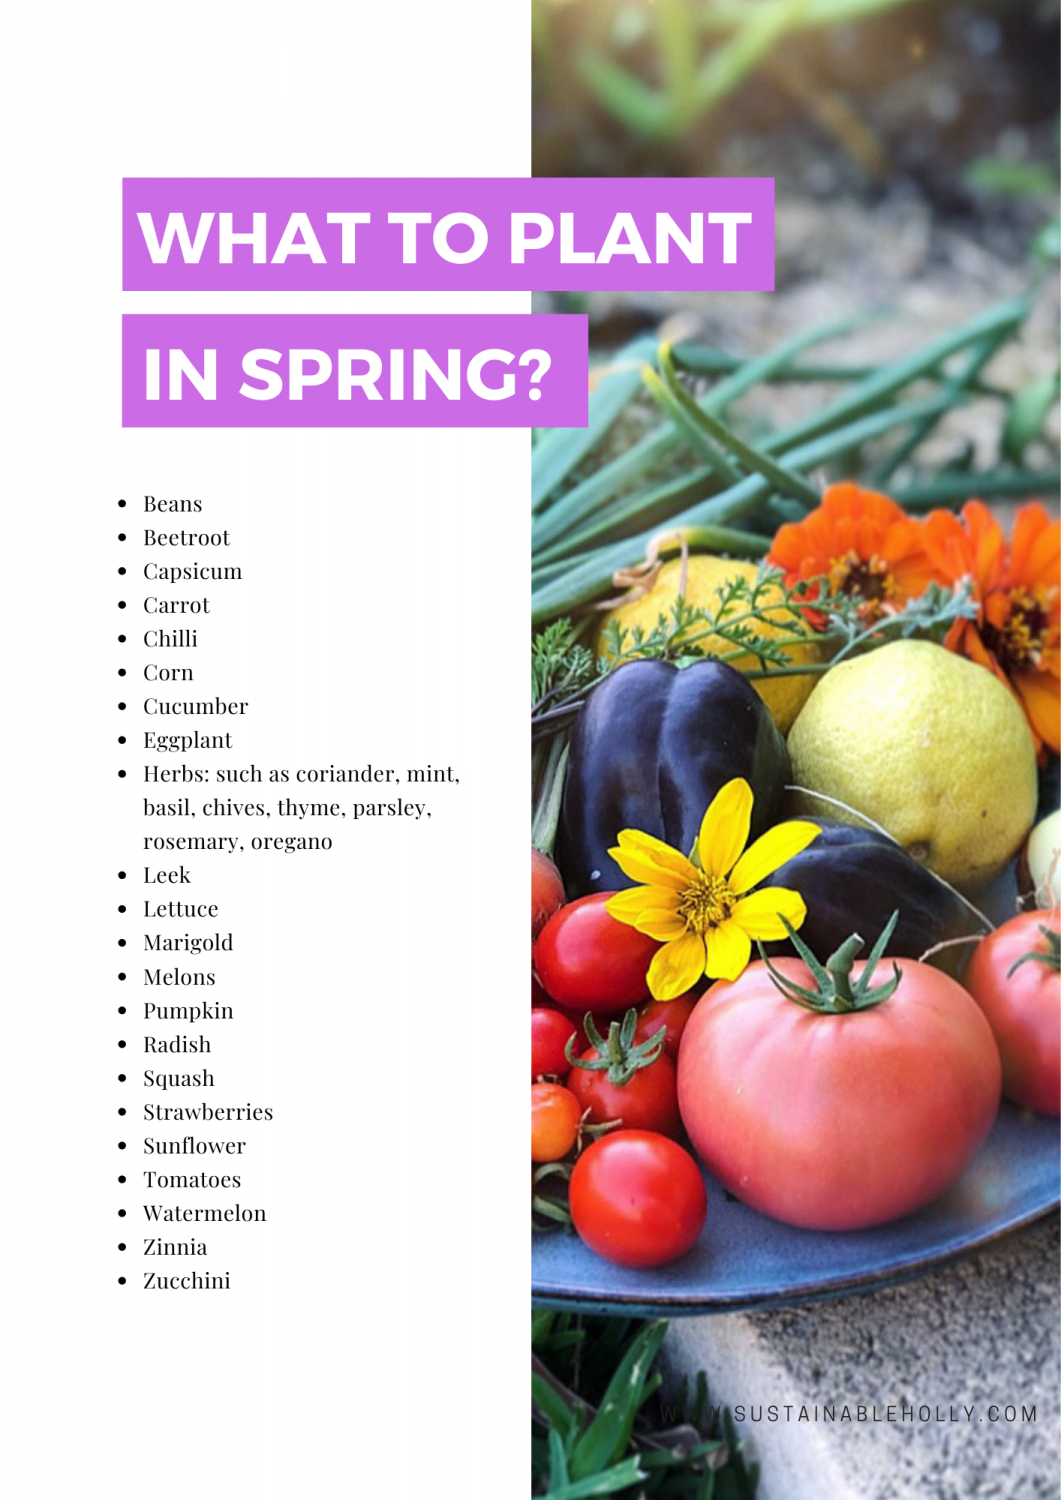
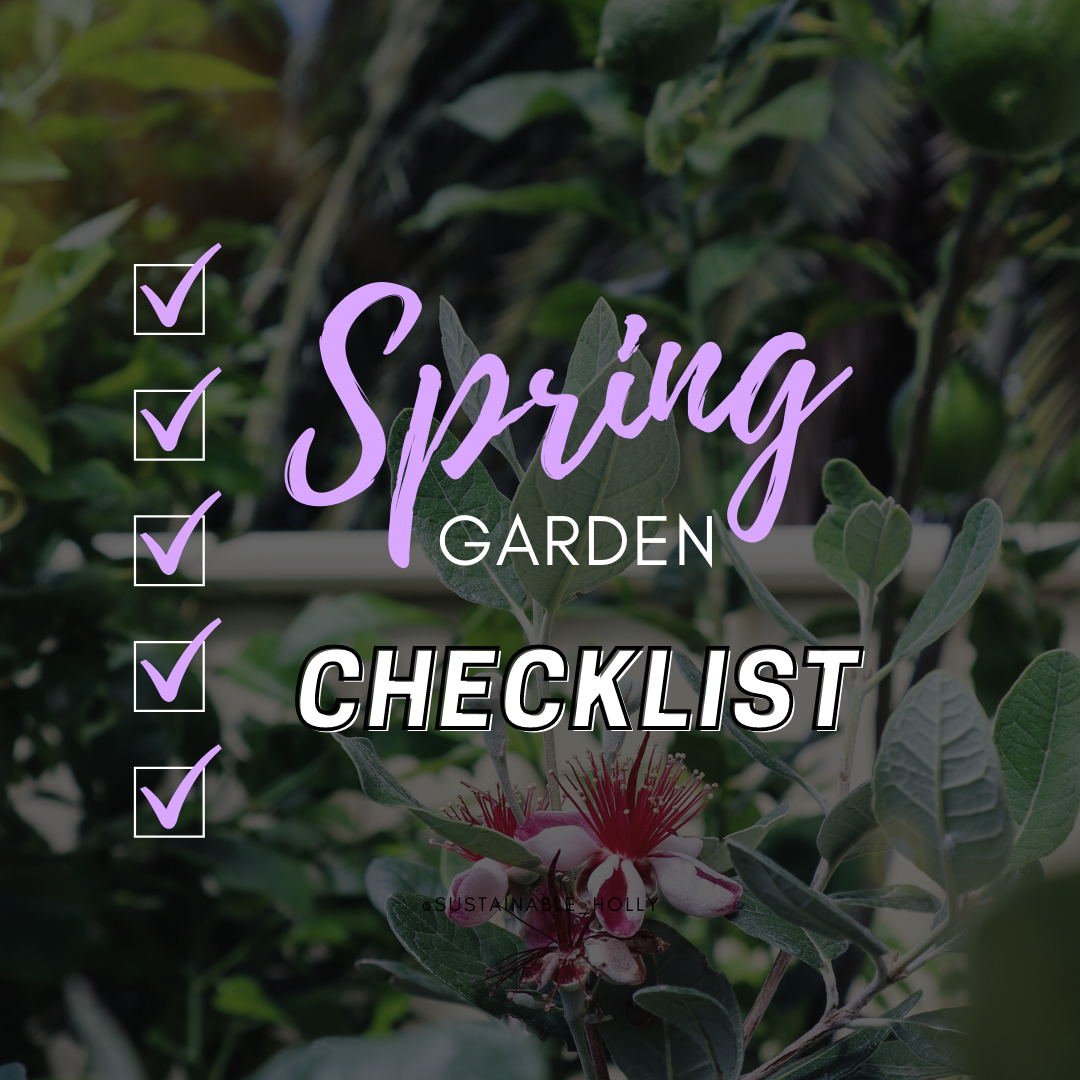
SPRING is all about planting seeds, seeds and more seeds. It’s an active time for gardeners which is a refreshing and much welcomed change after slowing down during the winter months. In winter I tend to spend more time indoors, sipping too much coffee, flicking through inspiring books and dreaming up all the potential new gardens for Spring.
Be careful during the spring months for late frosts and cold weather snaps. Starting your seeds inside or in a greenhouse is a good idea. Towards the end of spring you can start to sow some of the hardier seeds such as Zucchini and Pumpkin directly into the garden.
Spring Gardening
Spring can be a bit up and down with temperatures so it’s best to start your seeds in seed trays and keep them somewhere warm to germinate. Greenhouses and sunny windows inside will work well to get your seeds up and growing.
There are a few mini-greenhouse systems you can get these days or I often use clear storage containers and fish tanks as makeshift greenhouse systems.
The key is to keep your seeds warm but still allow plenty of diffused sunlight, air and moisture. These systems can also protect your seeds from hungry little mice who often like to dig up and eat your seeds before they get a chance to sprout!
Prune your fruit trees such as citrus if they are out of shape or too big. Do this before the spring growth starts. Keeping fruit trees pruned to a manageable height will allow the tree to put more of its energy into fruit production and also means you can harvest the fruit easier before the birds or other animals get to it.
Let your best vegetables go to seed so that you can collect your seeds. Some of your Winter veggies will be coming to an end so finish harvesting and allow the best ones to go to seed. This means you will have seeds to plant the next year which will be acclimated to your exact conditions. It also means some seeds will end up in the soil and will pop up on their own next season when the conditions are just right! This is my favourite thing to do. Let nature do its thing and everything becomes so easy and flows without any external work or force.
Keep gardens mulched to help retain moisture for the warmer months. Mulch will also help reduce the amount of weeds popping up during their peak growth months.
Save the ends and scraps of your greens, herbs, onion and root vegetables and make a batch of Veggie Scrap Stock
Make extra soups to freeze
Be inspired by Spring
Hang solar fairy lights.
Create an outdoor dining area.
Cook over an outdoor fire pit or fireplace and spend more nights outside.
Make an insect hotel using foraged sticks.
Make colourful plant labels for your new seedlings.
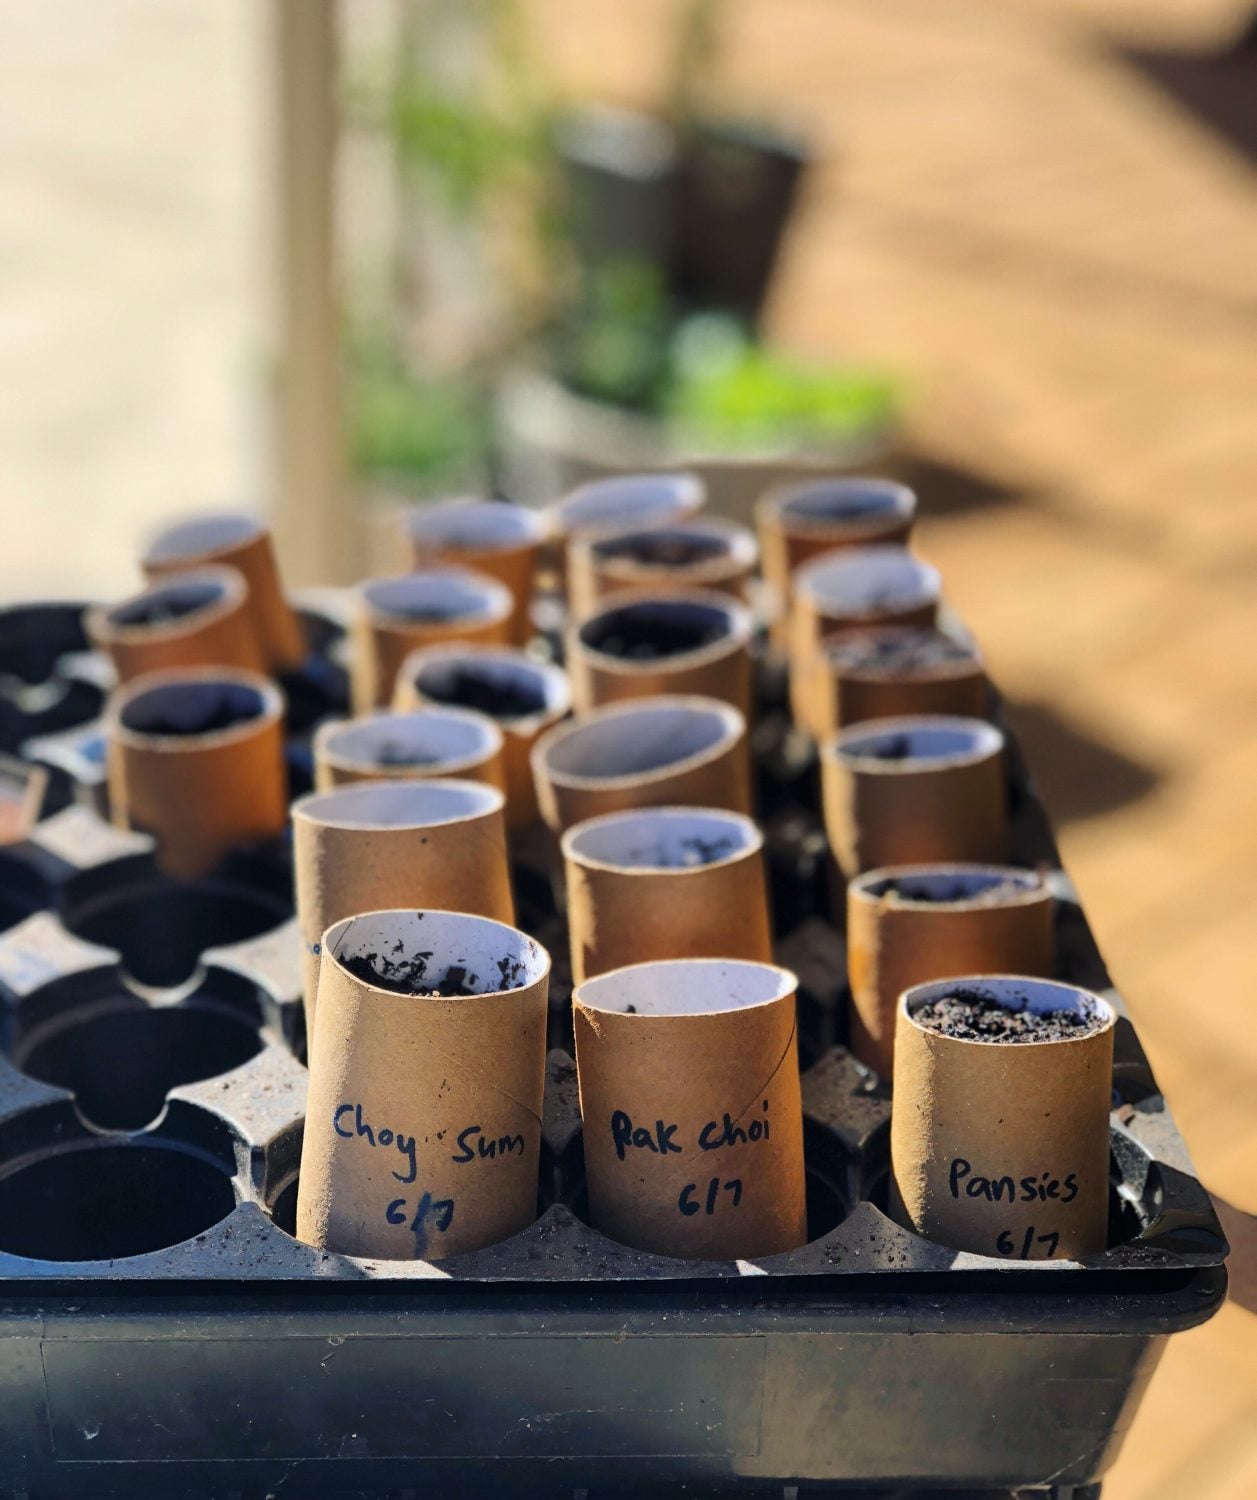
Make recycled pots and seed trays using toilet rolls, newspaper and egg cartons.
Start a cocktail garden – Plant herbs and flowers so you can enjoy beautiful refreshing summer drinks.
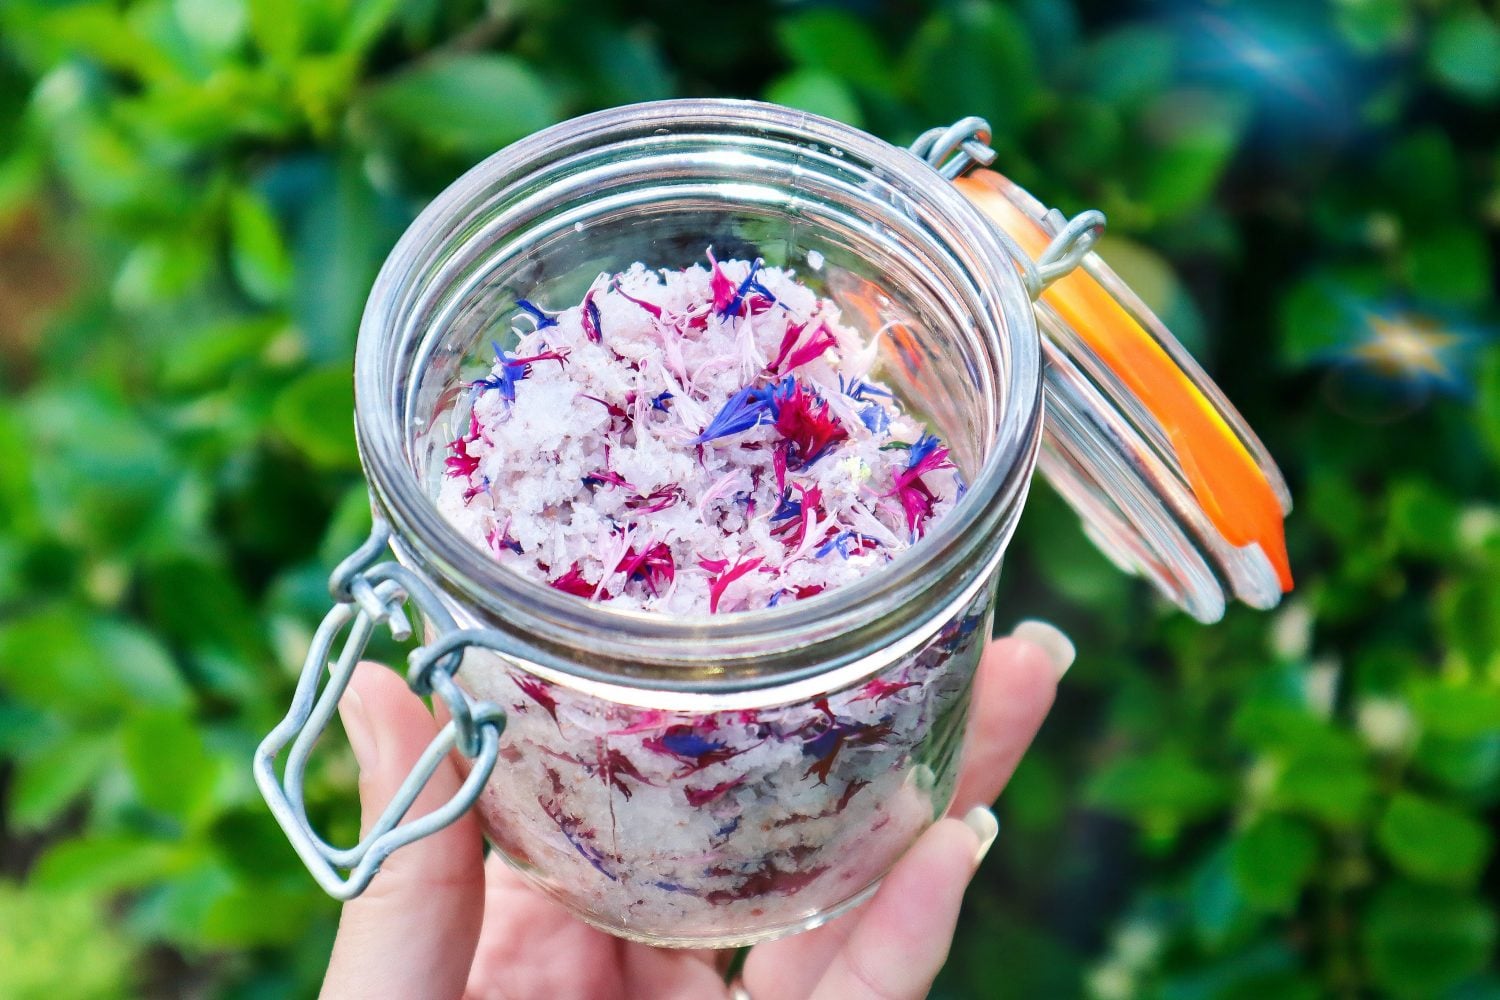
Press flowers – Preserve the colourful blooms of spring to create cards and art during the slower seasons.
Try your hand at some photography! The bees and flowers will be putting on a brilliant show.
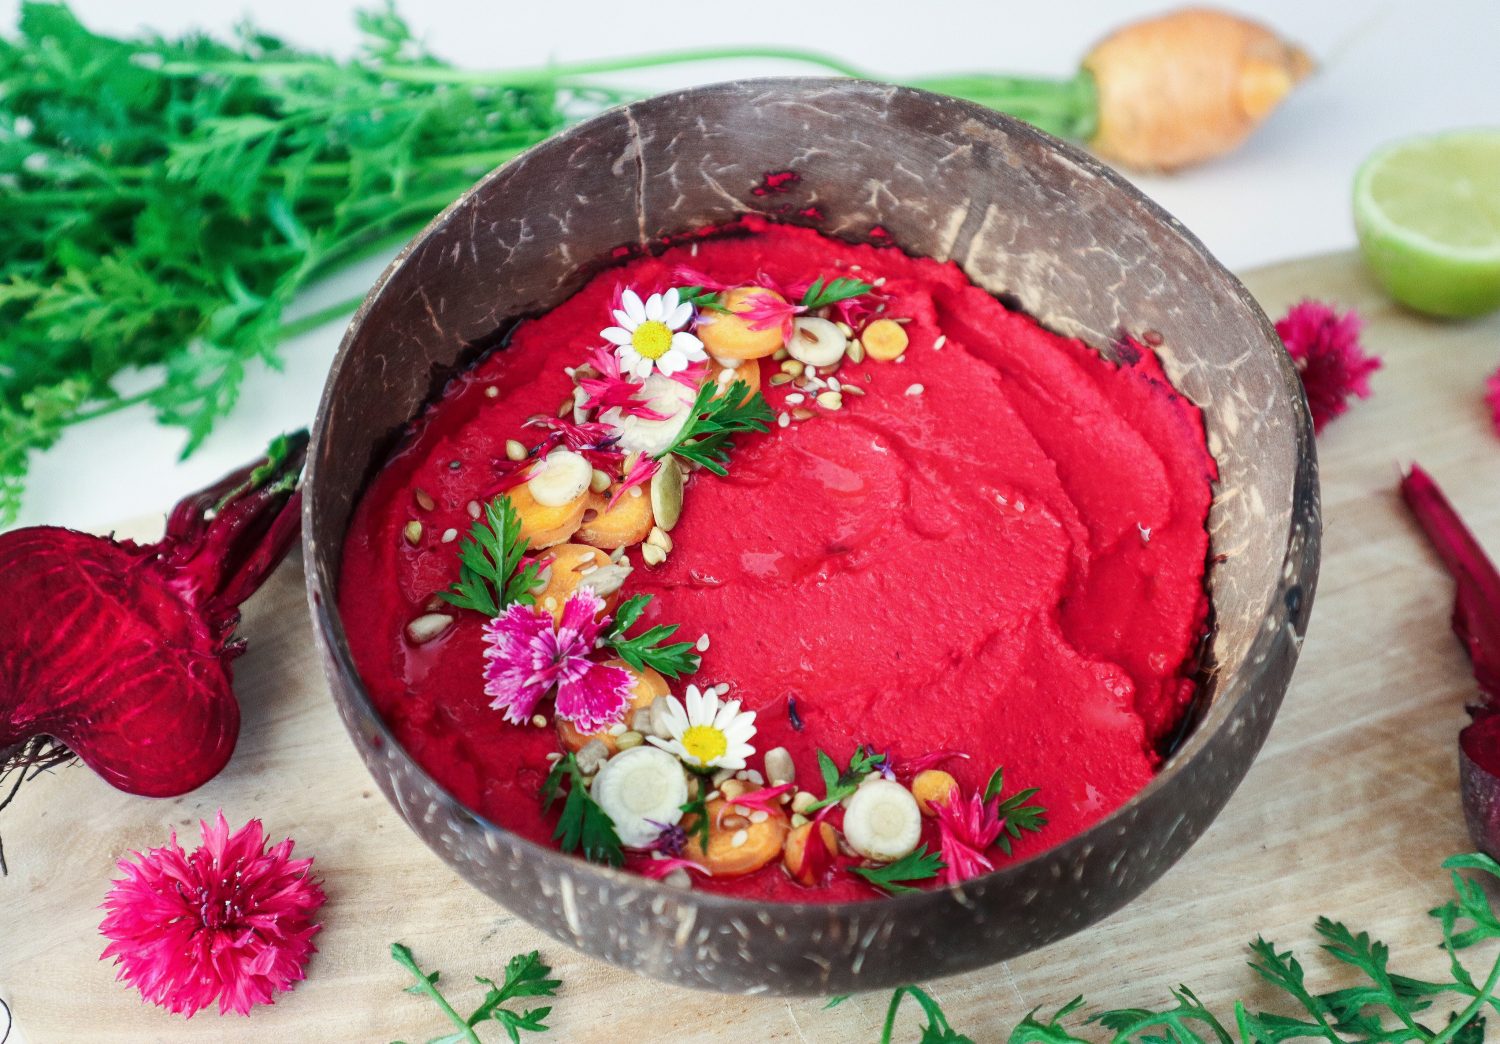
Host a dinner party or high tea to celebrate and welcome the change of season. Use edible flowers to create show stopping, colourful drinks and dishes.
Planning for Summer
The key for easy and successful gardens is to plan ahead. This can help you maximise your food production and help maintain momentum. Summer can be a harsh season in the garden but there are a few things you can do to get the most out of your summer crops. The last month of Spring is a great time to get prepared and create a seamless transition into summer gardening.
Plan and prep any new garden beds with plenty of compost and composted manure.
Lay a thick 10cm layer of mulch to help retain water during summer.
Think about shade, if your garden beds will be in full sun do they need temporary shade.
Clean out any sprinkler heads and remove grass or plants from around the nozzles.
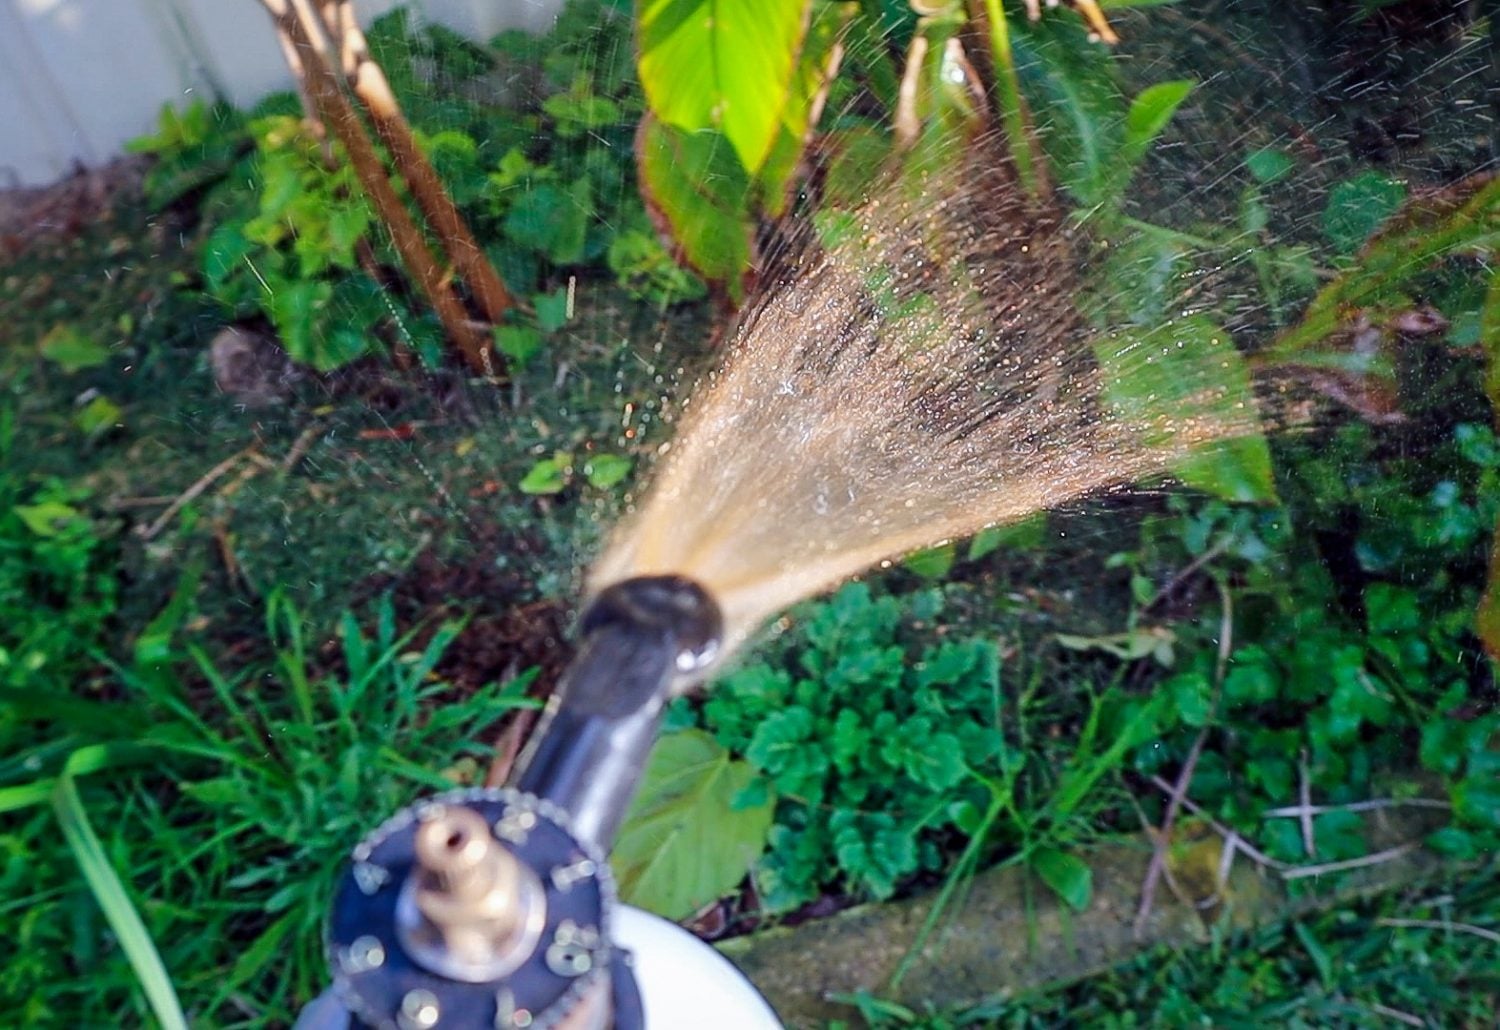
Do you have a hose nearby for ease of watering? On those super hot days you may need to water early morning and late evening so it is much easier and more realistically achievable if you have a hose close by.
Weeper hoses are great for distributing water slowly and allow the plants and trees to absorb it.
Plant flowers for the Bees. With lots of flowering fruit and vegetables over summer, it is vital you have pollinators in your garden to get a successful harvests. Plant lots of flowers in between your fruit trees and vegetables. Choose edible flowers so that you can also use them too! Zinnia and sunflowers are beautiful summer editions that the bees love.
The winter season brings with it crisp mornings, darker skies, and more time spent inside. Our bodies crave comforting, warm hearty meals and an endless amount of hot drinks. Winter guides us to slow down, re-evaluate, and allows us to come up with new and exciting plans. In the garden, plant growth rates slow down, temperatures are a lot cooler and the sun tracks lower in the sky, resulting in more shaded areas. It is important to observe your garden throughout the seasons and see where the sun and shades shift throughout the year. This means you can plan what to plant and make sure you have selected areas where each plant gets adequate sunlight for its desired growth cycle. For example, Citrus like full sun, year-round, so make sure they will not be shaded by a big tree over the Autumn and Winter months. Otherwise, they may struggle, and when plants struggle they are more susceptible to pests and diseases. Recognizing the areas of sun and shade in your garden and getting to know what conditions your plants like will go such a long way in creating a thriving, easy to grow garden.
Shady Situations
One of the most important factors to consider when planning your edible plants or permaculture garden is to OBSERVE your environment and analyse your sectors (wind, sun, fire, water, frost). It is number one on David Holmgren’s list of Permaculture Principles (1. Observe and Interact). Learning how these external energies behave on your specific property will make your garden design and planting so much more successful, easy and long-lasting. The sun tracks lower in the sky over winter, so trees, sheds, fences, and other obstacles may cause more of your garden to be in shade over winter. Once you have recognised these areas you can then plan to plant things that grow well in shade. Utilise and harness this rather than see it as a problem.
Observing where the sun and shade are throughout the year will also allow you to plan which plants or elements will grow best in each spot. Rather than finding a spare spot and planting a full sun-loving tree in an area that is 80% shaded. Gardening is a lot of trial and error, but by observing and interacting you will be able to identify what issues you have and figure how to solve them.
My Top 10 Edible Plants to Grow in the Shade:
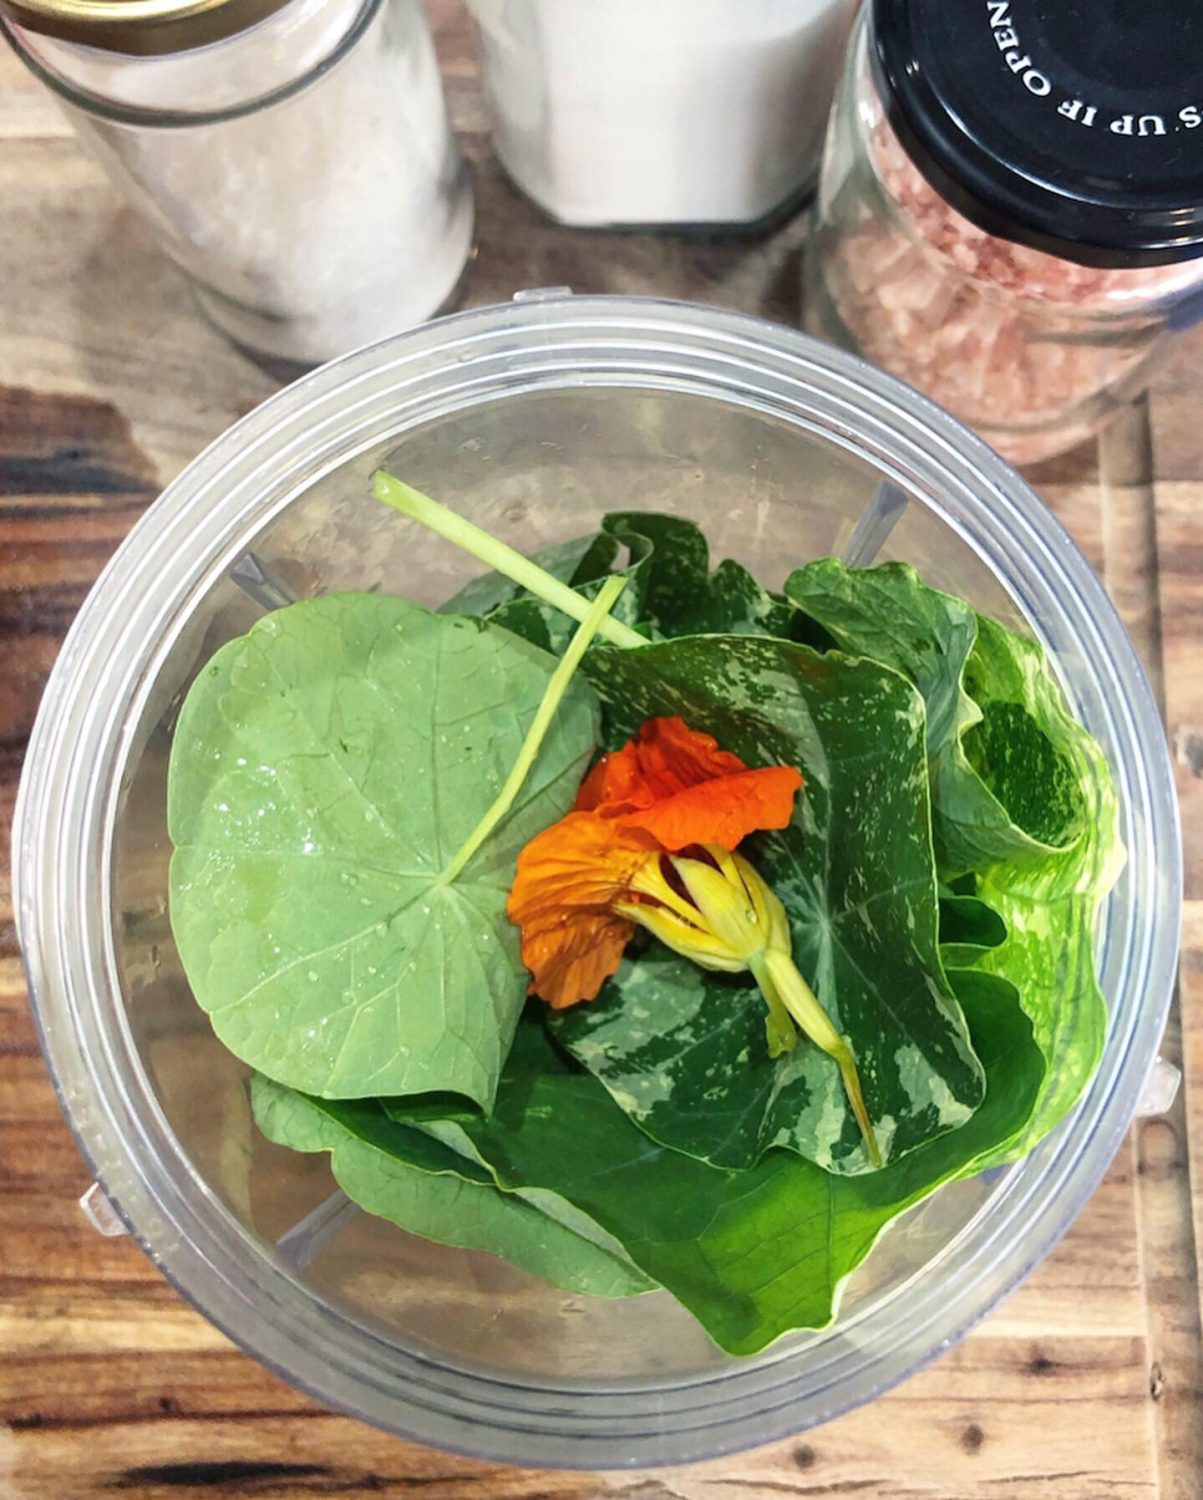
Nasturtiums – Tropaeolum majus. If you don’t know by now these are one of my favourite plants. They thrive pretty much anywhere and are so abundant even in shaded areas. Most of the plant is edible!
Sweet Violets – Viola odorata. Sweet violets, also known as English Violets, Wood Violets or Common Violets, have cute little purple or white and purple edible flowers and make a beautiful carpeted ground cover.
Lettuce – I grow many different varieties of lettuce and they don’t seem to mind the shade. In fact in Perth, WA I find they do better in the shade.
Chives – Allium schoenoprasum. I have chives planted in the shade year-round and they do well. They add great oniony freshness to omelettes and the flowers are also edible.
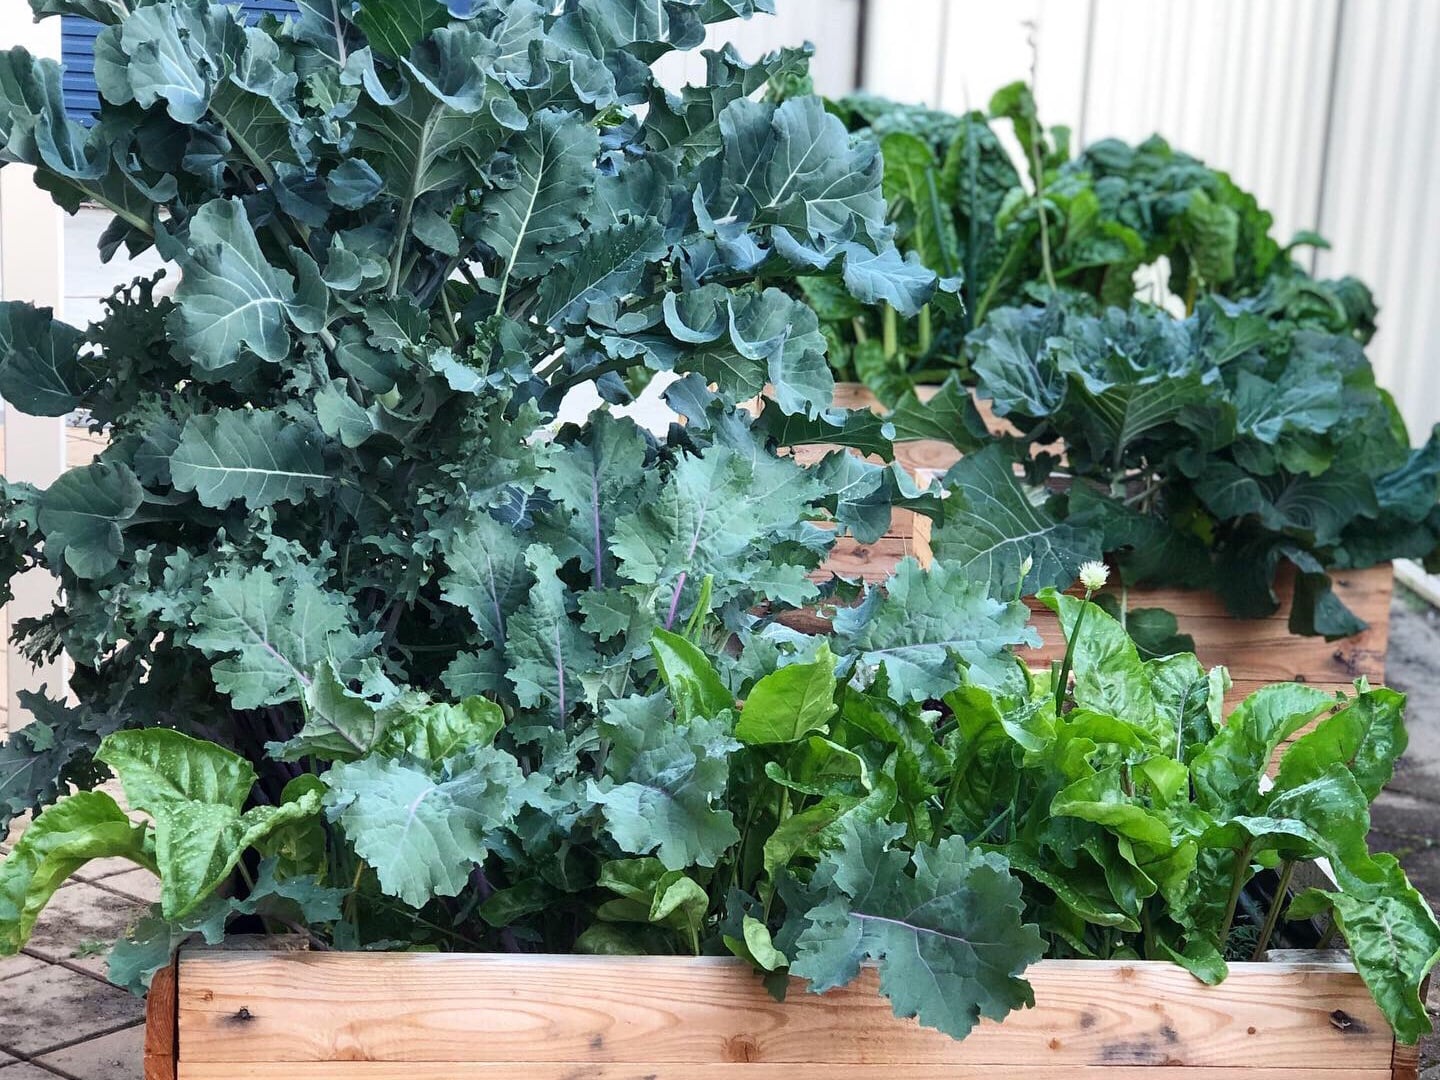
Kale – Brassica oleracea var. acephala. Kale grows well in the shade due to its large leaves being able to sustain adequate energy. It does grow at a slower rate (like most plants in the shade) which I like because although I like kale it is much easier to keep up with it.
Radish – Raphanus raphanistrum subsp. sativus. Radish are fast-growing and will do well in the shade. They are a perfect fresh accompaniment to a salad or pickled.
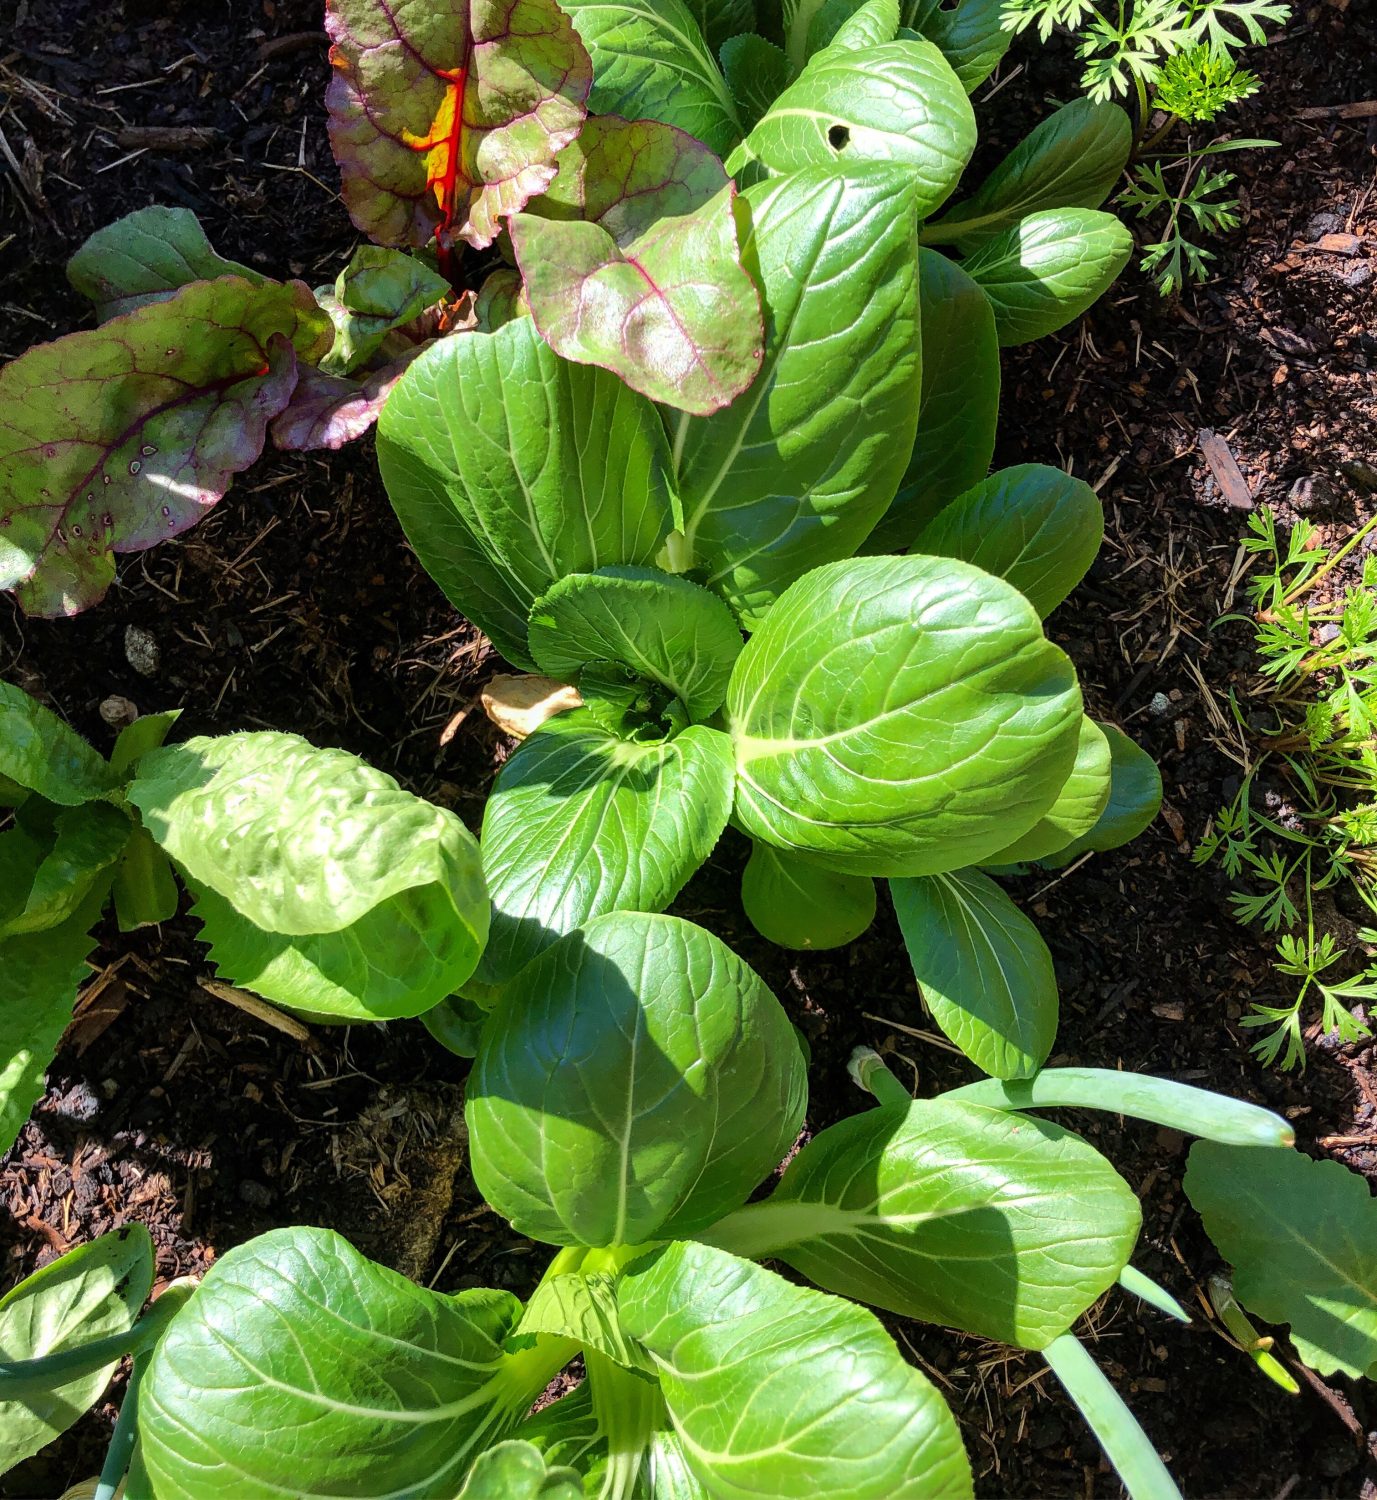
Asian Greens – Bokchoy, Tatsoi, Choy Sum, these are some of my favourite Asian leafy greens and they all do well in the shade or part shade.
Parsley – Petroselinum crispum. Parsley will tolerate shade and I find it grows at just the right rate for me to use without having masses going to waste.
Sweet Potato – Ipomoea batatas. Although full shade is not ideal growing conditions my Sweet Potato still does well. Slower growing but a great ground cover and still produces decent size crops.
Rocket – Eruca vesicaria ssp. sativa. Rocket does fine in the shade too and is a great addition to any salad, served with Pizza or make a delicious rocket pesto!
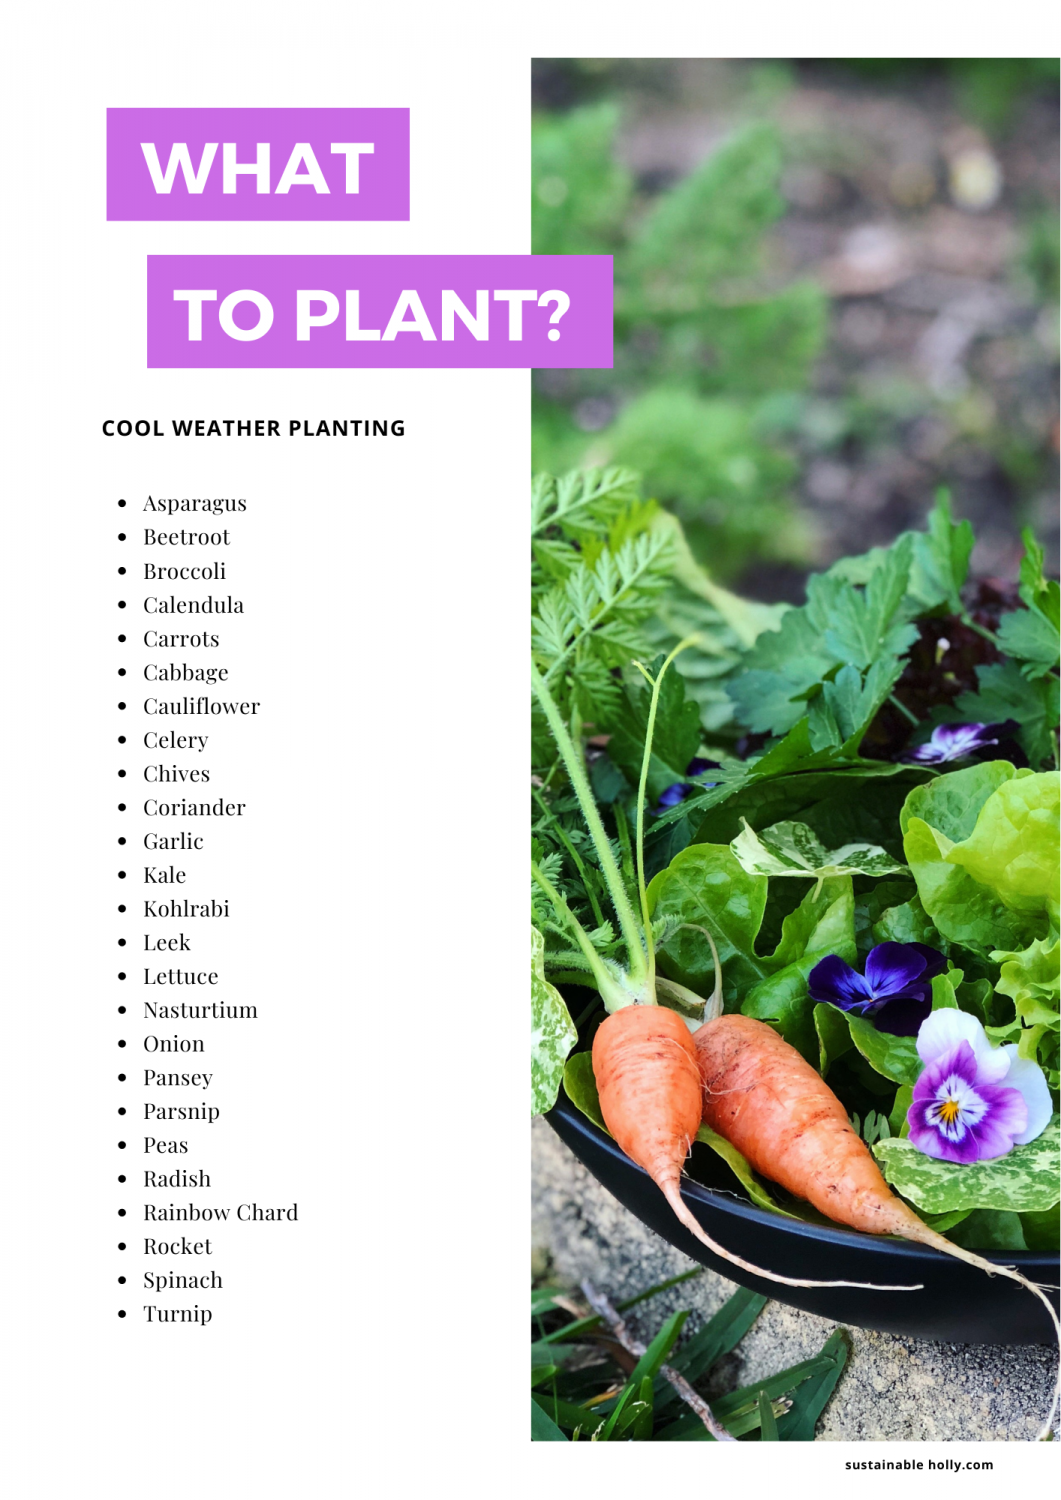
What to Plant
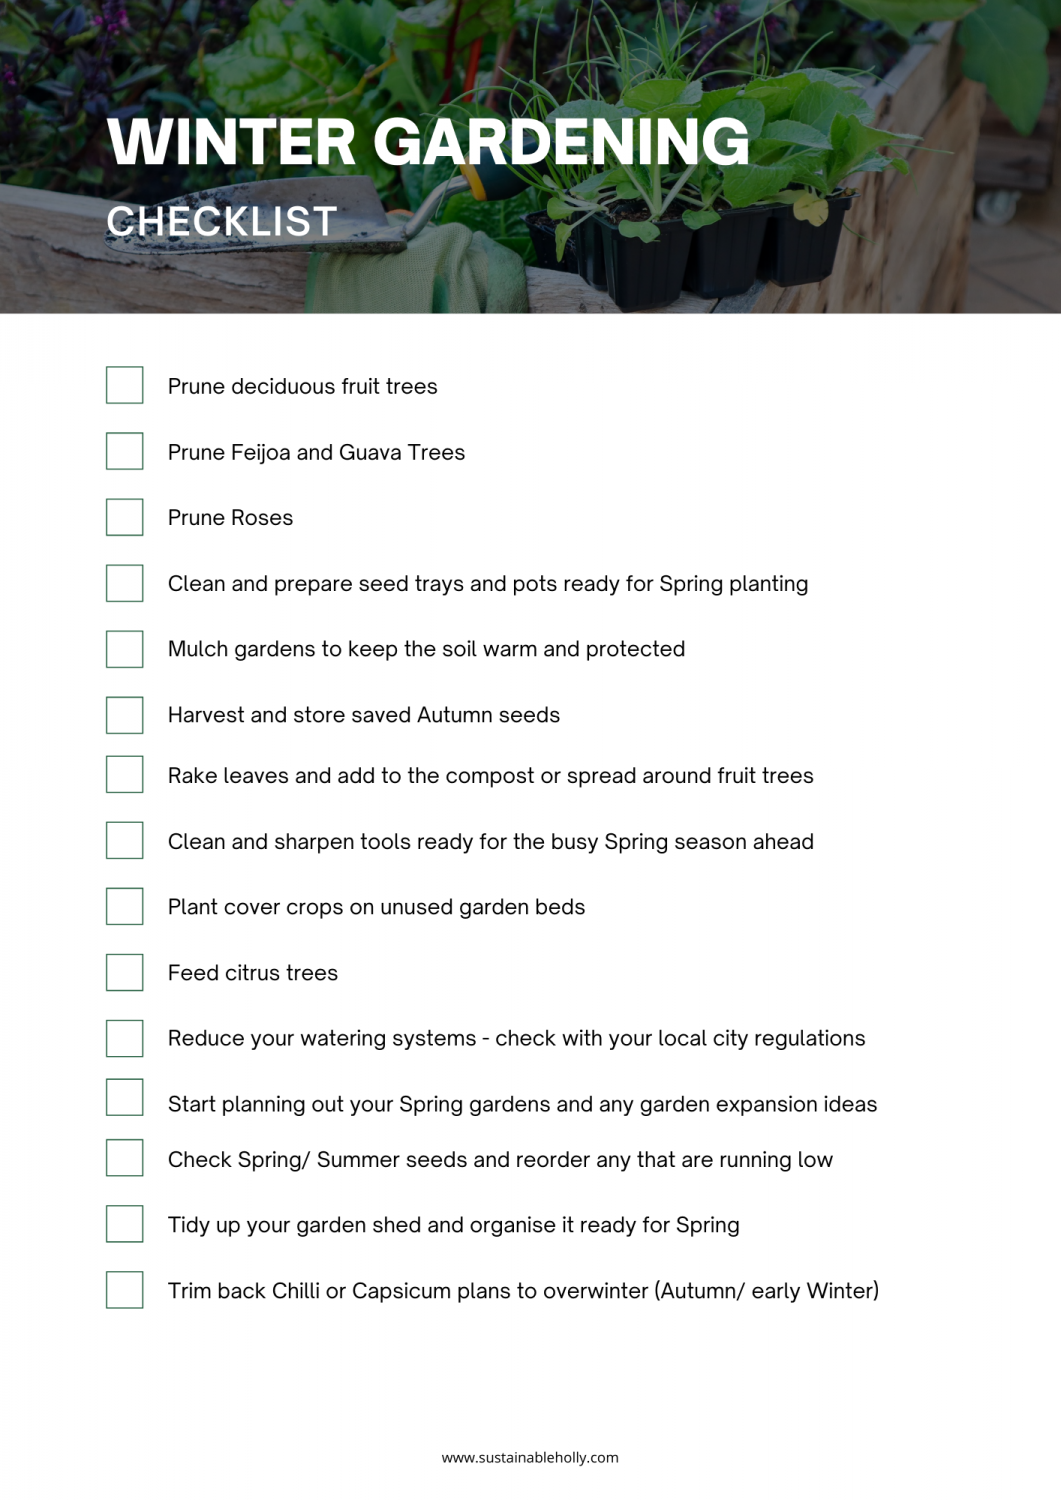
Winter Maintenance
Prune your deciduous trees or ones that have just finished fruiting such as the Feijoa and Guava. Keeping fruit trees pruned to a manageable height will allow the tree to put more of its energy into fruit production and also means you can harvest the fruit easier before the birds or other animals get to it.
Let your best vegetables go to seed so that you can collect your seeds. Some of your Summer and Autumn veggies will be coming to an end so finish harvesting and allow the best ones to go to seed. This means you will have seeds to plant the next year which will be acclimated to your exact conditions. It also means some seeds will end up in the soil and will pop up on their own next season when the conditions are just right! This is my favourite thing to do. Let nature do its thing and everything becomes so easy and flows without any external work or force.
Keep gardens mulched to help retain heat and moisture. Mulch will also help reduce the amount of weeds popping up.
Save the ends and scraps of your greens, herbs, onion and root vegetables and make a batch of Veggie Scrap Stock
Planning for Spring
Sometimes it can feel like you are always behind when it comes to planting seeds and seedlings. Here are some tips to do in Winter that will have you speeding ahead in your Spring and Summer gardens!
Check your seed collection and order your spring and summer seeds (tomatoes, pumpkins, zucchini, capsicum, chilli)
Start planting any early spring seeds inside or in the green house. The last month of winter can be a great time to do this and get a few things growing to kickstart your spring garden.
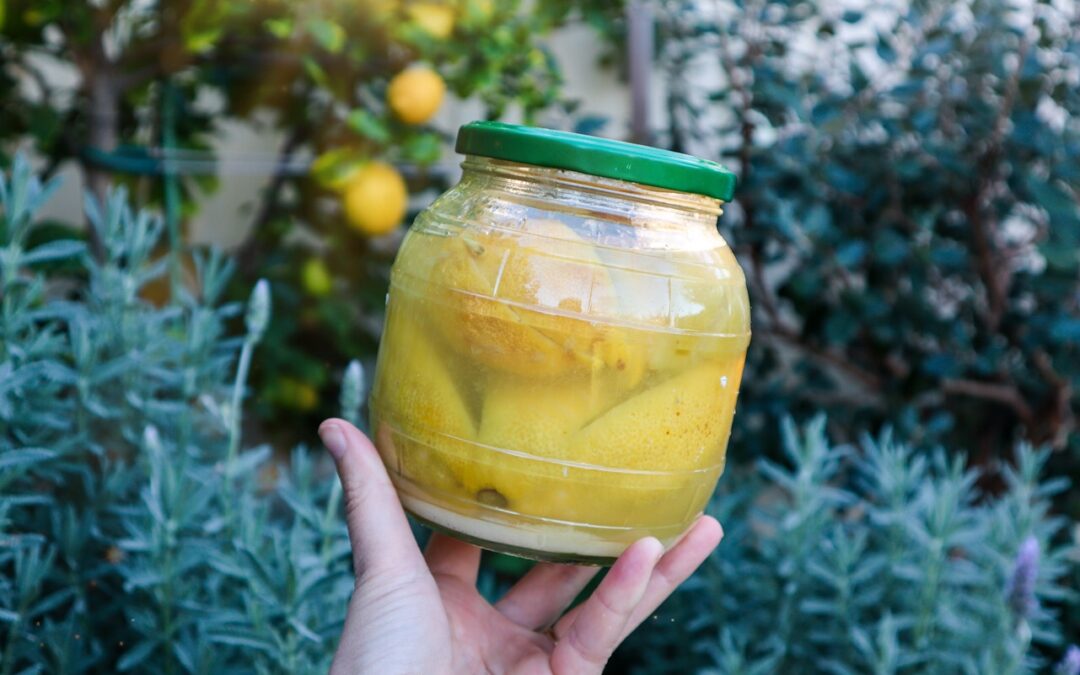
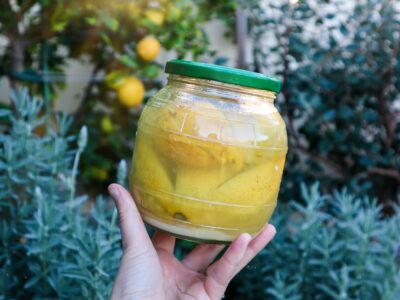
Preserved lemons is another great way to save and store your beautiful lemon harvests to use later in the year. Preserved lemons are easy to prepare and add a zesty, salty depth of flavour to your dishes. Plus they look beautiful lined up in jars. Preserved lemons can be used in many dishes such as pasta, fish, chicken, salads, salad dressing, dips, platters, salsa and rice dishes.
Preserved Lemons
Prep Time: 10 minutes
Additional Time: 1 month
Total Time: 1 month10 minutes
Store your lemon harvests to use throughout the year by making these preserved lemon jars.
Ingredients
5 or more Lemons
1 Cup Salt
Instructions
Sterilize your jars in boiling water.
Rinse your lemons and place them on a plate. Slice 3 or 4 lemons depending on how large your jar is. You will also need a couple of extra lemons at the end for extracting the juice.
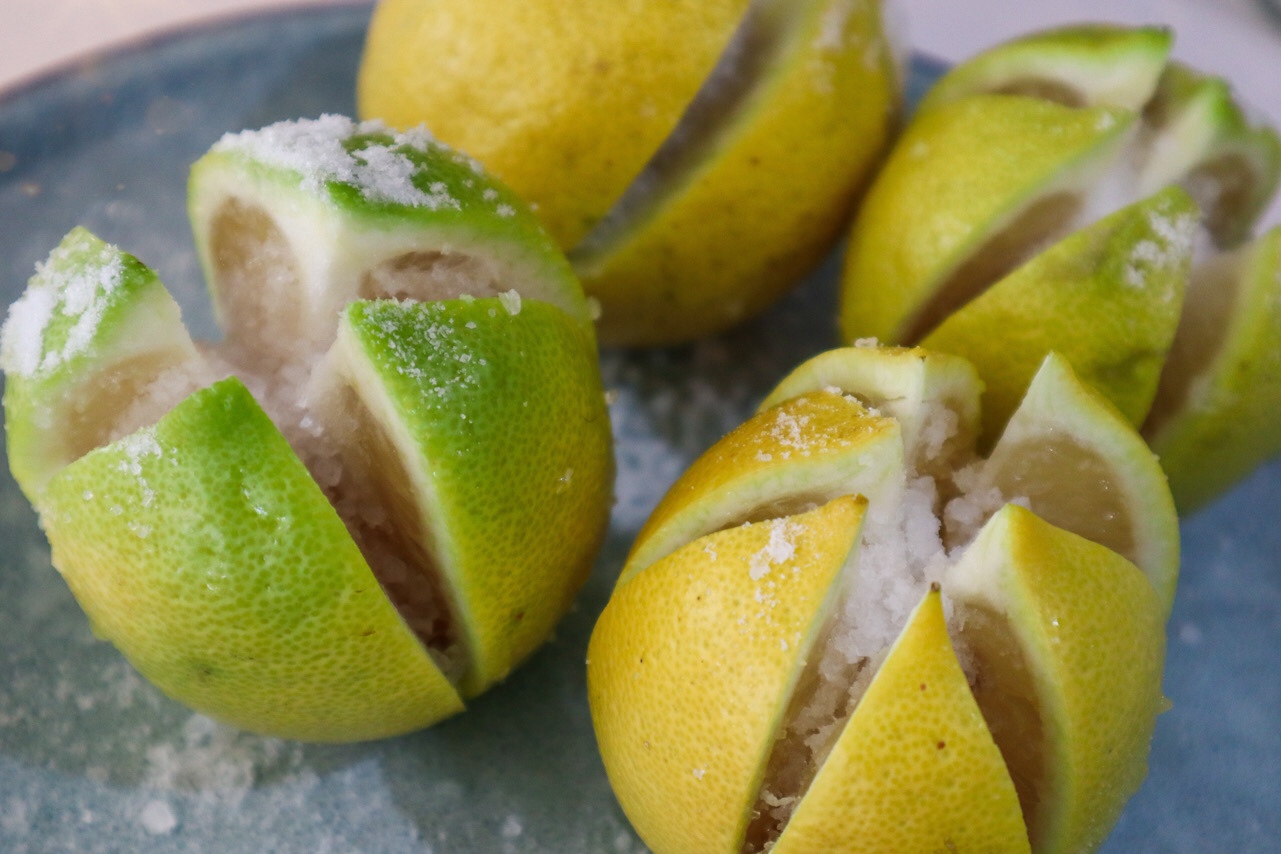
Cut the lemons lengthways into 4-6 wedges without cutting the whole way through. Leave a cm at the bottom to keep the wedges attached at the base.
Add 1TBSP of salt to the bottom of the jar.
Add 1TBSP of salt to each lemon and gently squeeze them to absorb the salt.
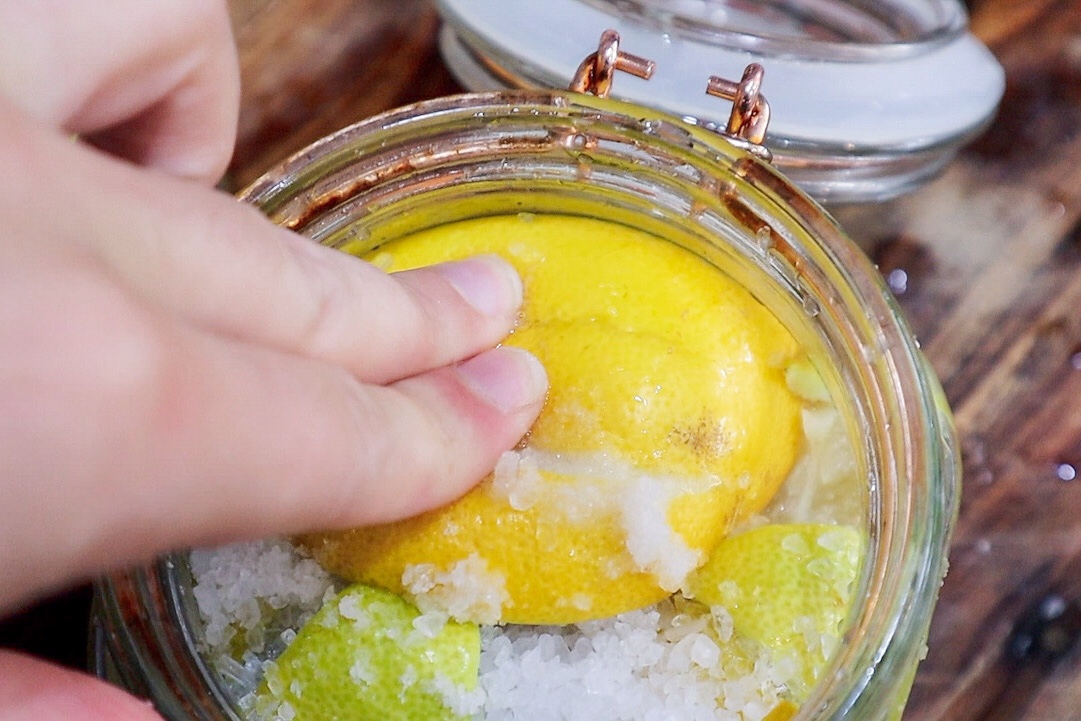
Add your lemons to the jar and squish them down to try and fill up as much space as you can.
Add the remaining salt on top and any salt and liquid leftover on the plate they were cut on.
The lemons will start to release their liquid but you may need to top up the jar with extra lemon juice and salt. You want to make sure your lemons are covered in liquid. Push down on the lemon and this will help release more liquid.
Secure your lids ensuring the salt mixture doesn't touch any metal part of the lid as you don't want any corrosion. Keep your jars somewhere cool and dark. They will be ready to eat after 1 month but they can be preserved for years to come. Refrigerate after opening.
Notes
Add spices to mix up your flavours such as bay leaves, fennel seeds, chilli, coriander seeds, cloves.
Lemon trees make an amazing addition to any edible garden. They produce in abundance and are one of the easiest fruit trees to grow. They can also be easily grown in pots so are a great choice for urban gardens or renters. Lemons are powerhouses of flavour and such a versatile fruit.
Lemons can be used for desserts, salad dressings, condiments and even cleaning products.