Garden toast is something I created one day when I was scraping together something for lunch and all I had was a crust and some cottage cheese in the fridge. I didn’t have any avocado, eggs or anything special to have with it. So I went out into the garden and found some inspiration! I picked two small tomatoes, herbs and edible flowers. It looked like a mini garden on toast and now I can’t stop making these beautiful, tasty creations!
Here are the creations I have made so far..
Original Garden Toast
My first addition with the last piece of bread I had left! I had fun making this and it definitely tasted delicious! Ingredients: Rye Multigrain toast, Cottage Cheese, Fresh tomato, Parsley, Rosemary, Rosemary flowers, Zinnia Petals and Basil leaves.
Fairy Garden Toast
It’s amazing what a little bit of Beetroot juice can do! Natural colouring and plenty of beneficial nutrients with an array of micro herbs and greens. You may even be able to convince your kids to eat more greens with this Fairy Garden toast. Get them involved in the process by having a bowl each to go outside and collect herbs. Ingredients: White Multigrain Toast, Cottage Cheese mixed with beetroot juice or fresh grated Beetroot, Baby Nasturtium leaves, Parsley leaves, Basil leaves, Sweet Violet flowers, Rosemary Flowers, Baby Pink chard leaves, Pink Zinnia Flower petals and Dill Flowers.
Jungle Garden Toast
Packed full of herbs and flavour! Ingredients: Country Grain Toast, Basil Pesto, Orange Nasturtium petals, Tiger Eye Viola Petals, Strawberry Flowers, Parsley leaves, Rosemary Flowers, Pea tendrils, Burgundy Marigold Petals and Purple basil leaves.
Summer Garden Toast
Summer on toast! Homegrown tomatoes are so sweet and delicious and tomato on toast is one of my favourite ways to eat them! Ingredients: Rye Multigrain toast, Red, yellow, orange cherry tomatoes, Purslane, Red basil leaves, Strawberry Flower, Sweet Violet Flower, Dill flowers, Rosemary Flowers, chopped Purple Kale, baby Nasturtium leaves and Fresh Chilli.
Botanical Garden Toast
Pest on toast is so delicious! I made extra pesto and if you follow me on Instagram you would have seen that I ate this for breakfast for an entire week! It was also so good with a poached egg on top. Ingredients: Sourdough toast, Basil pesto, Cottage Cheese, Chopped walnuts, Fresh Chilli, Basil Leaves, Fennel Flowers, Pink and White Dianthus, Baby Pumpkin Tendrils, Parsley Leaves and Strawberry Flowers.
Unicorn Garden Toast
My latest creation and maybe my favourite yet! Purple sweet potato spread is a vibe! Ingredients: Sourdough Toast, Mashed Purple Sweet Potato and Cottage Cheese, Overnight Pickled Red Cabbage and Red Onion (1/2 cup water, 1/2 cup apple cider vinegar, a teaspoon of sugar heated to dissolve. Pour cooled liquid over Cabbage and Onion), Purple Kale, Grilled Baby Eggplant, Purple Pansy, Multicoloured Dianthus, Rosemary Flowers and Red Basil.
Get Inspired by your Garden
There is always something in my garden to make a toast topping and I love how easy and creative it is! Each piece is so unique and full of fresh garden nutrients! Having these ideas tried and tested means I know I can always whip up something even when my fridge is looking very lean.
Get creative and inspired by your own garden. There is something so satisfying about being able to walk outside and make a meal from your own fresh, homegrown veggies. This is a great meal idea for beginner gardeners who don’t have many established edibles. Just look out for baby leaves and edible flowers (make sure you research and clearly identify they are edible). Baby leaves and flowers can add subtle flavours and turn any dish into a work of art!
Be sure to tag me on Instagram or Facebook so I can see your creations!
Holly 🌱
MY GARDENING ESSENTIALS // Fertiliser spray gun: https://bit.ly/366nL1t Retractable Hose: https://bit.ly/2TSC0Bo More gardening tools: https://bit.ly/32IQmbD
DISCLAIMER: Links included in this description might be affiliate links. If you purchase a product or service with the links that I provide I may receive a small commission. There is no additional charge to you! Thank you for supporting my page so I can continue to provide you with free content!
There is no better time to start growing your own food than NOW. Creating your own food security and using your time to help create a greener world is win-win. I have always had the dream of growing my own food and living a more sustainable lifestyle and it is something that I have been continually building and working towards for years. I don’t want to be 100% self-sufficient because there are just some things I either won’t be able to grow or choose not to grow. But there are plenty of ways to supplement my homegrown food supply such as trading, swapping, and local farmers markets. I have put together (in no particular order) 18 simple ways you can start living a more self-sufficient lifestyle today.
1. Start a Herb Garden
No matter whether you have a big garden or live in a tiny apartment, growing herbs can be easy and takes up very little space. Grow in small pots, recycled containers, hanging planter,s or windowsill planters. If you like to use herbs it is a great first step towards self-sufficiency. And no, that does not mean buying those packed herb pots from the supermarket…. they are often grown hydroponically and then placed in the soil so they rarely survive long and don’t handle being planted out into real life. Get a packet of seeds and try growing your own 🙂
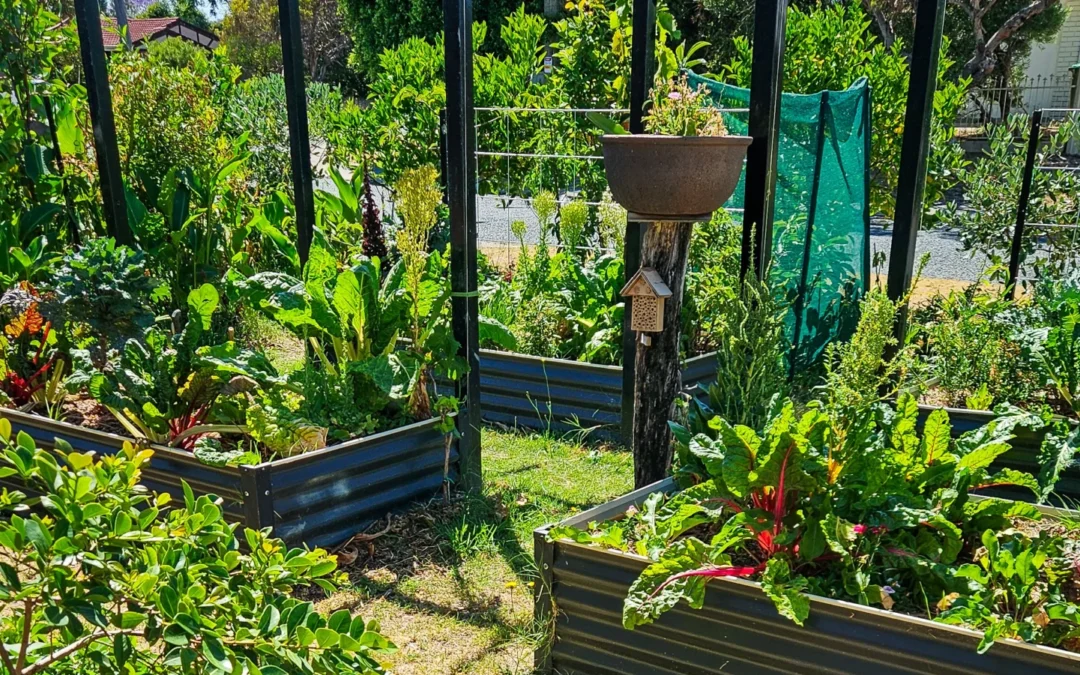
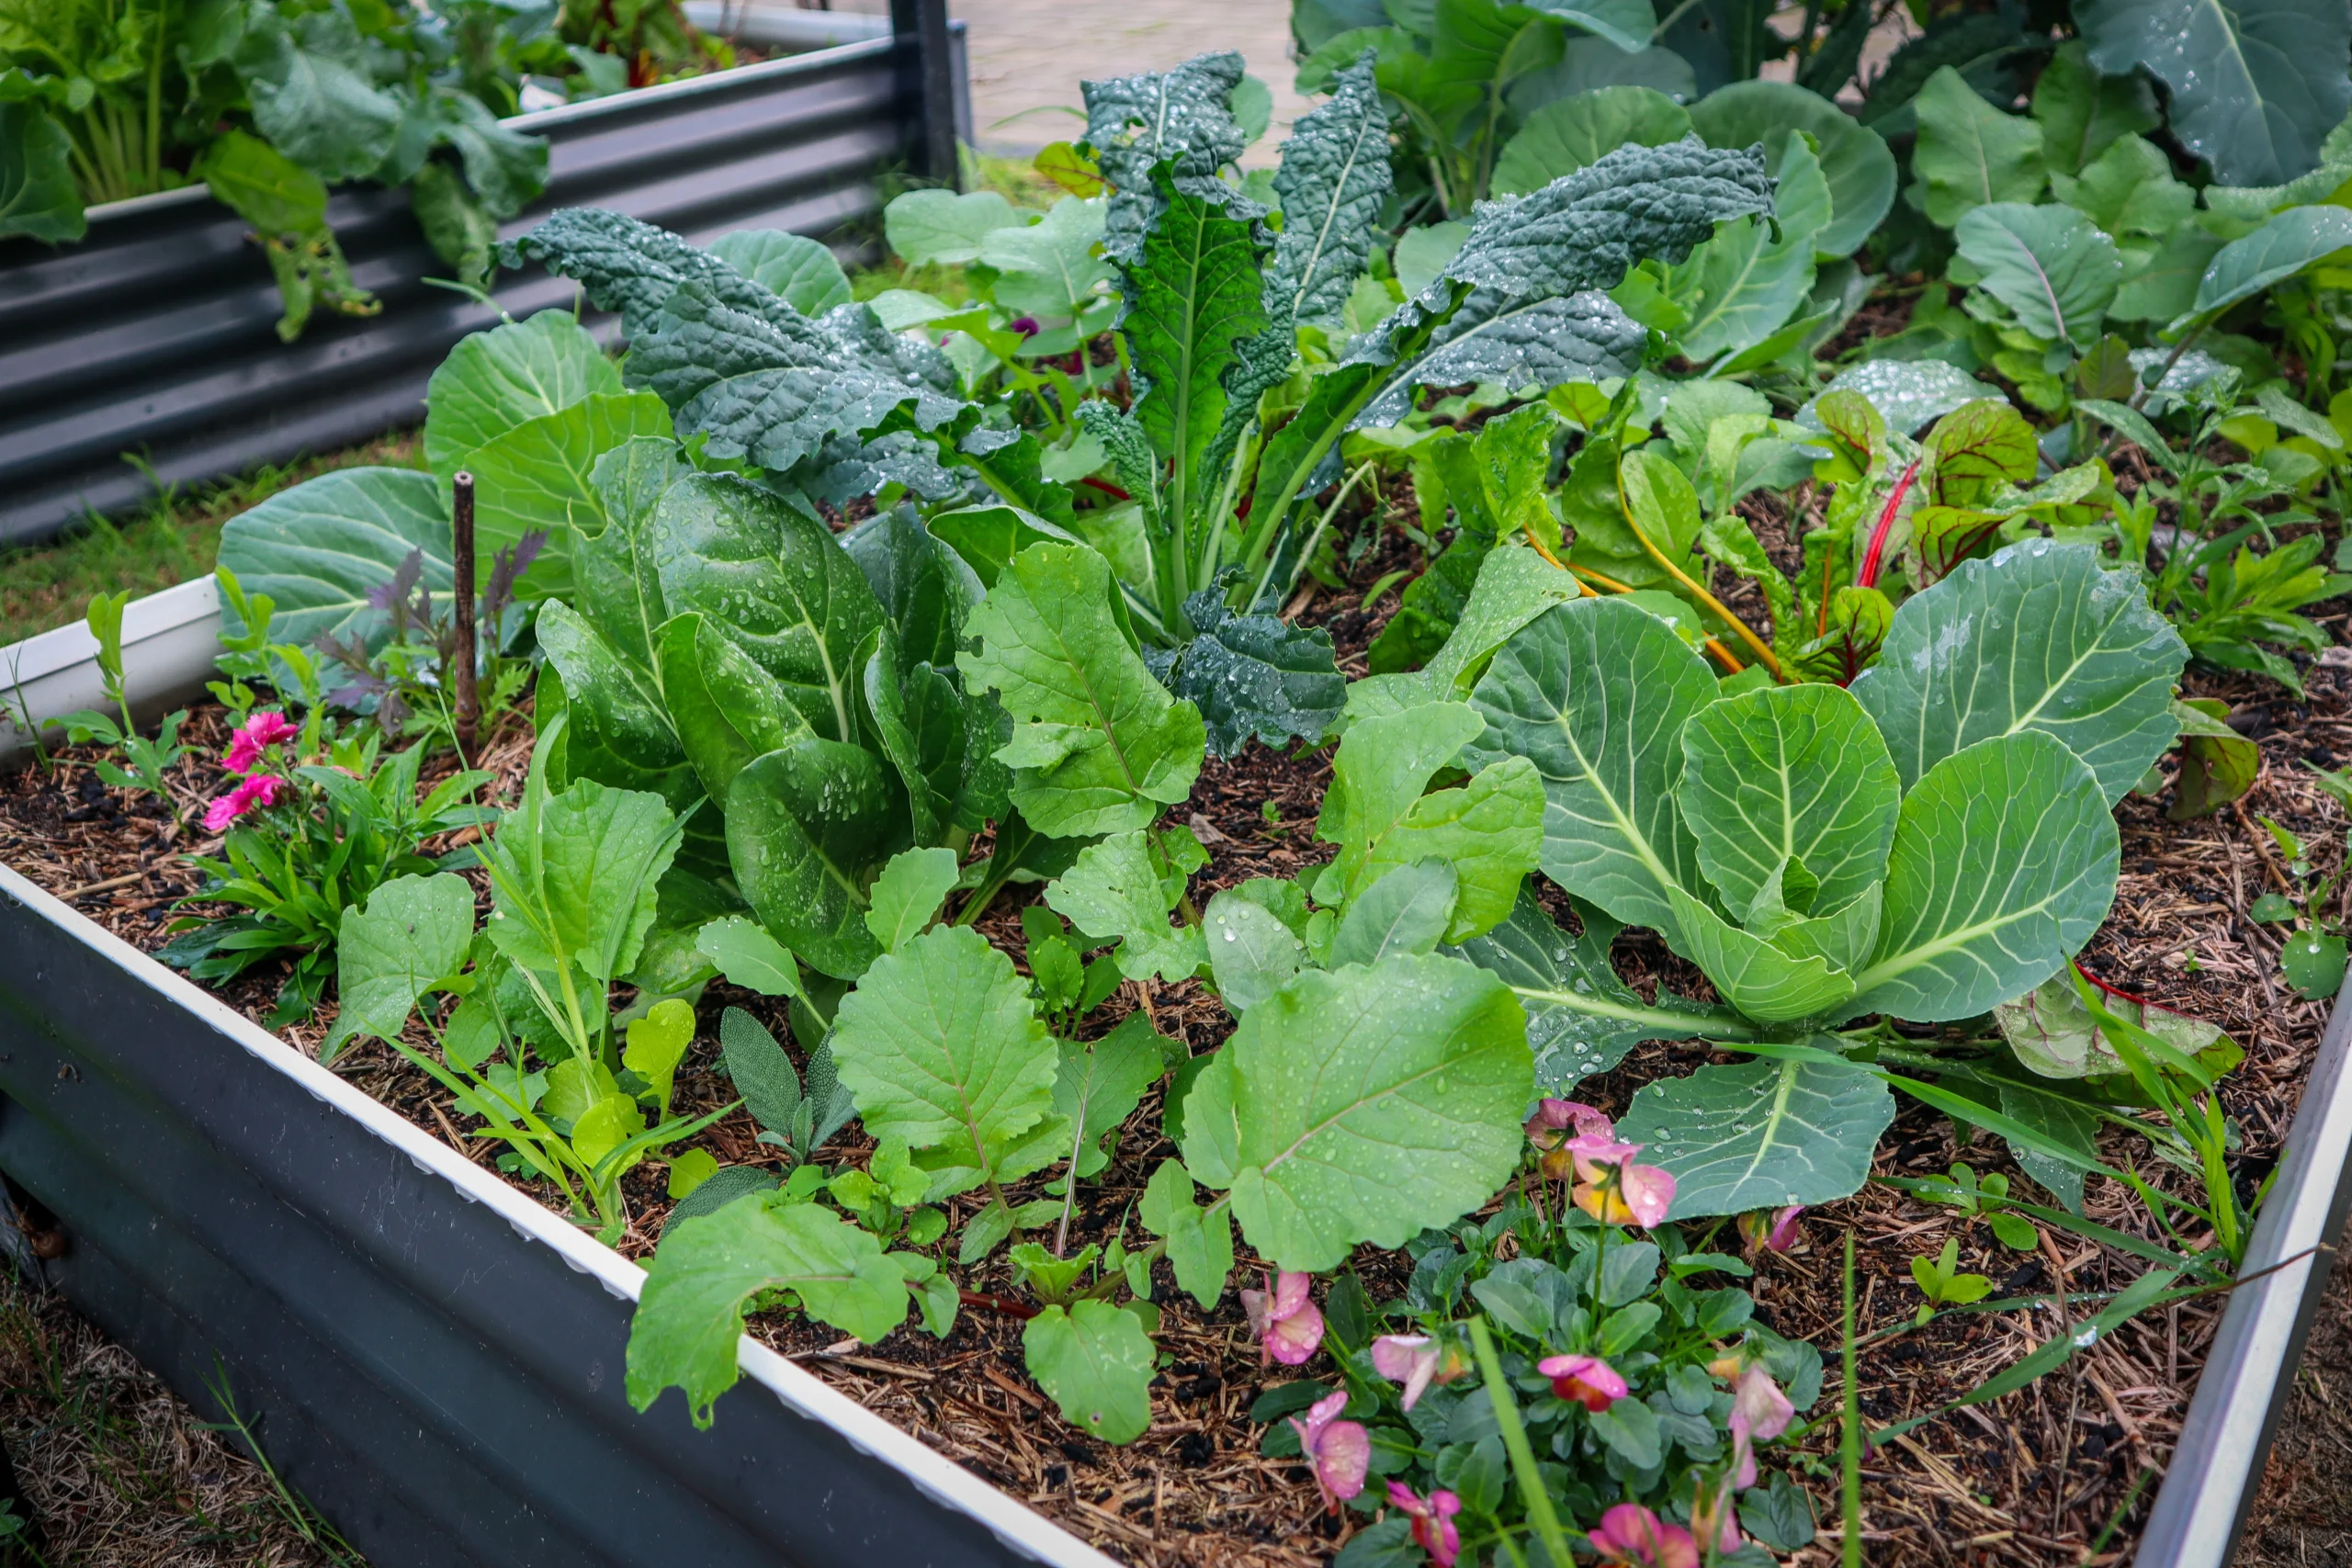
2. Start a Vegetable Patch
The best way to learn how to grow vegetables is to simply start trying! Start small with either a planter box or convert one small patch of your garden or even driveway into an edible vegetable patch. You can also start by simply integrating edibles into your established garden. Once you start growing some things you can start expanding bit by bit. Goodbye grass 🙂
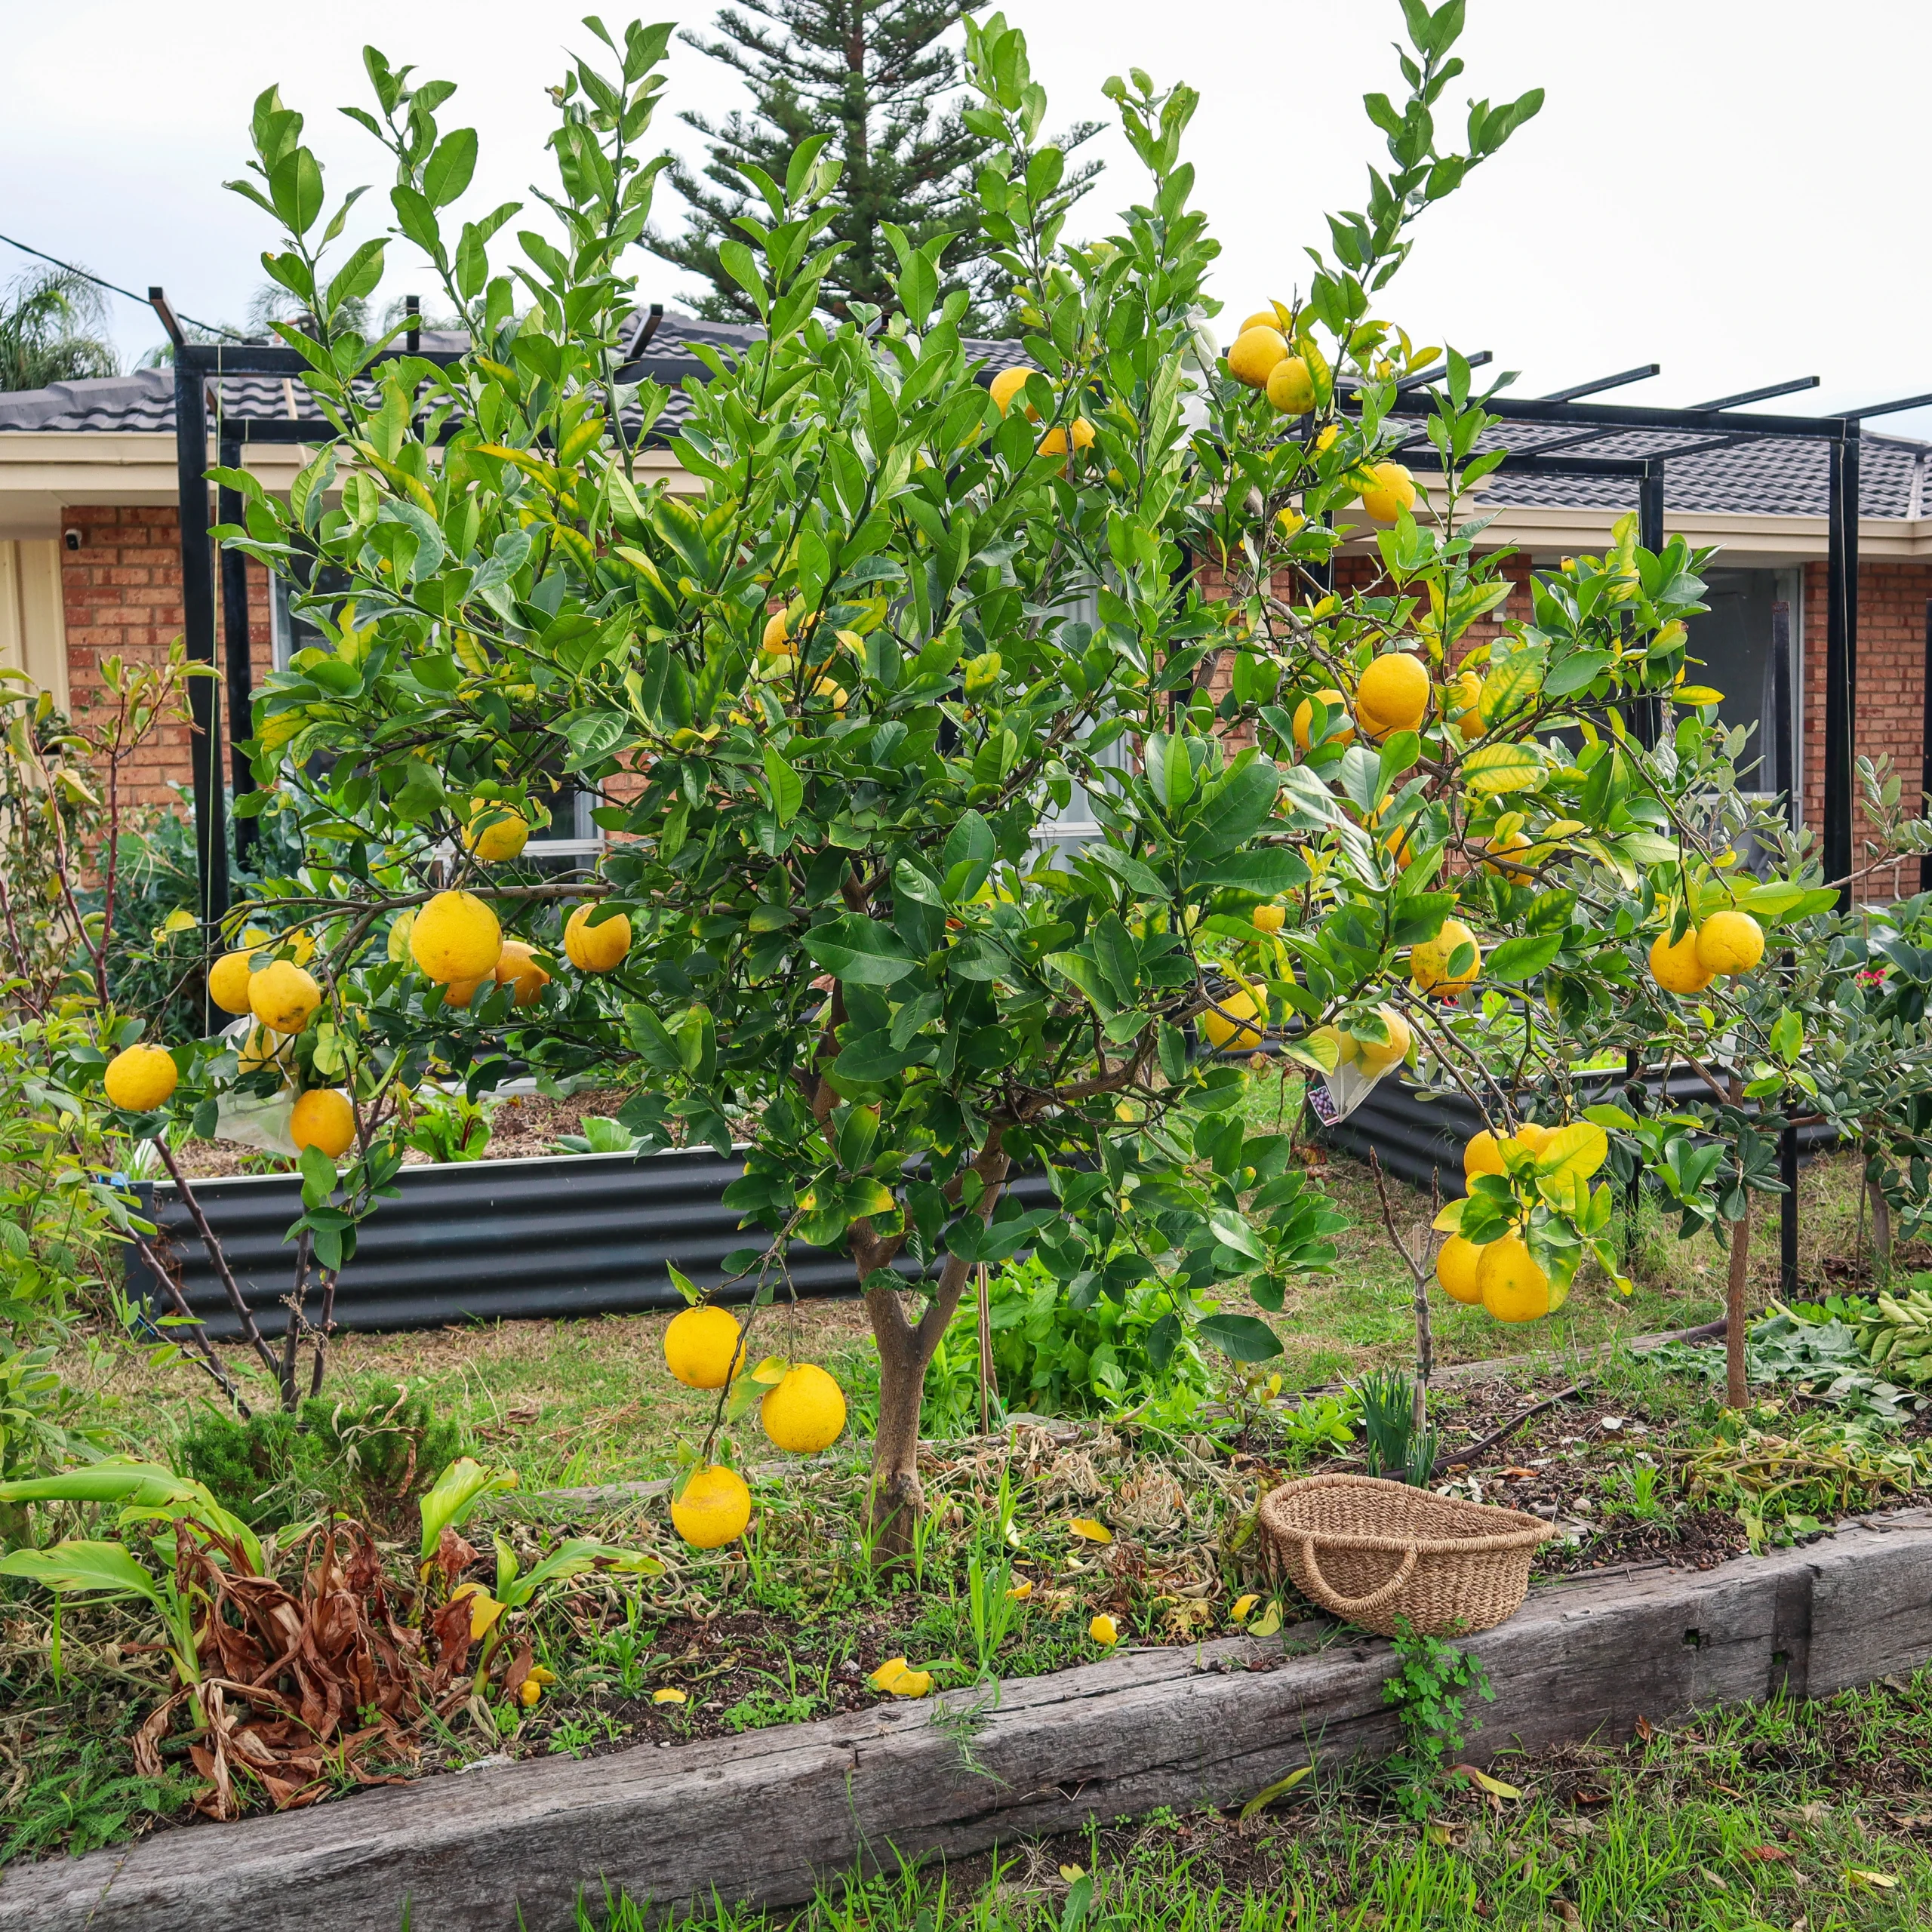
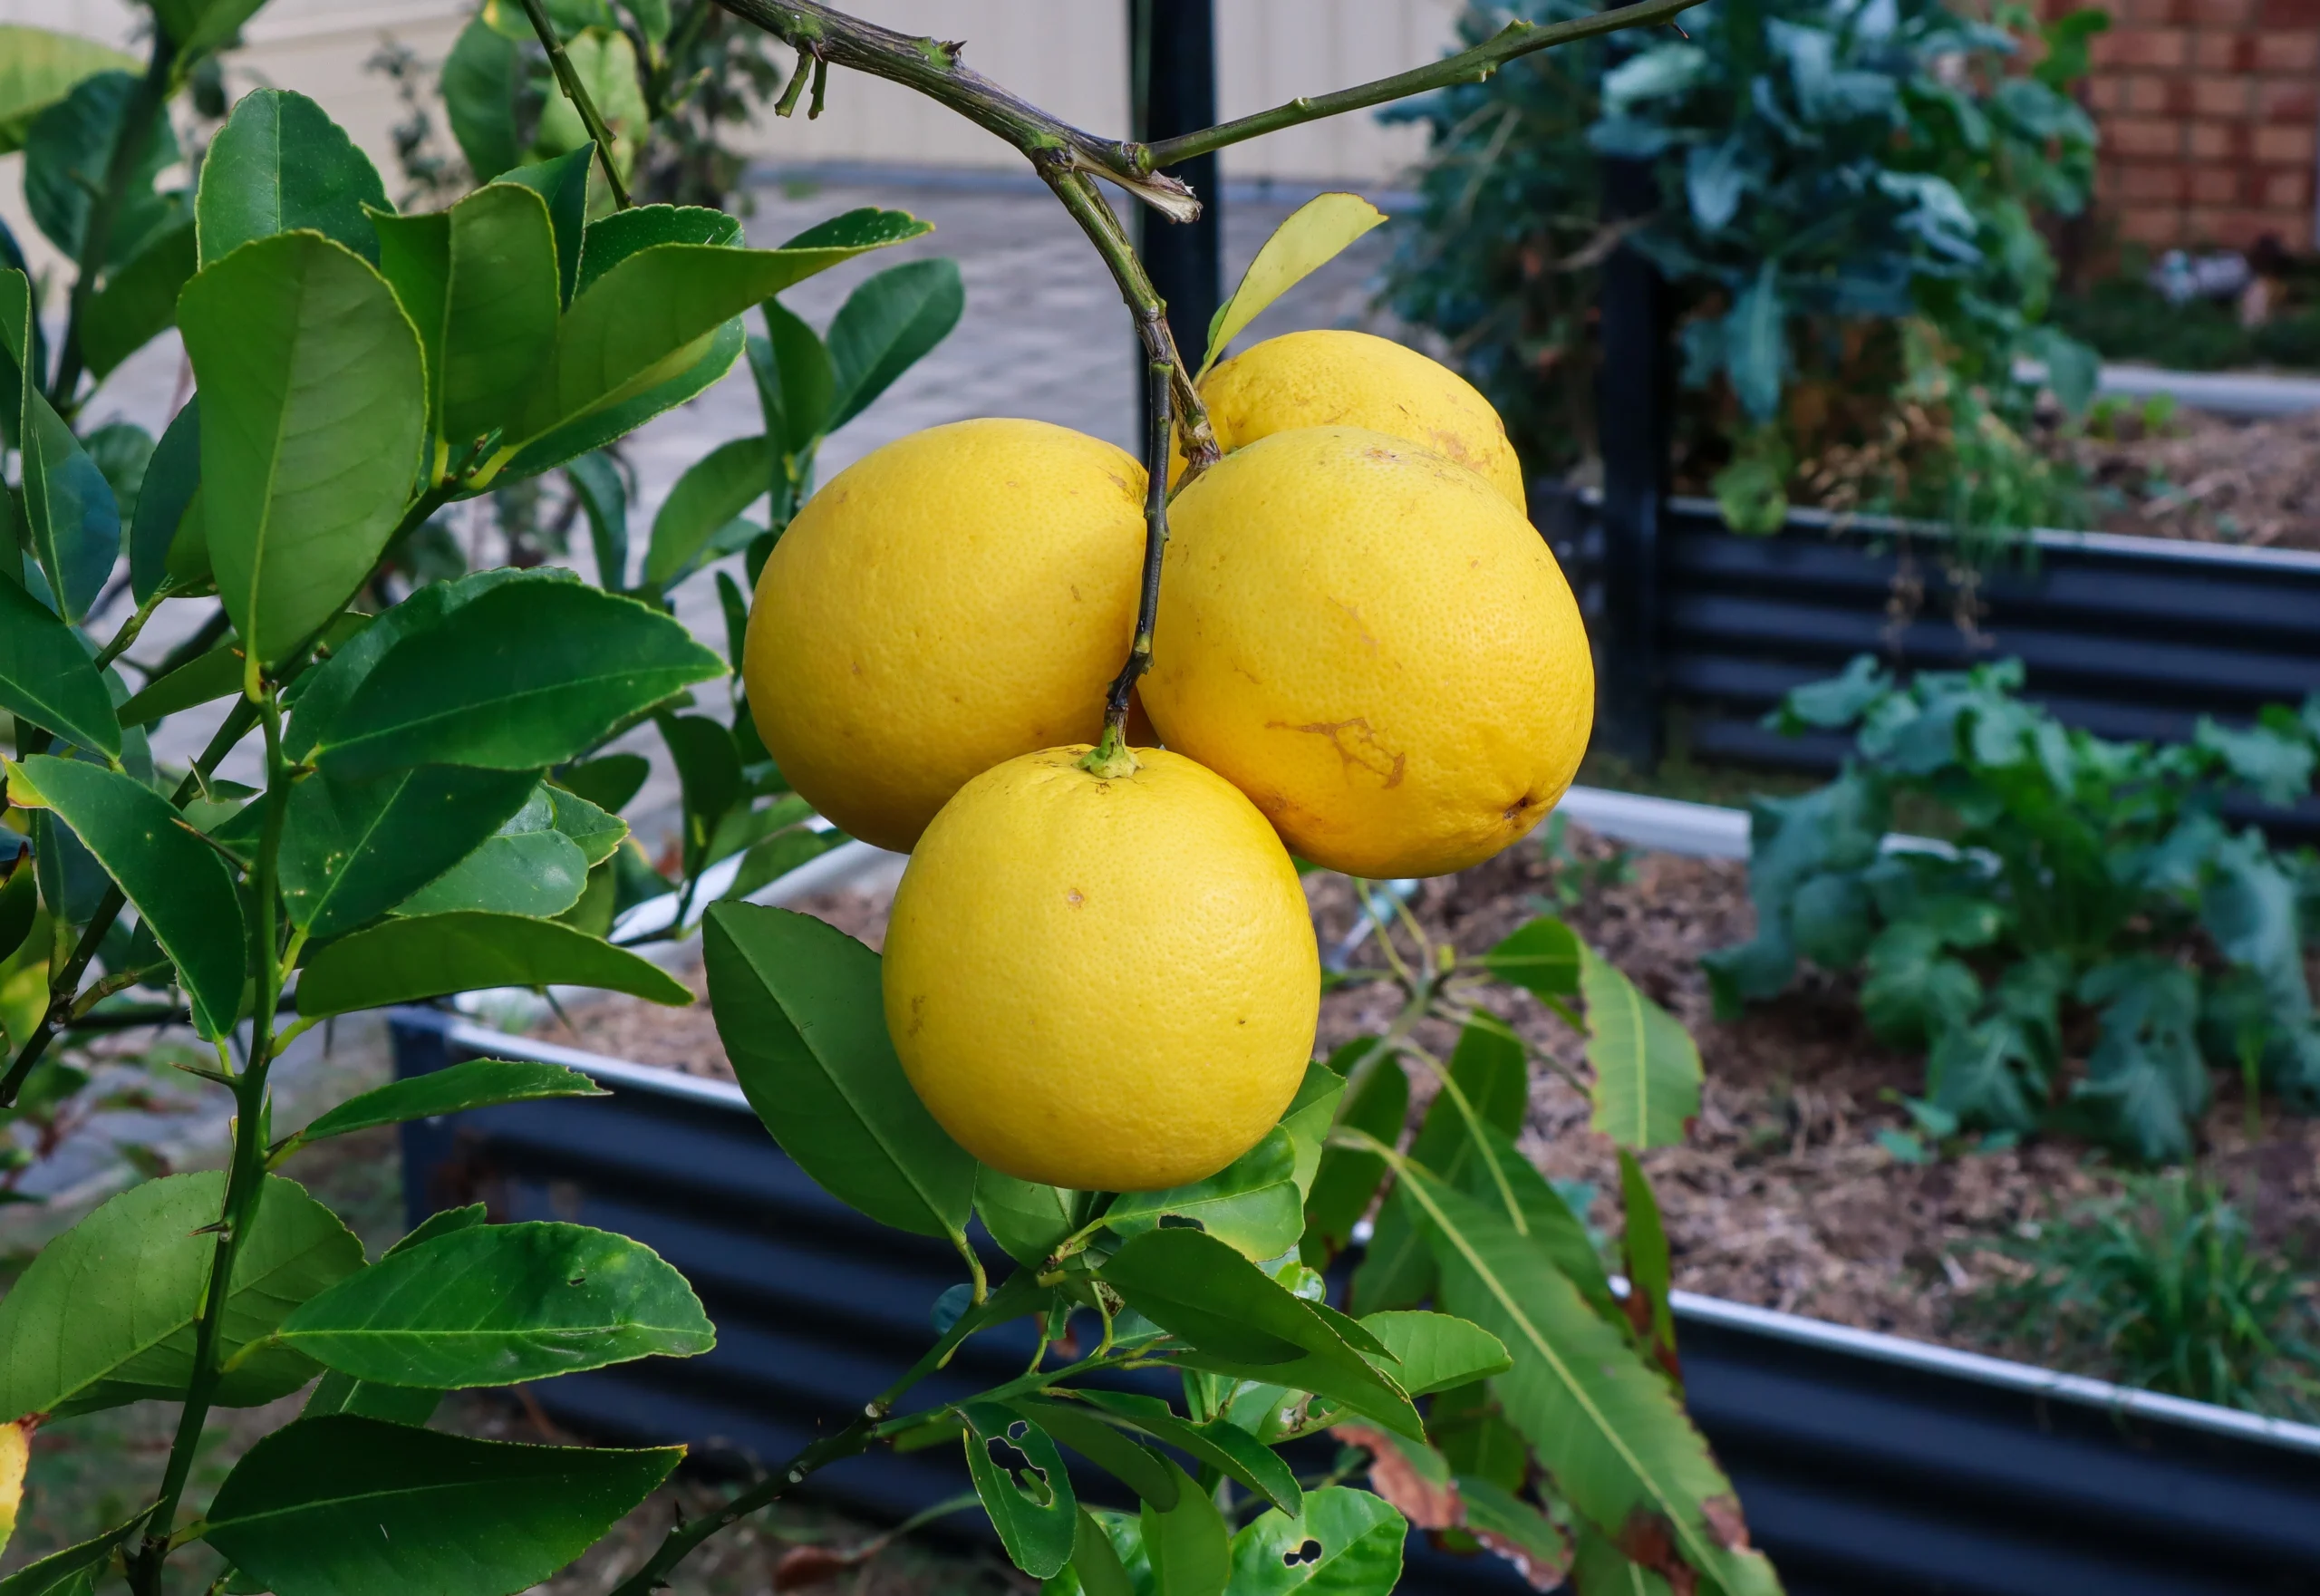
3. Plant Fruit Trees
I love fruit trees because although they take a while to get going, once they do, they are abundant and don’t require as much care as vegetables. You can plant them in either a large pot or directly into the garden. I would recommend going to a local specialist fruit tree nursery so they can help you choose the best fruit tree for your location. Also, make sure you get something with fruit you actually enjoy! With the abundant produce you can then preserve, swap, and trade with others!
4. Grow Base Crops
I couldn’t think what else to call them but growing crops that will feed you for longer and create a good base to fill your pantry. Crops such as Pumpkins, Potatoes, Onions, Garlic, and Sweet potatoes will provide decent amounts of food that you can store and use throughout the year! A great base vegetable to feed a family.
5. Grow Soil
Composting is not only great for the fertility of your soil and the secret to AMAZING vegetables but also stops waste from going to landfill. There are a whole bunch of ways to do this depending on your living situation. You can make your own compost bin out of recycled wood, find a second-hand tumbler online or purchase one. You can also simply dig a hole in the garden and bury it (be careful of attracting pests though). There are also some new ways for people with no land to connect with others that do and give them your compost scraps. Either community gardens, local Facebook groups or now in Australia there is even an app! Sharewaste
6. Save Seeds
This is just as important as growing food and will be a huge step towards your self-sufficient journey. Saving seeds helps you maintain food security knowing that you have more healthy seeds to grow next year. Save seeds from your healthiest plants that thrive in your garden. Keep them in a dry dark place.
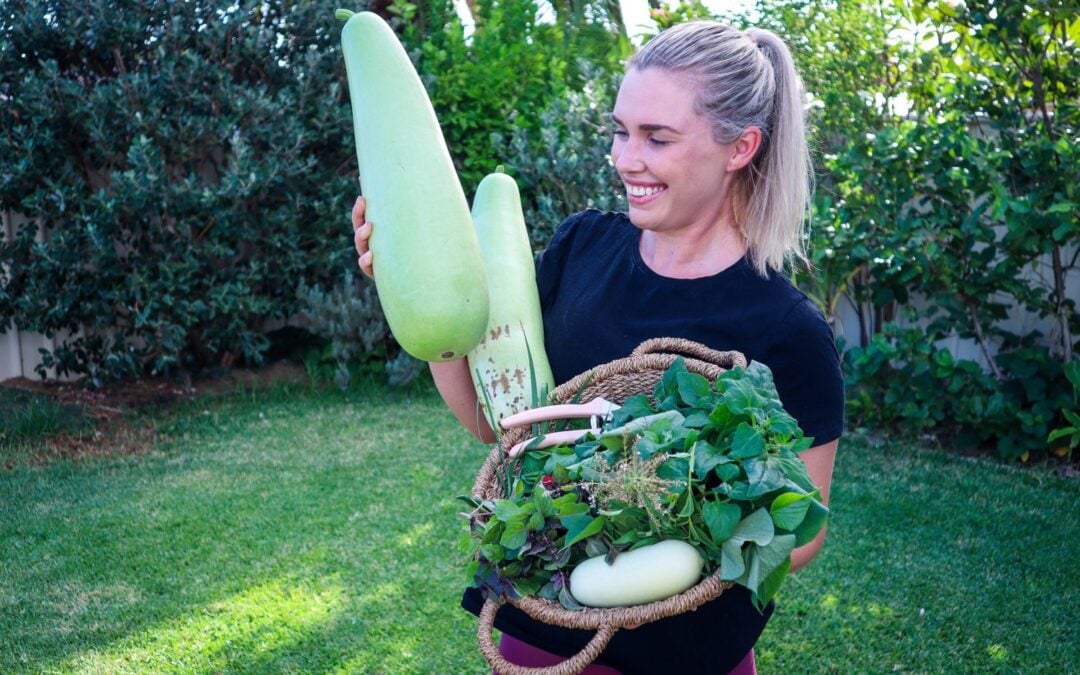
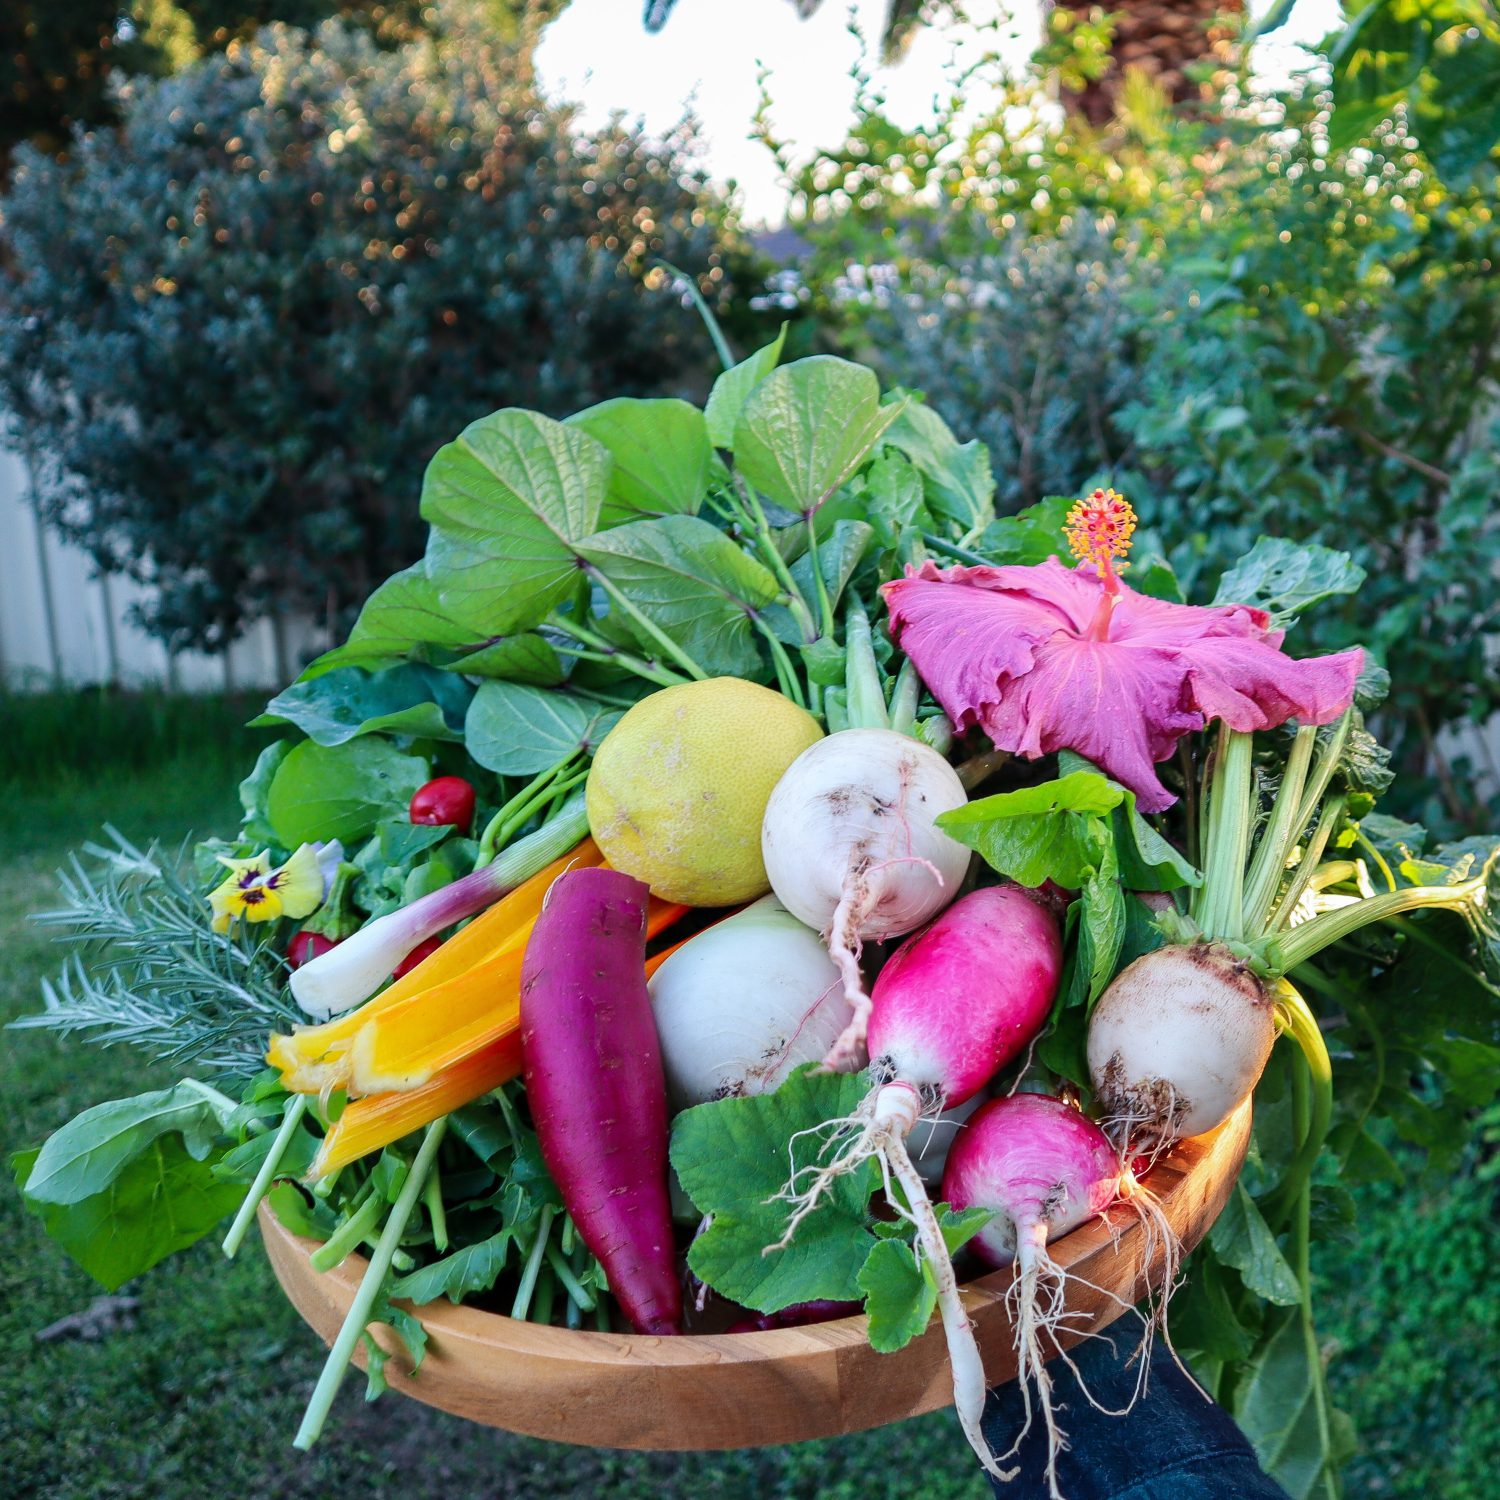
7. Grow Community
Get your friends involved! Take them over a basket of homegrown food or preserves. Once they see your delicious fresh food they may also get inspired! Help them out with seeds, and cuttings and surround yourself with like-minded people. Community gardens can be a great place to learn, get involved, and even seed/ produce swap. It can be an amazing network of knowledge, especially in relation to your local climate and growing conditions. There are also some great social media forums and groups that are great for finding answers to your questions and local knowledge.
8. Shop Local
Explore your local farmer’s markets! Grab a friend and go have a browse! They are usually on a Saturday or Sunday morning and I look forward to it every week. Although I love my local farmers market (Kalamunda) every few months I like to check out other farmers markets to mix things up and find new and interesting produce. Bulk food stores have been making a come back and I am sold! Lucky for me there is a fantastic Bulk Store ( Replenish Kalamunda) right by my local farmer’s markets. So I head there straight after I have picked up some fresh veggies. They may seem daunting at first but there are always plenty of signs explaining how to do it. I also love how each product clearly states where they have come from as I try to only choose Australian products.
9. Learn to Cook from Scratch
This is a big one! Learning to cook a wide range of meals from scratch using simple ingredients is key! I mean we can all make a butter chicken right…you just get the sauce and pour it in… Ditch the sauces from the supermarket and learn to make your own. I am constantly experimenting and expanding my knowledge so I can make a wide selection of meals from the produce I grow. Try to buy vegetables that are in season and fruits and vegetables that you are planning to grow. That way you can practice and become a pro at recipes for YOUR future harvests!
10. Grow Food From Scraps
Ok, this is one of my favourites! It is so quick and easy and a lot of fun! Plus you are getting the most out of your food. Buy one get multiple free!! Cut off the ends of your farmers market vegetables such as Spring Onion, Leek, Pineapple, Sweet Potato and regrow!
11. Forage and Trade
Keep an eye out on your walks and day trips for wild or excess food. So often there are olive trees, fruit, nuts or wild apple trees going to waste. Do your research and learn how to identify plants. That way you will know what you are looking at. It is also important to be careful if things have been sprayed by the council. I would be always cautious of things such as blackberries. You may even notice a neighbours tree loaded with fruit that is going to waste on the ground. Politely ask if you can have some in exchange for some preserves or baking you make with it. They will probably be happy for it to be used!
12. Repair and Upcycle
Get the most out of your things by fixing or updating them! Even if you don’t know how you may be able to pay someone a fraction of the cost to fix it rather than buying brand new. We often are so quick to throw out and buy new, we don’t even stop to consider if it can be fixed or repurposed. My hair straighteners and been fixed multiple times by electrician friends over the past 12 years and are still working amazingly! Recovering cushions, and couches, DIY, get creative, and even find a local seamstress if you don’t have access to a sewing machine.
13. Shop Second Hand
I try my best to not buy new and it is something I am continuing to work on. Most items you want can be found on Facebook market place, Gumtree (Trademe, Craigslist, etc). You can usually pick up a bargain and keep things in the loop rather than consuming more new things. You can even post in your local community groups and borrow or buy. Especially with things like appliances as many people often have them sitting in the cupboard collecting dust…Pasta maker, I’m talking about you 🙂
14. Backyard Chickens
Chickens make an excellent addition to sustainable living. They provide eggs, eat leftover scraps, produce manure for fertilising your garden, and can they also be incorporated into an integrated pest management system to help you keep your slugs and snails at bay. Many councils will allow backyard chickens in suburbia. Although I do not have chickens …yet (Pictured above is mums ‘Chick Inn’) my council allows x6 backyard chickens on properties 600sqm -2000sqm.
15. Back to Basics
Bread/milk/butter/pizza dough. The age-old skill of baking your own bread is a fantastic skill to have! How amazing to just whip up a fresh loaf of bread or make your own pizza bread without the preservatives or plastic packaging. Milk is super easy and you can make delicious plastic, preservative-free milk whenever you want! Whether that’s oat, rice or almond milk.
16. Learn to Preserve Harvests
I am not really at a point yet where I have an abundance of produce to preserve but I have planted a lot of fruit trees…so I am starting to learn different ways to preserve things so that when I am flooded with produce (yay!) I will be able to make the most of it! Get some produce from the farmer’s markets and give it a go! Jams, chutneys, sauces, pickles, nasturtium capers and all those delicious things. They also make great gifts and can be used to swap for other produce with your friends and family and community.
17. Make your Own
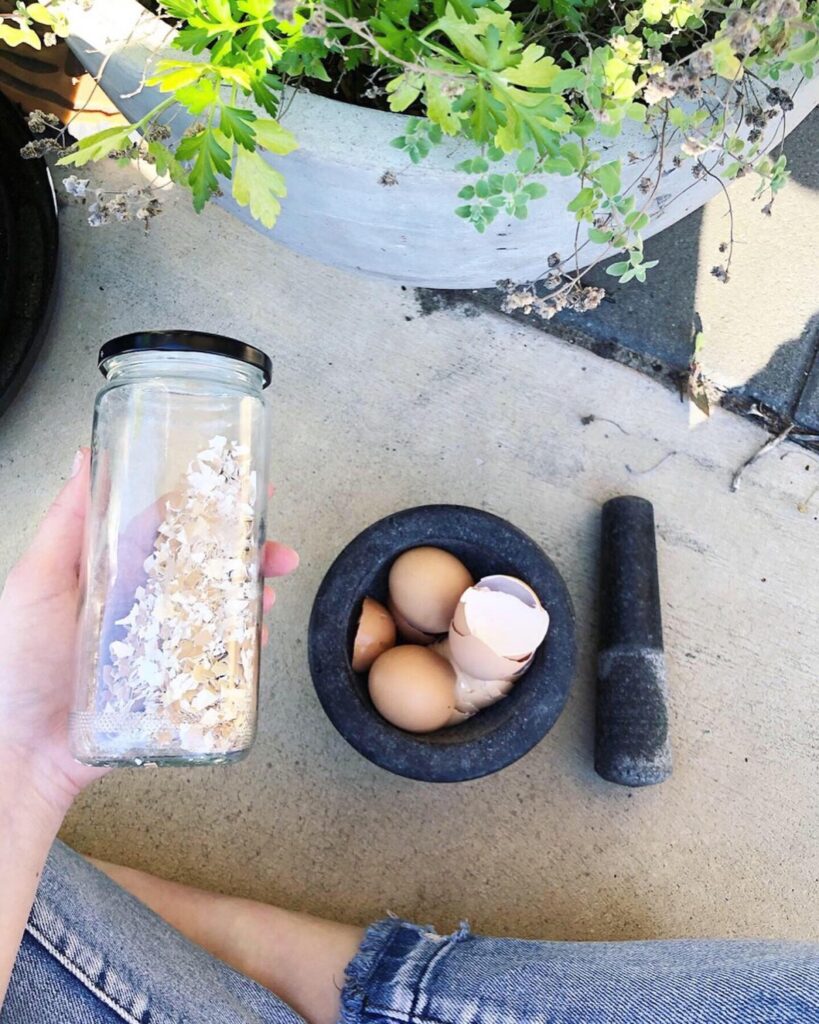
Ditch the toxic chemicals and pesticides and start making your own natural cleaning and garden products. You can get a few ingredients from your local bulk stores such as white vinegar and bicarb soda and make a huge range of cleaning products. Check out my Citrus cleaner here. I also used crushed eggshells to keep slugs and snails at bay. Natural pest management
18. Learn, Read, Practice
I can’t stress how important this is! Knowledge is power. Join your local library and get a book on jam making or search YouTube for “how to prune a lemon tree”. Educating yourself and giving things a go will get you a long way on your journey to living a more self-sufficient lifestyle. Take things one a time and really try and master it before moving on. It can be overwhelming if you try to do it all at once and may lead to failure and giving up.
Small and slow solutions!
Holly 🌱
MY GARDENING ESSENTIALS // Fertiliser spray gun: https://bit.ly/366nL1t Retractable Hose: https://bit.ly/2TSC0Bo More gardening tools: https://bit.ly/32IQmbD
DISCLAIMER: Links included in this description might be affiliate links. If you purchase a product or service with the links that I provide I may receive a small commission. There is no additional charge to you! Thank you for supporting my page so I can continue to provide you with free content!
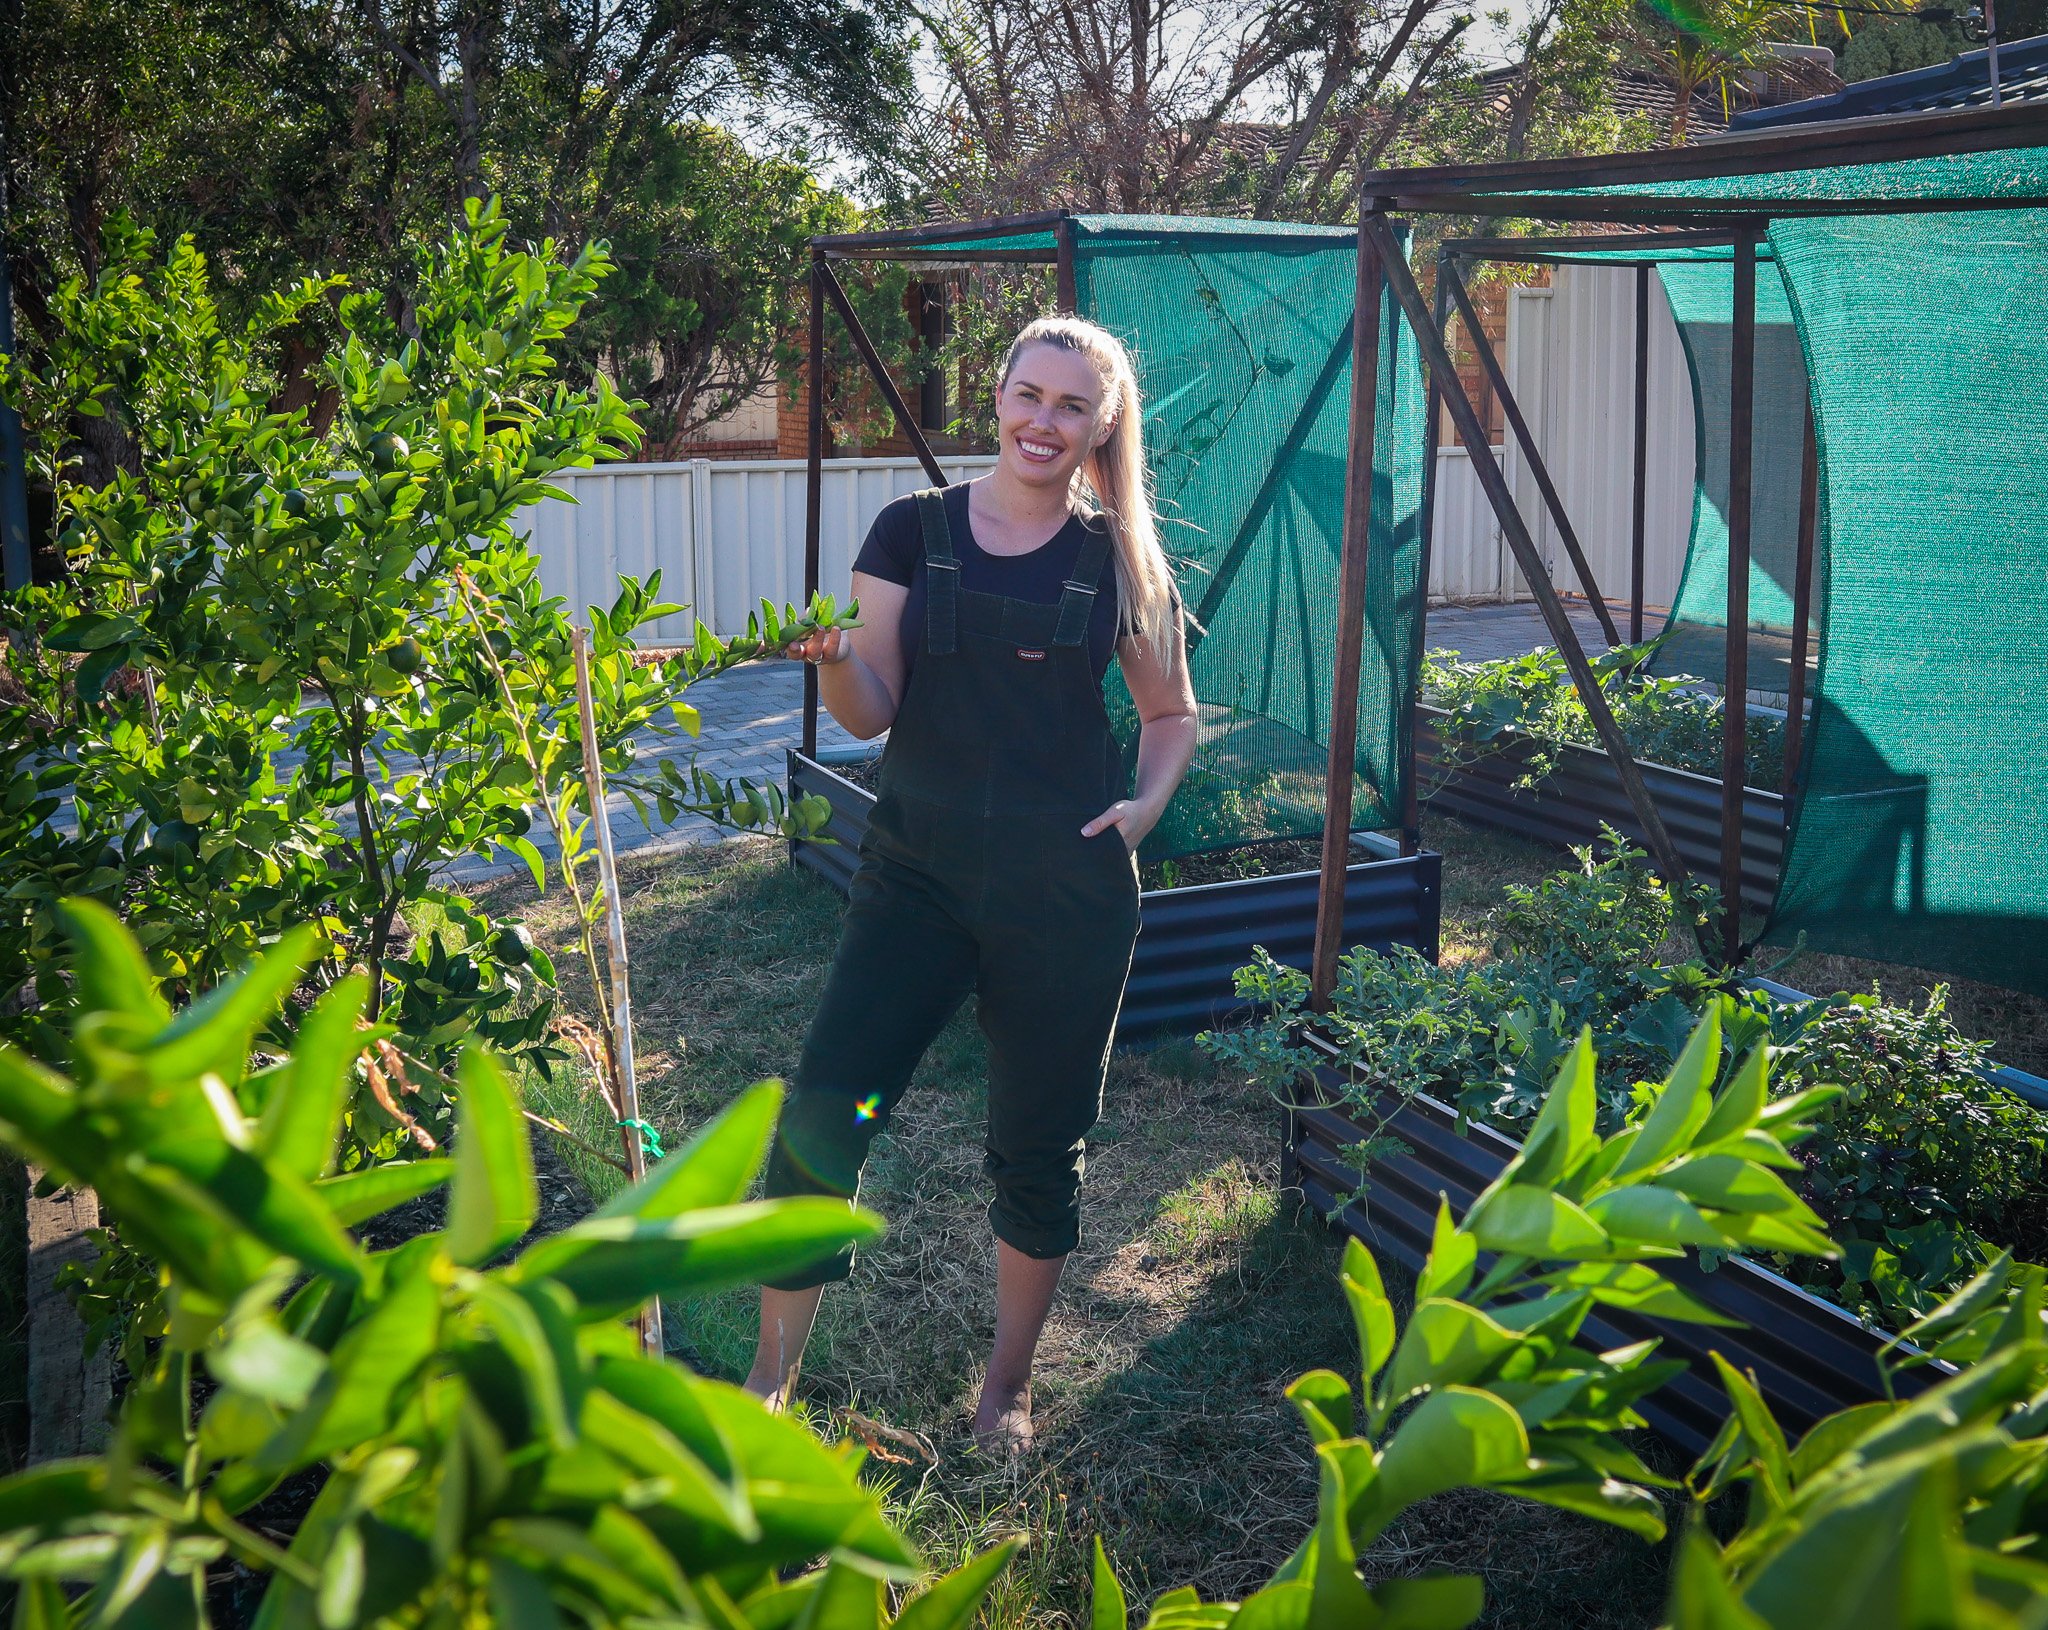
When I first started gardening here I remember googling ” how to keep plants alive in a heatwave?” 😅 Welcome to Perth summer gardening! I have always struggled with how hot it gets here in Perth in summer. After 7 years here, the 40degree days don’t get any easier! We have a large amount of thermal mass at our house with concrete and paved areas so it can get so hot in my garden! One of the main reasons I decided to make pallet planters on wheels was to be able to grow more food during the hot summer months by being able to have them undercover on hot days. Watch how we made them here.
How to keep plants alive in a heatwave
If you are experiencing a heatwave or have days of hot weather ahead of you, here are a few tips I use to try and get my plants through!
🌱 WATER | Give a good deep water early in the morning. This will allow time for the moisture to reach the roots before it evaporates.
🌱 SHADE | If your plants are in containers move them undercover or to a shady area of your garden. Otherwise, try and rig up some temporary shade using shade cloth or even umbrellas to keep the direct sun off your plants during the hottest part of the day.
🌱 PROTECT THE SOIL | Ensure you have a good layer of mulch or ground cover over your entire garden. This will protect the soil from being exposed to direct sun and reduce the amount of water loss through evaporation.
🌱 BUILD SOIL | This is something that should be continually worked on by composting and adding more fibre and leaf matter to your soil. Sandy soils like we have here in Perth allow all the water to drain away and can become severely water-resistant. But by consistently mulching, composting and adding green matter, you will not only grow strong, healthy plants but also protect your plants from future dry spells. Healthy soil is key!
🌱 REPLENISH | As the sun goes down and the temperatures start to drop again, give your plants another well-earnt drink. This should help their leaves perk back up again.
🌱 SAVE SEEDS | If you notice a certain plant seems to survive better than others in hot weather, make sure you save the seeds at the end of the season. That way you can futureproof your garden by growing strong plants that you know will grow well in your exact climate.
My favourite watering tools are:
Retractable Hose with 7 spray nozzle and water flow adjuster: Control exactly how much flow you want to each plant with an easy retractable hose system. CLICK HERE for more info.
Deep root waterer and soil breaker: Helps get water directly to the roots without any runoff or loss of water from evaporation. CLICK HERE for more info.
Weeper hose works great for drip-feeding water and allowing the plants to absorb more. CLICK HERE for more info.
Happy Gardening!
Holly 🌱
MY GARDENING ESSENTIALS // Fertiliser spray gun: https://bit.ly/366nL1t Retractable Hose: https://bit.ly/2TSC0Bo More gardening tools: https://bit.ly/32IQmbD
DISCLAIMER: Links included in this description might be affiliate links. If you purchase a product or service with the links that I provide I may receive a small commission. There is no additional charge to you! Thank you for supporting my page so I can continue to provide you with free content!
I much prefer offering natural and sustainable solutions rather than a pointless list of negative things not to do. But this topic is something I am very passionate about and something new gardeners often get caught up in (including myself when I first started growing food many years ago). You will find my list of natural pest management remedies below 🙂
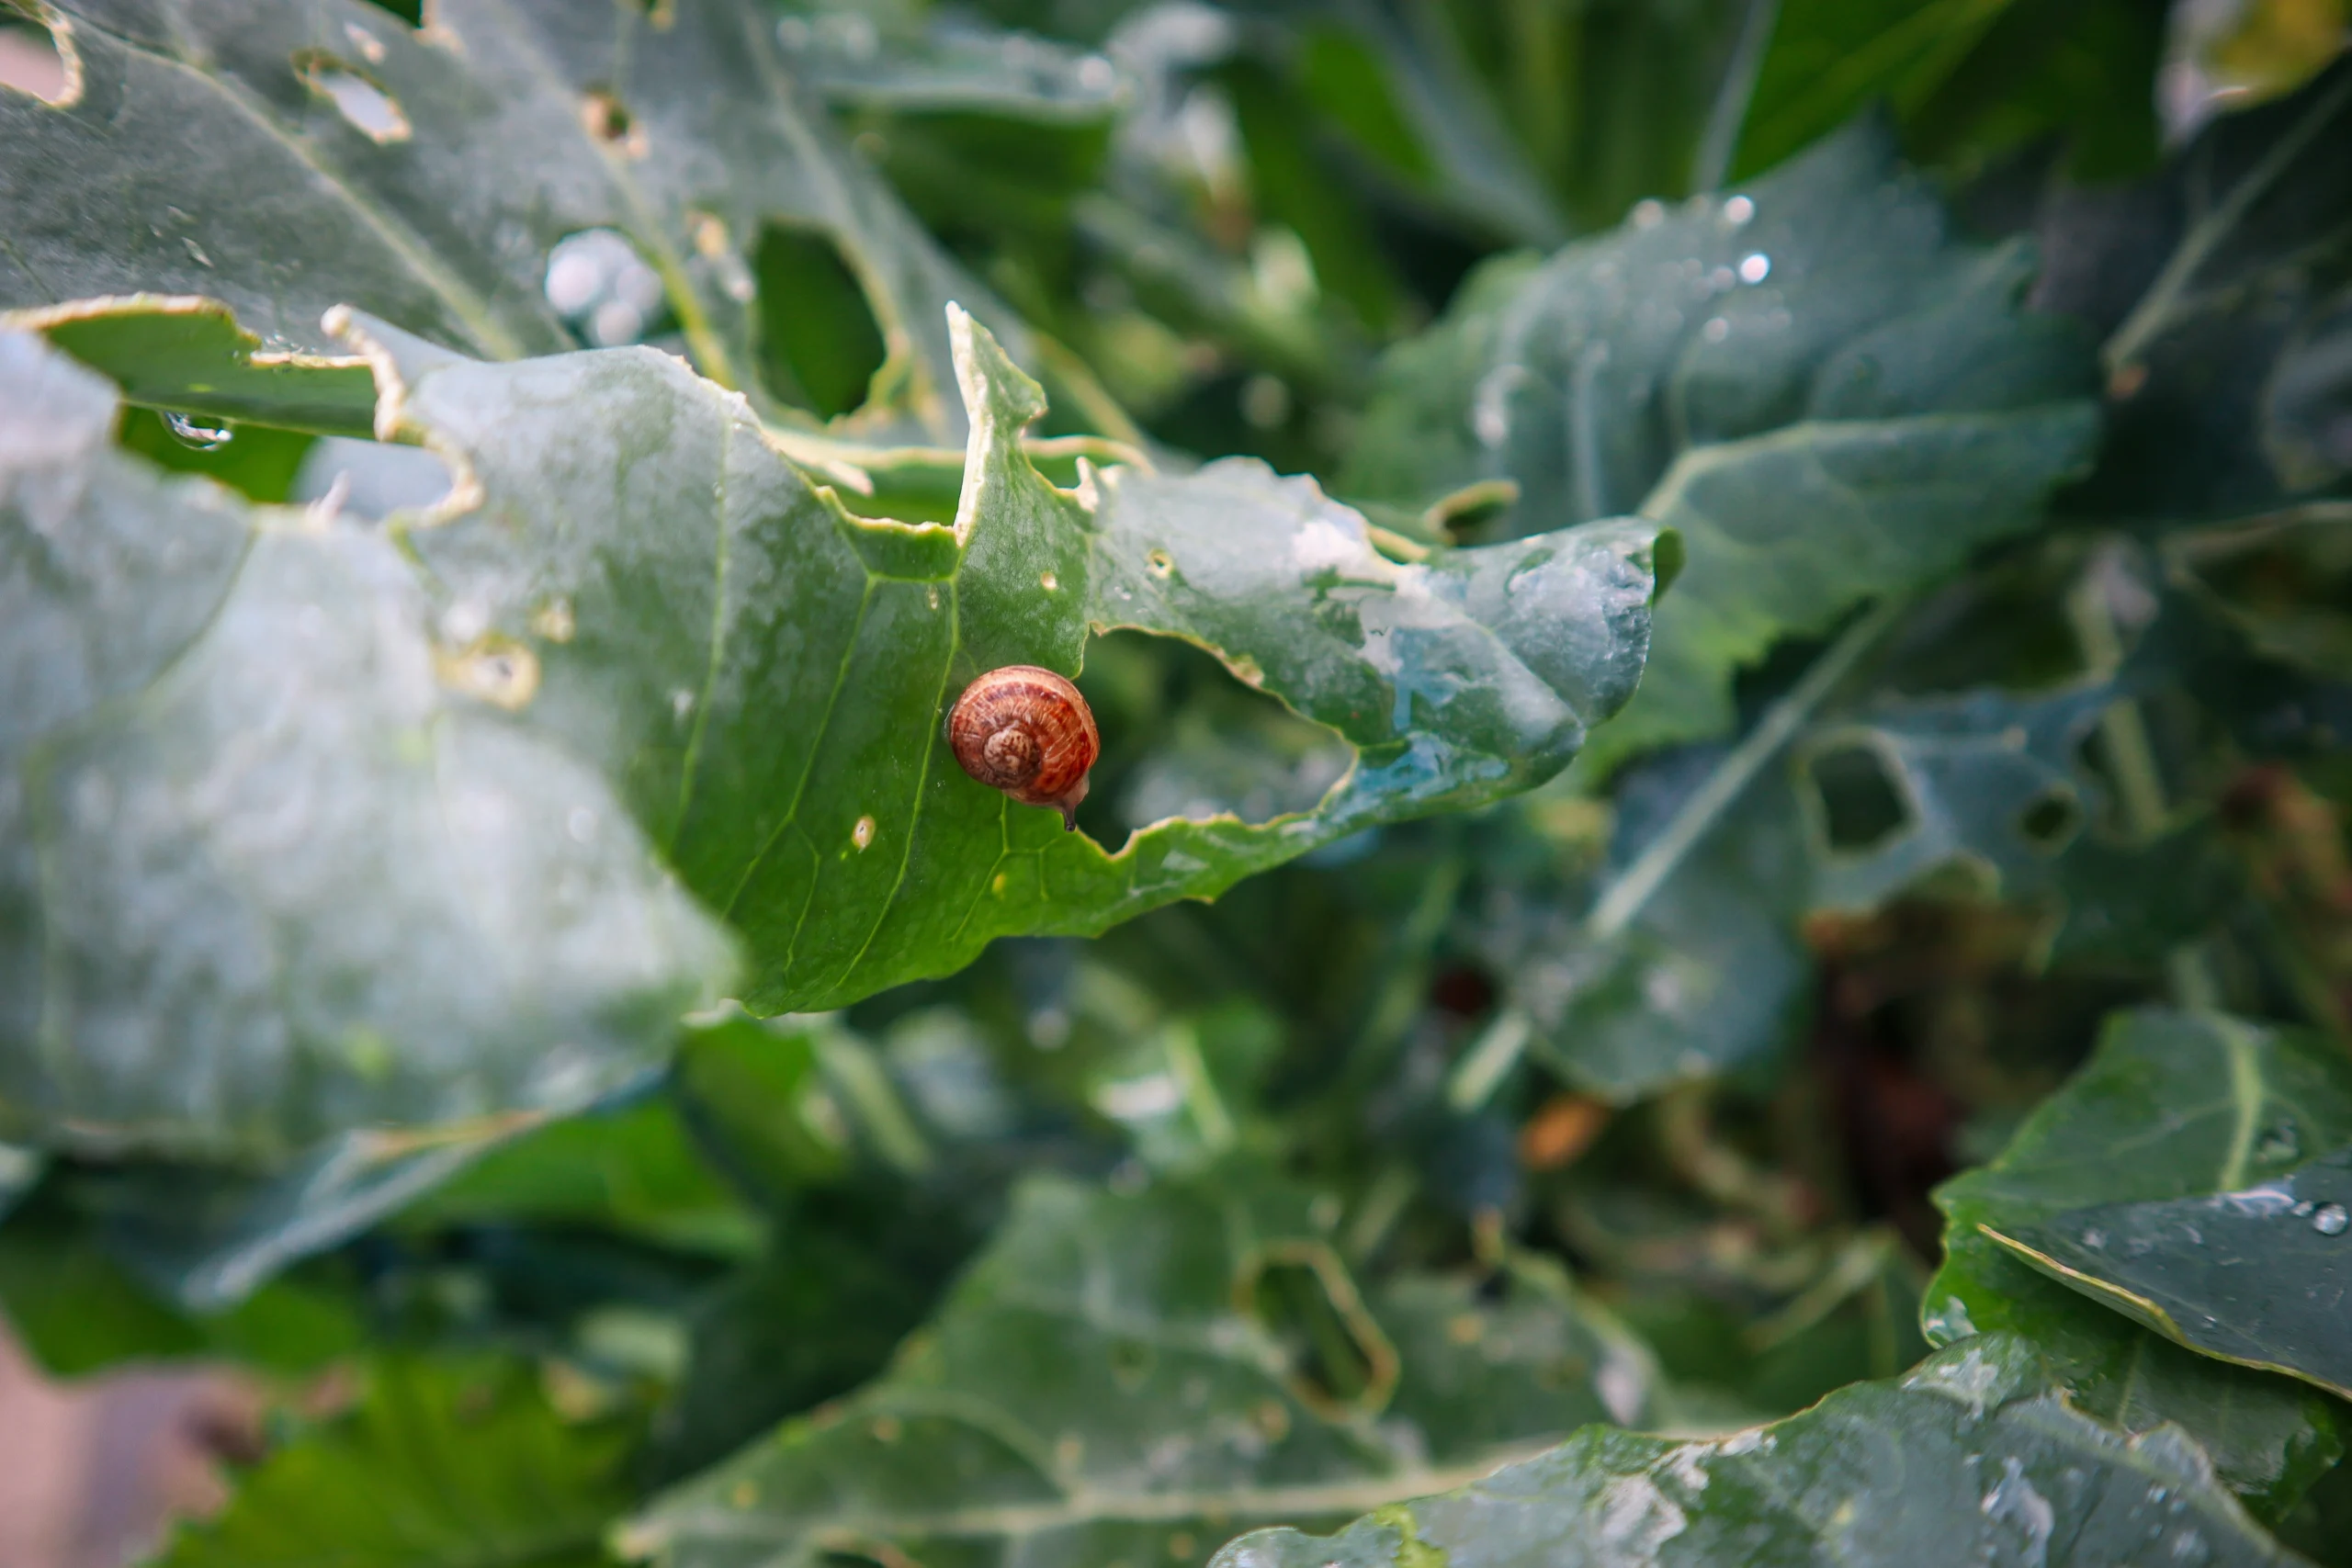
When you first start growing food you will get slugs and snails eating your new precious veggies and will want to INSTANTLY fix the situation. I see some newbie gardeners pour on huge amounts of snail bait to combat the hungry predators. This is POISON, not only will it kill the slugs and snails but is also deadly to cats and dogs. Now, if it can kill dogs, having it covering the soil and getting watered in and absorbed into the soil that your vegetable will feed on, especially those root vegetables, cannot be good for us.
If you’re reading this and thinking…I do this..you are not alone. It is something that has been a “norm” for way too long. But the first step you can take is safely throw out your poisonous slug bait. I would place it in something that animals can’t get into in case it crosses paths or they get into the bins. Even better, contact your local council to find the best way to safely dispose of it.
Watch my latest video
There are plenty of ways to naturally combat pests and have safe and nontoxic vegetables for your family.
Eggshells – Save your eggshells and dry in the oven on low. Then crush into small pieces and place in a jar. Sprinkle this around the base of your vegetables and the slugs and snails do not like the surface so will stay away. It also adds some beneficial calcium to your soil.
Plant extras – Plant a few extra plants in different areas of your garden so that if one gets attacked you still have plenty 🙂
Encourage beneficial insects – Plant diversity and flowers to create habitats and attract beneficial insects. You could even make an insect hotel using lots of different sized sticks and logs for them to live 🐞🐝
Manually remove – Go out and check your garden and remove the pests by hand. I often do this when I am on the phone, its a great way to multitask.
Beer Traps – Cheaper the better, there is no need to use up any fancy craft beer. Place little containers around your vegetable patch and this will capture the slugs and snails before they get to your precious veggies 🍺
Coffee grounds – Often your workplace or local cafe will be throwing these out anyway. Sprinkle around the base. Only add a small amount as it will change the PH of the soil ☕️
Companion Plants – Often very fragrant plants will repel pests. These are plants such as: Marigolds and Rosemary 🌼🌿
Soapy Water – this is great for aphids. All my dishwashing liquid is non-toxic and greywater friendly so I just mix up some diluted in water and paint it on the new growth that is affected by aphids. This is the last resort though as it may harm beneficial insects too. Try and isolate the coverage.
Chilli spray – Mix up some chilli powder in some water and spray on your affected plants. I have read crushed garlic as well but that is bad for dogs so I would avoid.
Healthy Soil – growing healthy soil by composting and mulching helps keep your plants strong and healthy 💪 this means that if they do get bugs they can survive and thrive after an infestation.
Sacrificial plants – Usually one plant will just get attacked and I just leave it. It usually means the bugs will only eat that plant and the rest will be fine! Sorry for that one plant but it’s feeding nature…🌿
Chickens and ducks are also a great way to integrate natural pest management into your garden. Win-win 🐛🦆
MY GARDENING ESSENTIALS // Fertiliser spray gun: https://bit.ly/366nL1t Retractable Hose: https://bit.ly/2TSC0Bo More gardening tools: https://bit.ly/32IQmbD
DISCLAIMER: Links included in this description might be affiliate links. If you purchase a product or service with the links that I provide I may receive a small commission. There is no additional charge to you! Thank you for supporting my page so I can continue to provide you with free content!
Your home garden can do more than just look nice… You can grow your own groceries and boost your homegrown food security!
With rising food prices and a growing desire for self-sufficiency, growing your own groceries has never been more important. Keep reading to see what to grow in your home garden to replace supermarket staples, from natural sweeteners, salt and pepper, protein-rich legumes, to fresh herbs, healthy fats, and easy-to-harvest fruits and vegetables.
Whether you have a small balcony, a suburban backyard, or a larger food forest, these plants will help you create a homegrown, chemical-free supply of staple crops to grow your own groceries! This guide is based on my garden in Perth, Australia, in a warm climate (zone 10b). :
Your Grow-Your-Own Grocery List
🍬 Sugar and Sweeteners
Instead of buying refined sugar, these plants naturally sweeten your food. They’re easy to grow and provide fresh, chemical-free sweetness straight from your garden. Most ripe fruits will offer you natural sugars, but below are some of my top picks!
Plants to Grow for Sugar and Sweeteners:
Sugarcane (Saccharum officinarum) – accounts for about 80% of global sugar production. You can grow sugar cane at home and start producing juicy stalks of sugar!
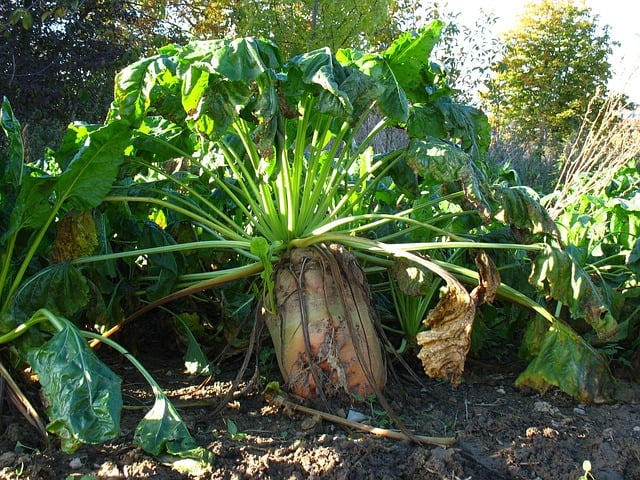
Sugar Beets (Beta vulgaris subsp. vulgaris) – a cool-climate option for natural sugar; roots can be processed into sugar. Like a white beetroot but super sugary! BONUS: Leaves can also be used as a green.
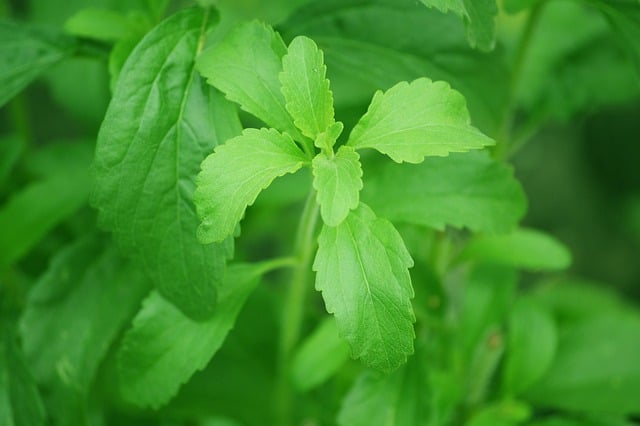
Stevia (Stevia rebaudiana) – a perennial herb; leaves can be used fresh or dried as a natural sweetener.
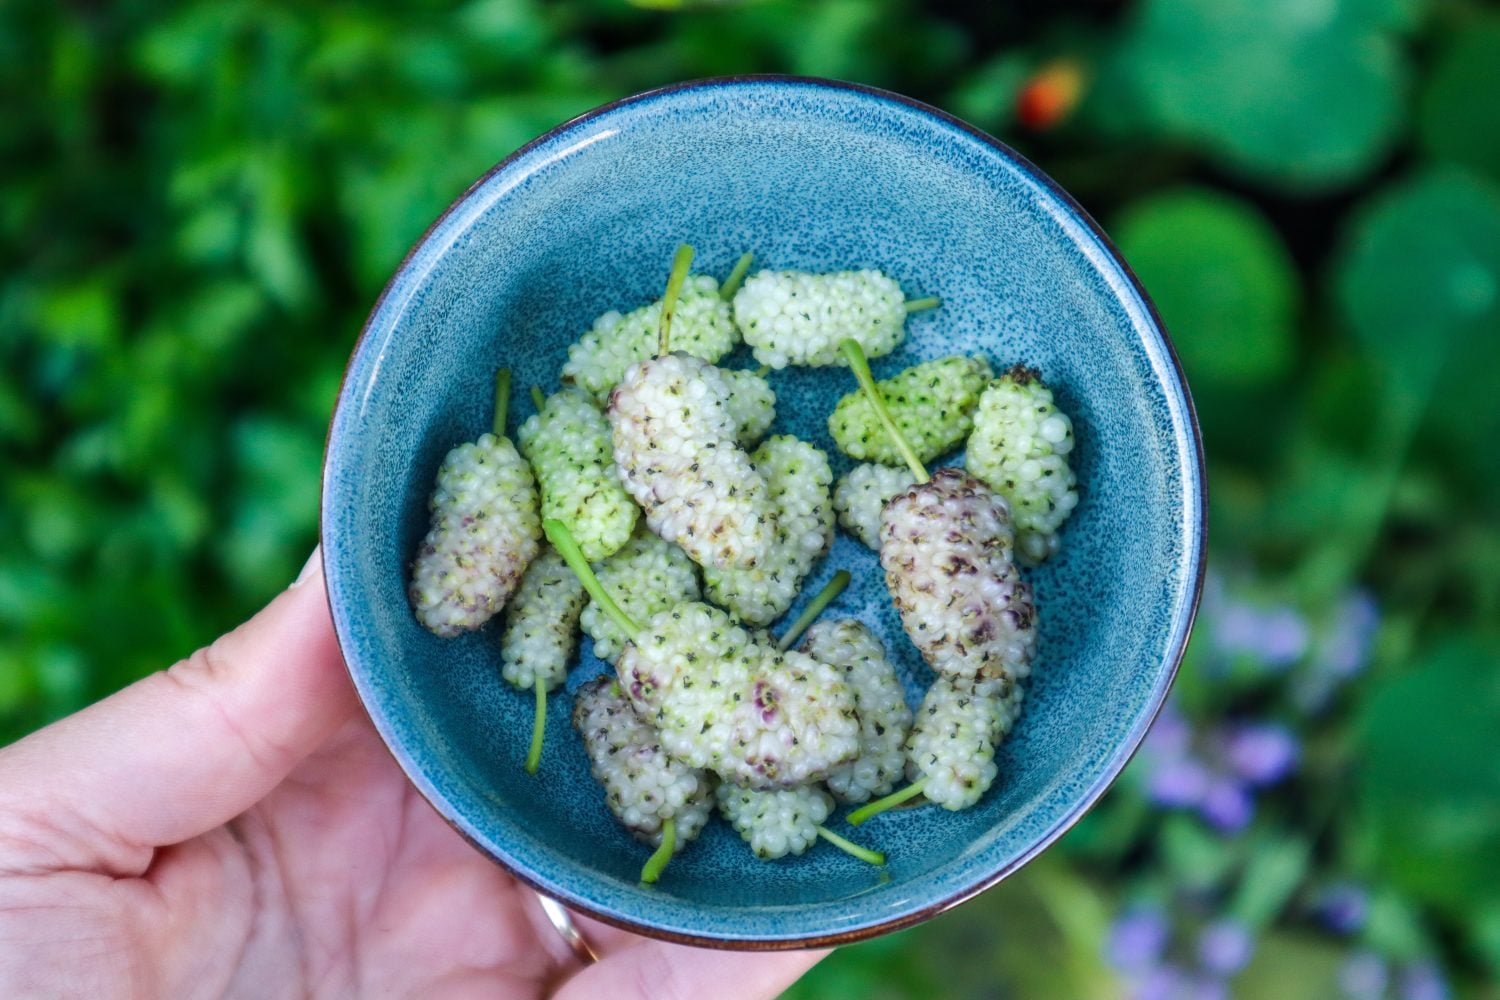
White Mulberry (Morus alba) – ripe berries taste like honey and sugar combined!
Yellow Figs (Ficus carica, Honey Fig) – yellow figs particularly are super sweet, soft, and perfect fresh or dried.
Bananas (Musa spp.) – ripe bananas can sweeten baking or be frozen and blended for natural ice cream.
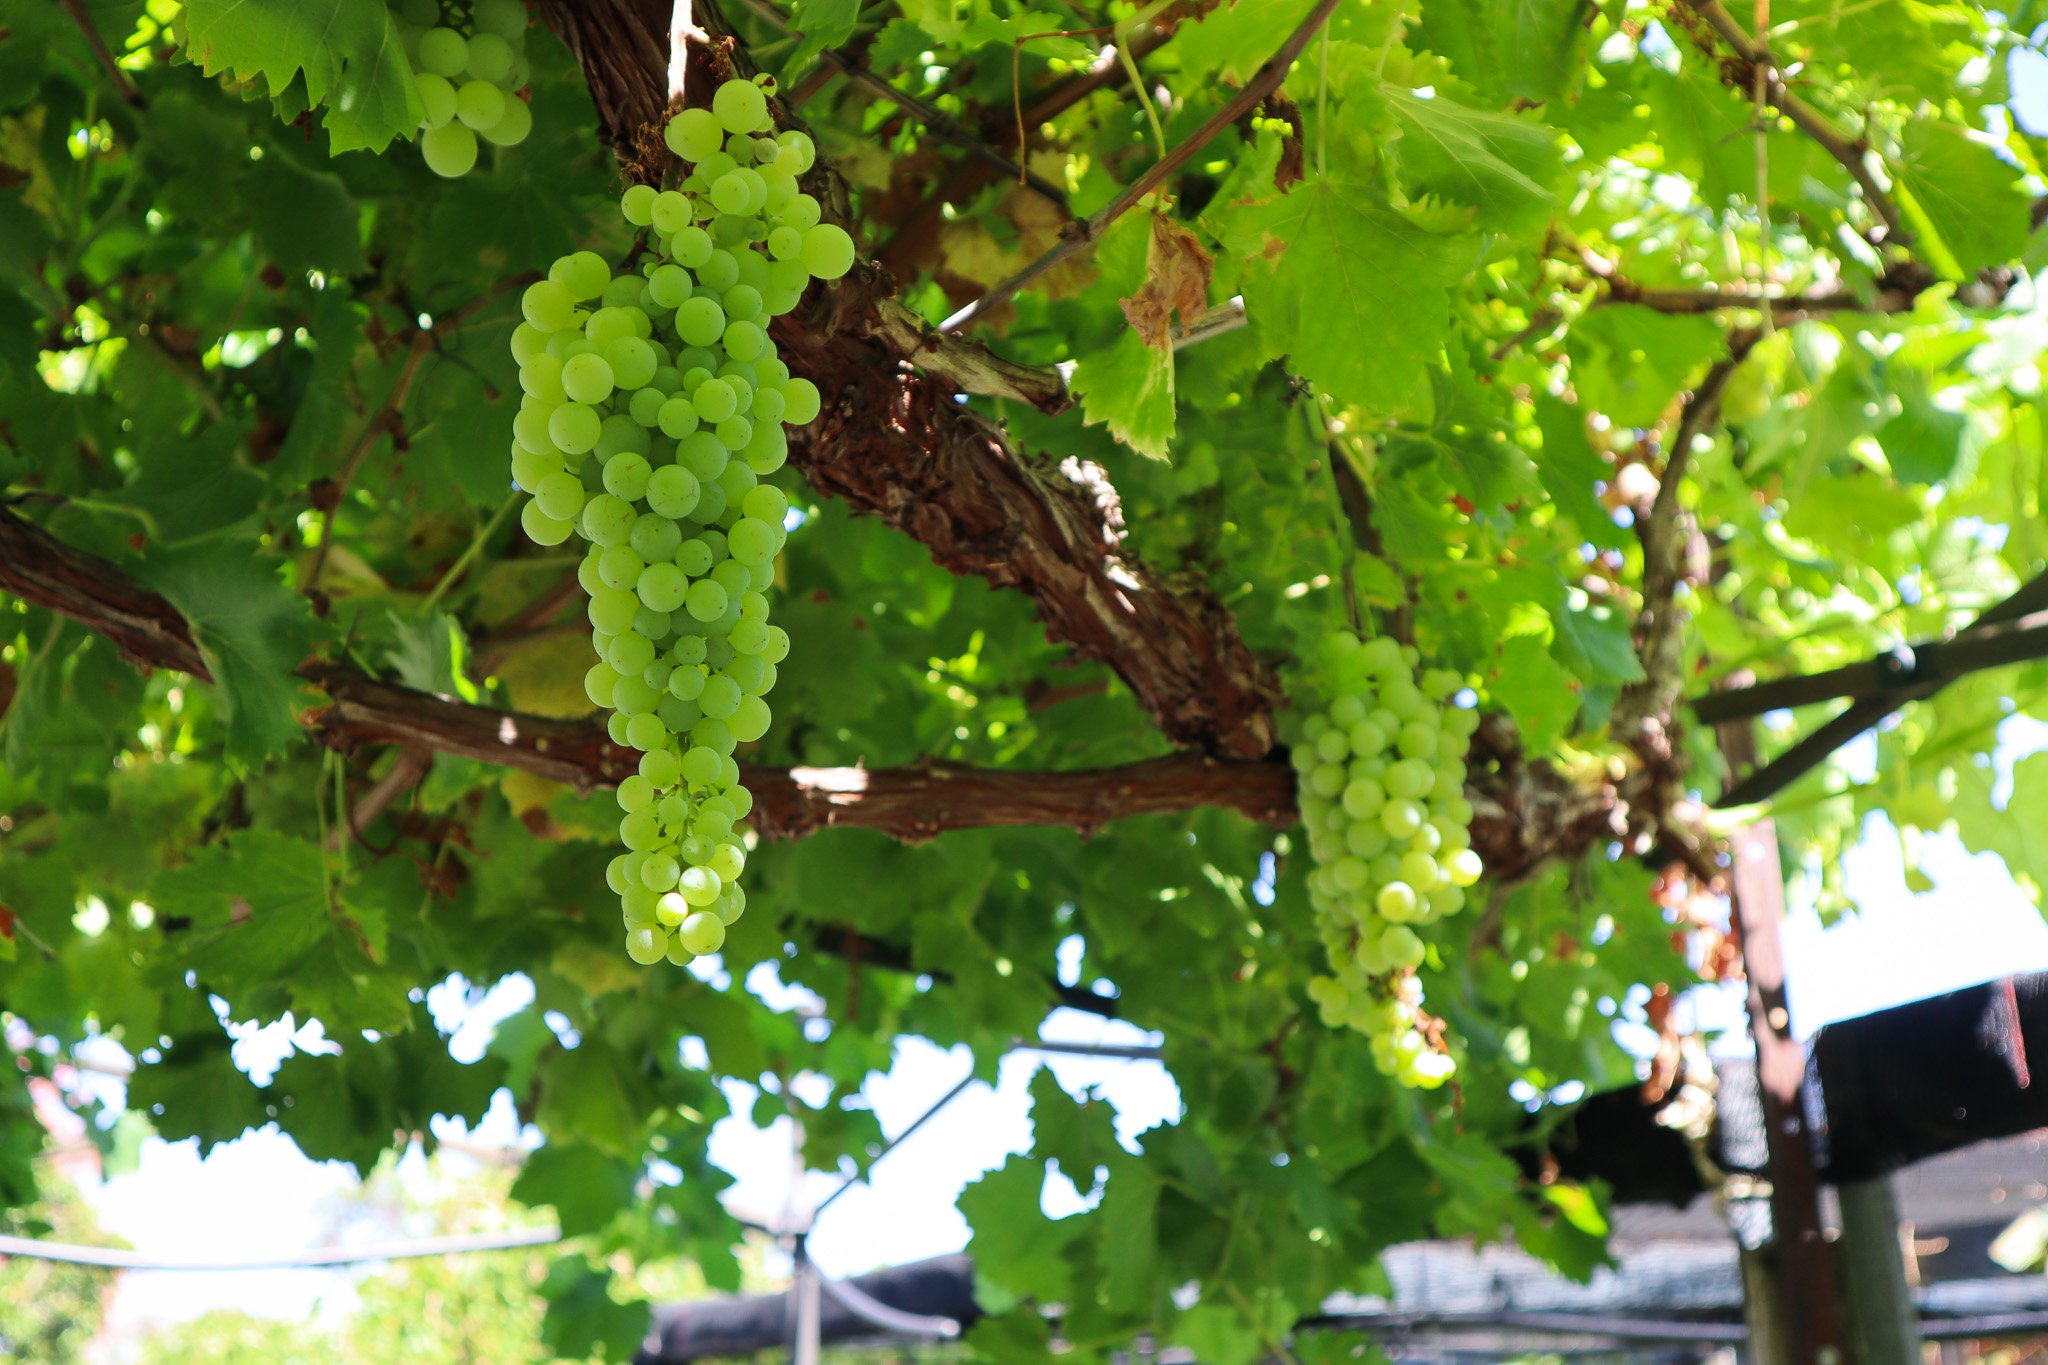
Grapes (Vitis vinifera) – homegrown grapes are naturally sweet, like nature’s candy.
Pineapple (Ananas comosus) – homegrown pineapple is so sweet! Plus, they grow well in pots or indoors near a sunny window.
Jujube (Ziziphus jujuba) – extremely drought-tolerant and produces sweet apple-like fruit that dries naturally into date-like sweets.
Melons (Cucumis melo / Citrullus lanatus) – if you have ever dehydrated watermelon, you would know just how sugary sweet it is! Vine-ripened watermelon, rockmelon, or honeydew melon are all very sweet options.
🧂 Salt and Pepper
Yes! You can grow your own salt and pepper in the garden! These plants add salty or peppery flavour while being easy to grow.
Plants to Grow for Salt and Pepper:
Old Man Saltbush (Atriplex nummularia) – hardy Australian native with silvery leaves that are naturally salty! Excellent in salads and cooking. Hardy an ddrough tolerant shrub.
Seaberry Saltbush (Rhagodia candolleana) – red, slightly sweet and salty berries and salty leaves; great for cooking.
Peppervine (Tasmannia lanceolata) – produces Tasmanian peppercorns; berries can be harvested at different stages and dried for red, white, or black pepper.
Kawakawa (Piper excelsum) – NZ native; leaves and ripe orange (female) seeds can be dried for pepper!
Nasturtium (Tropaeolum majus) – edible flowers and leaves with a natural peppery bite. The leaves pack more of a spicy punch, and the flowers have a nice, mild pepper flavour. The green seed pods can be pickled and made into “poor man capers”.
Rocket / Arugula (Eruca vesicaria) – fast-growing leafy green with a strong peppery flavour.
💪 Protein-Rich Plants
Legumes and other protein-rich plants are essential for a self-sufficient garden. They are easy to grow, nutritious, and have the added bonus of naturally improving soil fertility – to grow more food!
Plants to Grow for a Source of Protein:
Bush Beans (Phaseolus vulgaris) – fast-growing, compact, and perfect for vertical gardening.
Perennial Beans / Madagascar Bean (Phaseolus coccineus) – also called the seven-year bean; keeps producing for many seasons.
Edamame / Soybean (Glycine max) – high protein with 12g of protein per 100g, similar to two eggs.
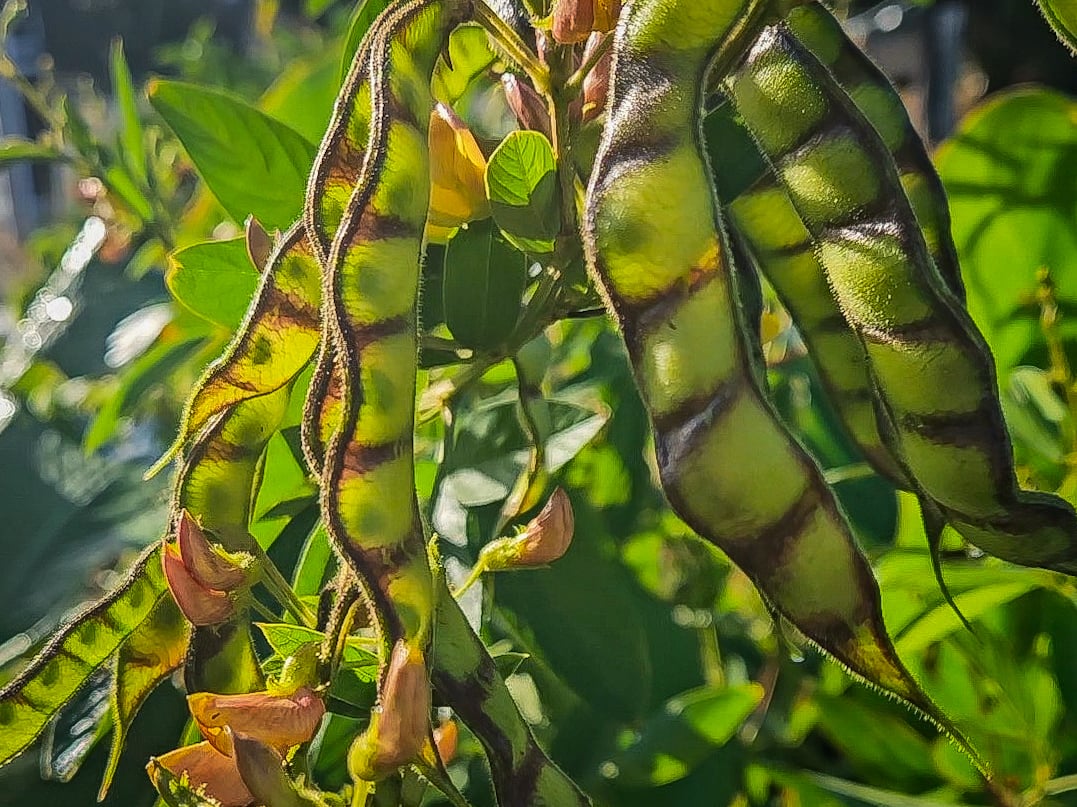
Pigeon Pea (Cajanus cajan) – edible pods can be eaten green or dried; nitrogen-fixing for healthy soil. One of my top support plants in the garden for mulch and food!
Peas (Pisum sativum) – eat pods and shoots; excellent garden snack for the cooler months.
Chickpeas (Cicer arietinum) – dry and store for long-term use.
Lentils (Lens culinaris) – nutritious and easy to store.
Broccoli and other Brassicas (Brassica oleracea) – surprisingly high in protein compared to many vegetables.
🍎 Snacks and Fruit
Swap packaged snacks for fresh, garden-grown fruits. I love nothing more than a wander through the garden to find snacks!
Plants to Grow for Snacks:
Lemon Cherry Guava (Psidium cattleyanum) – sweet and compact. I love the yellow variety with sweet snackable fruit!
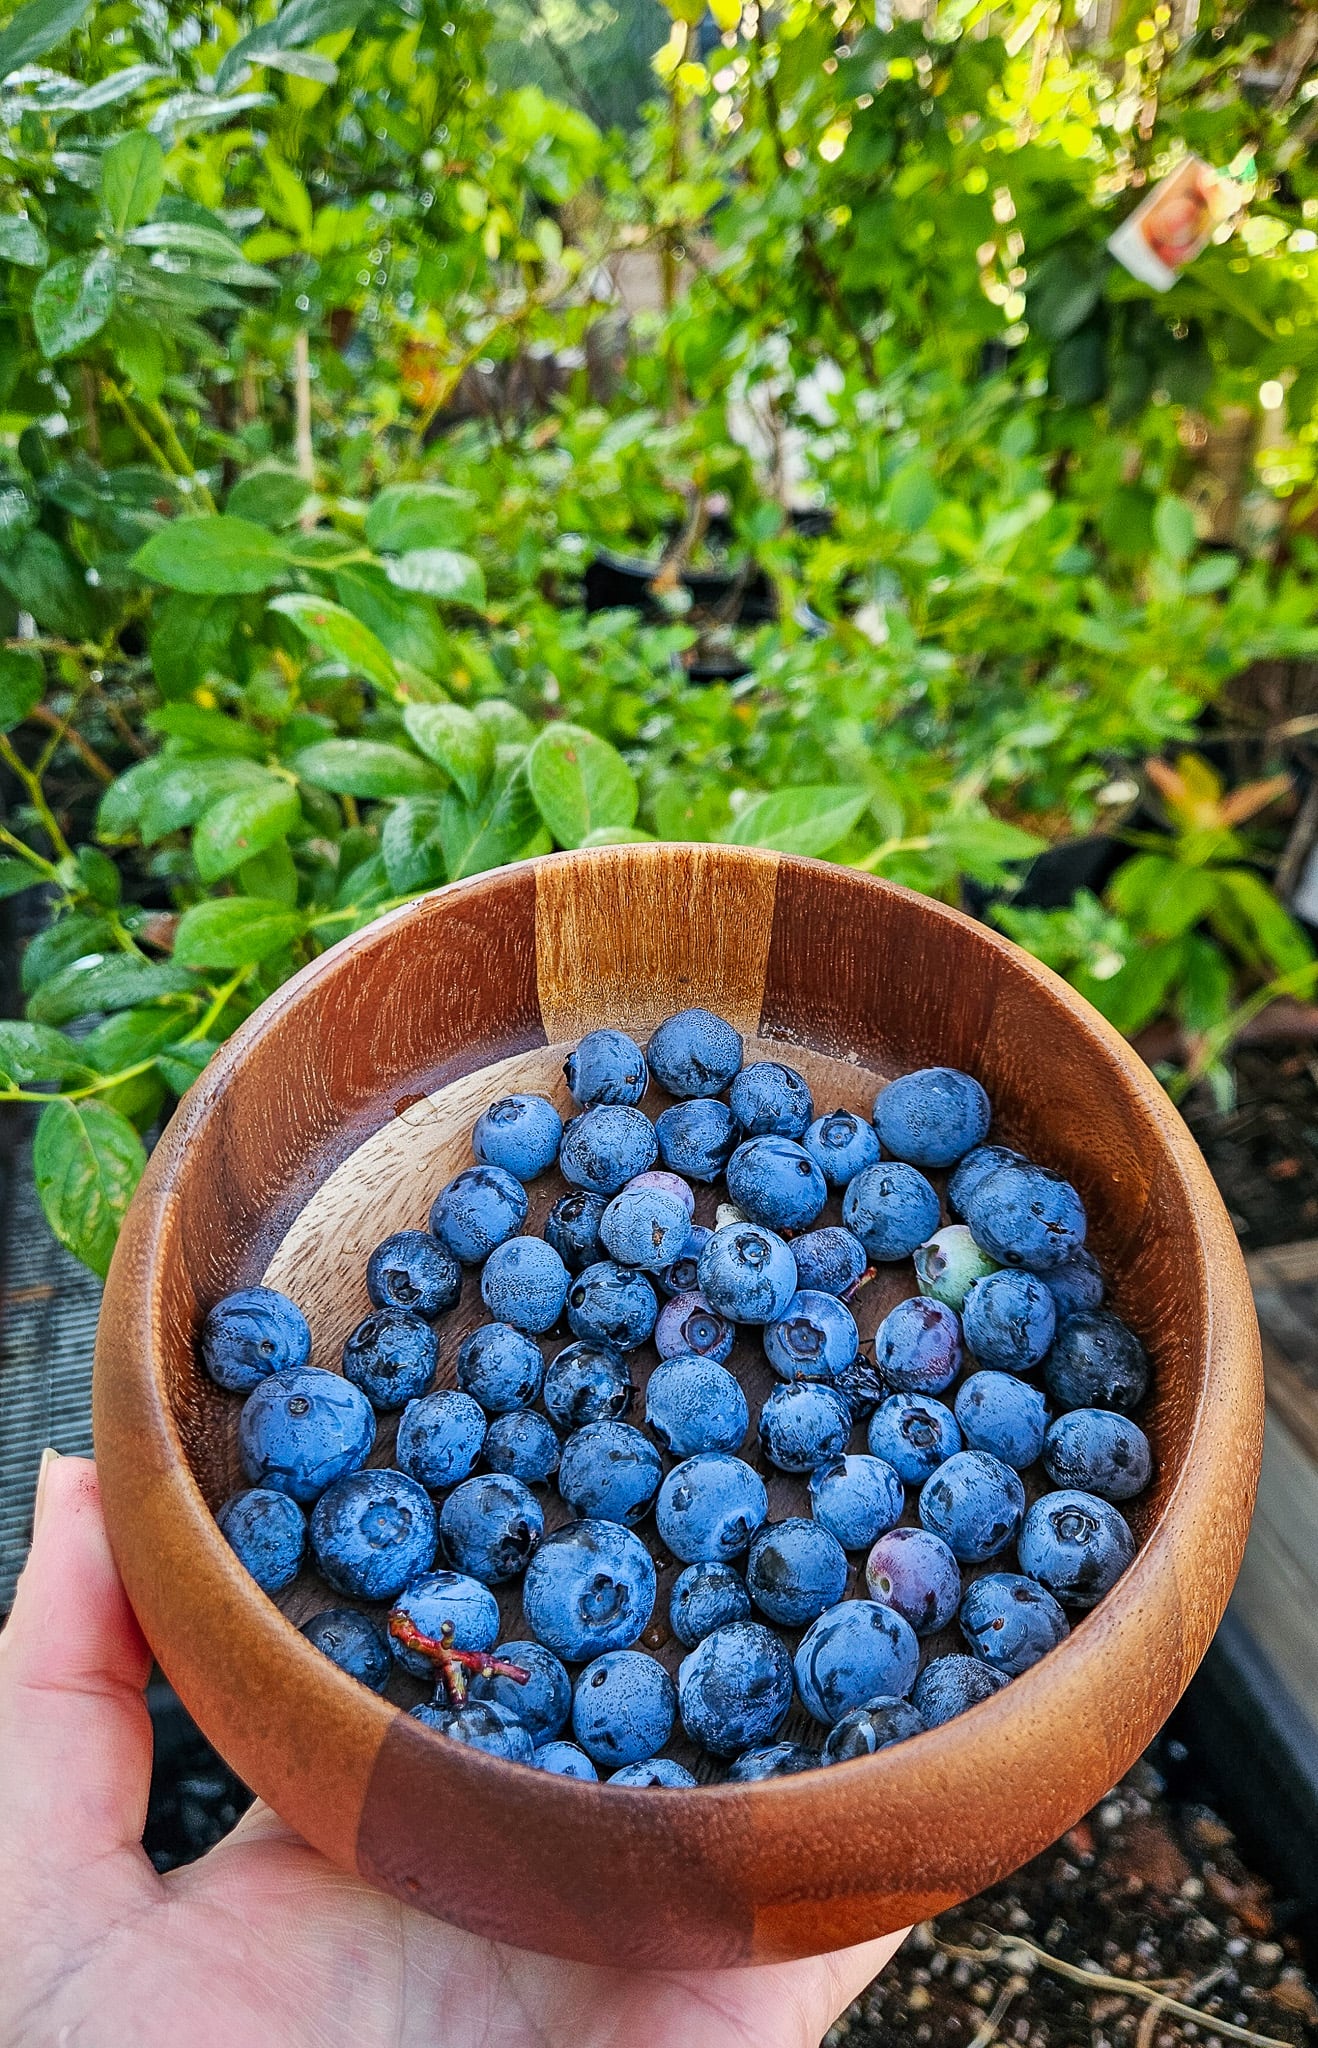
Berries – give us all the berries! Strawberries, blueberries, raspberries, kiwiberry, the list goes on!
Apples (Malus domestica) – a versatile staple base crop
Bananas (Musa spp.) – come with natural packaging, and homegrown bananas are so delicious!
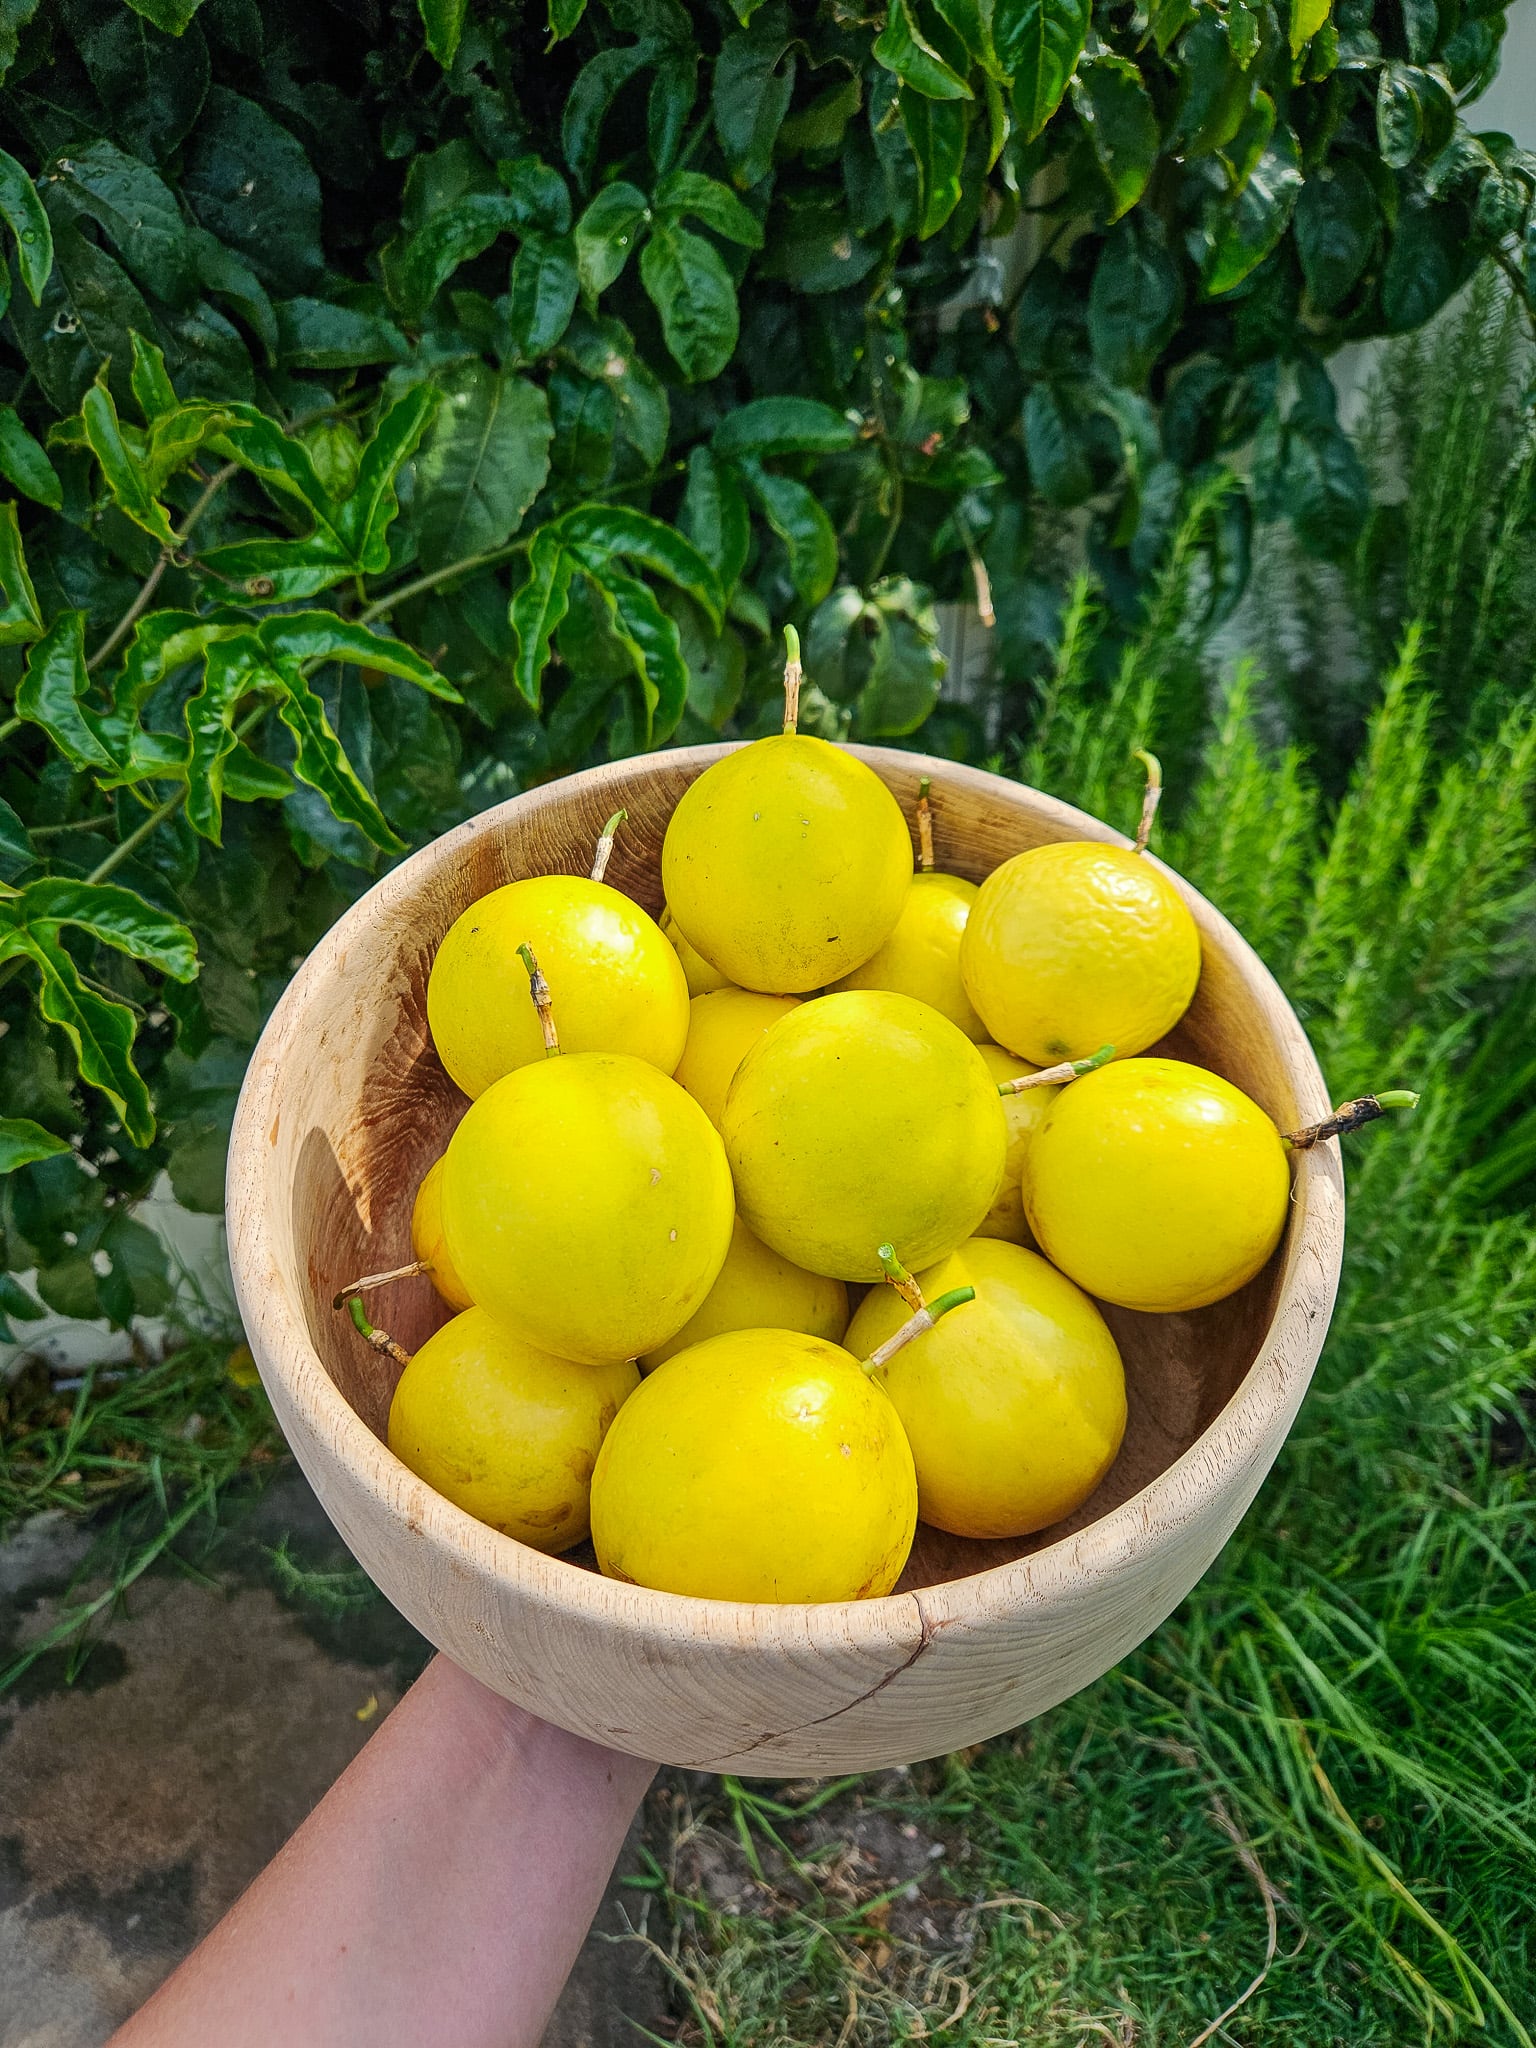
Passionfruit (Passiflora edulis) – robust skin, easy to take with you on the go.
Loquat (Eriobotrya japonica) – sweet, tangy fruit – tastes like a mix of apricot, pear and mango.
Mulberries (Morus spp.) – prolific and easy to harvest. Eat fresh off the tree as a garden snack.
Snap Peas (Pisum sativum) – crunchy and great for snacking. These never make it out of the garden! They are too delicious.
Carrots (Daucus carota subsp. sativus) – long-lasting root crop. Great to eat with some homemade hummus using your legumes!
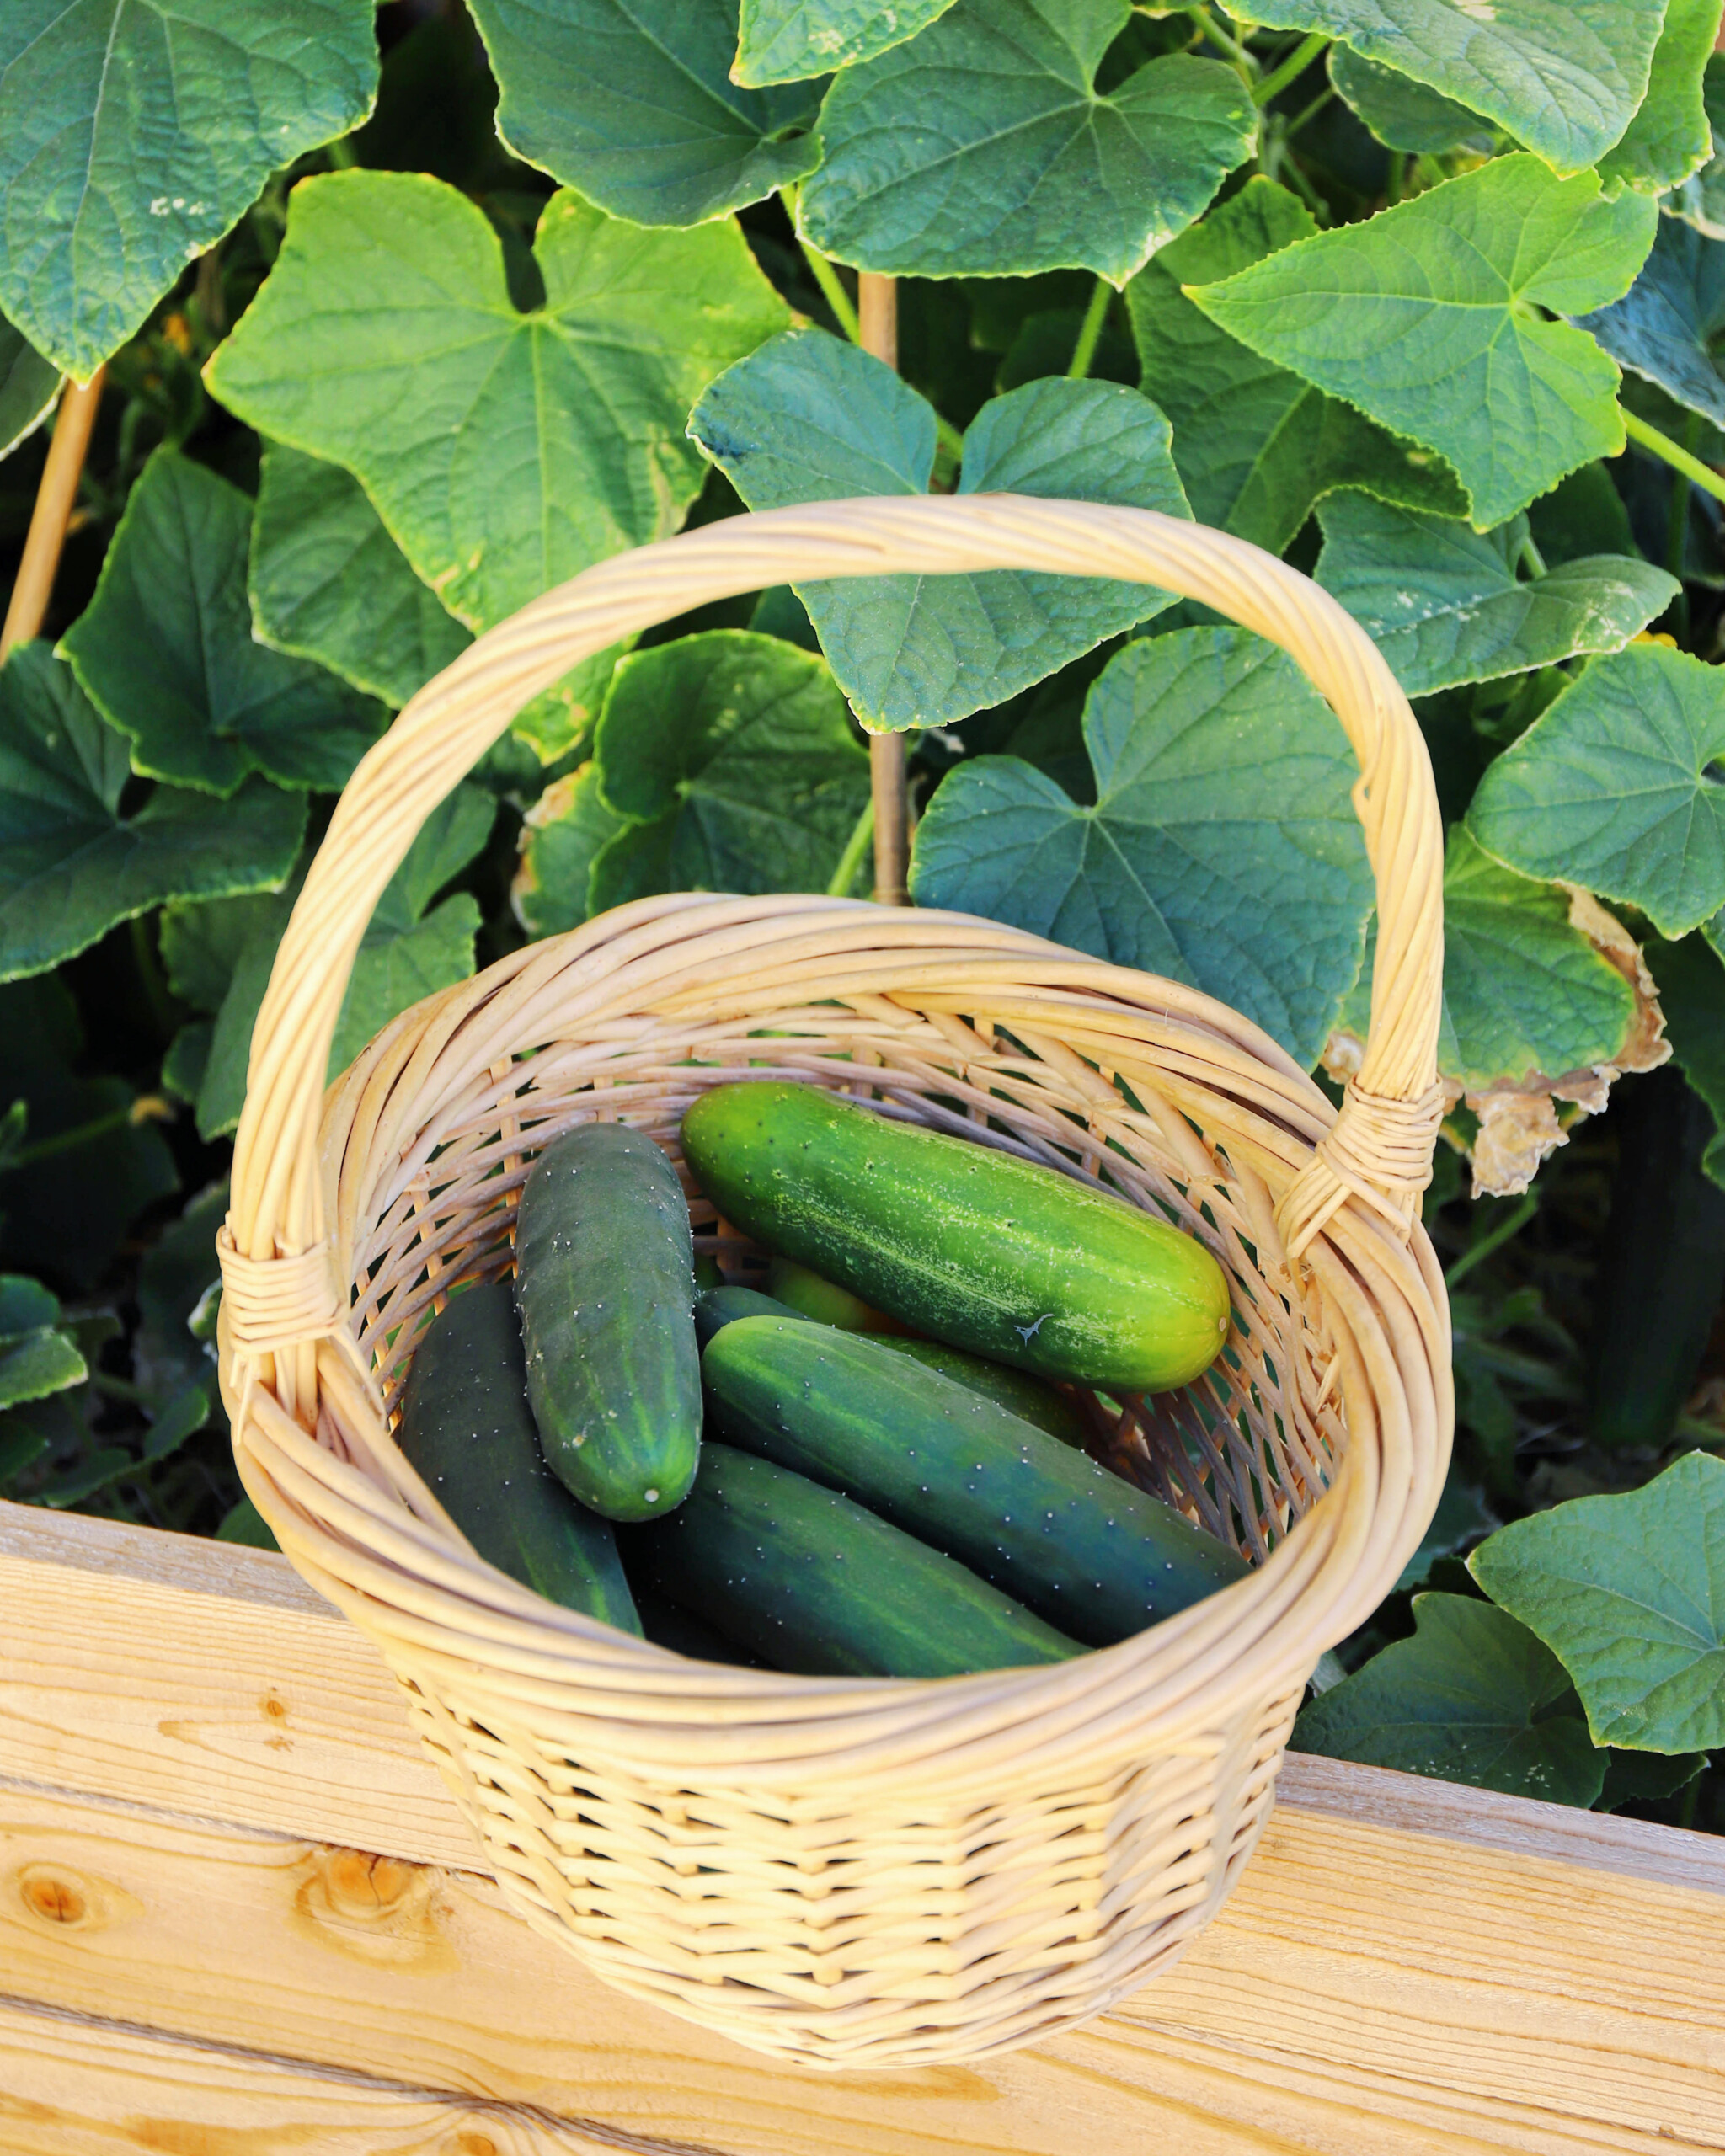
Lebanese Cucumber (Cucumis sativus) – Snack- sized cucumbers are usually sweeter and crisper than store-bought ones because they can be harvested and eaten immediately.
🥑 Healthy Fats
Healthy fats from plants are easy to grow and replace processed oils.
Plants to Grow for Healthy Fats and Oils:
Avocado (Persea americana) – high in monounsaturated fats. Delicious substitute for butter in many meals. I feel like having an avocado tree in the backyard is living rich 😆
Macadamia (Macadamia integrifolia) – slow to mature but productive for years.
Sunflower (Helianthus annuus) – seeds for snacking, butter, or oil.
Almond (Prunus dulcis) – nutrient-dense and versatile.
Peanuts (Arachis hypogaea) – peanuts are so fun and easy to grow in warm climates. They can also be grown in a pot or a container.
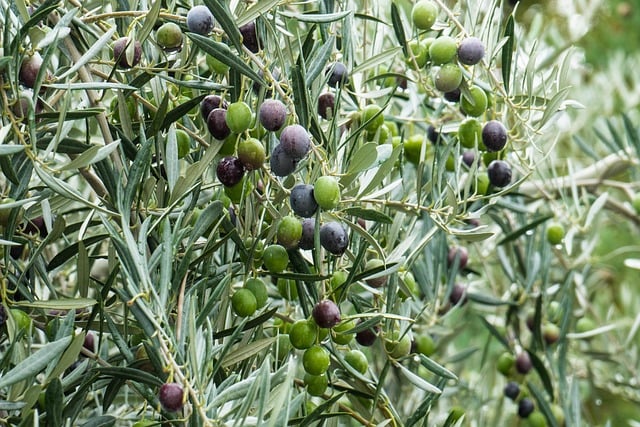
Olives (Olea europaea) – can be pressed for oil; collaborate with neighbours to share processing costs.
🥬 Greens and Salad
Leafy greens are one of the easiest edibles to grow at home and replace pre-packaged salads! You don’t need a big garden, pots and containers work great too!
Plants to Grow for Greens and Salads:
Lettuce (Lactuca sativa) – cut-and-come-again varieties for continuous harvest. Let one lettuce go to seed each year, and you will have an endless supply!
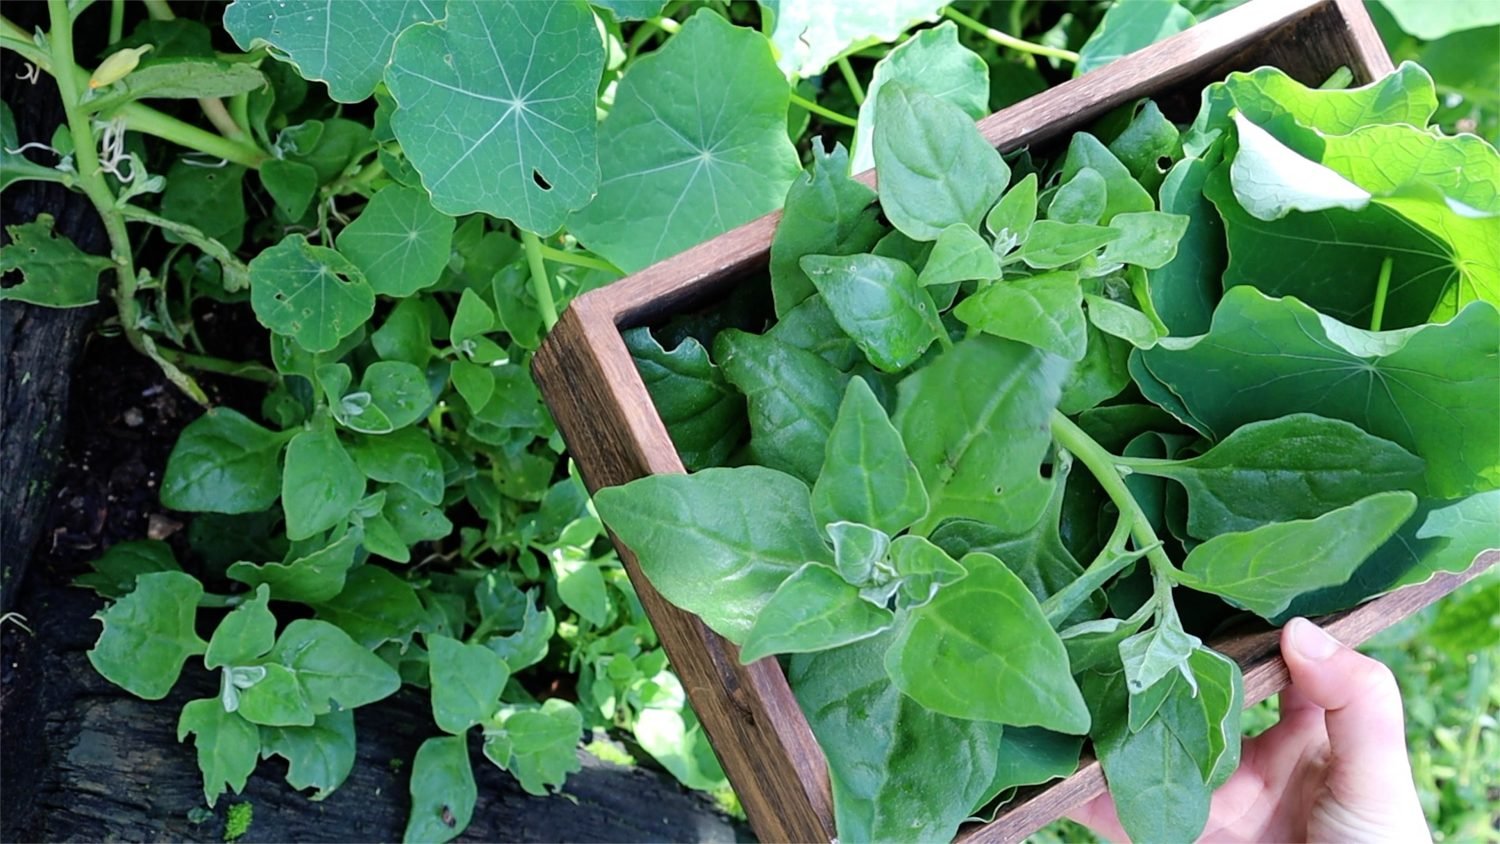
New Zealand Spinach (Tetragonia tetragonioides) – great edible ground cover, drought-tolerant, self-seeding greens. Great for soups, stir-fries, and curries.
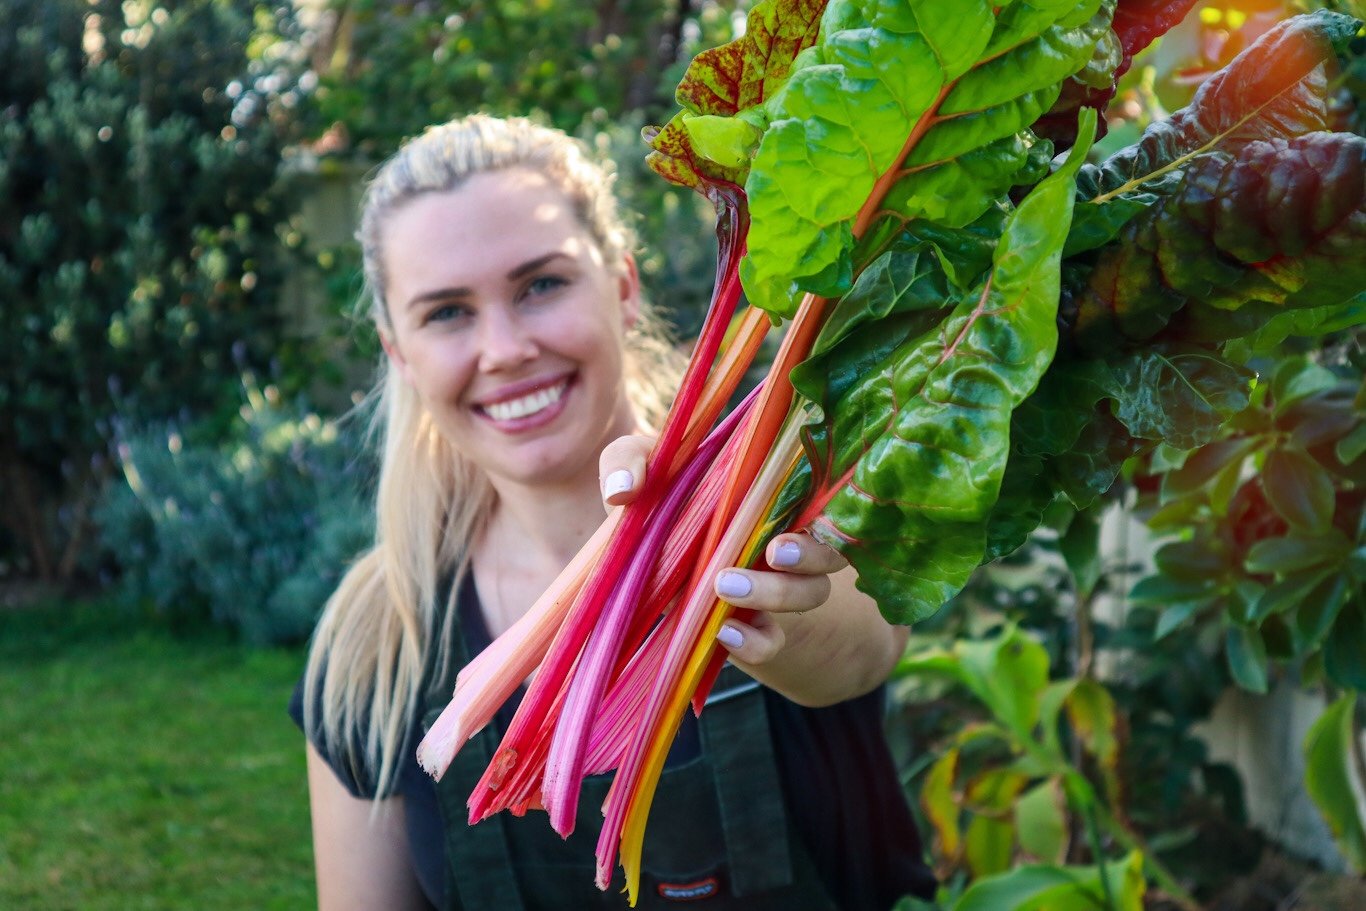
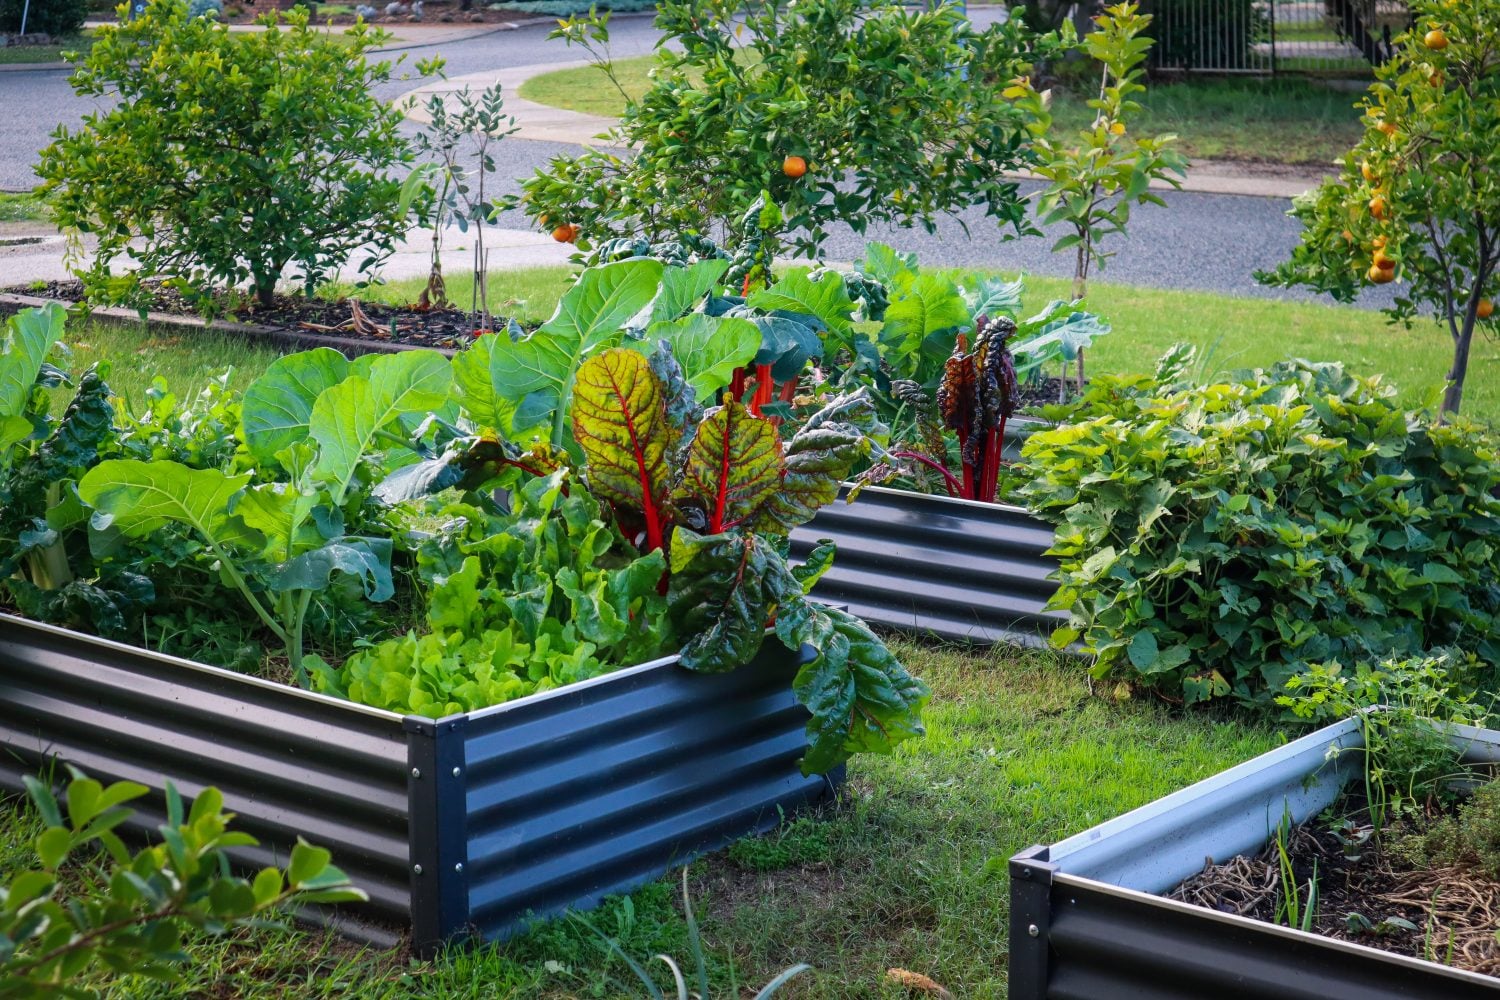
Chard (Beta vulgaris subsp. cicla) – nutrient-dense and versatile. I love growing chard, especially rainbow chard, in my kitchen garden. The colours brighten up a winter garden! Plus, make easy one-ingredient preservative-free wraps!
Kale (Brassica oleracea var. sabellica) – robust, flavorful leaves. Kale gets a bad rap, but it is easy to grow, and its rough leaves and curls are amazing at holding on to flavour. So the key is to cook it or massage dressing into it for a salad!
Longevity Spinach (Gynura procumbens) – perennial, nutrient-rich, especially good for warm climates. Known for managing blood sugar and reducing inflammation.
🍠 Carbs and Staples
Processed carbs aren’t necessary when you can grow your own and boost your homegrown food security. Root crops are one of the highest accumulators of herbicides and pesticides because they spend their whole life in the soil that is commercially sprayed with nasties. So if you want to replace supermarket food with spray-free veggies, I would have these high on my “to grow list”.
Plants to Grow for Carbs:
Sweet Potato (Ipomoea batatas) – one of my top edible plants, it is sooo easy to grow, and once you grow sweet potato, you literally will never have to buy another plant ever again. To get started, you can grow from a store-bought by either placing it in soil or a jar of water to sprout. The leaves are also edible, which is always a bonus when talking about food security.
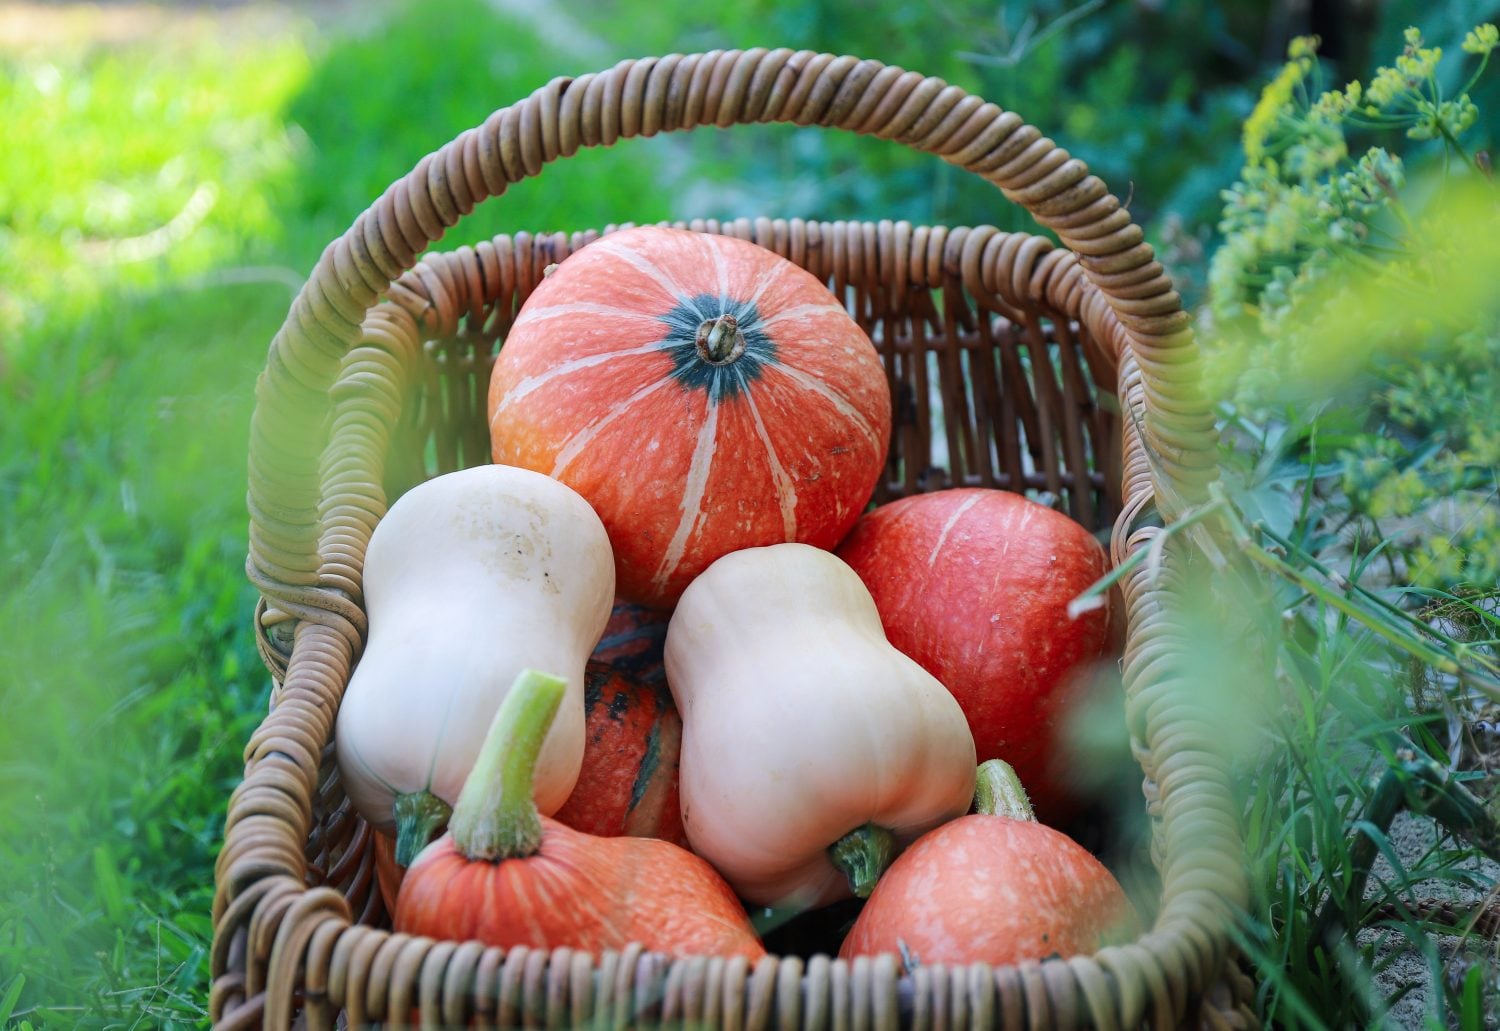
Pumpkin (Cucurbita spp.) – the great thing about pumpkins is that you can grow a bunch and then dry or cure them for long-term storage and use throughout the rest of the year.
Queensland Arrowroot (Canna edulis /indica) – another core plant in my garden because of the multiple uses! As a carbohydrate, it grows rhizomes under the ground that can be used as a substitute for potatoes. A perennial potato! You can also make flour to use in cooking and baking. But it is also great at providing shade, wind protection and the water-filled stems make amazing chop and drop mulch to feed the garden.
Potato (Solanum tuberosum) – a classic staple – you don’t need a lot of space to grow potatoes; they can be easily grown in tubs and containers. Perfect for small gardens.
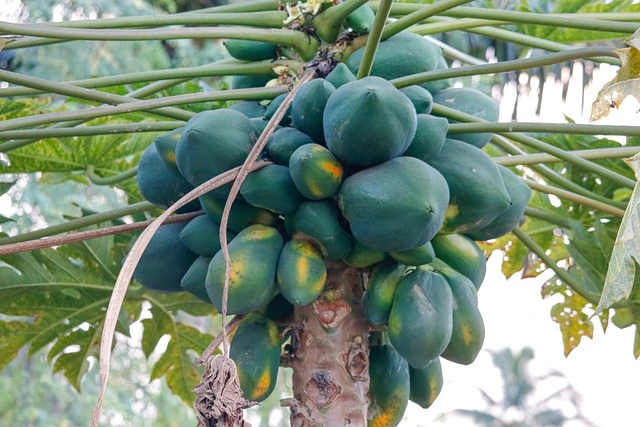
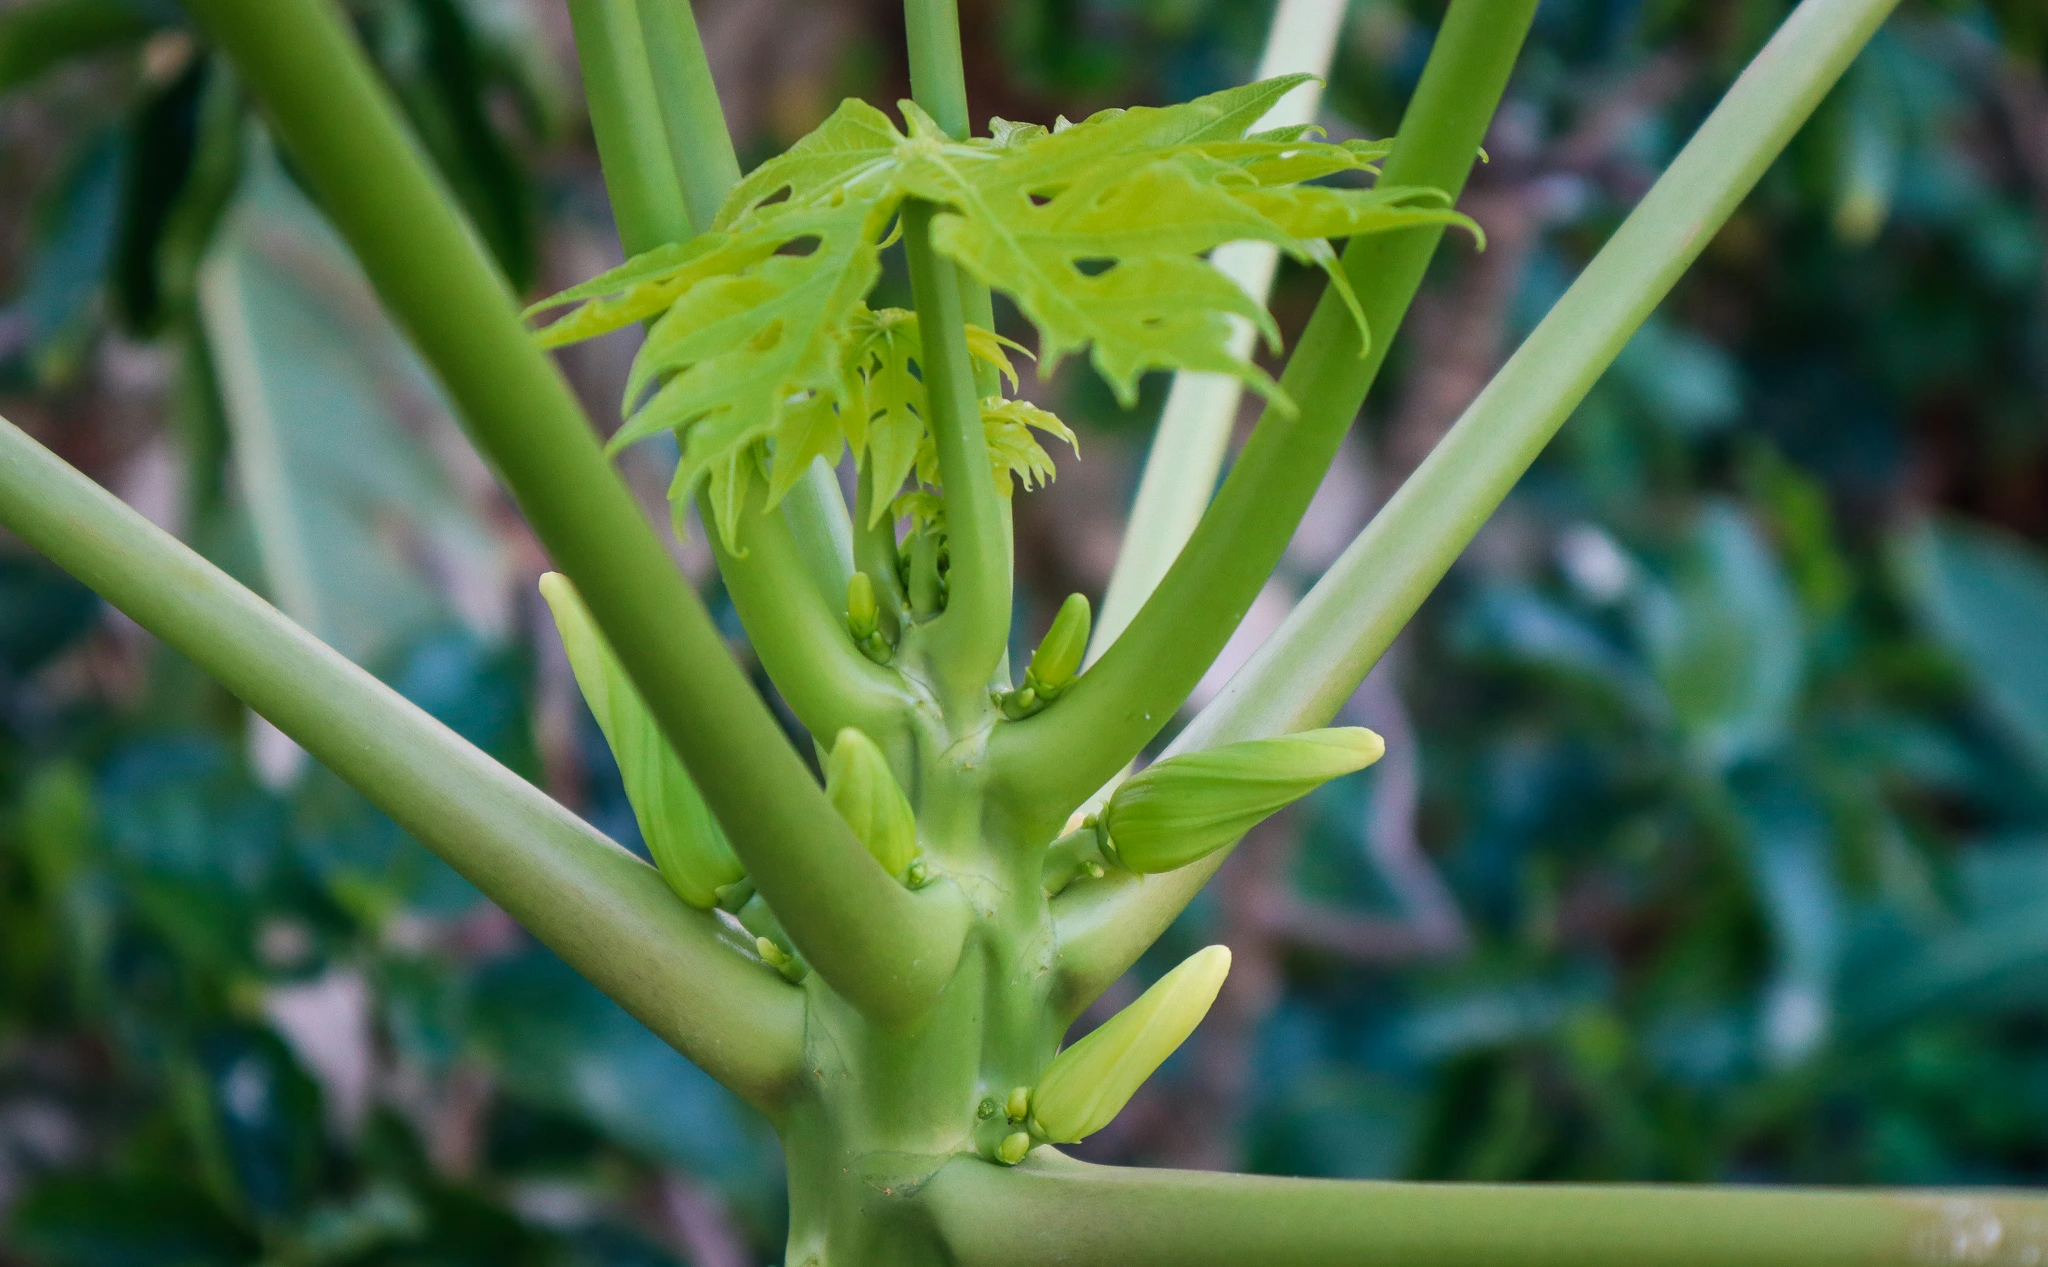
Papaya (Carica papaya) – It is a nutrient-dense, low-calorie fruit, with most of its calories coming from these healthy carbohydrates. The amazing thing about papaya is that you get two options to eat it: green as a vegetable or ripe as a fruit, two for the price of one space in the garden!
Plantain (Musa paradisiaca) – offering a sustained energy release due to its high resistant starch and fibre content. Also, ripe plantains can still be eaten as bananas; they just aren’t as sugary.
🌿 Flavour and Herbs
Instead of buying lifeless flavour from jars, grow your own and give your meals real freshness straight from the garden 🌿
Plants to Grow for Carbs:
Herbs – herbs are a powerhouse flavour enhancer. Fresh herbs are stronger and have more nutrients than the plain, processed dried herbs found in stores. Go outside and pick what you need fresh for each meal, or dehydrate and make your own natural blends of dried herbs.
Chilli (Capsicum spp.) – versatile flavour with a wide range of flavours and varieties. Also, make your own green and red curry pastes.
Onion (Allium cepa) – foundational flavour in so many dishes. Can be dried and stored.
Ginger (Zingiber officinale) – very medicinal and packs a punch of flavour. You can grow an amazing amount in a tub or container, too.
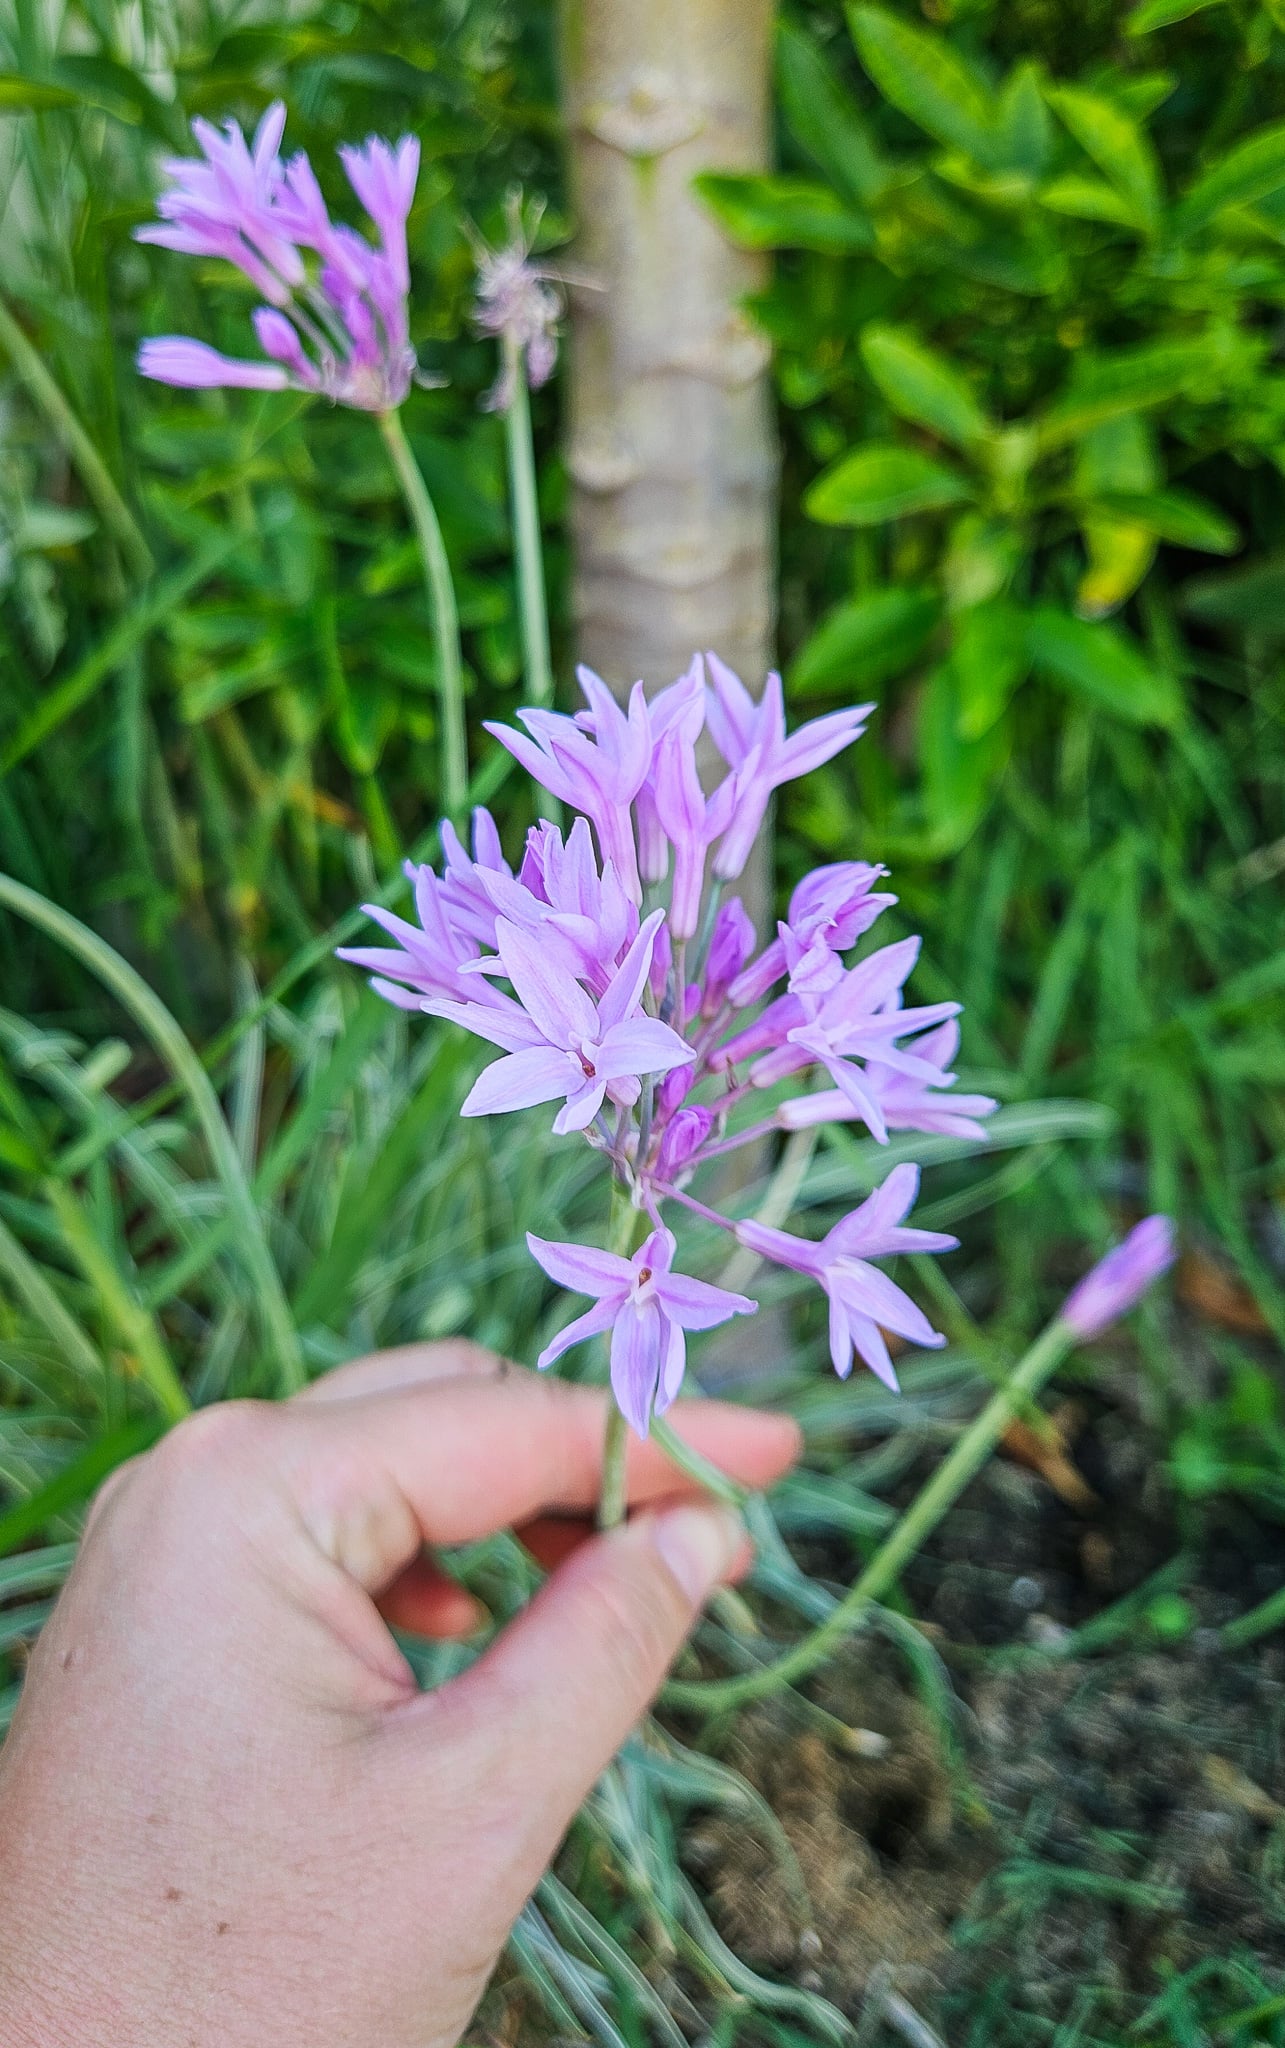
Garlic (Allium sativum) – staple culinary flavour! You can grow a bunch and dry to use throughout the year, or grow perennial forms of garlic flavour with garlic chives or society garlic flowers (Tulbaghia violacea)! for a year-round source of garlic in the garden.
Lemongrass (Cymbopogon citratus) – a fragrant addition to many dishes and teas!
Turmeric (Curcuma longa) – both medicinal and culinary uses. Like ginger, turmeric can be grown in small gardens and containers. freeze or make a dried powder to use throughout the year.
Spring onion (Allium fistulosum) – easy to grow and just cut at the base, and they regrow! Such an easy swap to make! Sprinkle plants or seeds throughout your garden to fill the gaps.
🍃 Medicinal Plants
Grow natural remedies for common ailments. Many medicinal plants have multiple functions in a garden, including medicinal, culinary, pollinator and wildlife habitat.
Skip the microplastic tea bags and grow your own herbal teas.
Lemongrass Cymbopogon citratus) – easy to use and full of flavour. Simply tie a bunch of leaves in a knot and add to hot water.
Lemon balm (Melissa officinalis) – I love lemon balm in teas and infused into a lemon and honey drink. Lemon balm has calming properties.
Mint(Mentha spp.) – strong flavour and an insane amount of types of mint, such as apple mint, orange, ginger, and chocolate – just remember this is one you really want to keep contained away from your garden.
Rosella (Hibiscus sabdariffa) – the calyces make a vibrant, tart and cranberry-like flavoured tea or drink. mix with honey for sweetness. packed full of vitamin C. They can also be used to make jams, syrups and chutney.
Lemon Myrtle (Backhousia citriodora) or Cinnamon Myrtle (Backhousia myrtifolia) – Are Australian natives that are full of flavour.
Holy basil (tulsi) (Ocimum tenuiflorum)– a great natural sleepy tea or anti-anxiety tea for a relaxing evening brew.
Ginger (Zingiber officinale)– full of flavour and immune qualities for a health-boosting tea
Pineapple sage (Salvia elegans) – sweet, fragrant tea herb with pineapple scent and flavour. The red flavours are popular with small birds or great for flavour and garnish.
Start Building Your Homegrown Supermarket
Growing your own food and boosting your homegrown food security does not have to happen all at once. Actually…The most sustainable gardens usually grow slowly over time. Start with a few staple plants that you already use in your kitchen, herbs for flavour, leafy greens for salads, or a fruit tree for snacks and expand from there.
One of the biggest benefits of growing your own groceries is freshness and no nasty chemicals! Fruit and vegetables picked straight from the garden are often sweeter, more nutritious, and far more flavourful than produce that has travelled long distances to reach the supermarket. You also gain the peace of mind that comes from knowing exactly how your food was grown.
For gardeners in warm climates like mine in Western Australia, many of these plants thrive with very little input once established. Hardy staples such as sweet potato, pigeon pea, mulberry, lemongrass, and arrowroot can produce food, mulch, and soil improvement all at the same time. Over time, these plants start to form the foundation of a productive backyard ecosystem. Food security does not mean growing absolutely everything yourself. It simply means bringing more of your food supply closer to home. Every herb you harvest, every fruit you pick, and every staple crop you grow reduces your reliance on supermarket supply chains.
Start with one plant, then another, and before long, you may find that your backyard begins to feel less like a garden and more like a small, living supermarket.
In hot climates, heat isn’t the only thing stressing your garden – create windbreaks to reduce heat stress and protect your garden this summer. Here in my Perth garden, summer not only brings disgustingly hot temperatures (40+ degree club) but it also brings HOT WINDS to double the heat stress. Wind pulls more moisture from leaves, dries soil faster than the sun ever could, and turns hot days into survival mode for plants. Even a “mild” breeze can double water loss in summer, which means wilting, leaf scorch, poor fruiting, and stressed soil life! Most summer gardening advice focuses on sun and water…But in hot climates, windbreaks and shade are key! If you’re gardening in heat, windbreaks are one of the most underrated tools for building a resilient, productive summer garden.
Why Wind Is So Damaging in Hot Climates
In summer, plants are already working hard to stay cool. They regulate temperature by releasing water through their leaves (transpiration). Wind forces this process to speed up. Creating windbreaks for heat stress will help your gardens survive a hot summer!
The result: Faster moisture loss from leaves, increased evaporation from soil, reduced humidity around plants, and greater demand on root systems. This creates compound stress: Heat stress + wind stress means plants end up burnt and crispy faster! That’s why a garden can fail in summer even when you’re watering well.
What a Windbreak Actually Does for Heat Stress
A windbreak doesn’t stop wind completely…instead, it slows and filters airflow, creating a calmer environment for plants to thrive. By reducing the speed of the wind, it lowers evaporation from both soil and leaves, helping your garden retain moisture more effectively. Young plants and fruit trees benefit particularly, as they are less stressed and more likely to grow strong. Even partial wind protection can reduce wind speed by 30–50%, producing a noticeable improvement in plant health and water retention throughout the garden.
Where Windbreaks Matter Most in Hot Summer Gardens
Front yards and newly established gardens tend to be hit hardest because they’re often open on multiple sides, with little existing shelter. This creates a funnel effect and increases the speed of the winds. Exposed sites and sandy soils make the problem worse, as moisture is already quick to drain, and wind accelerates drying even further.
Here in my garden the the western and south-western sides of the garden are usually the most vulnerable. This is where hot afternoon winds arrive, compounding heat stress at the exact moment plants are already struggling to cope. Summer winds tend to be predictable, so it is important to work out which direction your garden is getting hit with. You may live near the coast and have a strong afternoon sea breeze or swirling winds from nearby buildings.
Also, some plants just really hate wind more than others! Trees like avocado, banana, tamarillo, papaya, and even young citrus really do not like wind. Their large, soft leaves lose moisture quickly, stems snap or bend under pressure, and growth often stalls despite good soil and regular watering. In windy conditions, these trees may survive, but they rarely thrive or are productive. Tall Banana leaves can get shredded, and that causes a huge reduction in photosynthesis – resulting in smaller banana racks or none at all….
How to Create Effective Windbreaks to Reduce Heat Stress in the Garden
The most successful windbreaks don’t try to block wind completely. Instead, they slow it down, filter it, and soften its impact. Solid walls or fences often create swirling winds, sending fast-moving air over the top and around the edges. A good windbreak works with airflow, not against it.
In summer gardens, wind protection usually falls into three categories: living windbreaks, temporary windbreaks, and permanent structures. Many gardens use a combination of all three, especially while new plantings are establishing.
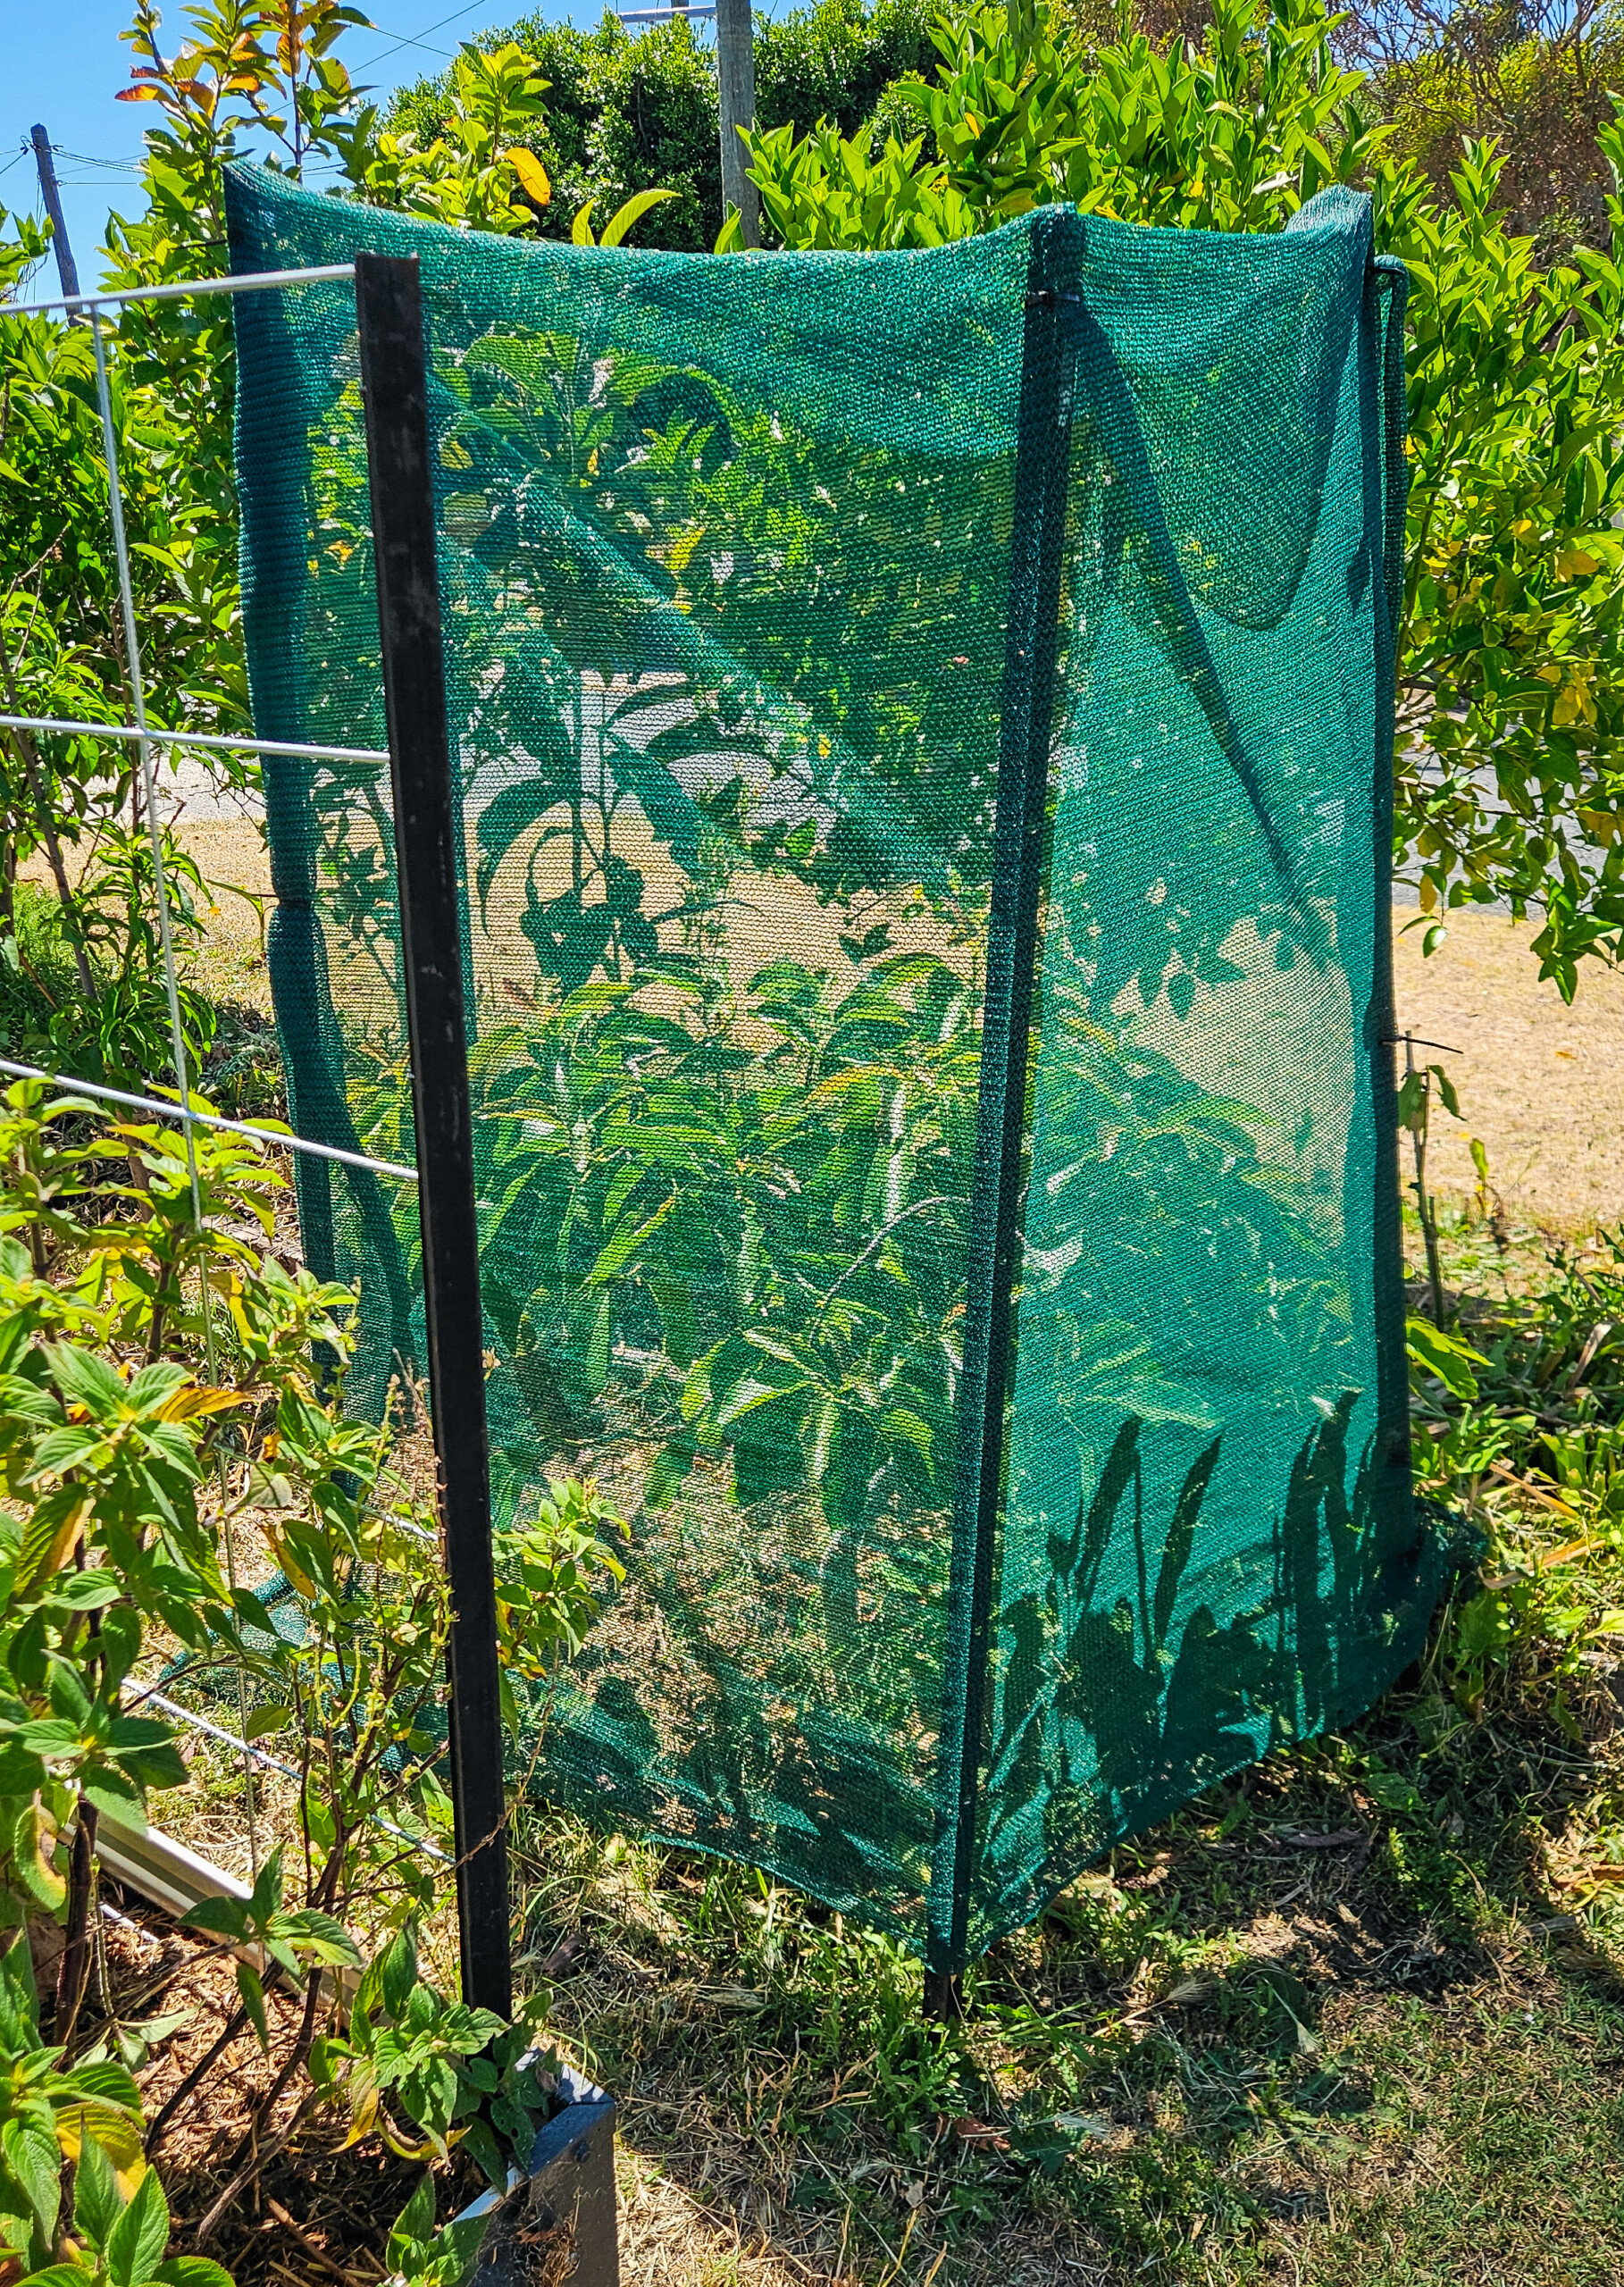
I prefer to use living windbreaks in the garden, but while I’m waiting for these to establish, I set up temporary relief around more vulnerable plants such as Avocados.
Living Windbreaks: The Most Effective Long-Term Solution
Living windbreaks are the ultimate goal for long-term sustainable gardens inhot climates.Because they’re permeable, they reduce wind speed gradually rather than deflecting it harshly, creating calmer, more stable growing conditions – which we like! And so will your plants.
Well-chosen and placed plants also provide multiple benefits beyond wind protection — shade, organic matter for chop & drop, habitat for beneficial insects, and often food. Having plants that have multiple uses and benefits will skyrocket your garden’s success!
Good options for hot climates include pigeon pea, moringa, pomegranate, mulberry, feijoa, katuk, queensland arrowroot, natives, and clumping bamboo (always clumping, never running). These plants handle heat well and respond positively to pruning, making them easy to shape over time. Some, like the Mulberry and Pomegranate, are deciduous, so they will let light in during winter. If you want wind protection or privacy screening all year round, go for an evergreen tree such as Feijoa or Pigeon pea.
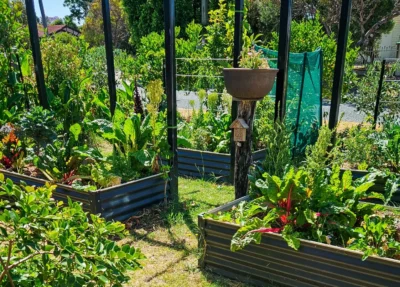
I have recently planted a bunch or queensland arrowroot and pigeon pea around the western sides of my raised garden beds. These will grow fast to offer protection from the hot afternoon sun. Helping not only shade the annula veggie patch but also reduce the sides of the garden beds from heating up.
The key to success is layering. A mix of heights and leaf textures filters wind far more gently than a single solid hedge. Taller trees slow high winds, shrubs reduce mid-level airflow, and ground-level plants protect soil from drying out. As a bonus, living windbreaks improve the overall resilience and productivity of the garden as they mature. If you don’t need them during a season, then you can cut them back to let light in or increase airflow during the wet season. Essentially, growing a windbreak and your own mulch or fertiliser.
Plants That Make the Best Living Windbreaks and more!
A living windbreak doesn’t just slow wind, it can also feed your garden, protect your soil, and improve the microclimate. Choosing plants with multiple benefits ensures your windbreak contributes to long-term garden productivity.
Perennial Options
Pigeon pea (Cajanus cajan) – Nitrogen-fixing, fast-growing, excellent for chop-and-drop mulch, summer shade.
Moringa (Moringa oleifera) – Edible leaves, mulch, deep roots for soil stabilisation, drought-tolerant.
Mulberry (Morus spp.) – Fruit for humans and wildlife, deciduous (lets light in winter), dense foliage for wind filtering.
Corn (Zea mays) – Tall seasonal buffer, biomass for mulch, edible stalks and cobs.
Amaranth (Amaranthus spp.) – Tall leafy annual, edible leaves and seeds, provides shelter for smaller plants.
Using Native Plants for Hardier Windbreaks
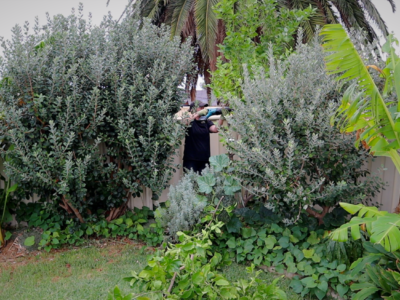
Native plants are often underappreciatedin hot, windy gardens. Because they’ve evolved in local climates, many are naturally hardy, drought-tolerant, and well-adapted to cope with constant airflow. Their sturdy, scrubbing growth habit makes them particularly effective as living windbreaks, creating dense layers of protection without requiring excessive maintenance.
Using native trees and shrubs can also boost biodiversity, providing habitat and food for local birds, insects, and beneficial wildlife. Many species are evergreen, giving year-round wind protection. By selecting a mix of heights, textures, and flowering times, you can build a multi-functional windbreak that slows wind, stabilizes soil, and adds so much value to the garden, as well as creating windbreaks for heat stress! I plan to have a row growing along my verge to act as a buffer from the road, not only providing wind breaks but also plenty of food for the pollinators.
Some examples of hardy native windbreak plants for hot climates include:
Acacia spp. – Nitrogen-fixing, fast-growing, excellent for screening.
Callistemon / Bottlebrush – Dense, flowering shrubs that tolerate heat and wind.
Leptospermum spp. (Tea tree) – Tough shrubs or small trees, wind- and drought-hardy.
Eucalyptus spp. (small varieties) – Provide taller screening with minimal water once established.
By integrating natives into your windbreak design, you not only protect your more delicate plants but also create a resilient, self-sustaining garden ecosystem. In combination with perennials, annuals, and temporary barriers, natives make wind protection both effective and beautiful.
Temporary Windbreaks: When You Need Protection Fast
Not every garden has the luxury of time. New plantings, heatwaves, or exposed sites often need immediate protection while permanent solutions are slowly establishing. Temporary windbreaks are not always the most aesthetic…. but they can dramatically reduce stress in a very short time.
Shade cloth at 30–50% allows airflow while slowing wind speed.
Mesh fencing and trellises act as effective filters, especially when combined with climbing plants.
Tall, fast-growing seasonal crops like corn, sunflowers, or sorghum can also act as living wind buffers during the hottest months.
These short-term solutions are flexible and forgiving. They can be adjusted, moved, or removed as conditions change, and often become part of a longer-term windbreak strategy rather than a wasted effort.
Permanent Structures: Supporting the System
Fences, walls, sheds, and pergolas can all form part of a broader windbreak system to reduce heat stress when combined with planting. On their own, solid structures tend to create wind tunnels and pressure points, but softened with plants or placed strategically, they help redirect and slow airflow across the garden. Planting vertical climbers can not only reduce the speed of the wind but also help cool it down. Passionfruit is a great heat-tolerant climber that can help soften permanent structures, or try grapes for a deciduous option.
The most resilient summer gardens rarely rely on a single solution. Instead, they build layers of protection over time, starting with temporary measures and evolving toward living windbreaks that grow more effective with each season.
Plants That Struggle in Hot Windy Gardens
Some plants simply don’t cope well with high winds. Wind can tear leaves, stress stems, accelerate water loss, and stunt growth in these species. Knowing which plants are vulnerable helps you place them wisely and protect them with windbreaks.
Avocado (Persea americana) – Large, soft leaves and shallow roots make it prone to leaf damage and windburn.
Banana (Musa spp.) – Tall, flexible stems and wide leaves shred easily, resulting in poor growth and production. They also topple over easily.
Tamarillo / Tree Tomato (Solanum betaceum) – Fragile stems and leaves are easily damaged, affecting fruit production.
Papaya (Carica papaya) – Tall, thin stems with large leaves are highly susceptible to wind stress.
Young citrus (especially lemon, lime, and mandarin) – Small branches can snap, flowers drop, and young trees struggle in constant wind.
Soft-leafed subtropicals – Any tender, large-leafed plant benefits from partial wind protection until established.
Maximising Your Windbreak to Reduce Heat Stress
The key to a resilient windbreak for heat stress is layering plants of different heights and growth habits. Tall trees or fast-growing perennials slow high winds, shrubs reduce mid-level airflow, and annuals or low-growing perennials fill in gaps and protect soil. Combining food, mulch, and nitrogen-fixing plants ensures your windbreak contributes to soil fertility, provides food, and stabilises the microclimate for your main crops. Even a small suburban garden can benefit from a multi-layered, multifunctional windbreak, giving you calm, protected spaces, improved yields, and less stress in a hot climate!
If your garden struggles every summer, you’re not alone! Trying to protect your garden from Heat in a hot climate, especially in places like Perth… is tough! The sun is so harsh, and summer seems to drag on forever! The soil dries out faster, and plants need backup systems to survive. But it doesn’t have to be a struggle… I want to share everything I’ve learned from growing in a hot climate like Perth, and what I wish I had done sooner….to help keep your garden thriving through a hot summer!
Start Your Garden with Hardy, Heat-Tolerant Plants
A resilient summer garden starts with strong foundations. Hardy plants give structure, create shade, and protect more sensitive species as your garden matures. Think of them as your garden’s framework. This is a garden design strategy I have used since starting my edible gardens, and now that I have more established trees, I have started adding in the more sensitive tropicals. Begin by creating the growth structure from heat-tolerant plants that support everything else. Plant these in hot spots near driveways or to protect your garden from the hot afternoon sun.
Use hardy trees and shrubs on the outer edges, such as:
These plants work as windbreaks, reduce evaporation, cool the garden, and help create microclimates. I focus on planting these in hot spots near driveways or bordering the areas that get hot afternoon sun. Then bring in deciduous trees (like stone fruit) closer to your annual garden beds to provide your patch with much-needed shade in summer but let the sunlight in during winter. And don’t forget perennials!
Grow Living Shade!The Best Way to Keep Your Garden Cool
Fast-growing “living shade” is honestly a game-changer to easily protect your garden from heat… even if it’s temporary. Use quick growers to create a shady “umbrella-like” canopy by planting things like:
Moringa
Papaya
Pigeon pea,
Cassava
Banana
Mulberry
These plants grow fast, create dappled shade, and cool the entire garden. They also act as temporary “nurse plants” for your fruit trees. These don’t need to be permanent. You can utilise them for a few years while your main trees grow, then take cuttings, save seeds and chop and drop them to create mulch and organic fertiliser. I have grown mulberries from a cutting, and after a few years of harvesting fruit and utilising the shade, I have removed them to give my other trees the space they need.
Mulching & Groundcoversto Protect Your Garden from Heat
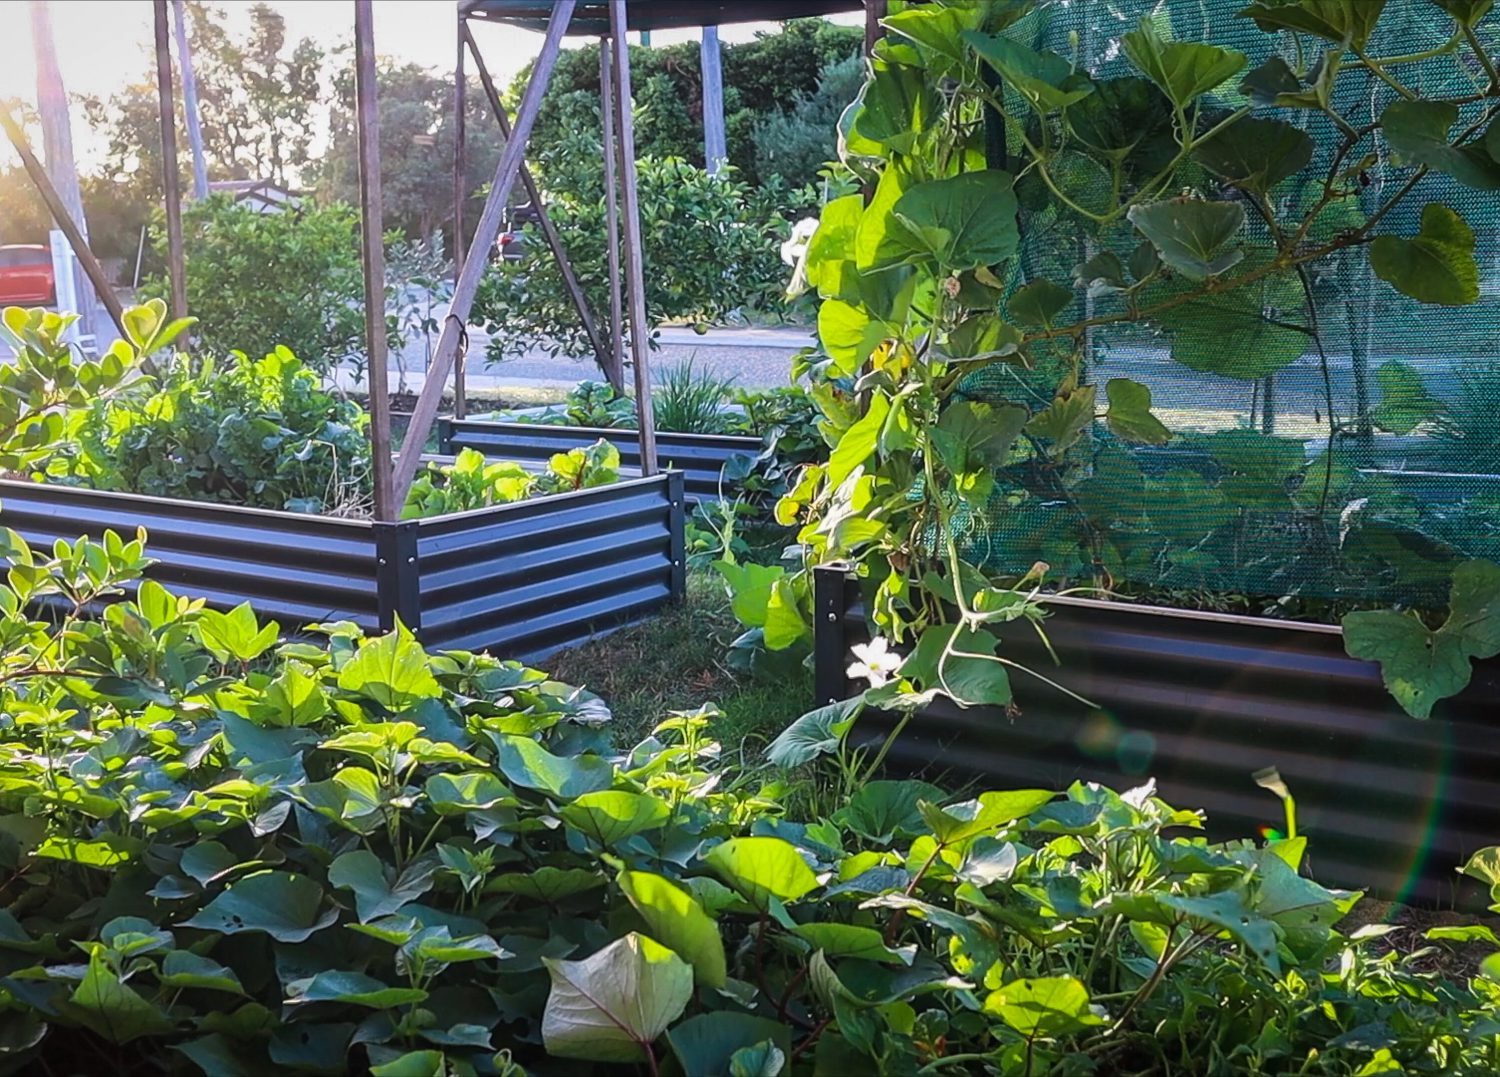
Something I have learned from gardening in sandy soil is the importance of continuously adding fibre and nutrients to my soil. If you’re in a dry, hot climate like me here in Perth, growing mulch plants could save your garden! Use living mulches like sweet potato, pumpkin, New Zealand spinach, and Nasturtium to protect bare soil and suppress weeds. Mulching doesn’t just help retain moisture…It also protects the shallow feeder roots of fruit trees from getting hot and cooked! And the bonus… mulch breaks down into compost, feeding soil microbes and improving soil structure over time.
Add Vertical Gardens
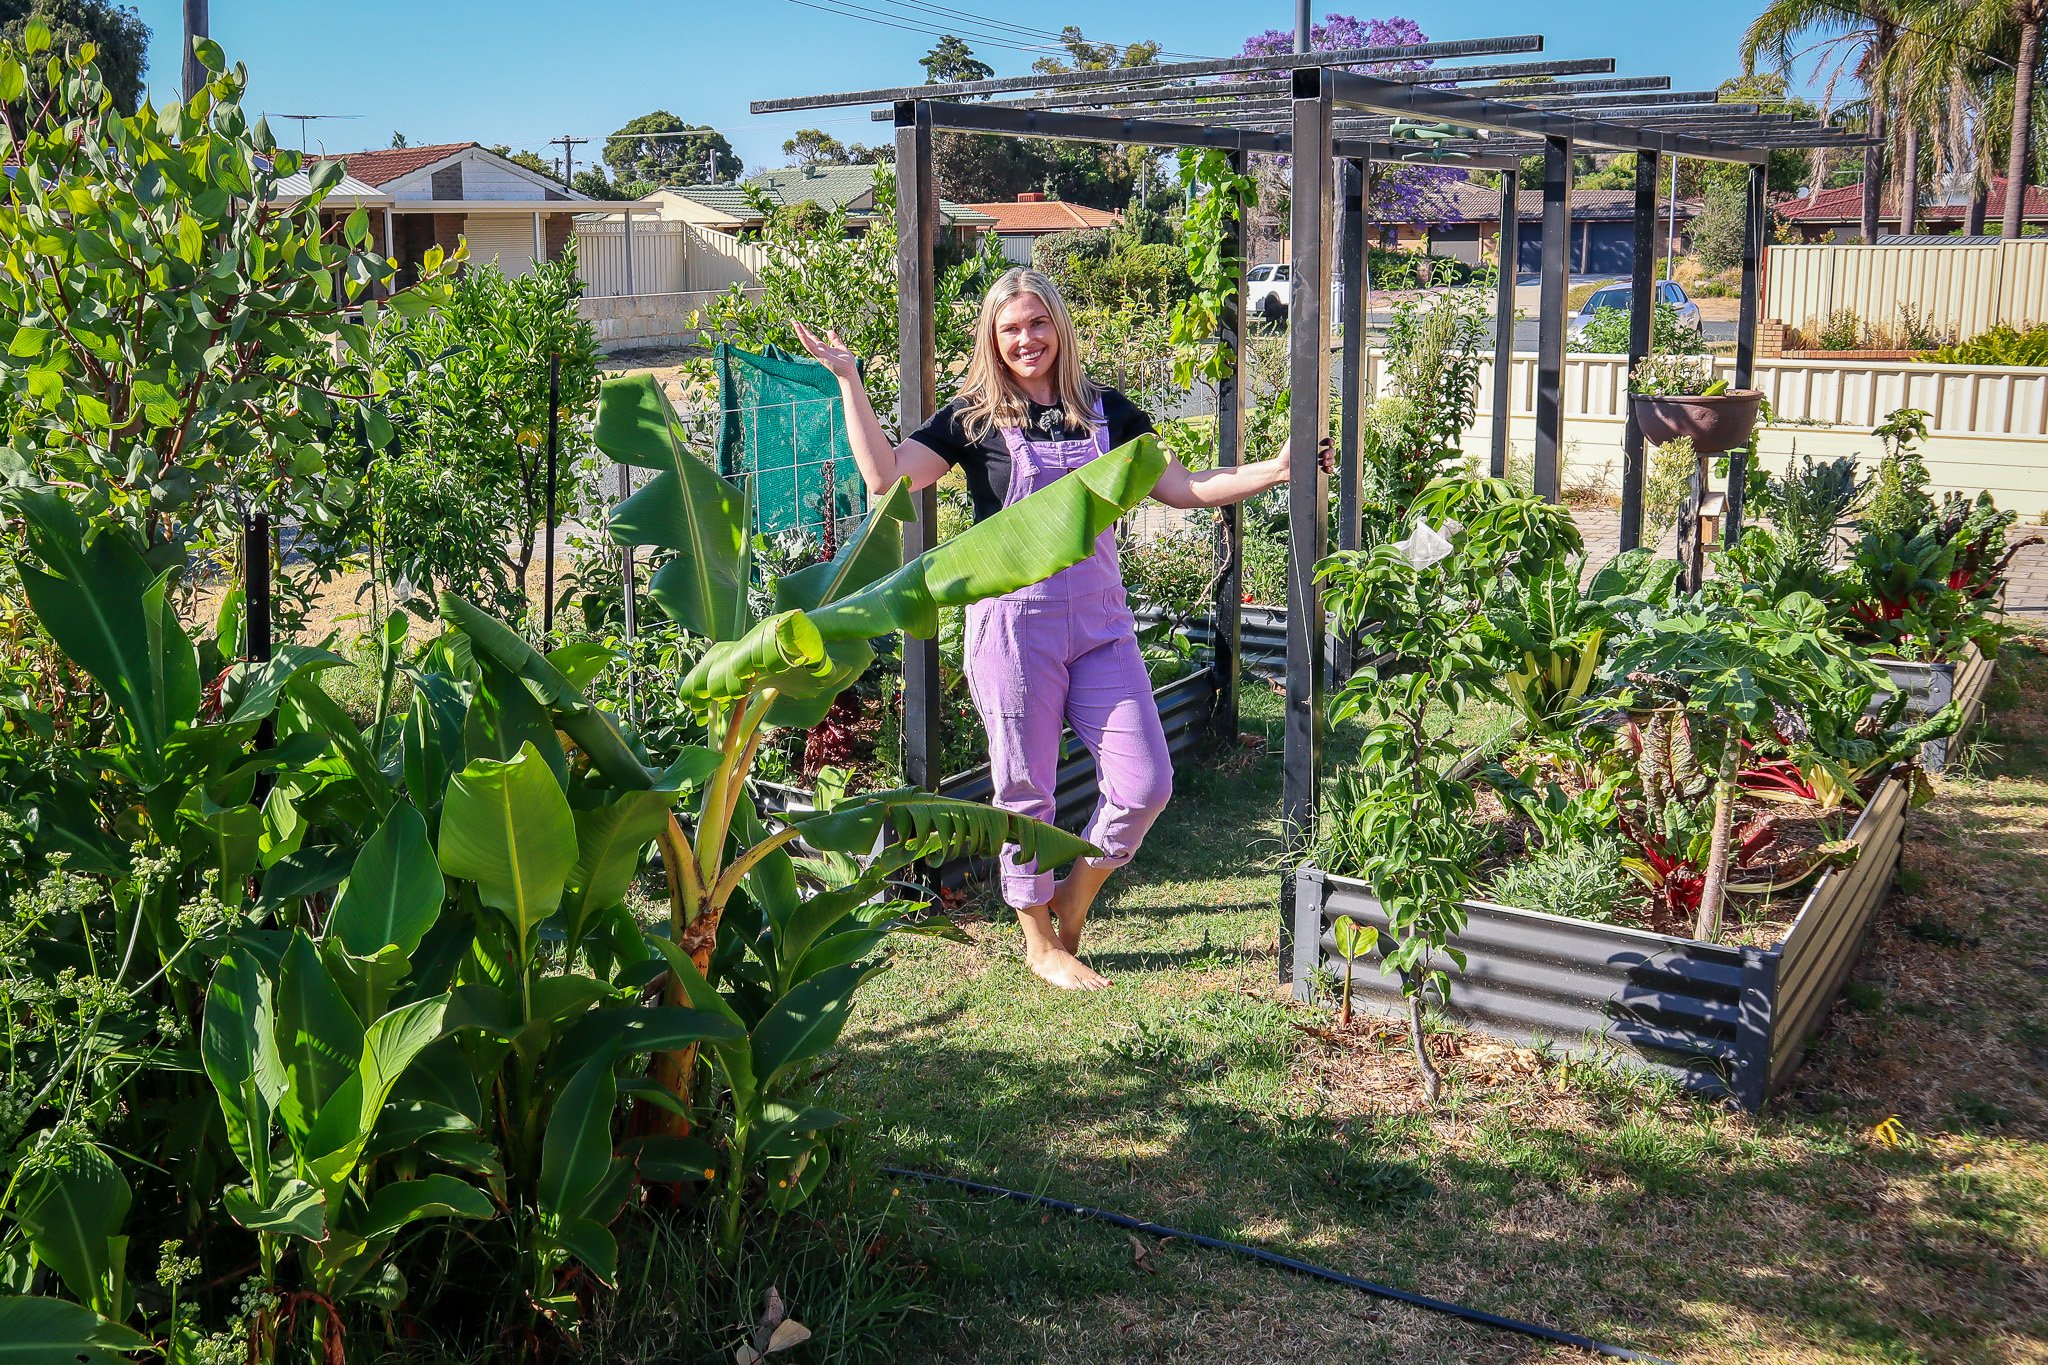
Adding vertical structures like trellises, arches, and fences for climbers (passionfruit, beans, grapes, cucumbers) creates natural shade for the garden beds underneath. Creating micro-shade pockets. Plan your layout to off the best shade for your garden. Growing edible climbers that are deciduous can be a great way to create summer shade, but let the light in during winter when they lose their leaves. I have grape vines growing over my raised garden beds to add summer protection from the heat, produce delicious crops and also allow winter sun to reach my garden.
Watering Strategies for Extreme Heat
Most plants die in heatwaves because they’re watered incorrectly — not because they’re not watered enough. Water deeply and less often. Deep watering encourages deep roots, which makes plants far more heat-tolerant. Consistency is also important. Long periods without water can cause the soil life to die, and the soil will become hydrophobic. Think of your soil as alive (it is) and that you are watering to feed the microbes, not just the plants. Happy, healthy soil will reward you with happy and healthy plants!
Most plants die in heatwaves because they’re watered incorrectly…. not because they’re not watered enough.
✔️ Water deeply and less often- Deep watering encourages deep roots, which makes plants far more heat-tolerant.
✔️ Cover your soil – whether that is with mulch, ground covers/living mulch or even better, a combination of both! This will help retain moisture and keep the soil alive.
✔️ Consistency is also important. Long periods without water can cause the soil life to die, and the soil will become hydrophobic. Think of your soil as alive (it is) and that you are watering to feed the microbes, not just the plants. Happy, healthy soil will reward you with happy and healthy plants!
✔️ Best times to water: early morning (best) or late afternoon (second best). Avoid midday watering — 80% of the water evaporates, and water on the leaves can burn your plants.
✔️ Sandy soils can also drain water fast and can easily become hydrophobic. It is important to add fibre by increasing the organic matter. This can be done by adding compost, manure, chop and drop and mulching.
High-Density & Succession Planting to Create Microclimates
This is honestly one of my biggest summer survival strategies…High-density planting helps shade the soil, reduce evaporation, minimise hot wind, and create cooler microclimates. Plants actually protect each other… more foliage means more shade and less moisture loss.
Annuals – Fill gaps quickly with fast growers like basil, bush beans, or herbs.
Perennials – Use mulch plants, nitrogen fixers, low shrubs, tall canopy plants, hardy fruit trees, and ground covers to fill all the gaps.
Succession planting fruit trees is a concept I dabbled in early on, but I wish I had gone harder! Planting from seed and cuttings will allow you to plant more and utilise high-density without the fear of deleting them later down the track. High-density doesn’t mean overcrowding… it means layering, timing, and letting plants work together… instead of cooking alone. They don’t ALL need to be permanent…some can be “nurse trees” until your “main fruit trees” are established.
What to Do Before a Heatwave Hits
When a heatwave is in the forecast, a little preparation can make the difference between a thriving garden and a fried one. These quick actions help your plants stay hydrated, cool, and protected during extreme temperatures — and they take less than an hour to set up.
Water deeply the night before – Give your plants a long, slow soak so the water reaches deep into the root zone. Moist soil holds temperature better than dry soil and keeps plants stable through the hottest part of the day.
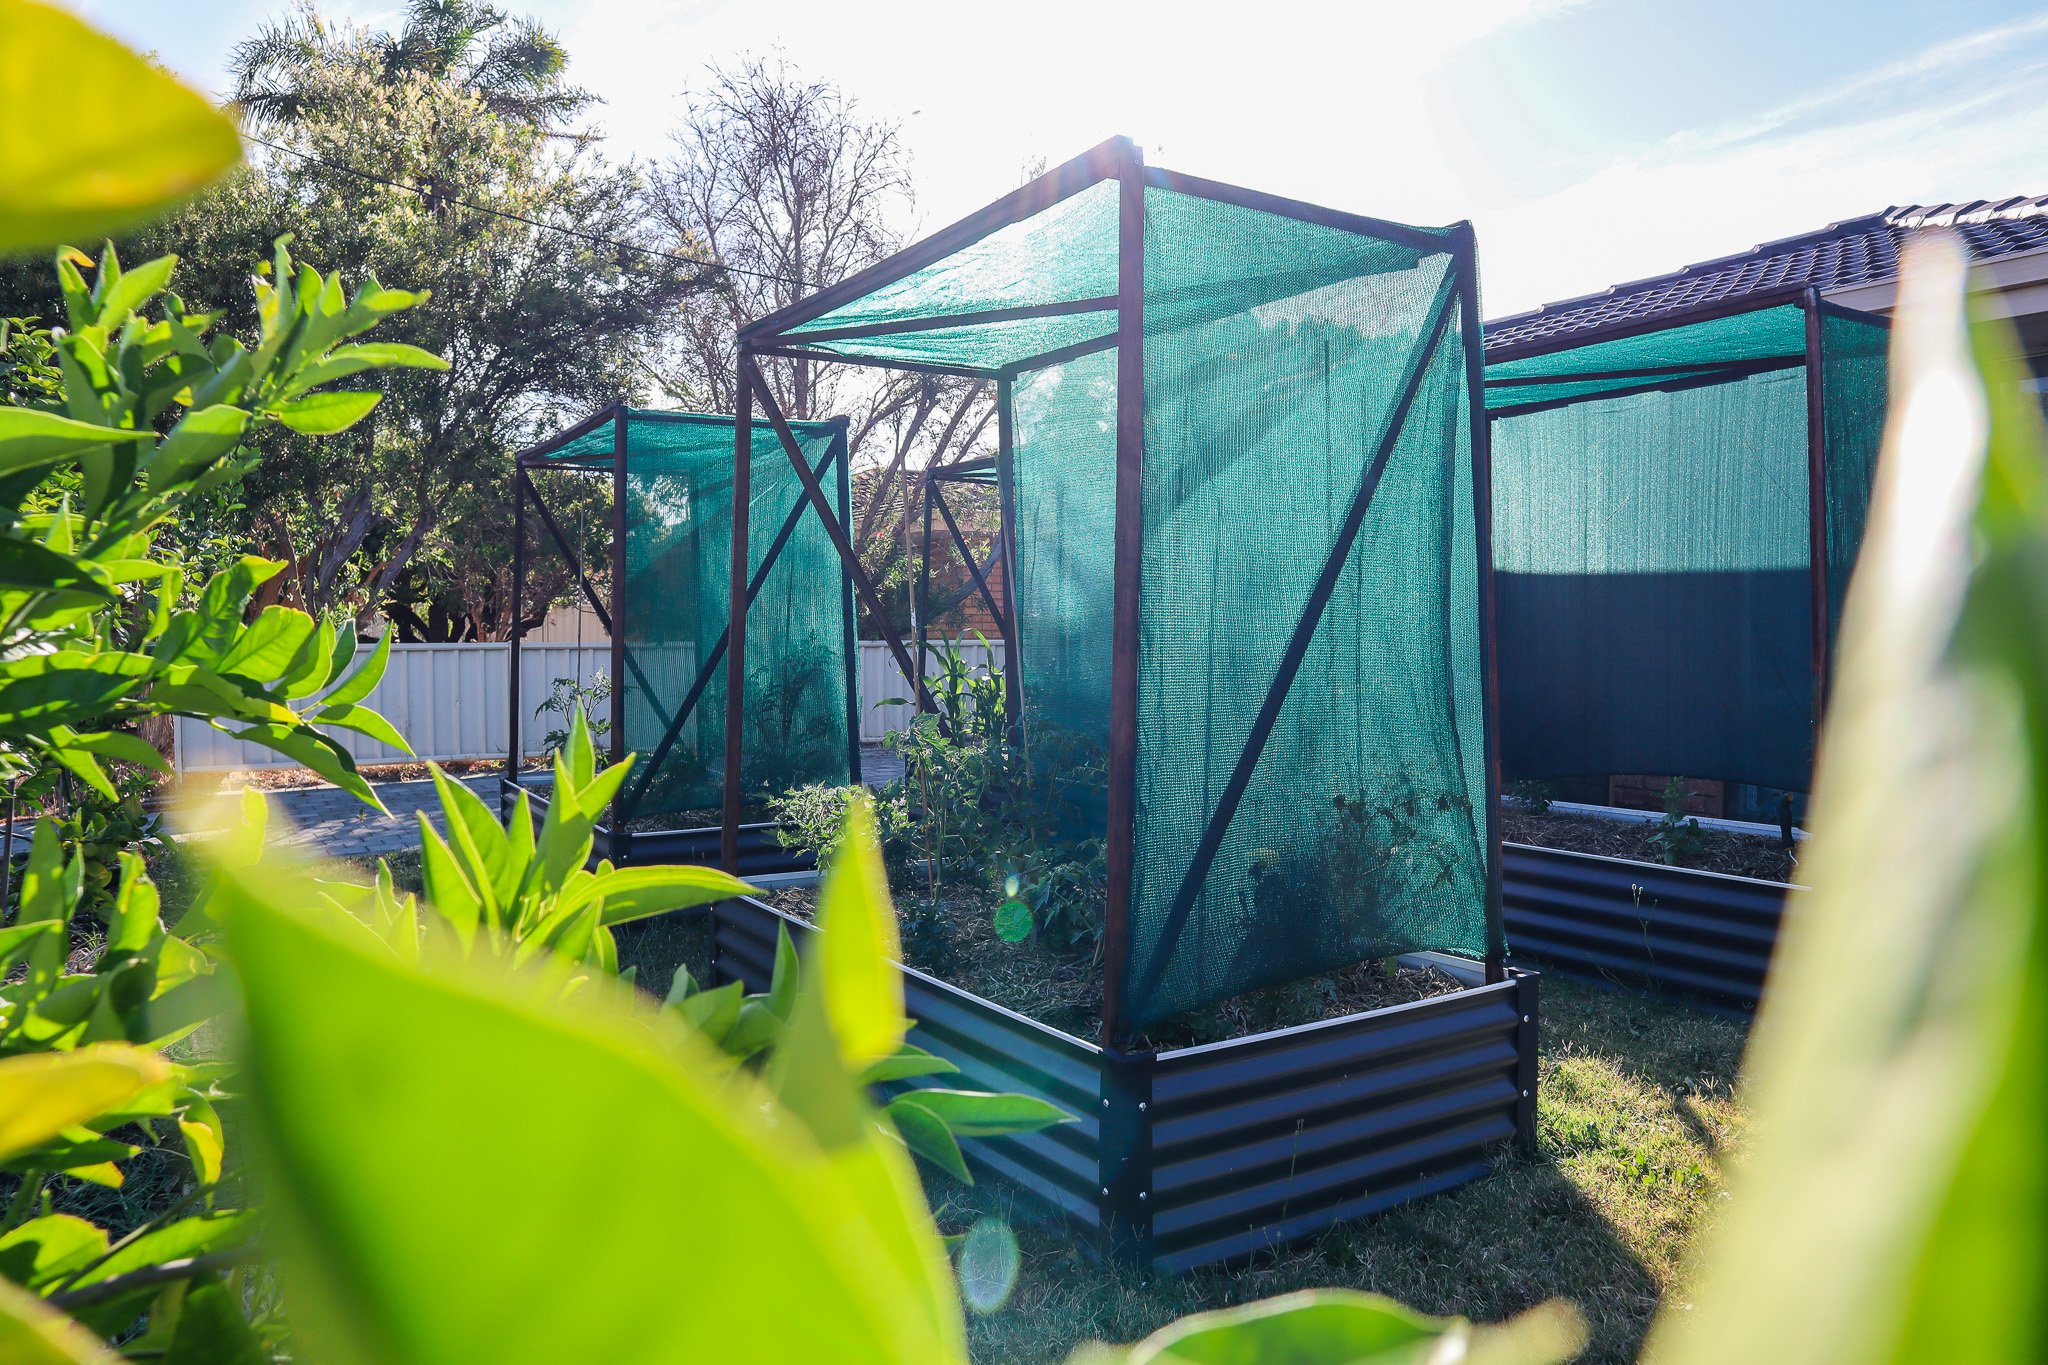
Add temporary shade cloth – A simple 30–50% shade cloth over garden beds, young fruit trees, or tender plants such as avocados and young tropicals can prevent sunburn and drastically reduce heat stress and wind damage. Even a beach umbrella or an old sheet works (allow airflow).
Move pots into shade or under cover – Potted plants heat up far quicker than plants in the ground. Move them against a cool wall, under a patio, or beneath a tree canopy to protect their roots from overheating.
Mulch any exposed soil – Bare soil is the fastest to dry out and heat up. Add a thick layer of mulch around fruit trees, garden beds, and seedlings to keep the soil cool and reduce evaporation.
Water deeply early in the morning – Give your plants a long, slow soak at sunrise. This allows the water to move deep into the soil before the sun becomes intense. Moist soil holds temperature better than dry soil and helps your plants stay hydrated throughout the day.
Grow and Chop-and-Drop Your Own Mulch
I think one of the best ways to protect your garden from heat is to grow your own mulch. It not only offers shade when you need it, but you also get to chop it back to create your own organic mulch or fertiliser. This will help feed your soil and, in turn, improve the water retention! a WIN-WIN. When your garden produces its own leafy biomass, you have a constant supply of materials that cool the soil, protect roots, and feed the microbes that build long-term resilience. It’s a system that works with your climate instead of against it.
Great chop-and-drop plants for hot climates include:
Pigeon pea – fast-growing, drought-tolerant, nitrogen-fixing
Queensland Arrowroot – Repopulates fast with water-filled stems
Moringa – rapid growth and abundant leafy material
Lemongrass – dense, fibrous clumps that suppress weeds
Cassava – hardy, productive, and perfect for biomass
Mexican sunflower (Tithonia) – one of the fastest biomass producers
These plants bounce back quickly after pruning and thrive even in harsh conditions. Each layer protects the roots from harsh sun, reduces water loss, and breaks down into organic matter that improves soil structure over time. It’s the most sustainable long-term strategy for gardeners in hot, dry climates.
🌱 Want a deeper guide to mulch plants, chop-and-drop strategies, and soil-building techniques?
You’ll love my ebookHow to Grow Your Own Natural Fertiliser, where I break down exactly how to select, grow, and use mulch plants to create a self-feeding, low-maintenance garden. It’s packed with practical tips specifically for hot climates and sandy soils.
If you want to fill your garden with fresh food this spring/summer season but don’t have much room…these annual edible climbers are the best for vertical gardening in spring! I don’t know about you, but I always feel like I need more gardening space… BUT incorporating vertical plants into your veggie patch or garden can not only maximise the amount of food you can grow but also help shade and protect your garden. I love growing perennial or long-term climbers as they grow to produce more and more fruit each year without having to replant them but…. It’s also fun to have room to mix it up and try different annual climbers each year.
These fast-growing, productive climbing plants make the most of vertical garden space and can transform fences, trellises, and arches into lush, edible walls. Ideal for spring and summer planting, annual climbers are perfect for renters, small gardens, and food forests needing seasonal coverage and abundant harvest. Check out my top tips and plant list below and start growing more food in the same amount of space!
Annual vs Perennial Climbers? Which are better for Vertical Gardens?
I love growing a mix of both! I will share more about perennial climbers at the end of this post. Annual climbers grow for a season, produce food, and then die off. This means you can use the space to grow different things each season, or usually over two growing periods: summer crops and winter crops. Annual vertical climbers are great for….
Fast Results: Most are quick to establish and produce within one season.
Perfect for Temporary Gardens: Great for renters or testing garden layouts.
Seasonal Versatility: Easily rotated out each year to suit changing garden needs.
Creates Shade: Can provide temporary dappled shade for young fruit trees or veggie beds.
Increasing Pollinators & Biodiversity: Lush greenery, flowers, and harvests attract pollinators during the busy Spring & Summer season.
Ways to Support Your Vertical Climbers
Climbers need something to climb, and it’s best to have this installed before you get busy planting your seeds and seedlings. That way, you don’t risk stepping on them or snapping off stems. Below are some of my favourite ways to create trellis and support for my vertical gardens.
Vertical Pre-made Trellises: You can buy panels of pre-made wood or metal lattice or mesh frames. These can either be scrwed to existing fences or supports or add in your own. Star pickets or bamboo poles are often an easy and cost-effective way to go.
A-Frame or Teepee Supports: These are great for a quick and easy vertical garden. They also add interest to a flat space. Bamboo, stakes, branches, or recycled materials can be tied together to create a strong Aframe support. My mum adds an old bicycle tyre to a support post and ties string lines from the tyre to pegs in the ground . It doesn’t need to be fancy as long as it is strong and secure, the plants will cover the structure and look lush in no time!
Fences & Arches: I love archways in the garden as they give space to grow vertically, plus the added experience of walking under them is a little magical. Premade archways are a quick solution, but are often expensive. DIY arch ways can be made from metal cattle panels, timber trelis, branches, or recycled wood, even PVC piping over metal stakes. Chicken mesh, Rio mesh, or fencing mesh can be used to create small vertical supports for one side of your raised bed. This way, you can grow lower plants in the front of the bed and climbers up the back to maximise growing space.
Nets or Strings: Soccer nets or other string-construction nets can be a great DIY idea. Cheap and flexible, great for beans or light vines.
Ensure your structure is strong enough to support mature vines and fruit weight. The great thing about lightweight DIY structures is that they can be used for a season and packed away. This gives you flexibility each season to design your garden. As opposed to perennial climbers, they do better on more permanent structures.
Top 15 Annual Edible Climbers to Grow in Spring/Summer
These plants are either true annuals or fast-growing tropicals, often grown as annuals in warm climates. Check out the links to find more info on how to grow, harvest, and preserve.
Luffa (Loofah Gourd) (Luffa aegyptiaca / L. acutangula) – edible when young and makes natural sponges.
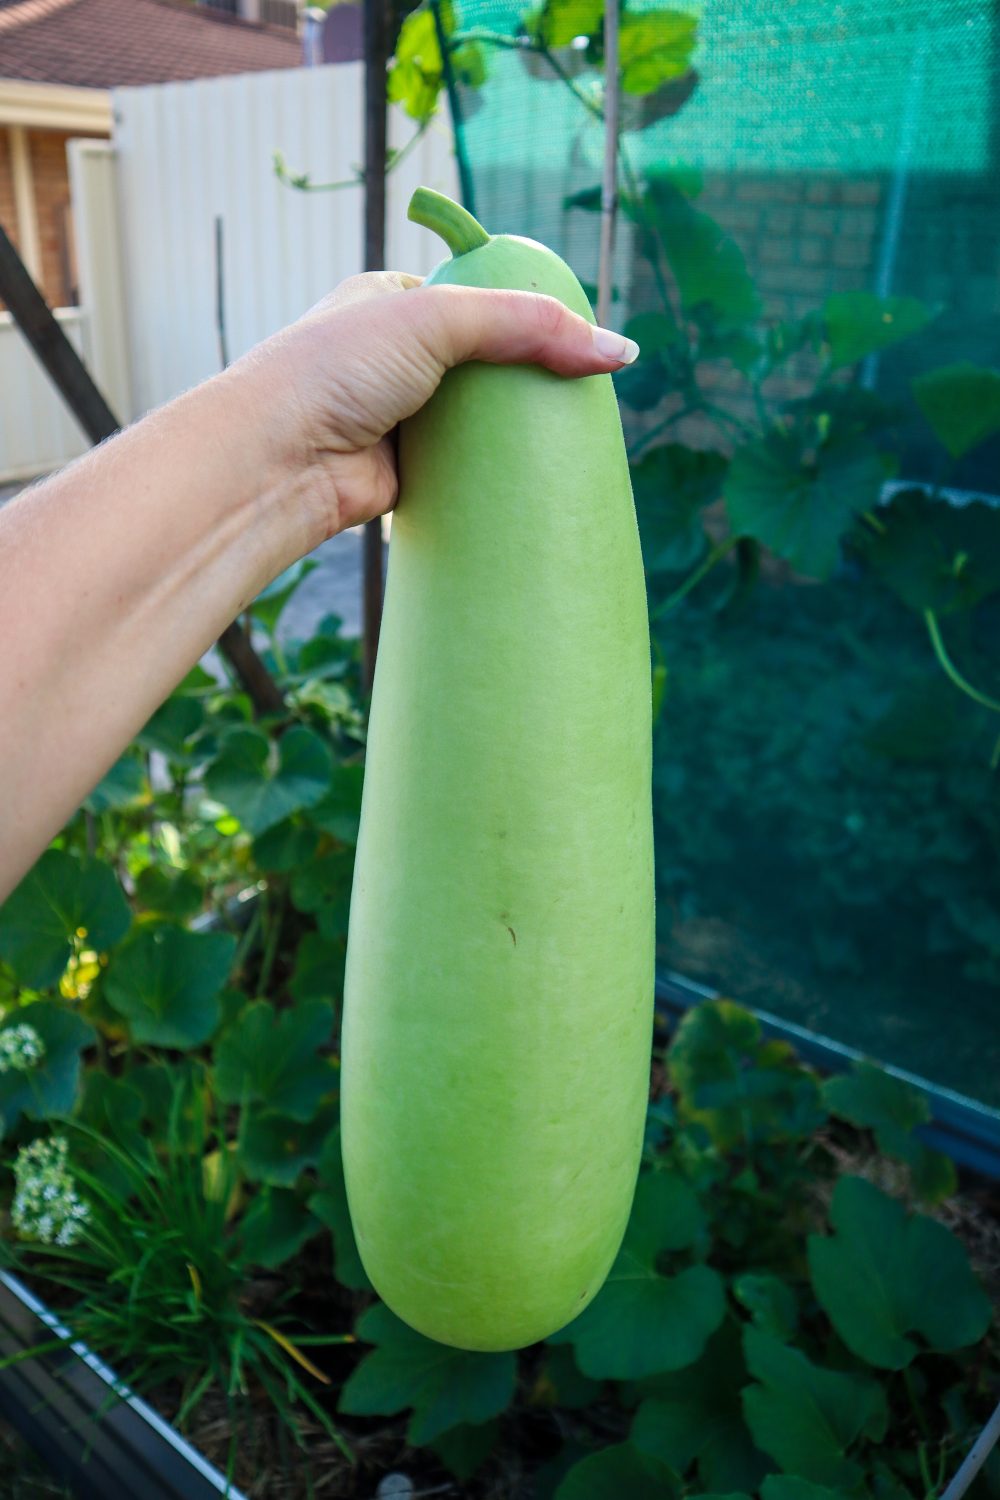
Bottle Gourd (Lagenaria siceraria) – versatile vegetable, produces a lot of food! A vigorous growing vine that is perfect for creating summer shade
Cucumber (Cucumis sativus) – classic favourite with refreshing fruit for summer salads or pickling.
Tromboncino (Climbing Zucchini) – long fruits, mildew-resistant, great summer for creating shade.
Winged Bean (Psophocarpus tetragonolobus) – edible pods and leaves, great shade plant. Thrives in hot, humid conditions.
Malabar Spinach (Basella alba / rubra) – succulent-like leafy green for warm climates.
Climbing Beans (Purple, Green, Borlotti, etc.) – great for A-frames and Teepee structures.
Chayote/Choko (Sechium edule) – vigorous, edible fruit and shoots. Hardy summer shade plant. It can be perennial in warmer climates.
Cucamelon / Mouse Melon (Melothria scabra) Tiny, cucumber-like fruits with a tangy, citrusy flavor. Fun snacking plant for kids and great in salads or pickled.
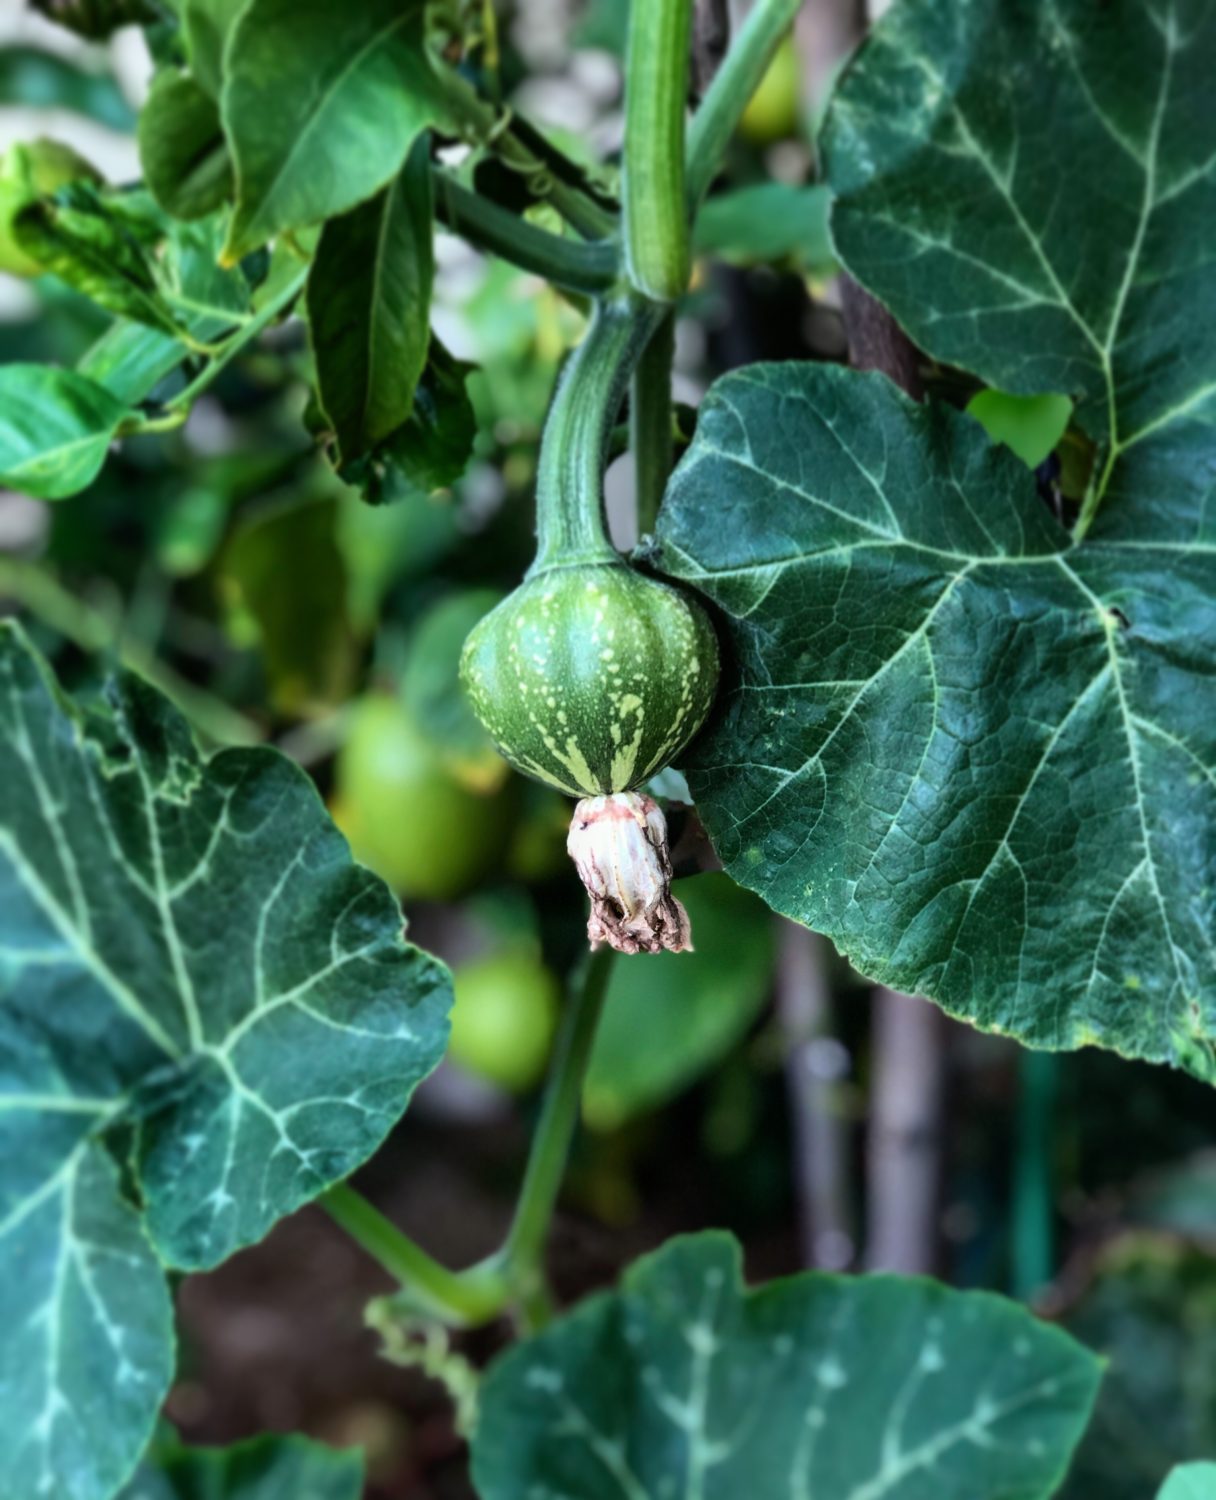
Pumpkin / Squash (Cucurbita spp.) Fruits for roasting and soups. Young shoots, flowers, and even leaves are edible.
Climbing Tomatoes (Indeterminate Varieties) – support needed, but highly productive.
Melons (Cantaloupe, Honeydew, Watermelon) – may need individual support slings for the fruit to stop them from dropping when ripe and smashing.
Mini Pumpkins or Gourds – great for a smaller trellis and very ornamental.
Sweet Potato (Ipomoea batatas) – Fast-growing vine with edible roots (tubers), tender young leaves, and shoots. A dual-purpose plant that provides staple carbohydrates and leafy greens through summer.
When to Sow and Planting Tips
Start Seeds Early: Direct sow after frost, or start indoors if needed. Plants that flower and then produce fruit such as melons, pumpkins, and gourds, need the full spring and summer season to grow, flower, and mature their fruit. Plant these in late winter or early spring. If you are likely to get cold snaps or frosts, start them indoors or in a greenhouse until the last frost has cleared.
Get structures installed: Make sure your structures are in place and sturdy before planting out your seeds and seedlings.
Feed the Soil: Mix compost and organic fertiliser into the soil before planting. Quick-growing annual plants require plenty of food and energy to grow.
Mulch: Retains moisture and keeps roots cool during the warmer months.
Train Early: Gently guide vines to supports while young.
Prune Lightly: Remove tangled or unhealthy vines to maintain airflow and access. As they grow, prune off leaves that are in the first 30cm of the soil. This helps reduce bacteria from splashing up onto the plant. Prune old or dead leaves throughout the growing period to increase airflow and reduce wasted energy.
Support fruit: Some large fruits, like pumpkins and melons, may need extra support. Hammock-style nets or string can help take some of the weight off and reduce the chance of the fruit dropping to the ground.
Want More Long-term Vertical Gardening Ideas?
Annual climbing vines are an incredible way to grow more food in less space, add beauty to your garden, and have fun experimenting with new crops each year! I always make room for annual climbers in my raised beds and kitchen garden. I also love perennial climbers for more long-term vertical food and summer shade. Although more permanent, these grow back each year to provide more and more food. Incorporating a mix of both annual and perennial climbers into your garden will help you grow massive amounts of food whilst still having the flexibility and space to try new varieties and plants each year.
Simple, Spray-Free Solutions for Veggie Garden Pest Problems
Just when you think the garden is looking good, the bugs show up in force! I often get asked why the bugs don’t eat my veggie garden, but the reality is they definitely do! If they weren’t, I’d be more worried! Because if the bugs aren’t eating your veggie plants, it means your garden isn’t part of the ecosystem. A few nibbles here and there are normal. Even a good sign that your garden is healthy, alive,and balanced. But.. when pests start taking more than their share, these easy & natural solutions will help you control bugs in your veggie garden.
TopTips for Controlling Bugs in the Veggie Garden
These tips are just second nature to me now, and combined, they reduce the pests in my veggie garden. Allowing me to harvest more of my food without any harmful chemicals or sprays. Each year, this helps improve the strength and resilience of my garden and results in less work for me. I hope these simple solutions help you grow more of your own food at home naturally and sustainably.
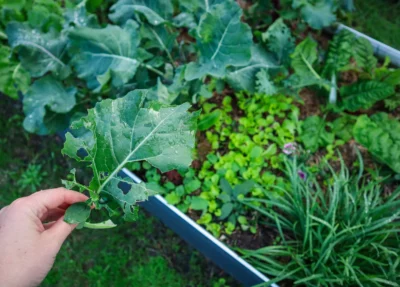
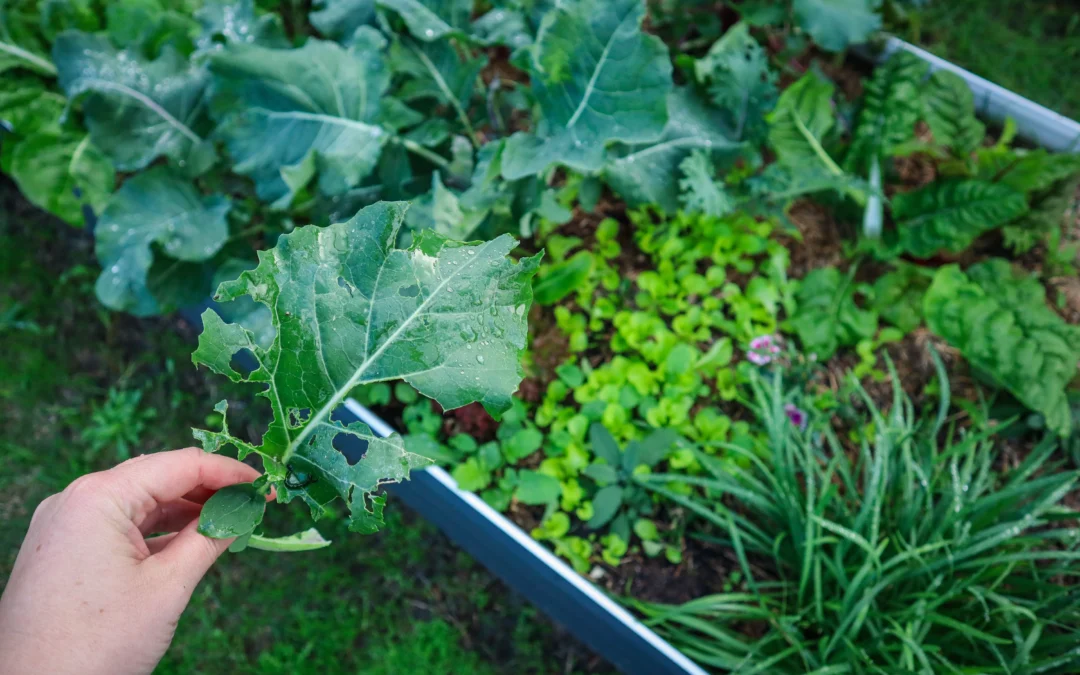
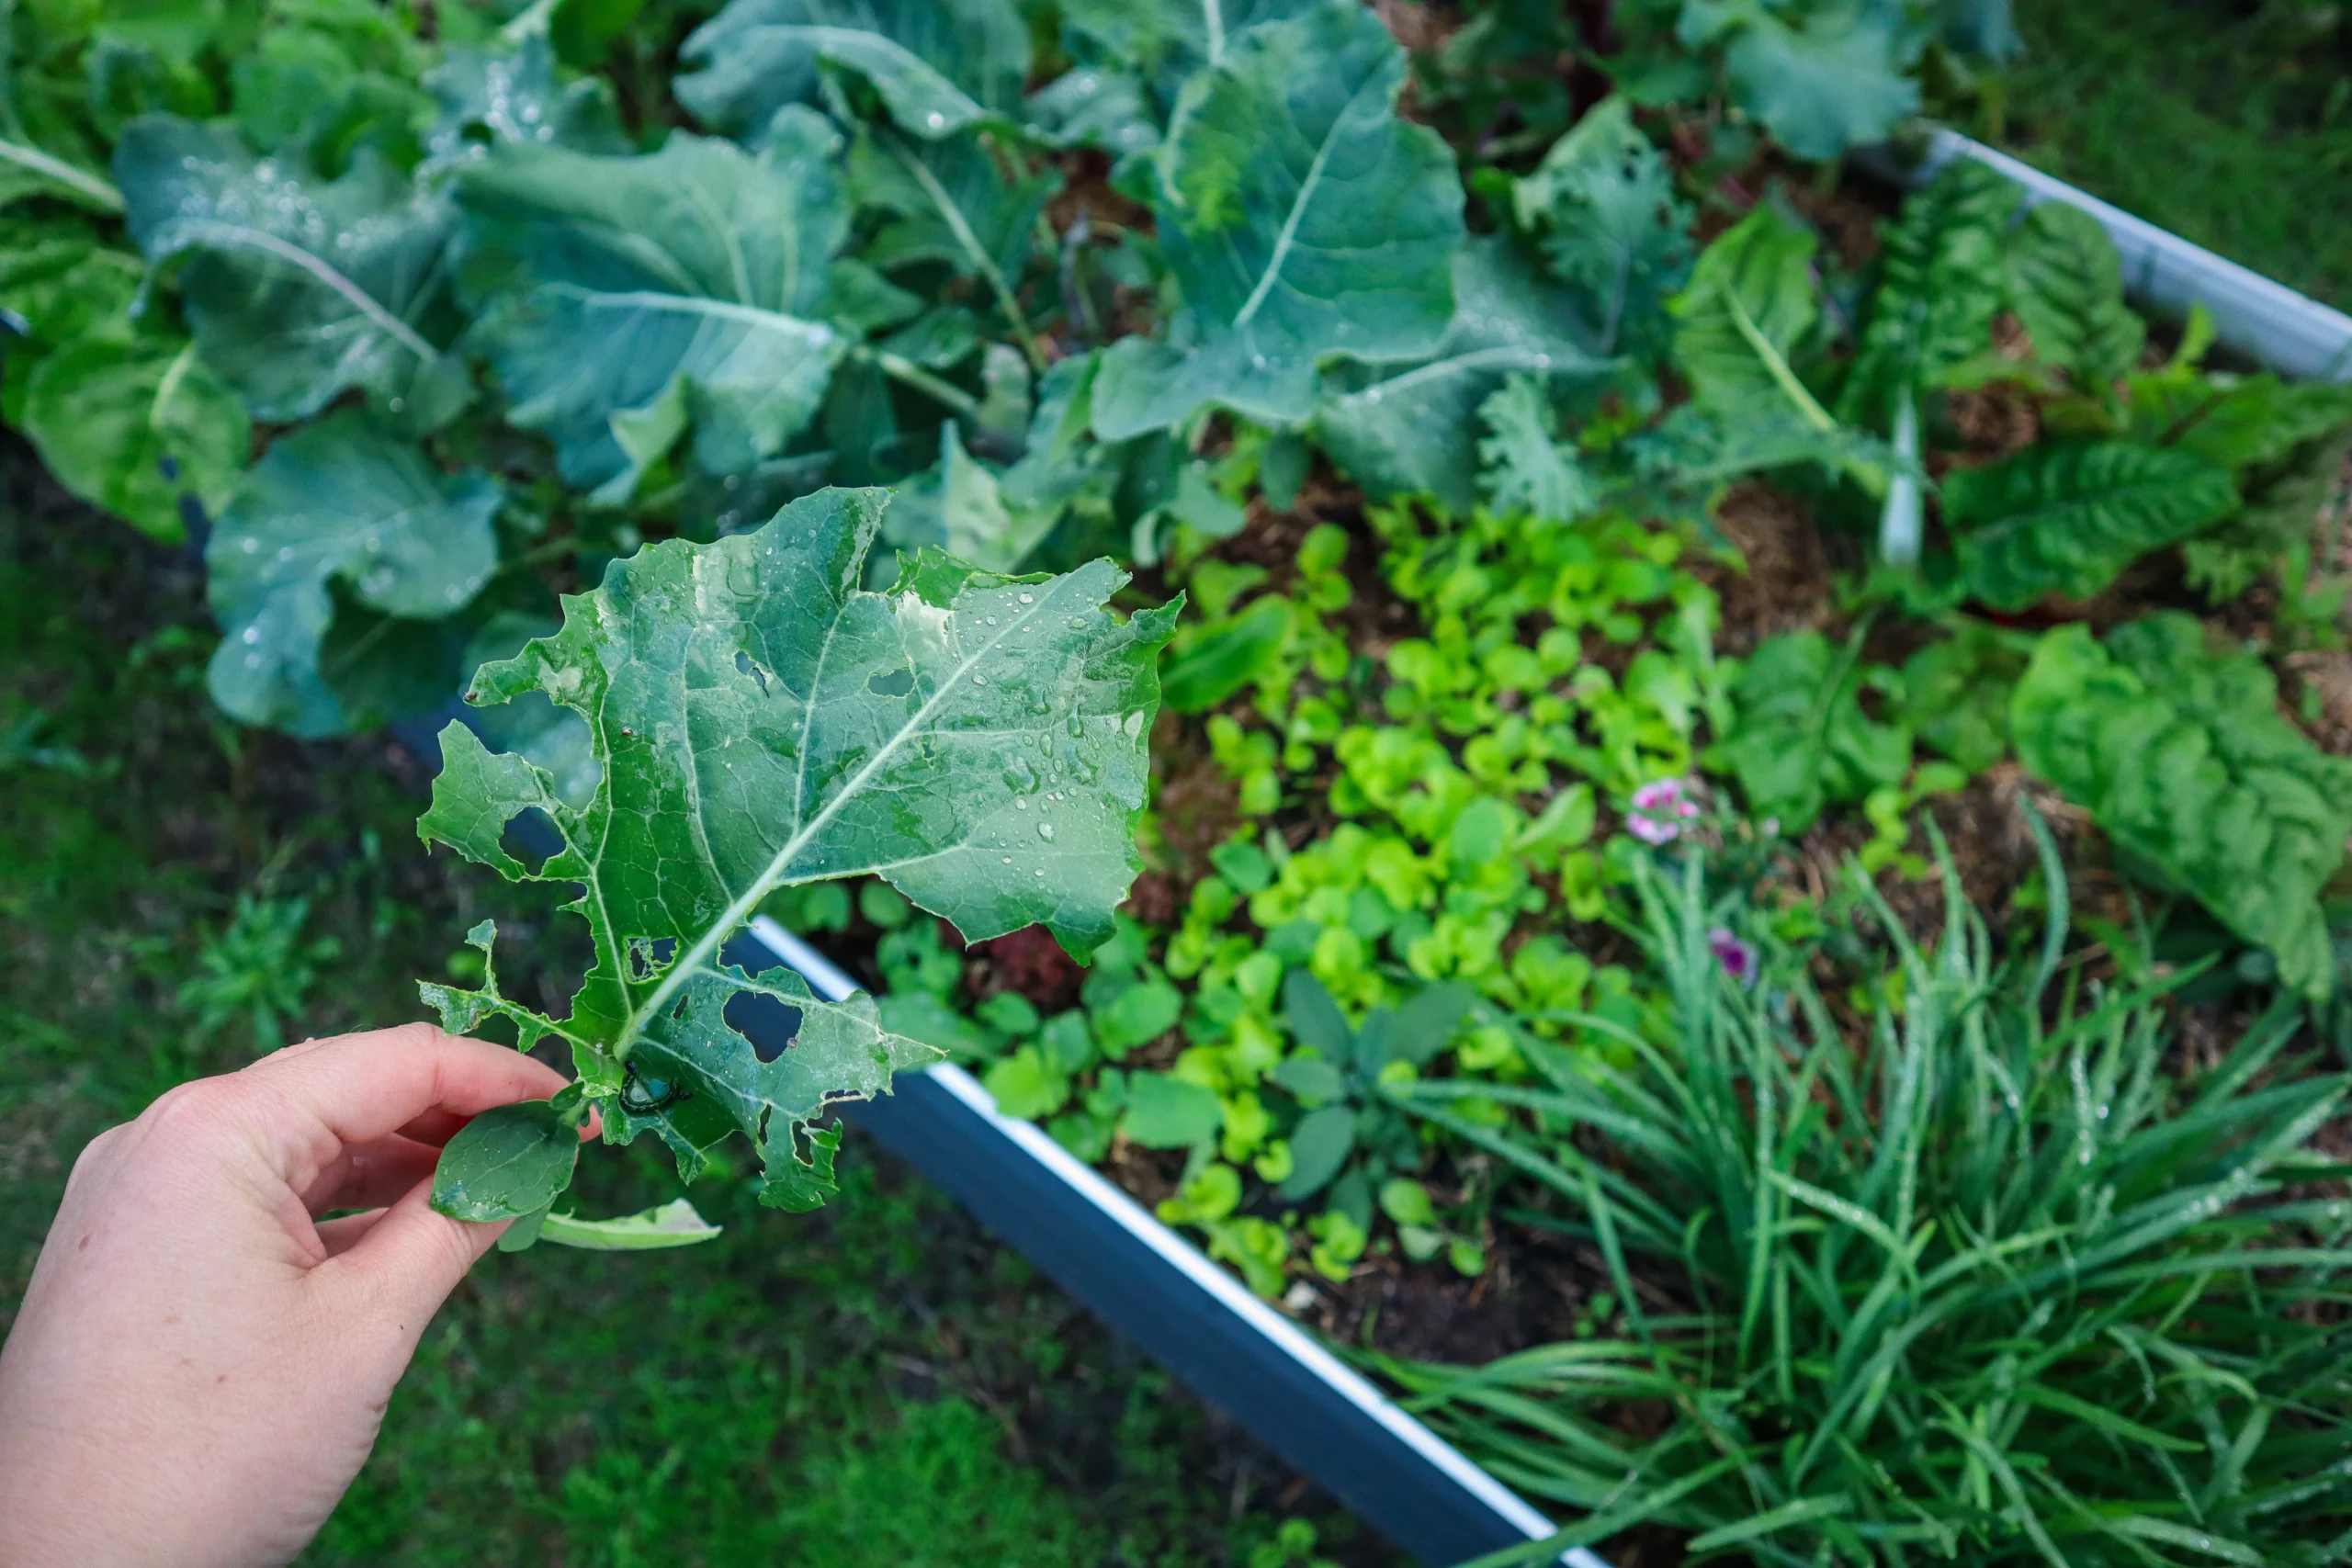
Remove the lower leaves
This helps stop slugs, snails, and other crawlers from getting easy access. I check my raised beds every few days. Pick off the lower leaves, both good and the sad, bug-bitten leaves. This allows more light (bugs like slugs and snails love dark, shady, wet spots) and reduces the amount of natural “ladders” up to your veggies. You can always clean off and use your holey veggie leaves to make a delicious, nourishing green soup or garden pesto.
Outplant the pests
This is probably my top tip and my favourite one! If bugs are hitting one patch hard, I just plant more! and randomly… I always interplant different things, so I’m not offering up a buffet of their favourite foods. The idea is to overwhelm the pests with too much choice and increase your chances of getting a harvest. It works especially well with fast-growing seeds like radishes, asian greens, and lettuce. Saving your own seeds is a great way to have more than enough to go around. So you aren’t so precious about using too many seeds or relying on the 6 seedlings you have purchased.
Sprinkle used coffee grounds
Many bugs hate crawling over gritty textures. I’ve been collecting used coffee grounds from my local cafe for years. By sprinkling them around the base of plants and even fully over young seedlings, I found my losses greatly reduced! It works really well to protect young seedlings from getting ring-barked by slaters/roly-poly, too! It’s free, reduces waste, and adds organic matter too!
Keep your plants well-fed
Healthy plants recover faster from pest attacks and are less likely to get smashed. Top up with liquid compost, worm castings, or even just a light mulch of compost to keep your plants thriving.
Relax and let a few “sacrificial” plants go
Sometimes the best defence is distraction! If a few plants just keep getting hit, I let them go and leave them as sacrificial plants. These often allow good predator bugs like Ladybugs or even birds to come visit the patch. The bugs often will focus on plants that have already been eaten…keeping them off your other healthy plants. It’s a simple way to work with nature and keep the peace in the patch.
Diversity makes it harder for the bugs
I focus on encouraging diversity in all my gardens. I do not plant the same thing all in one bed because if the bugs show up in my veggie garden and decide they like that plant… I’ve just made an easy-access all-you-can-eat buffet for them! Spreading them throughout different gardens makes it harder for the bugs and results in more food for me! Interplanting strong plants such as onion, chives, garlic, or leeks also helps confuse and ward off the bugs. Spreading plants out also reduces the nutritional depletion in the soil, as each plant takes different nutrients from varying depths due to their root growth and nutritional needs.
Control Bugs in the Veggie Garden Naturally
Dealing with bugs in the garden doesn’t have to mean reaching for harsh sprays or quick fixes. With a few simple, natural strategies, you can keep pests under control while still supporting a healthy, balanced ecosystem in your veggie patch. Caring for your soil’s health and your own at the same time.
I hope these tips help you feel more confident tackling any winter pest problems in your own garden! And remember, bug-bitten veggies are totally normal and even a sign that your garden is alive and thriving!
Want More Seasonal Garden Tips Like These?
Subscribe to my Tuesday Tips newsletter and get practical, organic garden advice delivered straight to your inbox each week 😊
If you’ve ever thought… “I wish I had more space to grow fruit,” This one’s for you! I’ve squeezed over 200+ types of fruit and edible plants into my suburban block… and while this may sound a bit crazy and not for everyone 😂 There are a few key tricks I’ve learnt along the way I want to share to help you grow a wider variety of fruit in a small space 🍊🍑🍓 Below are my top 5 tips to grow more fruit in less space..that actually work!
Top 5 Ways to Maximise Fruit in a Small Garden or Urban Space
Grow Fruit Trees in Pots
Pots make it possible to grow fruit trees almost anywhere.. balconies, patios, rental properties, awkward spaces, driveways. Choose dwarf or compact varieties, and you can move them to catch the sun or protect them in winter. Bonus: Potted trees are naturally dwarfed, so less maintenance and pruning.
Use Vertical Space
Increase the number of varieties by growing vertical fruits. Train passionfruit vines along fences, grow berries on trellises, or espalier apples along walls. Vertical growing = more fruit with less garden bed space used.
Try Multi-Grafted Trees
One tree, multiple fruits! Grafted trees can grow many varieties on a single trunk. You can purchase these as fruit salad trees or learn to graft and do it yourself! Each family type can usually be grafted together eg: stonefruit like peach, apricot, plum, nectarine can all go on one tree (except cherries must go with cherries) or citrus mixes. Great for variety, especially in limited space.
Plant High-Density Style
You probably know by now this is something I practice in my gardens… but there is method to my madness. Fruit trees don’t need to be spaced as far apart as you think. You can either have x2 fruit trees “correctly spaced” or x4 closer together. This means you will need to prune them smaller, resulting in less fruit on each tree, but more trees means more variety AND may extend your fruit season. I don’t need 1000 oranges, I’m happy with 20 😄 This works best by combining dwarf fruit trees and #5 👇
Succession + Seasonal Layers
Grow fast fruiting crops like Cape Gooseberry, Papaya, Tamarillo, and Bananas between slower ones. You’ll get harvests while your trees are still establishing. It’s all about planning for layers and timing. Then, after a few years, once your main fruit trees, say Avocado or Mango, start taking up the space, you can cut the short-lived crops out to make space.
Start Small and Grow in Less Space
You don’t need a huge property to enjoy an abundant, homegrown harvest. Even a small courtyard, rental garden, or suburban backyard has the potential to grow a diverse mix of fruit when planned strategically. Start with just one or two of these tips, like adding a potted citrus or training a passionfruit vine, and see how much more you can grow. With each season, you’ll learn more about your microclimate, sun patterns, and fruit tree behaviour, which will help you maximise your space even further. Over the years, I have edited many of my fruit trees by removing ones I don’t enjoy as much as I thought I would. I have even created multi-grafted fruit trees to then remove one of them to make room for a new tree…But I still get to enjoy the same fruit just on one tree.
Your Backyard Fruit Jungle Starts Here
Urban gardening isn’t about sacrificing abundance; it’s about designing smart, layered systems that work with the space you have. By thinking vertically, embracing container gardening, and planting with both time and growth habits in mind, you can enjoy a steady harvest of fresh fruit almost year-round.
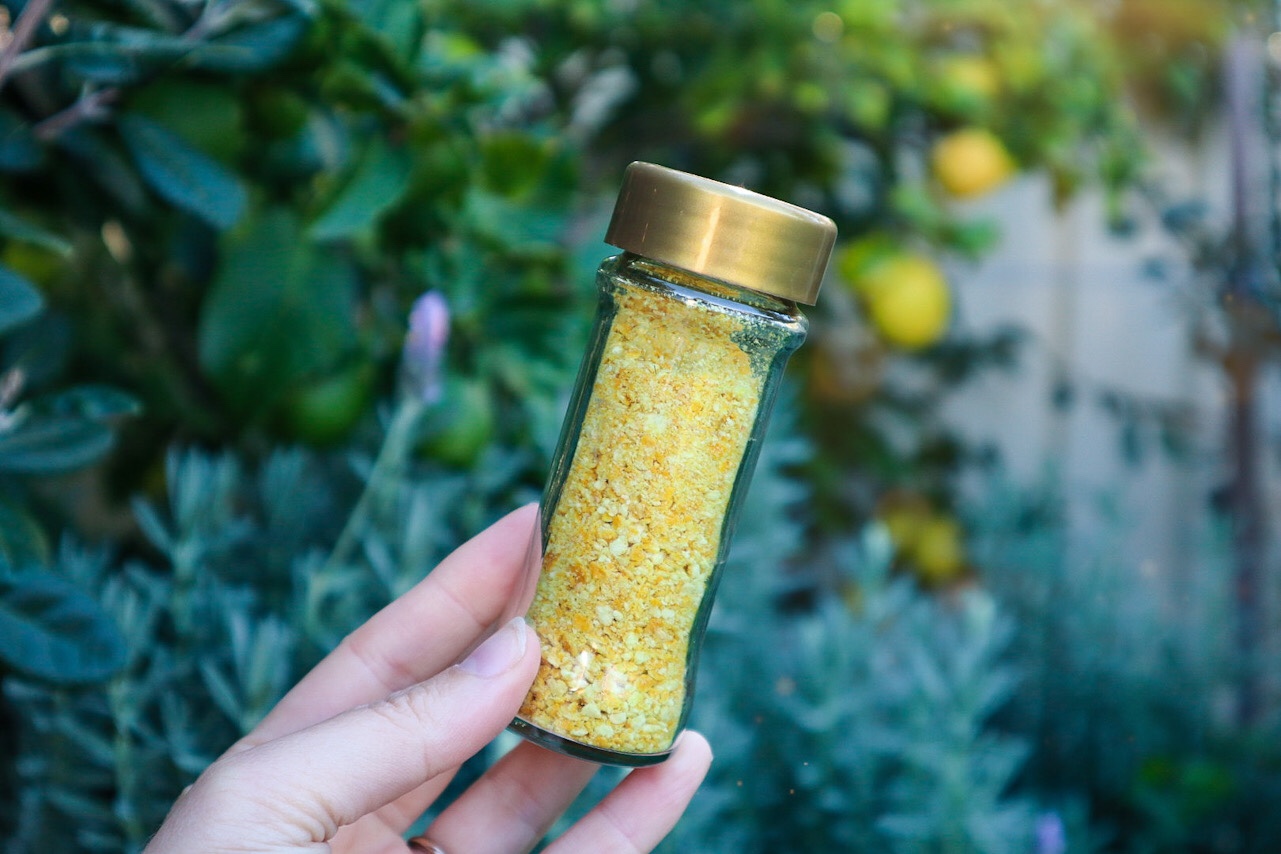
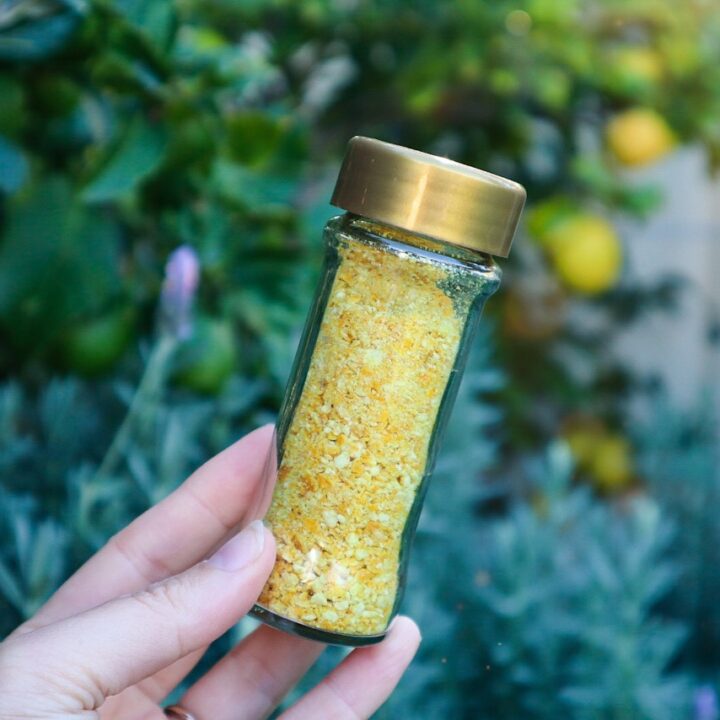
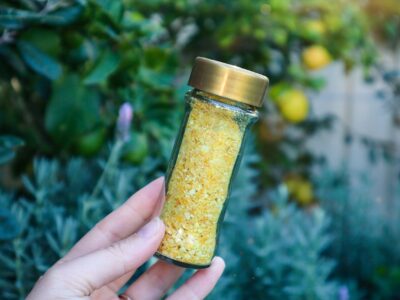
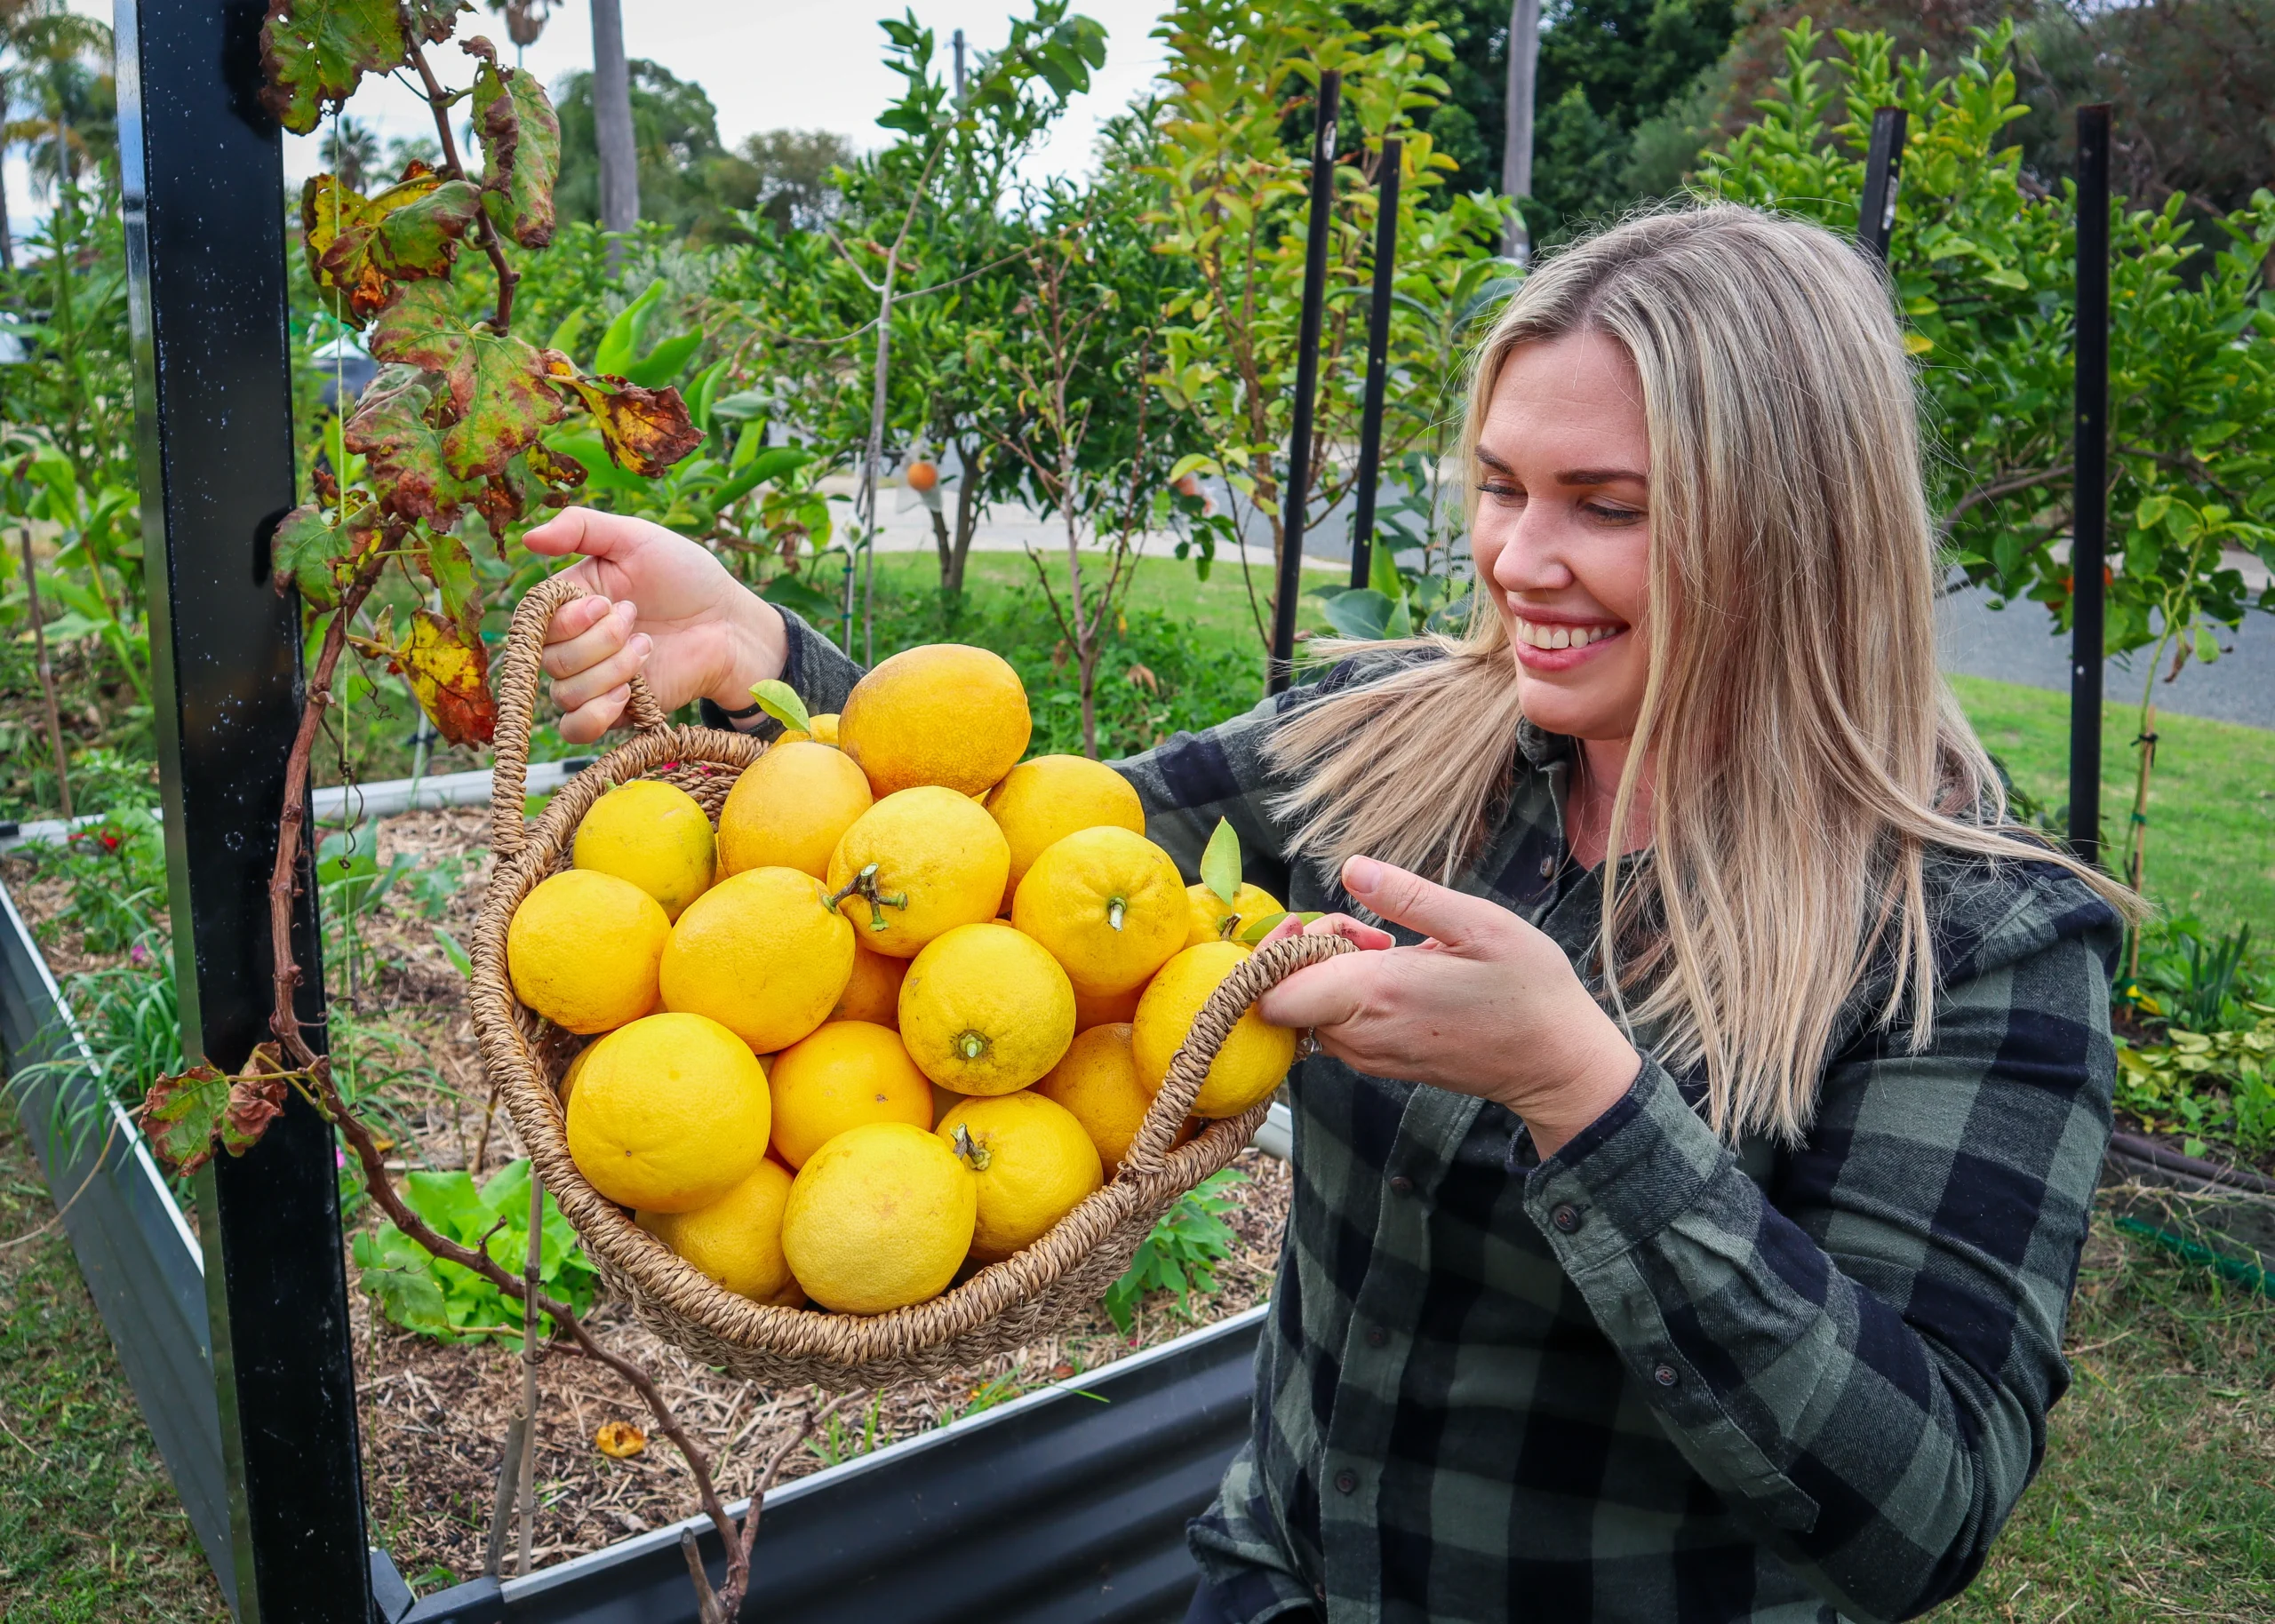
If you’ve ever juiced a bunch of lemons and felt a twinge of guilt tossing out those beautiful yellow peels, this one’s for you. These lemon zest sprinkles are a vibrant, aromatic way to get even more out of your citrus and add a burst of flavour to your meals. As a home gardener and low-waste kitchen enthusiast, I’m always looking for ways to use every part of what I grow or harvest. Lemon zest is one of my favourite zero-waste flavour boosters, and these dehydrated lemon sprinkles are a must-have in my pantry.
Not only does this recipe help reduce food waste, but it’s also a great way to preserve the bright taste of citrus for use all year round, especially when your lemon tree is loaded and you’re making juice in batches.
Sustainable, Simple, and Full of Flavour
✔️ Uses up leftover lemon skins after juicing
✔️ Easy to make with just one ingredient
✔️ Stores well and lasts for months
✔️ Adds fresh, zesty flavour to sweet and savoury dishes
✔️ A perfect DIY pantry staple for low-waste living
How to Use Lemon Zest Sprinkles
This citrusy powder is so versatile! Here are a few of my favourite ways to use it:
It also makes a beautiful homemade gift when packaged in a recycled spice jar with a handwritten label!
What You’ll Need
3–4 lemon skins (or more if you’re batch prepping)
A dehydrator or oven
A spice grinder, food processor, or Nutribullet
Clean, dry jar for storage
Tip: Use organic lemons or those from your own garden to avoid wax and pesticides.
How to Make Lemon Zest Sprinkles
Step 1: Wash and Peel After juicing your lemons, give the skins a quick rinse. Carefully peel or slice off the outer yellow part of the skin. Try to avoid too much of the bitter white pith.
Step 2: Dehydrate Lay the peels on a tray in your dehydrator or on a baking tray in the oven. Dry at around 45°C (113°F) for 2–4 hours, or until the peels are crisp and snap easily.
Step 3: Blend Once completely dry, add the peels to your spice grinder or blender. Blitz until they turn into a fine powder.
Step 4: Store Transfer to a clean jar—this is a great use for old spice jars or small glass jars with tight lids. Store in a cool, dark place.
Lemon Zest Sprinkles
Prep Time: 5 minutes
Cook Time: 3 hours2 seconds
Total Time: 3 hours5 minutes2 seconds
If you have used lemons for juicing then this is a great way to get the most out of your lemons.
Ingredients
3-4 Lemon skins
Instructions
Wash and peel or carefully slice off thin pieces of the lemon skins. Use organic lemons or fresh from the tree.
Layout the skins on a tray and dehydrate using a dehydrator or oven at 45degrees for 2-4 hours until completely dry.
Add the dry peels to a spice blender, food processor, or Nutribullet and blitz to a fine powder.
Place in a jar. I save my spice jars to recycle for future homemade spices such as this.
Notes
Add to sugar for a lemon sugar or add to your dishes for a fresh zesty flavour. Great in salad dressings, stirfry or even on top of ice-cream or yoghurt.
Low-Waste Kitchen Tip
After using the zest, the remaining lemon peel (especially the pith and leftover pulp) doesn’t have to go to waste. Here are two great options:
Compost it: Citrus adds acidity to your compost and breaks down well when chopped.
Make citrus cleaner: Soak the leftover peels in a jar of vinegar for 2–3 weeks to make a natural, homemade all-purpose cleaner. Strain and store in a spray bottle.
This lemon zest sprinkle recipe is a beautiful example of how simple, low-waste habits can add flavour and sustainability to your kitchen. It’s one of those small swaps that turns scraps into something useful, aromatic, and delicious. Next time you juice a few lemons, don’t toss those peels, dry them, blend them, and sprinkle some sunshine on your next dish.
Kumquat and custard scrolls are delicious! If you have a Kumquat tree overflowing with fruit, then whip up a batch of Kumquat jam and make these scrolls. There’s nothing quite like a tree dripping with golden-orange kumquats in the middle of winter. These tiny citrus gems are tart, tangy, and packed with flavour, and if you’ve ever grown your own, you’ll know how quickly they can go from “a few ripe fruit” to an overwhelming abundance.
When your kumquat tree is loaded and you’re wondering what to do with all that fruit, this kumquat and custard scroll recipe is a must-try. It’s comforting, simple, and a great way to preserve and use your homegrown harvest. These scrolls are soft, sticky, and filled with a beautiful mix of creamy custard and zesty kumquat jam—perfect for a weekend treat, morning tea, or a garden-inspired dessert.
Why Kumquats Deserve a Spot in Your Garden
If you’re new to kumquats, they’re small, oval citrus fruits that can be eaten whole, skin and all! Their skin is sweet while the inside is tart, making them ideal for marmalades, jams, and even fermenting. They’re also compact and make wonderful trees for small backyards, pots, or food forests.
Kumquats fruit prolifically through the cooler months, adding much-needed colour and freshness to a winter garden. But because they’re so tangy, many gardeners are left scratching their heads over how to use them all. This recipe is one of my favourite ways to turn that vibrant tartness into something sweet, creamy, and utterly delicious.
Kumquat & Custard Scrolls Recipe
These scrolls are super easy to make and don’t require yeast or rising time, so they’re perfect for a quick baking session. All you need is a batch of homemade kumquat jam, thick custard, and a few pantry basics.
1 cup thickened custard (store-bought or homemade)
Kumquat and Custard Scrolls
Yield: 8-10
Sweet, tart, creamy, and crunchy these Kumquat and custard scrolls are mouthwatering and delcious.
Ingredients
2 cups self-raising flour
2 TBSP icing sugar
80 grams of butter
1/2 cup milk
1/2 cup Kumquat Jam (see recipe below)
1 cup thickened custard
Instructions
Preheat oven to 200 degrees celsius.
Mix flour, icing sugar, and butter until it forms a breadcrumb texture. Add milk and form a dough.
Roll out on a floured bench to a rectangle shape rough 30cm long.
Add cooled set custard on top and spoon on your kumquat jam. Mix slightly.
Then roll the long side to form a long roll. This is quite tricky but just do your best.
Then cut into 8cm pieces and place in a greased oven dish with the cut side down.
Spoon on any extra mixture that has fallen out. Bake for 20mins until golden.
Allow cooling before removing them so the custard has set again.
You can also brush with extra jam to glaze.
Make Your Own Kumquat Jam
You’ll need kumquat jam for this recipe, and making your own is incredibly rewarding. You can bottle up the sunshine of your citrus tree and use it in scrolls, toast, cakes, or even savoury dishes like glazed roasted vegetables.
Kumquat Jam
Yield: 3 jars
Prep Time: 4 hours30 minutes
Cook Time: 10 minutes
Additional Time: 15 minutes
Total Time: 4 hours55 minutes
Kumquat jam is a great way to use and preserve your harvests. Add this jam to pikelets or baking for a delicious citrus flavour.
Ingredients
4 cups chopped Kumquats
5 cups of water
1 1/2 cups sugar
1/2 lemon
Instructions
Wash and chop your Kumquats and keep the seeds as you will need them to use as natural pectin.
Place the Kumquats and water in a pot.
Get all your seeds and make a little bag from cheesecloth or in a strainer. You want the seeds to be submerged in the water but not dispersed throughout as you will be discarding them later. Let the seeds and kumquats sit in the water for 4hrs to release the natural pectin. Remove the seeds and discard.
Place a saucer or plate in the freezer to test your jam out at the end.
Bring the pot to a simmer for 30mins. Add in the sugar and stir. Bring the pot to boil for 5min.
Test your jam by putting droplets onto your frozen plate. They should thicken as you run the end of a spoon through the droplet to check. If it doesn't look like it is set add some fresh lemon juice, reheat, and stir. Test again. I repeated this a couple of times and it started to look set.
Spoon hot mixture into hot jars (heat mine in the oven to sterilise 120 degrees for 15 mins and the lids in a bowl of boiling water).
Turn the jars upside down to cool and help the lids seal.
Refrigerate and enjoy.
Watch the video
Why Grow Kumquats at home?
Here are some of the many reasons to grow Kumquat
Hardy, low-maintenance fruit tree
Perennial
Ornamental and edible
Prolific producer
Dense busy shrub
Grows well in pots and containers
The whole fruit is edible
Great for making jams and preserves
Popular Kumquat Varieties
Nagami – Japanese variety with small oval-shaped fruit. Bright orange when ready. Sweet skin and tart flesh. 1-2 seeds in each fruit ( my favourite).
Meiwa – Larger round orange fruits. Sweet skin and flesh. A hybrid of Nagami and Marumi varieties.
Marumi – Round fruits that are quite sour or tart. Mainly used for preserving.
Variegated Kumquat – Stand out ornamental variegated leaves and fruit. Variegation disappears on fruit usually once ripe. Also known as Calamondin or Calamansi.
What to Make With Excess Kumquats
If your kumquat tree is overflowing with fruit and you’re wondering what to do with them all, you’re not alone! Kumquats are a wonderful citrus to grow, but their short season can leave you with more fruit than you know what to do with. Thankfully, these small citrus gems are incredibly versatile — perfect for both sweet and savoury recipes.
Here are some delicious ways to use up your extra kumquats:
Make a quick kumquat jam – perfect for toast, yogurt bowls, or as a swirl in baked goods like scrolls or muffins. (I used mine in these Kumquat & Custard Scrolls!)
Candy them – sliced thin and simmered in sugar syrup, candied kumquats are beautiful on desserts or cheeseboards.
Add to salads – thinly sliced fresh kumquats add a pop of tang and sweetness to green or grain salads.
Preserve them – kumquats can be fermented, turned into marmalade, or preserved in honey for winter immunity boosts.
Dehydrate them – sliced and dried kumquats make a bright, citrusy snack or addition to tea blends.
Use in sauces or glazes – cook them down with honey or vinegar for a punchy topping to chicken, tofu, or roasted veg.
And of course, if you’re baking, kumquat and custard scrolls are a delicious and unexpected way to transform your harvest into something cozy and irresistible.
TIP: Don’t forget — even if you’re not using the whole fruit right away, kumquats freeze well or can be zested and juiced for future use.
Garden to Plate
There’s something incredibly satisfying about using your own homegrown ingredients in a recipe from start to finish. These kumquat and custard scrolls are a sweet reward for your gardening efforts, and they showcase just how versatile your backyard harvest can be. If you make these, I’d love to see them! Tag me on Instagram or leave a comment letting me know how they turned out—and if you’ve got other creative ways to use kumquats, share them too.
Learn how to grow a Lemonade Tree (Citrus limon x reticulata) at home, from planting to harvest, and how to use its delicious fruit in drinks, desserts, and garden-fresh recipes. The Lemonade Tree is one of my favourite citrus trees, especially because it’s so productive! You can eat the fruit fresh off the tree, just like an orange, but with lemon flavour!
The lemonade tree was discovered in New Zealand from a chance seedling. Many backyards have Lemonade Trees growing, and it was a staple fruit in my lunch growing up in NZ. I now have a Lemonade Tree in my Perth gardens, and it is loaded with fruit each year. It’s honestly one of the most refreshing, productive citrus trees you can grow. The fruit is naturally sweet and low in acid, like lemonade straight from the tree! It’s perfect for eating fresh, juicing, or turning into easy garden-to-table treats.
What parts of Lemonade are edible?
Flesh – Edible
Mild, sweet-tart flavour with low acidity—can be eaten fresh, just like a mandarin or orange. Great for juicing, making cordial, using in desserts, or adding to savoury dishes. Unlike regular lemons, you often don’t need to add sugar!
Juice – Edible
Naturally sweet juice makes a refreshing lemonade-style drink with no sugar needed.
Zest (Outer Peel) – Edible
The peel (zest) is full of citrus oils and adds bright flavour to:
Cakes and cookies
Dressings and sauces
Herbal teas or syrups
Rind (Including Pith) – Edible when Cooked
Can be used to make candied citrus peel, marmalade, or citrus-infused vinegar. Thicker rinds can also be oven-roasted with herbs or added to preserved lemon recipes.
What is a Lemonade Tree?
The Lemonade Tree is a hybrid between a lemon and a mandarin, resulting in a fruit that looks like a lemon but is mild, sweet, and low-acid. It can be eaten fresh like an orange, juiced into a zingy lemonade-style drink, or used in desserts without that sharp citrus bite.
Quick Tips on How to Grow Lemonade at Home
PLANT
Autumn or spring in frost-free areas.
SOIL
Well-draining, compost-rich soil. Avoid heavy clay unless mounded or in raised beds.
LOCATION
Full sun (at least 6 hours daily). Protect from strong winds and frost.
CARE
Mulch thickly, water consistently (especially during flowering and fruiting), and prune to shape after harvest.
FERTILISE
Feed in early spring, summer, and late summer with organic citrus fertiliser or worm juice + compost.
PESTS
Watch for citrus gall wasp, aphids, scale, leaf miners, and fruit fly. Encourage beneficial insects and prune affected areas.
HARVEST
Pick when fully yellow for peak sweetness. Or slightly green for more tartness and flavour.
REPRODUCE
Usually grown from grafted trees.
Why Grow Your Own Lemonade?
Here are some of the many reasons to grow Lemonade.
Naturally sweet fruit – no sugar needed!
One ingredient Lemonade!
Great fresh eating
Low-acid – gentle on the stomach and kid-approved
Perfect for small spaces or large pots
Highly productive from an early age
Great pollinator and companion tree for citrus guilds
Versatile in the kitchen – from juice to marmalade, even baking
Temperature & Climate Conditions
Lemonade Trees grow best in subtropical to warm temperate zones, but they’re more cold-hardy than many tropical fruits. With the right care, they can thrive in most areas of Australia:
Ideal temperatures: 15–30°C
Can tolerate down to: -2°C (brief frost OK with protection)
Best zones: 2–4 (Subtropical to Warm Temperate)
Plant in a sunny, sheltered location, preferably near thermal mass (like a wall or paved area) to keep roots warm in winter.
In colder regions: grow in large pots and move to a sunny porch or greenhouse in winter.
TOP TIPS TO GROW LEMONADE
Choose a warm sunny location
Prepare the soil with plenty of compost
Free draining is key!
Choose a sunny spot with great drainage
Protect from frost in the first 1–2 years
Mulch thickly but keep away from the trunk
Feed regularly and deep water in dry months
Remove gall wasp galls before spring
Net for fruit fly
Keep weed-free and well-mulched
Growing Lemonades in Pots or Small Spaces
Great for renters, balconies, or frost-prone areas (can be moved to shelter). Plant in their final position early to minimise root disturbance. Use a large pot (at least 50L) with premium potting mix + added compost. Ensure good drainage. Feed more often, as potted citrus use up nutrients faster.
How to Care for Lemonade Trees
Care/ Maintenance
Lemonade trees are heavy feeders due to the amount of fruit they produce! Add plenty of compost and mulch often to keep them well fed. Always ensure the mulch is pulled away from the trunk. Keep an eye on suckers and remove any growth from below the graft line. Add frost cloth during sudden cold snaps. Place young trees near north-facing walls or thermal mass.
When to Feed Lemonade Trees
Citrus trees are hungry feeders, especially during their active growing and fruiting seasons. Feed them three times a year, timed with key growth phases:
1. Early Spring (August–September)
Just as new growth starts and flowering begins
Encourages healthy leaves, blossoms, and strong fruit set
2. Early Summer (November–December)
Helps fuel fruit development and maintain strong leaf growth
Important for trees already holding fruit
3. Late Summer / Early Autumn (February–March)
Boosts energy before fruit harvest and supports next season’s buds
Prepares the tree to handle cooler months with stronger roots and reserves
Bonus Feeding Tips:
Avoid feeding in winter when growth slows, especially in cooler areas.
Use organic citrus fertiliser, compost, worm juice, or seaweed tonic.
Apply after watering, then water again to avoid burning roots.
Mulch well, but keep it away from the trunk
Watering
Citrus trees like the Lemonade Tree need consistent watering, but they don’t like soggy feet! The key is to keep the soil evenly moist, not wet, not bone dry. Excess watering or inconsistent watering near ripening can cause fruit to split.
How Often to Water:
Young trees: Water 2–3 times per week, depending on weather
Established trees (in-ground): Deep water once a week in mild weather, 2–3 times a week in summer or heatwaves
Potted trees: Water more frequently—every 1–2 days in summer, but always check the soil first
Best Watering Tips:
Water early morning or late afternoon to reduce evaporation
Mulch thickly (with compost, straw, or bark) to keep moisture in, but keep mulch clear of the trunk
Signs of Over or Underwatering:
Yellow, curling leaves: Could be either! Check if the soil is too wet or too dry.
Dry, crispy leaves or fruit drop: Not enough water
Drooping, dark green leaves or root rot: Too much water or poor drainage
Pro Tip: Use your finger! Stick it about 5 cm into the soil—if it feels dry, it’s time to water.
When to Harvest Lemonades
Lemonade trees are early-season producers. They can start to ripen in late Autumn to early winter. Pick when fully yellow. Fruit doesn’t ripen much off the tree, so taste test before harvesting large batches. Or slightly green for more tartness and flavour. Lemonades can lose some flavour when over-ripe.
Pruning & Care Tips
Prune after fruiting to maintain shape and airflow.
Remove any inward-facing or crossing branches
Cut off any suckers or growth below the graft
Keep well-mulched and weed-free at the base
Pests / Disease
Slugs, slaters, and snails can also be damaging to young plants. Watch for fruit fly, root rot (in soggy soil), and mealybugs. Net fruit if needed. Birds, rats and fruit bats will also enjoy your fruit.
Cooking and Using Lemonades
Lemonades are great because you can enjoy them straight off the tree! However, once your tree gets bigger, you will have an abundance! It can be too much to eat fresh, even after giving some away. Below are some ideas to use and preserve your Lemonade harvests.
Dehydrate slices for teas, cocktails, or cake decoration
Freeze juice
Preserve in Jams, Marmalade or Chutney
Watch for more tips on growing a lemonade tree
Lemonade FAQs
Do lemonade trees have thorns? Yes, most do have thorns.
Are Lemonades a hybrid fruit? Yes, they are a cross between a lemon and a Mandarin
Are Lemonades sweeter than Meyer lemons? Yes, and even less acidic
Do they grow true from seed? Very Unlikely. This is a hybrid cross, and can be cross-pollinated again, so seedlings will be surprising results.
How long until they fruit? Grafted fruit trees will likely try to fruit in year 1. Due to the size of the tree it can be better to remove the fruit until year 2-3.
Where did Lemonade trees come from? Thought to have originated from New Zealand in the early 1980s from a chance hybrid seedling.
Learn how to grow Papaya (Carica papaya) at home from seed and what to make with your abundant Papaya crops! Papayas are a must-grow plant if you live in a warm climate and want abundant, quick harvests, vertical shade, and tropical vibes in your food forest or backyard. They grow fast, produce generous fruit, and are surprisingly easy to start from seed, making them perfect for urban permaculture gardens!
I have 6 Papaya plants that I’ve grown from seed and love how they act as an umbrella for my hot gardens, plus offer so much fruit! The amazing thing about Papaya is that you can harvest it green and use it like a vegetable, or wait for it to tree ripen and develop a sweet tropical flavour. They have quickly become one of my top picks for a low-maintenance, productive fruit tree that fits beautifully into even small gardens.
What parts of Papaya are edible?
Fruit (Ripe Papaya) – Edible
The orange to reddish flesh of ripe papaya is sweet, soft, and full of enzymes.
Commonly eaten fresh, in smoothies, salads, salsas, or desserts.
High in vitamin C, A, and papain (a digestive enzyme).
Seeds – Edible (in moderation)
Have a peppery, slightly bitter flavour—can be eaten fresh or dried and ground as a pepper substitute.
Rich in enzymes and antimicrobial properties, but best in small amounts (they can be too potent or slightly toxic in excess).
Green (Unripe) Fruit – Edible when cooked
Used as a vegetable in curries, stir-fries, or grated into salads (like Thai green papaya salad).
Contains more papain, which breaks down proteins—great for tenderising meat.
Must be cooked or prepared properly, especially for those sensitive to latex.
Flowers – Edible (especially male flowers)
Sometimes used in traditional dishes in Asia and the Pacific Islands.
Have a mild bitter flavor; usually sautéed or boiled before eating.
⚠️ Parts NOT Recommended to Eat Raw:
Stem, latex, and roots: Contain milky sap (latex), which may cause irritation or be mildly toxic.
Unripe parts (fruit or leaves) should be cooked if consumed, especially for people with latex sensitivity.
Quick Tips on How to Grow Papaya at Home
PLANT
Sow seeds in spring to early summer for best results.
SOIL
Free-draining compost-rich soil.Mounded above ground in clay soil.
LOCATION
Full sun. Choose a warm, sheltered spot protected from wind and frost.
CARE
Water deeply but allow the soil to dry slightly between watering. Mulch thickly. Prune lower leaves as they yellow.
FERTILISE
Feed monthly with compost tea, worm juice, or organic fertiliser high in potassium.
PESTS
Watch for fruit fly, root rot (in soggy soil), and mealybugs. Net fruit if needed.
HARVEST
Pick when the fruit starts to yellow and softens slightly. Let it ripen further indoors.
REPRODUCE
Grow from seed, but know your plant’s sex! See below for more info on male, female, and bisexual types.
Why Grow Your Own Papaya?
Here are some of the many reasons to grow Papaya.
Super fast-growing fruit tree
Suitable for pots or small spaces
Vertical growth = space saver
Produces fruit in under a year
Can grow tall to act as a shade umbrella
Perfect for syntropic and food forest layering
It can be used as a fruit or a vegetable
Versatile uses in the kitchen
How to tell Papaya Plant Sex: Male, Female & Bisexual
Male
Mainly just produces flowers with many on long shoots. Sometimes they will produce fruit also at the end of the long stem. Males are often the quickest to start flowering. Keep one if you want to pollinate females, but usually not needed if you grow bisexual types.
Female
Produces the largest flowers with mini Papayas tucked under their unfurling white petals. They fruit better if pollinated by a male or bisexual plant. Fruit is rounder and often larger than bisexual fruits. Female fruits sometimes have fewer seeds inside and even none when they haven’t been pollinated.
Bisexual (Hermaphrodite)
Produces small flowers in clusters close to the main stem (unlike the male, which clusters on long stems). Self-pollinating and highly productive. The fruit is usually more elongated with plenty of seeds inside. Ideal for small gardens as you only need one plant.
When can you tell what sex a Papaya is?
You won’t know the sex until flowers appear, usually a few months in, when the plants are about 0.5 – 1m tall. This is why it is a good idea to grow your own from seed and plant multiple seedlings (5–6) and remove males later, unless needed for pollination. Some nurseries will falsely sell Papaya plants as Bisexual, but because they are all grown from seed, there is still a chance of getting a male or female plant.
Popular Papaya Varieties
Red Army- Large, firm red-fleshed fruit with excellent flavour and good shelf life.Bred for disease resistance and improved productivity in Australian conditions.
Pink Lady – Deep pink flesh, sweet flavour, smooth texture. Performs well in warm, humid climates and responds well to regular feeding.
Southern Red – Sweet, deep red-orange flesh, medium-sized fruit. Australia’s most commonly grown red papaya variety. Productive and widely available.
Solo Sunrise – Small, sweet, pear-shaped fruit with orange-red flesh. Compact plant, good for pots or smaller gardens.
TOP TIPS TO GROW PAPAYA
Choose a warm sunny location
Prepare the soil with plenty of compost
Free draining is key!
Papayas hate wet feet and can rot easily. In clay soils – mound up above the ground rather than planting down in a hole
Do not disturb roots when removing from the pot.
Protect from frosts and high winds
Keep the trunk clean and clear with good airflow.
Remove older yellowing leaves
Keep weed-free and well-mulched
How to Grow Papaya from Seed
You can grow papayas from shop-bought or homegrown fruit. Ideally, source locally grown fruit as supermarket-imported fruit is often treated and has fewer viable seeds. Here’s how:
Step-by-Step:
Scoop out fresh papaya seeds and rinse off pulp.
Gently squeeze the seed to pop the casing off and reveal the bumpy seed.
Plant 2–3 seeds per hole in a sunny seed-raising tray or directly into a garden bed.
Thin out to the strongest seedling once sprouted.
Keep at least 5-6 plants, either in pots or the ground and wait until they start to flower to determine sex.
💡 Tip: Papayas don’t like transplanting or having their roots disturbed. Plant in their final position early to minimise root disturbance.
Temperature & Climate Conditions for Growing Papaya
Papayas (Carica papaya) love the heat and grow best in tropical to warm subtropical climates. They’re fast-growing but sensitive to cold, so choosing the right spot and protecting young plants is key.
Frost-sensitive: Frost can damage or kill papaya trees, especially young ones.
If you’re in a warm coastal or inland area with mild winters (like parts of WA, QLD, NT, or northern NSW), papayas will thrive year-round. In cooler zones, they’ll need protection from cold, wind, and frost—especially during their first 1–2 years.
Tips for Growing Papaya in Cooler Zones:
Plant in full sun, ideally with a north-facing wall, fence or thermal mass to reflect warmth
Use a frost cloth or a mini greenhouse in winter if needed
Grow in large pots and move under cover during cold snaps
Apply thick mulch and avoid planting in frost-prone low spots
Want to Grow Papaya in Cooler Climates? Try These Alternatives:
If your garden gets frost or struggles to stay warm through winter, papaya might not be the easiest option. But there are a few cold-tolerant cousins and lookalikes worth trying!
Mountain Papaya (Vasconcellea pubescens)
Native to the Andes, this papaya relative handles much cooler temps—even light frosts! This one is popular back home in New Zealand. I haven’t been able to find a plant here in Western Australia…yet.
Grows well in temperate zones with protection.
Fruit is smaller, ripens to yellow and is pear-shaped
Champagne-like flavour and you can eat the seeds as well.
Bonus: It’s often grown for its enzyme-rich latex, like papain.
Babaco (Vasconcellea × heilbornii)
A natural hybrid related to mountain papaya.
Alaos called the Champagne fruit due to the flavour.
Grows in cool subtropical to mild temperate zones—tolerates down to around -2°C with protection.
Produces seedless, tangy-sweet fruit that tastes like a mix of pineapple, pawpaw, and lemon.
Compact, attractive tree perfect for pots or small backyards.
Needs pruning to keep productive, and doesn’t tolerate root disturbance.
North American Pawpaw (Asimina triloba)
Not related to papaya, but often confused due to the name.
Native to eastern North America and thrives in cold temperate zones.
Deciduous tree with custard-like fruit that tastes like banana, mango, and vanilla.
Needs chill hours and two trees for pollination, but a great option for truly cold climates.
Best grown in full sun with rich, moist soil.
North American PawpawNorth American Pawpaw
How to Care for Papaya Plants
Care/ Maintenance
Papayas are heavy feeders, so compost and mulch often to keep them well fed. Always ensure the mulch is pulled away from the trunk, as papaya stems are susceptible to rot.
Feeding
Feed monthly with compost tea, chop and drop mulch, worm juice, or organic fertiliser high in potassium.
Watering
Water deeply but allow the soil to dry slightly between waterings.
Harvesting
Fruit takes 5–8 months to mature from a flower.
Harvest when the skin starts to turn yellow.
Clip off with secateurs. Ripen further indoors.
Use green if preferred for savoury dishes (salads, curries, stir-fries).
Can you Prune Papaya Plants?
Yes! Some Papaya plants can get very tall, which is great for shade, and as the canopy is overhead, they take up less room in the garden. However, this can make it very hard to pick ripe fruit. Pinching the top of the Papaya plant can force it to stop growing taller and branch out. If your papaya does get too tall, you can cut the main stem, which will also force it to branch out. Stems can be hollow, so you may need to cover the cut to stop rain from getting down in the stem and causing rot. An upside-down container can work well. Prune off the older yellowing leaves by gently pulling down on the stem. This will help to divert energy back to the plant.
Pests / Disease
Slugs, slaters, and snails can also be damaging to young plants. Watch for fruit fly, root rot (in soggy soil), and mealybugs. Net fruit if needed. Birds, rats and fruit bats will also enjoy your fruit. It is best to pick fruit at the first sign of yellow and allow it to ripen inside to avoid attracting more pests.
ReproducingPapaya
Scoop seeds from ripe fruit.
Rinse and dry thoroughly.
Store in a paper envelope in a cool, dry spot.
For better odds of getting bisexual plants, save seeds from bisexual fruits only.
Cooking and Using Papaya
Papaya is delicious raw or cooked as well as ripe or unripe. Making it a great staple food to grow in the garden.