Add a little bit of flair to your desserts, baked treats, or cocktails with these sparkly, sweet candied mint leaves. They’re beautiful, easy to make, and add a delicate crunch with a refreshing minty finish. Perfect for when you want something a little special to top a cake, tart, pavlova, or even a fancy iced drink.
Mint on its own can sometimes be a little overpowering, but candying softens that intense bite while preserving all the aromatic freshness. The sugar balances the strength of the mint, leaving you with a light, sweet leaf that melts in your mouth and looks stunning as a garnish.
How to Make Candied Mint Leaves
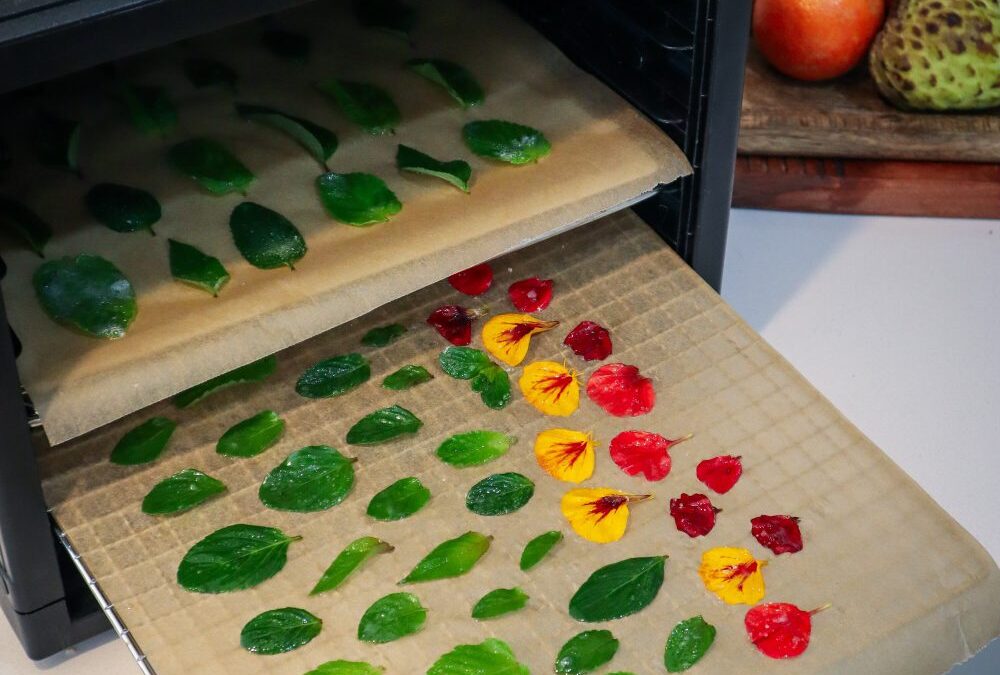
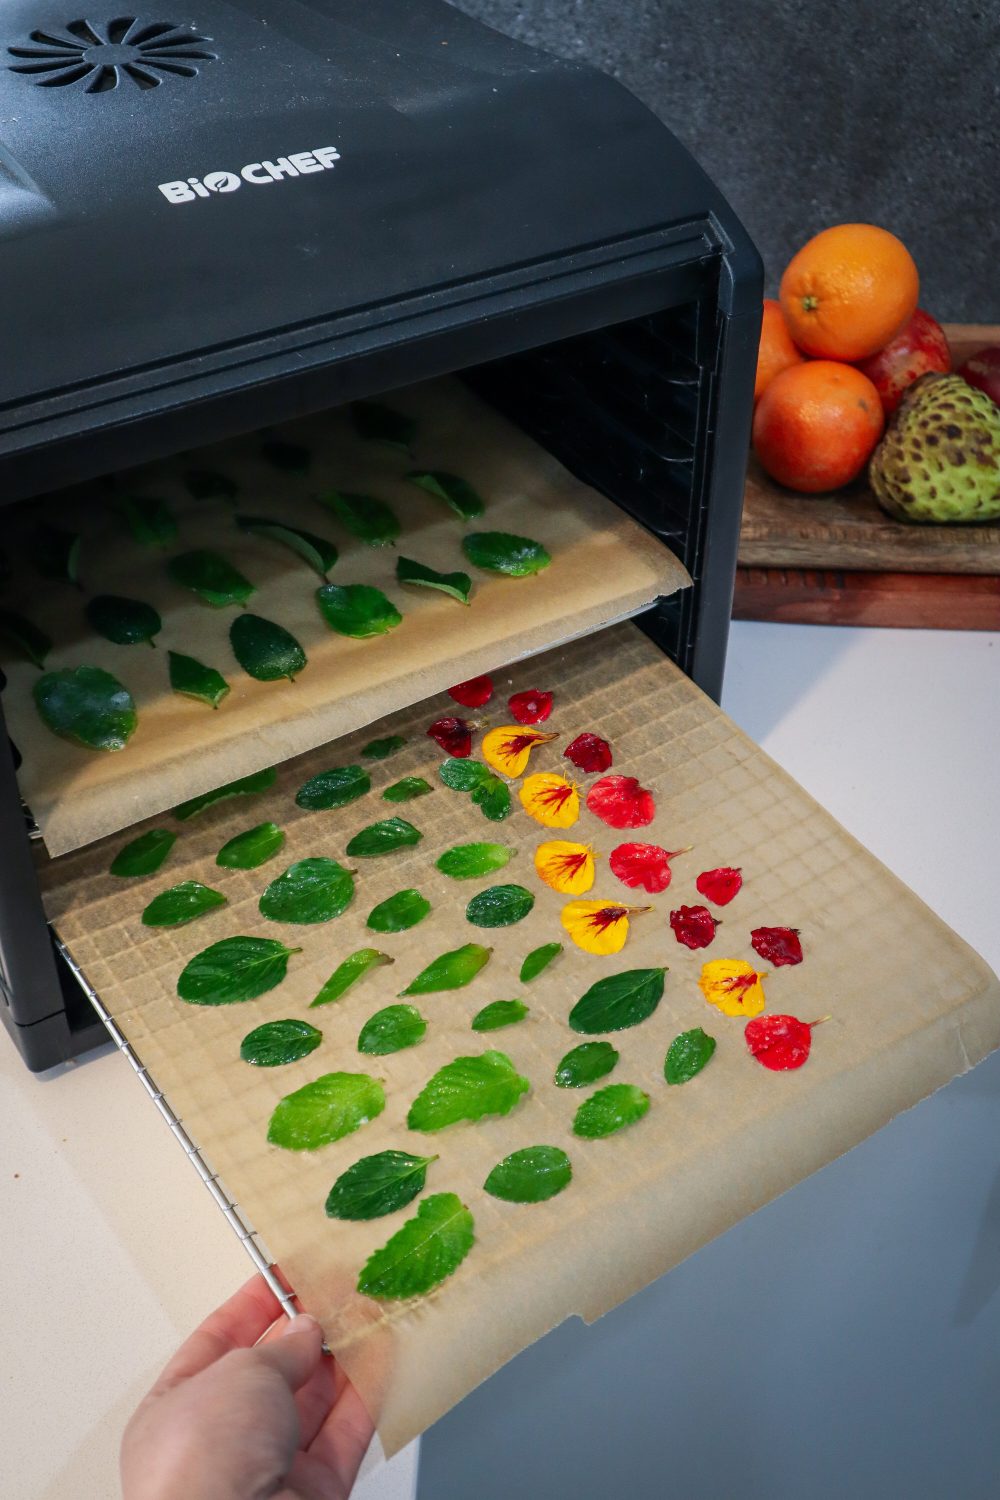
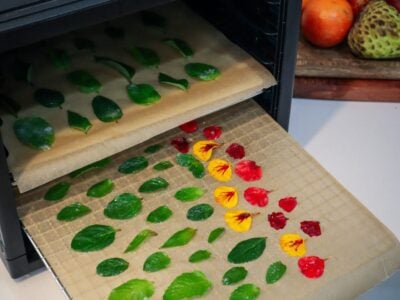
All you need are a few fresh mint leaves, some egg white (or aquafaba for a vegan version), and a sprinkle of caster sugar. Simply coat each leaf in a bit of frothy egg white, dust with sugar on both sides, and let them dry for several hours until crisp. I like to leave mine on baking paper in a switched-off dehydrator or a warm, dry spot in the kitchen. They’re best made the night before and can be stored in an airtight container for a day or two.
Candied mint leaves are a great way to use up any extra mint growing in the garden, especially when it starts to take over. You can also try this method with other edible leaves like lemon balm or even tiny herb leaves for a twist.
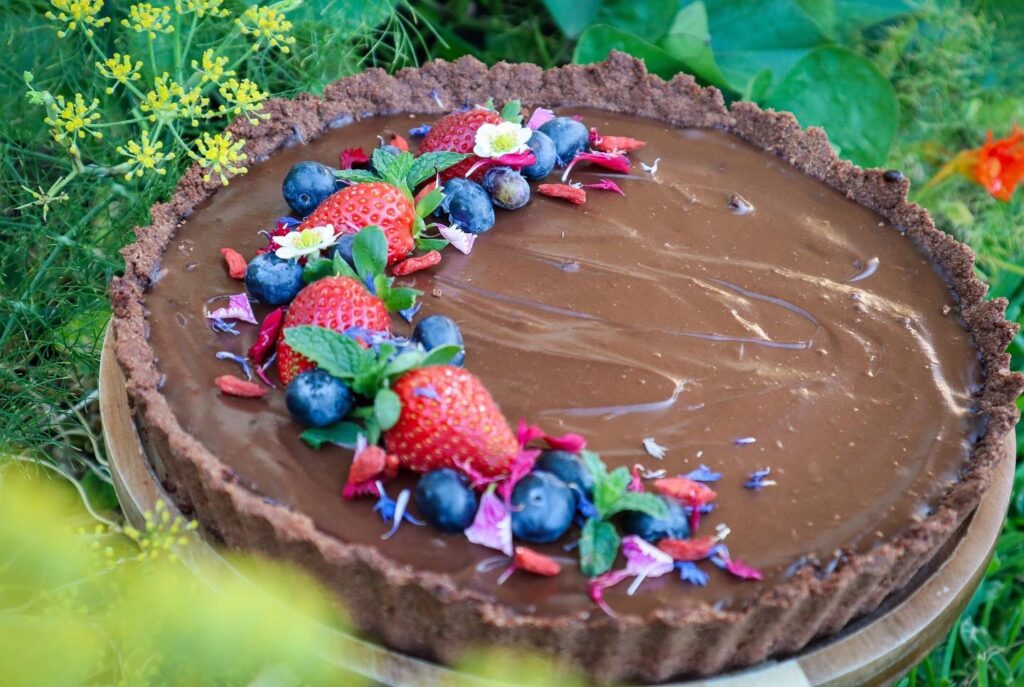
They’re not just decorative—they’re delicious! Whether you’re topping an avocado chocolate tart, dressing up a fruit salad, or adding charm to a summer cocktail, these little leaves add a handmade, whimsical touch that’s sure to impress.
Candied Mint Leaves
Prep Time: 10 minutes
Additional Time: 6 hours
Total Time: 6 hours10 minutes
Sweet and minty these candied mint leaves are a delicious addition to decorate baking or cocktails.
Ingredients
10 + Mint leaves*
1 Egg White or Aquafaba (chickpea water)
Caster Sugar
Instructions
Whisk egg white until frothy.
Prepare a tray with baking paper.
Lightly coat the mint leaves in egg white by dipping them in and wiping off excess on the edge of the bowl.
Sprinkle both sides with sugar and place on the baking paper tray.
Allow to rest at room temperature for 6 hours + or overnight. I stored them in my dehydrator (switched off) to keep any bugs off.
Store in an airtight container and use within a day or two.
Notes
* Try with edible flowers or other herbs such as pineapple sage
Garden to Plate Magic
Candied mint leaves are a simple yet elegant way to elevate your homemade treats. With just a few ingredients and a bit of drying time, you can transform humble garden mint into a beautiful garnish that looks impressive and tastes delicious. Whether you’re making them for a special occasion or just to enjoy some creative time in the kitchen, they’re a fun way to celebrate what’s growing in your garden.
Links included in this post might be affiliate links. If you purchase a product or service with the links that I provide I may receive a small commission. There is no additional charge to you! Thank you for supporting my blog so that I can continue to provide you with free content.
Gift-giving doesn’t need to be expensive, stressful, or hard! These sustainable DIY gift ideas will have you inspired to create more gifts from your garden – all year round! Whether you are visiting a friend or trying to find a Birthday, Mother/fathers day, or Christmas gift there’s something for all occasions in this gift guide.
Click to watch my gift guide ideas below
My thoughts around gift giving
I don’t always buy or give gifts for special occasions…It can seem strange at first to skip out on gift-giving. We may feel guilty, awkward, or just like a bad friend or partner! But if nothing is popping up as the perfect gift idea then I don’t waste money on consuming more “stuff” that they may not even like.
BUT….what I do is.. make more homemade gifts myself! It’s much more personalised and can spark inspiration in others. If you gift produce or create gifts from your garden you may even inspire the receiver to reconnect with their own garden. I also give small gifts from my garden each time I visit friends and family. In short, my gift-giving is sporadic and you may receive an amazing gift from me, regular handmade gifts, or nothing at all. But if I find the perfect idea later in the year I just gift it then. Who doesn’t love a surprise gift?
Garden to Gift Ideas
These gift ideas can be used all year round to create personalised gifts from your garden. The great thing is, they are free/low cost, low waste, and easy to put together for last-minute (oops I forgot ) gift ideas.
—- GET CREATIVE —-
1. Framed Art
Pressed flowers make beautiful garden art ideas. Mixed with small illustrations or paintings. TIP: Choose small frames as nearly everything looks cute in a small frame… You could also get second-hand frames and paint them for an extra thrifty option.
2. DIY Colouring in Book
Draw basic outline illustrations and create a custom colouring books for kids. They don’t need to be professional artworks just choose objects that they love and use their name to make them feel special. Choose themes such as Farm, Beach, Woodland, Food Forest, and Veggie patch!
3. Photography
Framed photos or prints make great gifts! They are low-cost and can be easily personalised. Close-ups from the garden, scenic landscapes, and photos of friends and family. I love getting printed photographs because it is something I rarely do anymore. In this digital age, we rarely take the time to sort through our hundreds of photos so sometimes it’s nice to do.
4. Custom Clothingand Plant Dye
DIY Jackets are a fun way to get creative and make custom gifts. Denim jackets can always be found at secondhand shops and upcycled. I love making jackets for significant events like weddings and first birthdays. They make great keepsakes too. Paint flowers from your garden or sew fabric patches. Get extra creative and make your own natural plant dyes from the garden.
—-GETPRESERVING —-
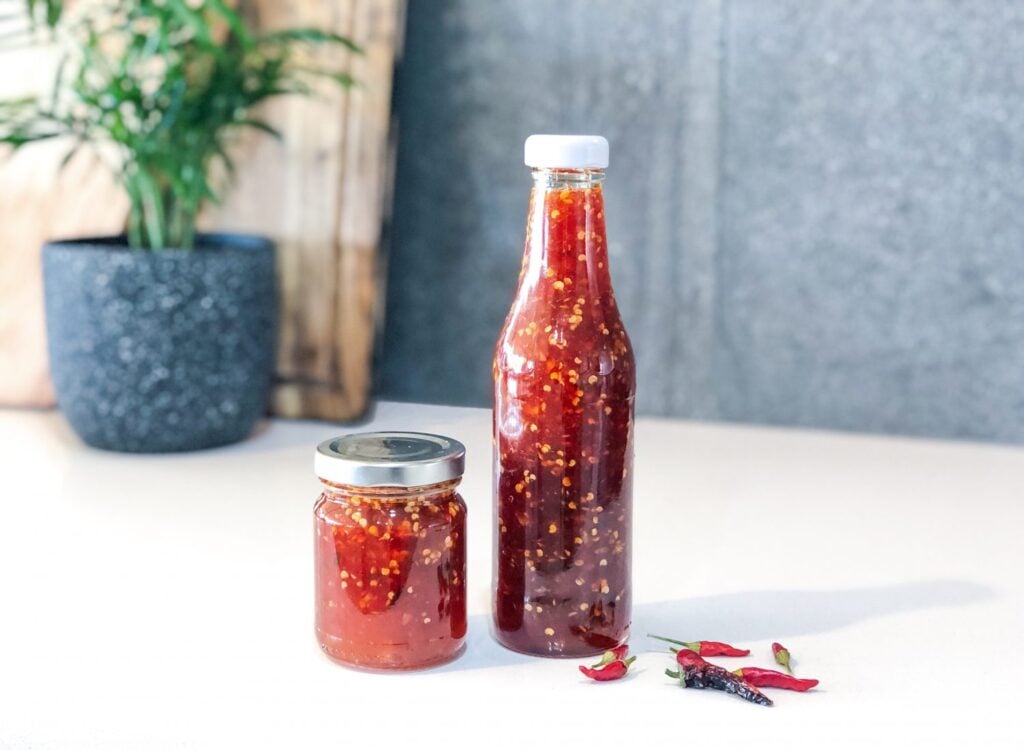
5. Homemade Jam, Chutney & Sauces
Homemade preserves make such great gifts! Especially if they are made from delicious fruit and vegetables grown in your home garden. Create fun, custom labels easily using Canva templates. You can also create DIY tags and notes using leaves and small bundles of herbs and flowers.
Herbs produce in abundance and drying them is a great way to preserve them to use throughout the year. Make your own mixed herb blends and gift them to others to use in their kitchen. Homemade dried herbs are so much better than the greyish uninspiring supermarket editions.
7. Dehydrated Fruit
Dehydrated fruit is one of my go-to garden to gift ideas! I make large batches and always have enough on hand to either pop in a recycled jar or cut up and mix with dried flowers for a tea blend or a cocktail garnish blend. Dried citrus can be used in teas, cocktails, cakes, and baking. Also, incredible in mulled wine! Try chocolate-dipped for something extra special!
8. Flavoured Sugar and Salts
Herbal sugars and salts are such a fun and easy way to incorporate produce from your garden in a unique way. Simply blitz herbs and mix through salt and allow to fully dry. Dried edible flowers, herbs and citrus can be added to sugar to create flavoured sugars. Try Mint sugar in a hot chocolate!
Tea blends make incredible gifts from the garden. See the list and mix and match to make your favourite blends. Dry herbs and flowers fully first either air dry or in a low-temperature oven or dehydrator (30-40 degrees Celcius). Dried fruit, herbs, and flowers also make great cocktail garnishes. Add to a nice jar and create a DIY Label.
—-GET BAKING —-
10. Bake Bread
Homemade bread is so delicious and makes a great gift idea. Baking great bread is not a skill everyone possesses so if you do, share the love and make a sourdough loaf or even a Garden Foccacia using herbs and fresh ingredients from your garden. Wrap it in brown paper with a note and place a small bundle of herbs or flowers. Done!
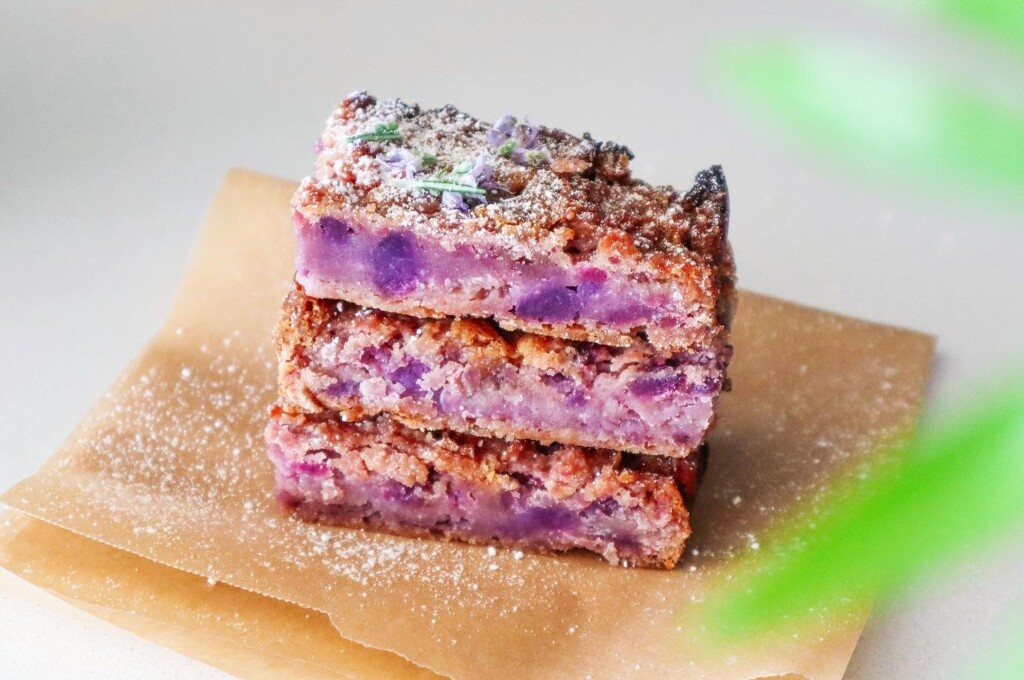
11. Sweet Treats
Who doesn’t love sweet treats? Homemade cookies, cakes and slices always make great gifts. Get creative and use edible flowers, herbs and fruit from your garden to create something special!
12. Savoury snacks
Savoury snacks are an entertainer’s dream. Try some botanical crackers for a great way to use herbs from your garden. Other delicious snacks could be scrolls, scones, slices, quiche or flavoured nuts.
—-GET GROWING —-
13. Cuttings and Seedlings
Take extra cuttings and pot them up to have extra gifts on hand at all times! Cuttings such as Sweet potato, mint, rosemary, fig and mulberry are easy to get striking. Check out my Cuttings Ebook for more ideas. If you have extra plants pop up in the garden, (hello volunteers!) simply pot them up to give as gifts.
14. Plant Extra Seeds
It’s always a good idea to plant extra seeds in case something happens to your others. I do this in stages so I plant extra seeds 3-4 weeks after my first lot. That means if my seeds have made it to the garden as seedlings but get eaten or damaged I have replacements already on the way. However, if I don’t need the backs up then I have plenty to gift to friends and family.
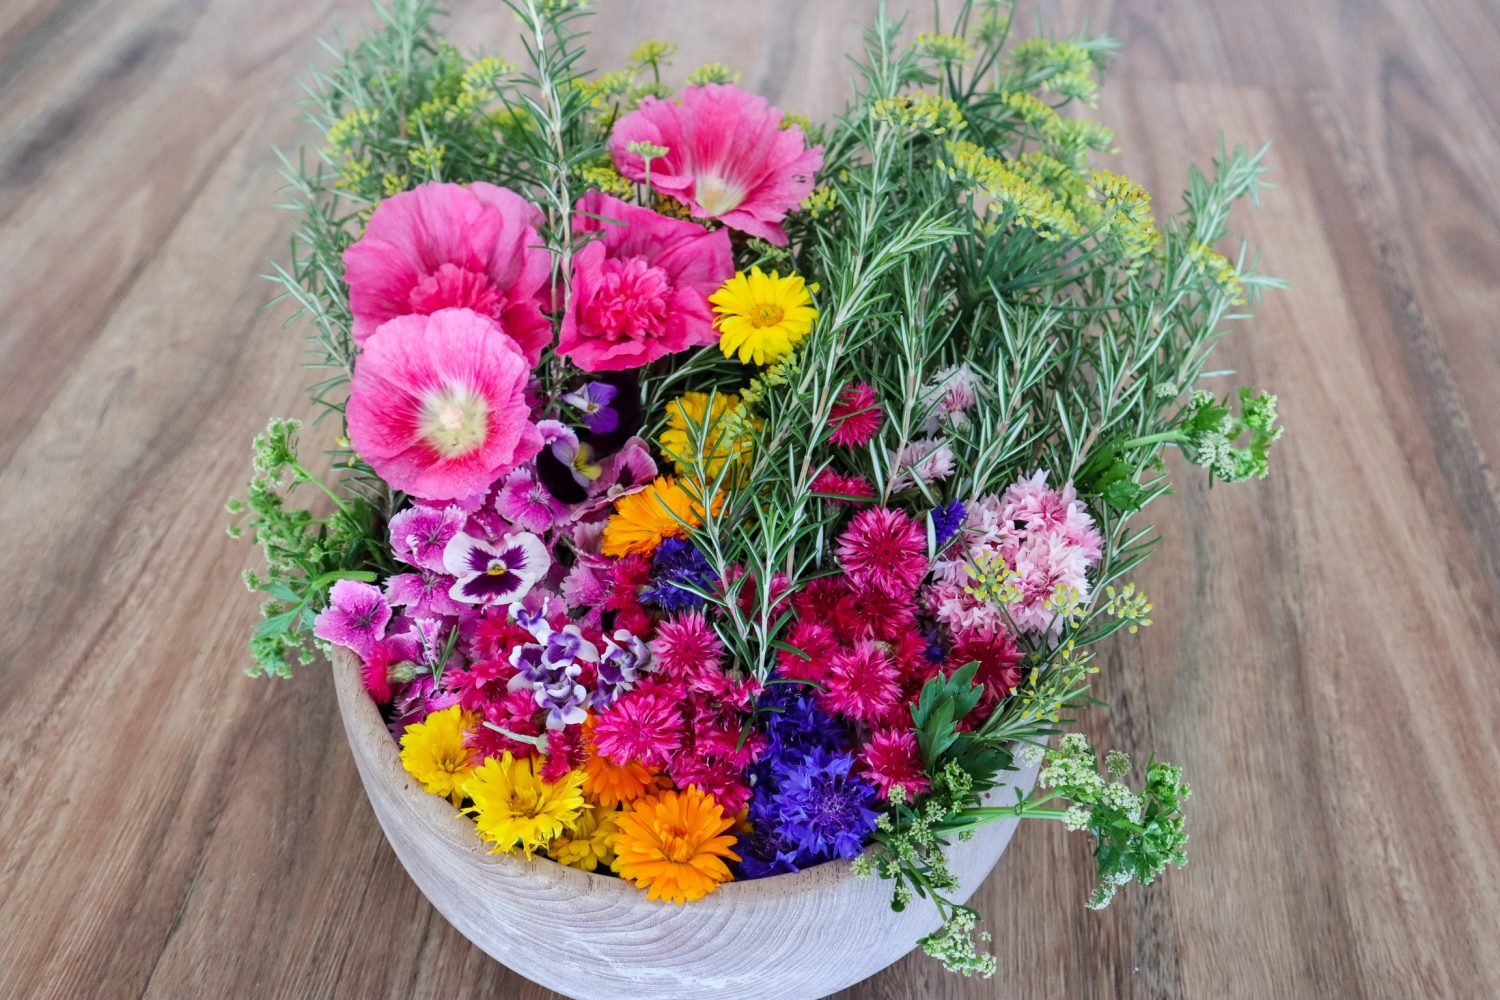
15. Edible Bouquets
I love picking wild vegetable and herb flowers that have gone to seed, herbs and edible flowers to create beautiful edible bunches to gift. There are so many great reasons to do this!
They smell amazing
Look beautiful and a little wild
Don’t cost anything!
Can be used to flavour meals and tea
Can be regrown in their own garden.
The great thing about keeping herbs such as Mint, Rosemary, Basil and Lavender in jars of water is that they will send off roots! Let your gift receiver know what they can replant.
16. Fresh Produce
Extra produce makes incredible gifts! This can be vegetables, herbs, flowers or fruit you have grown in your garden. Pop in a basket or box and deliver to your friends and family. The great thing about gifting produce from your garden is they get to try different things that may not be at the supermarket. You may also inspire them to reconnect with where their food comes from and start growing their own. You really don’t know how much you can inspire and make a change by simply gifting some homegrown produce.
17. Gifting Seeds
Once your gardens get established you will have plenty of seeds to start harvesting. Pop some in a brown envelope with a note of what they are, when you harvested them and who they were from. Seeds are great gifts because they bring with them so much inspiration and potential!
If you found these gift ideas helpful please share this post with others and help to inspire more people to create their own Homemade Garden to Gifts.
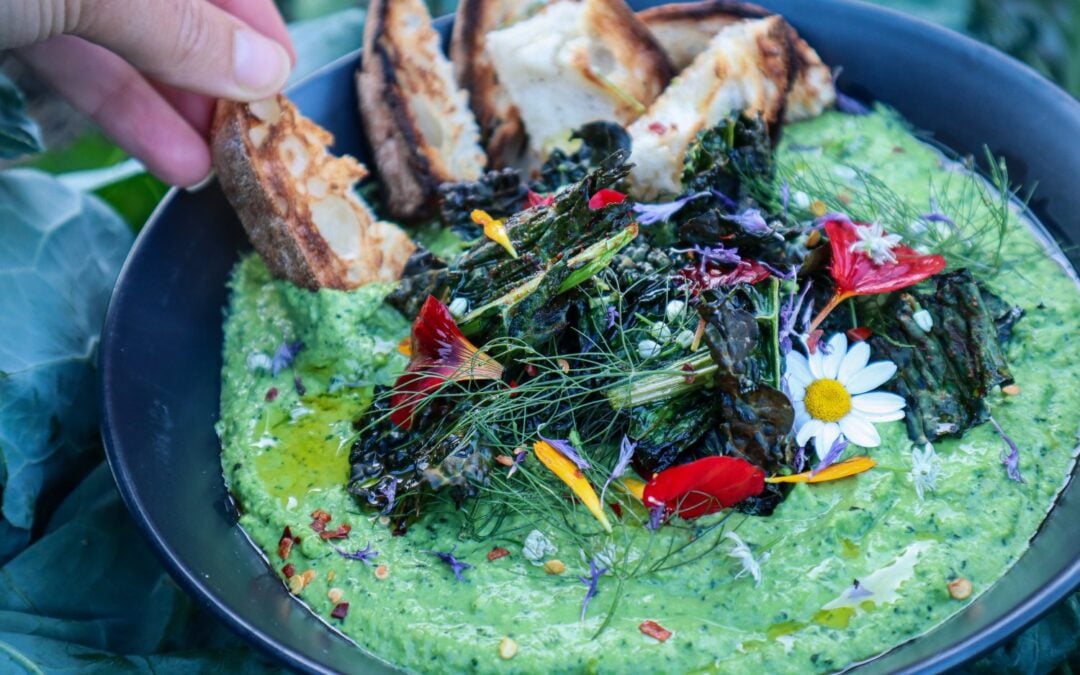
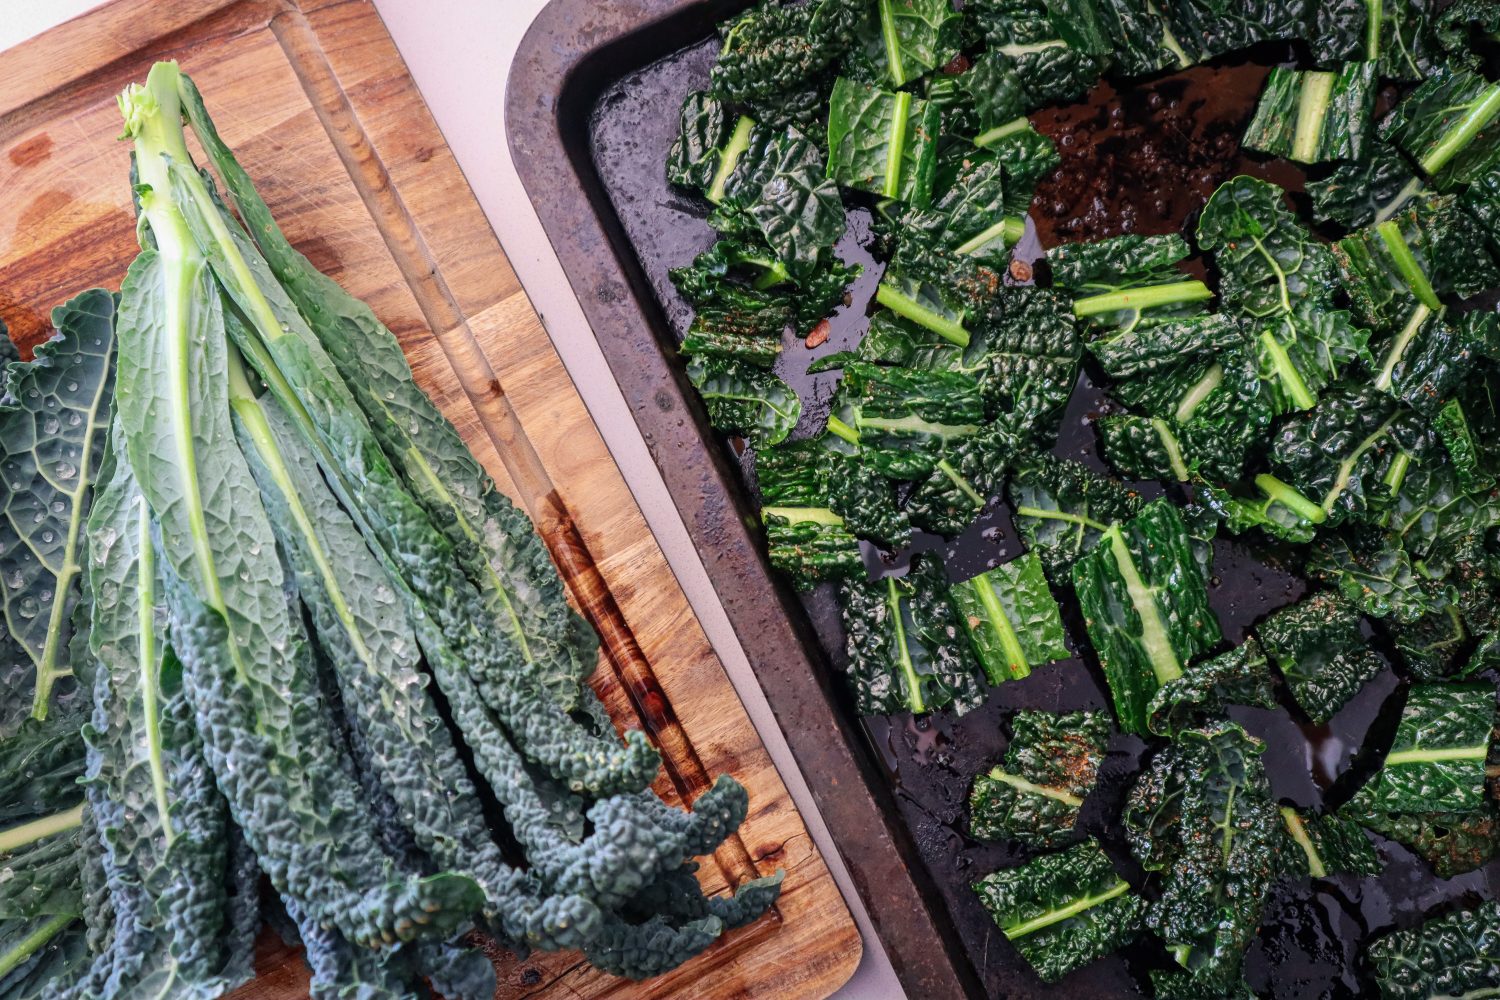
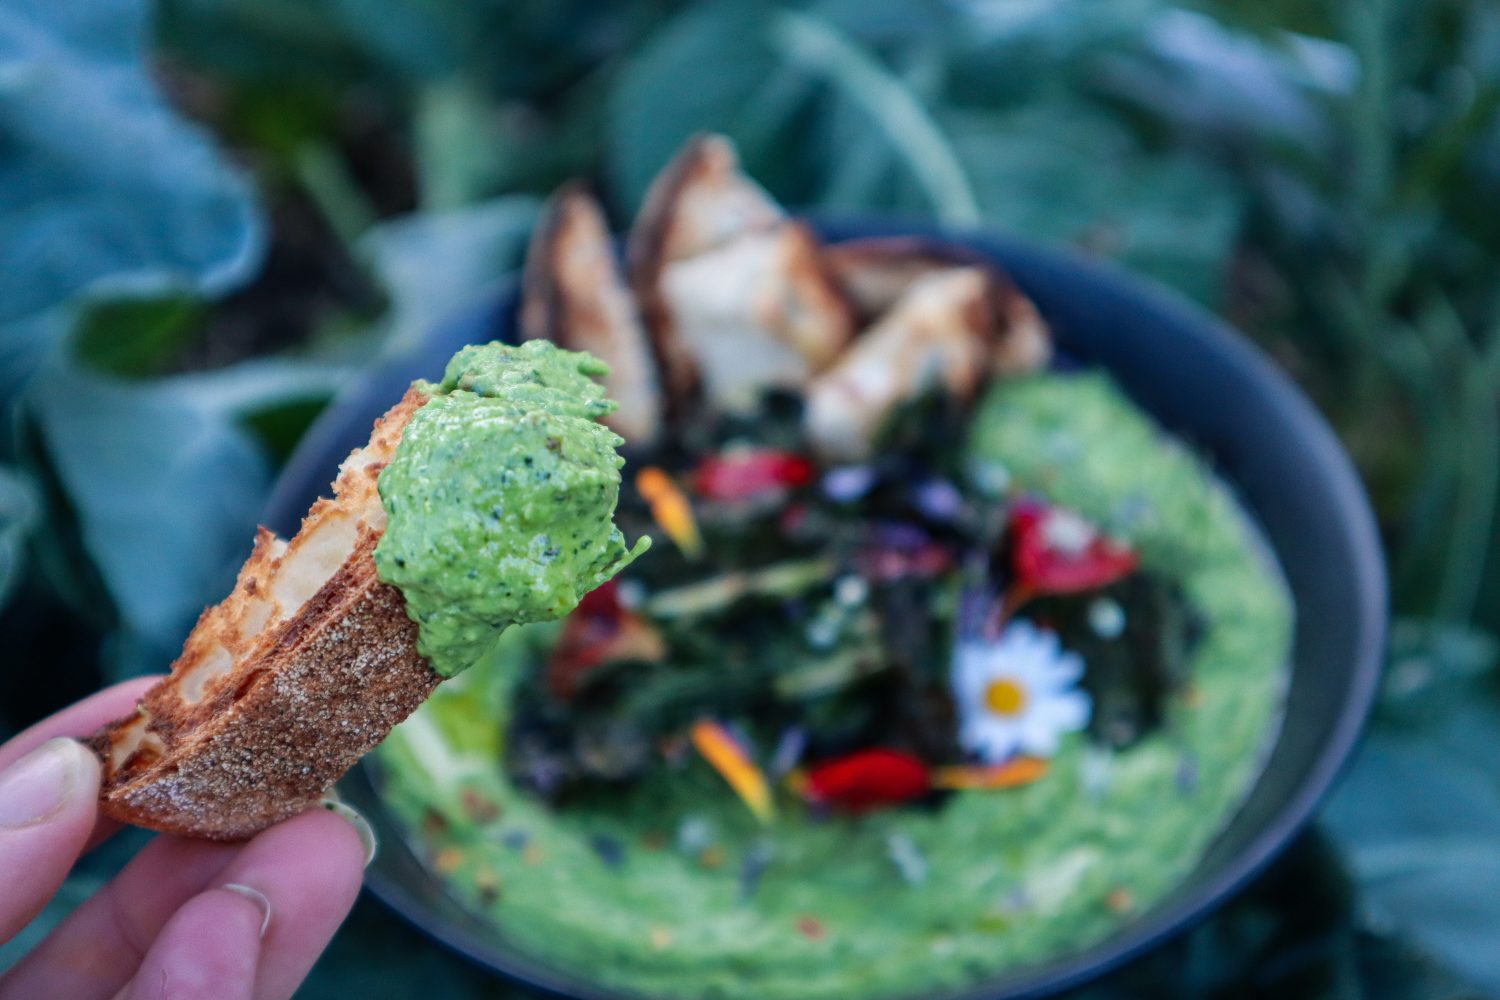
Creamy hummus loaded with crispy kale chips and edible flowers, this is a great way to use up your excess Kale harvest. Perfect for entertaining, served with toasted bread, pitas, or spooned onto a salad wrap. If you’ve got kale growing like crazy in your winter garden, this one’s for you! This Loaded Kale Hummus is a fresh, vibrant twist on classic hummus and one of my favourite ways to use up a big harvest of leafy greens. It’s packed with flavour, rich in nutrients, and makes the perfect colourful addition to snack platters, wraps, grain bowls or a simple piece of sourdough.
Ingredients from the Garden
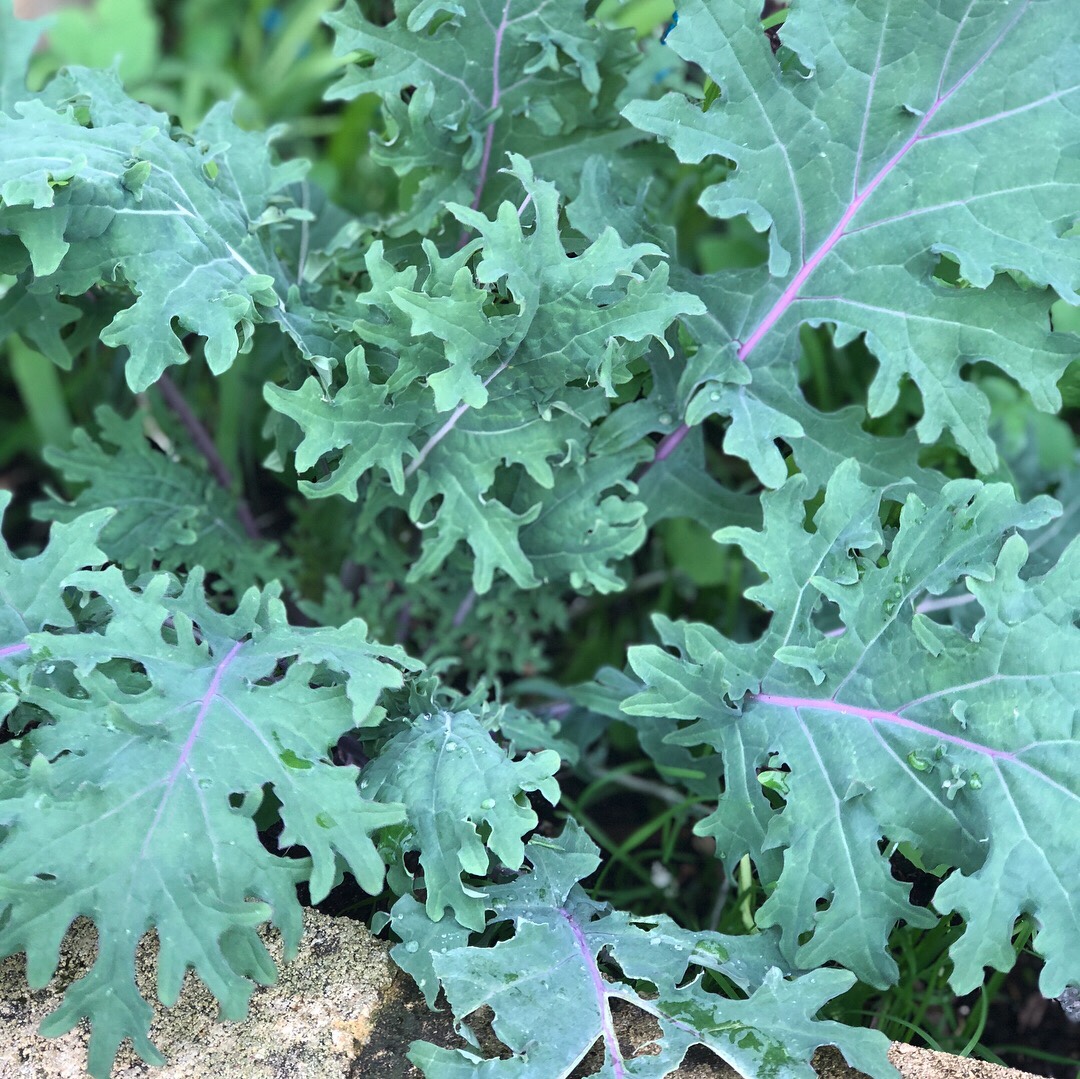
Kale: Use any variety you have! I often mix curly and Tuscan kale for colour and texture.
Fennel fronds: Optional but adds a soft, aniseed freshness.
Edible flowers: Calendula, viola, nasturtium, or blue cornflower all work beautifully for a colourful finish.
Easy Swaps
Swap chickpeas for white beans or lentils if you’re using what you’ve got on hand.
Add a little cumin, za’atar, or preserved lemon for extra flavour.
If you like heat, add fresh chilli on top!
Loaded Kale Hummus
Ingredients
Hummus
2 cups chopped Kale
1½ cups cooked chickpeas, drained and rinsed (or 1 can)
⅓ cup smooth tahini
2 tablespoons olive oil
½ teaspoon sea salt
2 1/2 tablespoons fresh lemon juice, more to taste
2-3 Roasted garlic cloves
6 tablespoons water, or as needed to blend
Crispy Kale Topping
2 cups chopped Kale
1 TBSP Olive Oil
1/4 tsp Salt
1/2 tsp paprika or smokey seasoning
Edible flowers to serve*
Fennel fronds to serve
1/4 tsp chilli flakes
Instructions
Preheat oven to 180 degrees. Wash and dry off Kale.
Add two cups of chopped Kale (approx 2cm square chunks) to a mixing bowl.
Add 1 TBSP oil and massage into the Kale. Sprinkle on the 1/4 tsp salt and the paprika and stir to combine. Add to a baking tray along with the whole cloves of garlic (unpeeled lightly coat in oil).
Bake until Kale is crispy (10minutes). Check if the garlic is soft and if not remove the kale and cook the garlic for a further few minutes.
Set the crispy kale aside in a bowl.
Add all the hummus ingredients into a mixer or blender including the roasted garlic (remove the peels first). Blitz to combine. Taste and add extra salt or lemon juice if needed.
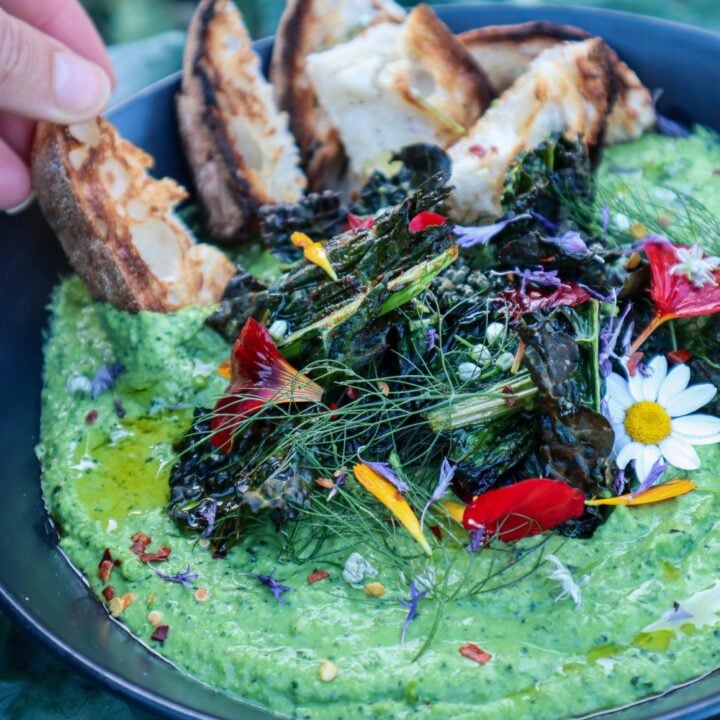
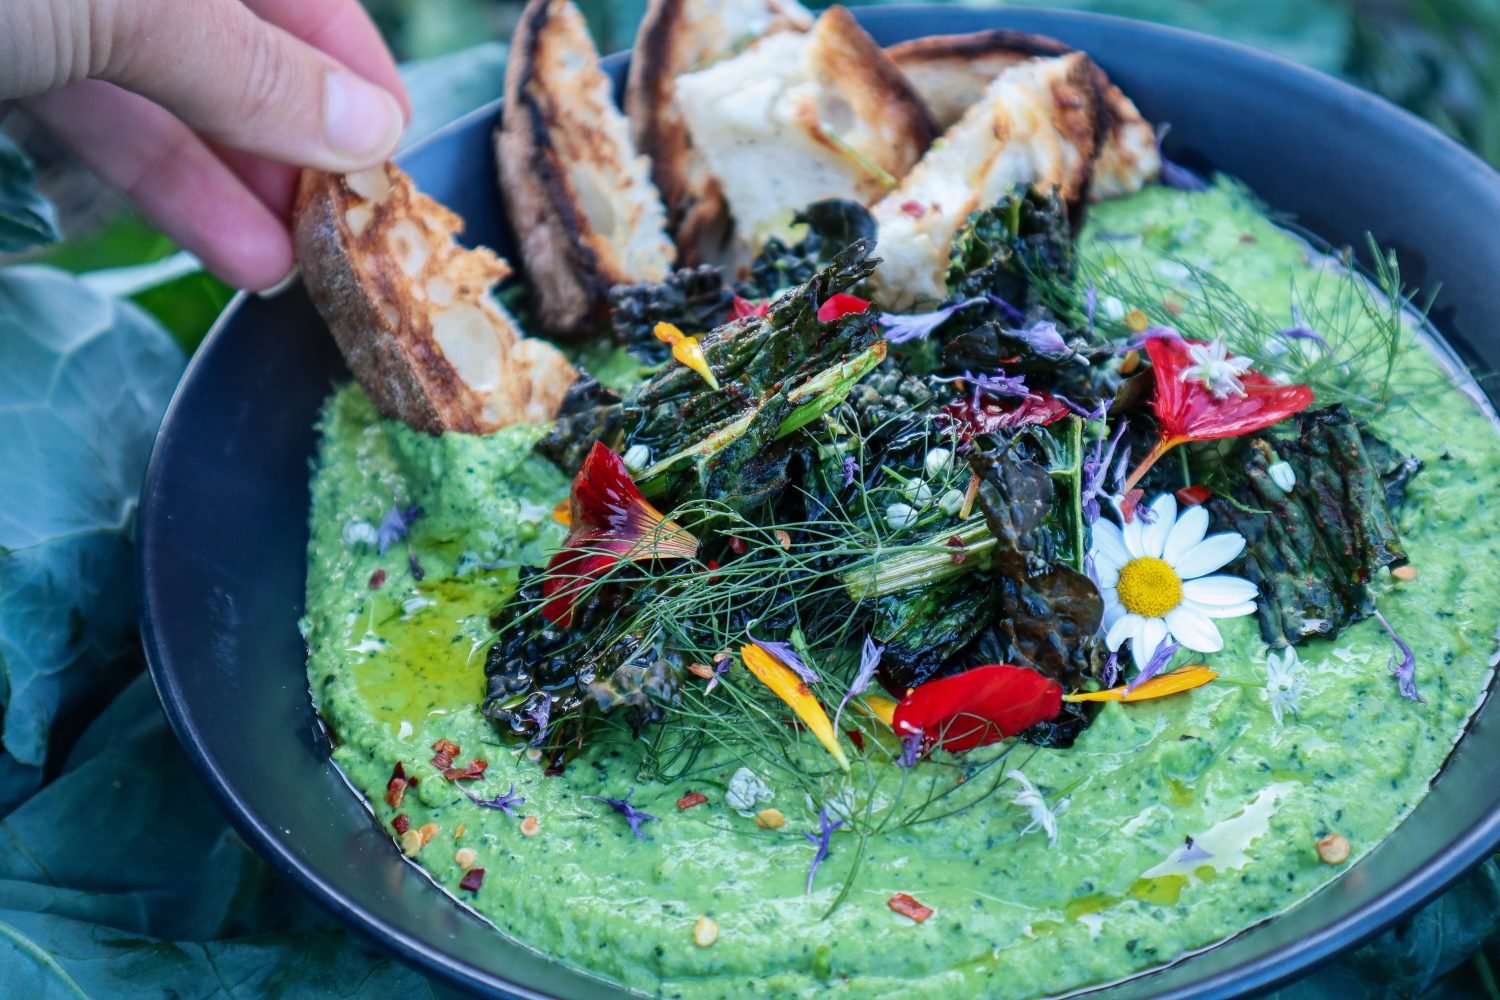
Pour the hummus into a bowl and load up the crispy Kale chips on top. Sprinkle over edible flowers and optional chilli flakes and serve with warm toasted bread.
Notes
Edible flowers I used are: Onion flowers, pansies, calendula, cornflower, chrysanthemum, and nasturtium.
Toasted nuts and seeds would also be delicious additions.
Drizzle a little extra olive oil to serve.
Storing Kale Hummus
This hummus keeps in the fridge for up to 5 days in an airtight container. The crispy kale topping is best enjoyed fresh, but you can make a fresh batch quickly if needed. You can also freeze the base hummus (without toppings) for up to 3 months, perfect for quick snacks or lunch prep.
Garden to Plate
If your kale is getting ahead of you this season, blanch and freeze chopped kale in small handfuls so you’re ready to make this hummus (or green smoothies, soups, etc.) anytime. You can also substitute other leafy greens like silverbeet, beet greens, or parsley if you’re harvesting those instead.
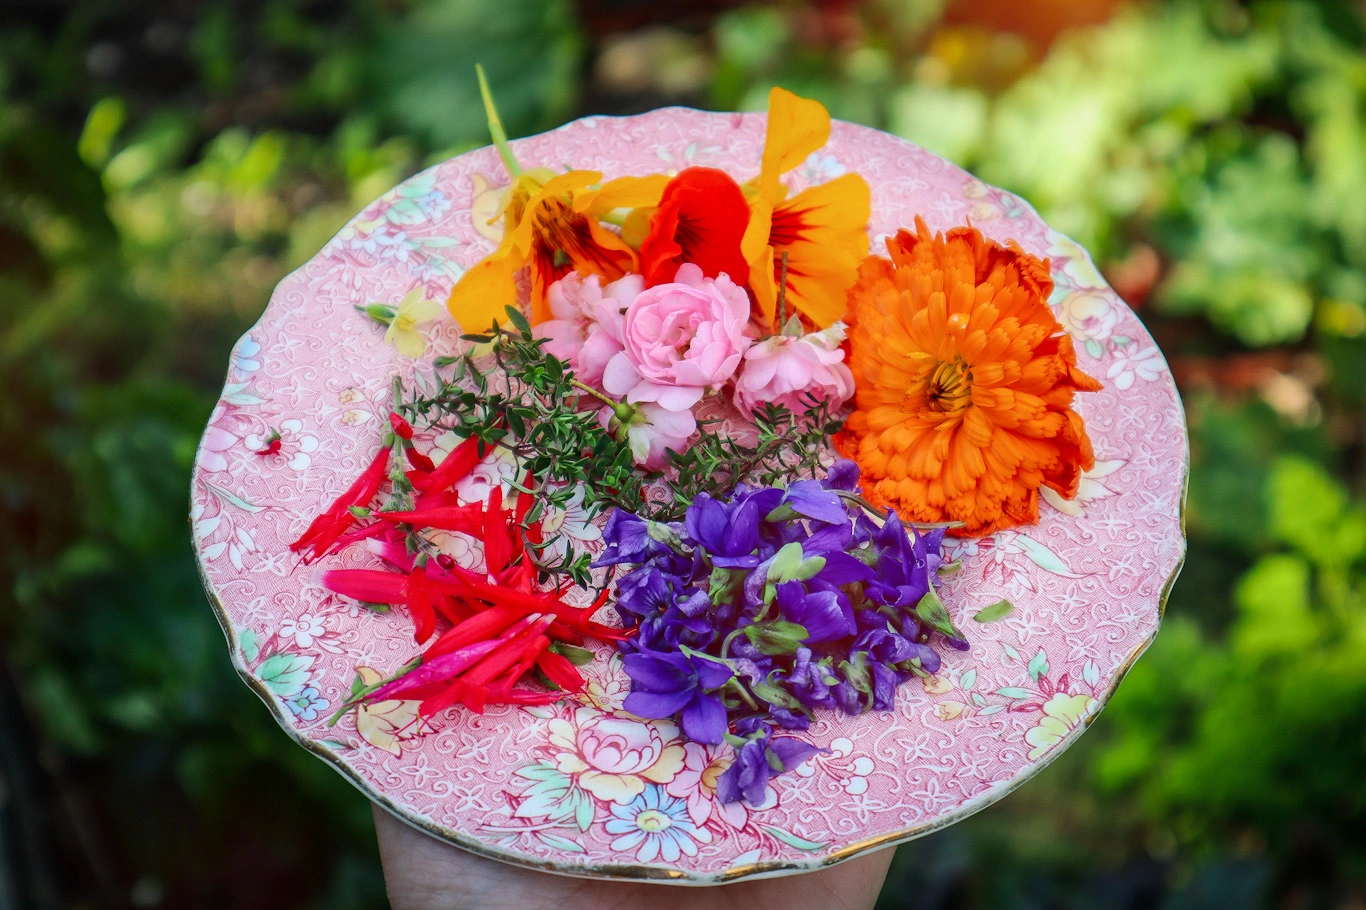
Beautiful and delicious floral shortbread with subtle flavours of orange and thyme. This basic shortbread recipe can easily be adjusted to add seasonal edible flowers and herbs from the garden. I created this recipe when I was home (New Zealand) in my mum’s garden. Although she has very limited baking equipment….she made up for it with her inspiring gardens and the perfect eclectic set of vintage floral tea cups and saucers. I hope you also find some inspiration. The perfect treat to spoil your friends and celebrate spring with a tea or coffee in the garden.
Orange and Thyme Botanical Shortbread
Prep Time: 20 minutes
Cook Time: 20 minutes
Additional Time: 1 hour
Total Time: 1 hour40 minutes
Fresh, subtle flavours infused in soft melting biscuits. These botanical shortbread biscuits can be made using seasonal edible flowers and herbs.
Ingredients
250gram butter
1 cup icing sugar
3 cups flour
2 tbsp orange juice
2 tbsp ( 1 orange) zest
1 tsp chopped fresh thyme
1 /2 cup edible flowers
Instructions
Beat sugar and butter until very pale yellow/white and creamy.
Grate the zest of one large orange and add to the mix along with 2 TBSP of juice.
Mix through the flour to make a soft dough.
Wrap or cover the bowl and refrigerate for at least 1 hour.
Preheat the oven to 140 degrees. Lightly dust a baking tray with flour.
Remove the dough and lightly knead to bring it together.
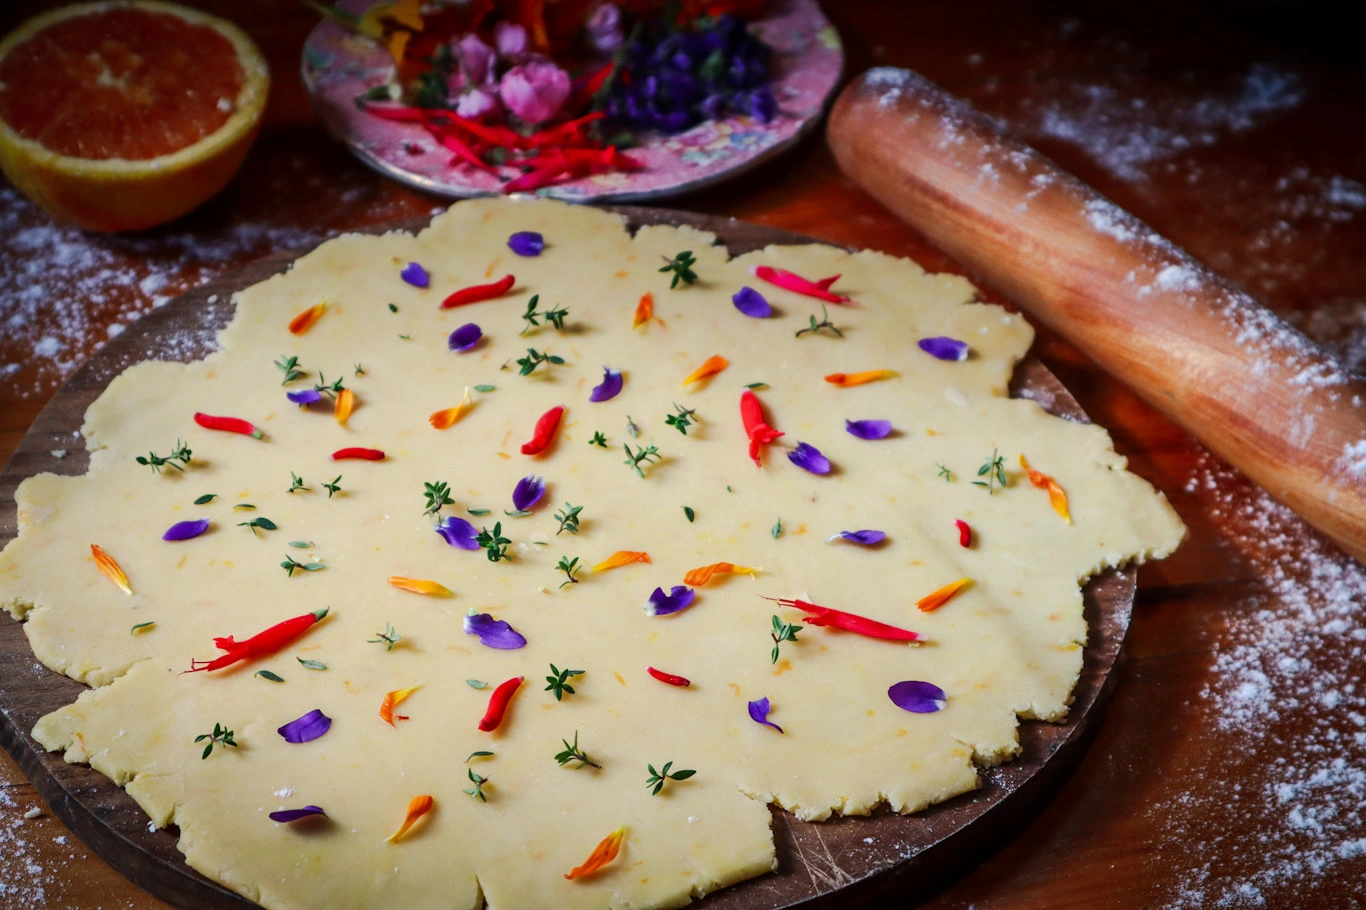
Roll out the dough on a lightly floured surface to approximately 1 cm thick (easier to manage using 1/2 the dough at a time)
Sprinkle over edible flower petals and fresh thyme leaves (removed from the stalk).
Gently roll over the flowers. Some may not stick, so just lightly press them into place. Cut out shapes using a cookie cutter and place them onto the baking tray.
Merge the leftover edges and re-roll out, and continue to cut shapes. The second roll will incorporate the flowers into the dough, so you may want to add extras on top.
Bake for 15-20mins or until very slightly starting to go golden. You want to keep them pale so they don't become too dry and crumbly. Remove and allow to cool on a wire rack.
Notes
Edible flowers I used: Pineapple Sage (red flowers), Calendula, Rose, Sweet Violet, and Nasturtium.
Use seasonal edible flowers and herbs: other options to try are Lemon and Lavender, Lemon and Rosemary, or Mint.
Calendula-infused salts or sugars make perfect gifts from the garden. It is a great way to preserve calendula to use throughout the year. Infused sugars can be great for finishing cakes, desserts, cookies, cocktails, or other sweet treats. There are two easy ways to make infused salt or sugar:
Mix dried herbs and flowers with Salt or Sugar and place in a jar.
Blend equal parts (1:1) of fresh herbs or flowers with Salt or Sugar and lay flat on a tray and allow to dry completely in a dehydrator or oven at 40 degrees celsius. Once the herbs are dry you can loosen the mix back up and place in a jar.
Note: blended sugar will turn to fine powdered sugar, similar to icing sugar. If you want more of a granular salt or sugar just blend a small amount with the herbs and mix the rest through at the end.
Calendula and Lemon Sugar
Ingredients
Zest of 1 lemon
1 cup Raw Sugar
6-8 fresh Calendula Flowers
Instructions
Zest Lemon using a fine grater.
Remove petals from the fresh calendula flowers and add to a bowl with the sugar and lemon zest.
Lightly blitz in a mixer or blender.
Spread on a tray to dry. Use a dehydrator at 40degrees celsius or the oven for 4-5 hours or until lemon zest and flowers are completely dry.
Place in an air-tight jar to store.
Notes
To make an infused salt simply swap the sugar with salt.