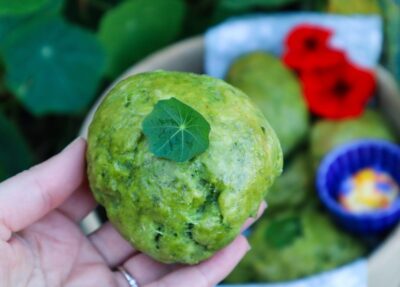
Focaccia bread is so easy to make and I use a basic bread recipe that I also use for pizza bases. With heaps of basil still in my garden, I thought I would make some delicious herb focaccia. You can use any herbs and greens you have in your garden for this Focaccia Bread recipe and get creative with the topping design!
Bread Ingredients – makes 2 focaccia
1 tsp Sugar
2 1/4 tsp Active Dried Yeast
4 cups Flour
1 1/2 cups lukewarm water
1 tsp salt
1 TBS olive Oil
Topping ingredients
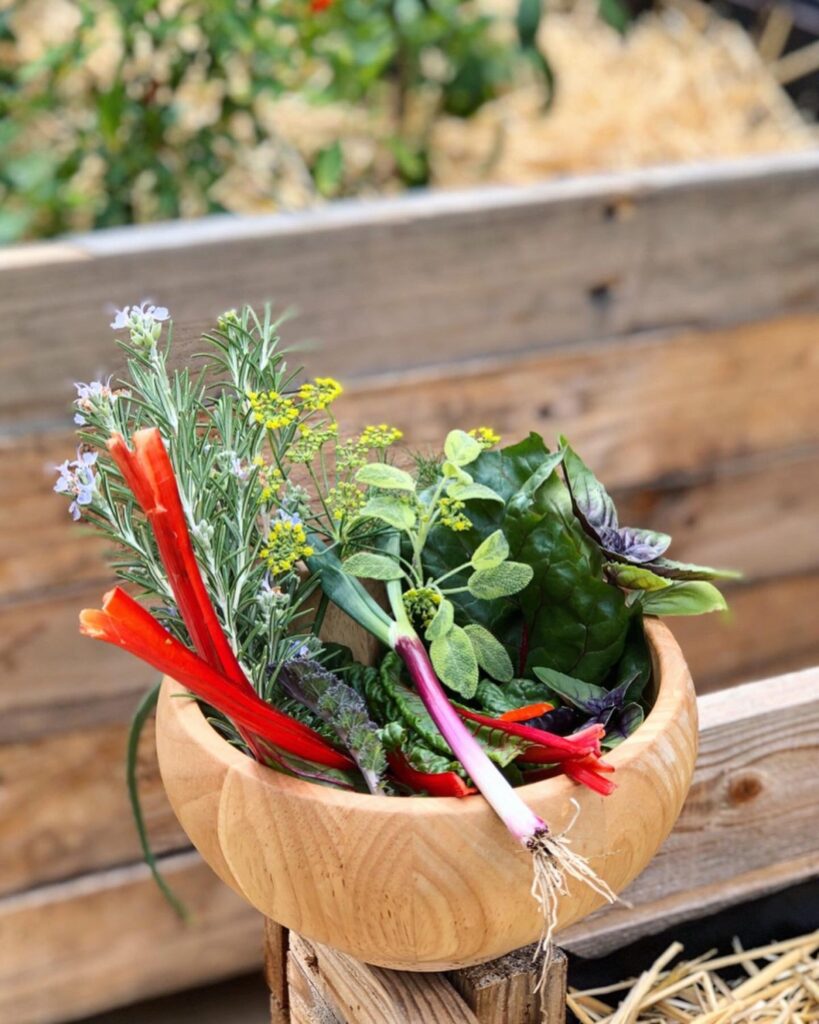
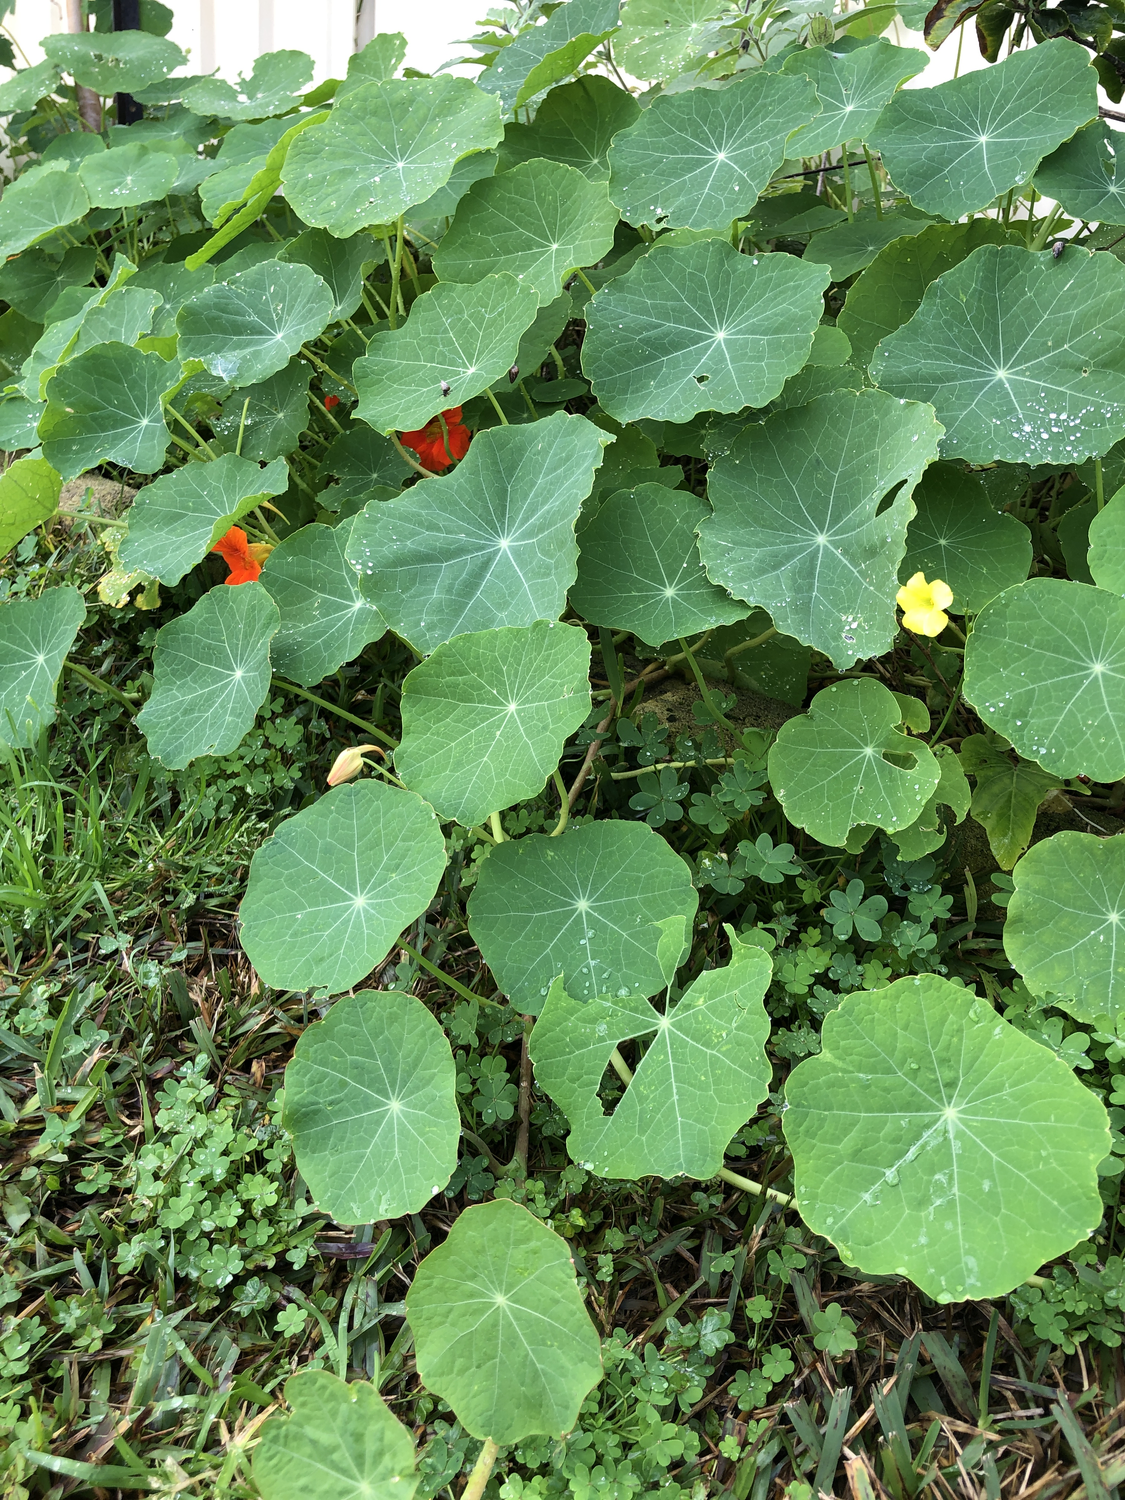
2 cups of herbs ( I used 70% basil, chives, sage, dill, nasturtium leaves)
4 Chillis
4 Cloves Garlic
1/2 tsp rock salt
2-3 TBS Olive Oil
1 small Red Onion
1 small Red Bunching Onion or spring onion
Baby Rainbow Chard
Dill flowers
Rosemary
Method
To make the bread combine water, sugar and yeast in a jug or bowl. Whisk to mix and set aside for 10mins.
In a large bowl mix flour, salt and Olive oil and then add yeast mix. Stir and form a dough. Add extra flour or water if needed.
Cover and leave somewhere warm for 1-2 hours to rise.
Whilst waiting for the dough start making your herb mix. Finely chop garlic, herbs and chilli (remove seeds if you don’t like too much heat and place in a pestle and mortar. Add rock salt and 1 TBSP Olive oil. Grind to a paste. If you don’t have a pestle and mortar just chop finely and crush in a bowl using the end of a rolling pin or similar.
Add the remaining 2 TBS of oil and stir to combine.
Finely slice rings of red onion. I use the thin fitting on my mandoline. Place in a bowl and add your baby greens, then drizzle with oil.
Cut your spring onion or bunching onion down the middle lengthways.
Once the dough has doubled in size, place on a floured bench and split in half. Roll each half out to form your focaccia. Place on a greased oven tray.
Using the end of a chopstick or teaspoon handle, make small indents into the dough so that the flavour can get right in. Brush on your oily herb mix and then place on your extra toppings as desired. Red onion, spring onion, rosemary, extra herbs or chilli, baby greens.
Add an extra drizzle of olive oil and cover with a tea towel. Let them rise again somewhere warm for about 10mins.
Heat oven to 170degrees celsius and cook for 25mins or until slightly golden.
Top with fresh herbs and serve. Delicious by themselves but amazing with chutney. I had extra herb oil left so I added more herbs/ chilli and made a green curry to eat with my bread and it was so good together!!
Other topping suggestions: Feta, olives, cheese, sundried tomatoes, caramelised onion… the options are endless for Focaccia Bread toppings!
Get creative and make your Focaccia bread your own piece of art. Be sure to tag me so I can see your amazing creations!
Holly 🌱
MY GARDENING ESSENTIALS // Fertiliser spray gun: https://bit.ly/366nL1t Retractable Hose: https://bit.ly/2TSC0Bo More gardening tools: https://bit.ly/32IQmbD
DISCLAIMER: Links included in this description might be affiliate links. If you purchase a product or service with the links that I provide I may receive a small commission. There is no additional charge to you! Thank you for supporting my page so I can continue to provide you with free content!
There is no better time to start growing your own food than NOW. Creating your own food security and using your time to help create a greener world is win-win. I have always had the dream of growing my own food and living a more sustainable lifestyle and it is something that I have been continually building and working towards for years. I don’t want to be 100% self-sufficient because there are just some things I either won’t be able to grow or choose not to grow. But there are plenty of ways to supplement my homegrown food supply such as trading, swapping, and local farmers markets. I have put together (in no particular order) 18 simple ways you can start living a more self-sufficient lifestyle today.
1. Start a Herb Garden
No matter whether you have a big garden or live in a tiny apartment, growing herbs can be easy and takes up very little space. Grow in small pots, recycled containers, hanging planter,s or windowsill planters. If you like to use herbs it is a great first step towards self-sufficiency. And no, that does not mean buying those packed herb pots from the supermarket…. they are often grown hydroponically and then placed in the soil so they rarely survive long and don’t handle being planted out into real life. Get a packet of seeds and try growing your own 🙂
2. Start a Vegetable Patch
The best way to learn how to grow vegetables is to simply start trying! Start small with either a planter box or convert one small patch of your garden or even driveway into an edible vegetable patch. You can also start by simply integrating edibles into your established garden. Once you start growing some things you can start expanding bit by bit. Goodbye grass 🙂
3. Plant Fruit Trees
I love fruit trees because although they take a while to get going, once they do, they are abundant and don’t require as much care as vegetables. You can plant them in either a large pot or directly into the garden. I would recommend going to a local specialist fruit tree nursery so they can help you choose the best fruit tree for your location. Also, make sure you get something with fruit you actually enjoy! With the abundant produce you can then preserve, swap, and trade with others!
4. Grow Base Crops
I couldn’t think what else to call them but growing crops that will feed you for longer and create a good base to fill your pantry. Crops such as Pumpkins, Potatoes, Onions, Garlic, and Sweet potatoes will provide decent amounts of food that you can store and use throughout the year! A great base vegetable to feed a family.
5. Grow Soil
Composting is not only great for the fertility of your soil and the secret to AMAZING vegetables but also stops waste from going to landfill. There are a whole bunch of ways to do this depending on your living situation. You can make your own compost bin out of recycled wood, find a second-hand tumbler online or purchase one. You can also simply dig a hole in the garden and bury it (be careful of attracting pests though). There are also some new ways for people with no land to connect with others that do and give them your compost scraps. Either community gardens, local Facebook groups or now in Australia there is even an app! Sharewaste
6. Save Seeds
This is just as important as growing food and will be a huge step towards your self-sufficient journey. Saving seeds helps you maintain food security knowing that you have more healthy seeds to grow next year. Save seeds from your healthiest plants that thrive in your garden. Keep them in a dry dark place.
7. Grow Community
Get your friends involved! Take them over a basket of homegrown food or preserves. Once they see your delicious fresh food they may also get inspired! Help them out with seeds, and cuttings and surround yourself with like-minded people. Community gardens can be a great place to learn, get involved, and even seed/ produce swap. It can be an amazing network of knowledge, especially in relation to your local climate and growing conditions. There are also some great social media forums and groups that are great for finding answers to your questions and local knowledge.
8. Shop Local
Explore your local farmer’s markets! Grab a friend and go have a browse! They are usually on a Saturday or Sunday morning and I look forward to it every week. Although I love my local farmers market (Kalamunda) every few months I like to check out other farmers markets to mix things up and find new and interesting produce. Bulk food stores have been making a come back and I am sold! Lucky for me there is a fantastic Bulk Store ( Replenish Kalamunda) right by my local farmer’s markets. So I head there straight after I have picked up some fresh veggies. They may seem daunting at first but there are always plenty of signs explaining how to do it. I also love how each product clearly states where they have come from as I try to only choose Australian products.
9. Learn to Cook from Scratch
This is a big one! Learning to cook a wide range of meals from scratch using simple ingredients is key! I mean we can all make a butter chicken right…you just get the sauce and pour it in… Ditch the sauces from the supermarket and learn to make your own. I am constantly experimenting and expanding my knowledge so I can make a wide selection of meals from the produce I grow. Try to buy vegetables that are in season and fruits and vegetables that you are planning to grow. That way you can practice and become a pro at recipes for YOUR future harvests!
10. Grow Food From Scraps
Ok, this is one of my favourites! It is so quick and easy and a lot of fun! Plus you are getting the most out of your food. Buy one get multiple free!! Cut off the ends of your farmers market vegetables such as Spring Onion, Leek, Pineapple, Sweet Potato and regrow!
11. Forage and Trade
Keep an eye out on your walks and day trips for wild or excess food. So often there are olive trees, fruit, nuts or wild apple trees going to waste. Do your research and learn how to identify plants. That way you will know what you are looking at. It is also important to be careful if things have been sprayed by the council. I would be always cautious of things such as blackberries. You may even notice a neighbours tree loaded with fruit that is going to waste on the ground. Politely ask if you can have some in exchange for some preserves or baking you make with it. They will probably be happy for it to be used!
12. Repair and Upcycle
Get the most out of your things by fixing or updating them! Even if you don’t know how you may be able to pay someone a fraction of the cost to fix it rather than buying brand new. We often are so quick to throw out and buy new, we don’t even stop to consider if it can be fixed or repurposed. My hair straighteners and been fixed multiple times by electrician friends over the past 12 years and are still working amazingly! Recovering cushions, and couches, DIY, get creative, and even find a local seamstress if you don’t have access to a sewing machine.
13. Shop Second Hand
I try my best to not buy new and it is something I am continuing to work on. Most items you want can be found on Facebook market place, Gumtree (Trademe, Craigslist, etc). You can usually pick up a bargain and keep things in the loop rather than consuming more new things. You can even post in your local community groups and borrow or buy. Especially with things like appliances as many people often have them sitting in the cupboard collecting dust…Pasta maker, I’m talking about you 🙂
14. Backyard Chickens
Chickens make an excellent addition to sustainable living. They provide eggs, eat leftover scraps, produce manure for fertilising your garden, and can they also be incorporated into an integrated pest management system to help you keep your slugs and snails at bay. Many councils will allow backyard chickens in suburbia. Although I do not have chickens …yet (Pictured above is mums ‘Chick Inn’) my council allows x6 backyard chickens on properties 600sqm -2000sqm.
15. Back to Basics
Bread/milk/butter/pizza dough. The age-old skill of baking your own bread is a fantastic skill to have! How amazing to just whip up a fresh loaf of bread or make your own pizza bread without the preservatives or plastic packaging. Milk is super easy and you can make delicious plastic, preservative-free milk whenever you want! Whether that’s oat, rice or almond milk.
16. Learn to Preserve Harvests
I am not really at a point yet where I have an abundance of produce to preserve but I have planted a lot of fruit trees…so I am starting to learn different ways to preserve things so that when I am flooded with produce (yay!) I will be able to make the most of it! Get some produce from the farmer’s markets and give it a go! Jams, chutneys, sauces, pickles, nasturtium capers and all those delicious things. They also make great gifts and can be used to swap for other produce with your friends and family and community.
17. Make your Own
Ditch the toxic chemicals and pesticides and start making your own natural cleaning and garden products. You can get a few ingredients from your local bulk stores such as white vinegar and bicarb soda and make a huge range of cleaning products. Check out my Citrus cleaner here. I also used crushed eggshells to keep slugs and snails at bay. Natural pest management
18. Learn, Read, Practice
I can’t stress how important this is! Knowledge is power. Join your local library and get a book on jam making or search YouTube for “how to prune a lemon tree”. Educating yourself and giving things a go will get you a long way on your journey to living a more self-sufficient lifestyle. Take things one a time and really try and master it before moving on. It can be overwhelming if you try to do it all at once and may lead to failure and giving up.
Small and slow solutions!
Holly 🌱
MY GARDENING ESSENTIALS // Fertiliser spray gun: https://bit.ly/366nL1t Retractable Hose: https://bit.ly/2TSC0Bo More gardening tools: https://bit.ly/32IQmbD
DISCLAIMER: Links included in this description might be affiliate links. If you purchase a product or service with the links that I provide I may receive a small commission. There is no additional charge to you! Thank you for supporting my page so I can continue to provide you with free content!
I have been wanting to make this vegetarian “pulled pork” for a while now and of course, I had to put my own Holly’s Kitchen experiment twist on it and make the dough pink! I was sent some of Vinofoods delicious Merlot BBQ sauce to try for the #vinofoodchallenge and it was AMAZING! This sauce is hand-made at the Lake House Denmark in Western Australia. They have a beautiful range of small-batch, handcrafted Sauces and Condiments.
This recipe is easy and such a fun meal to make if you are entertaining or even cooking with kids. The “vegetarian pulled pork” is so quick and easy to make with ONLY 3 ingredients and could be used on many other dishes such as burgers, wraps or tacos!
Pizza Dough Ingredients (makes 4)
1 1/2 cups Beetroot Juice (approx 4 Beetroots) – or replace with water for plain dough
4 cups Plain Flour
2 tsp Dry Active Yeast
1 tsp Sugar
1 tsp Salt
1 TBS Olive Oil
Vegetarian Pulled Pork Ingredients
1 Onion ( i used half red and half white)
1/2 Bottle Vinofood Merlot Barbecue Sauce 280g – HERE
1 can Organic Young Jackfruit (CeresOrganics)
Pizza Toppings
Tomato paste
Fresh herbs (pizza thyme, oregano)
Cheese
Tomato
Mushroom
Method
Juice the Beetroot. I used 4 medium-sized Beetroot and it worked out nearly the perfect amount. If you don’t quite have enough you could add water, it may just mute the colour a little. Set the juice aside. I also put the pulp in an airtight container and use throughout the week in smoothies, curry or anything really! #zerowaste
Place the beetroot juice in a saucepan and heat slightly so that it lukewarm. Measure into a mixing bowl to ensure you have 1 1/2 cups (add water if you are short).
Add the yeast and sugar to the beetroot juice and stir well. Cover and set aside for 10mins. This will start to froth so make sure your bowl or jug has plenty of room spare.
In a mixing bowl sift flour, add olive oil, salt and slowly mix in the beetroot juice to form a dough.
On a floured bench form the dough into a ball and sprinkle with more flour as needed until it is combined and no longer sticky. Place dough in a clean floured bowl, cover and place in a warm spot to rise for 1-2 hours.
While you wait for the dough you can prepare your vegetarian pulled pork. I used this amount to make 2 pizzas but it could stretch to 4 just depends how much topping you like. I rolled out my two extra bases and froze them for future use.
Cut the onions and brown in a pan with a little olive oil.
Rinse and drain the can of jackfruit and add to the pan once the onions have browned. Stir and cook through for a few minutes then simply add the Merlot BBQ sauce. I also added about 1/2 cup water. Stir and start to break up the jackfruit by mashing down with a spoon or spatular. It should start to break apart similar to pulled pork.
Simmer on medium heat for 5 minutes until the chunks of jackfruit are separated. Turn off, cover and set aside.
Once the dough has risen. Place on a floured bench and cut into 4 even size pieces. Roll out each base using flour as needed to stop it sticking.
Preheat oven to 200degrees Celcius.
Place your pizzas on an oven tray (lightly dust with flour) and add your toppings. Start with a few teaspoons of Tomato paste, herbs then add BBQ jackfruit, tomato, mushroom and top with cheese.
Place in the oven and cook until dough is crispy – approx 10-15mins
To serve I added some edible flowers…I would also suggest an extra drizzle of BBQ sauce because it is so good!
MY GARDENING ESSENTIALS // Fertiliser spray gun: https://bit.ly/366nL1t Retractable Hose: https://bit.ly/2TSC0Bo More gardening tools: https://bit.ly/32IQmbD
DISCLAIMER: Links included in this description might be affiliate links. If you purchase a product or service with the links that I provide I may receive a small commission. There is no additional charge to you! Thank you for supporting my page so I can continue to provide you with free content!
DISCLAIMER: Links included on this page might be affiliate links. If you purchase a product or service with the links that I provide I may receive a small commission. There is no additional charge to you! Thank you for supporting my channel so I can continue to provide you with free content each week.
Hello everyone! Crazy that we are now already into February! I set a goal this year to start recording the amount of food I am growing from the garden and just keep a visual record for fun! I will do a monthly round-up and let you know how much I have grown and share some of the food I have made with those harvests. Keep reading to see just how much I harvested in January!
Front Garden
Another one of my goals is to grow a years supply of pumpkin which I estimate to be about 1 large or 2 small pumpkins a month. I created a new garden bed out the front in a car space beside the carport. Pumpkins need a lot of space and I just had so much unused space out the front so it was a great solution.
I started off strong with my Lakota pumpkins in the ground around October. I harvested these in January and the vines have pretty much died off now. I have trimmed them back and I’m hoping they will go another round. I also had some Butternut start growing from the compost I put in the bed so that was a welcomed bonus! In some of the empty spaces, I have now planted more pumpkin such as the Kent which I’m hoping to get some decent sized pumpkins in the coming months.
The Lakota Pumpkin is apparently kind of like squash and you can eat the skin.
Backyard Garden
Out the back, we built two new Pallet Planters bringing the total to x4 large and 1 small. The larger ones are roughly about 1.2m x 1.2m square and the smaller one 0.5m x 0.5m. I created a video of the process as i often get questions on how we make them.
Pallet 1 – I have Lebanese cucumbers growing and I have been picking them daily in January! This is my first successful attempt at cucumbers because they usually don’t last through a 40degree day. This time I think I had more success because they were in the pallet planter so had a decent amount of healthy soil and I could bring them undercover on hot days.
Pallet 2 – Tomatoes and Basil. Classic companion planting and the bees are loving the basil flowers. I also had a few compost volunteers (rockmelon, watermelon, pumpkin) which i am leaving now that the Tomatoes have pretty much finished.
Pallet 3 – Small pallet has a white apple cucumber growing. I haven’t got anything from it yet but hopefully, this will continue my cucumber harvests through Feb/March.
Pallet 4 – Newly planted with x4 chilli plants, Armenian Cucumbers and some rainbow radishes.
Pallet 5 – I planted some corn seeds in this new planter but our dog kept sleeping in it so I had very little strike rate. I ended up getting some corn seedling on sale at the farmers markets for 50c so I have now planted those and he has luckily stopped using it a bed haha.
Back fence garden – Things are chugging along in the back fence garden. The hot days and sandy soil mean the smaller plants slow down considerably. The fruit trees are all doing ok though and I have a few feijoas on the way!!!! These are my pride and joy and are in their 4th year. Last year I got two baby fruit so I’m hoping for some decent harvests in the coming years. Pretty much a currency over here among the Kiwis 😂
My new carport garden has well outperformed the back but that was all the pumpkins. x8 Pumpkins so far. January I also launched my YouTube channel! I have experienced a lot of technical difficulties being a complete novice when it comes to video and editing but I will get the content rolling in shortly so make sure you subscribe!
Holly 🌱
MY GARDENING ESSENTIALS // Fertiliser spray gun: https://bit.ly/366nL1t Retractable Hose: https://bit.ly/2TSC0Bo More gardening tools: https://bit.ly/32IQmbD
DISCLAIMER: Links included in this description might be affiliate links. If you purchase a product or service with the links that I provide I may receive a small commission. There is no additional charge to you! Thank you for supporting my page so I can continue to provide you with free content!
When I first started gardening here I remember googling ” how to keep plants alive in a heatwave?” 😅 Welcome to Perth summer gardening! I have always struggled with how hot it gets here in Perth in summer. After 7 years here, the 40degree days don’t get any easier! We have a large amount of thermal mass at our house with concrete and paved areas so it can get so hot in my garden! One of the main reasons I decided to make pallet planters on wheels was to be able to grow more food during the hot summer months by being able to have them undercover on hot days. Watch how we made them here.
How to keep plants alive in a heatwave
If you are experiencing a heatwave or have days of hot weather ahead of you, here are a few tips I use to try and get my plants through!
🌱 WATER | Give a good deep water early in the morning. This will allow time for the moisture to reach the roots before it evaporates.
🌱 SHADE | If your plants are in containers move them undercover or to a shady area of your garden. Otherwise, try and rig up some temporary shade using shade cloth or even umbrellas to keep the direct sun off your plants during the hottest part of the day.
🌱 PROTECT THE SOIL | Ensure you have a good layer of mulch or ground cover over your entire garden. This will protect the soil from being exposed to direct sun and reduce the amount of water loss through evaporation.
🌱 BUILD SOIL | This is something that should be continually worked on by composting and adding more fibre and leaf matter to your soil. Sandy soils like we have here in Perth allow all the water to drain away and can become severely water-resistant. But by consistently mulching, composting and adding green matter, you will not only grow strong, healthy plants but also protect your plants from future dry spells. Healthy soil is key!
🌱 REPLENISH | As the sun goes down and the temperatures start to drop again, give your plants another well-earnt drink. This should help their leaves perk back up again.
🌱 SAVE SEEDS | If you notice a certain plant seems to survive better than others in hot weather, make sure you save the seeds at the end of the season. That way you can futureproof your garden by growing strong plants that you know will grow well in your exact climate.
My favourite watering tools are:
Retractable Hose with 7 spray nozzle and water flow adjuster: Control exactly how much flow you want to each plant with an easy retractable hose system. CLICK HERE for more info.
Deep root waterer and soil breaker: Helps get water directly to the roots without any runoff or loss of water from evaporation. CLICK HERE for more info.
Weeper hose works great for drip-feeding water and allowing the plants to absorb more. CLICK HERE for more info.
Happy Gardening!
Holly 🌱
MY GARDENING ESSENTIALS // Fertiliser spray gun: https://bit.ly/366nL1t Retractable Hose: https://bit.ly/2TSC0Bo More gardening tools: https://bit.ly/32IQmbD
DISCLAIMER: Links included in this description might be affiliate links. If you purchase a product or service with the links that I provide I may receive a small commission. There is no additional charge to you! Thank you for supporting my page so I can continue to provide you with free content!
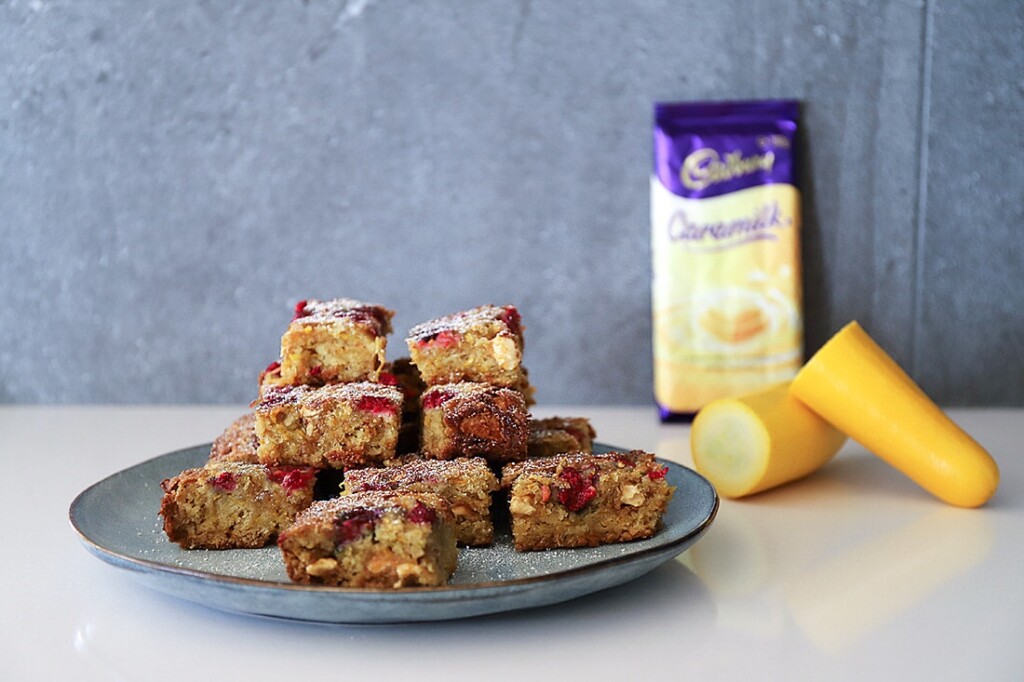
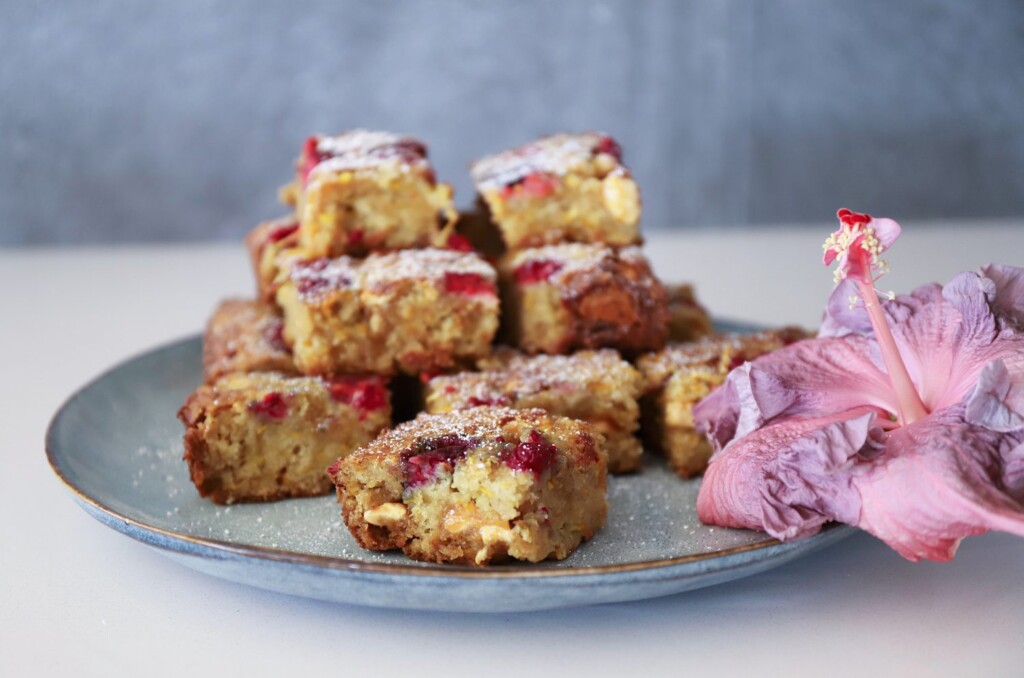
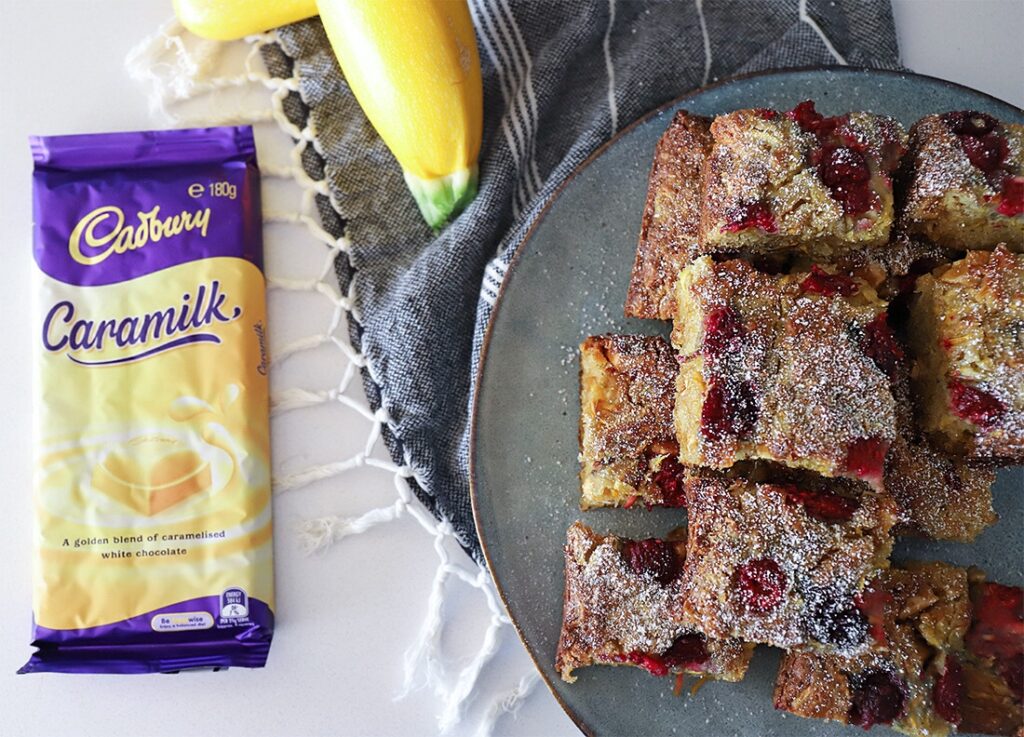
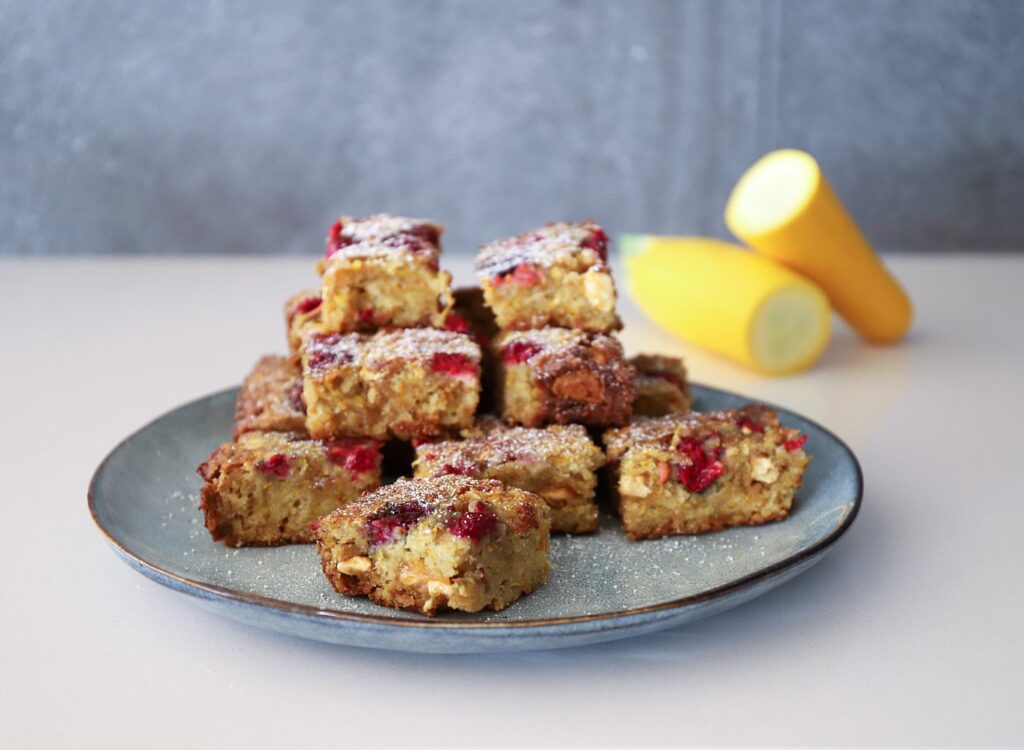
Zucchini season is in full swing and I am trying to make as many different recipes as I can to learn how to get the most out of harvests. These White Chocolate and Raspberry Zucchini Brownies are my new favourite sweet treats!! You can’t even taste the Zucchini.
My sister-in-law sent me a bunch of Caramilk blocks and I have been saving them in the freezer. I decided to use some to test out a batch of white chocolate brownies using my Golden Zucchini. WOW. They turned out way better than I could ever have imagined! Even have a slight banana bread vibe to them. I did try to film the recipe but my memory card ran out halfway through which was a total fail! I will get there!
Anyway, these are super easy and definitely a sweet treat! The raspberry is perfect to help balance out the sweetness.
White Chocolate and Raspberry Zucchini Brownies
Ingredients:
2 cups grated Zucchini – mine worked out about 2 medium-sized Zucchini
1/2 cup vegetable oil
1/2 cup brown sugar
1/2 cup raw sugar
2 teaspoons vanilla extract
1 1/2 teaspoons baking soda
2 cups organic plain flour
3/4 cup raspberries
1 block/180g White Chocolate (replace with which ever chocolate you like)
1 teaspoon salt
Method
Preheat oven to bake at 180degrees Celcius. Grease baking pan (roughly 28cm x20cm).
In a bowl mix sugar, flour and oil until combined.
Grate Zucchini and add to the bowl along with baking soda and vanilla extract.
Sprinkle salt over and stir until it becomes a moist batter. The mix will start off quite dry but keep mixing and the Zucchini will release its moisture to form a batter.
Once it has started to become a sticky batter. Chop up your chocolate into small chunks and mix through the batter.
Add half the raspberries and stir through gently.
Pour the mix into the greased pan and press in the remaining Raspberries.
Bake for 20-30 minutes or until a skewer comes out clean.
Cool on a wire rack. Cut into squares and enjoy!
Try quizzing your friends to see if they can pick the core ingredient.
Enjoy!
Holly 🌱
MY GARDENING ESSENTIALS // Fertiliser spray gun: https://bit.ly/366nL1t Retractable Hose: https://bit.ly/2TSC0Bo More gardening tools: https://bit.ly/32IQmbD
DISCLAIMER: Links included in this description might be affiliate links. If you purchase a product or service with the links that I provide I may receive a small commission. There is no additional charge to you! Thank you for supporting my page so I can continue to provide you with free content!
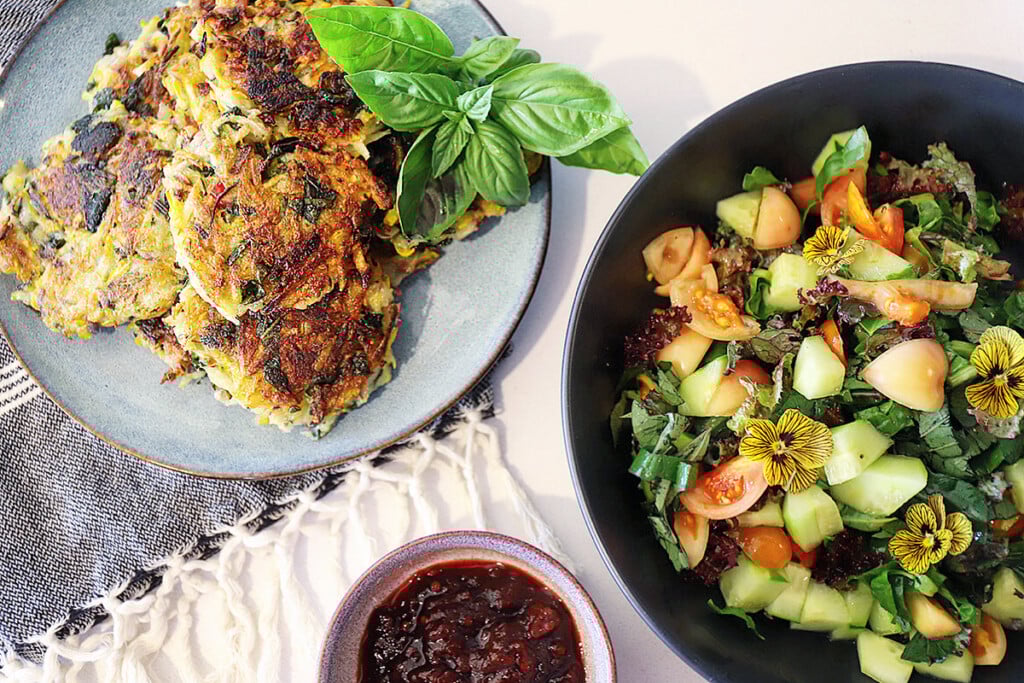
Yay, its summertime and Zucchini Fritters served with homemade chutney and a fresh garden salad is the perfect summer meal. My Zucchini harvests are in full swing and I will be making the most of the abundance by trialling out as many new Zucchini recipes as I can. When I first started growing Zucchini the only way I knew how to cook with them was to throw them in a stirfry, but I have since learnt there are so many easy and delicious ways to use them. I look forward to sharing them all with you! These were quick and easy to make and taste so good! That is pretty much the main criteria for anything I cook!
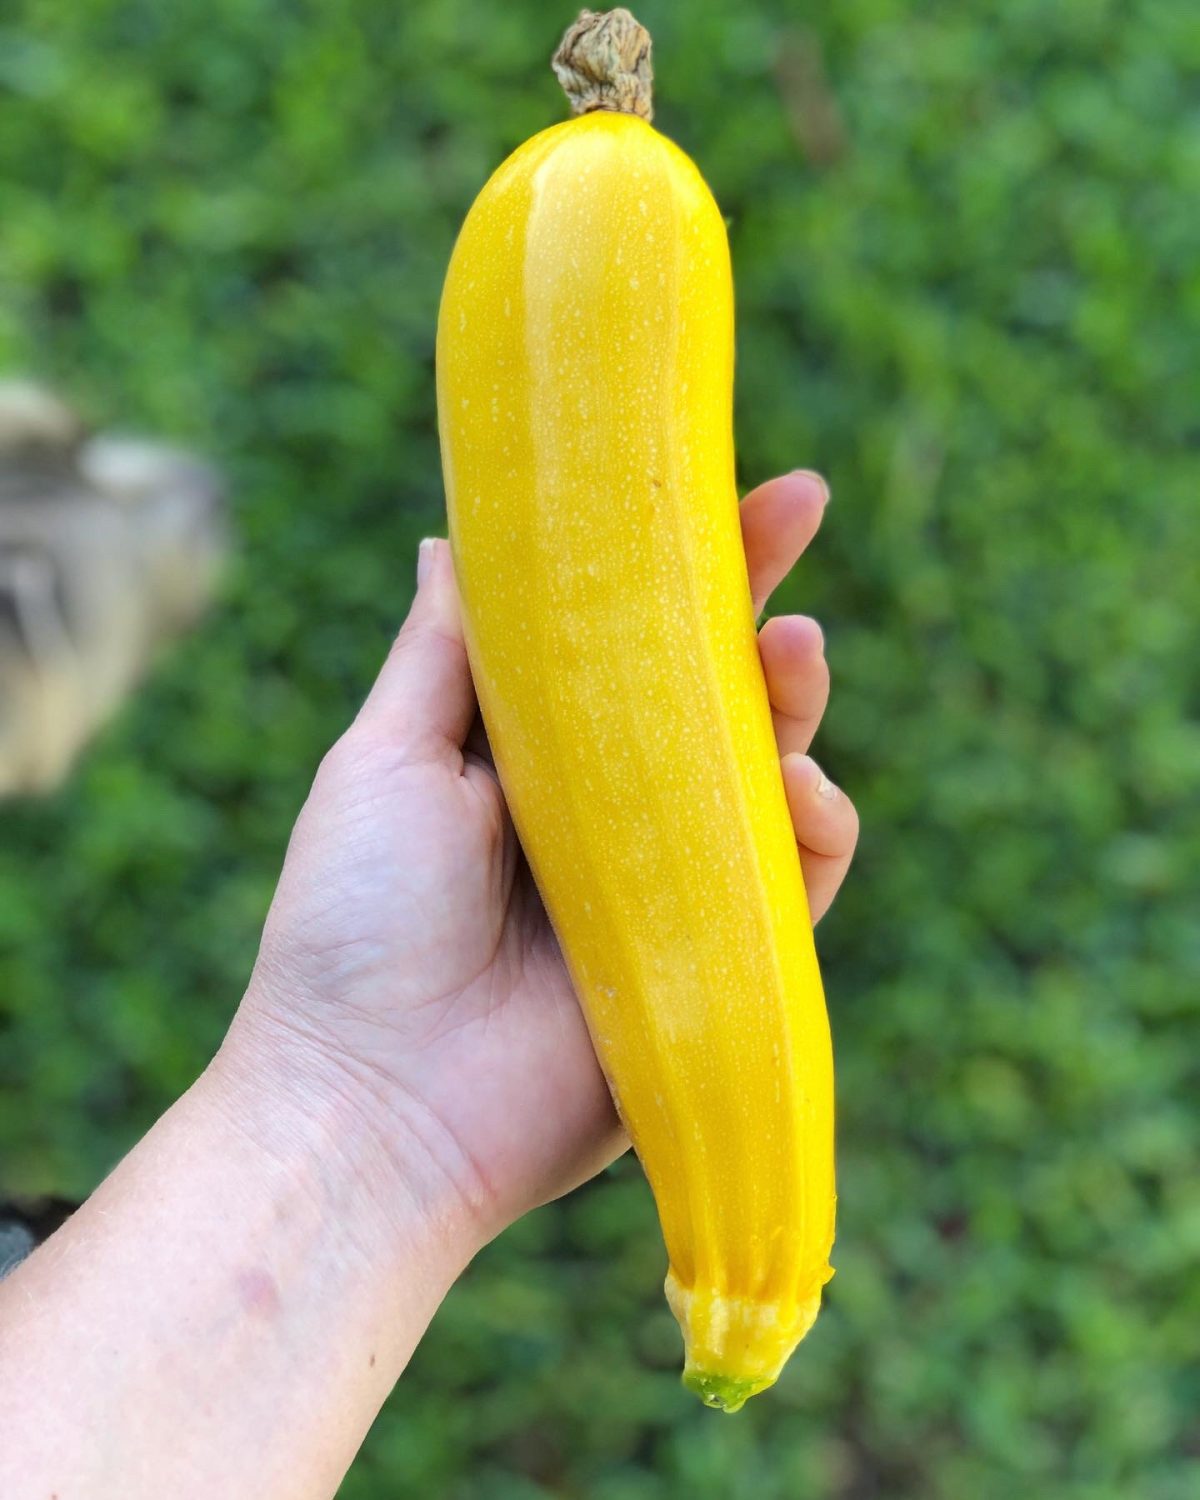
For these fritters, I used Golden Zucchini as that is what I had just picked but you can use any variety. I have found the Golden Zucchini much like the regular black variety but you do have to harvest them earlier as the seeds inside start to develop quickly.
Ingredients
3 small-medium zucchini
1/2 cup flour
1 Egg (sometimes I leave this out)
1/4 finely sliced red onion (could use shallots or spring onion)
1/2 cup chopped parsley and chives
Salt and Pepper
1 small fresh chilli finely sliced
Note: you could add 1/2 cup of cheese to really up the flavour such as parmesan, cheddar or fetta.
How to Make them:
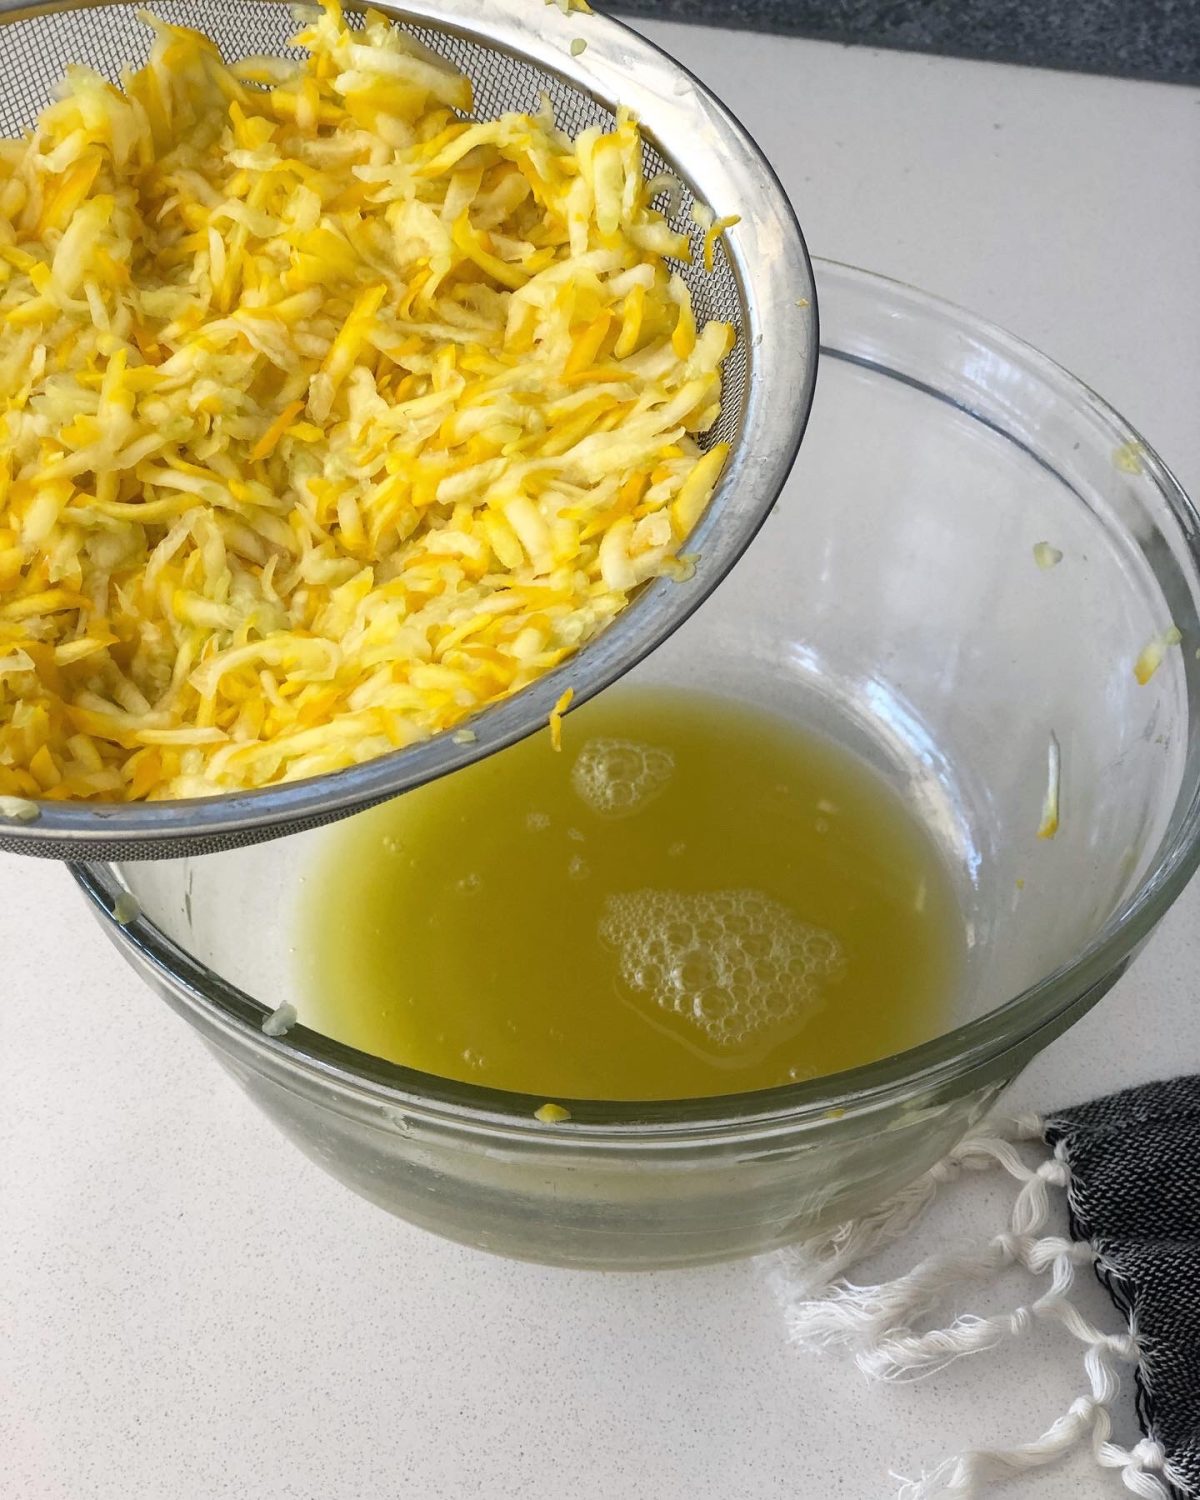
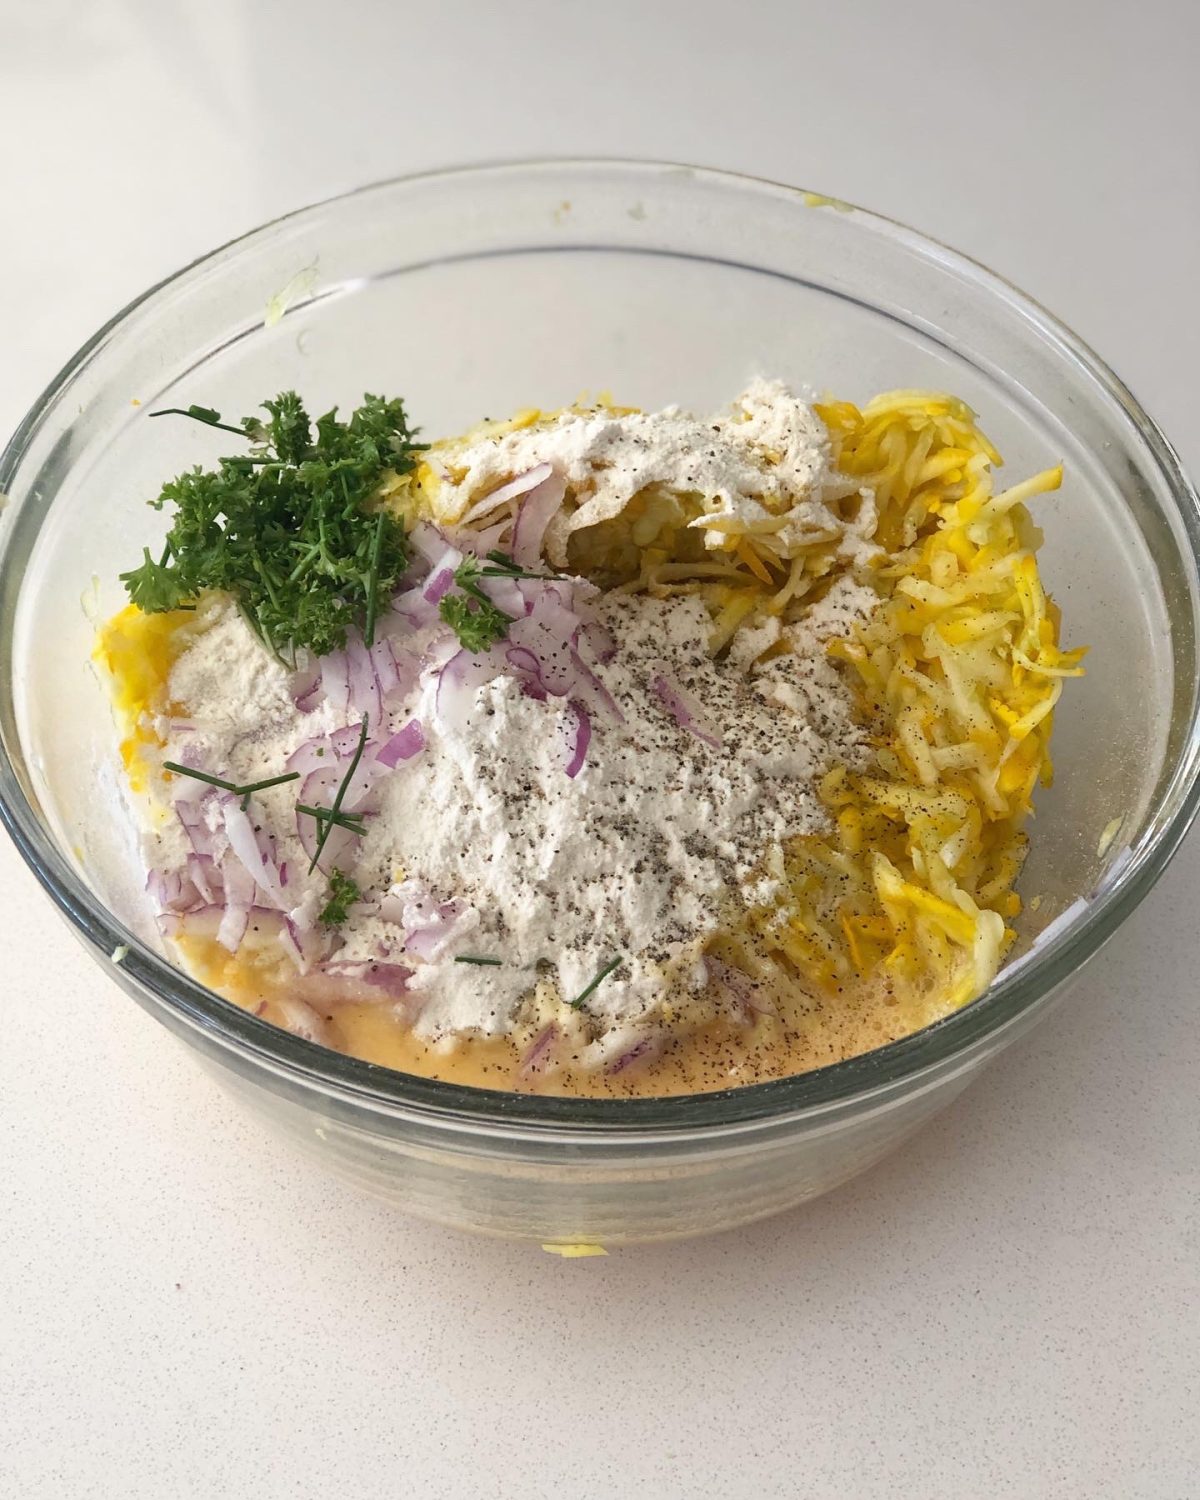
Rinse your zucchini and grate them into a bowl. Grind with a good amount of rock salt (roughly 5-6 grinds) to allow the moisture to extract. Stir through, cover and set aside for 10minutes.
Finely chop your herbs, onion and chilli.
After 10 minutes or so place your grated zucchini in a sieve and squeeze out all the extra moisture.
Then in a clean bowl mix all your ingredients together and season well with salt and pepper.
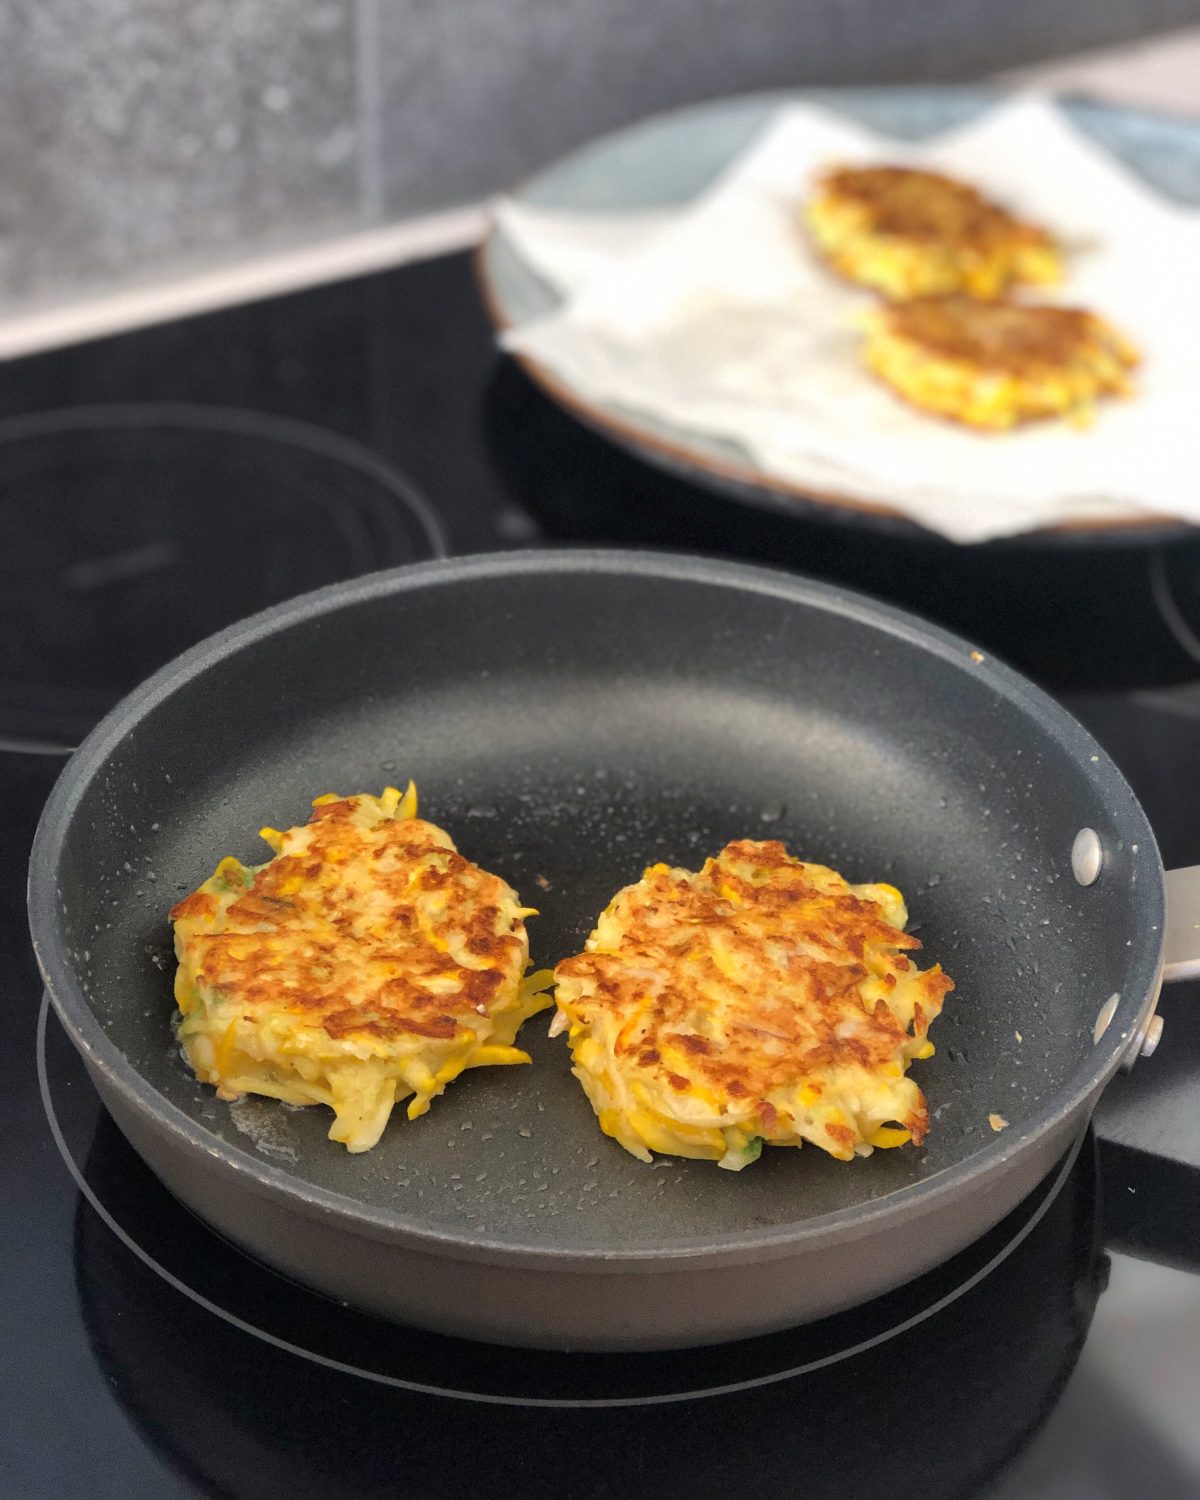
Heat a pan on medium-high heat with oil and spoon your mixture in and flatten it down a bit. Cook 3-4 minutes on each side or until crispy brown.
Makes 10-12 Zucchini Fritters
Serving suggestions:
You could serve your Zucchini Fritters with a dollop of Greek yoghurt or sour cream, your favourite chutney and a fresh green garden salad.
What are your favourite ways to use Zucchini?
Holly 🌱
MY GARDENING ESSENTIALS // Fertiliser spray gun: https://bit.ly/366nL1t Retractable Hose: https://bit.ly/2TSC0Bo More gardening tools: https://bit.ly/32IQmbD
DISCLAIMER: Links included in this description might be affiliate links. If you purchase a product or service with the links that I provide I may receive a small commission. There is no additional charge to you! Thank you for supporting my page so I can continue to provide you with free content!
Are you growing Zucchini, but the fruit seems to shrivel and die before being ready? If so, you may have a pollination issue. Hand-pollinating Zucchini is super easy to do once you know how. Today, I will share 4 easy steps with images so you can maximize your Zucchini harvests! This also works with Pumpkins, Melons, and Cucumbers.
Step 1: Identify a Male and Female Flower
Firstly, to hand-pollinate zucchini, you need to know how to identify the male and female flowers. The best time to do this is early in the morning when the flowers are open.
Female Flower
The female zucchini flower has a small fruit at the base.The centre stigma of the female flower has multiple parts to form a circular shape.
Male Flower
The male flower has just a plain stem and flower with the centre stamen a single point covered in pollen.
Generally, the plant will produce a bunch of male flowers first, which is nature’s way of attracting pollinators to the garden. Then it will alternate between male and female. I like to plant a few of the same variety as sometimes you can have female fruit but no male flowers open. Early mornings are best because the flowers will be open, and then they will close up to capture the pollen.
You can either use a paintbrush to simply transfer the pollen from the male stamen to the female stigma, but I find it easier to remove the male flower and use that to transfer the pollen.
Step 2: Pick a male flower
Pick the male flower and remove the petals.
Step 3: Dab pollen onto the female Stigma
Then you are left with a pollen-covered stamen to transfer onto the female flowers.Transfer the pollen onto the female flowers to hand pollinate Zucchini.
This will make sure your zucchini are getting pollinated so you can enjoy the abundant crop!
This method can be used for other fruiting vegetables such as pumpkins, melons, and cucumbers. I tend to use a small paintbrush for the melons and cucumbers though, as the flowers are much smaller and delicate.
It is also important to try to attract wildlife to your garden for natural pollination. To find out what flowers to plant, click below.
Do you hand-pollinate zucchini or other flowers in your garden? Leave me a comment below.
If your nasturtiums are starting to slightly take over the garden…this quick-pickled nasturtium caper recipe is a great way to put some of those seed pods to good use! These easy refrigerator pickles are simple to make and a delicious way to preserve part of your harvest.
When I first started my edible gardens and food forest, I went on a Nasturtium plant recipe craze! One of the things I am trying to do is create as many recipes as I can for things that I grow in my garden. It turns out Nasturtiums have a lot more uses than just a pretty edible flower!!
My plants were getting a bit wild and overtaking the garden, so I picked all the flowers and collected a whole bunch of Nasturtium seed pods to make Nasturtium Capers. This is a two-part process where I soaked the seed pods for 5 days before pickling. I like the way it splits up the tasks so you can focus on being busy in the garden, foraging the pods, then prepare to get pickling later on.
A Delicious Way to Use Excess Nasturtium Seed Pods
One of my favourite ways to make the most of an abundant nasturtium patch is by turning the green seed pods into nasturtium capers. I love anything pickled! And this recipe is even better because they are wildly abundant!
Often called “poor man’s capers”, they’re a simple refrigerator pickle with a tangy, salty flavour that’s surprisingly similar to traditional capers. Not only is this a great way to use another edible part of the plant, but harvesting the seed pods can also help slow down the spread of self-seeded nasturtiums around the garden.
If you’re someone who loves finding creative ways to use what you grow, this is a fun recipe to add to your collection.
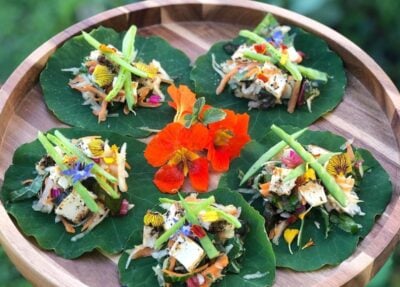
Quick Lunch – Lettuce wraps with Avocado, Haloumi, Basil and Nasturtium Capers.
What Exactly Are Nasturtium Capers & When Do You Harvest Them
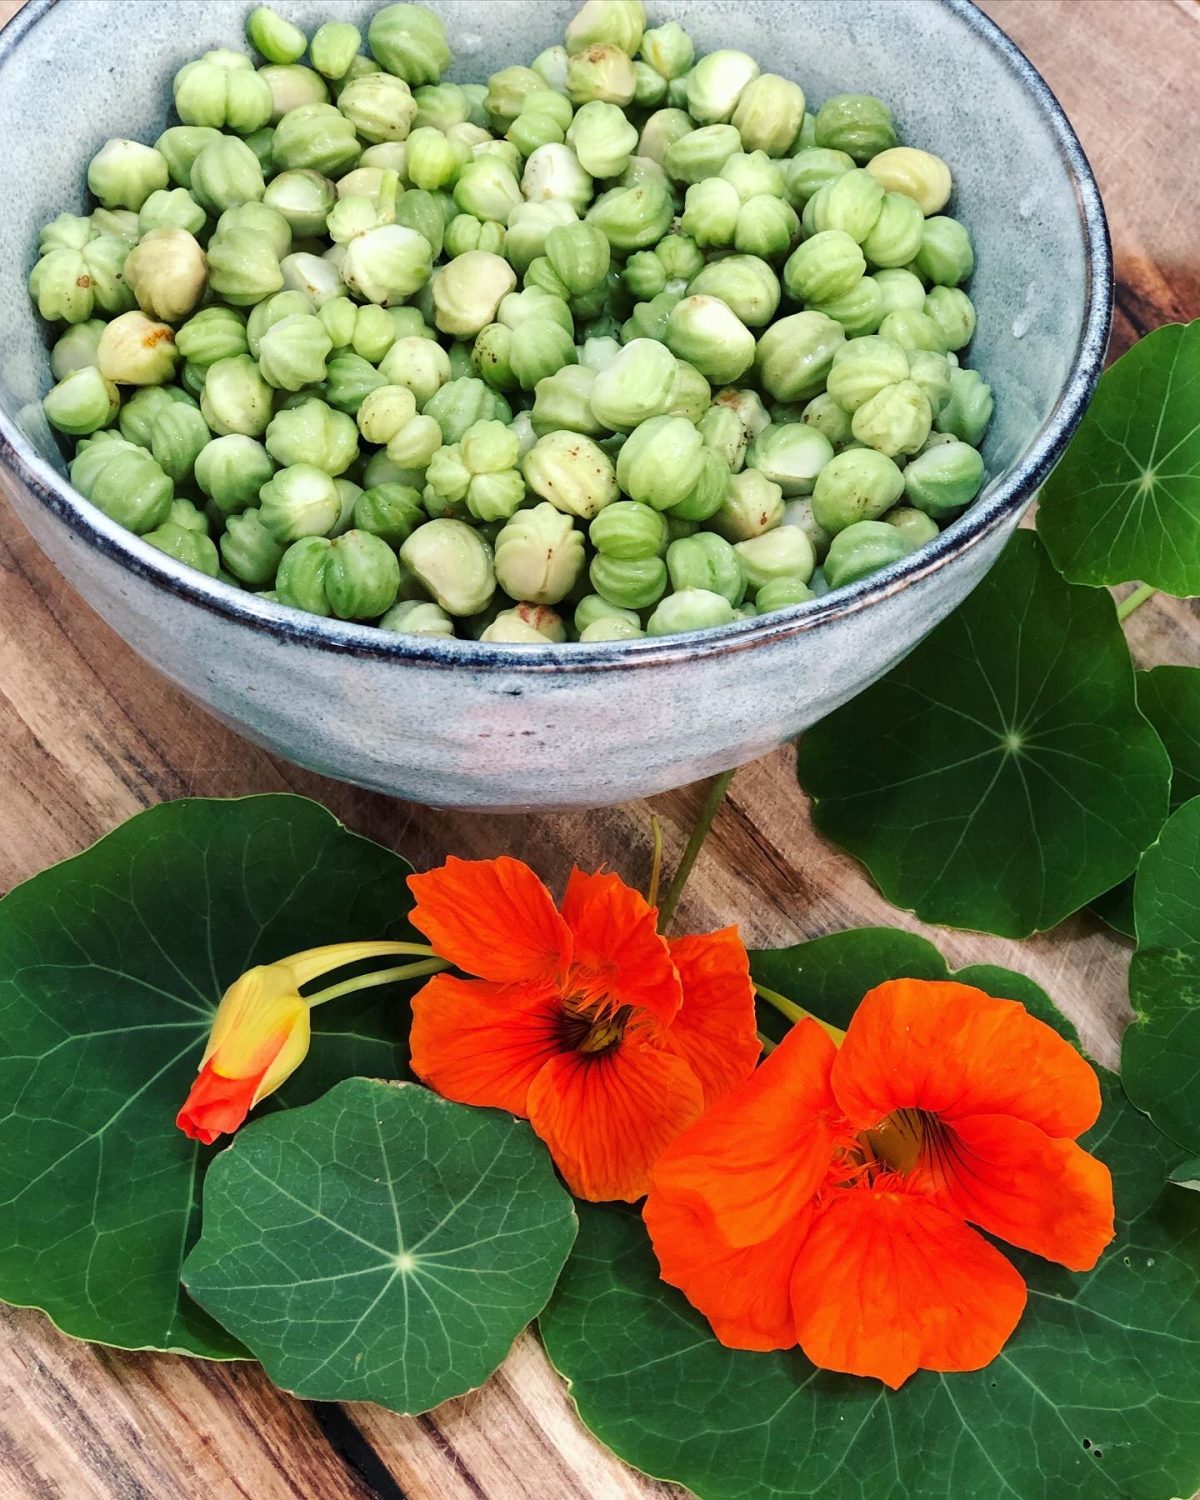
Nasturtium capers are made from the green seed pods of nasturtium plants (Tropaeolum majus). Once pickled, they develop a sweet, sour, salty flavour with a little peppery bite! Similar to traditional capers, they become a really useful little pickled condiment to add on top of salads, pizza or add to sandwiches.
The key is harvesting them at the right stage.
You want to pick the seed pods when they are:
Small, green and firm
Still slightly tender when squeezed
Formed after the flower drops, but before they harden or turn brown
If you leave them too long, they’ll become tough (super bitter!!) and eventually dry out and self-seed all through the garden. So harvesting them young gives you the best flavour and crisp texture. Plus…helps keep them a little more under control if they’re getting wild in your garden.
Ingredients: Pickled Nasturtium Seeds
This makes one small jar:
1 cup green nasturtium pods
1 cup white vinegar or apple cider vinegar (5%)
¼ cup water
1 teaspoon kosher salt
1 tablespoon sugar or honey (optional, but nice if you like a sweeter flavour)
1 teaspoon mustard seeds
A small sprig of dill or fennel frond (optional)
Pinch of chilli flakes (optional)
How to Make Nasturtium Capers (Refrigerator Pickle Method)
Step 1: Clean and soak
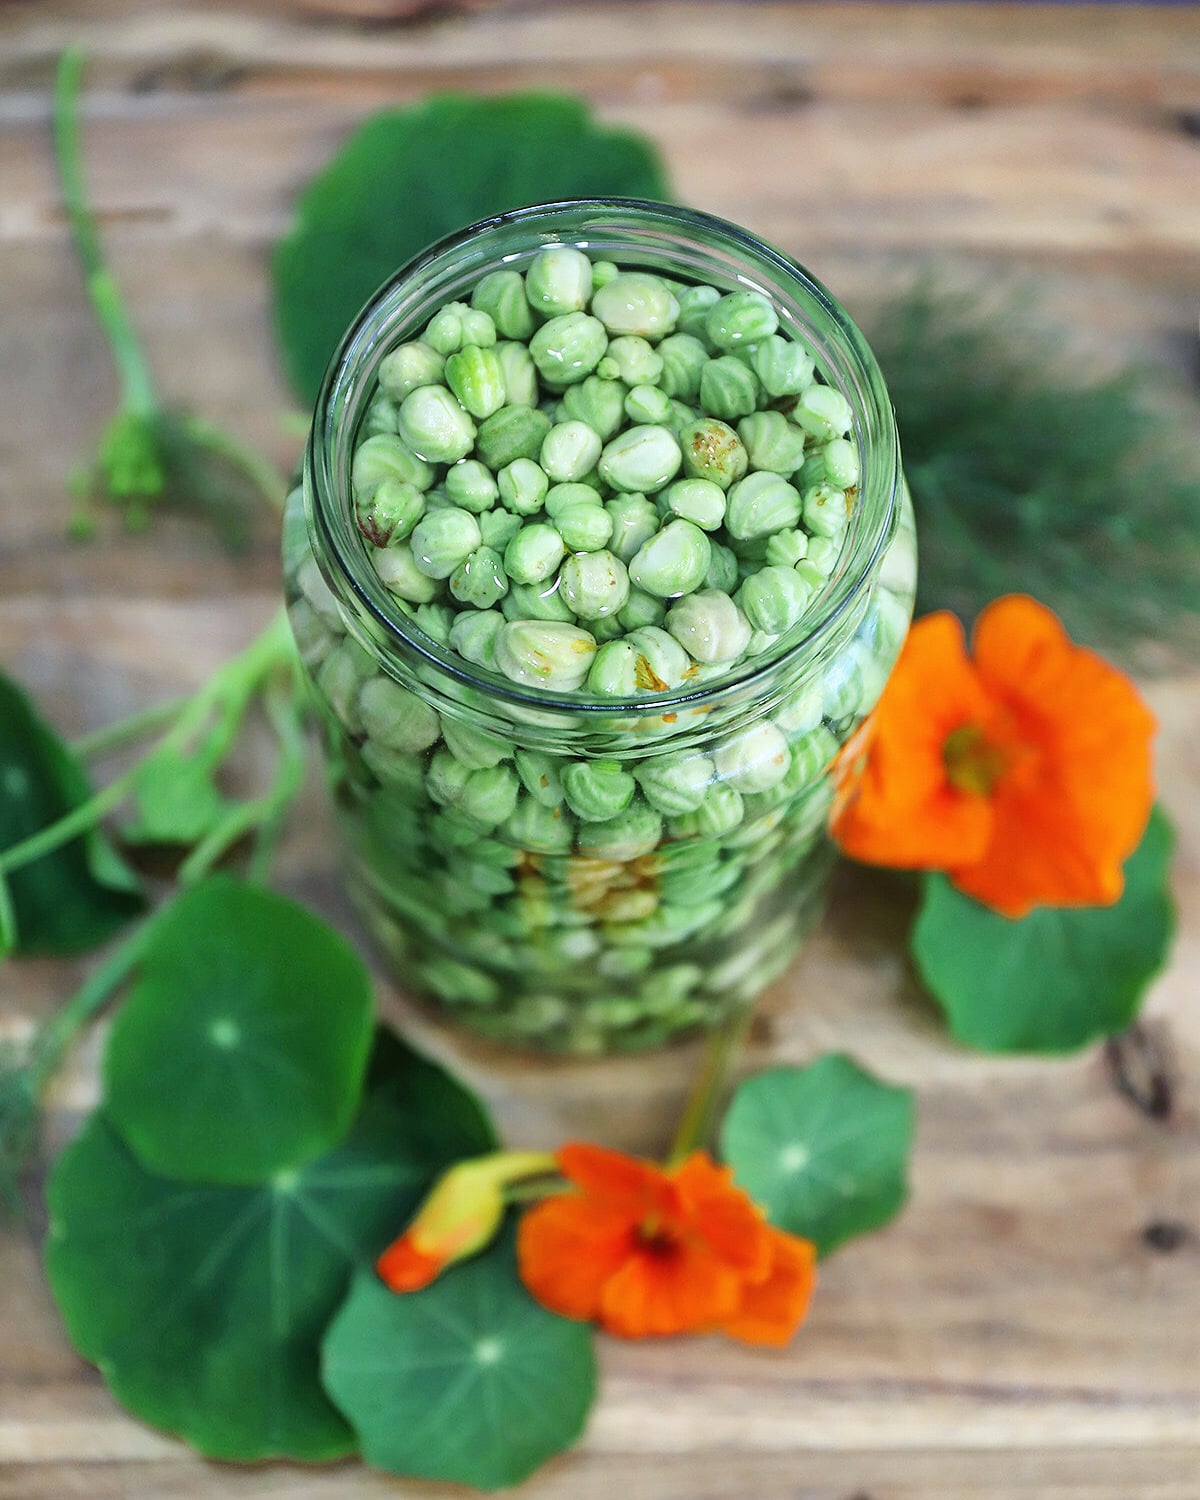
Wash the seed pods well to remove any dirt (or critters). Picking out any hard or brown seed pods. Place them in a jar and cover with water, securing the lid. Leave them to soak in the fridge for 1–2 days, changing the water once (if you remember). This helps mellow out any bitterness.
Step 2: Make the brine
In a small saucepan, gently heat the vinegar, water, salt and sugar until dissolved. Don’t boil it… just warm it enough to combine everything. Set aside to cool.
Step 3: Pack the jar
Drain and rinse the seed pods and pack them into a clean sterilised jar. Add mustard seeds, dill and chilli flakes if using (you could also add a bay leaf if you wanted). Pour the cooled brine over the top until everything is fully covered.
Seal the jar and place it in the fridge. They’ll start to develop flavour within a few days, but I usually leave mine for 1 week before using.
sustainableholly
Pickled Nasturtium Capers
5 from 1 vote
Turn overflowing nasturtium seed pods into delicious homemade "capers" with this simple fridge pickle recipe.
1tablespoonsugar or honeyoptional, but nice if you like a sweeter flavour
1teaspoonmustard seeds
A small sprig of dill or fennel frondoptional
Pinchof chilli flakesoptional
Method
Clean and soak – Wash the seed pods well to remove any dirt (or critters). Picking out any hard or brown seed pods. Place them in a jar and cover with water, securing the lid. Leave them to soak in the fridge for 1–2 days, changing the water once (if you remember). This helps mellow out any bitterness.
Make the brine – In a small saucepan, gently heat the vinegar, water, salt and sugar until dissolved. Don’t boil it… just warm it enough to combine everything.
Drain and rinse the seed pods and pack them into a clean sterilised jar. Add mustard seeds, dill and chilli flakes if using (you could also add a bay leaf if you wanted).
Pour the cooled brine over the top until everything is fully covered.
Seal the jar and place it in the fridge. They’ll start to develop flavour within a few days, but I usually leave mine for 1 week before using.
Nasturtium capers are one of those simple garden-to-kitchen recipes that really help you make the most of your abundant harvests! Something that would normally be overlooked can become a delicious addition to your meals.
DISCLAIMER: Links included in this description might be affiliate links. If you purchase a product or service with the links that I provide I may receive a small commission. There is no additional charge to you! Thank you for supporting my page so I can continue to provide you with free content!
I much prefer offering natural and sustainable solutions rather than a pointless list of negative things not to do. But this topic is something I am very passionate about and something new gardeners often get caught up in (including myself when I first started growing food many years ago). You will find my list of natural pest management remedies below 🙂
When you first start growing food you will get slugs and snails eating your new precious veggies and will want to INSTANTLY fix the situation. I see some newbie gardeners pour on huge amounts of snail bait to combat the hungry predators. This is POISON, not only will it kill the slugs and snails but is also deadly to cats and dogs. Now, if it can kill dogs, having it covering the soil and getting watered in and absorbed into the soil that your vegetable will feed on, especially those root vegetables, cannot be good for us.
If you’re reading this and thinking…I do this..you are not alone. It is something that has been a “norm” for way too long. But the first step you can take is safely throw out your poisonous slug bait. I would place it in something that animals can’t get into in case it crosses paths or they get into the bins. Even better, contact your local council to find the best way to safely dispose of it.
Watch my latest video
There are plenty of ways to naturally combat pests and have safe and nontoxic vegetables for your family.
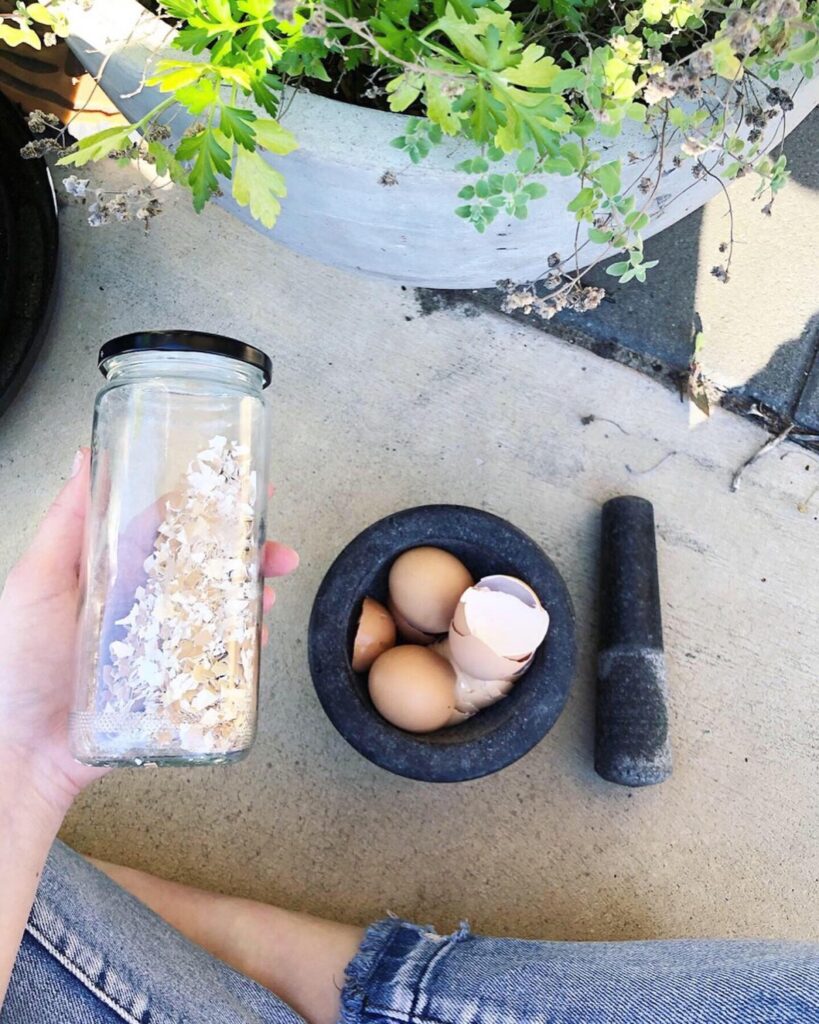
Eggshells – Save your eggshells and dry in the oven on low. Then crush into small pieces and place in a jar. Sprinkle this around the base of your vegetables and the slugs and snails do not like the surface so will stay away. It also adds some beneficial calcium to your soil.
Plant extras – Plant a few extra plants in different areas of your garden so that if one gets attacked you still have plenty 🙂
Encourage beneficial insects – Plant diversity and flowers to create habitats and attract beneficial insects. You could even make an insect hotel using lots of different sized sticks and logs for them to live 🐞🐝
Manually remove – Go out and check your garden and remove the pests by hand. I often do this when I am on the phone, its a great way to multitask.
Beer Traps – Cheaper the better, there is no need to use up any fancy craft beer. Place little containers around your vegetable patch and this will capture the slugs and snails before they get to your precious veggies 🍺
Coffee grounds – Often your workplace or local cafe will be throwing these out anyway. Sprinkle around the base. Only add a small amount as it will change the PH of the soil ☕️
Companion Plants – Often very fragrant plants will repel pests. These are plants such as: Marigolds and Rosemary 🌼🌿
Soapy Water – this is great for aphids. All my dishwashing liquid is non-toxic and greywater friendly so I just mix up some diluted in water and paint it on the new growth that is affected by aphids. This is the last resort though as it may harm beneficial insects too. Try and isolate the coverage.
Chilli spray – Mix up some chilli powder in some water and spray on your affected plants. I have read crushed garlic as well but that is bad for dogs so I would avoid.
Healthy Soil – growing healthy soil by composting and mulching helps keep your plants strong and healthy 💪 this means that if they do get bugs they can survive and thrive after an infestation.
Sacrificial plants – Usually one plant will just get attacked and I just leave it. It usually means the bugs will only eat that plant and the rest will be fine! Sorry for that one plant but it’s feeding nature…🌿
Chickens and ducks are also a great way to integrate natural pest management into your garden. Win-win 🐛🦆
MY GARDENING ESSENTIALS // Fertiliser spray gun: https://bit.ly/366nL1t Retractable Hose: https://bit.ly/2TSC0Bo More gardening tools: https://bit.ly/32IQmbD
DISCLAIMER: Links included in this description might be affiliate links. If you purchase a product or service with the links that I provide I may receive a small commission. There is no additional charge to you! Thank you for supporting my page so I can continue to provide you with free content!