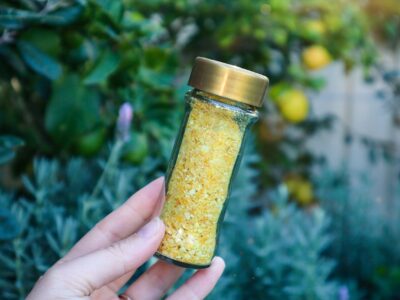
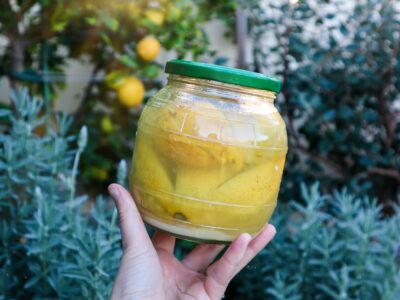
Preserved lemons is another great way to save and store your beautiful lemon harvests to use later in the year. Preserved lemons are easy to prepare and add a zesty, salty depth of flavour to your dishes. Plus they look beautiful lined up in jars. Preserved lemons can be used in many dishes such as pasta, fish, chicken, salads, salad dressing, dips, platters, salsa and rice dishes.
Preserved Lemons
Store your lemon harvests to use throughout the year by making these preserved lemon jars.
Rinse your lemons and place them on a plate. Slice 3 or 4 lemons depending on how large your jar is. You will also need a couple of extra lemons at the end for extracting the juice.
Cut the lemons lengthways into 4-6 wedges without cutting the whole way through. Leave a cm at the bottom to keep the wedges attached at the base.
Add 1TBSP of salt to the bottom of the jar.
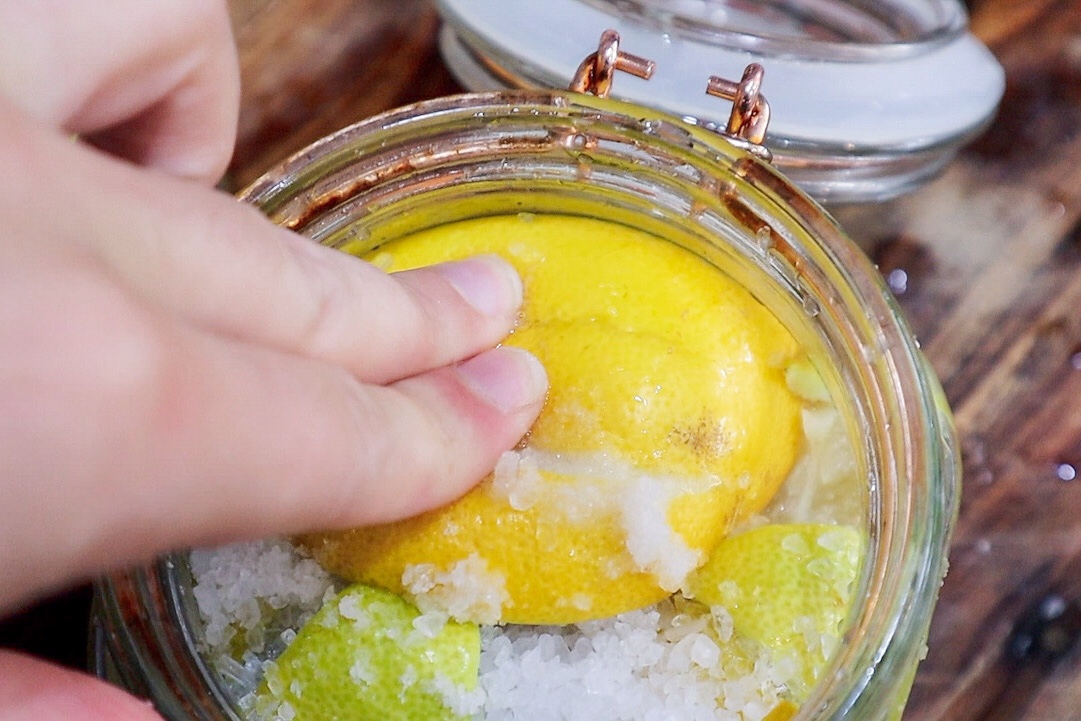
Add 1TBSP of salt to each lemon and gently squeeze them to absorb the salt.
Add your lemons to the jar and squish them down to try and fill up as much space as you can.
Add the remaining salt on top and any salt and liquid leftover on the plate they were cut on.
The lemons will start to release their liquid but you may need to top up the jar with extra lemon juice and salt. You want to make sure your lemons are covered in liquid. Push down on the lemon and this will help release more liquid.
Secure your lids ensuring the salt mixture doesn’t touch any metal part of the lid as you don’t want any corrosion. Keep your jars somewhere cool and dark. They will be ready to eat after 1 month but they can be preserved for years to come. Refrigerate after opening.
Notes
Add spices to mix up your flavours such as bay leaves, fennel seeds, chilli, coriander seeds, cloves.
On a journey to grow your own food and live more sustainably, it is important to grow a selection of staple base crops to set yourself up for success. Base crops are ones that produce a large amount of food and will provide a great platform to build complete dishes. Just like we have staples in the pantry to create meals, it is important to have staples in the garden to carry us through each season. Base crops are easy to grow, harvest and store and will provide a good level of calorie-dense nutrition and carbohydrates. They also include things that can be grown in bulk and used throughout the year. Below are some of my favourite annual base crops.
Autumn / WinterCrops
Cabbage
Cabbage is a hearty winter vegetable to grow that provides a lot of food for one plant. A single cabbage can go a long way when creating meals for your family. Cabbage can be preserved to use throughout the year by fermenting it and making sauerkraut. This is a great way to use up lots of your cabbage and is also great for your gut health. Cabbage is a great way to bulk up salads, stirfries, or sauteed as a side dish of its own. Cabbage can also be used for bunless burgers and steaks. I can’t wait to showcase as many cabbage recipes as I can.
Cauliflower
Cauliflower is another hearty winter crop that can be the base of many different meals. You can also use the leaves of the cauliflower as another form of leafy greens for vitamins and nutrients. Cauliflower can be pickled or frozen to use throughout the year. Cauliflower has so many uses and can be used to replace rice and flour in many dishes. Cauliflower can be blitzed to make pizza bases, bread, rice, pasta, or a substitute for mashed potato. Cauliflower can be roasted whole or the florets used in stirfries, curry, and soups. You can also slice it into steaks and oven-roast it. There are just so many ways to create wholesome dishes with the humble cauliflower. Cauliflower sushi is one of my favourites! Cauliflower also comes in many varieties and colours including purples and green!
Onions
Onions are the base of many dishes and are a staple flavour-enhancing vegetable. The great thing about onions is that they store well and can be dried and kept for many months after harvesting. Onions can also be dehydrated, pickled or frozen to use throughout the year. They are also easy vegetables to grow and grow well in many different conditions. Onions prefer the cooler weather of Autumn here in Western Australia and in colder climates, they can be sown in Spring. The onion family come in many shapes and sizes from spring onions, red onions, bunching onion, pickling onions, white onions and many more. They are a great staple vegetable to add flavour to many dishes.
Garlic
Just like the onions, Garlic is another staple flavour enhancer. You can grow a large crop of garlic and use it throughout the year. Garlic is not only great for enhancing the flavour of your food but is also medicinal with antibacterial and anti-fungal properties. It is a great allrounder for your health, home and kitchen needs.
Rainbow Chard
Rainbow chard or Swiss Chard are powerhouse greens for your edible garden. They are easy to grow and produce an abundance of nutrient-dense food. You can pickle or freeze your extra produce to eat throughout the year. I choose to grow the rainbow chard because I love the pop of colour in my winter garden and in the meals I produce with it. You can use chard in so many dishes from stirfries, curry, soup, omelette, pesto, salads and as a stand-alone side dish. Chard can also be used as an alternative to wraps.
Spring / SummerCrops
Pumpkins
Pumpkins are a fantastic vegetable to grow as they produce a lot of food and can be easily stored to use throughout the year. Pumpkins are easy to grow and prefer warm dry weather. It is important to water pumpkins in the morning or under the leaves as they can be prone to mildew if their leaves remain moist for too long. Pumpkins can be used in both sweet and savoury dishes and a single pumpkin can go a long way to help provide garden-to-plate meals. Watch how to preserve pumpkins for storage in this linked video.
Sweet Potato
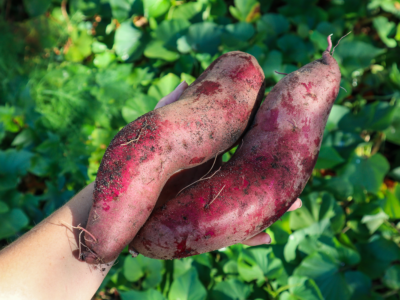
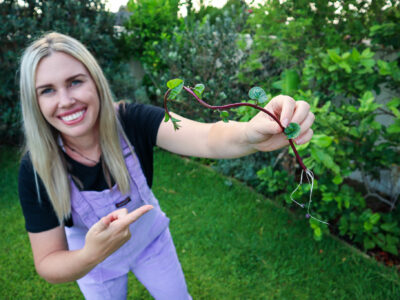
Growing Sweet Potatoes (Ipomoea batatas) in your home garden is a great step towards self-sufficiency. Sweet Potatoes are my favourite permaculture plant and are an easy crop to grow for beginner gardeners. It is important to grow plants that support and encourage other plants and beneficial insects in your garden. Creating a cohesive ecosystem that promotes the growth and success of your garden’s health and supports abundant harvests. The leaves of the sweet potato are also edible which provides a great source of greens whilst your crop is growing. Sweet potato are very versatile in the kitchen and can be used for both sweet and savoury dishes.
Tomatoes
Tomatoes are a plant that grows in abundance during summer and can easily be preserved to use throughout the year. You can grow a huge amount of tomatoes on just a few plants which makes them a great staple for self-sufficiency. You can preserve your tomatoes by canning, bottling, making sauce, chutney, relish, soup, dehydrating or simply freezing them whole. Whole frozen tomatoes can be used to make sauces or relish at a later date or added to soups and dishes throughout the year.
Beans
Beans are another vegetable that produces a huge abundance in a small time frame. You can grow a lot of beans in a small space by creating a vertical trellis to grow them up. Beans can be frozen, fermented, or bottled/canned to preserve for use throughout the year. Beans are an easy vegetable to throw into many meals such as stir-fries, curries, soups, salads, and as a side dish on their own.
Fruit Trees
Apple
Apple trees are a great staple fruit tree for a home garden because they can be used in so many ways. Apples are an extremely versatile fruit. You can preserve apples by freezing slices or puree, dehydrating or canning in juice or syrup. Apples can be used to form the base of many homemade sauce recipes, relish, chutney and jams. Apple sauce can even be added to baking in replace of eggs to retain moisture as well as to bulk up a fruit pie.
Lemon
Lemon is another great staple tree to start with on your journey to self-sufficiency. Lemons can be used in both sweet and savoury dishes and are a great flavour enhancer. Lemons can also be used to aid health and wellness or in-home cleaning products. They are a staple all-round fruit. You can preserve lemons by dehydrating, juicing, freezing, preserving in salt, or making into lemon butter.
Choosing what vegetables to grow at home can be so hard! But this selection of staples will help you form a good base to work from. Having vegetables preserved will help you during the slower months or when your garden is transitioning between seasons.
Autumn is often a slow time in my urban permaculture garden. Summer annuals are ending and the Winter seeds and seedlings are not yet up and running. There is a calmness to autumn which I love. I have filmed a new garden tour of my Urban Permaculture Gardens that you can watch below. For more garden tours and videos head over and subscribe to my YouTube Channel. That way you will get a notification each time I upload a new video (hopefully weekly!).
Here come the Feijoas!
Growing Feijoas here in Perth is a little piece of home that I cherish. They are the first fruit trees we planted here at our house and I have been lovingly caring for them for the past 5 years. Every year I get so excited and hope for fruit. They started producing in their 3rd year with just a couple of small fruit. The next year there was around 10 and this year there will be over 30. Hopefully now, each year there will be hundreds! Gardening definitely requires some patience, but it is so worth it in the end. I am celebrating this win!
What are Feijoas and Why Grow Them?
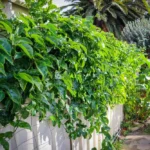
I definitely need to do a whole video on the Feijoa as they are one of my favourite fruit trees for any home garden. Feijoa or Pineapple Guava – Acca sellowiana is an evergreen fruit tree. They produce fragrant green fruit that are sweet and taste like a mix of pineapple /guava. Feijoa foliage is lush, thick, and grows quickly, which makes them a great option for a hedge or fence screening. Plus, an edible hedge is the best kind of hedge! They are also known to have fire retardant qualities so it can be a good idea to plant along with your fire-prone boundaries.
Most feijoa plants are self-pollinating, however, having multiple trees will increase your pollination rate and produce better yields. I highly recommend choosing named varieties rather than generic seedlings as they produce much quicker and better quality fruit. You can find these at your local fruit tree nursery.
Autumn Urban Permaculture Garden
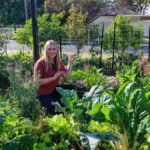
My summer annuals have just about all finished with just some basil and capsicums holding on. All my winter seeds and seedling are in and are starting to take off with a little bit of recent rain. This can be a slow time in the garden but I do have some cross-overs with my fruit trees and perennials to keep my food production up. The Feijoa and Hawaiian Guava are starting to ripen and the Lemons are coming through thick and fast. I also have plenty of sweet potatoes which not only provide large tubers for eating but also bucket loads of edible leaves which can be a great substitute for spinach. The banana capsicums are still producing and I have lots of herbs such as basil, parsley, rosemary, and sage. So there are still plenty of meals to be made using my homegrown ingredients.
Edible Front Garden
My front garden has transformed from a pumpkin patch into a cabbage patch with lots of red cabbage and brassicas. I have also interplanted with rainbow chard and flowers. It is a great space for all my larger vegetables as they take up too much real estate in the pallet planters. The front fruit trees are flourishing and I have one blood orange fruit, 3 lemonades, and a million baby limes coming through.
Pallet Planter Boxes
The pallet planters are where I grow most of my annuals and quick-picking greens and herbs. These are great because I can move them about to get the best sunlight during the winter months. In summer I am busy doing the opposite and giving them shade from the burning heat! My pallet planters are all mixed in with lots of brassicas, rainbow chard, edible flowers, lettuce, onion, and Asian greens. I also plant radish in between all my crops because they are ready to harvest from seed in just 28 days, so they will be ready before the main crops are overcrowded. This is a great way to maximize space in a small urban garden. Plus it’s a great way to get some quick food during a slower transition phase in the garden.
It is important to take down notes at the end of a season and that way you can make improvements for the next one. I have created these seasonal gardening review sheets which have helped me establish when things fruit and where the gaps are in my food production.
Let me know if you would like to see more regular garden tours maybe Monthly?
Happy Gardening
Holly 🌱
MY GARDENING ESSENTIALS // Fertiliser spray gun: https://bit.ly/366nL1t Retractable Hose: https://bit.ly/2TSC0Bo More gardening tools: https://bit.ly/32IQmbD
DISCLAIMER: Links included in this description might be affiliate links. If you purchase a product or service with the links that I provide I may receive a small commission. There is no additional charge to you! Thank you for supporting my page so I can continue to provide you with free content!
Lemon trees make an amazing addition to any edible garden. They produce in abundance and are one of the easiest fruit trees to grow. They can also be easily grown in pots so are a great choice for urban gardens or renters. Lemons are powerhouses of flavour and such a versatile fruit.
Lemons can be used for desserts, salad dressings, condiments and even cleaning products.
Preserving herbs from your garden is a great way to make the most of their abundance and store them for the winter months when many herbs will not be growing. Herbs are a great way to add flavour to any dish, and once you make your own dried mixed herbs, you will never want to buy them ever again!
Click below to watch
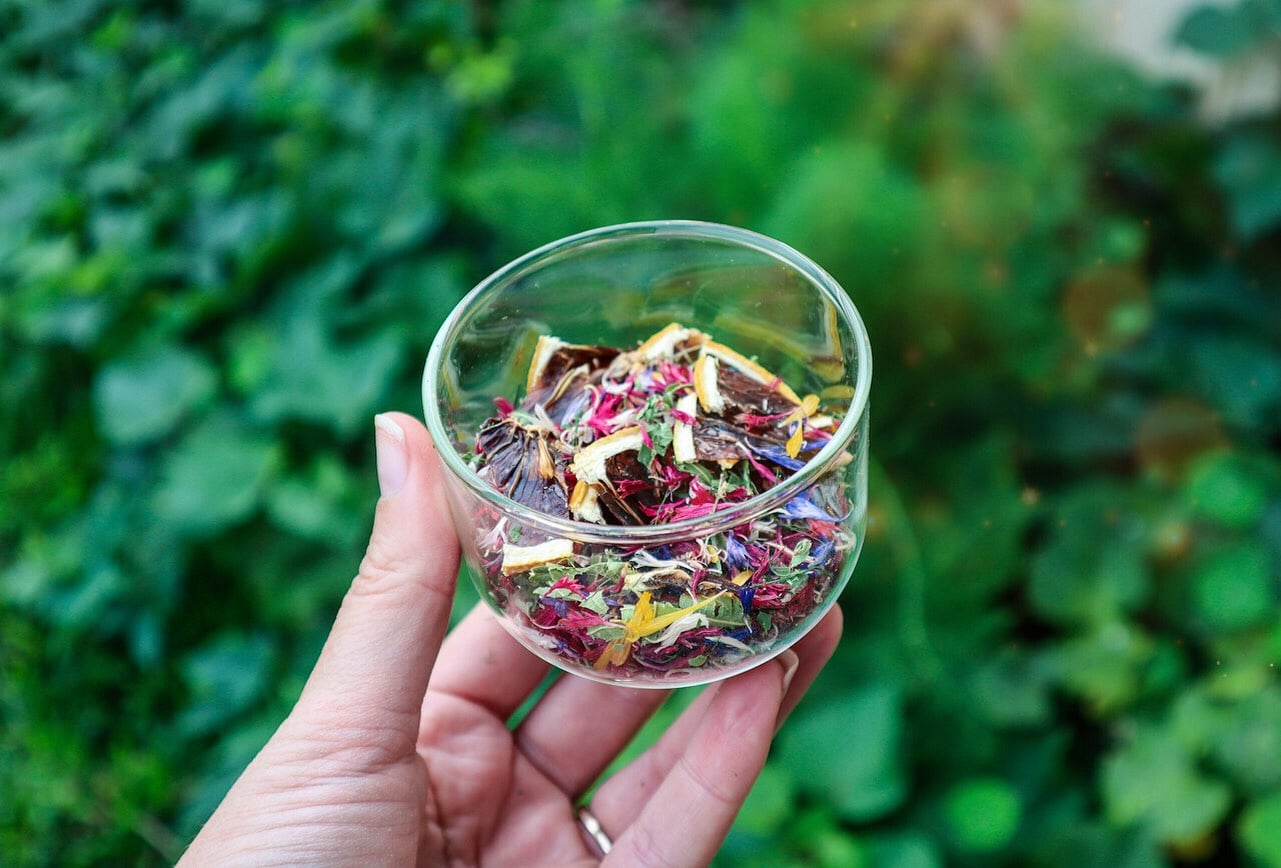
In this video I share how I pick, dry and preserve my herbs for both a dried mixed herb blend and also to make tea blends.
Why Grow Herbs?
Herbs are the easiest plants to start growing because they are hardy and less susceptible to pests. They also do not require much room to grow. You can grow herbs in pots or containers if you do not have room for a garden. It is absolutely achievable, and you never know where the journey will take you.
Grow Abundant Herbs
Nature provides so much abundance when we learn to see and utilise it. Sometimes cutting your plants can spark new growth, and they will continue to flourish in new directions. Young new growth is much nicer to eat than the older woody growth, too. Preserving your harvests also allows you to slow down and reconnect with where your food comes from. It just feels so right to go out to the garden and pick food that you know exactly what has gone into creating it. No chemicals, pesticides, or nasty sprays.
Basil is a warm-climate herb and will start to die off as the temperatures decrease. So harvesting and storing basil will mean I will be able to have it available during winter. Basil also responds so well to being cut. Especially towards the end of the season as it starts going to flower. Cutting the tops off will make it grow thicker and help prolong the plant’s life.
Take Cuttings for Gifts
My rosemary is growing a little wild and has even collapsed in the middle under the weight. So I am going to take some cuttings to replant and also harvest a big bunch to dry and preserve. Taking cuttings to regrow will give me new plants to gift and trade. It is always good to have some on the go for last-minute gifting.
When to Harvest Herbs?
The best time of day to harvest your herbs is first thing in the morning. This is when the plants are hydrated and full of life. As the day goes on they will lose moisture and not be as fresh and vibrant. Early in the morning, the bees are not yet active. As the sun comes up and the dew drys, the bees will be about in a hive of activity. So if you do pick later in the day just be slow and cautious not stress them out and avoid getting stung.
Take time to Slow Down
Spending time in the garden harvesting and caring for your plants allows so much time to observe and learn from your garden.
To slow down and reconnect. Giving your mind time to think. Some of my most creative ideas come when I can quiet the rest of the world. Harvesting also gives such a sense of pride. That you have grown all this delicious food is so special.
How to Preserve and Dry Herbs?
Step 1: Harvest and Wash Your Herbs
Harvest fresh herbs and give them a thorough rinse in the sink to remove any dirt, dust, or insects. Gently shake off excess water or pat them dry with a clean tea towel.
Step 2: Prepare the Herbs for Drying
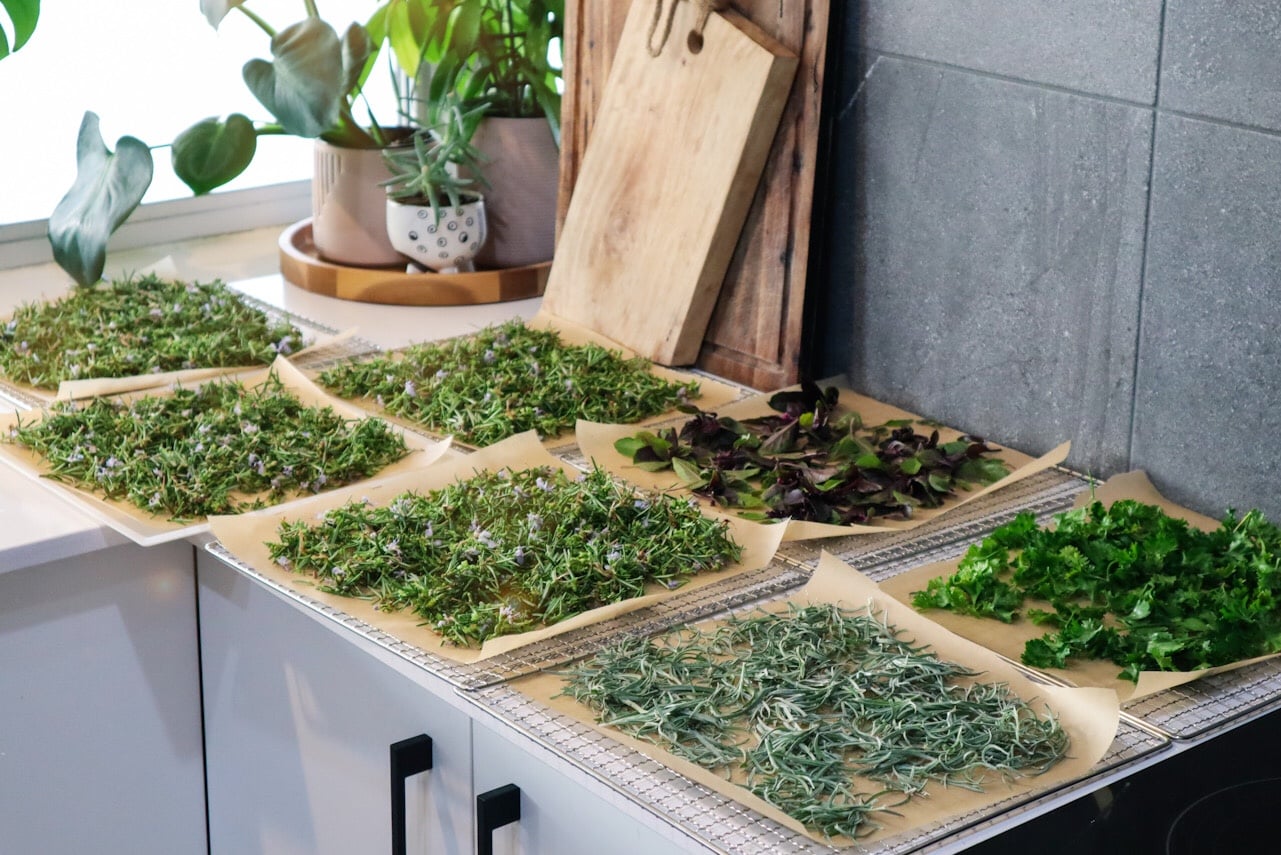
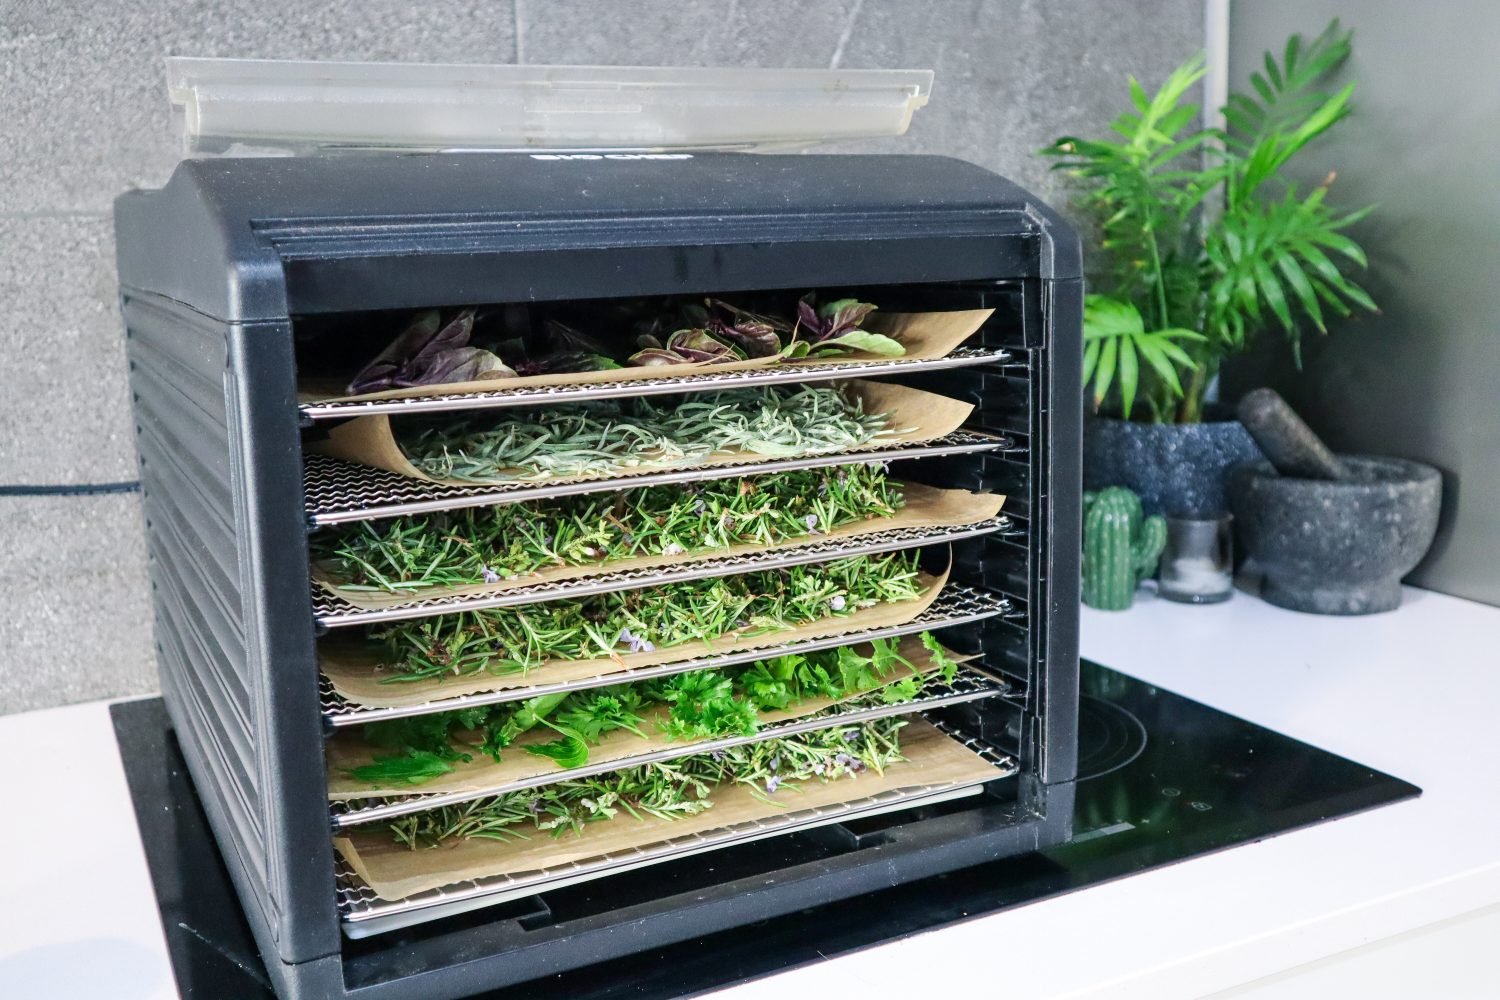
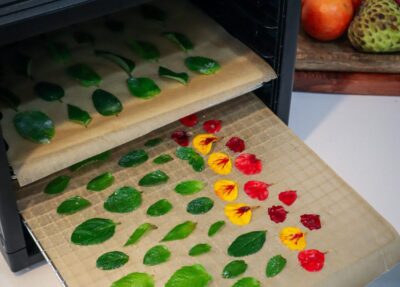
Separate the leaves from the thicker stems. Spread the leaves in a single layer on your dehydrator trays. I like to place a sheet of brown baking paper on each tray to prevent small leaves from falling through the grid. The baking paper can be reused many times for future dehydrating projects.
Step 3: Dry the Herbs
Place the trays in your dehydrator and set it to the lowest temperature setting, ideally between 20–30°C.
If you don’t have a dehydrator, you can use an oven on its lowest setting. Depending on the thickness and moisture content of the herbs, drying can take anywhere from 5–8 hours. Be sure to monitor them regularly and only use the oven when you are home.
Alternatively, herbs can be air-dried by hanging small bunches upside down in a warm, dry, well-ventilated area. This method works best in low-humidity climates. If you live in a humid area, a dehydrator is usually a more reliable option, as you want the herbs to dry as quickly as possible.
Step 4: Check for Complete Dryness
The herbs are ready when the leaves feel completely dry and crispy. They should crumble easily between your fingers. Avoid storing herbs that still contain moisture, as this can lead to mould or spoilage during storage.
Step 5: Store Your Dried Herbs
Once fully dried, transfer the herbs into clean, dry jars or airtight containers. Store them in a cool, dark place away from direct sunlight.
Step 6: Create Your Own Herb Blends
To save space, you can crush the dried herbs using a mortar and pestle before storing them. Try combining different herbs to create your own homemade seasoning mixes, perfect for winter soups, roasted vegetables, casseroles, and everyday cooking.
Share and Inspire Others
These dried herbs also make great gifts. Creating gifts from your garden to friends and family is something that should become a regular ritual. They will feel so special, and you will also feel joy and pride in sharing your homegrown produce. Sharing from the garden can also spark others to try to grow their own food, too. You have no idea how many people can be inspired to make changes from your single action of sharing. It should be the way of the future. Because what we are doing in the world right now is not sustainable.
I hope you feel inspired to grow your own herbs at home and make your own dried mixed herbs. They are so easy to make and so vibrant and full of flavour. Nothing like the dull grey herbs you find at the supermarket.
If you found this helpful, please share it with others 💚
This curried sweet potato soup is my FAVOURITE! Preparing batches of soup is a great way to have extra meals on hand in the freezer. Preparing meals ahead of time means you will have options for a quick and easy lunch or dinner and won’t be as tempted to buy takeout. Saving you money and a more eco-friendly option.
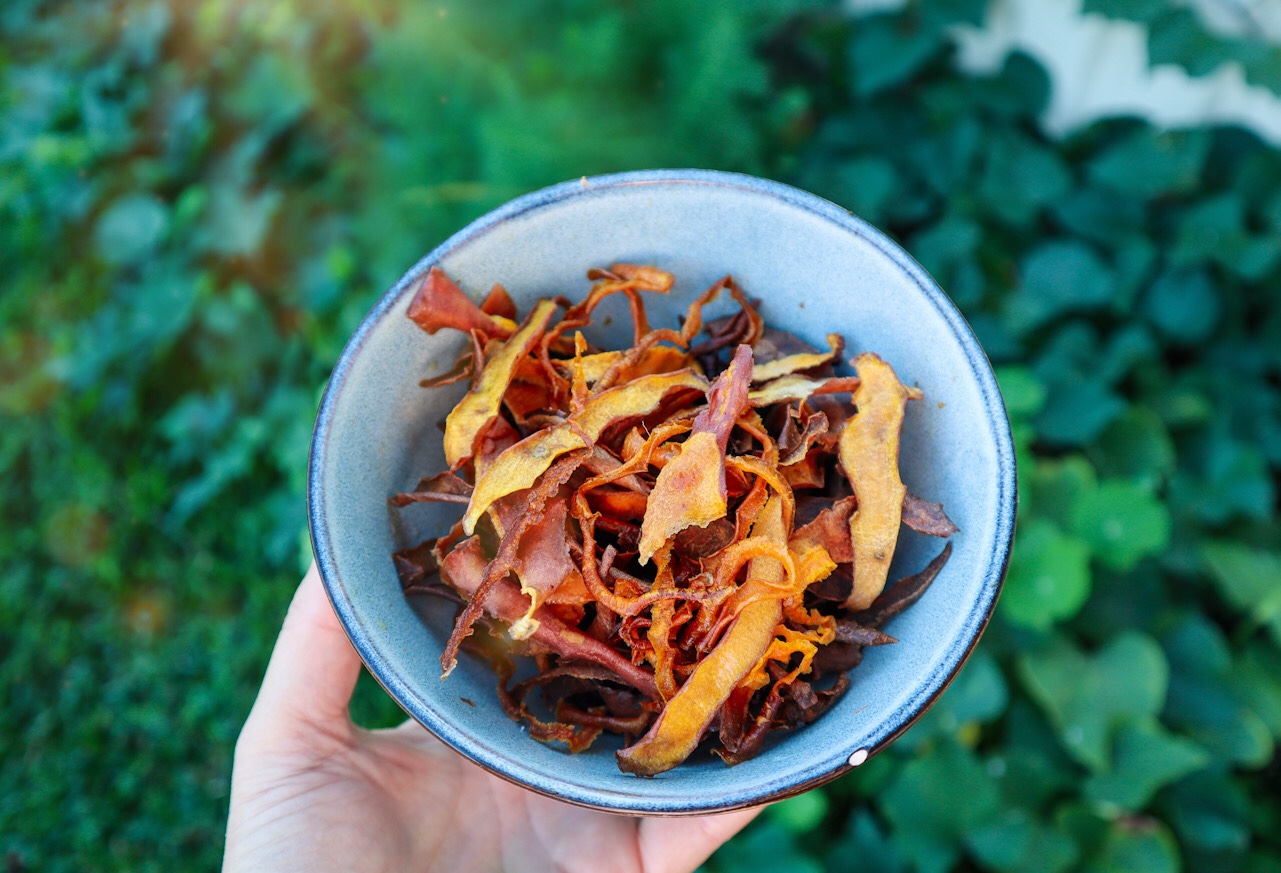
This sweet potato soup is topped with vegetable peel chips which taste amazing! So crunchy and quick to make. You can make these with any meals you are making where you want to peel the vegetables first. For this soup, you don’t need to peel the vegetables first but I like to just so I can create these crunchy chips to serve on top! A great way to get kids more excited for soups.
Curried Sweet Potato Soup
This hearty, winter warming soup is packed full of flavour and topped with crunchy vegetable skin chips. A great way to get the most out of your Sweet Potatoes.
Preheat the oven to 190 degrees Celsius on fan bake.
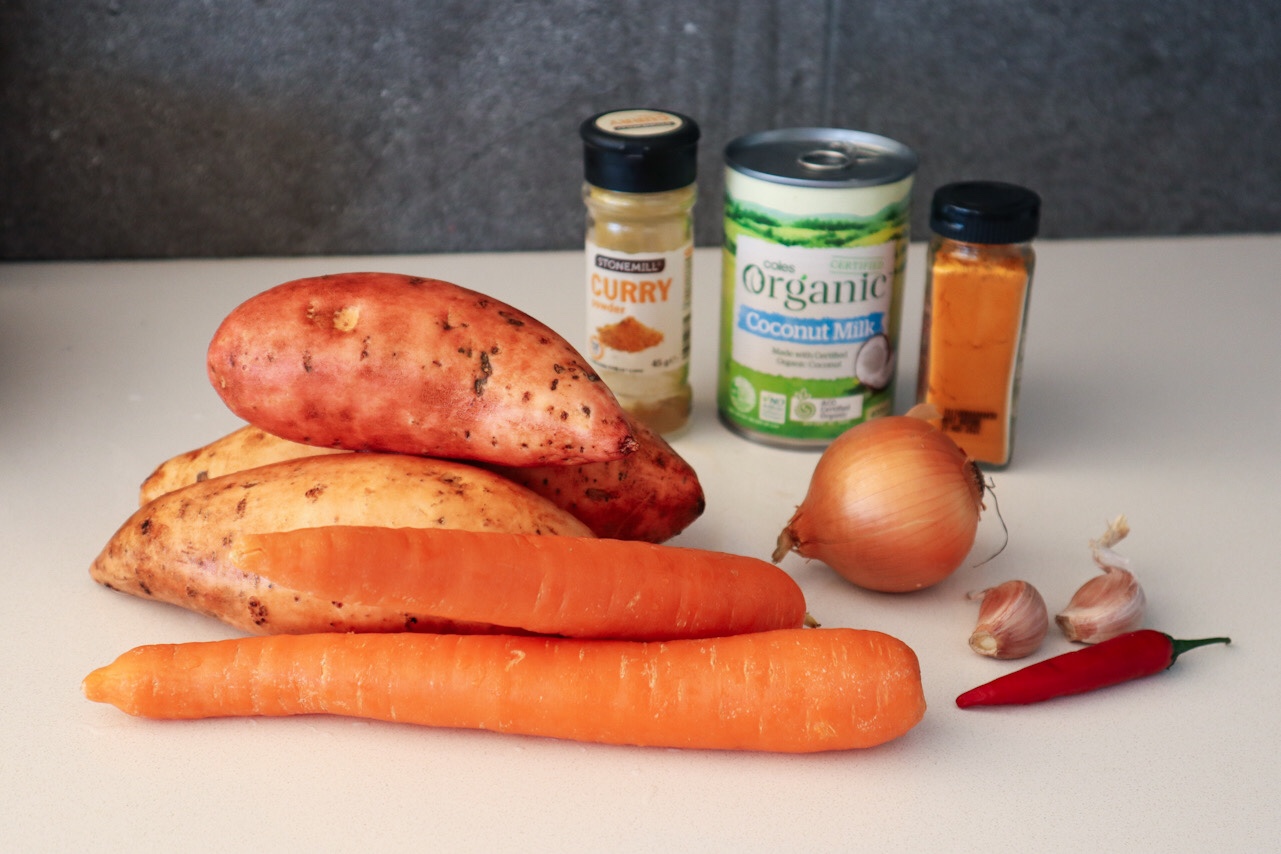
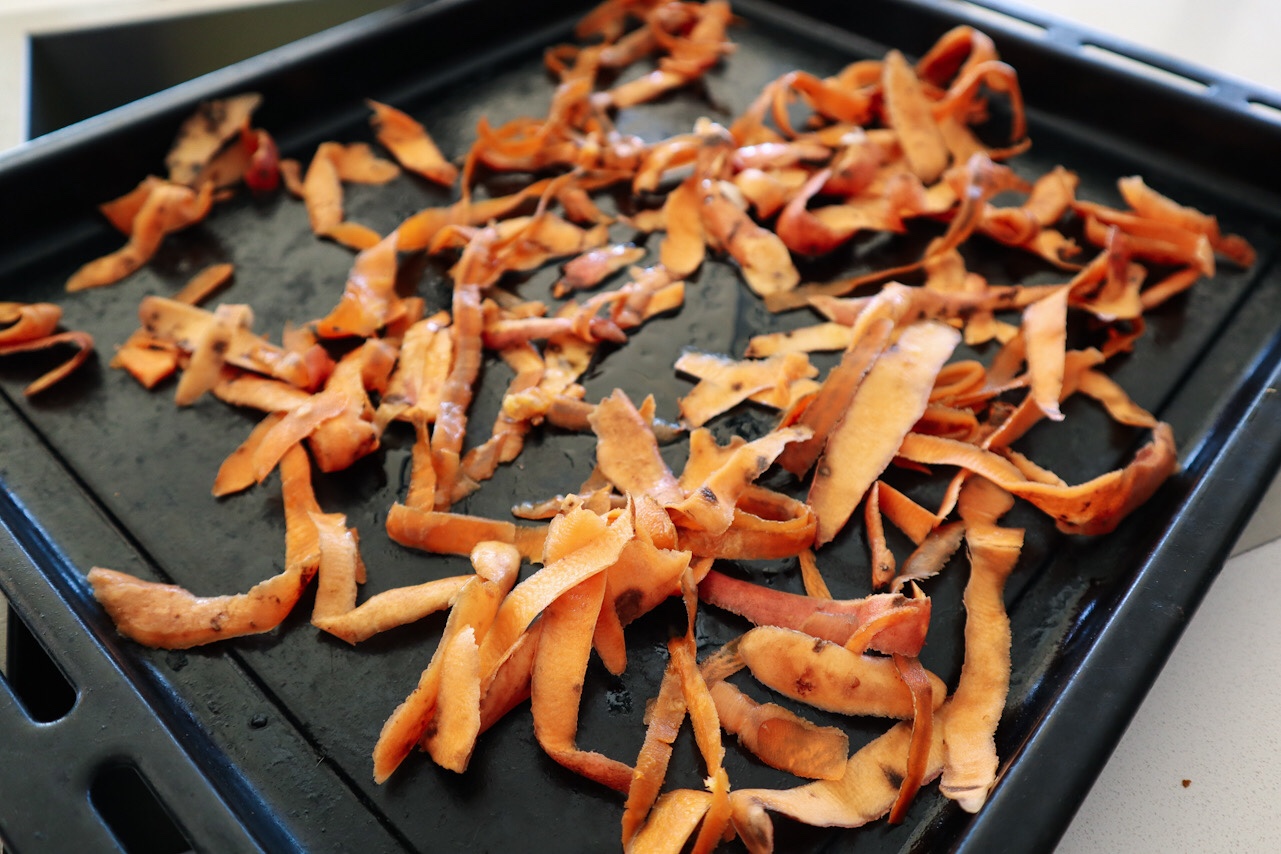
Wash and peel the vegetables placing the skins in a bowl, coat with the coconut oil, and set aside. Roughly chop the Sweet Potato into 5cm Chunks. Cut the carrots lengthwise down the middle and in half across the width.
Place the chopped vegetables in a roasting dish and coat them in vegetable oil. Sprinkle on the Curry Powder, Tumeric, and mixed herbs and mix to coat.
Cook in the oven for 45-50minutes until slightly golden and easy to pierce with a fork.
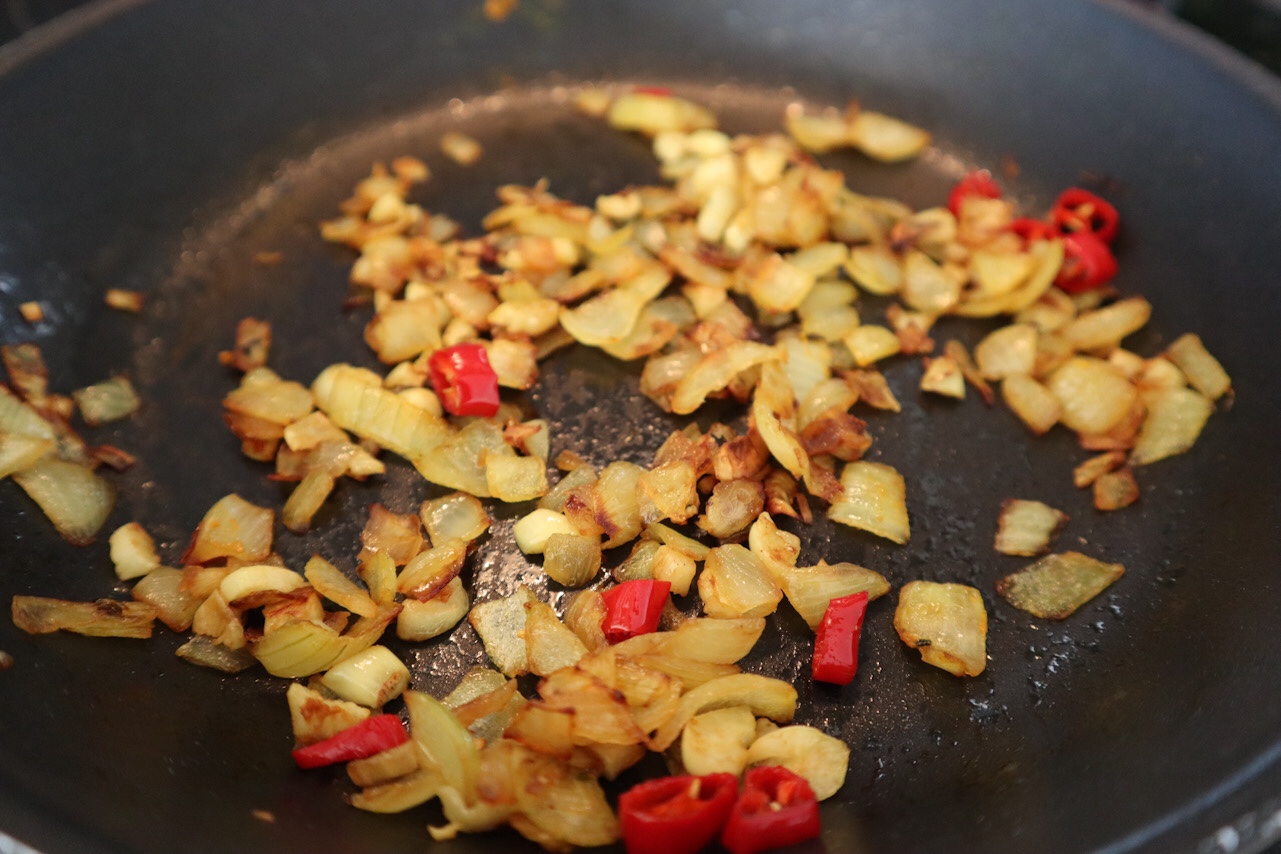
While that is cooking dice up your onion and add to the frypan with 1 TBSP oil and saute until cooked. Add in the garlic and chilli and cook for a further few minutes until the garlic is slightly brown. Remove from the heat and add to a large pot.
Once the vegetables are cooked add them to the large pot along with the onion mix. Add 1/2 cup hot water to the roasting pan and use a spoon to get all the flavor off the bottom and side. Add this to the pot too.
Pour in the can of coconut milk or cream. Then add half of the can with water and stir to get the residual coconut milk from the sides. Add this to the pot too.
Add the tamari, salt, and apple cider vinegar to the pot and simmer on low heat for 20 minutes mashing the vegetables in every now and then. Once the vegetables have all been integrated and mashed. Turn the heat off and allow it to cool slightly.
Place your vegetable skins on a baking tray and sprinkle with a little salt. Cook at 190 degrees celsius for about 5 minutes turning once halfway through. Keep an eye on them as they are so thin they will overcook easily. Remove when they are golden and slightly crispy. They will also crisp up as they cool.
Blend your soup. I like to use a stick mixer in the same pot but you could do two batches in a blender ( just be careful not to blend very hot soup or it may explode out the top!).
Add your soup to a bowl and top with the crunchy skins. I have also added basil flowers and baby sweet potato leaves to serve.
Notes
You can swap out some of the sweet Potato or Carrot for Pumpkin or Potato. To make a Thai Style soup just add a crushed lemongrass stalk in to the pot while it simmers, then remove before you blend it.
Growing your own homegrown fruit and vegetables does not automatically equal natural, healthy food. We are sold so many things for our home gardens that are actually toxic or full of nasty chemicals.
What we put into our soils will be drawn up through the plants and into the food they produce. Some plants will accumulate and retain more chemical and trace elements than others. Root vegetables and leafy greens are more at risk than those that form from flowers such as fruit, broccoli, eggplant, melons etc. Root vegetables such as carrots and potatoes have constant and direct contact with any contaminants in the soil or water. Fruit bearing plants will often be able to process and reduce any contaminants before it reaches the reproductive flowers and fruit.
Choosing to grow in toxic free soil and not using chemicals or pesticides on your plants will mean your food will be less at risk for harmful contamination. Growing food naturally and sustainably is a big learning journey and below are some ways to avoid harmful contaminants in your food. Actionable steps to grow food naturally and avoid any nasties at the shops.
1. Choose Organic Soil
The soil you grow your food in is absolute key! Not all soils are made the same. Spend a little time doing some research to determine if the soil you are purchasing is organic and free from any nasties. Ask questions, read labels and it may cost a little extra but it will be worth it! Do the same with composts and animal manure. Animal manure is great for your gardens but it is important to know what you are buying! Animals that are eating food with chemicals and sprays or are on medications may transfer contaminates through to their manure. Once you have your base soil sorted, composting and building soil at home is a great way to top up your garden beds with your own organic soil.
2. Select your Seeds and Seedlings Wisely
Seeds can be coated in chemicals! This was something I did not realise when I started this journey. “Roundup Ready seed” was not a term I had heard before but now I can’t un-hear it. Many seeds created by large manufacturers are coated in pesticides so you can spray for weeds and bugs without killing the seed. If you have ever bought seeds that are bright pink or other unnatural looking colours with speckles, this is most likely why. It’s hard to find information on what chemicals or pesticides these coatings contain and I would just avoid them all together. These seeds are also often grown in contaminated soils with chemical fertilisers and pesticides to mass produce large, productive plants to save seeds from.
The best seeds to purchase are heirloom varieties from local distributors. Choosing seeds that have been grown organically in your local area will have a higher success rate. These plants will be adapted to your local climate rather than those imported and grown in a completely different climate. You can find local seed suppliers at your nearest nurseries and plant stores. Take a look online as well to find local organic seed companies. It all starts with a single seed.
Seedlings will be exactly the same. Choose local, organic seedlings and ask questions. Seedlings for mass production will often be grown from pesticide coated or genetically modified seeds, fed with synthetic fertilizers to boost their growth and provide the public with a product that will have a “high success rate”. But of course that does not equate to natural healthy food. A little bit of research and you will find lots of healthy seedlings to purchase. Farmers markets can also be a great place to find locally grown seedlings and you will be able to find out directly from the grower what has gone into their production.
3. Use Natural Pest Management
When you first start growing food you will get slugs and snails eating your new precious veggies and will want to instantly fix the situation. Traditionally, gardeners are taught and marketed to pour on huge amounts of snail bait to combat the hungry predators. This is poison, not only will it kill the slugs and snails but is also deadly to cats and dogs. Now, if it can kill dogs, having it covering the soil and getting watered in and absorbed into the soil that your vegetable will feed on, especially those root vegetables, cannot be good for us.
Growing food naturally and sustainably can often mean we need to relearn old ways and not be afraid to fail. Ditch the need to constantly control the situation and start working with nature to find a balance. A balanced ecosystem where everything works together will not only be healthier for you but also less work in the long run.
There are lots of ways we can use what we have to add healthy vitamins and nutrients into our soil. These will help replenish what the plants have extracted from the soil and give your new plants a boost they need to thrive. Natural fertiliser ideas such as:
Weed Tea– are your weeds thriving? They will be full of vitamin and minerals that can be fermented into a fertiliser for your gardens.
Composting – Composting is a great way to return plant matter and nutrients back into the soil.
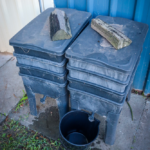
Worm Farms and Worm Tea – worms are powerhouses in the garden! Harness their energy by starting a worm farm and turn your recycling and scraps into nutrient rich fertilisers.
Banana Skins or Banana Tea Fertiliser – Chop and sprinkle banana skins in your soil or add to water to make a potassium rich natural fertiliser. This is great for fruiting trees as it promotes fruit production.
Coffee Grounds – Coffee grounds are high in potassium and nitrogen which are both great for the garden. By themselves, they can be quite acidic, so its best to add them into your compost or mix through soil and spread it out.
Mulching – mulching not only helps retain moisture in your soils but also add nutrients as it breaks down. Each time you add fresh mulch on top you are adding new layers of soil. So it is again important to choose natural and organic mulch.
Chop and drop – this is a technique I use often with my gardens. It can look a little messy but adds nutrients back into the soil. When you trim your trees roughly chop up the branches and place them on the surface of your gardens as mulch. This works best with fruit trees or low maintenance gardens. Fruit trees will benefit from the fungal activity of the branches as they break down.
5. Grow away from Roadsides and Contaminates
Cars and high traffic areas will give off a lot of atmospheric pollution. It is best to avoid growing in these places. There are a few ways you can reduce the risk of your gardens being contaminated such as:
Plant trees or hedges to create a barrier and diffuse some of the dust and fumes.
Choose to grow fruit trees rather than leafy greens to avoid directly consuming the contaminates.
Be sure to wash the fruit well before use.
6. Buy Local and Organic
If you are supplementing your food supply with bought produce, choose to purchase local and organically grown for a reduced risk of contamination. Knowing where your food has come from and being able to talk to the grower will give you peace of mind in what you are consuming. There is so much unknown in what goes into fruit and vegetables at the supermarket. Many vegetables will be grown in contaminated soils, constantly sprayed with harmful pesticides and chemical fertilisers. These accumulate and transfer into the food we eat. Many of these contaminants will be used from the beginning seed and then many times during the growth, harvest and transportation of the produce. All to increase production and shelf life.
It is hard to know what exactly you are eating when you purchase commercially grown produce. The best way to reduce harmful toxins is to buy your fruit and veggies from local organic growers and eat fresh!
7. Wash your Fruit and Vegetables
Washing your fruit and vegetables can help remove some of the toxins but not all of them. To wash your fruit and veggies – place them in the kitchen sink with 3 parts water and 1 part white vinegar or apple cider vinegar. Give them a good rub to remove any wax or sprays, then dry them and put them away.
8. Don’t get Caught out with “Natural” “Organic” Marketing
Most companies have invested thousands into their marketing and advertising to attract more customers. Using natural green and brown colours, patterns and textures, plants and insect imagery as wells as “sustainable” language. These strategies can trick us into thinking these products are good for us and the environment. Certified organic products are best and will have the accreditations on the labels. Next time you are shopping for gardening or food products take a second to read and evaluate what you are buying. Don’t get tricked with natural and sustainable looking imagery and advertising.
Growing naturally without harmful pesticides and fertilisers is not only better for you but will also make a huge difference to the health and wellbeing of local pollinators and insects. Pollinators are small and very at risk from contaminated gardens. Pollinators help our gardens thrive and produce more food so it is important that we care for them too.
Overall, the best way to eliminate toxic contaminants from our home and gardens is to slow down, read, ask questions and make informed decisions. Growing naturally and sustainably is something that will take work and many failures. Not having instant chemical fixes to problems but to learn to embrace failures and learn from any mistakes.
Sometimes failure is the best way to learn and move forward.
Happy gardening!
Holly
If you have any questions please leave me a comment below.
This Sweet Potato and White Chocolate Slice is so so delicious. The sweet potato makes it fudgy and the white chocolate gives it a caramel flavour with crisp and chewy edges. Sweet Potato is such a versatile plant and can be used for both sweet and savoury dishes. This Sweet Potato and White Chocolate Slice is so delicious and doesn’t require any eggs or butter so can easily be made vegan. Being able to use your homegrown veggies for a wide variety of recipes will mean you need to buy fewer ingredients. I used purple sweet potato for this, which is super fun, but you can use which every variety you have growing.
Growing Sweet Potatoes (Ipomoea batatas) in your home garden is a great step towards self-sufficiency. Sweet Potatoes are my favourite permaculture plant and are an easy crop to grow for beginner gardeners. It is important to grow plants that support and encourage other plants and beneficial insects in your garden. Creating a cohesive ecosystem that promotes the growth and success of your garden’s health and supports abundant harvests.
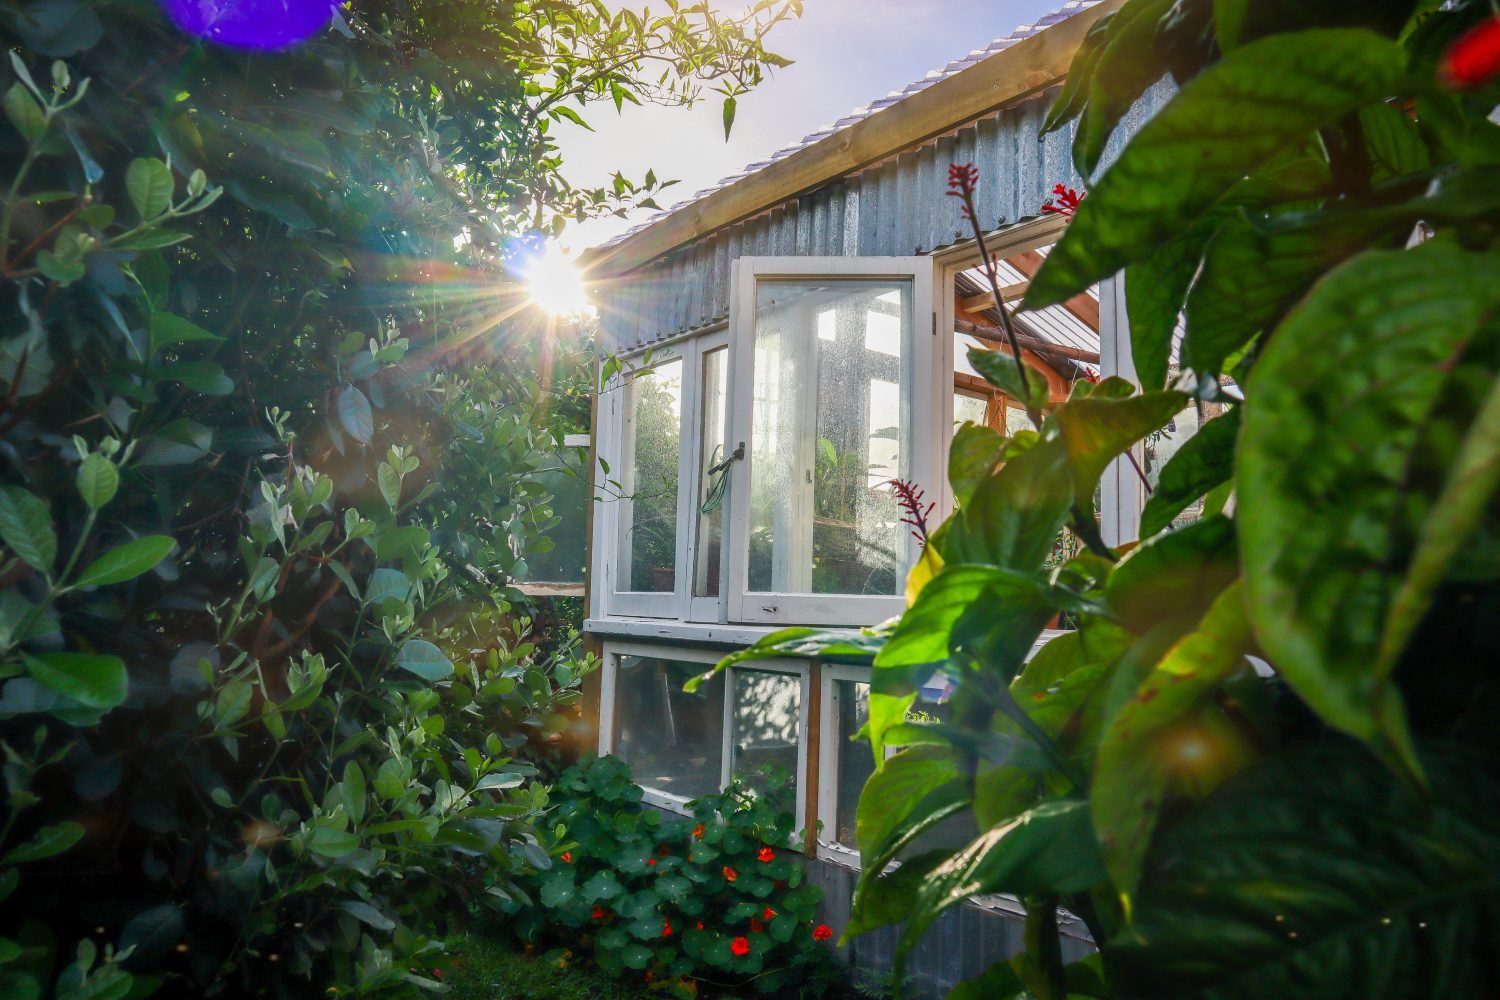
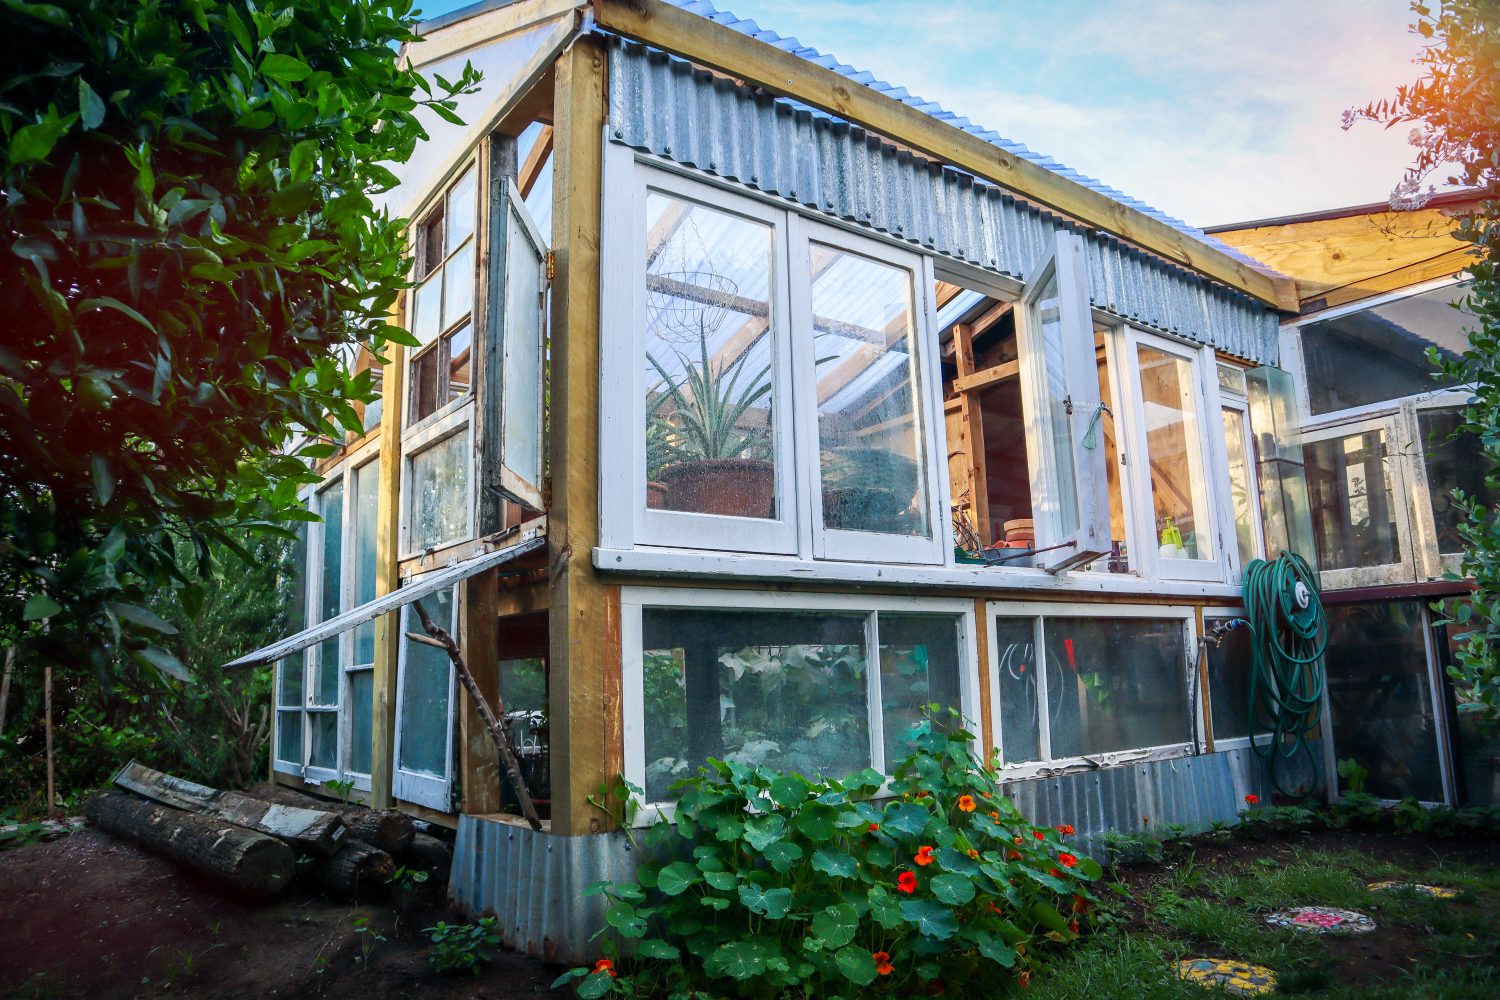
I was lucky enough to have recently been home to New Zealand to visit my parents and this new DIY greenhouse addition was so impressive! Mum built this DIY Greenhouse and She Shed from scratch using Recycled Timber Windows!!! Learning how to use tools along the way she made her dreams a reality!! I’m so proud of my mum and I can’t wait to show you this greenhouse tour! The perfect space for potting up seeds and cuttings or having a baileys in the evening.
Watch the Full Tour
Click the Image below.
Creating Sanctuary
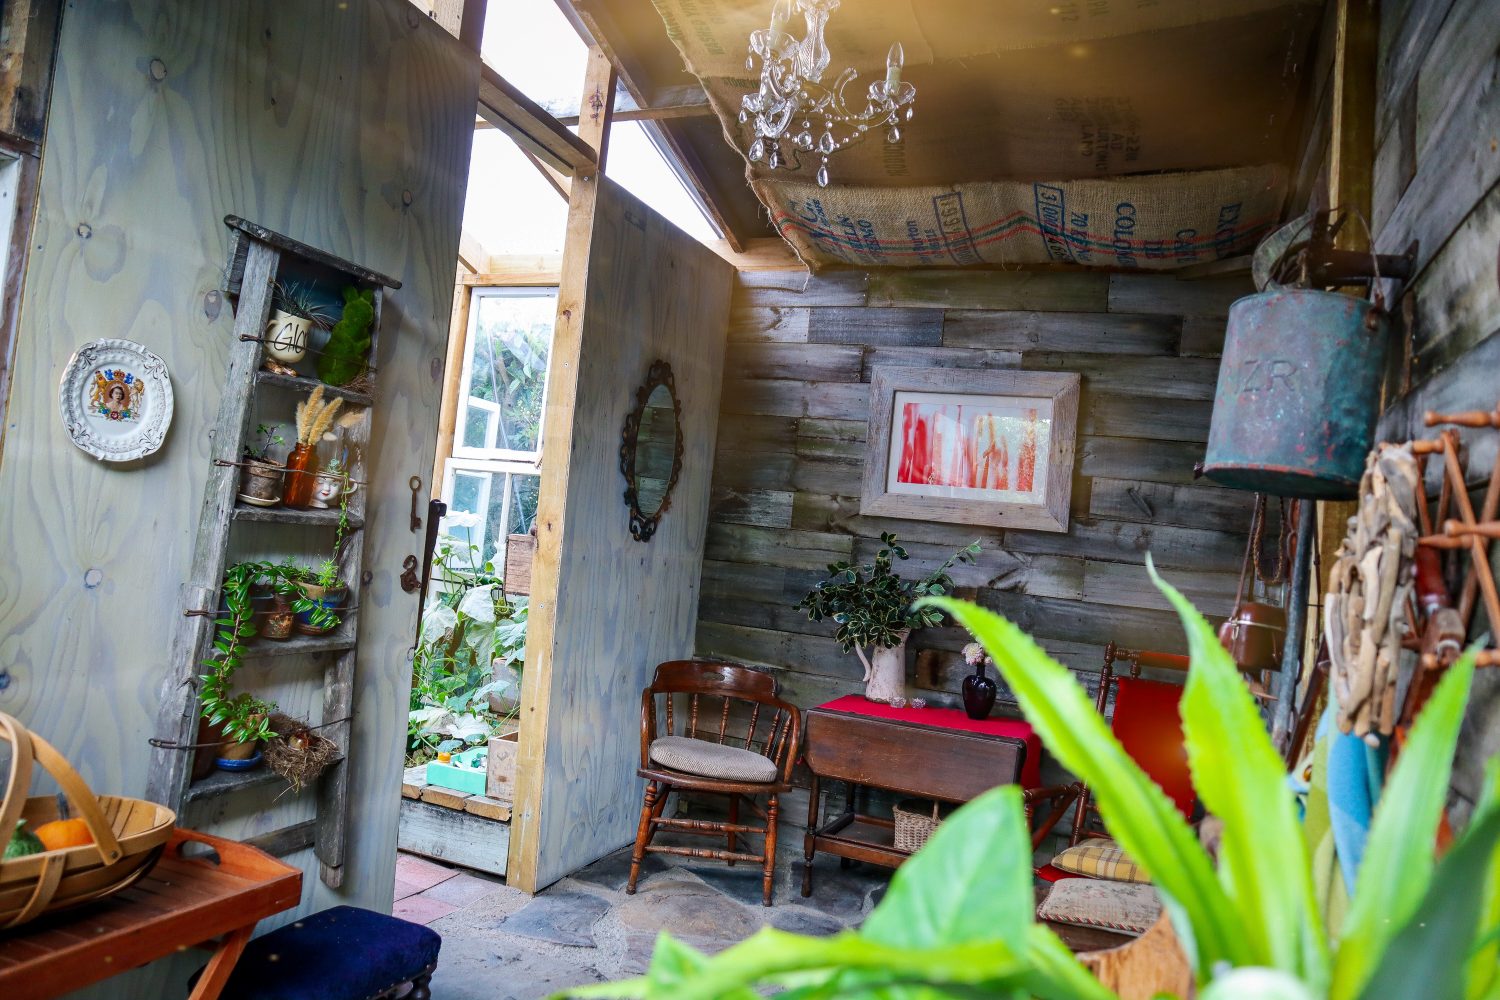
Mum wanted to create a space to display her family heirlooms and treasured items. A quiet place for reflection when the world around gets too busy. It is rustic and cosy with a warm inviting feel. The plants in the Ladies Lounge spill down from teacups and climb the ladder to help integrate between the outside and the greenhouse, making the whole place feel as if it was always there. The greenhouse also offers a more controlled environment to grow all year round. Being able to open and close the windows can keep the heat in or let air flow through.
From the Ground up
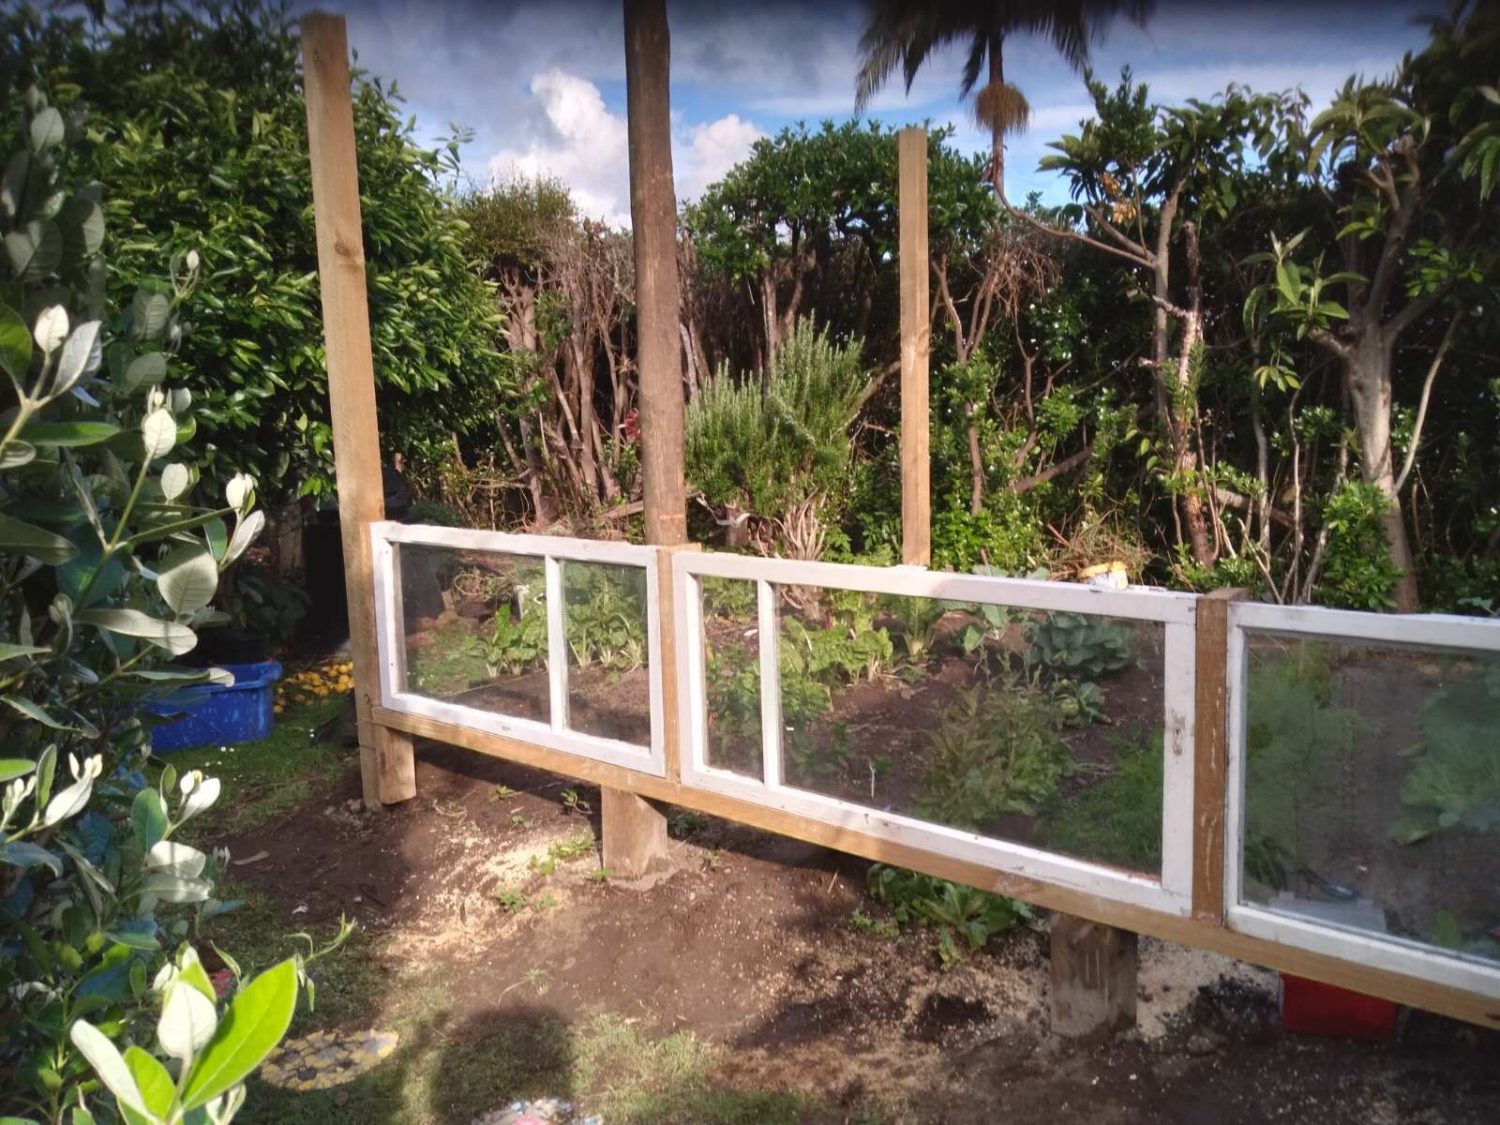
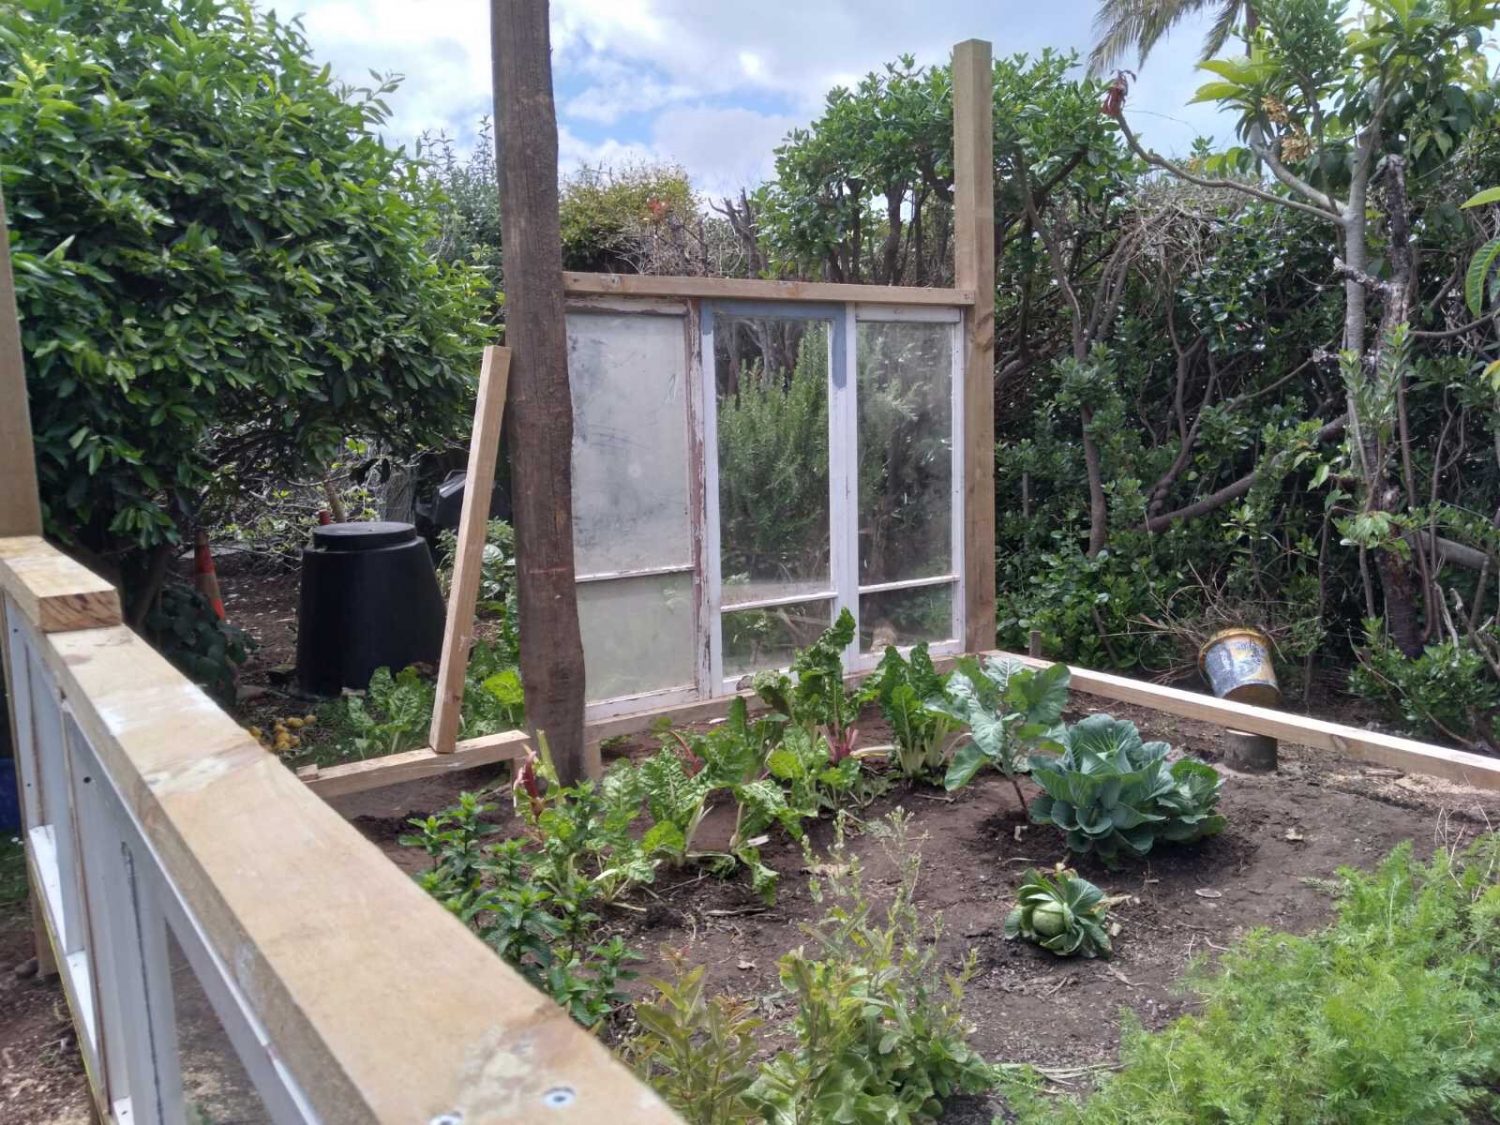
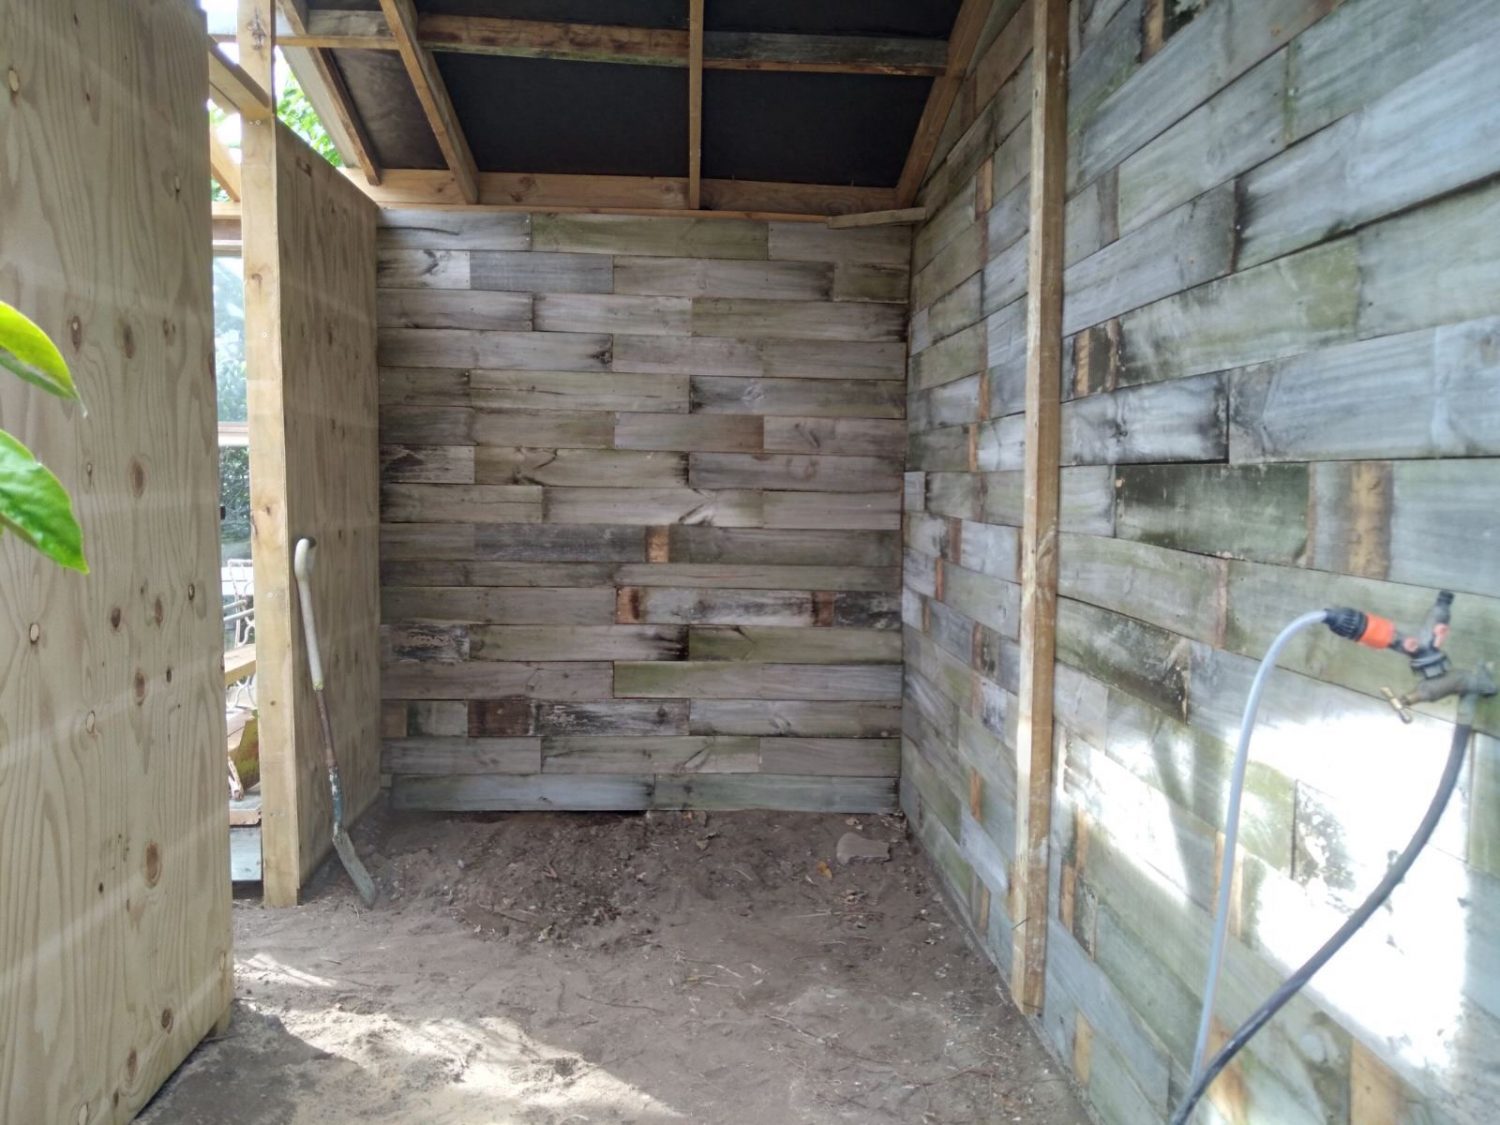
First up another vegetable patch was started in a new location to allow a seamless transition and continuous supply of homegrown veggies. Then the foundations were started and went up around the old veggie patch. The windows were still being sourced and collected along the way then secured in to place. Shiplapped timber walls were constructed using the neighbours discarded timber fence and has created beautiful rustic feature walls.
Recycled and Vintage Treasures
The Greenhouse floors are made from pavers donated from neighbours and the ladies lounge slate flooring was gifted from a friend and had been lovely kept in her family for many years. Then came the exciting part of decorating the rooms with all the special items and decor.
Follow your Dreams
“Surround yourself with the dreamers and the doers, the believers and the thinkers, but most of all, surround yourself with those who see the greatness within you, even when you don’t see it yourself”. – Edmund Lee
Inspiration is often found on the glossy pages of magazines or hoarded away in boards on Pinterest but the key to following your dreams is in the action of doing. You CAN do it. Mum shared her dreams and ideas with friends and family and they came together to offer supplies and words of encouragement. This became her driving force and she was off on a mission to bring her dreams to life. She learnt new skills, got stuck in and didn’t wait for someone to come along and do it for her. So don’t spend too much time searching for inspiration, share your ideas and just get started.
A big thank you to all her friends and family for donating special items and supporting her with this DIY greenhouse project. It sure is an inspiring space to visit!
Holly 🌱
MY GARDENING ESSENTIALS // Fertiliser spray gun: https://bit.ly/366nL1t Retractable Hose: https://bit.ly/2TSC0Bo More gardening tools: https://bit.ly/32IQmbD
DISCLAIMER: Links included in this description might be affiliate links. If you purchase a product or service with the links that I provide I may receive a small commission. There is no additional charge to you! Thank you for supporting my page so I can continue to provide you with free content!