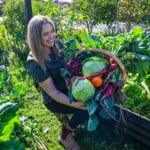
Composting turns organic waste into nutrient-rich soil to help feed and grow incredible gardens. Composting is not only great for the fertility of your soil and the secret to growing abundant gardens, it also stops waste from going to landfill.
Compost is alive with bacteria, micro-organisms, worms and many other beneficial insects. Soil that has been left to die will be dry, lack nutrients and will not promote the growth of your plants. There are many ways to start composting your left-over organic waste, depending on your living situation.
Below are some tips and tricks to start composting at home no matter the size of your garden..

WATCH the full Workshop
Why should we avoid sending food scraps to landfill?
Food scraps, although natural, should not end up in landfill. The problem is, when food scraps are sent to landfill, they are covered with other rubbish and starved of oxygen. They can not break down correctly so in turn, they produce methane gas. Methane gas has a negative effect on global warming and our future planet. “On average Australians throw out up to 20% of the food they buy, which once sent to landfill is generating methane equivalent to around 6.8 million tonnes of carbon dioxide. Not to mention all the energy used to get that food to your table in the first place”.*
Build Sustainable gardens
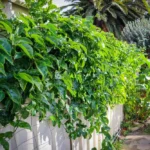
Creating your own compost at home will reduce waste and help you create a more sustainable garden. Food that you have grown in your garden, can then be put back into the compost to feed your future plants. It is a sustainable cycle that will not only save you money, but also have positive impacts on the planet. Working with nature instead of against it.
Where to Start with Composting?
To get started on your composting journey there are a few things to consider before you jump right in. Below are some tips on selecting the right compost system for your garden and how to keep your compost healthy. This will go a long way to helping you create a simple and effective compost routine to ensure you get the most out of everything that you grow.
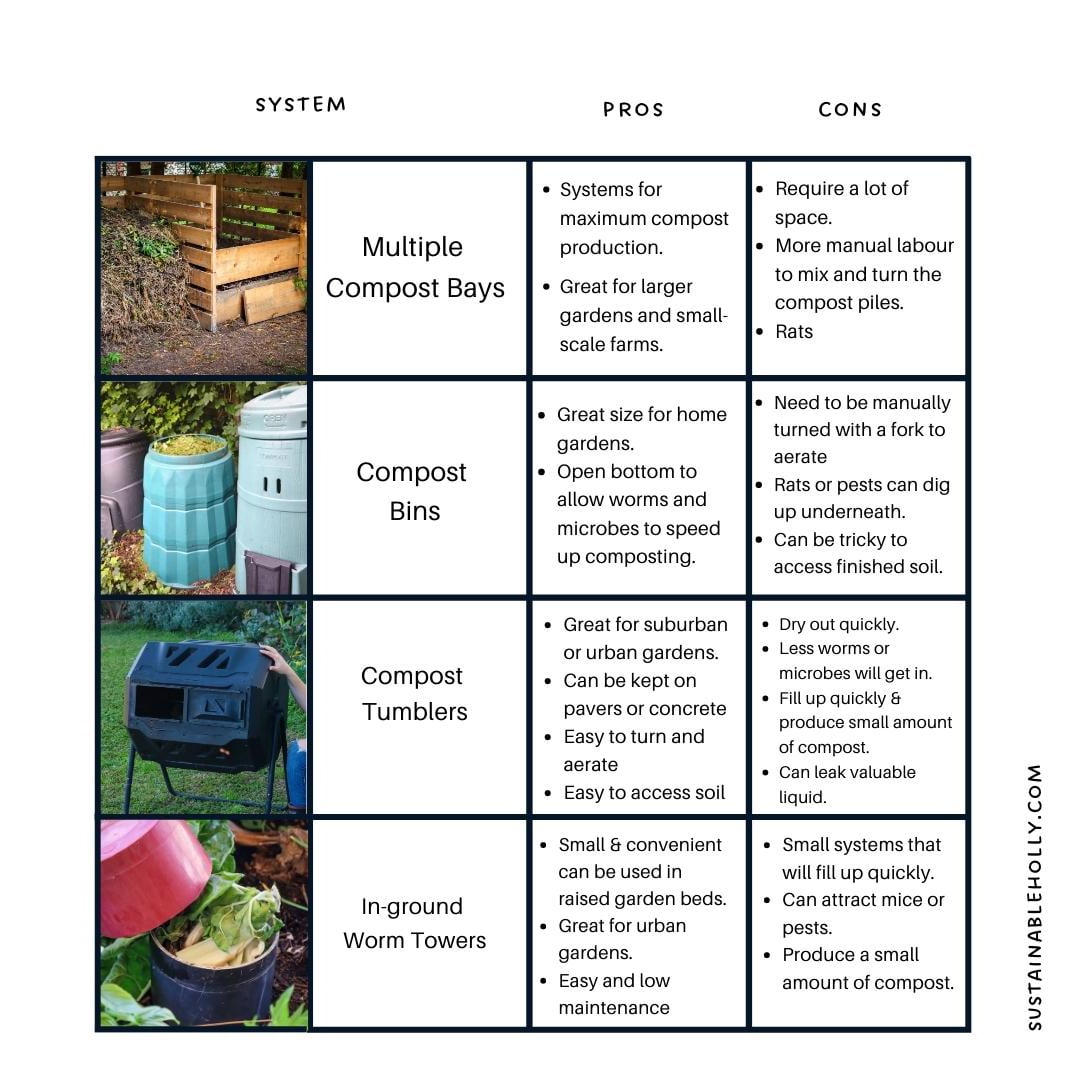
1. Choose your Compost Bin Systems
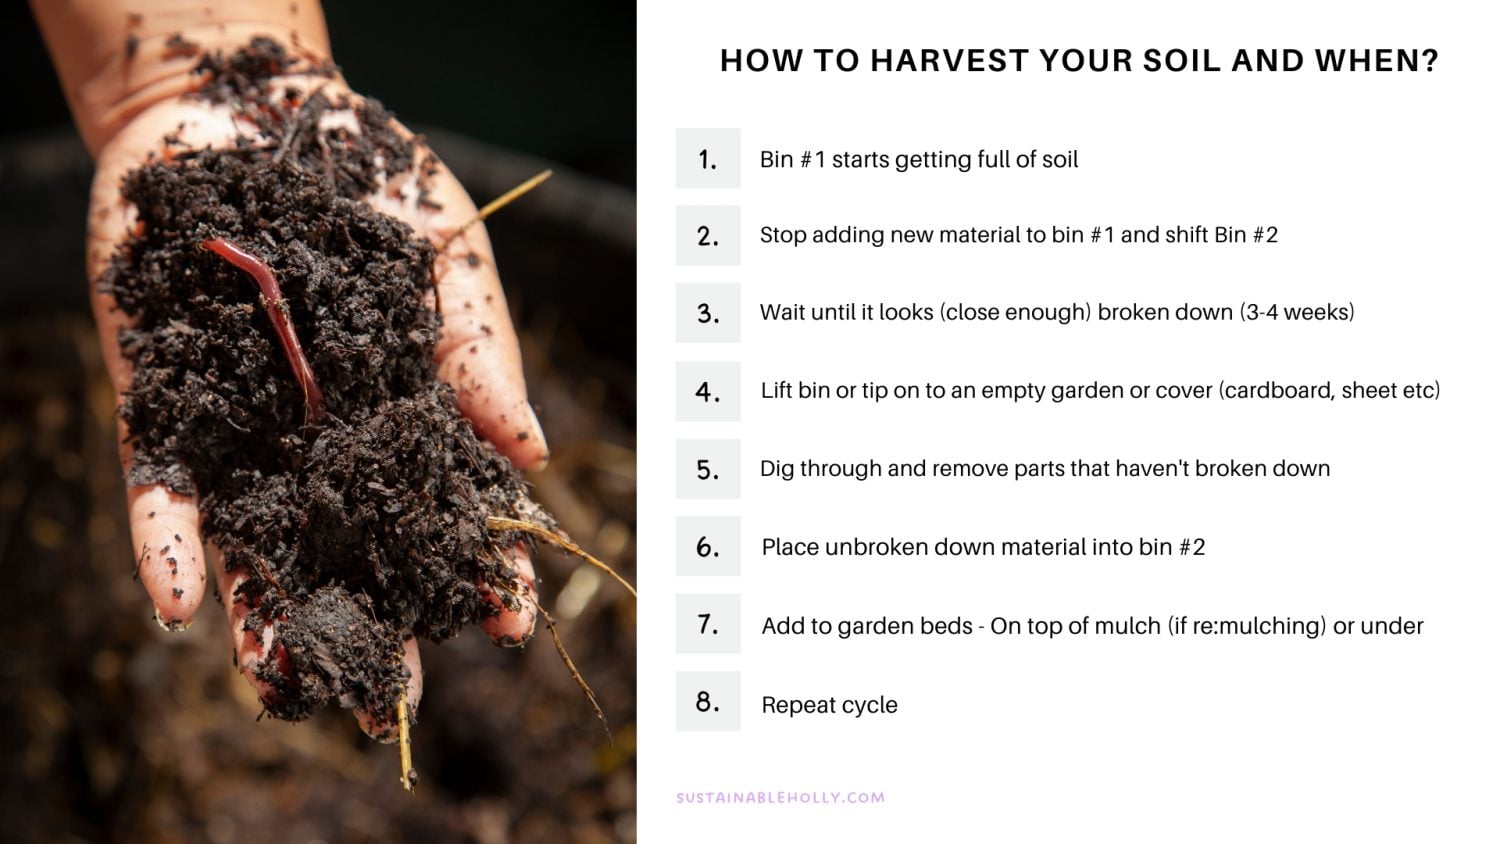
First, you will need something to make your compost in (although you can also just make piles!). There are many systems available depending on the size of your garden. DIY Compost Bays, Compost Bins, Tumblers, or in-ground Worm Towers. To get the most out of your compost it is ideal to have at least two systems. They can be different systems or some compost bins come with two parts already built in. Having two systems means you can stop putting scraps in one once it is full and allow it to break down fully whilst having a second location to put your green waste and scraps.
Below are some pros and cons to help you decide. I plan to have a mix of all these systems throughout my gardens.
2. Choose a location
This is an important part of setting up composting systems. You want the location of your compost system to be close and convenient to both your veggie patch and your kitchen. This will mean you will have easy access to add regular kitchen scraps and plant matter from maintaining your gardens. If it is placed right down the back in a faraway corner you are less likely to utilise it. If you are worried about the smell, following the tips and processes outlined in this workshop will help eliminate that. Having it far away will cause you to neglect the process and this will result in a stinky compost system. A location with part sun – shade will help to retain moisture and stop it from drying out.
If you receive a lot of rain it may be useful to have cover to sop it from getting too wet.
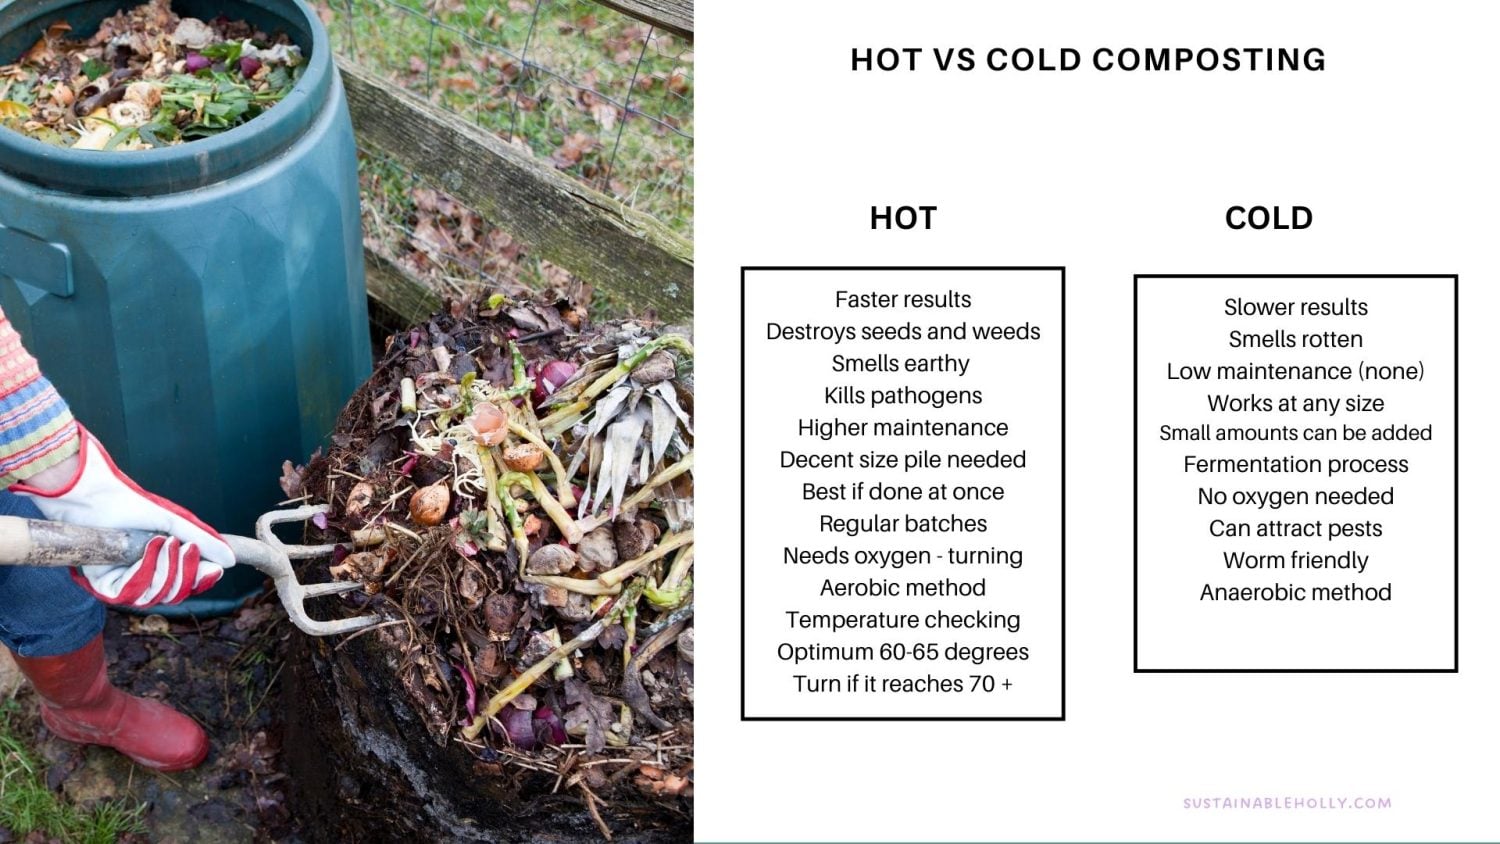
3. Hot vs Cold Compost
You may have heard these terms before and both will work to turn your organic material into the soil but there are clear differences. Again there is no right or wrong but hot composting will produce compost quicker and more efficiently.
For hot composting, the ideal temperatures are 60-65 degrees celsius. If you would like to be efficient and sure that you are reaching these goals you will need to get a temperature gauge to place in the centre of the pile. Once it starts to climb over 70 degrees you will need to tune and aerate with a fork to add oxygen and cool down the pile.
Currently, I do a mix of both. I aim for hot composting but I do not check temperatures and I don’t add all my material in at once. Because of this, my systems will not reach the optimum temperatures. This just means my systems will take a little longer to complete the process and create soil.
To increase temperatures add extra carbon or browns.
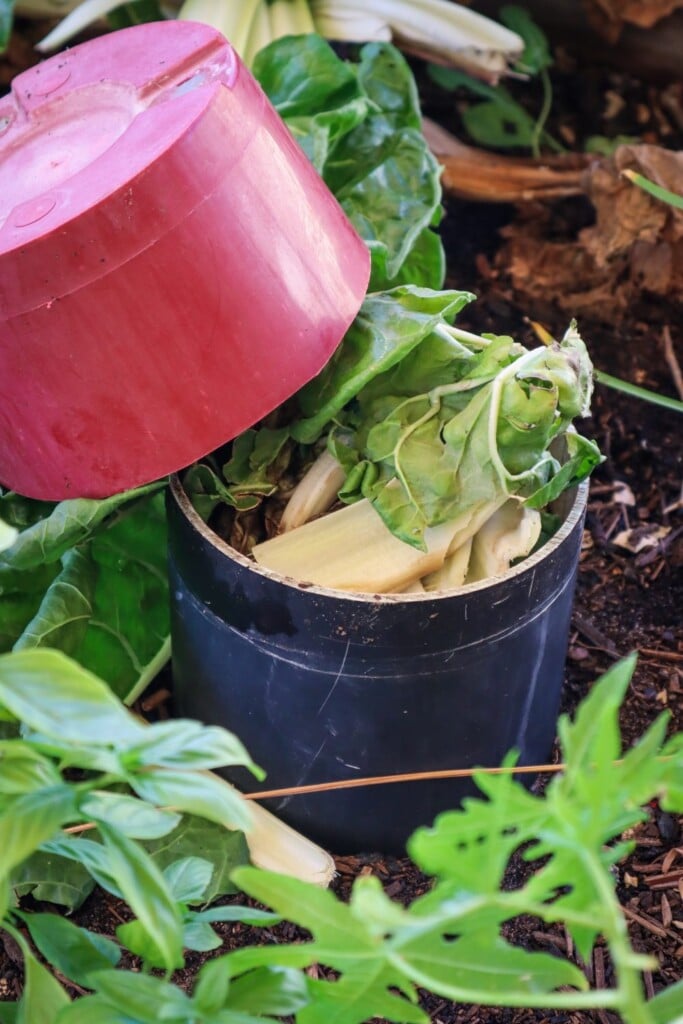
4. Inside Compost Bucket
It can be handy to have a small compost bucket with a lid to add your kitchen scraps into. This will make it easy to transfer your inside waste out to your compost bin. Keep it small so that you will need to empty it regularly to reduce odor. I just use a bowl and add kitchen scraps from the meal i am preparing and take it straight out to my compost bin. This reduces any bugs hanging around my kitchen.
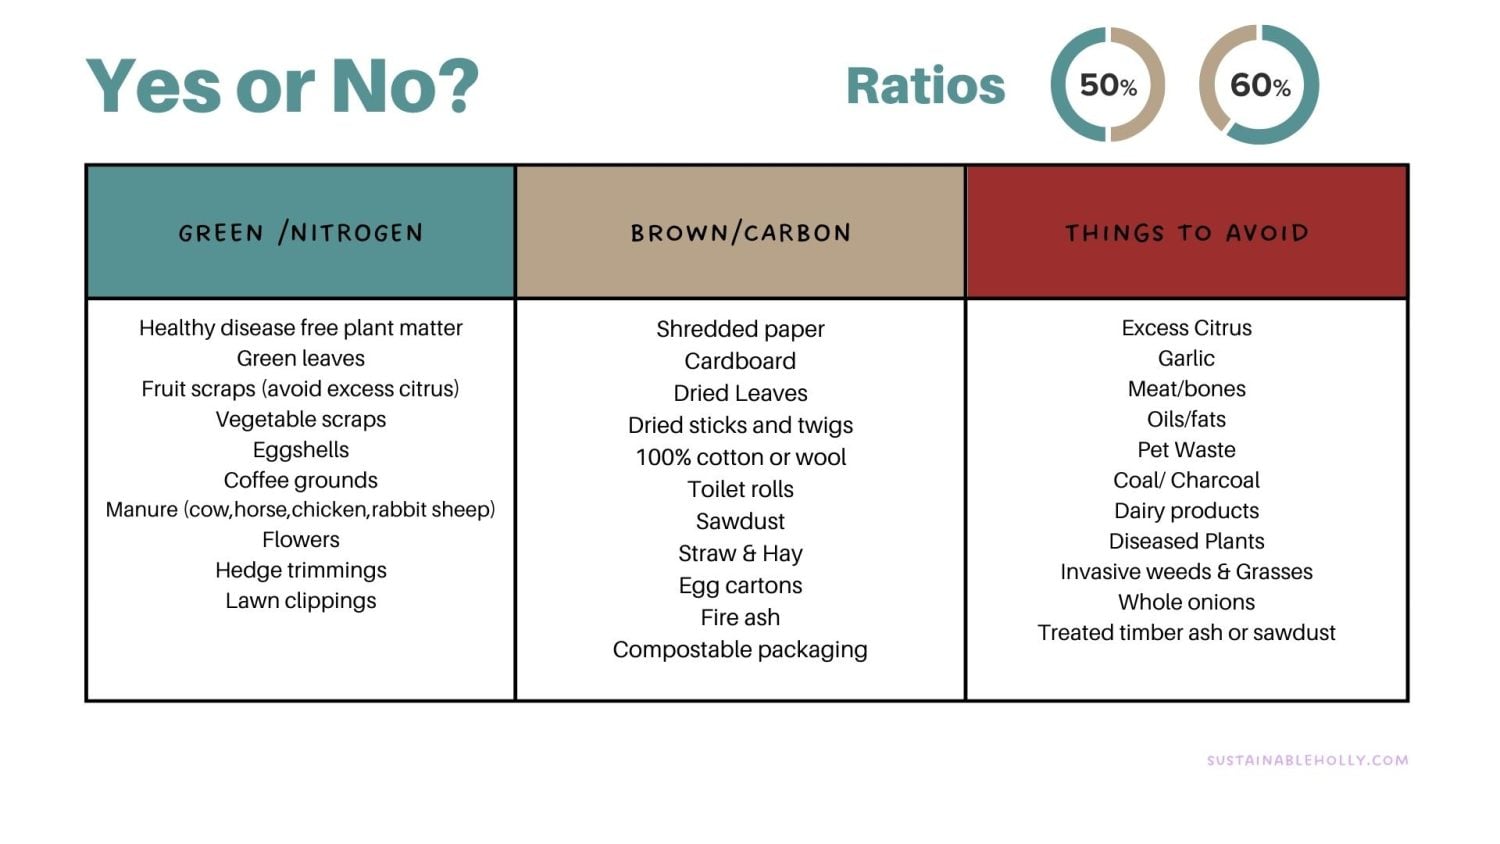
5. What can go in the compost?
Any disease-free waste from your gardens and your kitchen waste can go into the compost. Old plants that have finished or gone to seed, lawn clippings, prunings and so much more! Below is a list of some common things you can put into your compost and a list of things to avoid. It might be useful to print this list out and add to your fridge as a reminder.
You will need to add a mix of green and brown ingredients to create the right temperature and environment for the bacteria to live and start breaking down your scraps. If you add too much green (nitrogen) waste without any brown (carbon) the balance will be off, and you may find the compost bin starts to smell bad and look like a slimy mess. Aim for ratios of roughly 50:50 or 60:40. Green to brown. A good way to maintain this ratio is to add in some dried leaves or brown matter each time you add greens/ scraps to your compost.
6. Have a Carbon/ Brown Bucket
Carbon/ browns are an important part of a compost system or recipe. They can also be quite hard to source if you don’t have access to dried leaves. Having a bucket at your backdoor or somewhere nearby will mean you can keep filling it up every time you come across scrap cardboard or other brown materials from the list.
7. Tools Needed
Secateurs to cut up plant matter, gloves to protect your hands, a rake to collect dried leaves and a large fork to aerate the pile.
8. Spread in Layers
Composting is all about layers. Try to add a mix of green and brown layers as you go. It is also important to spread out your materials and cut up larger items into smaller parts. The smaller the pieces, the quicker they will be able to break down. Grab your secateurs and cut your plants or flowers into smaller pieces. Tear or shred paper and cardboard into smaller pieces and scatter across to form a layer. This will help disperse the materials so that they don’t end up in a thick matted clump, as this will slow down the process.
9. Add Garden Soil
It is not essential to add soil but highly recommended as it can help to add in a few handfuls of healthy soil from your garden. This soil will already have living microbes that will help kickstart your compost!
10. Keep Hydrated
Keep your compost pile moist but not too wet as this is important to speed up the composting process. Ensure you have your hoselink hose nearby and use the shower function to moisten the layers evenly. This is especially important during the warmer months of Spring and Summer. Keep your compost covered to reduce evaporation.
11. Turn and Aerate
The bacteria and microorganisms that get to work breaking down your scraps are alive and need oxygen to live. It is important to tumble or mix your compost regularly to help add oxygen into the centre of the pile. Do this every week or two if possible.
12. Finished Compost
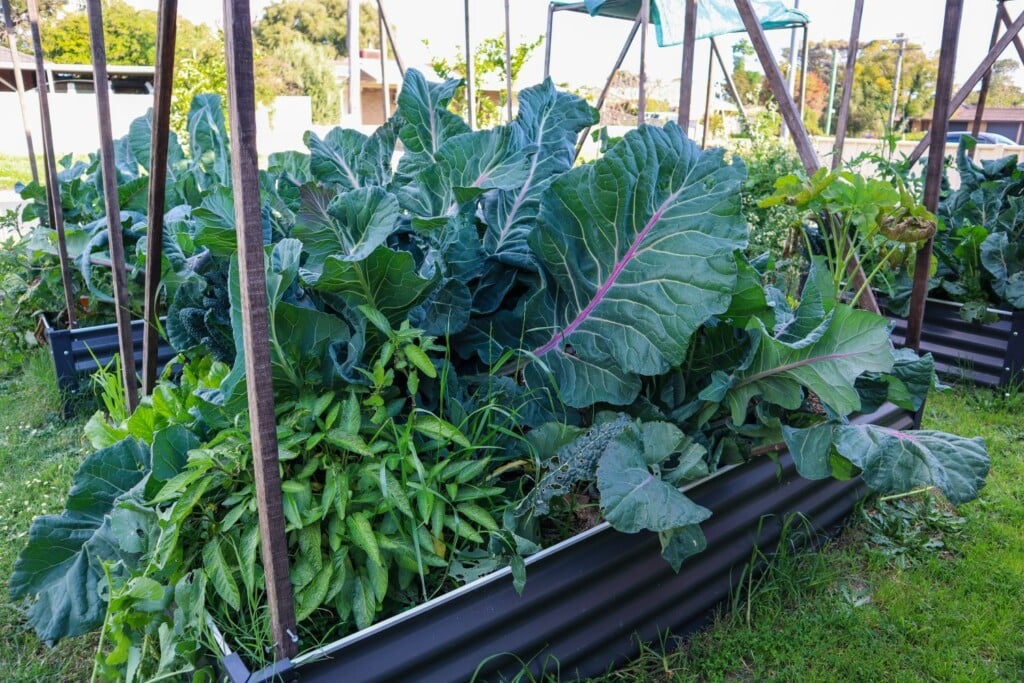
Once all your food scraps and plant material have turned into dark nutrient-rich soil, you can add this to your garden beds to replenish and feed your plants. As plants grow, they draw up nutrients from the soil, so it is important that we continue to replenish and feed our gardens regularly.
Urban Composting
Worm farms are great for urban environments because they take up very little space. There are also new ways for people with no land to connect with others that do, and give them their compost scraps. Community gardens, local Facebook groups or there is even an app! Sharewaste
Keep it Simple
Keep it simple and allow nature to do what it does best. Create systems that replenish and regenerate the earth rather than have a negative impact.
- Choose a Convenient Location
- Add your Green & Brown Waste
- Add soil microbes
- Hydrate & Cover
- Aerate and Turn
The key to thriving gardens is to feed and nourish your soil just as much, if not more, than your plants.
Care for your soil and your plants will grow with more ease and abundance. Nature is amazing and when we allow nature to do the work, there is balance and flow. Gardening will feel more sustainable and your plants will thrive all year round.
* source: https://www.climatecouncil.org.au/from-farm-to-plate-to-the-atmosphere-reducing-your-food-related-emissions/#:~:text=But%20what%20does%20food%20waste,million%20tonnes%20of%20carbon%20dioxide.