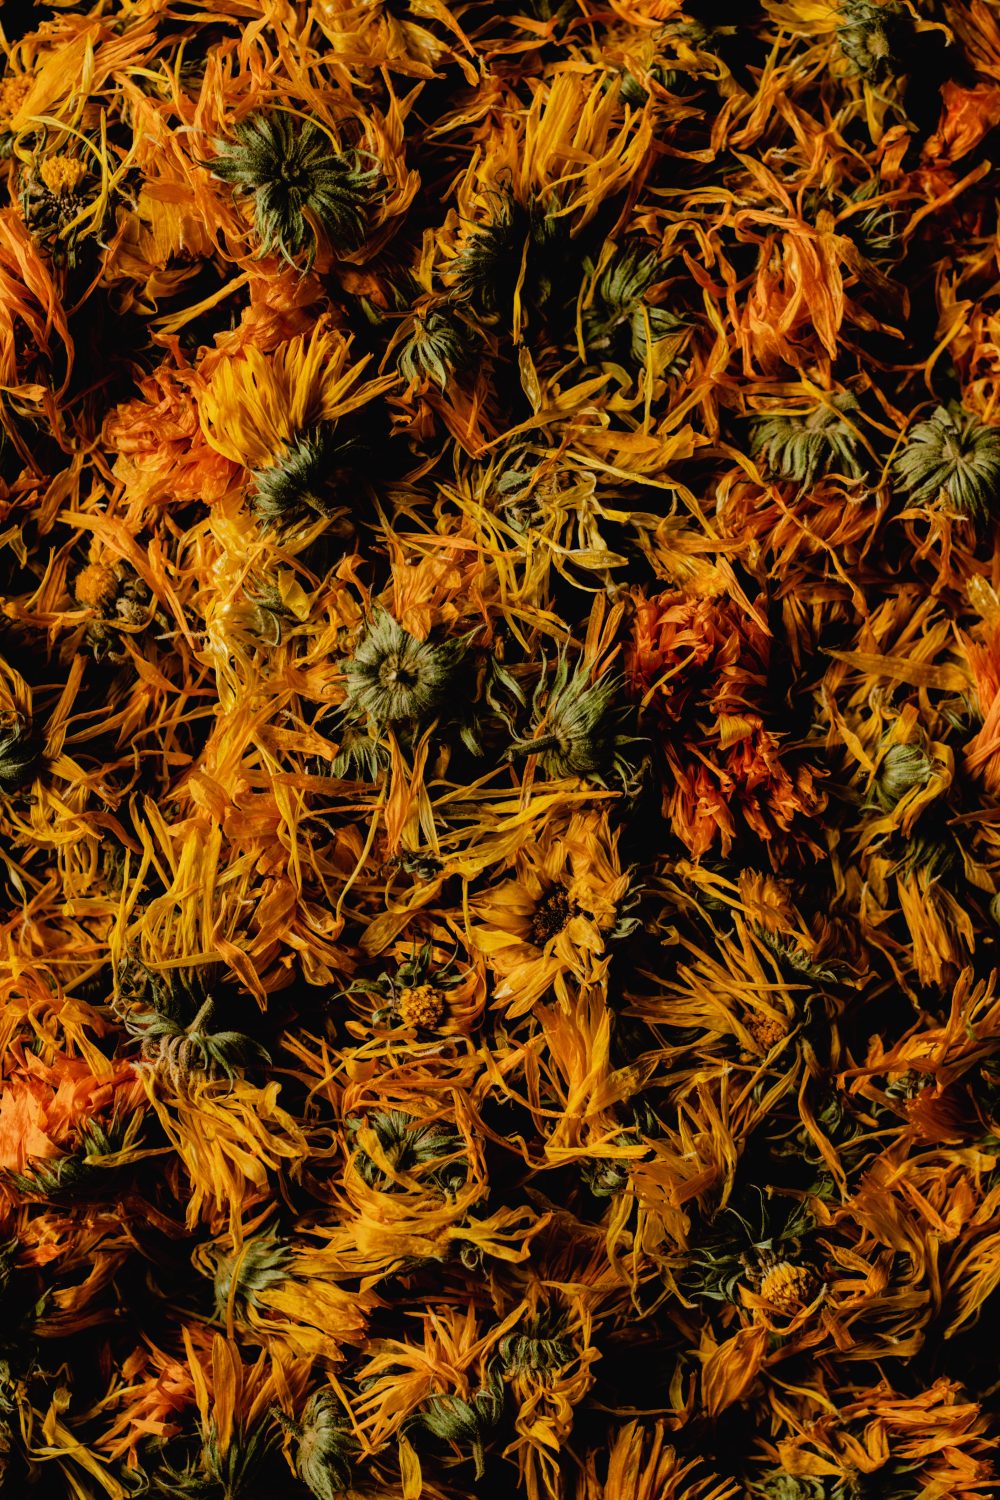
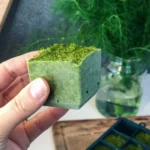
Calendula-infused salts or sugars make perfect gifts from the garden. It is a great way to preserve calendula to use throughout the year. Infused sugars can be great for finishing cakes, desserts, cookies, cocktails, or other sweet treats. There are two easy ways to make infused salt or sugar:
Mix dried herbs and flowers with Salt or Sugar and place in a jar.
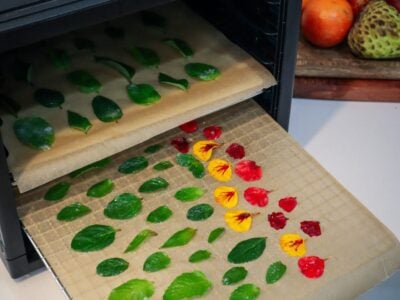
Blend equal parts (1:1) of fresh herbs or flowers with Salt or Sugar and lay flat on a tray and allow to dry completely in a dehydrator or oven at 40 degrees celsius. Once the herbs are dry you can loosen the mix back up and place in a jar.
Note: blended sugar will turn to fine powdered sugar, similar to icing sugar. If you want more of a granular salt or sugar just blend a small amount with the herbs and mix the rest through at the end.
sustainableholly
Calendula and Lemon Sugar
Calendula and lemon infused sugar can be great for finishing cakes, desserts, cookies, cocktails, or other sweet treats.
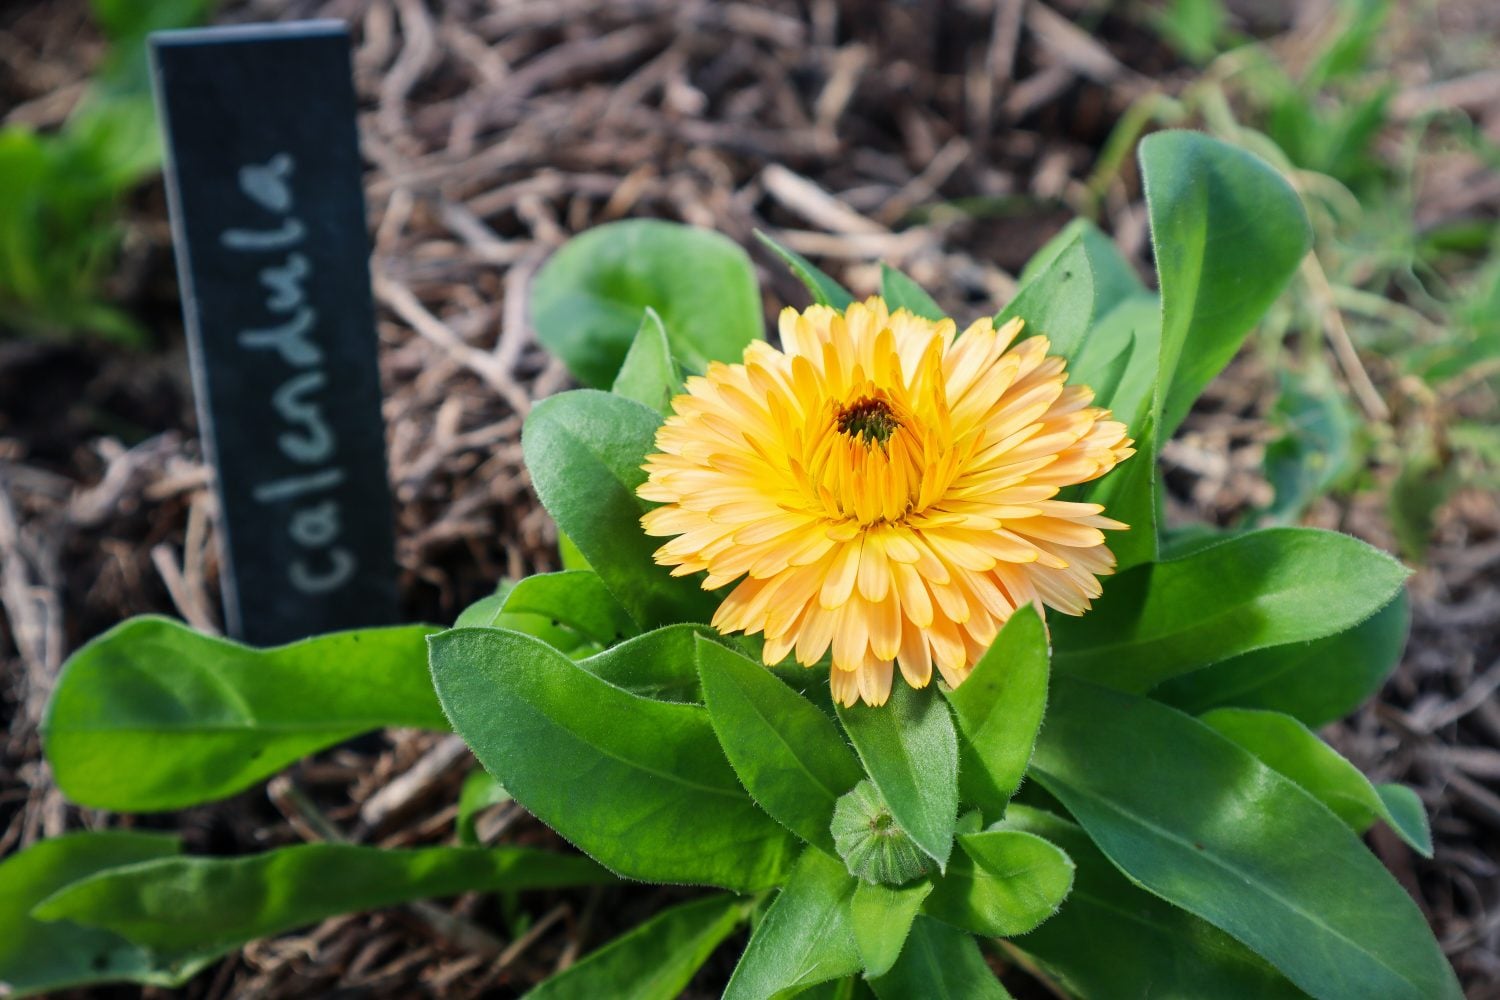
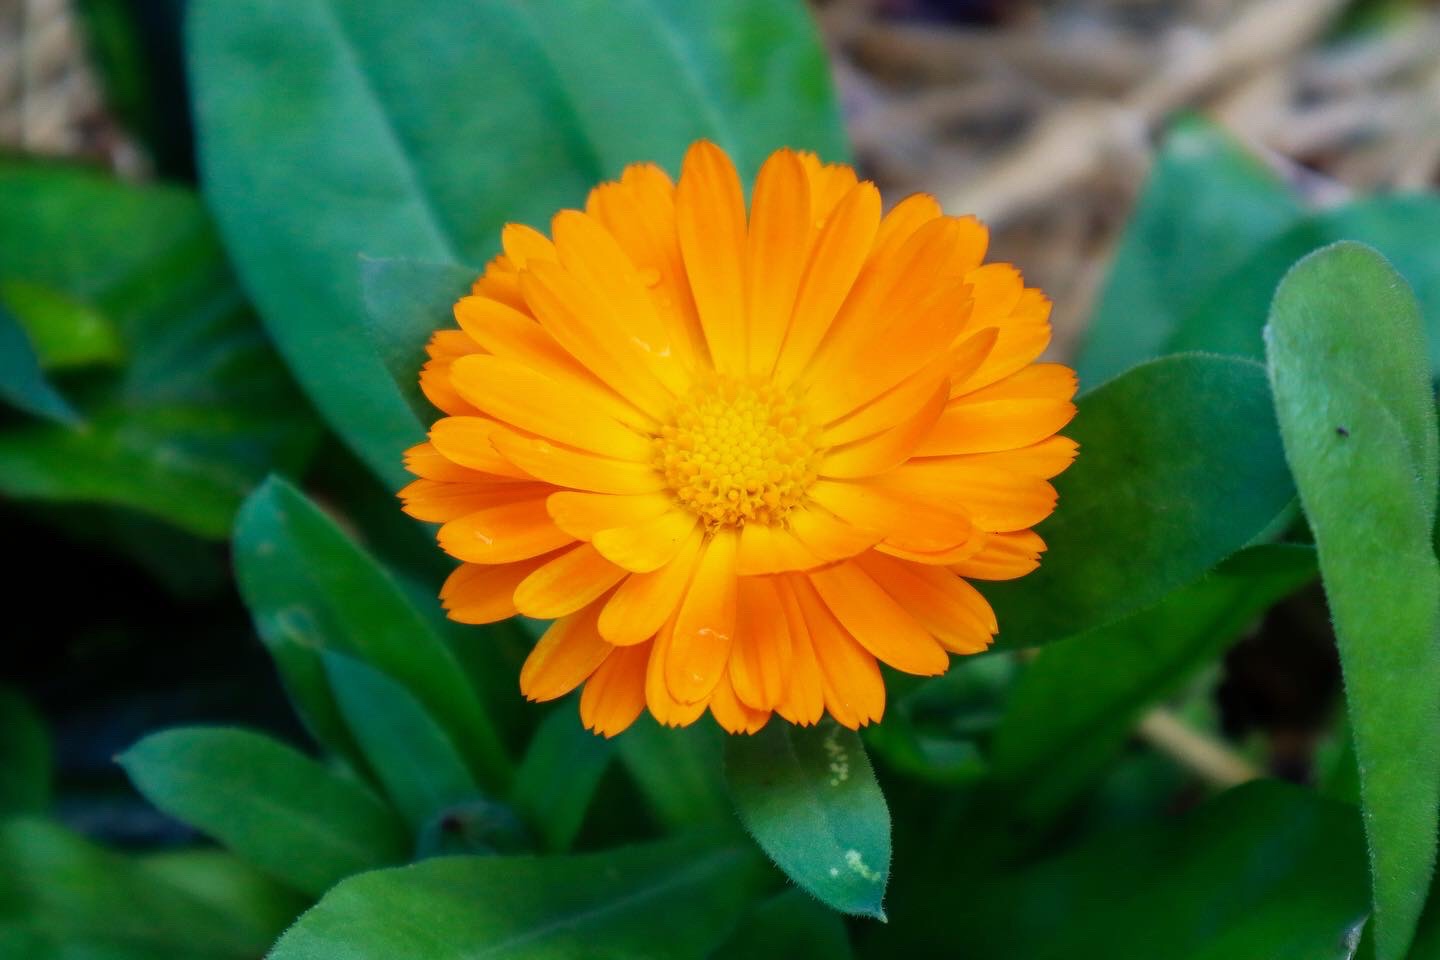
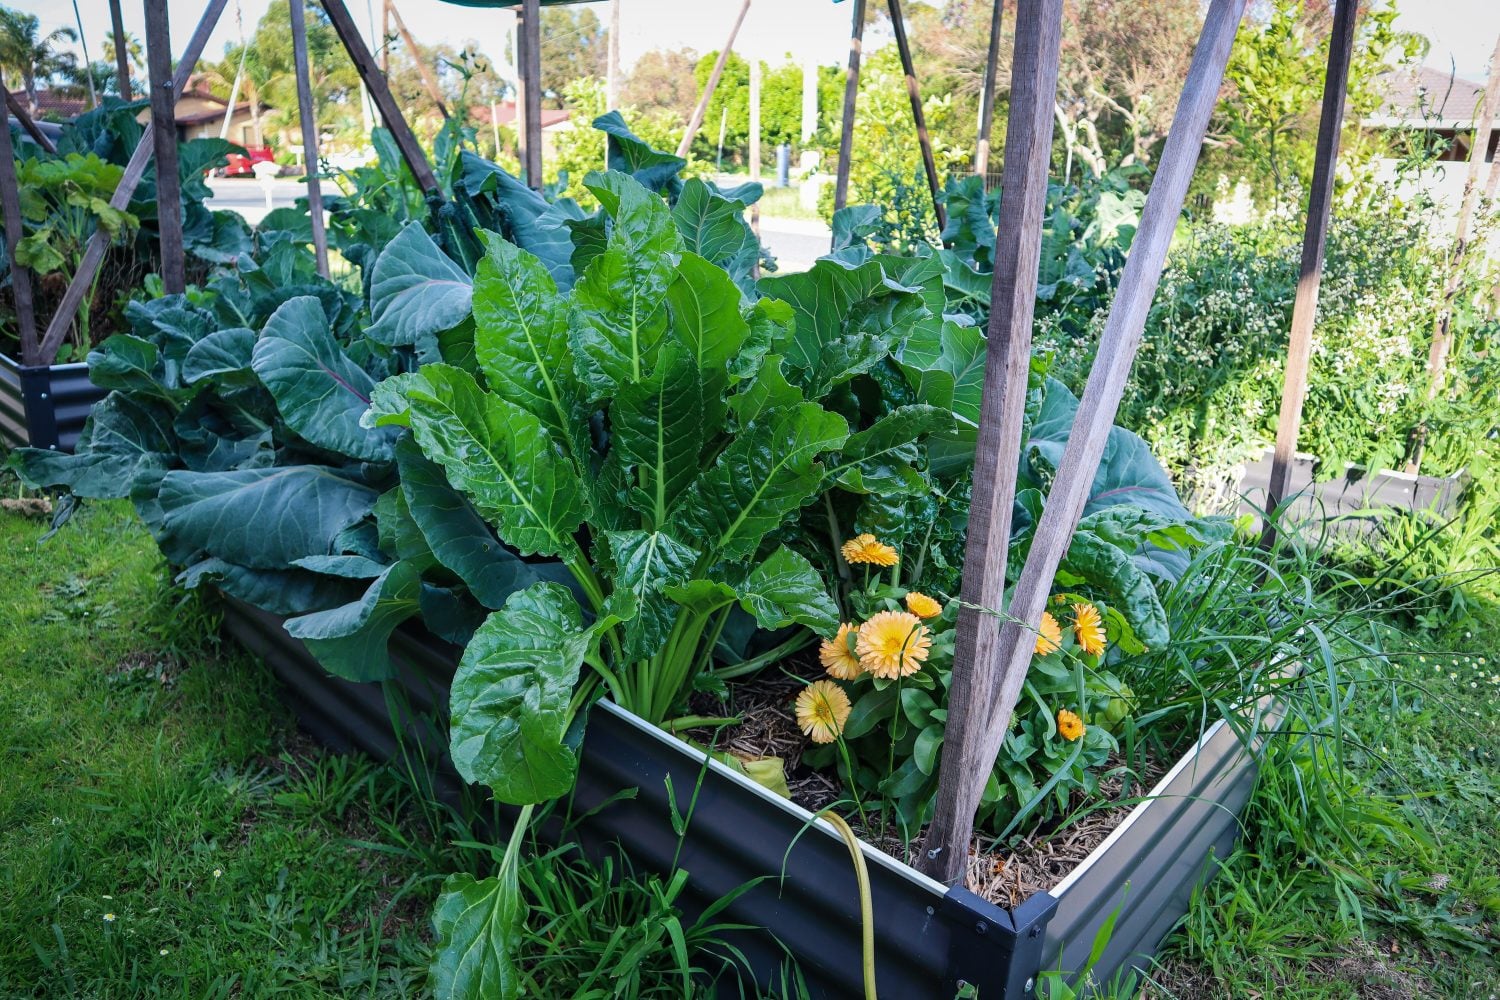
Calendula (Calendula officinalis) is a hardy edible flower that has many beneficial uses both in the garden and in the home. Calendula is easy to grow and if left to go to seed, will pop up each year in your garden with bright pops of colour.
Calendula has anti-inflammatory, anti-viral, and antibacterial properties great for making healing teas, balms and lotions.
Autumn – Spring.Mild summers can grow all year round.
SOIL
Grows well in most soil types.
LOCATION
Full sun – part shade position
CARE
Consistent watering.
FERTILISE
Doesn’t require feeding.
PESTS
Slaters, slugs, aphids, snails, green caterpillars.
HARVEST
Harvest young leaves fresh and flowers once fully open.
REPRODUCE
Seeds can be saved once the petals have fallen and the flower has dried off.
Why Grow Calendula?
Calendula is an edible that provides flowers for the bees; they look beautiful and ornamental in the garden.
Here are some of the many reasons to grow Calendula:
Easy to grow
Flowers for the bees
Natural pest management
Low maintenance
Edible flowers
Can be used raw or cooked
Edible leaves
Healing and medicinal qualities
Protects soil
Anti-inflammatory, anti-viral, anti-fungal
Natural food colouring or dye
High in vitamin A&C
Cut flowers
Chicken coop health
Popular Calendula Varieties
‘Pink Surprise’ – Large double-layer petals with a peachy colour.
‘Double Red’ – Large double-layered petals with a deep orange colour.
‘Golden Emperor‘ – Large single-petal flowers. Daisy-like flower with bright yellow colour.
‘Balls improved orange‘ – Large double orange flowers.
‘Pacific Apricot’ – Large double-petal light yellow-peach flowers.
When to Plant Calendula
Calendula can be sown at the end of summer or autumn. It can grow all year round in some locations that have mild summers.
How to Grow Calendula
Choose a sunny location.
Plant seeds directly in the soil or in seed trays.
Plant seeds or seedlings 1 hand width apart
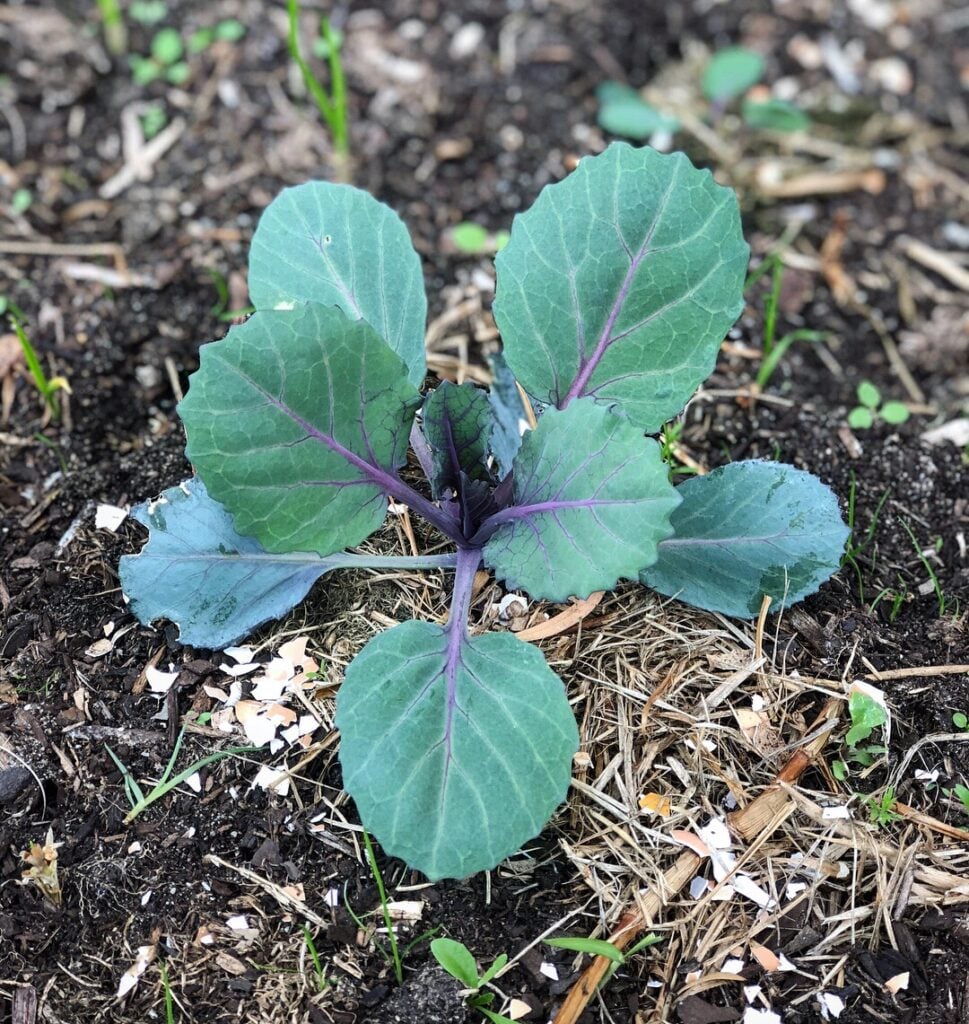
Protect young seedlings from slugs and snails but adding a ring of crushed eggshells
Add mulch to retain moisture
Care/ Maintenance
Calendula is a hardy, easy-to-grow plant. Harvest flowers regularly once petals are open to encourage more blooms.
Pests / Disease
Slugs and snails may eat young seedlings. Use natural pest management. Caterpillars can eat the leaves and flowers. Calendula can become a “trap” for pests and this will keep them away from your other plants.
How/ When to HarvestCalendula
The best time to harvest flowers and most vegetables is early in the morning, while the plants are hydrated. Wait until the flowers have opened usually once the sun is out. For medicinal uses, dry the flower with the green central structure attached, as that is where a lot of the healing properties are.
Reproducing
Wait until the flowers start to die off, their petals will fall and the seeds will start to form at the centre of the flower. Once they start to go brown and dry you can pick the flower and allow it to dry inside. Calendula self-seeds easily. If you would like to have flowers pop up in your garden next year, allow the seeds to dry on the plant and fall onto the soil. Once you know what calendula leaves look like you will be able to identify volunteer plants next year and dig up seedlings to spread around your garden.
Cooking and Using Calendula
Calendula flowers and leaves can be eaten raw or used in baking and home products.
NOTE: Calendula is not suitable for those who are pregnant or trying to conceive, as it may affect menstruation. Or those who are sensitive to the Asteraceae/Compositae family.
Preserving the Harvest
Calendula can be easily preserved to use throughout the year.
Calendula petals can be sprinkled in chicken bedding to help reduce ticks and bacteria. They can also be incorporated into their food which can make the egg yolks a deeper yellow colour.
Cabbage steaks are one of the easiest ways to turn the humble cabbage into a delicious meal or hearty side dish. Simply slice and roast to transform cabbage into tender, caramelised veggie steaks with crispy edges, while a creamy roasted beetroot and garlic sauce adds a punch of flavour and a vibrant splash of colour.
This simple cabbage steak recipe uses just a handful of ingredients fresh from the garden and is perfect as a light lunch, side dish, or vegetarian dinner. It’s an easy garden-to-plate recipe for winter when cabbages and beetroot are both growing abundantly in the garden.
Serve these roasted cabbage steaks on their own, drizzle them with garden pesto, or pair them with your favourite roasted vegetables for a hearty seasonal meal.
Growing Your Own Ingredients
This recipe is a great way to make the most of winter harvests. Cabbage is one of the easiest cool-season vegetables to grow and can provide large harvests from a relatively small space. Beetroot is equally productive and is ready to harvest at the same time. Making it the perfect seasonal companion crop in the winter garden.
Growing your own ingredients not only saves money but also allows you to harvest fresh veggies for simple and delicious recipes like these cabbage steaks.
Drizzle a baking tray with olive oil, place your cabbage steaks on, and drizzle a little extra on top. For extra flavour you can brush on some butter.
Cut the beetroot into 4-6 pieces approx 1-inch chunks. Drizzle in oil and add to the baking tray with the garlic clove (skin on).
Bake the cabbage for 15 minutes then turn it over for a further 15 minutes. Cook the beetroot and garlic for the full 30 minutes.
Remove from the oven. Place the beetroot and peel the garlic and pop in a blender or mixer. Blitz to a puree.
Add yoghurt and mix to combine. Season with salt and pepper.
Drizzle over your cabbage to serve.
Notes
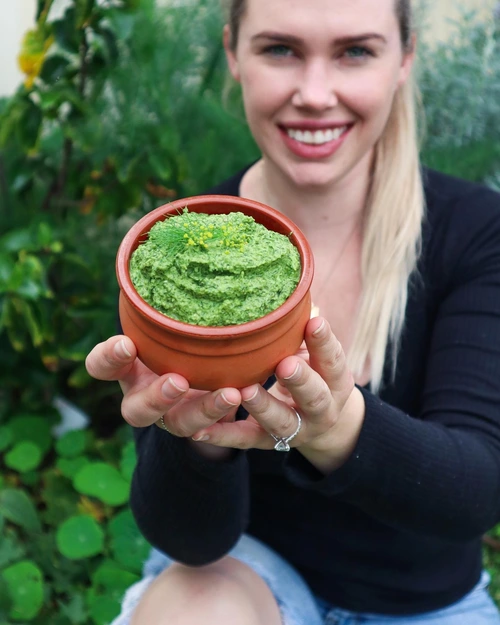
Serving suggestion: Garden pesto
A Simple Garden-to-Plate Winter Meal
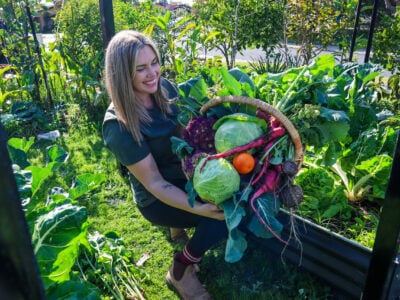
Cabbage might not usually be the most exciting vegetable, but when you grow your own, it is a whole different feeling! Take pride in harvesting so much food from your garden and make the most of it! Roasting cabbage completely changes the game. It’s the kind of recipe I love making during winter for a hearty meal that still feels fresh and vibrant (thanks to that super pink beetroot and garlic sauce!)
Simple ingredients, minimal effort, and plenty of flavour. If you give it a try, don’t forget to serve it with a spoonful of garden pesto for an extra burst of freshness.
Beet sauerkraut is a simple way to preserve extra veggies while creating a delicious probiotic-rich side dish. I made this kraut with red cabbage, beetroot and carrot, but I also have a list of other fun additions i like to mix in. This bright and vibrant cabbage ferment is packed with flavour, crunch and all the natural goodness.
It’s an easy recipe for reducing food waste, preserving a garden harvest and adding more fermented foods to your plate.
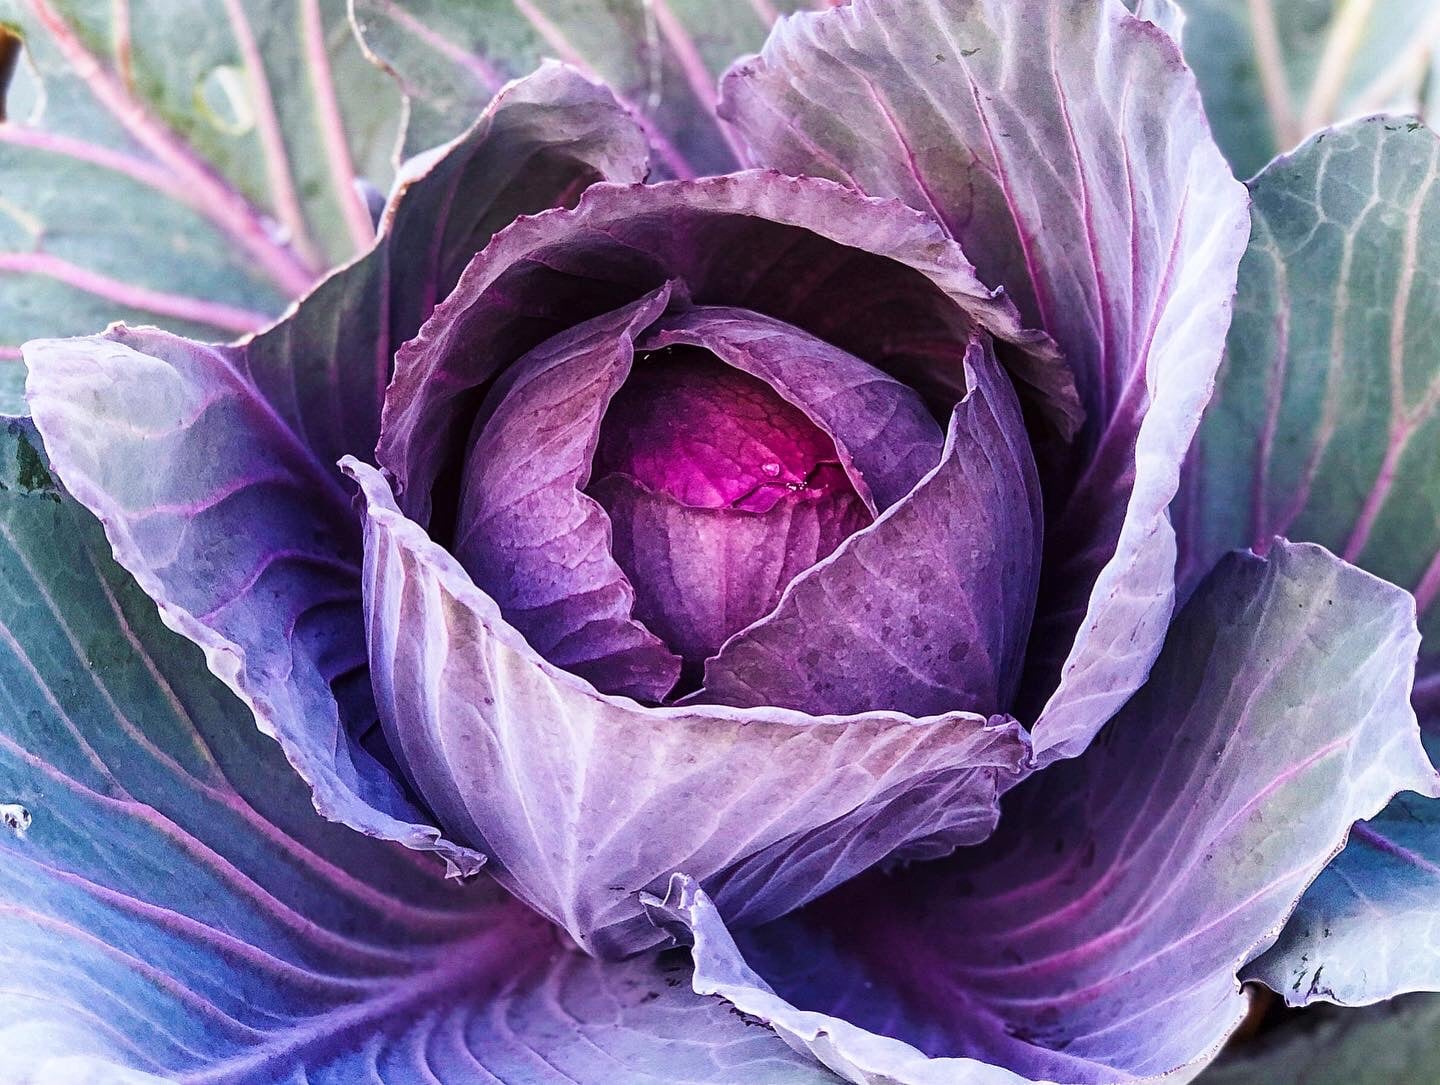
I love growing red/ purple cabbage (always have to have purple veggies growing!), but if too many are ready at the same time – it can be a lot of cabbage! If you have an abundance of cabbage or root veggies from the garden, this easy red cabbage and beet sauerkraut recipe is a great way to turn them into something that will last for weeks in the fridge.
Why Make Beet Sauerkraut?
Fermentation is one of the oldest food preservation methods and requires very little equipment, and I love to keep things simple! Salt draws moisture from the vegetables, creating a brine that encourages good bacteria to thrive. This may help give your whole immune system a boost. Unlike store-bought kraut, which is pasteurised and all the good live bacteria are killed off.
Making sauerkraut at home is:
A great way to preserve excess garden produce
Rich in natural probiotics
Easy and inexpensive
A simple way to reduce food waste
Packed with flavour and crunch
What Salt to Use for Sauerkraut
The best salt for sauerkraut is a natural, unrefined salt like sea salt, kosher or rock salt. These don’t contain additives that can interfere with fermentation and help create a healthy brine for the vegetables. Avoid iodised table salt if possible, as it can sometimes affect the fermenting process and slow down the growth of beneficial bacteria. You only need a small amount of salt, but it plays a big role in drawing out moisture from the cabbage and helping everything ferment safely.
Fermentation Timeline
The speed will depend on your room temperature.
Day 1–2: You may start to see small bubbles forming as fermentation begins
Day 3–5: The flavour becomes tangy and slightly sour
After Day 5: The sauerkraut becomes stronger, softer and more sour
Cooler temperatures slow fermentation, while warmer temperatures speed it up. Always taste as you go to find your preferred flavour.
Ingredients
3 cups shredded red cabbage
1 medium red beetroot (or try golden beets or candy cane beets for a sweeter less earthy flavour)
2 medium carrots
1½ teaspoons salt
Equipment
Large mixing bowl
Grater or mandoline
Sterilised 700ml jar
Clean spoon or tamper
Instructions – Beet SauerkrautRecipe
1. Salt the Cabbage
Finely shred the cabbage and place it in a large bowl. Reserve one whole outer cabbage leaf for later. Other outer leaves can also be used to make my unicorn noodles! Sprinkle the salt over the cabbage and massage it with your hands for 5–7 minutes until it begins releasing liquid.
2. Add the vegetables
Grate the beetroot and carrots and add them to the cabbage mixture bowl. Stir everything together and leave the mixture to rest for 5 minutes.
3. Pack the Jar
Give the mixture another squeeze and transfer it to a sterilised jar. Press it down firmly as you go to remove air pockets. Pour any juices left in the bowl over the vegetables.The veggies should be fully covered by liquid. If needed, add a small amount of filtered water.
4. Keep Everything Submerged
Place the reserved cabbage leaf over the surface of the vegetables to help keep everything below the brine. Leave approximately 2cm of space at the top of the jar.
5. Ferment
Store the jar in a cool, dark place for 3–5 days. Check it daily to ensure the vegetables remain submerged beneath the liquid. Taste the sauerkraut after a few days. The longer it ferments, the tangier and more sour it will become.
6. Refrigerate
Once the flavour is to your liking, secure the lid and move the jar to the refrigerator. Once in the fridge it will continue to ferment but at a much slower rate. Helping the flavour continue to get better!
Cabbage, Beet and Carrot Sauerkraut
Vibrant kraut full of gut-loving probiotics. This is a quick and easy way to see up extra Cabbage harvests.
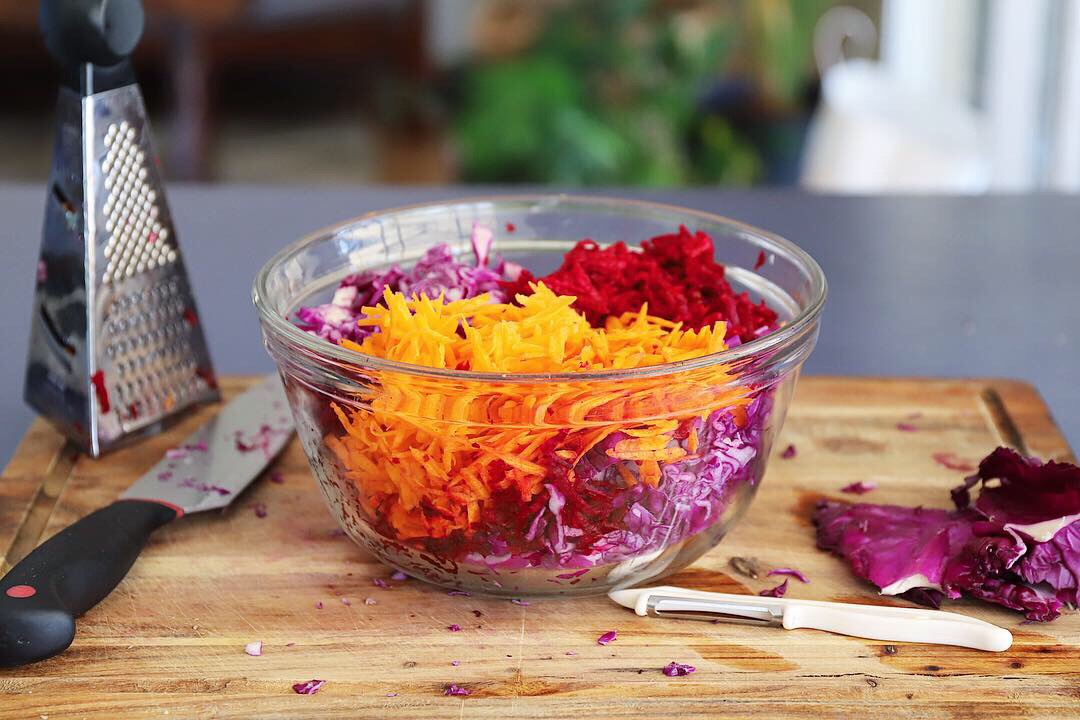
Finely slice or grate cabbage using a mandoline or grater. Reserve a whole piece to cover the contents at the end. Add to a large mixing bowl and sprinkle over the salt. at the
Squeeze the salted cabbage to extract the moisture. Do this for 5-7 minutes.
Grate carrot and Beetroot and add to the cabbage bowl. Peeled or unpeeled is optional – see notes.
MIx to combine. Cover and let it sit for 5 minutes.
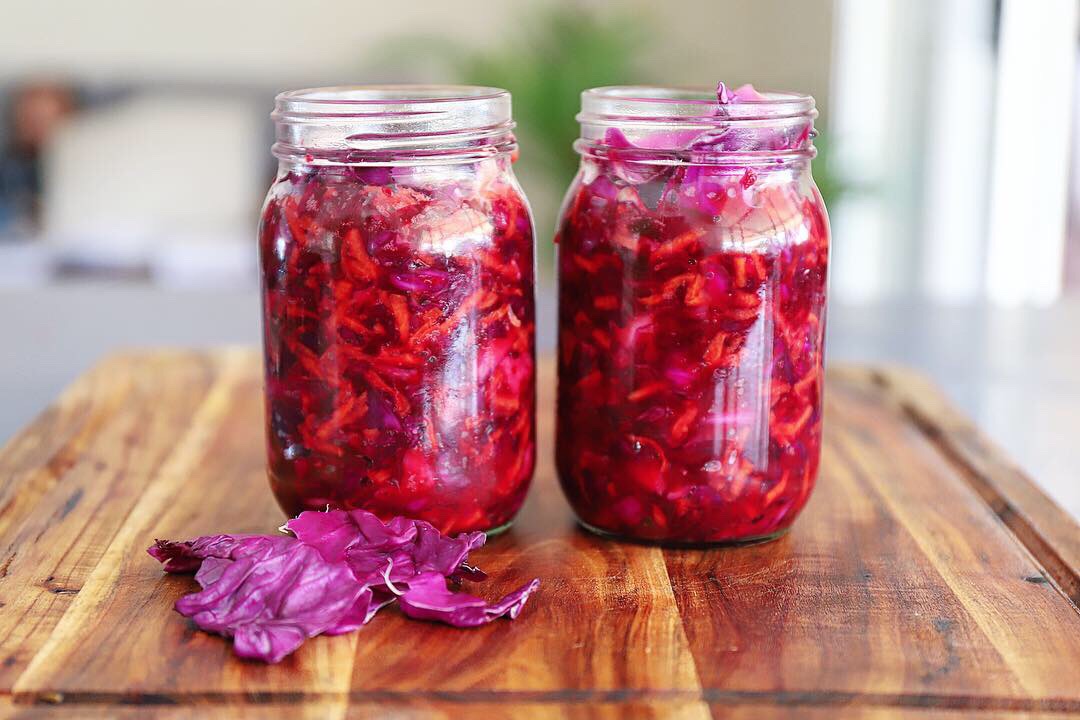
Give the mixture a final squeeze and mix. Then add to a sterilised jar. This mix will fit a 700gram jar so you could also use two smaller jars. Allow 2cm of empty space at the top of the jar. Press the mixture down to remove air bubbles and pour over any remaining liquid from the bowl. The liquid should cover the cabbage. Add a little bit of filtered water if you need it. Place a piece of cabbage leaf over the top to keep the mix submerged in liquid.
Store in a cool dark place for 3-5 days or until you like the flavour. It will get increasingly sour the longer you ferment it. Once you are happy secure the lid and place it in the refrigerator. This will mellow out the smell and slow the fermentation down.
Notes
– Peel the beets and carrots if the skin is particularly dirty and hard to remove or if you have purchased the beets from the store.
– Don't use pre-shredded store-bought cabbage as it will not have the active bacteria.
– Check the mix daily to ensure it is fully submerged in liquid. You may need to add a small weight to keep it down.
How Long Does Homemade Sauerkraut Last?
When stored in the refrigerator and kept below the brine, homemade beet sauerkraut can last for several months. Always use a clean utensil when serving to help maintain quality.
Tips for Success
Use Fresh Cabbage
Freshly harvested cabbage contains the beneficial bacteria needed for fermentation. Avoid using pre-shredded store-bought cabbage, as it may not ferment as well.
Keep the Vegetables Under the Brine
The most important rule of fermentation is keeping the vegetables submerged under the liquid. Exposure to air can lead to spoilage.
Don’t Worry About the Colour
The beetroot will naturally stain the cabbage and carrots a deep pink-purple colour. This is completely normal and one of the reasons this kraut looks so stunning.
Ways to Use Beet Sauerkraut
Once fermented, beet sauerkraut can be used in many ways! It is the perfect side to add a good contrast and help freshen up heavier meals.
Once your beet sauerkraut is packed into the jar, it’s best to leave it somewhere cool, dark and out of direct sunlight. A kitchen bench is fine as long as it’s not in full sun, but a pantry, cupboard or shaded corner of the kitchen works even better. You want a stable temperature without too much heat or light.
Avoid placing your jar in direct sunlight, as this can speed up fermentation too quickly and affect the flavour.
During the first few days, it’s also important to check the jar daily. Make sure the vegetables stay fully submerged under the brine, as anything exposed to air can spoil. If needed, press the mixture back down or add a small weight to keep everything below the liquid.
Sauerkraut Storage, Shelf Life & Safety
Once your beet sauerkraut is ready and moved to the fridge, it will keep for several months as long as it stays submerged under the brine and you use a clean utensil each time you serve it.
Like all fermented foods, it’s important to trust your senses. If something looks, smells or feels off, it’s best to discard it. Signs of spoilage can include mould that is fuzzy or brightly coloured (a thin white film on the surface is usually harmless kahm yeast), a rotten or unpleasant smell rather than a sour fermented smell, or a slimy texture that doesn’t improve after stirring.
A healthy ferment should smell tangy, sour and slightly salty, with a crisp texture and a vibrant colour.
Other Garden Additions You Can Try
One of the best things about making sauerkraut is how flexible it is. Once you understand the basic cabbage and salt base, you can start adding whatever you have growing in the garden.
Some other ingredients that work really well in this beet sauerkraut include:
Garlic – adds a deeper, savoury flavour
Ginger – gives a gentle heat and freshness
Kale or silverbeet – helps bulk it out with extra greens
Radish – adds crunch and a peppery bite
Chilli – for a little heat if you like spice
Fresh herbs like dill, parsley or coriander stems for extra flavour
Apple – adds natural sweetness and balances the earthiness of beetroot
Caraway seeds – a traditional sauerkraut spice that adds a warm, earthy flavour
Fennel seeds – give a light aniseed flavour and pair really well with cabbage and beetroot
Turmeric – adds a warm, earthy flavour and a golden colour that pairs beautifully with beetroot
You don’t need to add much… even a small handful of extras can change the flavour of your cabbage ferments. The key is still keeping the cabbage as the base so the ferment process works properly.
Frequently Asked Questions
Can you ferment beetroot and cabbage together?
Yes. Beetroot and cabbage ferment well together and create a colourful sauerkraut with a slightly earthy flavour.
Do I need to peel the beetroot?
Not necessarily. If the beetroot is freshly harvested and clean, simply wash it well. Peeling is recommended if the skin is dirty, difficult to clean or non-organic with chances of pesticide residue.
How do I know when sauerkraut is ready?
The flavour is the best indicator. Start tasting after 3 days and continue fermenting until it reaches the level of tanginess you enjoy.
Why does my sauerkraut smell strong?
Fermentation naturally produces a sour aroma. Once refrigerated, the smell usually becomes much milder.
Common Fermentation Problems
My sauerkraut is too salty
You may have added too much salt or not enough vegetables. You can balance it by adding more fresh cabbage and letting it ferment again briefly.
My vegetables are not submerged
Press them down firmly or use a small fermentation weight. You can also add a little filtered water if needed.
There is white film on top
This is usually kahm yeast and is harmless. You can skim it off the surface.
My sauerkraut smells bad
A strong sour smell is normal, but a rotten or unpleasant smell means it should be discarded.
From Garden to Plate
One of my favourite things about making small batches of sauerkraut is how little you need to create something delicious. A few simple in-season veggies, salt and a bit of patience can turn a garden harvest into a probiotic-rich food that lasts for months. If you’ve never tried fermenting before, this beet sauerkraut recipe is a great place to start.
Okonomiyaki is a delicious cabbage dish similar to a fritter or hash brown (although referred to as a pancake). They make a great base to build any toppings you like! Add a fresh salad, pickles, or anything really! As the dish translates to “how you like it”.
Cabbage Pancake – Okonomiyaki
Delicious and easy cabbage meal for breakfast, lunch, or dinner!
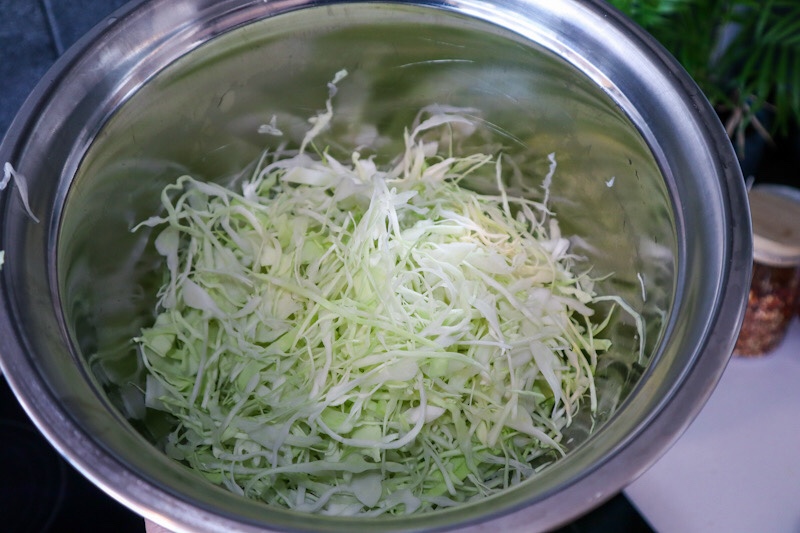
Finely slice the cabbage. A mandoline is a great way to do this quickly. The finer the cabbage the easier it will stick together. Add to a large mixing bowl.
In a small bowl whisk eggs and add the remaining ingredients. Whisk to form a batter.
Add the batter to the cabbage and stir until the cabbage is fully coated in the batter.
Heat a frypan to medium heat. Drizzle with a little oil (or butter for a browner crust).
Add the cabbage and press to form one large fritter or make two smaller ones.
Cook for 5mins and flip onto a plate. Carefully transfer the uncooked side back to the pan (push off the plate.
Cook for a further 4-5mins.
Top with sauces and sesame seeds. Add a fresh garden salad.
Notes
For a vegan alternative replace the eggs with 2 TBSP Sushi seasoning and allow the full cabbage mix to sit for 5 minutes before cooking. This will make the pancakes a pack more vinegary flavour so balance with a creamy salad.
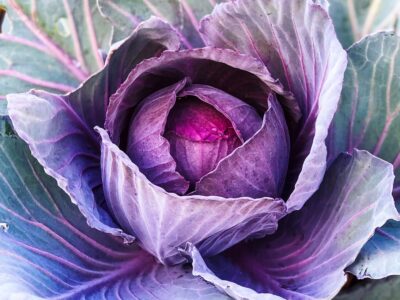
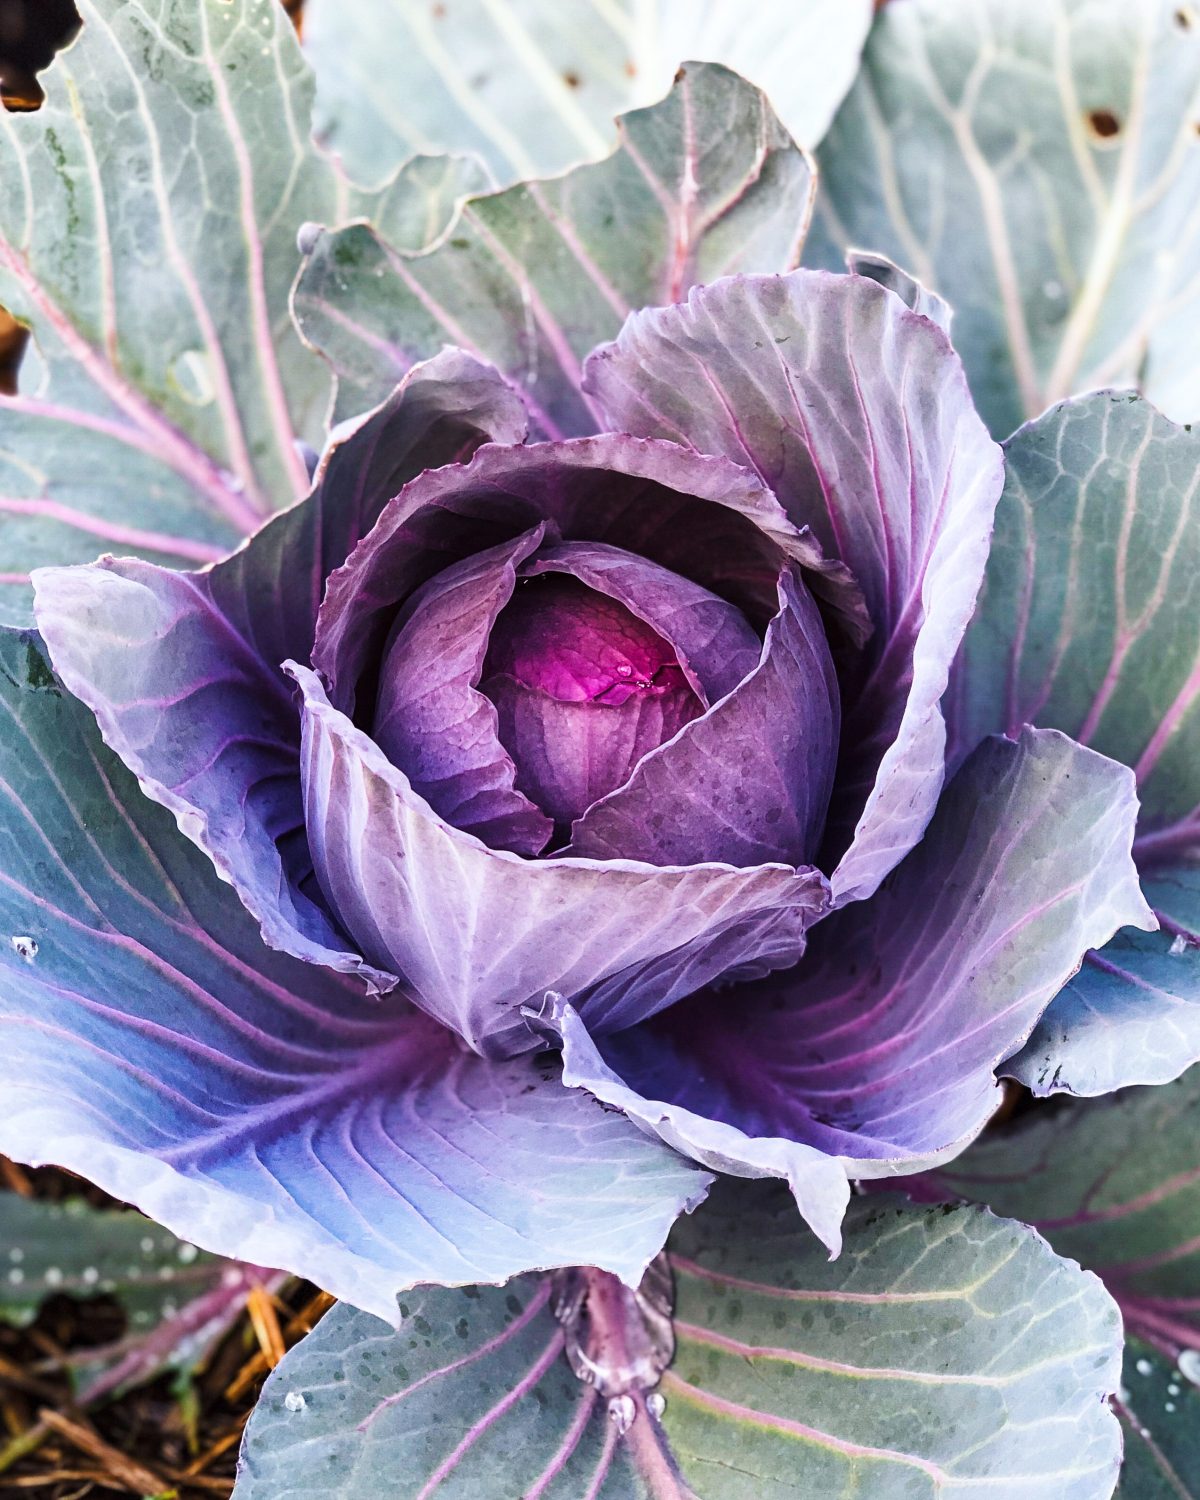
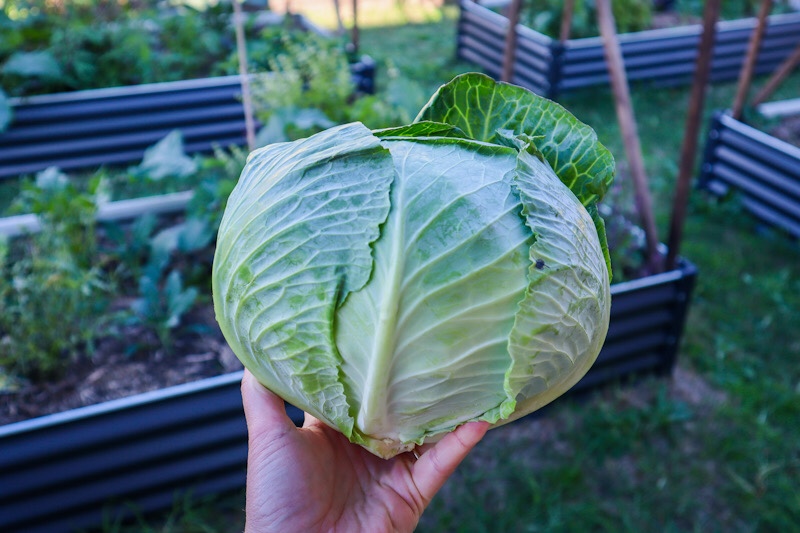
Cabbage (Brassica oleracea) is a classic staple winter veggie that provides your homestead with a hearty base crop to build many dishes.
Cabbage is a great supporting veggie BUT it can also be the star of the show! Learning to grow, cook and preserve cabbage will go a long way to supporting your ability to become more self-sufficient. Cabbage is low-calorie but packed with vitamins, antioxidants, and nutrients.
Feed with compost and with liquid seaweed fertiliser.
PESTS
Slaters, slugs, snails, green caterpillars.
HARVEST
When heads are firm. Cut with a sharp knife.
REPRODUCE
Seeds can be saved in the second year of growth. See below.
Why Grow Cabbage?
Cabbage is a great crop to grow to feed the family and they look beautiful and ornamental in the garden.
Here are some of the many reasons to grow Cabbage:
Easy to grow
Low maintenance
Produce a lot of food
Can be used raw or cooked.
Rich in vitamin C, K, B12
High in antioxidants
High in fibre
Nutrient-dense
Can be used as a food colouring
Promote cardiovascular health
Popular Cabbage Varieties
‘Mini’ – Small green cabbage great for urban gardens. Slow blot. 18 weeks to harvest. 1.3kg size.
‘Early Jersey Wakefield’ – Tight cone-shaped green cabbage. Space-saving for urban gardens. Harvest small or allow to 2-3kg size.
‘Brunswick‘ – German heirloom green cabbage. Late season crop. Large 3kg Cabbage.
‘Red Drumhead‘ -Heirloom red cabbage with beautiful purple leaves. Large 3kg+ size. Caterpillar resistant so good for warmer months.
‘Red Express’ – Compact small red cabbage. Quick to grow and will produce an early harvest.
‘Savoy‘ –Green cabbage with distinctive curly texture. Mild flavour. Rich in vitamins.
When to Plant Cabbage
Cabbage is mainly grown in the colder seasons of Autumn and winter but some varieties can be grown in the warmer months to allow for a full year of cabbage harvests. Plant seeds at the start of Autumn.
How to Grow Cabbage
Choose a sunny location.
Prepare compost-rich soil ( pH 7.5 preferred)
Direct sow or plant your seeds in seed trays.
Plant seeds or seedlings 40cm apart
Protect young seedlings from slugs and snails but adding a ring of crushed eggshells
Add mulch to keep retain moisture
Care/ Maintenance
Cabbage are heavy feeders and can benefit from a liquid fertilizer every 2-3 weeks
Regular watering
Pests / Disease
Slugs and snails may eat young seedlings. Use natural pest management. Green caterpillars from the white butterflies are usually the main culprits. Especially during warmer months of the year. In some cases, exclusion nets over your cabbage plants or entire patch may be the best option.
How/ When to Harvest
When the cabbages form a tight ball and look about the right size to harvest (check the variety to how big you can expect them to grow) Use a sharp knife to slice the cabbage stem at the base. Remove some of the old outer leaves and rinse well checking for bugs and poop.
Reproducing
Cabbage plants are biannual meaning they will produce seeds in their second season. This means saving seeds from cabbage can be quite time consuming and will take up space in your patch. Cabbages grown in warm months will also attract a lot of white butterflies to your veggie patch. Most of the time it is easier and more effective to purchase cabbage seeds. If you would like to try to save your own – leave a few cabbages without harvesting them for a year to produce flowers and then seeds. Once the seed pods start to dry on the plant, pick and dry further inside. Separate out the seeds from the seed pods and store them.
Cooking and Using Cabbage
Cabbage is a versatile veggie that can be used raw, cooked, roasted and pickled.
10 Sustainable Gardening hacks to ensure your garden is quickand easy to maintain for sustainable long-term growth. Do you want to grow an edible garden and harvest delicious organic food straight from your own backyard but… you don’t have enough time in the day? Whether you are a busy parent or your spare time is already devoted to hobbies, sports, growing your business, or other priorities and you want to ensure your garden is easy to maintain for sustainable long-term growth, then these Sustainable Gardening Hacks are perfect for you!
Lazy gardening is actually an amazing thing! It means you are working smarter, not harder, and have systems in place to work with nature to get abundant harvests.
So let’s not waste any time and get straight into it…
1. Plant Perennials
Perennial plants are ones that you plant once and they will continue to give you harvests for many years to come. They are the ultimate hack for sustainable gardening! So this is probably my number one tip for lazy or time-poor gardeners.
Perennials are plants such as Fruit Trees, Berries, Bananas, Sweet Potatoes, Rhubarb, Artichoke, and Asparagus. Aromatics such as Ginger and Tumeric, and Herbs such as Rosemary, Lemon Verbena, and Mint. These you plant once and each year they will produce more and more food. There are also many perennial versions of our much-loved annuals such as Perennial Basil, and Perpetual Spinach. This year I have added Egyptian Walking Onions, more Berries, Fruit Trees, Asparagus and Artichoke.
I am converting more and more of my gardens to perennials because not only does that mean I have more time to spend developing new gardens or pouring hours into creating more gardening content but, Perennial Plants also allow a seamless transition and continuous supply of food. Perennials will either produce all year round or they will have certain times of the year when they are fruiting or producing. If you want to really level it up you can plan out when your perennials are ready and ripe and plan to fill in the gaps with other perennials that will be productive during these gaps in the season. For example, my citrus are ready in winter, then over summer I have berries, and in autumn I have Feijoas. My plan is to have a continuous supply of fruit all year round so I will continue to select plants that are ready during the gaps.
2. Chop and Drop
This is a technique of mulching and composting that I use in my urban food forest. Any time I trim my plants or remove any annuals I simply chop up the leaves and branches and drop them around the garden allowing the plant matter to break down and feed my plants. This is very easy to do and I don’t have to move plant material anywhere. It protects the soil from the sun, suppresses weeds and it feeds my soil to help grow more and more food! It’s a win-win situation and saves a lot of time. Fruit trees also love the fungal properties that rotting sticks and branches provide.
This technique works best with a food forest situation rather than a veggie patch, as it would be much harder to spread the plant matter and not cover small seedlings. This may also attract slaters or woodlice which will help break down the plant matter but these little critters are not something you want in your veggie patch.
3. Direct Sow Seeds
This is my favourite way to plant seeds. No, it’s not the most effective, but it saves a lot of time. I find direct sowing seeds straight into the garden can take a bit longer for them to germinate because it might not be the right soil temperatures but once they pop up they will usually be stronger plants. Sowing in seed trays means you can control the conditions and bring them inside which will encourage them to pop up sooner but you need to baby them and care for them. Harden them off by taking them outside so they can get used to outside temperatures before you plant them in the garden. They are just more fiddly and do require more attention. So where I can I go with the survival of the fittest approach and plant a few extra seeds.
4. Grow Soil
If you are time-poor and only have small amounts of time to allocate to your gardens, I would definitely put a big chunk of that into improving your soil and creating soil-improving systems. This will go a long way in creating sustainable gardens. Healthy nutrient-rich soil means your plants will grow faster, they will be stronger and more resilient and they will not succumb to pests and diseases as easily. If your soil is poor and lacks nutrients you will end up spending more time trying to keep your plants alive, more time watering and more time babying your plants.
Following on from growing soil – keeping your gardens well mulched is a great system to help build soil for sustainable gardens. Mulch will start to break down over time and feed your soil. Mulching also helps keep moisture in so your gardens won’t need as much watering and they help suppress weeds. Weeds are not friends with time-poor or lazy gardeners. So having a thick layer of mulch will help reduce the time needed for weeding and also the weeds that do grow will be so much easier to pull out.
6. Make it Close and Convenient
Choosing a location for your garden can be a make or break for the time-poor or lazy gardener. If you decide to grow your veggie patch or garden down the back of your property or behind the shed, it may start off okay whilst you are full of enthusiasm and feeling inspired, but eventually it will be out of sight and out of mind…. this happens to me all the time and my property is just a suburban block. I plant all my low-maintenance plants such as perennials and fruit trees all in the outer parts of my property and the annuals or plants that require more attention or regular harvesting, within view of my kitchen. In permaculture, we call these zones and it makes so much sense. When it’s raining, dark or you have had a long day, traipsing out to the veggie patch might not be high on the list. But, if you have your gardens close to your house and within view, you might notice something that needs harvesting or attention, and your garden will naturally receive more love and attention because of that. Therefore it will be more productive.
Even If this means you start off with small container gardens and once you master that move on to larger more permanent spaces.
7. Grow Wild
Creating diversity and growing lots of plants all together will not only do amazing things for the number of beneficial insects in your garden, but it can also be a lot more low maintenance. Conventional gardens with neat edges, straight rows, and symmetrical layouts will take a lot more time to maintain. By creating a garden that is a little wilder it will look lush and have less room for weeds to take up home. Even if you do get some weeds they blend in and don’t look too messy and hey, some of them may even be edible or provide flowers for the bees. Edible ground covers are great for this.
8. Let Plants go to Seed
If you let some of your plants go to flower and seed you will have plants popping up all on their own next season. This is another way you can create sustainable garden systems. The great thing about self-sown seeds is that they stay dormant in the soil until they get the right conditions to grow and then they shoot up. With absolutely no effort on your behalf. I have lettuce, tomatoes, basil, and edible flowers pop up nearly every year. Free FOOD! This technique can be amazing but it can also be a little wild at times. It’s important to try to contain the seeds on your property. I let a celery plant go to seed once and I had celery popping up in everywhere!
9. Easy Watering
Watering can take up a lot of time, especially during the warmer months. And if you run out of time or can’t be bothered then you could lose your plants after just one day in the peak of summer (especially if you live here in Perth!). Thinking about watering and creating sustainable watering systems will go such a long way to savingtime in the garden.
Some great tips are to install automatic timers and drip lines. Another is to ensure you have a hose nearby to your gardens and make it a retractable hose! Nothing puts you off watering than thinking about unraveling and putting away a hose. A retractable hose can be out and back in seconds and it has honestly been a game-changer for me in my garden!
Mulching will also help with water retention.
10. Get the Plant Selection Right
Selecting the right plants will go a long way toward creating a low-maintenance sustainable garden. We talked about choosing perennials earlier but there are also other plant selection criteria than can really help you grow an abundant garden with less effort.
Choose local or native plants. Plants that thrive in your local area will be much more adapted to the conditions and will be easier to grow. Native edible plants are often interesting and unique additions to your garden. They will also attract your local pollinators and wildlife which is a bonus!
Choose low-maintenance plants. Some plants require more care and upkeep than others. And some will have a lot more pests and diseases than others. This will vary from place to place.
Tomatoes – require staking and tying and are susceptible to pests and diseases. I often grow cherry tomatoes as I find them a lot easier to grow.
Stone fruit – Trees such as Nectarines, Peaches, and Plums have soft skin and can be vulnerable to many pests and diseases. Birds, fruit flies, rats, bats, etc. They may require netting or individually bagging fruit to ensure you get a harvest. I have chosen citrus as they have thicker skins and I find them a little more hardy and low maintenance. I have a lot of citrus for that reason such as Lemon, Lime, Blood Orange, Finger Limes, Blood Limes, Kumquat, and Lemonade.
Herbs and fragrant plants such as Lemon Verbena, Rosemary, and Ginger are often left alone by pests and are easy to grow.
This is where it is a great idea to visit small local nurseries where you can get helpful advice on what grows well in your local climate.
WATCH Sustainable Gardening HACKS for Time-Poor Gardeners
Homemade Mint and Rosemary Sauce is so easy to make, and the flavour is unbeatable when compared to store-bought! With just a few ingredients and fresh herbs straight from the garden, you can whip this flavour-packed sauce to serve with any Sunday Roast.
Fresh herbs are one of the easiest and most rewarding crops to grow in a home garden. Mint and rosemary thrive with very little care, producing harvests almost year-round in many climates. When both plants are growing abundantly, this homemade mint and rosemary sauce is one of my favourite ways to turn a handful of garden herbs into something special.
Traditionally, mint sauce is served alongside roast lamb, but adding fresh rosemary gives it extra depth and a delicious savoury flavour. It’s quick to make, requires just a few simple ingredients, and is a great way to use herbs straight from the garden.
Whether you’re preparing a family roast dinner or simply looking for a new way to enjoy your homegrown herbs, this easy garden-to-plate recipe is worth keeping on hand.
Rinse off the Mint and Rosemary and remove the leaves from the stems. Roughly Chop.
In a saucepan add the vinegar and sugar. Heat until sugar is dissolved. Add the herbs and remaining ingredients and stir to combine.
Lightly blitz using a stick mixer or blender.
Serve hot or cold.
Notes
Store leftovers in the refrigerator in an airtight jar for 1 week.
Garden Harvest Tips
Mint is one of the most productive herbs in my garden. It grows quickly and benefits from regular harvesting, which encourages fresh new growth.
Rosemary is another reliable perennial herb that can provide harvests for many years. A light trim while collecting herbs for recipes helps keep plants bushy and productive. If you have both growing in your garden, this recipe is a simple way to transform a small harvest into a delicious homemade condiment.
Variations To Try
I am a huge advocate for using what is in season and adapting recipes to suit. I am always adding extra ingredients straight from the garden!
Add Garlic for a stronger savoury flavour, add one small clove of finely minced garlic.
Sliced chilli for a spicy kick
Society garlic flowers – a great garnish and mild garlic flavour
Garlic chives – another way to pack extra flavour in (be careful as they are quite strong)
Lemon – Replace some of the vinegar with fresh lemon juice for a brighter citrus flavour.
Honey – Make it sweeter by adding a little extra honey if you prefer a sweeter sauce to balance the herbs.
Frequently Asked Questions
Can I make mint and rosemary sauce ahead of time?
Yes. It can be prepared up to three days in advance and stored in the refrigerator. The vibrant colour may go a little brown, though.
Can I freeze mint sauce?
While possible, the texture is best when made fresh. The herbs can become softer after freezing. The colour can also go a bit brown.
What does mint and rosemary sauce go with?
It pairs beautifully with roast lamb, chicken, beef, potatoes, roasted vegetables, and grilled meats.
Garden to Plate Recipes
One of the joys of growing your own food is being able to step outside and gather fresh ingredients moments before a meal. This homemade mint and rosemary sauce captures exactly that garden-to-plate experience. With just a handful of herbs and a few pantry staples, you can create a fresh, flavourful sauce that celebrates the abundance growing right outside your door.
For more garden-to-plate recipes check out my other posts and share this if you found it helpful 💚
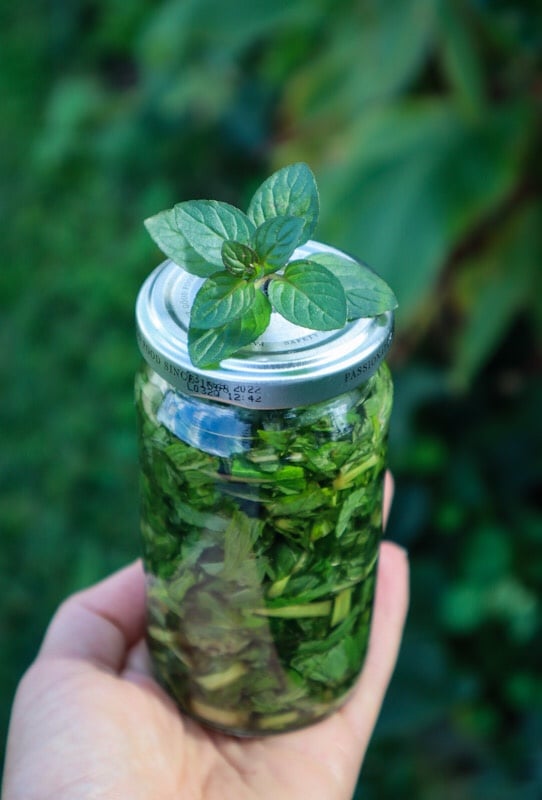
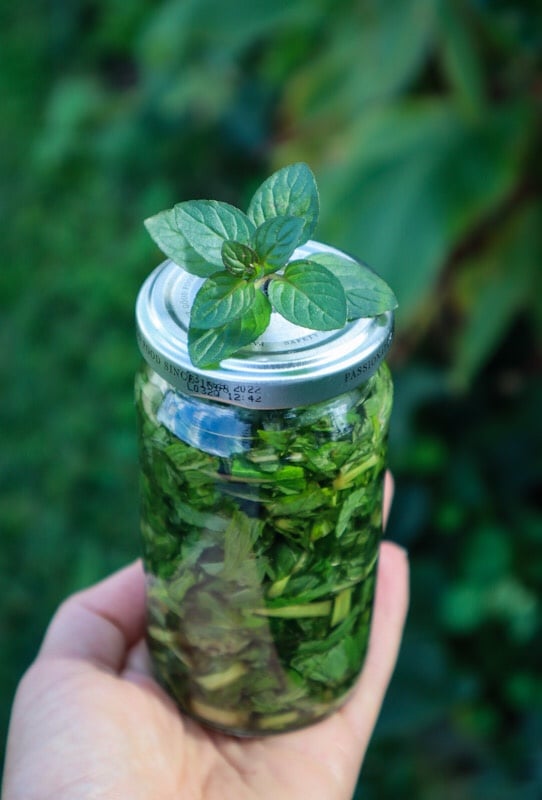
Mint Extract is a great way to preserve your abundant mint harvests. This recipe works well with chocolate mint or any type of mint you have growing in the garden. With two simple ingredients, you can create a flavour-enhancing extract to use in your cooking and baking. No need for the fake store-bought Mint extracts! This homemade mint extract is a great addition to your homestead.
Chocolate Mint Extract
Capture and store the delicious minty flavours straight from your garden. Great for baking and cooking.
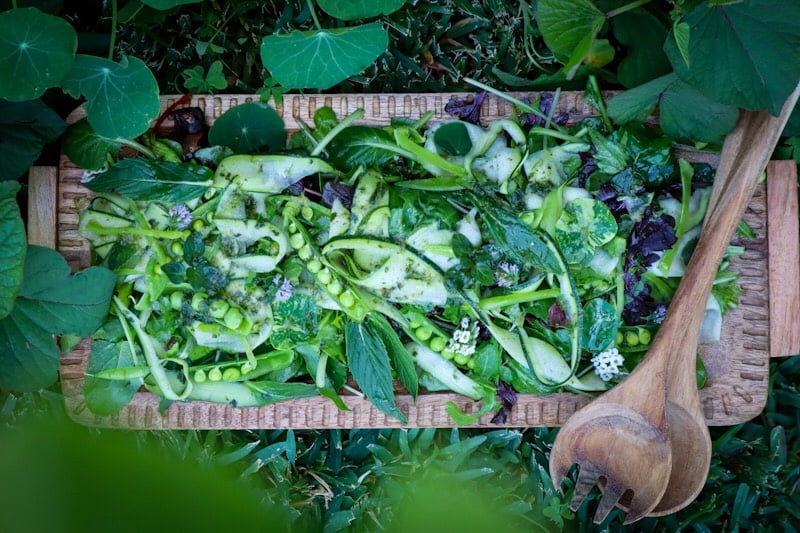
Green salads are a staple in any homegrown, garden-to-plate lifestyle — but that doesn’t mean they have to be boring. This simple green salad is fresh, vibrant, and packed with flavour, using ingredients that grow during the spring months. It’s the kind of salad you throw together in five minutes, but it tastes like something you’ve put real effort into. The secret is in the sauce! What I love most is how adaptable it is. Rocket brings a peppery bite, zucchini adds sweetness and crunch, peas bring that soft pop of freshness, and the mint ties everything together with a cooling lift. It’s the perfect side dish for spring and summer meals, or an easy way to use up handfuls of garden produce when everything is growing at once.
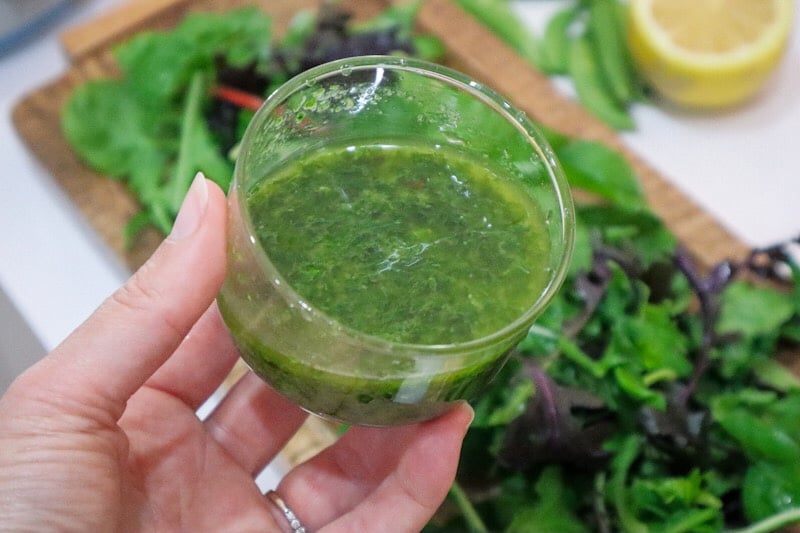
Try this delicious mint sauce recipe to dress potatoes or roast veggies!
Green Living
This is also a great recipe for anyone trying to reduce food waste — baby zucchinis, slightly overgrown rocket, or peas that aren’t “pretty” enough for a pod-and-eat moment all shine beautifully in this salad. Serve it alongside grilled veggies, roast chicken, a simple pasta, or enjoy it as a refreshing lunch on its own. And if you want to take it to the next level, try dressing it with my fresh mint sauce — it’s unbelievably good drizzled over potatoes, tossed through greens, or spooned onto roasted vegetables.
Growing your own food is all about keeping things simple, seasonal, and flavourful — and this salad does exactly that. Fresh, light, nourishing… and straight from the garden.
Rocket, Zucchini, Pea and Mint Green Salad
Simple and packed full of flavour this green salad is sure to impress!
Add Rocket and Greens to a mixing bowl and drizzle with 1/2 the mint sauce. Mix lightly to coat.
Add greens to the Serving dish.
Using a wide peeler, peel long strips of zucchini lengthwise. Add to mixing bowl and coat with a little extra dressing. Add on top of the salad mix.
Cut the Peas in half-length ways and place them throughout the salad.
Place mint leaves throughout the salad and top with edible flowers. (I used Mint flowers and white Alyssum). Drizzle over the remaining mint sauce to serve.
Notes
* Use seasonal salad greens such as Mizuno, Lettuce, Nasturtium, and Baby Spinach